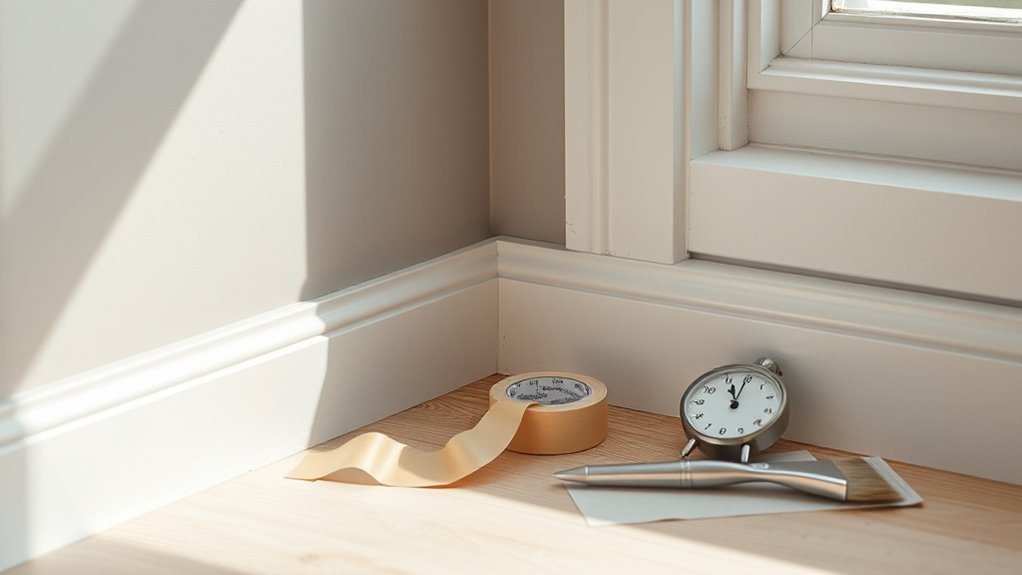
How Long Does Paint Have to Dry Before Taping
You should wait until paint is dry to the touch and no longer tacky before applying tape to avoid lifting or bleed-through. Fast‑drying water‑based paints often tolerate tape after 1–2 hours; slower latex or oil formulas may need 6–24 hours or more, especially in high humidity or on porous surfaces. Do a fingertip tack test or a small low‑tack strip first. If you want timing details, tests, and pro scheduling tips, keep going.
Quick Answer: When to Tape After Painting
If you’re re-coating or touching up, wait at least 24 hours before applying tape.
For new coats, you’ll usually be safe after 2–4 hours for water-based paints and 24 hours for oils or high-gloss finishes.
Consider humidity, temperature, and film thickness; slow drying means longer wait.
Use low-tack painter’s tape and press edges firmly to prevent seeping.
When blending colors, tape later to avoid disturbing wet edges and guarantee clean color blending.
For textured surfaces, allow full cure to avoid lifting—texture masking needs patience.
If unsure, test a small corner before committing.
Quick Checklist: Is It Safe to Tape Now?
Because drying times vary, use this quick checklist to decide whether it’s safe to tape now.
Check surface dryness by touch—no tackiness, no paint transfer.
Check the surface by touch—no tackiness or paint transfer before applying tape.
Verify edges: paint film should hold without lifting when you press lightly.
Confirm room conditions: temperature and humidity are within the paint manufacturer’s recommended range.
Inspect for color blending: adjacent coats shouldn’t smear or streak.
Look at texture smoothing: surface should retain desired texture without being pulled by tape.
Test first: apply a small strip of painter’s tape for 15 minutes, remove slowly at 45 degrees.
If no damage, go ahead and tape.
Why Drying Versus Curing Matters
You’ve checked the surface and run the tape test, but now you need to understand why “dry” and “cured” mean different things for paint. You’ll care because tape removes or damages paint that’s only surface-dry, not fully bonded.
Curing affects adhesion, hardness, and resistance to peeling. Consider how paint texture and drying speed influence when you can safely tape.
- Surface may feel dry while solvents remain
- Thicker paint films cure slower than thin coats
- Humidity and temperature alter drying speed
- Tape can lift uncured edges or leave residue
- Wait longer for glossy or textured finishes to bond
How Paint Type Affects Drying (Latex vs Oil)

When choosing tape timing, remember that latex (water-based) and oil-based paints dry and cure in different ways, so you’ll need to treat them differently. You’ll notice latex dries faster to the touch and lets you tape sooner, while oil stays tacky longer and demands more patience to avoid lifting or smudging.
Consider finish and ventilation, since humidity slows latex and solvent evaporation controls oil. Also think about color psychology when planning touch-ups or accent lines, because hue perception shifts during curing.
If you use eco-friendly paints, check manufacturer guidance—low-VOC formulas can alter drying behavior compared with conventional options.
Recommended Wait Times by Paint Type
Although drying times vary with conditions, a simple guideline helps you decide when to tape: latex (water-based) paints usually become touch-dry within 30 minutes to an hour and can be safely taped after about 1–2 hours for light-tack tape.
While oil-based paints generally need 6–8 hours or even overnight before taping to avoid lifting or smearing. Follow these recommendations, adjusted for humidity, temperature, and paint sheen.
Consider color psychology when planning quick repaints and choose eco-friendly finishes if indoor air quality matters.
- Latex: 1–2 hours for light tape
- Semi-gloss: lean longer
- Oil: 6–24 hours
High humidity: add time. Test a corner first.
Primer: Does It Change Tape Timing?
If you’ve primed a surface, you’ll need to factor in the primer’s drying time before taping.
Some primers dry quickly and offer strong adhesion, letting you tape sooner, while others need longer to cure to avoid lifting.
Check the primer’s label and do a small adhesion test if you’re unsure.
Primer Drying Time
Because primer soaks into and seals the surface differently than paint, it can change when you should apply tape. You’ll want to take into account primer drying time before taping so your edges stay clean and tape removes without lifting. Factors like temperature, humidity, coat thickness, and product type matter.
Also think about color mixing and brush selection when applying primer—thin covers dry faster; thick coats take longer.
- Check manufacturer’s dry-to-tape recommendation.
- Wait longer in high humidity or low temps.
- Sand between coats only when fully dry.
- Use quick-dry primers for faster taping.
- Test a small strip before full removal.
Primer Adhesion Effects
When primer bonds well to the substrate, it changes how and when you should apply painter’s tape—strong adhesion means the primer can resist tape pull without lifting, so you can often tape sooner than you could over fresh paint.
You’ll still consider primer adhesion quality and drying effects: tightly bonded primer tolerates earlier taping, while weak adhesion or incomplete cure risks lifting or peeling. Check manufacturer cure times and feel for tackiness.
For latex primers, waiting a few hours may suffice; for oil-based or high-build primers, allow longer. Test a small taped area first to confirm safe timing before full application.
How Coat Thickness Alters Drying Windows
Though a heavier coat may seem like a quicker way to hide imperfections, thicker paint layers slow solvent evaporation and extend the time before tape can be applied safely.
You’ll notice that coat thickness affects tack time, edge lift risk, and final hardness. Proper surface preparation and mindful color blending reduce the urge to overapply.
Follow practical guidelines:
- Apply thin, even coats for predictable drying.
- Wait longer between coats when you lay on more paint.
- Use light sanding to smooth without adding mass.
- Test with a small tape strip before committing.
- Record drying times under your conditions.
How Humidity Slows or Speeds Drying

High humidity slows paint curing because moist air keeps solvents and water from evaporating, so you’ll need to wait longer before taping.
Higher temperatures speed evaporation and shorten drying times, while cooler temps extend them.
Good ventilation and airflow help move moisture away from the surface, letting paint set more predictably.
Relative Humidity Effects
Because moisture in the air controls how quickly solvents and water evaporate from paint, relative humidity has a direct effect on drying times: higher humidity slows evaporation and lengthens tack-free and cure times, while lower humidity speeds them up.
You should monitor humidity to avoid long waits or tacky finishes. Consider climate considerations and paint odor—higher humidity can trap solvents, intensifying odor and delaying safe taping.
- Use a dehumidifier to lower indoor humidity.
- Ventilate to remove solvent-laden air.
- Wait longer after rainy days.
- Check manufacturer RH recommendations.
- Test a small area before taping.
Temperature And Drying
When you raise the temperature, paint solvents and water evaporate faster, shortening tack-free times and letting you tape sooner. You’ll notice faster curing in warm conditions, but don’t assume all paints behave identically: oil, latex, and specialty coatings respond differently. Monitor manufacturer guidelines and allow extra time for thicker coats.
High temps can affect color mixing outcomes and accelerate skinning in cans, so practice proper paint storage to preserve consistency. Conversely, colder conditions slow evaporation, extending tack time and increasing risk of adhesive pulls. Adjust your schedule based on temperature, and test a small taped edge before committing.
Ventilation And Airflow
If humidity lingers in the room, paint will stay tacky longer because moisture in the air slows solvent and water evaporation, so you should boost ventilation to speed drying.
You’ll notice drying times change with airflow; open windows, run fans, or use a dehumidifier to cut humidity.
Good ventilation preserves Color blending edges and prevents tacky layers that ruin Brush techniques.
Aim for steady, moderate airflow rather than blasting, which can dust surfaces.
Consider these practical steps:
- Open opposite windows for cross-ventilation
- Position box fans toward an exhaust
- Run a dehumidifier set to 40–50%
- Use ceiling fans on low
- Limit room occupancy
How Temperature Affects Drying and Adhesion
Although you mightn’t notice it, temperature has a big impact on how fast paint dries and how well tape will stick to it. You’ll see Temperature effects in both solvent evaporation and film formation: warmer conditions speed solvent loss and shorten tack time, colder ones slow chemical curing and can leave paint gummy.
Aim for the manufacturer’s recommended drying temperature to guarantee proper surface hardness before applying tape. Avoid taping when temperatures fluctuate or drop near freezing, since adhesion weakens and tape can lift fresh paint.
If you must tape early, choose low-tack tape and test a small area first.
How Ventilation Speeds Paint Drying
Because moving fresh air carries solvent-laden moisture away from the surface, proper ventilation accelerates drying and helps the paint form a hard, tape-ready film sooner. You should position fans or open windows to create cross-flow, reducing tackiness and minimizing color blending issues between coats.
Moving fresh air removes solvent moisture, speeding drying so paint forms a hard, tape-ready film faster.
Good airflow also helps texture smoothing by letting raised edges settle evenly.
- Open windows on opposite walls
- Use box or oscillating fans
- Aim airflow across, not directly at, wet paint
- Maintain moderate humidity (45–55%)
- Replace stale room air frequently
With controlled ventilation you’ll tape sooner and get cleaner edges.
How Additives and Retarders Change Dry Time
If you add retarders to slow drying, you’ll give the paint more open time but also delay film formation, which can affect when you safely tape.
Other additives—like flow agents or coalescents—change how the paint levels and cures, so tape adhesion timing can shift.
Know what’s in your mix and follow manufacturer guidance before taping.
Effects Of Retarders
When you add retarders or other additives to paint, you’re intentionally slowing its chemical or physical drying processes so you get more open time and smoother finishes. You’ll notice retarder effects on tack time and leveling, and they’ll change paint consistency, making application more forgiving.
Use them sparingly to avoid blistering or prolonged cure.
- Extends open time for blending
- Improves flow, reducing brush marks
- Can delay tape-safe time; test first
- May thin or thicken depending on formula
- Overuse risks poor adhesion or surface defects
Always follow manufacturer ratios and test small areas before taping.
Additives And Film Formation
Although additives like retarders, coalescents, and flow agents work to extend open time and improve leveling, they also alter how the paint film forms at each stage—from surface tack to full cure.
You’ll notice the Additive impact immediately: slower skin formation, longer tack, and sometimes delayed solvent release. That changes Film formation kinetics—coalescence happens later, and cure reactions can be prolonged.
Because tape adhesion responds to surface tack and cohesive strength, you’ll need to wait longer before taping when additives are present. Check manufacturer guidance and test a small area so you don’t lift fresh paint or compromise the finish.
Label Drying Times Versus Jobsite Reality
Manufacturers give you a neat drying time on the label, but real jobsite conditions usually change that number — temperature, humidity, ventilation, and even coat thickness all speed up or slow down drying.
You’ll need to judge when paint is ready for tape by feel and observation, considering color blending and paint sheen changes as clues. Check these practical factors before taping:
- Ambient temperature and drafts
- Relative humidity levels
- Number and thickness of coats
- Surface porosity and cleanliness
- Type and age of paint used
When in doubt, wait longer; testing a small taped corner prevents damage.
How Long to Wait on Primed Versus Unprimed Surfaces
If you’re working over a primed surface, you can usually tape after the primer feels dry to the touch and has cured for the manufacturer’s recommended time.
On unprimed drywall or raw wood you’ll need to wait longer or use a sealing coat, since porous surfaces can pull moisture and reduce tape adhesion.
To get clean lines, pick a tape suited to the surface and test a small area before committing.
Primed Surface Dry Time
When you’re deciding whether to tape, remember that primed surfaces usually need less dry time than raw drywall or wood because the primer seals the substrate and speeds topcoat adhesion. On a primed surface, the drying process is more predictable, so you can often tape sooner without lifting paint.
Consider these quick guidelines:
- Wait at least 24 hours after a water-based topcoat on a primed surface.
- Allow 48 hours for oil-based systems.
- Check for tackiness with a clean finger.
- Make certain humidity and temperature match product recommendations.
- Light sanding between coats improves tape adhesion and prevents peeling.
Unprimed Surface Considerations
Primed surfaces dry more predictably, but unprimed drywall or bare wood behaves differently and usually needs more time before you tape.
With unprimed surfaces, paint soaks in unevenly, extending drying and curing times. You’ll want to wait longer than for primed walls—often 24–72 hours depending on porosity, humidity, and temperature—so surface adhesion stabilizes.
Test a small area by pressing tape gently; if paint lifts or feels tacky, wait and recheck.
Prioritize consistent conditions: moderate temperature, low humidity, and good ventilation speed drying.
When in doubt, give extra drying time to protect finish and avoid paint pull.
Tape Adhesion Best Practices
Although tape can stick quickly to a freshly painted wall, you’ll get the best results by matching wait time to the surface. You should test small areas: primed dries faster and holds tape better; unprimed may need longer to cure. Consider primer type, humidity, and recent color mixing that can affect drying.
Store leftover cans properly—good paint storage keeps consistency for touch-ups.
- Wait 30–60 minutes on sealed, primed surfaces
- Allow 24 hours for unprimed or latex over oily stains
- Use low-tack tape for delicate finishes
- Press tape edges firmly
- Remove within 24 hours to avoid residue
When to Tape After Spray Paint or Airless Spraying
If you’ve just finished spray or airless painting, wait until the surface feels dry to the touch and the paint no longer transfers when you lightly press a fingertip—typically 30 minutes to an hour for fast-drying lacquer or enamel sprays, but several hours for thicker or high-solids formulations.
Check sheen and tack across varied light to judge readiness; color contrast can hide still-tacky zones.
Confirm surface preparation was thorough to avoid lifting when you apply tape. Use a low-tack painter’s tape and press edges firmly. Test a small strip first; if paint peels, wait longer or cure fully before taping.
How Long to Wait Between Coats If Taping
When you’re planning to tape between coats, wait until the previous layer is dry to the touch and not tacky—typically the manufacturer’s recoat time, but often 1–2 hours for water-based paints and 2–6 hours for oil-based or high-solids formulations.
You’ll protect edges, avoid lift, and preserve color blending if you follow dry times. Consider these tips before you apply tape:
- Test a small area to confirm tack-free feel.
- Use low-tack painter’s tape for delicate finishes.
- Press edges firmly to prevent bleed-through.
- Remove tape within the paint’s specified open time.
- Avoid stretching tape over heavy texture masking.
How Surface Material Affects Tack and Tape Safety
How the paint film hardens and the texture of the surface both change how tacky tape will grab. You’ll notice that softer or less-cured films and rough or porous textures increase adhesive bite and raise the risk of lifting.
Check cure time and surface feel before taping to keep edges safe.
Paint Film Hardness
Because different substrates cure and harden at different rates, you should factor surface material into decisions about taping time and tape choice. Paint film hardness determines tack and how safely tape lifts without damaging finish. Consider substrate, formulation, and environmental cure.
Also remember color theory and paint sheen can influence perceived defects if tape pulls or leaves residue.
- Test a small section before full taping
- Use low-tack tape on softer films
- Wait longer for oil-alkyds than acrylics
- Warm, dry conditions speed hardness development
- Peel slowly at a low angle to reduce stress
Follow manufacturer cure times for best results.
Surface Texture Effects
Surface texture plays a big role in how tape adheres and how safe it is to remove without harming the paint film. You’ll notice rough textures grab tape differently than smooth ones; texture patterns and surface preparation determine tack and edge sealing. Test small areas, wait for recommended cure, and pick tape suited to the finish.
| Surface Type | Effect on Tape |
|---|---|
| Smooth glossy | High contact, risk on soft paint |
| Eggshell | Moderate adhesion, safer removal |
| Textured plaster | Uneven contact, gaps |
| Sanded wood | Variable hold, fibers lift |
| Metal | Predictable, low risk with prep |
Testing Tack: Fingertip Test Explained
Before you apply tape, do a fingertip tack test to check if the paint’s dry enough to resist lifting. You press lightly with a clean fingertip; if paint doesn’t stick or smear, it’s usually safe to tape.
Consider how color mixing and brush techniques affect surface cure. Thicker layers or heavy brushwork take longer.
- Clean, dry fingertip
- Light, brief contact
- Test near an inconspicuous edge
- Wait and retest if tacky
- Note sheen changes as cue
If paint lifts, wait longer and retest. Record results so you learn timing for different paints and surfaces.
The 24‑Hour Adhesion Tape Test
When you wait the recommended 24 hours and then test with a length of quality painter’s tape, you’ll get a reliable read on whether the paint has cured enough to resist lifting—this adhesion test complements the fingertip tack check by using an actual tape removal action that mimics your masking step.
Press the tape firmly, rub to ensure contact, then pull at a 45° angle. If paint peels or shows uneven edges, it’s not ready.
Repeat in different spots to check color blending and texture smoothing across the surface. If tape passes, you can proceed with confidence to mask and finish.
Using Low‑Tack Test Strips for Delicate Finishes
If you’re working with delicate wallpapers, aged trim, or light-bodied paints, use low-tack test strips to avoid pulling or marking the finish; they let you confirm adhesion without committing to full masking. You’ll press a strip, wait a few minutes, then remove it to check for lift.
Test in hidden spots, note results, and adjust drying time rather than switching tapes. Keep color mixing and paint storage habits consistent—contaminants or old paint change tack.
Quick checklist:
- Test multiple locations
- Wait recommended dry times
- Use fresh, labeled strips
- Record results and adjustments
- Store strips in a dry place
Which Painter’s Tape to Choose for Fresh Paint
When choosing tape for fresh paint, you’ll want to match adhesion strength to the surface so it holds without damaging the finish.
Check a paint compatibility guide or manufacturer notes to confirm the tape works with your paint type and cure time.
Finally, pick a tape that promises clean, easy removal to avoid lifting or leaving residue.
Tape Adhesion Strength
Because tape must stick without lifting fresh paint or leaving residue, you should pick a tape whose adhesion matches the paint type and surface. You’ll balance hold versus removal: too strong pulls paint, too weak seeps under edges, ruining color blending and texture smoothing efforts.
- Light adhesion: delicate surfaces, easy removal
- Medium adhesion: most walls, good edge crispness
- High adhesion: rough or exterior surfaces
- Specialty tapes: low-tack for fresh latex, high-tack for textured stucco
- Test strip: always try a small area and wait recommended dry time
Choose tape by adhesion rating and test before committing.
Paint Compatibility Guide
Although fresh paint’s tackiness varies by formula and conditions, you can choose a tape that protects edges without damaging the finish by matching tape type to paint type and cure time.
For latex or acrylic, use medium-adhesion tape after surface dry time; it handles slight color mixing at edges and won’t pull soft film.
For oil-based or alkyd, opt for low-adhesion or specialty tapes until full cure to prevent lift.
Delicate finishes and faux techniques need painter’s tape designed for texture smoothing and crisp lines.
Test a small area when in doubt, noting manufacturer cure recommendations and paint age.
Ease Of Removal
If you want crisp lines without ruined edges, pick a tape that releases cleanly at your paint’s specific dry stage and surface type. You’ll want low-tack options for delicate finishes and higher-tack for textured walls. Consider how tape pull time interacts with drying: sooner pulls need gentler adhesives.
Also factor color matching when protecting adjacent hues and choose tapes compatible with eco-friendly paints to avoid chemical reactions.
- Low-tack paper tape for fresh latex on drywall
- Crepe tape for semi-dry trims
- Painter’s tape for glossy enamel
- Specialty tape for textured surfaces
Test strip on scrap before full application
How Tape Adhesion Levels Change Timing Decisions
When you pick a tape, its adhesion level directly affects how long paint should dry before you apply it. High-adhesion tapes stick aggressively, so you’ll wait longer for paint to cure to avoid lifting fresh film or disturbing paint sheen and color matching.
Medium tapes balance hold and safety for slightly tacky surfaces, letting you tape sooner.
Low-adhesion or painter’s tapes work best on delicate finishes and newly dried coats, reducing risk but sometimes allowing bleed if paint isn’t set.
Match tape strength to your paint type, surface porosity, and project speed to protect edges and finish.
How to Prep Edges Before Taping for Sharp Lines
Before you apply tape, clean and flatten every edge so paint can’t seep under or lift when you pull the tape off. You’ll prep surfaces to get razor‑sharp lines: remove dust, sand burrs, and make sure surfaces are dry. Consider surface priming where needed to equalize absorption and make color mixing results predictable.
Before taping, clean and flatten every edge—remove dust, sand burrs, and ensure dry, primed surfaces for razor‑sharp lines.
Use the list below to prep efficiently:
- Wipe edges with a tack cloth to remove particles.
- Lightly sand glossy areas to dull the sheen.
- Fill gaps or cracks with flexible caulk; smooth flush.
- Confirm primer is fully cured before painting.
- Use a clean, sharp blade to trim loose fibers.
How to Apply Tape Without Stretching or Bleeding
Now that edges are clean and smooth, apply tape carefully to avoid stretching or bleed-through. Press tape down gently with your fingers, keeping tension minimal so it doesn’t warp the surface. Align tape to preserve desired color contrast, checking angles before you stick.
Use short, controlled strokes when smoothing—don’t pull. If paint touches tape, wait the recommended dry time before removing. For intricate corners, cut tape with scissors rather than stretching it into place.
Use brush techniques to clean up tiny gaps after removing tape, feathering with light strokes to blend without creating new ridges or bleed marks.
Seal Tape Edges to Prevent Bleed‑Through
Press the tape firmly along the edge to create a tight seal before you paint.
For extra protection, run a thin bead of painter’s caulk along the tape edge and smooth it with your finger.
Remove the tape at a 45-degree angle while the paint is still slightly tacky to prevent lifting or bleed-through.
Press Tape Firmly Along Edge
If you want crisp paint lines, press the tape firmly along the edge so the adhesive seals against the surface and blocks paint from seeping underneath. You’ll want to check color contrast and tape texture to match the job: smoother tape seals better on flat trims, textured tape works on uneven surfaces.
Press along the whole length, especially corners.
- Run your fingernail or a plastic card along the tape
- Start from one end and smooth toward the other
- Reinforce corners with extra pressure
- Avoid stretching the tape as you press
- Inspect for gaps before painting
Good edge sealing cuts bleed‑through and saves touchups.
Use Painter’s Caulk Sealant
When you want absolutely sharp paint lines, run a bead of painter’s caulk along the tape edge and smooth it into the seam so it seals against the substrate and blocks wet paint from seeping under the tape.
You’ll press the caulk flush, wipe excess, and let it skin per manufacturer directions before painting.
Choose a paintable caulk that matches your finish and think about color matching if you’ll tint the caulk for longevity.
Use a small, stiff brush for clean smoothing and proper brush selection when feathering paint near the joint. This prevents bleed-through and keeps edges crisp.
Remove Tape At Angle
Although it’s tempting to peel the tape straight off, you’ll get the cleanest edge by pulling it back on itself at a 45-degree angle while the paint is still slightly tacky; this prevents the dried film from lifting and reduces bleed-through.
You’ll improve Tape removal and Angle removal results by using steady, slow motions. Follow these quick tips:
- Score edges lightly if paint fully dried.
- Pull tape back over itself, not upward.
- Keep a low, consistent speed.
- Use quality painter’s tape to minimize seepage.
- Remove tape before full cure for crisp lines.
Practice this and your lines will stay sharp.
How Long Painters’ Tape Can Safely Stay On
Because different tapes and surfaces vary, you’ll want to know the safe maximum time painters’ tape can stay put before adhesive problems or paint damage occur. You should generally remove standard tape within 7–14 days; delicate surfaces or fresh paint shorten that to 24–72 hours. Longer stays risk residue, tearing, or pulled edges. Consider humidity, finished dryness, and how tape interacts with color mixing or paint storage nearby. Check a small test strip if unsure.
| Tape Type | Surface | Max Time |
|---|---|---|
| Standard | Painted drywall | 7–14 days |
| Delicate | Fresh trim | 24–72 hours |
| Heavy-duty | Exterior | 14+ days |
Best Removal Timing to Avoid Lifting Paint
You should wait until the paint is cured enough to resist the tape’s pull rather than just surface-dry.
Before removing a long strip, test tape on a small corner to see if the paint lifts.
If the paint peels, wait longer and recheck until the tape comes off cleanly.
Wait For Paint Cure
When you want clean, crisp edges without ripping fresh paint, wait for the finish to cure rather than just feel dry to the touch. You’ll protect your work by letting solvents fully evaporate and binders set, reducing tape lift and surface tack.
Consider factors like humidity, temperature, and paint type; latex often needs longer than satin or semi-gloss. Also remember color matching and brush selection affect finish uniformity, which influences how tape interacts with the surface.
- Allow full cure time per manufacturer
- Test small, inconspicuous strip first
- Wait longer in high humidity
- Avoid heavy adhesive tapes
- Remove tape slowly at 45°
Test Tape On Corner
If you’re unsure about timing, test tape on an inconspicuous corner before committing to long runs of tape across freshly painted walls. You’ll see whether the paint lifts and how the edge peels—information that matters more than guesswork.
Press the tape, wait the recommended cure, then remove at a 45-degree angle. If lifting occurs, give more time; consider how your paint’s formulation, color mixing, and additives affect adhesion.
Note batch differences and keep records like you do for paint storage. That quick corner trial saves repainting, preserves crisp lines, and prevents wasted materials and effort.
How to Remove Tape for the Cleanest Edge
Although it’s tempting to pull the tape off quickly, remove it slowly and at a 45-degree angle to get the sharpest line; this minimizes paint lift and helps you spot any wet spots that need attention. You’ll protect edges by lifting gently, keeping your knife handy to cut any skinning paint.
Remember color mixing and brush techniques affect edge crispness, so clean strokes reduce bleed. Follow these steps:
- Score the tape if paint has started to skin.
- Pull toward the painted surface, not away.
- Keep a steady, slow pace.
- Use a fresh blade for corrections.
- Touch up tiny defects with a fine brush.
Removal Angle and Timing: What to Use When
When you pull tape off, keep the angle shallow—about 45 degrees or less—to lift the edge without tearing the paint.
Aim to remove it during the paint’s *best* timing window: not wet, not fully cured, usually within an hour or two for latex and a bit longer for oil-based finishes.
If the paint’s skin is tacky but still flexible, you’re in the sweet spot for the cleanest edge.
Tape Removal Angle
Once paint’s dry to the touch, pull the tape back on itself at a low, sharp angle—about 30 to 45 degrees—to reduce the chance of lifting cured paint or leaving jagged edges. You’ll steady the pull, keep tension low, and watch for spots needing touch-up.
Consider how color matching and brush techniques affect final cleanup; small scuffs are easier to fix when the coat applied evenly.
- Pull slowly and steadily
- Keep tape close to the surface
- Use a razor for stray strands
- Touch up thin lines with a fine brush
- Inspect under good light
Optimal Timing Window
Because paint cures at different speeds, you’ll want to match your tape removal timing and angle to the specific paint and conditions. You’ll check sheen, humidity, and how Color mixing or Brush selection affected drying. Remove tape at a shallow angle (about 45°) for soft edges and after paint is tack-free but not fully cured; pull steep (near 90°) if paint is fully dry to avoid lifting. Use this simple guide:
| Paint State | Angle | When to Remove |
|---|---|---|
| Tack-free | 45° | 1–4 hours |
| Fully dry | 90° | 24+ hours |
| Sensitive | 60° | 4–24 hours |
Taping Textured or Porous Walls: Special Rules
If your walls are textured or porous, you’ll need to take extra steps before applying tape to guarantee a clean edge and reliable adhesion. You’ll evaluate texture considerations and perform porous surface treatment so tape sticks without pulling paint. Follow these concise steps:
- Clean surface: remove dust and loose particles.
- Sand high peaks lightly to reduce snagging.
- Apply a primer or sealer for porous surfaces.
- Use tape designed for rough textures (low-tack first).
- Press tape firmly with a plastic scraper, sealing edges.
Wait recommended dry times for primer before taping, then remove tape slowly at a 45° angle.
Taping High‑Gloss and Satin Finishes
When you’re working with high‑gloss or satin paints, remember these finishes show imperfections and tape lines more clearly than flat paints, so you need to choose the right tape and timing to avoid lifting or leaving a ridge.
High‑gloss and satin finishes reveal imperfections and tape lines—choose the right tape and timing to avoid ridges.
You should wait longer—follow manufacturer dry and cure times—then test a small strip. Use low‑tack or painter’s tape rated for delicate surfaces, press edges firmly, and remove at a 45° angle while paint’s slightly tacky to prevent peeling.
Consider how color psychology affects contrast: darker glossier colors reveal lines more.
If you use eco-friendly paints, always check their specific recoat guidelines.
Taping Around Windows and Doors for Two‑Color Jobs
After you’ve handled high‑gloss and satin areas, plan your approach for windows and doors in two‑color jobs to keep lines crisp and prevent paint bleed. You’ll prep surfaces, let base coats fully cure, and use tape techniques that respect drying times.
Focus on color blending where panels meet, and apply edge sealing to lock tape edges.
- Clean frames and reveal gaps
- Ensure base coat is touch‑dry, then wait recommended cure
- Use quality painter’s tape and press firmly
- Back‑roll or feather second color for smooth segue
- Peel tape slowly at 45° while paint is set
Protecting Trim, Glass, and Hardware While You Paint
When you’re masking trim, glass, and hardware, pick a low-tack painter’s tape so you don’t peel off finish or leave residue.
Cover vulnerable surfaces with drop cloths or plastic sheeting and press tape edges firmly to stop paint bleed.
Remove tape slowly and at a low angle after the paint’s set to avoid lifting or chipping.
Choose Low-Tack Tape
Why reach for low-tack painter’s tape? You want clean lines without ripping fresh paint or delicate finishes. Low-tack tape respects color mixing edges and aids surface preparation by lifting easily when paint’s dry enough.
Use tape that won’t peel primer or varnish.
- Choose tape labeled low-tack or delicate
- Test a small hidden spot first
- Remove tape at a 45° angle after recommended drying
- Avoid pressing tape too hard to prevent seal over wet paint
- Store tape in cool, dry conditions to maintain adhesion
These steps protect trim, glass, and hardware while you paint precisely.
Protect Vulnerable Surfaces
Taping carefully is only part of the job—you’ll also want to protect trim, glass, and hardware from overspray, drips, and accidental brush strokes. Cover trim with paper or thin plastic, securing edges where surface bonding might be weak so sealant or paint won’t creep underneath.
Mask glass with low-tack film to avoid residue, and wrap hardware in painter’s cloth or plastic to prevent scratches. Keep tools and rags off protected areas to maintain paint durability on finished surfaces.
Check coverings periodically during work, replace any that shift, and remove debris before removing tape to keep edges crisp.
Remove Tape Properly
Although it’s tempting to wait until everything looks dry, you should remove painter’s tape at the right moment and with the right technique to protect trim, glass, and hardware. Peel slowly at a 45° angle while paint is slightly tacky to avoid lifting edges. Use a utility knife where paint bridges tape on glass or metal. Warm long runs with a hairdryer for stubborn adhesive.
Remember how Color mixing affects opacity and how Brush techniques change edge crispness—adjust timing if using heavy-bodied paint.
- Peel slowly
- Cut sealed edges
- Heat stubborn spots
- Clean residue promptly
- Inspect for touch-ups
Planning Tape Work on Multi‑Day Projects
When you’re planning tape work across several days, map out which coats need full cure time and which just need surface dry so you can schedule taping without risking lifts. You’ll list stages: surface priming, base coats, color mixing trials, and final coats.
Note manufacturer cure times and room conditions, then slot taping after the minimum safe interval. Protect completed areas with low-tack tape and revisit edges before applying new tape.
Keep records of application times and temperatures so you can confidently tape adjacent sections on subsequent days without peeling or contamination, maintaining clean lines throughout the project.
How to Speed Drying Safely With Fans and Dehumidifiers
If you need to accelerate drying without risking finish problems, use directional fans and a dehumidifier to move moisture away from the surface and shorten cure times. Position fans to create steady airflow across the painted area (not blasting one spot). Keep the dehumidifier sized for the room, and maintain moderate temperature so solvents evaporate evenly.
You’ll control humidity and reduce tack time while protecting edges for tape. Keep ventilation consistent, avoid extreme heat, and test a small area before full tape. Consider Color matching and Brush selection when planning retouches after faster drying.
- Place fans for cross‑flow
- Set dehumidifier capacity
- Monitor temperature
- Check tack with fingertip
- Allow short cure test
Fast‑Drying Do’s and Don’ts (What to Avoid)
Because rushing drying can easily ruin edges and adhesion, you’ll want to avoid shortcuts that trade speed for quality.
Don’t tape over paint that’s tacky or cooled rapidly by heat—blisters and lifting follow.
Don’t use solvent or accelerators unless a product’s instructions allow it; you’ll risk color shifts and poor film formation.
Avoid overworking wet edges to speed cure; that creates streaks and weak seams.
Skip DIY ventilation hacks that blow dust onto fresh surfaces.
Mind proper paint storage between coats so contaminants and skinning don’t compromise adhesion.
Follow manufacturer dry times and test a small area before taping.
Troubleshooting Common Tape‑and‑Paint Problems
If your tape peels paint when you remove it, check that the paint was fully cured and press the tape down firmly along the edge before painting.
For paint that seeps under the tape, try sealing the edge with a thin skim of the base color or use a higher‑quality low‑bleed tape.
Test a small patch so you can confirm the fix before tackling the whole area.
Tape Lift Prevention
When paint peels away with the tape, it usually means adhesion or timing went wrong, but you can prevent it with a few precise steps.
Check paint cure time before taping, test a small strip, and avoid re-coating too soon.
Use proper surface prep and choose low-tack painter’s tape.
Mind your color mixing and brush techniques to avoid heavy buildup at edges.
Remove tape at a 45° angle while paint’s just set, not fully brittle.
- Wait manufacturer’s recommended cure
- Clean and dry surfaces
- Use low-tack tape
- Avoid thick edge buildup
- Pull tape slowly
Edge Bleed Fixes
Although tape’s meant to keep paint lines sharp, small gaps or improper adhesion can let paint seep under the edge. When that happens, gently score the tape line with a utility knife, peel back slowly, and touch up with a fine brush.
If bleed is minimal, feather the edge by glazing with the base color to blend. For stubborn stains, sand lightly once dry, then recoat.
Consider tape quality, surface prep, and paint sheen—higher sheen shows faults more. Use color theory: choose a trim or shadow hue that masks edges.
Test techniques on scrap before committing to walls.
How to Fix Lifted Paint After Early Tape Removal
Since tape can tug up fresh paint, you’ll want to act quickly but carefully to repair lifted areas without creating more mess. Gently scrape loose flakes, sand edges smooth, and clean the surface.
Act fast but gently: remove loose flakes, sand edges smooth, and clean before repainting to avoid more damage.
Match shade using color mixing, thin a small amount, and test on scrap. Use precise brush techniques to feather repairs into surrounding paint.
- Remove remaining tape slowly at a shallow angle.
- Sand only the lifted spot until flush.
- Wipe dust with a damp cloth and let dry.
- Apply thin, even paint layers; let each dry fully.
- Blend edges with light feathering strokes and inspect.
How to Retouch Edges Without Redoing the Wall
If you want crisp edges without repainting the whole wall, focus on careful prep and controlled touch-ups. Clean the edge with a damp cloth, sand any raised bits lightly, and remove dust so new paint adheres.
Match color by sampling from a hidden area and use precise color mixing to blend tones. Choose a small, high-quality angled brush; practice steady brush techniques on cardboard before you work.
Load the brush sparingly, feather strokes away from the edge, and let thin layers dry fully between passes. Step back often to assess blending; stop when the seam disappears and finish with gentle cleanup.
How Product Labels and SDS Inform Timing Choices
When you check a paint can label and the Safety Data Sheet (SDS) before taping, you’ll get the specific dry, tack-free, and recoat times that guide safe and effective timing decisions. Read recommended temperature and humidity, solvent or water-base notes, and any surface prep reminders.
Use that info to avoid lifting, smudging, or uneven color blending.
- Check tack-free time for tape application
- Confirm full cure before heavy handling
- Note solvent warnings that affect adhesion
- Match paint sheen recommendations for consistent finish
- Follow recoat window to prevent blistering or striping
How Pro Painters Schedule Taping and Trim Work
Although timing varies with product and conditions, pro painters build taping and trim schedules around dry, tack-free, and recoat windows to keep work moving and finishes flawless.
You plan sequencing: prime, allow recommended cure, then test tack before taping.
You coordinate crew tasks so one person handles color mixing and touch-ups while another prepares trim.
Tool selection—low-tack tape, fresh blades, angled brushes—matches substrate and paint type.
You stagger rooms to let panels cure longer where needed, avoid rushing edges, and schedule final trim after a full recoat window.
That discipline minimizes lifting and rework.
How to Document Conditions to Avoid Future Mistakes
Because paint behavior can change with temperature, humidity, and jobsite practices, you should record key conditions and actions every time you tape and trim so you can pinpoint causes of future problems.
Note time since application, temp and RH, and whether Color mixing or different batches were used. Track tape type, adhesion time, and any lift or bleed. Log Paint storage conditions and how long cans sat open. Keep brief photos and a one-line outcome.
- Date and time
- Temperature and humidity
- Color mixing batch/ratio
- Tape type and dwell time
- Paint storage and can condition
Pro Tips That Save Time and Guarantee Sharp Lines
Keeping a clear log of conditions helps you spot patterns, but you also want a set of go-to techniques that save time and guarantee sharp lines every job.
Start by choosing quality painter’s tape and press its edge firmly; peel back at a 45° angle while paint’s slightly tacky for crisp edges.
Use thin coats and proper drying times instead of heavy globs.
Master color mixing to avoid retouches from mismatched hues.
Employ decisive brush techniques—short, controlled strokes and feathering—near tape.
If bleed appears, touch up with an angled brush and matching color immediately for seamless correction.
Frequently Asked Questions
Can Masking Paper Adhesive Bleed Through and Affect Paint Curing?
Yes — you can get paint bleeding if masking paper adhesive seeps, and it can weaken tape adhesion; you should test adhesives, use low-bleed tapes, and remove masking promptly so curing isn’t compromised.
Can Tape Pull off Underlying Primer Layers After Weeks?
Absolutely — you can still pull off primer after weeks, like peeling wallpaper from a mountain. If paint curing wasn’t complete or adhesion was weak, tape removal can lift primer layers, so test and use low-tack products.
Do Sunlight and UV Exposure Change Tape Timing Recommendations?
Yes — sunlight exposure and UV effects speed surface curing but can make tape adhesion unpredictable, so you’ll wait longer in harsh sun, test a small area first, and use UV-resistant tape for safer results.
Can Cleaners or Solvents Used Before Painting Affect Tape Adhesion?
Yes—you’ll want clean surfaces: if cleaners or solvents leave residue or over-strip the paint surface, they’ll wreck tape adhesion, so use mild cleaners, rinse thoroughly, and let the paint surface fully re-cure before you press tape on it.
Is There a Risk of Chemical Reaction Between Tape Adhesive and Specialty Paints?
Yes — you can encounter tape reactions: you should check chemical compatibility between the tape adhesive and specialty paints, because solvents or formulations may trigger staining, lifting, or adhesive breakdown that damages the finish.
Conclusion
You’re ready to mask when paint feels dry to the touch and meets the label’s minimum wait—don’t rush or you’ll pay later. Remember that “dry” isn’t full cure: latex sets quicker, oil takes longer. Check product specs and note temperature/humidity so you can repeat success. Pro painters often wait a few hours for latex, a day or more for oils. Plan like a pro, and you’ll cut corners without cutting quality—measure twice, tape once.