How Long Does Putty Take to Dry Before Painting
You should usually wait at least 30 minutes to an hour before light sanding and generally 24–72 hours for putty to fully cure before painting, with oil‑based or epoxy fill often needing longer. Humidity, temperature, depth of fill and product type change times, and surface dryness isn’t the same as full cure. Test a small area or follow manufacturer specs to avoid peeling or tackiness — keep going for more details on timing, testing and best practices.
Quick Answer: How Long Putty Takes to Dry Before Painting
If you’re wondering whether putty is ready for paint, expect most water-based putties to dry in about 30 minutes to an hour for light sanding and up to 24 hours for full curing.
Oil-based or epoxy putties often need several hours to overnight or even a couple of days before painting. You’ll check touch, tack, and shrinkage before painting.
Remember that weather patterns can speed or slow drying. Ignore common drying myths that claim instant readiness; humidity and temperature matter.
When in doubt, wait longer or test a small area so your paint adheres properly.
Drying vs. Curing: What’s the Difference and Why It Matters
Although both terms get used interchangeably, drying and curing are different processes you need to understand before painting. Drying removes solvents so surfaces feel dry; curing completes Chemical reactions that build strength. You’ll wait hours for surface dryness but days for full cure, especially for Outdoor applications where temperature and humidity vary. Don’t paint just because it’s dry; curing influences durability and resistance. Below is a simple table to remind you how they feel and why you might hesitate, tapping worry, relief, and patience.
| Feel | Timeframe | Emotion |
|---|---|---|
| Surface dry | Hours | Relief |
| Full cure | Days–weeks | Patience |
| Variable outdoors | Weather-dependent | Worry |
Why Drying Time Affects Paint Adhesion and Finish
You need to let putty fully cure so the surface is stable and ready to hold paint. If the putty still has moisture, the paint can blister or peel.
Incompatible paint types can worsen the problem. Check recommended curing times and match your paint to the putty to guarantee a smooth, durable finish.
Proper Curing Time
Because putty continues to chemically harden after it feels dry to the touch, you should wait the recommended curing time before painting so the surface can accept and hold the finish. You’ll follow manufacturer guidelines—often 24–72 hours for standard putties, longer for deep fills or low temperatures—to guarantee full cure.
Historical context shows craftsmen learned patience yields durable results; modern formulations speed curing but still need proper time. Curing affects adhesion, flexibility, and final sheen, reducing cracks or peeling.
Waiting also supports environmental sustainability by preventing premature rework and wasted materials or emissions from repeated coatings.
Surface Moisture Levels
When moisture’s still trapped in putty, paint won’t bond properly and you’ll see problems like blistering, poor sheen, or peeling. Letting the surface reach recommended dryness guarantees the coating can form a continuous film and chemically cure as planned.
You should test dampness with a moisture meter or tape method before priming. Excess moisture alters surface texture, making it softer or tacky so paint won’t level correctly, and it can shift pigments during drying, complicating color matching.
Wait until readings fall within manufacturer specs, then sand and clean the area so you get predictable adhesion, uniform finish, and accurate color.
Paint Compatibility Issues
Although putty may feel dry to the touch, residual solvents or moisture can still interfere with paint chemistry and ruin adhesion, so you need to confirm it’s fully cured before coating.
If you paint too soon, the finish can blister, peel, or fail to bond, affecting decorative finishes and long-term durability. Check manufacturer cure times and ambient conditions; use a moisture meter or test patch to verify readiness.
Also consider primer compatibility—some primers seal lingering compounds better than others. For accurate color matching, apply sample swatches after full cure to avoid surprises from trapped moisture altering hue or sheen.
What Affects Putty Dry Time: Overview

How quickly putty dries depends on a few key factors you’ll want to check. The putty formula matters a lot, as different types cure at different rates.
Ambient temperature and surface porosity also change drying speed—warmer air speeds curing, and more porous surfaces can either pull moisture out faster or require more product to dry fully.
Putty Formula Type
Because putty formulas vary widely, the ingredients and their proportions are a primary factor in drying time—you’ll find solvent-based, oil-based, and water-based putties that each cure differently.
You should note putty color can signal additives or pigments that slightly alter cure rate, while texture consistency informs solvent content and filler ratio.
Solvent-based putties often skin over faster but need longer for full solvent evaporation.
Oil-based types oxidize and can take days.
Water-based options dry by evaporation and usually finish quicker.
Match formula to the job, follow manufacturer’s recommended wait times, and test a small patch before painting.
Ambient Temperature Effects
When temperatures drop, putty takes longer to dry and can remain tacky for hours or even days.
Warmer conditions speed up evaporation and chemical reactions so it cures faster.
You should monitor ambient temperature because manufacturers base dry times on standard lab conditions.
Historical context explains why older recipes tolerated slower curing.
You’ll see accelerated drying in warm, dry rooms and slowed curing in cold, humid spaces.
HVAC, season, and microclimates around work areas matter.
Also consider that environmental regulations have pushed modern putties toward formulations sensitive to temperature, so following recommended temperature ranges guarantees predictable drying before painting.
Surface Porosity Impact
Why does surface porosity matter for putty drying? You’ll notice porous surfaces soak moisture from putty, speeding skin formation but slowing full cure. Non-porous surfaces keep moisture longer, extending dry time. Consider porosity to avoid uneven results, texture contrast, and poor color matching.
- High porosity (bare wood, plaster): absorbs liquid, may need multiple coats.
- Low porosity (metal, glazed tile): traps moisture, lengthening cure.
- Sealers: pre-sealing evens absorption, reducing texture contrast.
- Test patch: check drying and color matching before full application to ensure consistent finish.
How Putty Type Affects Drying Time
Although different formulations may look similar, the type of putty you choose directly changes how fast it dries and how you should prepare it for painting.
The putty you pick affects drying speed and painting prep — choose formulation accordingly.
You’ll find fast-curing acrylics dry in hours, so you can sand and prime the same day, while water-based fillers vary with humidity.
Pre-mixed gypsum or spackle sets quicker in thin layers but needs longer in deep fills.
For restoration work with historical textures, pick compatible blends to avoid mismatched appearance.
If you prefer eco-friendly formulations, check cure time specs and solvent content.
Always follow manufacturer instructions and test a small area first.
Oil‑Based Putty: Dry Times and Paint Compatibility
If you moved from water‑based or gypsum fillers to oil‑based putty, expect a different drying rhythm and paint behavior. You’ll notice longer cure times—often 24–72 hours depending on thickness, temperature, and ventilation—so don’t rush painting.
Oil‑based putty sands smoothly and accepts oil or alkyd primers best. Latex paints can follow after proper priming.
Mind color matching: oil putty may yellow slightly with age, so match under final lighting.
Consider environmental safety: oil putty emits VOCs while curing, so ventilate and use low‑VOC products when possible.
- Check cure by touch and hardening.
- Sand progressively finer.
- Prime with compatible primer.
- Allow full ventilation.
Acrylic (Water‑Based) Putty: Dry Times and Paint Compatibility
With acrylic (water‑based) putty, drying times hinge on factors like layer thickness, humidity, and room temperature, so you’ll need to account for those before painting.
Generally it skins in 30–60 minutes and cures enough for sanding and priming within a few hours under good conditions.
You can topcoat with water‑based or compatible solvent‑based paints once the putty is fully dry and sanded, but always check the manufacturer’s recommended recoat time.
Drying Time Factors
When you’re working with acrylic (water‑based) putty, drying times typically range from 30 minutes for thin fills to several hours for deeper repairs. Factors like layer thickness, temperature, humidity, and ventilation directly control how fast it sets.
You should also remember historical context—modern formulations dry faster and emphasize environmental sustainability, reducing solvents and VOCs.
Consider these practical factors:
- Layer thickness: thinner coats dry much quicker.
- Temperature: warmer conditions speed evaporation and curing.
- Humidity: high humidity slows drying; use dehumidifiers if needed.
- Ventilation: good airflow removes moisture and accelerates setting.
Paint Compatibility Guidelines
Knowing how drying conditions affect acrylic putty helps you match paints correctly once the filler has set. You’ll let acrylic (water‑based) putty cure fully—usually 24–48 hours depending on thickness, humidity, and temperature—before priming.
Use water‑based primers and paints for best adhesion; solvent‑based enamels can be applied but may need a compatible primer barrier. Test small areas if you plan mixed media or Historical techniques restoration, since older materials behave differently.
For Artistic applications, choose flexible, breathable paints to avoid cracking. Always sand gently between coats and follow manufacturer recoat times to ensure durable, even finishes.
Epoxy Putty: Set Time and Full Cure Timeline
Although epoxy putty often feels hard enough to handle within minutes, its full cure takes much longer and depends on temperature, thickness, and the specific resin-hardener mix. You’ll notice initial set in 5–30 minutes, but full strength can require 24–72 hours or longer in cold conditions.
Consider historical applications that demanded long cures and evolving environmental regulations that affect formulations and ventilation. Follow manufacturer cure charts and test a small patch before painting.
- Thin layers cure faster.
- Warmth speeds reaction; cold slows it.
- Thicker fills generate heat and need more time.
- Allow full cure for maximum adhesion and paint compatibility.
Latex Wood Filler vs. Glazing Putty: Drying Comparison
Because you’ll be choosing between products that look similar but behave differently, it helps to compare drying profiles. You’ll find latex wood filler dries by evaporation and can be paint-ready in 30 minutes to several hours depending on depth and humidity. Glazing putty cures slower, often 24–72 hours, as it relies on solvent release and chemical setting. Know historical techniques to understand expectations, and ignore environmental myths that claim instant cure in every condition. Use the table to weigh factors quickly:
| Feature | Typical outcome |
|---|---|
| Dry time | Latex: fast; Glazing: slow |
| Best use | Latex: small fills; Glazing: window putty |
Lightweight Spackling: Dry Times for Small Repairs
When you’re fixing small dents and nail holes, lightweight spackling usually dries quickly—often ready to sand and paint in 15–30 minutes for thin applications—so you can finish touch-ups the same day. You’ll appreciate fast cure times for quick projects, and many brands now offer eco friendly formulations and non toxic options that reduce fumes.
Follow simple steps: apply, feather edges, let dry, then sand. Don’t overapply; thicker layers take longer. Check manufacturer times and room conditions. For stubborn pits, reapply thinly after sanding. Clean tools promptly to keep spackling effective for next use.
- Apply thin layer
- Feather edges
- Wait 15–30 min
- Sand and paint
Ready‑Mix vs. Powdered Putty: Drying Speed Tradeoffs
If you use ready-mix putty, you’ll usually get predictable surface drying in an hour or two but longer cure times beneath the surface.
Powdered putty can dry faster once mixed because you control the water ratio and hardener, but its full cure depends on proper mixing and temperature.
Remember that humidity and temperature strongly affect both products, so you’ll want to adjust your timing based on the environment.
Ready-Mix Drying Time
Although ready-mix putty saves you the step of mixing, it generally dries slower than powdered putty because manufacturers formulate it for ease of use and longer open time. You’ll plan around that slower cure: thinner layers, better ventilation, and realistic drying expectations. Think of product choice like following mobile apps and social trends — convenience often sacrifices speed.
- Apply thin coats to speed surface drying.
- Use fans and moderate heat; avoid high humidity.
- Sand lightly between coats after touch-dry.
- Test a small patch to confirm readiness before priming.
This helps you paint sooner without ruining the finish.
Powdered Putty Cure
Curious how powdered putty stacks up against ready‑mix for drying speed? You’ll find powdered putty often dries faster once mixed because you control water ratio and accelerator use, but it demands skill. Historical regulations shaped allowable additives, so check local rules before altering mixes. If you use it for fine artistic techniques, you’ll appreciate faster cure and sculpting time, yet you must mix consistently to avoid weak spots. Ready‑mix trades convenience for predictability. Compare practical factors below.
| Factor | Impact |
|---|---|
| Mixing control | Faster or slower cure |
| Additives | Regulated by law |
| Skill needed | High |
| Consistency | Critical |
| Finish quality | Variable |
Environmental Impact On Drying
Because ambient conditions directly affect how both ready‑mix and powdered putty dry, you’ll want to account for temperature, humidity, and airflow when timing your work. You’ll notice ready‑mix sets more predictably indoors, while powdered putty lets you adjust water for faster or slower cure.
Consider environmental pollution and runoff from washouts; powdered mixes can leach more solids if mishandled, harming wildlife habitat. Choose ventilated, moderate conditions for either type. Follow disposal rules to limit impact.
- Monitor temperature and humidity.
- Use fans for airflow control.
- Avoid outdoor washouts.
- Dispose of residues properly.
How Layer Thickness Slows Drying
When you apply thicker layers of putty, the material takes considerably longer to dry because solvents and moisture have farther to travel before they evaporate or react. You should think regarding surface-to-volume: a thin skim dries quickly, while deep fills trap moisture and cure slowly.
That affects scheduling, sanding, and paint adhesion. Plan multiple thinner coats instead of one heavy layer to speed work and reduce cracking. Consider historical applications and cultural significance of traditional techniques that favored thin layers for longevity.
Test thickness on scrap, follow manufacturer limits, and allow extra time when you must build up deep repairs.
How Ambient Temperature Changes Drying Time
Temperature has a big impact on how quickly putty sets, so you’ll want to account for it when planning your project.
In warm conditions, the drying process speeds up as solvents evaporate faster.
In cold environments, chemical reactions slow down and extend cure times.
Keep in mind extremes—too hot can cause cracking, too cold can prevent proper hardening.
Temperature Effects On Drying
If the air around your putty’s warmer, it’ll dry faster; cooler conditions slow the chemical reactions that let the filler set. You’ll notice timing shifts with humidity and airflow, and old advice from historical techniques reflects cultural influences on ventilation and workspace choices. Adjust expectations: manufacturer times assume moderate temps.
- Higher temps speed curing but can cause surface skinning, so watch for trapped moisture.
- Lower temps extend tackiness; plan extra wait time before sanding.
- Use gentle heat or increased ventilation to standardize drying.
- Monitor product-specific guidance—formulations react differently to the same temperature.
Cold Vs Warm Environments
Shifts from moderate conditions to really cold or warm air will change how quickly your putty sets, so plan accordingly. You’ll notice cold slows curing—moisture lingers and bonds form slowly—while warmth speeds drying but can cause cracking if too fast. Consider historical context: traditional formulations tolerated chill poorly, modern blends improve performance. For environmental sustainability, avoid heating spaces excessively; instead use controlled ventilation and manufacturer-recommended temps. Monitor humidity as well; it interacts with temperature. Use the table below to compare typical effects and quick fixes.
| Condition | Effect & Fix |
|---|---|
| Cold | Slows cure; use mild heat |
| Warm | Speeds cure; avoid rapid drying |
How Humidity Alters Drying : And What to Do
Because moisture in the air slows evaporation, high humidity can double or even triple putty’s drying time, and you should plan accordingly. You’ll check humidity levels before starting; wetter air means longer cure and higher risk of surface tackiness. Adjust your schedule, choose slower-setting products if needed, and avoid painting until firm.
Use simple ventilation techniques to help, but don’t rely solely on them (see next section for more). Monitor the putty by touch and time rather than appearance.
- Test humidity with a hygrometer.
- Delay sanding/painting when damp.
- Pick putty rated for humid conditions.
- Keep records of drying times.
Ventilation and Airflow: Speeding Safe Drying
Place the work near a window to promote cross-ventilation and pull in fresh air.
Use fans to keep airflow steady around the putty, pointing them to move moist air away from the surface.
If humidity’s high, run a dehumidifier or air conditioner to speed drying while keeping conditions safe for curing.
Proper Window Placement
When you position windows to create a clear cross-breeze, putty dries faster and more evenly, reducing the risk of trapped moisture or skin formation. Focus on window placement and proper ventilation to control humidity and temperature without overdoing it. You’ll want steady, gentle airflow that carries moisture away.
- Open opposing windows to establish a direct airflow path.
- Use smaller openings to avoid drafts that can dry surfaces unevenly.
- Keep windows elevated slightly to let warm air escape, pulling cooler air through.
- Close interior doors to channel ventilation where putty is curing.
Use Of Fans
Once you’ve set up window openings for steady airflow, adding fans lets you control both direction and speed of that flow to speed safe drying of putty. You’ll position intake and exhaust to move moisture away without blasting surfaces; oscillating fans spread air evenly. Aim fans to avoid direct wind on newly applied putty that can cause skinning or uneven cure. Keep metal tools dry to prevent metal rust and protect painted edges from color fading. Use this simple checklist:
| Position | Speed | Purpose |
|---|---|---|
| Intake | Low | Gentle fresh air |
| Exhaust | Med | Remove moisture |
| Oscillate | Varied | Even drying |
Controlling Humidity Levels
Because putty cures by losing moisture, keeping humidity in check speeds drying and prevents soft, tacky finishes. You’ll want to monitor Humidity control as a key Environmental factor: high moisture slows curing, low humidity can crack edges. Balance is critical.
- Open windows to improve ventilation and reduce indoor moisture.
- Use dehumidifiers in damp rooms to pull excess water vapor.
- Position fans to circulate air without blowing directly on fresh putty.
- Check readings with a hygrometer and avoid painting until humidity is stable.
You’ll speed safe drying by managing these conditions consistently.
Substrate Effects: Wood, Drywall, Plaster, Metal
Although different substrates share the same basic chemistry, they’ll affect putty drying times in distinct ways.
On wood, you’ll see faster absorption where grain is open, so thin coats dry quickly but dense hardwoods slow cure. Consider eco-friendly finishes that interact differently.
Drywall wicks moisture rapidly; you should expect quicker skinning but deeper solvent retention.
Plaster often slows drying because it’s less absorbent and retains moisture longer, so wait more before sanding.
Metal prevents absorption entirely, so putty cures by evaporation and chemical reaction—use primers for adhesion.
For historical preservation, test small areas to confirm timing.
Old or Porous Surfaces: How They Change Drying
Moving from how different substrates affect drying, old or porous surfaces present their own challenges that speed or stall putty cure in unexpected ways. You’ll need to adjust prep and expectations: porosity soaks moisture quickly, while aged finishes can repel new compounds. Pay attention to absorption, contamination, and cracking risk. Consider priming or sealing to standardize drying and improve color matching and texture blending before final layers.
- Test porosity on a hidden spot.
- Clean off dust and oils thoroughly.
- Use a sealant when absorption is high.
- Feather edges for consistent texture blending and adhesion.
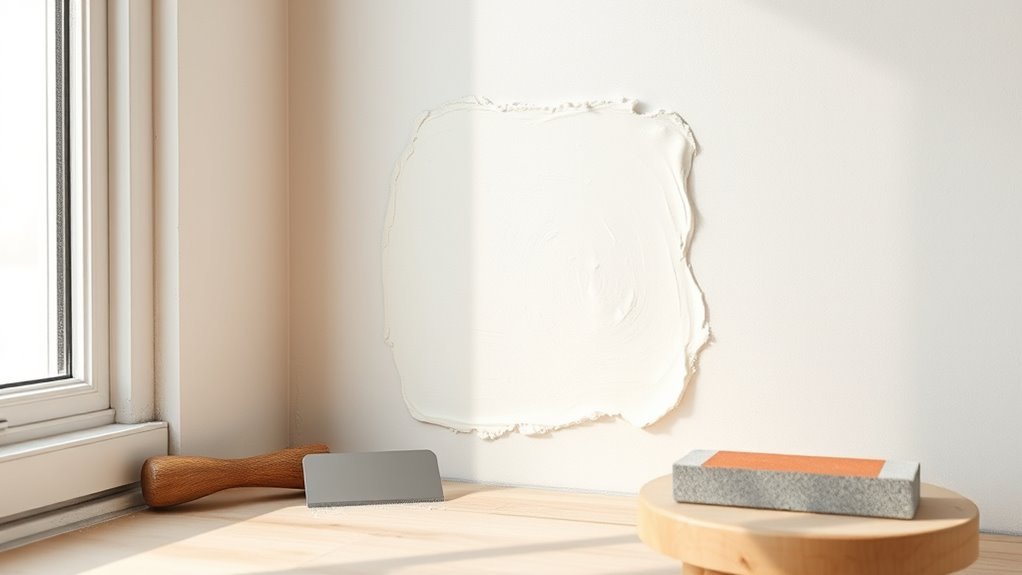
Testing Putty Readiness: Touch, Fingernail, and Knife
You can check putty readiness with three simple tests: a gentle touch to feel surface tack, a fingernail press to gauge firmness, and a knife edge scrape to see if it lifts cleanly.
Start with the lightest touch and only move to firmer checks if the surface seems dry. If the knife drags or putty smears, give it more time before sanding or painting.
Touch Test Method
When you want a quick, reliable check of whether putty is ready for paint, use the touch test: press gently with your fingertip, try a light scrape with a fingernail, and then test an edge with a knife blade. You’ll judge surface tack, firmness, and whether the interior’s cured.
Think of historical context and artistic applications where tactile checks guided restorations and finishes. Follow safe, clean technique to avoid contamination.
- Press fingertip lightly — no impression means likely dry.
- Lightly scrape with a fingernail — slight residue suggests not ready.
- Run a knife edge gently — it should cleanly shave cured putty.
- Recheck after an hour if unsure.
Fingernail Pressure Check
Although a fingertip touch gives a quick surface check, pressing with your fingernail provides a clearer indication of putty readiness by revealing whether the material still deforms or resists pressure.
You press gently at several spots; if your nail leaves a faint indentation that springs back, the putty needs more time. If it resists and barely indents, it’s likely ready for sanding and painting.
Compare areas near edges and fills, noting any color options changes as some putties darken while curing.
Use consistent tool selection for preparation—your fingernail for this test, then switch to proper sanding tools when firmness is confirmed.
Knife Edge Scraping
If you need a definitive check beyond touch and the fingernail test, try knife-edge scraping to verify putty readiness. You’ll hold a clean utility knife at a shallow angle and gently scrape a small area; dry putty will shave cleanly without clumping or smearing. Don’t gouge—test an inconspicuous spot.
Compare scraped residue to knife-edge results from other repairs or even tasks like cleaning kitchen appliances edges for a consistent feel. Think of this like gardening tips: you probe soil firmness before planting. If scraping leaves smooth shavings, you’re ready to sand and paint.
- Use a clean sharp blade.
- Angle shallowly.
- Scrape gently.
- Inspect residue.
When to Sand Putty Before Painting: Timing and Tips
Because putty’s firmness varies with type and conditions, you’ll want to confirm it’s fully cured before sanding to avoid clogging your sandpaper or reworking dried ridges. Check firmness by gently pressing an inconspicuous spot; if it dents or smears, wait.
Use progressively finer grit—start 120–150, finish 220–320—for smooth progressions. Keep sanding light to avoid overcutting edges.
Clean dust with a tack cloth between passes. For historic restorations, study historical techniques and match original textures; consider testing on scrap with alternative materials like modern fillers to gauge drying and sanding behavior before committing to the actual surface.
When and Why to Prime Putty Patches
Once your putty is fully dry and sanded smooth, you should prime the patch before painting to seal the surface and guarantee even paint adhesion.
Priming blocks stains, prevents flashing where paint soaks differently, and helps the finish match the surrounding area.
You’ll get a more durable, uniform result with minimal extra effort.
When To Prime
When your putty patch has fully cured and the surface feels hard and dry to the touch, you should prime it before painting to guarantee even adhesion and hide differences in porosity; priming seals the filler, prevents flash-through, and gives paint a uniform base so your finish looks consistent.
Prime when:
- You’ve sanded smooth and dust-free, ensuring the primer bonds evenly.
- Color matching matters—prime to neutralize patch tone before topcoat.
- Environmental factors (humidity, temperature) are within product specs to avoid seal failure.
- You’ll apply the final coat within manufacturer-recommended time to maintain adhesion.
Benefits Of Priming
After you’ve primed to lock in adhesion and even out porosity, you’ll see several practical benefits that make the extra step worth it. You’ll get uniform paint absorption, hiding slight color differences and reducing the number of finish coats needed.
Primer improves durability, preventing moisture or stains from showing through patched areas. It helps paint adhere to both modern putty and surfaces repaired using historical techniques, so restorations match surrounding finishes.
Choosing eco-friendly materials for primer keeps indoor air quality safer while supporting sustainable projects. Overall, priming saves time, reduces waste, and guarantees a professional, long-lasting result.
Painting Over Putty: Wait Times by Putty Type
Because different putties cure by chemistry, not time alone, you’ll need to match your paint schedule to the specific product you used. Know that traditional linoleum and window putties carry a historical context tied to slow oil curing, while modern acrylics mimic artistic techniques with faster waterborne chemistry.
Follow these rough wait times, adjusting for temperature and thickness:
- Oil-based putty: 7–14 days for full cure; prime after surface skin forms.
- Linseed/oil putty: 2–4 weeks; longer in cool, damp conditions.
- Acrylic latex putty: 24–48 hours; sand and paint when dry to touch.
- Epoxy/fast cures: 6–24 hours; follow manufacturer for coatings.
How to Speed Drying Safely With Heat, Fans, and Dehumidifiers
You can speed up putty drying by applying gentle heat, boosting airflow, and removing excess moisture from the air.
Use low-heat sources like a warm lamp or space heater set well away from the surface to avoid softening or cracking the putty.
Position fans and a dehumidifier to circulate and dry the room evenly without blowing directly on fresh repairs.
Use Gentle Heat
If you need to speed up putty drying without risking cracks or shrinkage, use gentle, consistent airflow and low heat sources to pull moisture out slowly. You’ll avoid hot spots and preserve finish integrity by applying mild warmth—hair dryers on low, radiant heaters set back, or warm-room placement.
Remember historical techniques that relied on steady warmth, and consider alternative materials’ drying traits before adjusting temperature.
- Keep heat constant and low—no blasts.
- Monitor surface and center for even dry.
- Use thermometer to keep temps moderate.
- Pause heating if skinning or shrinking appears.
Increase Airflow & Dehumidification
While keeping heat gentle helps, boosting airflow and cutting humidity are the fastest safe ways to speed up putty drying without causing surface flaws.
You can position fans to move air across patched areas, keeping the breeze steady but not blasting. Run a dehumidifier nearby to lower moisture, which shortens cure time and reduces tackiness.
Combine gentle heat, circulation, and dehumidification for consistent results, monitoring firmness before sanding or priming. These steps preserve finish quality and support your creative inspiration during renovation.
In interior design projects, controlling the environment helps you stay on schedule and prevents blisters, shrinkage, or uneven drying.
Avoiding Salt, Blistering, and Shrinkage When Drying Fast
Because fast drying raises surface tension and traps moisture, you’ll need to control conditions and techniques to prevent salt deposits, blistering, and shrinkage in putty. You can avoid salt buildup and blister formation by preparing and drying strategically: use thin layers, clean substrate, and moderate airflow. Follow these steps:
Control drying: use thin coats, clean substrate, feather edges, and allow skinning to prevent salts, blisters, and shrinkage
- Apply thin, even coats to reduce trapped moisture and minimize shrinkage.
- Wipe the substrate to remove salts and contaminants before puttying.
- Feather edges and avoid overworking to prevent blister formation and uneven drying.
- Allow initial skinning before light sanding so interior moisture escapes slowly.
Using Heaters and Dehumidifiers: Benefits and Risks
You can speed up putty drying with heaters or dehumidifiers, which is useful when time’s tight.
Be careful, though — excessive heat can cause cracking or shrinkage while over-drying can ruin surface adhesion.
Aim for controlled moisture removal to balance faster drying against heat-related damage risks.
Faster Drying Times
If you need putty to dry faster, using a heater or dehumidifier can speed moisture removal and cut wait time considerably, but they also bring trade-offs you should know. You’ll get quicker turnarounds, yet you should weigh the historical context of traditional air-drying against modern tech.
Consider eco-friendly options like energy-efficient dehumidifiers or low-watt heaters to reduce impact. Keep ventilation steady and monitor humidity.
- Speed: dries days to hours depending on device and conditions.
- Control: dehumidifiers offer gentler, consistent drying.
- Cost: energy use raises expenses.
- Monitoring: check hardness before sanding or painting.
Heat Damage Risks
Speeding up putty drying with heaters or dehumidifiers can save time, but those same tools can cause heat-related damage to the putty and surrounding surfaces if you’re not careful. You’ll want to balance faster drying against risks: excessive heat can crack or discolor putty, and uneven airflow can cause shrinkage. Use moderate settings, monitor temperature, and avoid direct heat sources. Dehumidifiers help moisture control but can dry edges faster than centers. Check regularly and test a small area first to prevent irreversible defects.
| Tool | Risk |
|---|---|
| Heater | Cracking |
| Dehumidifier | Uneven drying |
| Direct heat | Discoloration |
| High temp | Shrinkage |
Moisture Control Balance
While heaters and dehumidifiers can cut drying time, they also demand a careful balance to avoid damaging the putty or surrounding surfaces. You’ll speed curing, but too much heat or dryness can crack putty, warp trim, or disrupt color matching.
Use gentle, even warmth and maintain moderate humidity. Vintage techniques favor slow, steady drying for authentic finish and better adhesion.
- Monitor humidity and temperature closely.
- Position devices to avoid direct hot air on putty.
- Test a small patch for color matching after drying.
- Allow extra cure time for thick fills or older wood.
Applying Thin Layers: Best Practices to Reduce Wait
Because thin coats dry faster and more evenly, apply putty in layers no thicker than recommended on the product label. You’ll work more precisely, sanding between coats once each layer cures to the touch.
Use a broad knife held flat, keep strokes light, and wipe away excess to avoid ridges. Temperature, humidity, and ventilation affect cure time, so check the label guidance rather than guessing.
Consider historical context and cultural significance when matching restoration techniques to older surfaces.
Finally, keep records of layer thickness and drying intervals so you can reproduce successful results without trapping moisture or overfilling.
Building Deep Repairs Without Trapping Moisture
Once you’ve built up thin, well-cured layers, you’ll sometimes need to tackle deeper gouges or holes without sealing moisture inside the repair. You’ll create drainage and bulk reduction by using breathable fills and packing in stages, preferring eco-friendly materials and learning from historical techniques that promoted airflow.
Follow a simple routine to avoid trapped moisture and future failure:
- Remove loose debris and undercut edges for mechanical keying.
- Pack a coarse, breathable core (wood wool or hemp-based filler).
- Allow full curing of the core before topping.
- Finish with a thin, feathered skin compatible with the substrate.
Nail‑Hole Repair: Step‑by‑Step Timeline
When you’re repairing nail holes, follow a clear timeline so each step dries and bonds properly. Clean the hole, remove debris, and press filler in; small holes usually take 15–30 minutes to skin over, larger ones need an hour.
Sand smooth after it’s dry, then apply a second thin layer if needed and wait another 30–60 minutes.
Prime before painting; oil-based primers may extend wait times.
For antique or period projects, consider historical techniques for matching texture before finishing.
Match paint sheen to surrounding decorative finishes and allow the final coat to cure per manufacturer instructions.
Hairline Crack Repair: Step‑by‑Step Timeline
If you’re tackling hairline cracks, start by evaluating length and width so you can choose the right filler and drying schedule. You’ll prep by cleaning and slightly widening the crack for adhesion, then apply a thin putty layer. Let it skin before a light second pass. Sand smooth, prime, and paint when fully cured.
- Clean and widen: remove dust so filler bonds.
- First fill: thin application, quick skin drying.
- Second fill and sand: build level, smooth finish.
- Prime and paint: wait full cure per product.
Note historical context and artistic applications when matching texture.
Gouge and Dent Repair: Step‑by‑Step Timeline
First, you’ll assess the gouge or dent to decide if it needs layered filling or just a single application.
Then you’ll apply putty with the right technique—pressing firmly, feathering the edges, and shaping it to match the surface.
Finally, you’ll follow recommended drying times before sanding smooth so the repair holds and the paint goes on evenly.
Assessing Damage Severity
Before you start filling, take a close look at the gouge or dent to judge how deep and wide it really is — that determines the repair steps, the type of putty and filler you’ll need, and the drying times to expect.
Check for underlying damage, loose material, and whether the area will trap neighborhood noise or amplify a paint smell during curing.
Use this quick checklist to assess severity:
- Surface scrape only — shallow, just needs thin putty.
- Moderate dent — needs backing or layered fills.
- Deep gouge — may require structural filler.
- Cracked edges — cut back and reinforce.
Applying Putty Correctly
When you’re ready to apply putty, work in thin, controlled layers so each one cures fully and bonds well to the surrounding surface.
Press putty firmly into gouges and dents, overfill slightly, then scrape excess with a clean scraper held at a shallow angle.
Keep edges feathered to minimize sanding later.
Wear gloves and a mask to limit exposure; be aware of environmental hazards like ventilation and solvents.
Clean tools immediately after each pass—proper tool maintenance prevents contamination and ensures smooth application.
Check for voids and repeat layering only when prior layers are tack-free and stable.
Drying And Sanding Times
Although drying times vary by putty type, layer thickness, temperature, and humidity, you’ll generally wait until each layer is tack-free and firm before sanding or adding another coat. You’ll notice times range from 30 minutes to several hours; deeper gouges need longer cure.
Follow these concise sanding steps and timing tips, remembering historical techniques influenced modern expectations and reflect cultural significance in craft standards.
- Test tackiness lightly after recommended wait.
- Sand with fine grit; avoid over-sanding.
- Clean dust, inspect for pinholes.
- Reapply thin layers, allowing full cure between coats.
How Long to Wait Between Sanding Coats of Putty
If you’ve just sanded a layer of putty, give it enough time to fully cure and settle so your next pass won’t gum up the paper or raise new ridges. Wait until the surface feels dry and firm—usually 30 minutes to several hours depending on product, humidity, and thickness.
Lightly wipe dust and inspect for low spots before recoating. Thin layers dry faster; thicker fills need longer. You can plan multiple thin cycles for speed and better finish.
Consider eco friendly alternatives and creative applications that tolerate slightly longer waits. Always follow manufacturer cure times for best adhesion and paint readiness.
Tools and Supplies That Control Drying Time
Now that you know how long to wait between sanding coats, you can shorten or extend those times using the right tools and supplies. You’ll control drying by adjusting environment and additives: fans, heaters, hygrometers, and choice of putty or modifiers.
Consider both modern options and historical techniques for tempering cure times, and prefer eco friendly materials where possible.
Weigh modern tools against traditional tricks to tune cure times, favoring eco-friendly options whenever possible
- Use a hygrometer to monitor humidity.
- Apply slow or fast-curing putty additives per instructions.
- Position fans or gentle heat to speed evaporation.
- Choose eco friendly materials and non-toxic sealers to preserve finish and health.
How Paint Type (Latex vs. Oil) Interacts With Putty
When you’re choosing between latex and oil paints, remember that their chemistry and film properties affect how putty bonds and cures. Latex is water-based and stays more flexible, while oil creates a harder, less permeable surface.
You’ll let latex-coated putty remain a bit more forgiving with movement, so you can paint sooner on interior trims if temperature and humidity are controlled. Oil paint can seal slower-curing putty and may mask slight undercures but demands longer waiting to prevent adhesion failures.
Consider historical techniques and decorative patterns: oil worked well for ornate trim, while latex suits modern flexible substrates and simpler patterns.
Matching Putty Color and Texture for Invisible Repairs
Because your goal is invisibility, matching the putty’s color and texture to the surrounding surface is as important as getting the fit right. You’ll tint putty in small batches, test on scrap, and let it cure before final tweaks.
Aim for invisibility: tint small batches, test on scrap, and let cured putty guide your final adjustments
For textured or decorative finishes, press and tool the surface to mimic patterns, and keep edges feathered. Practice and tool maintenance keep your impressions consistent.
- Mix tiny tints, test under actual light.
- Replicate texture with the original tool or a matching substitute.
- Sand cautiously to blend without over-flattening.
- Clean tools and replace blades for crisp results.
Seasonal Tips: Winter vs. Summer Drying Strategies
If you’re working in winter, expect slower curing and adjust your approach; lower temperatures and higher humidity can double or triple putty drying times. So, warm the room, use dehumidifiers, or bring materials to room temperature before mixing to keep timelines predictable.
In summer, increased heat speeds evaporation but can skin surfaces. Control airflow and avoid direct sun to guarantee even cure.
You’ll treat putty like tending plants: consistent environment matters as much as seasonal extremes—think of drying like plant growth affected by humidity and temperature, similar to nutrient absorption needs. Steady conditions give reliable drying windows.
Common Mistakes That Make Putty Take Longer to Dry
One common error is applying putty too thick, which traps moisture and can add days to drying time.
You’ll also slow things down if you paint immediately after sanding, since trapped dust and unfinished cure prevent proper adhesion.
Avoiding these mistakes speeds drying and gives you a better final finish.
Applying Putty Too Thick
When you pile putty on too thick, it traps moisture and slows curing dramatically, so you’ll end up waiting far longer than necessary. You should apply thin, even layers so each bond cures; think in coats, not blobs. Note that putty color can mask wetness, so don’t judge dryness by appearance alone. Also mind application temperature — colder air extends drying time.
- Spread thin coats to promote airflow and steady drying.
- Use a putty knife to feather edges for uniform thickness.
- Wait recommended intervals between layers rather than adding more.
- Inspect by touch and time, not just look.
Painting Immediately After Sanding
Because sanding leaves putty surface dusted and still slightly moist beneath, painting right away seals in that moisture and stalls full curing. You’ll trap dust and solvents, causing blistering, adhesion failures, and longer overall drying.
Always wipe with a damp cloth or vacuum, let the putty breathe until it’s uniformly firm, then sand lightly.
If you’re doing historical repairs, be especially patient—older materials need extra drying time and testing.
Choose eco-friendly options like low-VOC putties and primers that tolerate slower cures.
Wait for manufacturer-recommended times and perform a simple touch test before applying primer or paint.
Problems From Painting Too Soon: What to Expect
Although you might be enthusiastic to finish, painting over putty that hasn’t fully cured often leads to visible and costly problems. You’ll notice imperfections that clash with your furniture arrangement and chosen paint color, and those flaws draw attention.
- Blistering or bubbling: trapped moisture makes the finish lift and look uneven.
- Cracking: paint flexes differently than still-soft putty, creating hairline fractures.
- Poor adhesion: paint peels off in patches, forcing touch-ups or larger repairs.
- Staining and discoloration: solvents or uncured compounds bleed through, altering shade and sheen.
Wait for full cure to avoid these issues.
How to Remove and Redo Putty That Failed to Dry
If your putty hasn’t dried and the paint’s already failing, you’ll need to strip it back and start over to prevent ongoing adhesion and appearance problems.
First, score and lift softened putty with a scraper, then peel or scrape away residue. Clean the area with mild solvent or soapy water, let dry, sand smooth, and vacuum debris.
Reapply appropriate putty thinly, following drying times and ventilation.
Consider historic tools and historical techniques for traditional profiles, and note cultural influences on material choice in restoration.
Test a small patch, record conditions that worked, and only paint after full cure to ensure lasting results.
When to Call a Pro for Complex or Specialty Putty Jobs
When repeated stripping and redoing hasn’t solved soft or slow-curing putty—or when the job involves ornamented moldings, historic windows, or materials requiring specific conservation techniques—call a pro. You’ll save time and protect surfaces with historical context or cultural significance that demand careful handling.
Professionals assess substrate, match original materials, and use approved consolidation methods.
- Complex moldings: intricate profiles need skilled filling and profiling.
- Historic windows: glazing putty replacement must respect period methods.
- Conservation needs: materials with cultural significance require specialists.
- Unknown failures: repeated soft putty may indicate structural or moisture issues.
Environmentally Friendly Putties: Drying Traits
Because green formulations often swap solvents and heavy additives for water-based binders and low-VOC ingredients, you’ll notice their drying behavior can differ noticeably from traditional solvent-rich putties.
You’ll find eco-friendly formulations often dry slower on thick fills because water needs to evaporate and binders cure more gradually. Humidity and temperature matter more, so you should store and apply them in stable, warm, dry conditions.
Some products include biodegradable additives that improve workability but can extend cure time slightly. Read manufacturer cure times, test a small patch, and allow extra drying hours before sanding or painting to avoid failures.
Safety When Accelerating Putty Drying
Although speeding up putty drying can save time, you should prioritize safety to avoid fires, toxic fumes, and surface failures. When you try heat, solvents, or fans, weigh safety hazards and ventilation considerations first. Use low heat, approved accelerators, and keep sources away from flammable materials.
Prioritize safety when speeding up putty drying: use low heat, approved accelerators, and ensure proper ventilation.
Open windows or run exhaust fans to dilute vapors; wear a respirator if labels advise it. Test a small area to ensure adhesion and avoid bubbling.
- Read product labels and MSDS before accelerating.
- Keep a fire extinguisher nearby when using heat.
- Guarantee cross-ventilation or mechanical extraction.
- Dispose of rags and solvents safely.
How Old Paint or Coatings Affect Putty Drying
Speeding up drying is helpful, but you also need to take into account what’s already on the surface: old paint or coatings can greatly change how putty cures. If the existing finish is oil-based, solvent in the putty may evaporate slower, so you’ll notice longer tack times.
Water-based coatings can draw moisture from waterborne putties, speeding skin formation but risking poor internal cure. Flaky or poorly bonded paint prevents adhesion, so strip or sand to a sound substrate.
Consider color theory when matching topcoats over filled spots, and keep tool maintenance up to avoid contaminating fresh putty.
Storing Leftover Putty to Keep It Usable Longer
If you want leftover putty to stay usable, store it so air and temperature won’t compromise its cure—seal the container tightly, remove excess air, and keep it in a cool, stable spot out of direct sunlight. You’ll prolong life for small repairs and furniture restoration projects by minimizing exposure and avoiding temperature swings.
Consider eco-friendly options like reusable containers and wax seals. Clean tools before returning putty, and label with date and type.
- Press plastic wrap against surface
- Use airtight jars or resealable tubes
- Store in a cool cupboard, not garage
- Freeze only water-based putty
Cost vs. Performance: Choosing Putty for Faster Turnaround
When you need a quick turnaround, balancing cost against drying time and durability matters—cheaper putties may save money upfront but often require longer cure times or multiple coats.
While premium fast-setting formulas cut downtime at a higher price. You’ll weigh material cost, labor hours, and project scale: smaller jobs might justify economy putty, larger or time-sensitive jobs benefit from fast-setting variants.
Consider surface type and finish requirements, plus how historical techniques and cultural influences shaped aesthetic expectations for repairs.
Read labels for cure times, test small areas, and factor total project cost rather than just product price.
Quick Troubleshooting Checklist for Slow‑Drying Putty
Although slow‑drying putty can stall a project, you can usually pinpoint the cause quickly and get back on schedule with a few targeted checks.
- Check humidity and temperature — high moisture or cold slows cure; raise heat or use dehumidifiers.
- Verify layer thickness — thick fills need sanding back and reapplying thin coats.
- Confirm product compatibility — old paint or incompatible primers can trap moisture; consider eco friendly options if reworking.
- Inspect mixing and surface prep — improper mix, oil, or dust prevents bonding; use historical techniques like scouring for older wood before reapplying.
Real‑World Dry Times From Common Products (Examples)
Because different brands and formulations cure at different rates, you’ll want real product examples to set realistic expectations for scheduling paint.
You’ll see tubed acrylic filler often skins in 30–60 minutes and sands in 1–2 hours, while traditional linseed‑based wood putty can take 24–72 hours.
Epoxy putties usually reach sandable cure in 4–12 hours, with full crosslinking over days.
These examples reflect historical context and evolving chemistry; they also carry cultural significance in regional carpentry traditions that favor certain formulas.
Check manufacturer specs and test a small patch under your job’s conditions before painting.
Wait‑Time Summary Table by Putty and Scenario
To make scheduling easier, we’ve condensed those real‑world examples into a compact wait‑time summary you can scan before planning paint. This quick table helps you match putty type, typical wait, putty texture, and essential surface preparation so you know when to sand and prime.
- Oil‑based putty — 24–48 hrs: firmer putty texture; allow full cure on bare wood before sanding.
- Water‑based filler — 1–2 hrs: softer texture when wet; guarantee surface preparation removes dust.
- Epoxy putty — 6–24 hrs: hard, resinous texture; follow surface prep for adhesion.
- Lightweight spackle — 30–60 mins: crumbly texture; wipe surface before painting.
How to Read Manufacturer Drying and Curing Instructions
When you read a manufacturer’s drying and curing instructions, skim for three key items first: stated drying time, recommended curing time before sanding or painting, and any temperature or humidity limits that affect those windows.
Note whether times apply to thickness or layers, since thin patches dry faster. Check cure vs. paint windows to avoid trapping moisture under finish.
Follow specified temps and RH; adjust expectations if your shop’s conditions differ.
Manufacturers sometimes note shrinkage or sanding hardness—use that to plan texture blending and final profiling.
Finally, confirm any color matching guidance, especially if pigments alter cure appearance or gloss.
Further Resources and Product Links
If you want reliable product recommendations and how-to references, start with manufacturer technical data sheets and trusted DIY sites that specialize in fillers and paints. They’ll help you check drying times, color matching tips, and texture consistency notes so you pick the right putty and primer.
Also consult forums and video tutorials for real-world examples and troubleshooting.
- Manufacturer technical data sheets — specs on cure, sanding windows, and compatibilities.
- Trusted DIY sites — step-by-step guides and verified product tests.
- Video tutorials — visual cues for texture consistency and sanding technique.
- Community forums — user experiences with color matching and real conditions.
Frequently Asked Questions
Can I Paint Putty Over Existing Lead‑Based Paint Safely?
You shouldn’t paint putty over existing lead-based paint; you’ll risk disturbing lead. Prioritize lead safety, test and abate if needed, and confirm chemical compatibility between putty and remediation products before proceeding to avoid contamination.
How Does Paint Sheen Affect Visibility of Putty Repairs?
Sheen contrast makes putty repairs more noticeable, so you’ll match sheen to minimize contrast; higher surface reflectivity highlights texture differences, so use similar gloss levels or sand and prime to reduce visible seams.
Will Primerless Application Over Putty Cause Adhesion Problems?
Will primerless application over putty cause adhesion problems? You’ll risk poor bond without proper surface preparation and compatibility concerns checks; always test primerless systems, clean and sand surfaces, and confirm material compatibility before painting.
Can Additives (Accelerators) Alter Putty Color or Bond?
Yes — additives can change putty color and bonding strength. You’ll notice altered color consistency, and some accelerators may weaken bond or boost adhesion. Test small batches first to guarantee color consistency and adequate bonding strength.
How Long Should Furniture Hardware Be Removed Before Puttying?
You should remove furniture hardware during hardware preparation at least 30–60 minutes before puttying to allow full furniture removal access, prevent smudging, and guarantee accurate filling; longer drying needs depend on putty type and conditions.
Conclusion
So you’ve waited, sanded, and peered anxiously at a smear of putty, wondering if it’s “done” yet — only to learn drying isn’t dramatic. It’s patient, boring, and utterly necessary. Ignore it if you enjoy cracking paint and sticky brushes; otherwise follow the label, feel for firmness, and give extra time in cold or damp rooms. In short: don’t rush the snooze—your paint job will thank you, even if you won’t.