How to Get Dried Paint Off Window Frames Safely
You can remove dried paint from window frames safely by first identifying the frame material and testing a small hidden spot. Protect glass and seals, wear gloves and a mask, and start with gentle methods—warm soapy water, plastic scrapers, and rubbing alcohol for latex. Use low heat or a citrus remover for stubborn areas, work slowly to avoid gouging, and contain dust if lead is possible. Keep going to learn safer, material-specific tricks and cleanup tips.
Quick Answer: Safest Method to Remove Dried Paint From Window Frames

If you want the safest way to remove dried paint from window frames, start with gentle, nonchemical methods. You’ll scrape softened flakes with a plastic putty knife, use a nylon brush to work crevices, and apply warm soapy water to lift residue without harming paint color or altering window design. Test a hidden spot first to verify finish compatibility.
For stubborn spots, use a dampened microfiber cloth and patience rather than harsh solvents. Work slowly along seams and corners to avoid gouging.
If nonchemical steps fail, consider targeted, low-VOC products as a last resort and follow safety instructions.
Why This Guide Helps Remove Dried Paint From Window Frames
You’ll get clear, step-by-step techniques that prioritize your safety while removing dried paint from window frames.
The guide shows effective methods tailored to different frame materials and paint types so you can pick the right approach.
Follow the instructions and you’ll protect the glass, finish, and your hands as you work.
Safety First
Because removing dried paint can involve sharp tools, solvents, and dust, you should prioritize safety from the start: wear gloves and eye protection, guarantee good ventilation, and keep children and pets out of the work area.
Follow paint safety basics: read labels, handle solvents sparingly, and store materials securely.
Use protective gear—gloves, goggles, and a mask—especially with chemical strippers or sanding.
Work slowly to avoid slips, keep a first-aid kit nearby, and clear your workspace of tripping hazards.
If you’re unsure about a product or lead paint, stop and consult a professional before continuing.
Effective Removal Methods
When paint’s dried on a window frame, you need targeted methods that match the paint type, the frame material, and how stubborn the finish is.
This guide walks you through the fastest, safest options—from gentle scraping and heat to chemical strippers and sanding—so you can pick the right approach and avoid damaging the frame.
Start with a plastic scraper and mild solvent for water-based paints.
Use a heat gun or infrared for oil-based layers, keeping heat low.
For historic wood, prioritize historical preservation: test small areas, consider peel-away stripper, and document paint color matching before refinishing.
Identify Your Window Frame Material: Wood, Vinyl, Aluminum, Metal
First, check what material your window frame is made of—wood, vinyl, aluminum, or another metal—since each reacts differently to cleaners and tools.
Then note how well the dried paint is sticking: flaky, peeling, or firmly bonded will change your approach.
With that information you’ll pick methods that remove paint without damaging the frame.
Check Frame Material Type
Which material did the painter use for your frames—wood, vinyl, aluminum, or another metal? You’ll inspect frame durability and paint texture to choose the safest removal method. Soft woods need gentler scraping; vinyl resists solvents but can warp; aluminum tolerates scraping but dents; other metals vary.
| Material | Typical Feel | Removal Tip |
|---|---|---|
| Wood | Warm, grainy | Use plastic scraper, test small area |
| Vinyl | Smooth, slightly flexible | Use mild solvent, low heat |
| Aluminum/Metal | Cool, rigid | Metal scraper carefully, avoid gouging |
Identify material first, then proceed with appropriate tools.
Note Paint Adhesion Level
How firmly is the paint stuck to the frame? You’ll test paint adhesion before choosing removal methods. Gently scrape a small area; note if flakes, thin film, or solid coating remain. Good surface preparation previously means easier removal; poor surface preparation often means deeper bonding. Match technique to substrate—wood, vinyl, aluminum, or metal—to avoid damage.
- Scrape lightly with a plastic scraper first.
- Use a solvent patch test on an inconspicuous spot.
- Sand small areas to check underlying attachment.
- Tap with a putty knife to hear solid versus brittle adhesion.
- Record results to plan safe removal steps.
How to Tell Latex, Oil-Based, and Enamel Paint
Want to know what type of paint you’re dealing with before you start scraping? Check sheen and smell:
Latex (water-based) dries matte to semi-gloss and smells faint.
Oil-based feels smoother, has a stronger solvent odor, and often yellowed with age.
Enamel describes finish—hard, glossy—and can be either oil or water-based.
Test a hidden edge with rubbing alcohol: latex will soften, oil won’t.
A small acetone spot test can distinguish oil-based/enamel from latex.
Note any color matching or paint blending issues if layers differ; document findings so you choose the right remover and avoid damaging the frame.
Inspect Glazing and Weatherstripping Before You Start
Before you start scraping, check the glazing beads to make sure they’re secure and not loose or cracked.
Inspect the weatherstripping for gaps, brittleness, or compression that could be worsened by scraping.
Also note any paint-on sealants that may be sealing joints so you can remove or protect them first.
Check Glazing Beads
Have you checked the glazing beads and weatherstripping around the sash? You’ll want to examine the glazing beads closely before removing dried paint so you don’t damage them or compromise window sealing.
Gently pry a corner to test if beads are loose, note any cracked beads, and mark areas where paint has bonded. If beads are integral, plan to protect them while you work. Keep window sealing intact by avoiding aggressive scraping near the glass.
- Look for paint bridging bead to frame
- Test bead mobility gently
- Mark fragile sections
- Use protective tape along edges
- Prepare soft tools for removal
Examine Weatherstripping Condition
While you inspect the glazing beads, check the weatherstripping for cracks, gaps, or compressed areas that paint may have glued shut. Damaged seals can let drafts or moisture in once you disturb the sash.
You should run a careful frame inspection to spot areas where paint has adhered to rubber, foam, or felt. Gently peel or probe loose paint with a plastic tool to avoid tearing seals.
Note attachment method and material so you can replace strips if needed. If weather stripping is brittle or flattened, plan on replacing it after paint removal to restore proper sealing and operation.
Note Paint-On Sealants
Also check for paint applied over glazing putty, caulk, or other sealants before you start scraping—paint can lock those materials to the frame and to the sash.
You’ll want clear sealant notes so you don’t damage glazing or weatherstripping when removing dried paint. Assess adhesion and test a small area first; poor paint adhesion might peel away cleanly, while good adhesion could pull sealant.
- Identify painted-over caulk and putty
- Test paint adhesion with a small tool
- Protect glazing and seals before scraping
- Use gentle heat or solvent if needed
- Replace compromised sealant promptly
Tools Checklist: Scrapers, Brushes, PPE, and Abrasives
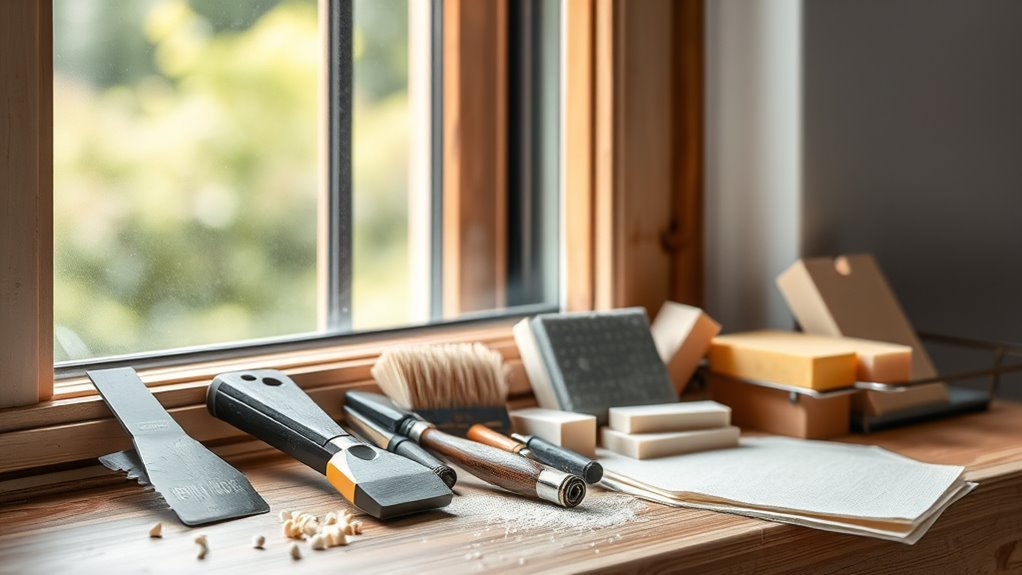
Because getting dried paint off window frames takes a mix of finesse and force, you’ll want the right tools lined up before you begin.
Start with plastic and metal scrapers—use plastic for delicate trim, metal for stubborn flakes.
Have assorted brushes: stiff nylon for crevices, soft-bristle for final dusting.
Wear PPE: safety glasses, nitrile gloves, and a dust mask or respirator if sanding.
Include sanding pads (fine to medium grit) and a small hand sander for larger jobs.
Keep a putty knife, painter’s tape, and a soft cloth handy.
Note: consider how color mixing and paint drying affect removal timing.
Gentle Solvents to Try First (And When to Use Each)
When you want to soften dried paint without damaging the frame, start with gentle solvents that dissolve paint films slowly and predictably. You’ll pick based on finish, age, and substrate, and always prioritize solvent safety: test in an inconspicuous spot, ventilate, and wear gloves.
For light surface paint use less aggressive options first; for thicker or older layers step up cautiously.
- Rubbing alcohol: good for latex, quick-dry smudges, low toxicity.
- White vinegar: mild acid for loosening water-based paint.
- Mineral spirits: for oil-based topcoats, moderate strength.
- Citrus-based remover: biodegradable, gentle on wood.
- Acetone: strong but usable sparingly on metal.
When to Use Stronger Chemical Strippers Safely
If gentle solvents can’t budge thick, old, or multiple paint layers, it’s time to contemplate stronger chemical strippers—but only after you confirm the frame material, test a small hidden area, and plan for ventilation and protective gear. You should weigh risks: wood, aluminum, and vinyl react differently. Follow product labels, use respirators and gloves, and keep pets and children away. Neutralize residues and dispose of waste per local rules. Practice on scrap first. Chemical safety matters during paint stripping; avoid mixing products. Visualize steps:
| Step | Image |
|---|---|
| Inspect | magnifying glass |
| Test | brush |
| Gear | gloves |
| Apply | brush |
| Clean | sponge |
Heat-Based Removal: Tips and Safety Precautions

Although heat guns and infrared tools can soften old paint quickly, you should approach heat-based removal with care. You’ll avoid burns, glazing, and fumes by combining sensible heat safety with awareness of chemical precautions from any nearby stripper residues.
Work in ventilated areas, keep a fire extinguisher handy, and test a small spot first. Use low settings and move constantly to prevent scorching.
- Wear heat-resistant gloves and eye protection.
- Keep combustibles and solvents away.
- Maintain a safe distance and steady motion.
- Monitor window seals and glazing for warping.
- Cool and clean the area before painting.
Using Plastic Scrapers and Putty Knives Without Scratching
Pick a plastic scraper or a flexible putty knife that’s thin enough to get under the paint but blunt enough to avoid gouging the frame.
Hold the tool at a low angle and push or lift gently, working with short, controlled strokes to ease the paint up rather than forcing it.
If you meet resistance, switch tools or soften the paint first to prevent scratches.
Choose The Right Tool
When working on painted window frames, choosing the right scraper keeps you from turning a cleanup into a repair job. You’ll pick tools that match the frame material and paint color contrast so you avoid gouges or discoloration.
Prioritize soft plastic scrapers for delicate finishes and thin putty knives for stubborn spots; keep blades clean for tool maintenance and consistent performance. Inspect edges for burrs and replace warped blades.
- Match scraper hardness to frame material
- Use flexible edges near trim
- Keep spare plastic scrapers on hand
- Replace nicked blades promptly
- Store tools dry after cleaning
Scrape With Proper Technique
Before you start scraping, position the frame so you can work at a low, shallow angle and let the blade do the work rather than forcing it—this reduces gouges and gives you better control. Use plastic scrapers or stiff putty knives, keep edges duller than metal, and work with the grain. Watch for soft spots from recent paint drying; wait if needed. Clean blade often to avoid color mixing from old paint. Test a small hidden area first. Move slowly, push rather than pry, and switch to softer tools near corners to protect seals and glass.
| Tool | Angle | Result |
|---|---|---|
| Plastic scraper | 20° | Safe removal |
| Putty knife | 30° | Stiff edges |
| Card | 15° | Finish/detail |
Protecting Glass During Paint Removal
If you’re removing dried paint from window frames, protect the glass first so you don’t create more work or damage the panes. Cover edges with painter’s tape, then shield larger areas with paper or plastic. Keep solvents off glass to avoid streaks during paint drying and to prevent residue that mimics color mixing problems.
Work from the frame outward, lifting flakes gently so chips fall onto the cover, not the pane.
Work outward from the frame, gently lifting flakes so chips fall onto the cover, not the glass.
- Apply low-tack painter’s tape precisely
- Use craft knife to score tape edges
- Lay kraft paper or plastic sheeting
- Weigh corners to prevent blowback
- Clean glass after removal promptly
Protect Finished or Painted Frames From Damage
After you’ve shielded the glass, focus on preserving the frame’s finish so your repair work doesn’t create new damage. Work slowly with a plastic scraper and soft cloth, avoiding metal edges that scratch.
Test solvents on a hidden area to confirm they won’t dull or strip the finish. Never leave solvent sitting during paint drying — blot promptly.
If paint chips, gently lift flakes rather than force them. Sand feathered edges very lightly.
Use painter’s tape on adjacent trim to prevent accidental color mixing.
Finish by cleaning residues and, if needed, touching up with matching paint applied sparingly.
Test Removal in an Inconspicuous Spot First
Before you start, pick an out-of-sight area like the frame’s underside or inside corner and work there first.
Test your chosen remover or method to see if the finish reacts, bubbles, or discolors.
Watch how the paint comes off so you can adjust pressure, solvent, or technique before treating visible areas.
Choose An Out-Of-Sight Area
Want to make sure your removal method won’t damage the frame? Pick an out-of-sight spot—behind trim, under the sill, or a corner—so you can try techniques without visible risk. Include areas near window tinting edges or where window cleaning streaks already hide imperfections.
Prepare tools and a tiny swatch of the solvent or scraper, then observe for discoloration, finish lifting, or softened caulking. If it looks good, proceed carefully. If not, stop and choose another method.
- Pick a hidden corner
- Clean area first
- Apply minimal solvent
- Wait and inspect closely
- Document results for reference
Test For Surface Reaction
Now that you’ve confirmed a safe test spot, try the actual removal method there to check how the frame reacts. Apply your chosen solvent or scraper gently, working a small area where paint drying or previous color mixing won’t be obvious.
Watch for immediate changes: discoloration, swelling, softening, or finish dulling. Time your actions—some reactions appear after a minute or two.
If the surface resists, stop and switch tactics; if it tolerates the treatment, you can proceed cautiously. Record which method and duration you used so you avoid surprises on visible sections and preserve the original finish.
Observe Paint Removal Results
Once you’ve confirmed the test spot tolerated the treatment, check the results closely to decide whether to continue. You’ll inspect adhesion, finish, and any damage. Note color matching differences and verify paint compatibility before proceeding. If edges lift or the substrate dulls, stop and reassess technique or solvent. Photograph the spot for comparison and let it dry fully to reveal true results.
- Look for scratches, softening, or residue
- Compare healed color matching to surrounding areas
- Test adhesion with a gentle tap or fingertip
- Confirm no blistering or chalking appears
Decide: continue, modify method, or consult pros
Remove Dried Latex Paint From Vinyl: Step-by-Step
If dried latex paint’s marred your vinyl window frames, you can remove it without scratching the surface by using the right tools and a gentle, step-by-step approach.
First, test a hidden spot for color mixing residue or finish change.
Check a discreet area first to ensure no color transfer or finish damage from the cleaner.
Gather warm soapy water, a soft cloth, plastic scraper, and isopropyl alcohol.
Soak the paint gently with soapy water, let sit during paint drying residue softens.
Then scrape carefully with the plastic tool.
Dab remaining spots with alcohol on a cloth, wiping toward fresh vinyl.
Rinse the frame, dry thoroughly, and repeat only as needed until clean.
Remove Oil-Based Paint From Wood: Step-by-Step
Paint on wood calls for a different approach than vinyl—oil-based coatings bond more strongly and need solvents or careful sanding rather than just soap and alcohol.
You’ll protect surrounding glass and use respirator, gloves, and drop cloths. Test a solvent in a hidden spot before proceeding, since heat or abrasives can damage trim.
Monitor paint drying stages to know when recoat or removal is viable. Consider prior Color mixing effects if multiple layers exist.
- Ventilate the area and mask off glass
- Soften paint with mineral spirits or remover
- Scrape gently with plastic scraper
- Sand with fine grit by hand
- Clean and refinish wood
Remove Enamel From Metal Frames: Step-by-Step
When enamel flakes or hardens on metal window frames, you’ll need a different method than for wood or vinyl: metal tolerates stronger solvents and scraping, but you still must protect glass and finishes. Work gloves, goggles, and masking tape first. Chip loose bits with a plastic scraper, then apply enamel remover per directions. Use a brass brush lightly; avoid stainless steel on polished frames. Neutralize and rinse, dry thoroughly. Note how color mixing during touch-ups affects final match once paint drying completes; test a small patch.
| Step | Tool | Tip |
|---|---|---|
| 1 | Masking tape | Protect glass |
| 2 | Remover | Follow label |
| 3 | Brush | Gentle agitation |
| 4 | Rinse | Dry fully |
Removing Paint Drips From Window Glass
Before you start scraping, check what kind of paint you’re dealing with—water-based paints soften with soap and water, while oil or enamel may need stronger solvents.
Choose a safe removal method that matches the paint type and your glass (razor blade for hardened spots, rubbing alcohol or mineral spirits for tougher drips).
Work carefully to avoid scratches and protect surrounding frames and seals.
Assess Paint Type
Wondering what kind of paint you’re dealing with? You need to identify whether it’s latex, oil, enamel, or acrylic before planning removal. Check drying texture, smell, and sheen; note any old layers. Color matching and paint compatibility matter if you’ll touch up afterward.
- Inspect a hidden edge for layer structure.
- Rub a small area with rubbing alcohol to test solubility.
- Use a cotton swab with mineral spirits to differentiate oil vs. water-based.
- Record paint age and previous coatings for repair planning.
- Photograph the drip and surrounding finish for reference and matching.
Safe Removal Methods
Now that you’ve identified the paint type and layered history, you can move on to removing drips from the glass without damaging the frame or finish. Work gently: soften stubborn spots with a hairdryer or heat gun on low, scrape with a new razor held at 45 degrees, and wipe residue with a lint-free cloth and a mild solvent suited to the paint.
Protect the frame with painter’s tape and plastic. If you plan touch-ups, keep notes for color matching and paint mixing to replicate original hues. Test any solvent or technique in a concealed area before proceeding across the whole window.
Removing Paint From Textured and Molded Frame Profiles
When paint gets into the grooves and contours of textured or molded window frames, you’ll need a gentler, more patient approach than you’d use on flat surfaces.
You’ll assess paint texture and frame molding details, then choose tools and solvents that won’t mar profiles.
Work small areas, soften dried paint with heat or a mild remover, and lift with a nylon brush, wooden pick, or dental tool.
Rinse residue and dry thoroughly to prevent staining.
- Test remover on hidden area first
- Use low heat from a hair dryer
- Scrape gently along contours
- Clean bristles between passes
- Protect surrounding glass and seals
Layers of Old Paint and Lead-Paint Precautions
If your windows were painted decades ago, they may have multiple, flaky layers—and some of those layers could contain lead, so take precautions before you start scraping. You should assume older paint layers might hold lead hazards until testing proves otherwise.
Get a certified lead-test kit or hire a pro, seal the work area with plastic, and wear a respirator and disposable gloves. Keep dust down by misting surfaces lightly and wiping with a wet cloth rather than dry brushing.
Bag waste securely, label it, and follow local disposal rules. Prioritizing testing and containment protects you and your household.
When to Sand Lightly : And When to Avoid Sanding
Although sanding can smooth edges and prep surfaces for paint, you should only sand lightly when the existing finish is sound and free of bubbling or loose flakes; otherwise you’ll risk creating dust and spreading contaminants.
You’ll use paint removal methods instead of aggressive abrasion when layers are failing or when lead-paint risk exists. Follow sanding precautions: wear a respirator, use low-grit sponge or 220 paper, and work gently to feather edges.
Don’t sand near active rot or soft wood. If in doubt, test a small area and consider chemical or professional options.
- Wear PPE
- Test stability
- Use fine grit
- Minimize dust
- Stop if flakes appear
Clean Residue and Prep Window Frame for Touch-Up Paint
Before you touch up the frame, identify the paint type so you know whether to use a solvent or just soap and water.
Scrape or brush away any loose residue, then clean the surface thoroughly to remove dust, oils, and old paint particles.
If the bare material is exposed or the cleaner removed gloss, apply a suitable primer before repainting.
Assess Paint Type
Wondering whether that speck of paint is water-based or oil-based? You’ll test and inspect to decide how to prep for touch-up paint, ensure color matching, and confirm if paint priming is needed.
Start with visual clues and a solvent test on a hidden spot. Note the finish, age, and smell.
- Rub gently with rubbing alcohol; water-based will soften.
- Try mineral spirits; oil-based will react.
- Compare sheen to nearby areas for color matching cues.
- Photograph the spot for store advice.
- Record results to determine if paint priming is necessary before touching up.
Remove Loose Residue
Now that you’ve identified the paint type, remove any loose flakes, chips, and dust so your touch-up will adhere and look smooth. Use a soft brush or vacuum with a brush attachment to lift debris without scarring the frame.
Gently scrape stubborn bits with a plastic scraper or putty knife at a low angle, working in small sections. After loose material’s gone, wipe with a damp microfiber cloth and let the area dry completely—timing affects paint drying and final adhesion.
Keep removed chips separate if you’ll match them later for color mixing when planning touch-ups.
Surface Clean And Prime
Once you’ve removed loose flakes, clean the remaining residue with a mild degreaser or trisodium phosphate (TSP) solution so paint will stick evenly; scrub gently with a non-abrasive pad, rinse thoroughly, and let the frame dry.
Next, sand any rough spots lightly, wipe dust with a tack cloth, and apply a rust-inhibiting or wood primer suited to the frame material.
Match primer and topcoat for proper color mixing and finish. Wait the recommended paint drying times between coats.
Use painter’s tape to protect glass and hardware before touch-up.
- Sand lightly where needed
- Wipe with tack cloth
- Apply appropriate primer
- Tape edges carefully
- Observe paint drying intervals
Best Touch-Up Products and Matching Existing Finish
A smart approach to touching up window frames is picking products that blend with the existing finish and suit the frame material. You’ll focus on color matching and finish restoration: bring a small chip to a paint store for a match or use removable touch-up markers for wood.
For metal or vinyl, choose acrylic or enamel touch-up paints labeled for that substrate. Match sheen—matte, satin, gloss—to hide patches. Use fine brushes or micro-rollers for thin, even coats.
Allow proper drying between layers and lightly scuff old finish if adhesion seems poor. Test invisibility on an inconspicuous spot first.
DIY Fixes for Small Spots vs. Professional Restoration
You can usually fix small paint spots yourself with a razor, fine sandpaper, and a matching touch-up. Try a gentle solvent or rubbing compound first, but stop if the frame’s finish starts to soften or the damage is larger than a few square inches.
Call a professional when repairs affect structural trim, extensive finish matching, or when you’re unsure how to avoid further damage.
Quick DIY Spot Treatment
Want to tackle small spots yourself before calling in pros? You can often remove dried flecks quickly if you act within a short removal timeline and match the paint color for touch-ups. Start gently to avoid damage.
- Test solvent on a hidden area.
- Soften paint with warm water or rubbing alcohol.
- Scrape gently with a plastic razor blade.
- Clean residue, let dry, and assess finish.
- Touch up with matching paint color using a fine brush.
Work patiently, avoid harsh abrasives, and stop if the frame’s finish changes—those signs mean you should reassess.
When To Call Professionals
After trying gentle spot methods, know when to stop and call a pro: small flecks and surface scuffs you can remove without altering the finish are fair DIY jobs.
But widespread peeling, deep gouges, lead-paint concerns, or frames with complex profiles or historic value need professional restoration to avoid costly damage.
You should call professionals if paint removal risks harming original trim, compromising window insulation, or disrupting interior decoration schemes.
Pros assess substrate, test for lead, restore profiles, and match finishes.
Hire a licensed specialist for major work; you’ll save time, avoid health risks, and protect your windows’ value.
Using Citrus Removers Safely : What They Can and Can’t Do
Curious whether citrus removers can safely tackle dried paint on your window frames? You’ll want to understand citrus safety and paint chemistry first. Citrus-based gels dissolve many latex and some oil paints without harsh solvents, but they won’t strip heavy enamel or multiple thick layers quickly.
Test a hidden spot, wipe residue promptly, and avoid prolonged contact on sensitive finishes. Use a plastic scraper and soft cloth; don’t sand sealed trims until you confirm compatibility.
- Works well on fresh or thin latex
- Gentle on many metals and plastics
- May leave sticky residue
- Slow on oil/enamel paints
- Requires spot-testing
Ventilation, PPE, and Disposing Removed Paint and Solvents
Because many paint strippers and loosened paint release fumes and fine particles, you should always work with good ventilation, the right PPE, and a plan for safe disposal.
Because paint strippers release fumes and dust, always ensure ventilation, proper PPE, and safe disposal plans.
Open windows and use fans to direct air outward; if you can, work on a calm day and avoid blowing dust into neighbors’ spaces.
Wear a respirator rated for organic vapors and particulates, gloves, and eye protection to protect skin during window cleaning or Glass repair tasks.
Collect paint chips and used rags in sealed, labeled containers.
Follow local hazardous-waste rules for solvents and contaminated materials; never pour them down drains.
Troubleshooting Paint That Won’t Budge
If stubborn paint won’t budge, don’t force it—start by identifying what’s holding it: multiple old coats, oil-based paint over latex, strong adhesion from primer, or paint that’s polymerized with heat.
You’ll adjust strategy based on Paint color, substrate, and the removal timeline you can tolerate.
Try escalating steps: gentle scraping, heat, chemical remover, or sanding, testing small areas first.
Note risks to seals and glass.
- Test a hidden spot before full treatment.
- Match remover type to paint chemistry.
- Allow solvent dwell per instructions.
- Use heat cautiously near glazing.
- Reassess if several techniques fail.
Preventing Paint Splatter During Future Projects
When you paint, take steps up front to stop splatter from creating extra cleanup and potential damage. Lay drop cloths, tape edges, and use plastic sheeting on glass and hardware.
When painting, prep carefully—use drop cloths, tape edges, and cover glass and hardware to prevent splatter.
Use a brush for edges and a high-quality roller with the right nap to minimize flick. Keep a damp rag handy to catch fresh specks before paint drying begins.
Control color mixing in trays to avoid overloading tools, and wipe excess back into the can. Work slowly near frames, angling strokes away from glass.
Wear goggles and breathable mask so you can focus on precision and avoid costly touch-ups.
Time and Cost Estimates for Common Removal Scenarios
Although the exact time and cost will vary with paint type and damage, you can expect most small spots of dried paint on a single window frame to take 15–45 minutes and $5–20 in supplies (razor, solvent, rags).
While for larger jobs—multiple windows, thick enamel, or paint baked onto frames—it can run several hours per window and $20–100 for stronger removers or replacement trim.
Plan by evaluating scope, substrate, and paint adhesion. Factor in color matching if you’ll repaint trim.
Typical scenarios:
- Single small smear: cheap, short.
- Multiple smears: moderate time.
- Enamel build-up: longer, costlier.
- Damaged trim: repair/replacement.
When to Call a Professional Window Restorer
You’ve probably handled small smears yourself, but some situations are better left to a pro: extensive enamel buildup, paint baked onto multiple panes, damaged or warped frames, or historic windows with delicate glazing and original finishes.
Call a professional window restorer when removal risks scratching glass, stripping original paint layers, or harming decorative glass, leaded lights, or decorative accents. You should also hire pros for sash alignment, rot repair, or when windows are part of historical preservation so legal and conservation standards are met.
A restorer uses appropriate solvents, poultices, and mechanical techniques to protect value and function.
Eco-Friendly Options for Removing Dried Paint
If you want to remove dried paint without harsh chemicals, there are several eco-friendly methods that work well and protect your windows and the environment. You can use simple, effective Eco friendly solutions and Chemical alternatives to soften and lift paint without damaging frames.
Try gentle heat, biodegradable soaps, or natural solvents, testing small areas first to avoid finish issues.
Try gentle heat, biodegradable soaps, or natural solvents—always test a small area first to protect the finish.
- Use a hairdryer or heat gun on low to loosen paint.
- Apply white vinegar or a citrus-based remover.
- Make a paste with baking soda and water.
- Try rubbing alcohol for small spots.
- Use a plastic scraper gently.
Common Mistakes That Damage Window Frames and How to Avoid Them
When you rush or use the wrong tools, you can easily gouge, strip finishes, or warp a frame—so pay attention to method and materials to avoid costly repairs.
Don’t sand aggressively or pry dried paint with metal putty knives; you’ll cause scratches and worsen paint peeling. Avoid harsh chemical strippers on delicate finishes unless you’ve tested a hidden spot.
Don’t skip protective masking; solvents and scrapers damage glass and hardware.
If a frame needs more than surface touch-up, plan for professional frame restoration rather than forcing removal.
Take measured, gentle steps to preserve integrity and save time and money.
Pre-Finish Checklist for Safe, Clean Paint Removal
Before you start scraping or solvent work, run through a short pre-finish checklist to protect the frame, glass, and surrounding surfaces. You’ll confirm tools, ventilation, and test solvents on an inconspicuous spot. Check for old paint types and assess soft spots before proceeding. Plan paint mixing disposal and make sure Frame sealing materials are ready if you’ll reseal after cleaning.
- Clear area and cover nearby floors and furniture
- Wear gloves, eye protection, and a respirator if needed
- Test solvent and scraping technique on a small area
- Have proper waste containers for paint mixing leftovers
- Keep spare sealant and applicators handy
Frequently Asked Questions
Can Paint Removal Void My Window Warranty or Homeowner’s Insurance Coverage?
Yes — paint removal safety matters because improper methods can void warranty implications; you should check your warranty and insurer, use approved techniques or pros, and document work to avoid damaging seals or finishes and losing coverage.
How to Remove Paint From Window Hardware Like Locks and Hinges?
Use a mild paint stripper on masked hardware, let it sit briefly, then gently scrub with brass brush or toothbrush; rinse, dry, and apply lubricant or protective coating for hardware cleaning so locks and hinges operate smoothly.
Can I Use a Heat Gun Near Vinyl Frames in Hot Climates?
Like holding a magnifying glass to sunbeams, you shouldn’t use a heat gun near vinyl frames in hot climates; Heat gun safety matters, because Vinyl frame concerns include warping and off-gassing, so keep temperatures low and distance ample.
Will Paint Removal Change the Thermal Performance of Insulated Windows?
Unlikely — you’ll usually see negligible thermal efficiency changes if you remove surface paint carefully. Proper techniques avoid glazing or seal damage, so the insulation impact stays minimal; damage to seals, though, can reduce performance considerably.
How Do I Handle Paint Removal on Antique Stained-Glass Windows?
Like walking on eggshells, you’ll prioritize antique preservation and stained glass safety: consult a conservator, use gentle solvents, soft tools, minimal moisture, protect leading, document condition, and work slowly to avoid heat or aggressive scraping that could shatter panes.
Conclusion
You’ve got this — removing dried paint from window frames is totally doable without wrecking the frame. Work slowly, test solvents on hidden spots, and match your method to the material so you don’t sand or strip delicate glazing. Use plastic scrapers, gentle heat, or eco-friendly removers when possible, and call a pro for antique windows or stubborn enamel. One careful session now will save you endless headaches later—like finding a unicorn that fixes paint perfectly.