How to Keep Paint Rollers From Drying Out Between Coats
Keep your roller ready between coats by sealing it tightly in plastic wrap or a resealable bag, pressing out excess air so the nap stays moist and paint doesn’t skin over. For short breaks, wrap the roller in a damp (not dripping) towel or mist it lightly with a spray bottle, then cover. For longer pauses, store wrapped in a cool spot or refrigerate briefly. Follow nap and paint-type tips below if you want more guidance.
Quick Fixes: Keep Paint Rollers Wet Between Coats
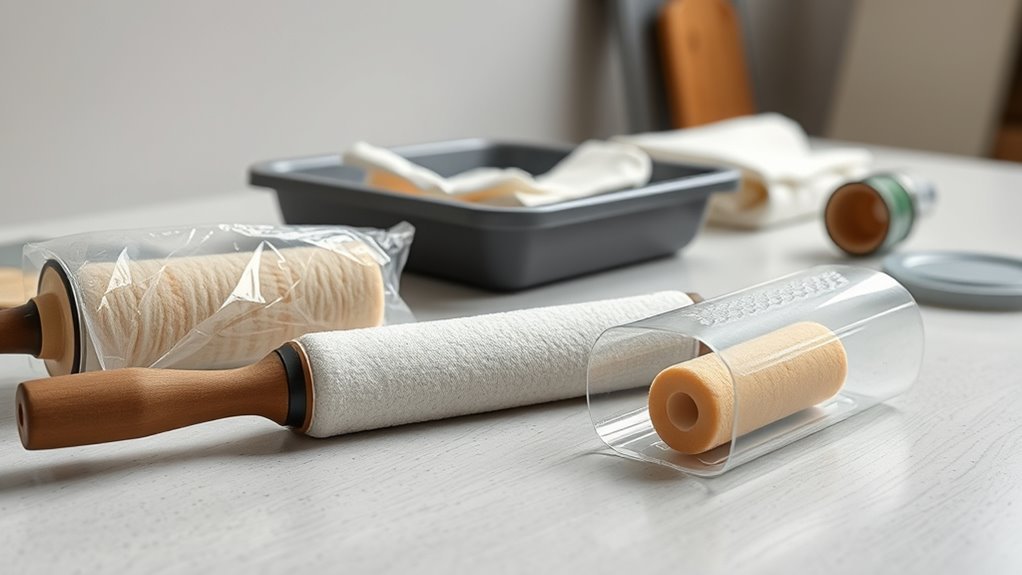
When you need a fast, reliable way to stop a roller from drying out between coats, use simple tricks that keep the nap saturated and ready to roll—wrap the roller in plastic wrap or a sealed plastic bag, place it in a zip-top bag with a little paint, or stand it upright in a shallow tray of water (for latex paints) to maintain moisture without contaminating the roller.
You’ll protect paint consistency, avoid muddy color mixing, and save time on roller cleaning. Cover rollers tightly, label bags if switching colors, and resume quickly without reloading or ruining texture, keeping work efficient.
Answer-First: Three Fastest Ways to Keep Rollers Wet
Want the quickest fixes? Wrap your roller in plastic, tuck it into a cooler, or cover it with a damp towel to keep it wet between coats.
Each method is fast, simple, and worth trying depending on your setup.
Wrap In Plastic
If you need the fastest ways to keep a roller wet between coats, wrap it tightly in plastic—three quick options are cling film, a disposable plastic bag, or plastic wrap from the hardware store.
Roll excess paint off lightly, then squeeze the roller so nap contacts the core and stays saturated. Tuck ends snugly and label if you’re switching colors after color mixing to avoid cross-contamination.
For shorter breaks, the wrap keeps moisture and paint usable; for longer pauses, include a damp paper towel before sealing.
When you resume, unwrap, spin excess back into tray, and skip full roller cleaning.
Store In Cooler
Because you’ll want the fastest way to keep rollers ready between coats, toss them into a cooler with ice packs to keep paint from skinning over. Place the roller in a sealable plastic bag, squeeze out excess air, and lay it flat on the ice packs so the nap stays saturated.
Cooler storage slows chemical evaporation; combined with steady temperature control it prevents drying without freezing water-based paint. Check every 20–30 minutes, swapping packs as needed.
When you’re ready to resume, let the roller warm briefly to room temperature before rolling to avoid condensation and uneven application.
Use Damp Towel
While you’re taking a short break between coats, wrap the roller in a damp towel to keep it saturated and ready to go. You’ll prevent skinning and keep nap flexible, so you resume painting fast. Dampen the towel (not dripping), squeeze excess, and fold snugly; check periodically. This helps with quick color mixing touch-ups and limits cleanup time during roller cleaning. For longer pauses, seal in plastic after wrapping. Use the table below to compare quick options.
| Method | Best For |
|---|---|
| Damp towel | Short breaks, color matching |
| Wrapped+plastic | Longer pauses, saves paint |
How Roller Covers Absorb and Release Paint
Different roller fibers soak up and hold paint in different ways, so you’ll want the right material for your project.
Nap length also affects how much paint the cover stores and how evenly it releases it onto the surface.
Understanding those paint-retention mechanics helps you choose and handle rollers to keep them wet between coats.
Fiber Type Matters
When you pick a roller cover, the fiber type determines how much paint it soaks up and how quickly it releases that paint onto the wall. You’ll choose natural, synthetic, or blended fibers based on Fiber durability and desired Texture enhancement. Natural fibers hold more oil-based paint; synthetics suit water-based paints and dry faster; blends balance both. Match cover to paint and surface for consistent application and less waste. Quick reference:
| Fiber | Absorption | Best for |
|---|---|---|
| Wool | High | Oil paints |
| Polyester | Low | Latex |
| Blend | Medium | Versatile |
| Microfiber | Medium-High | Smooth finishes |
Nap Length Effects
Because nap length controls how much paint the cover holds and how it releases that paint, choosing the right nap will directly affect coverage and finish. You’ll pick short naps (1/4″) for smooth surfaces to lay down thin, even coats; longer naps (3/8″–1/2″) for textured walls to carry more paint into crevices.
Match nap to sheen and viscosity after paint mixing so the roller neither overloads nor starves the surface. Treat roller care like brush maintenance: clean thoroughly between coats, wrap damp or use a sealed tray. That prevents drying and preserves consistent release for the next pass.
Paint Retention Mechanics
As paint hits the roller cover, its fibers act like tiny reservoirs that draw in pigment and binder through capillary action and surface tension, then release it under pressure as you roll. You’ll notice how pile density, fiber material, and roller design determine how much paint color and binder each fiber stores.
Thicker naps trap more viscous paints while microfibers hold thinner formulas, affecting coverage and drip. When you press, stored paint moves outward and transfers to the substrate; when you lift, surface tension pulls remaining paint back into fibers.
Understanding this helps you choose covers and loading techniques to minimize drying between coats.
Best Roller Materials for Slower Drying

If you want rollers that hold moisture longer and give you more working time between coats, choose nap materials with higher absorbency like polyester blends or natural fibers such as lambswool.
You’ll notice polyester blends release paint steadily and resist matting, while lambswool traps more liquid for extended coverage.
Consider pile density and core ventilation—denser piles retain moisture but can feel heavier, affecting paint roller ergonomics.
Match material choice to your paint type and project speed.
After use, follow proper roller cleaning techniques to remove buildup without crushing fibers, preserving absorbency and prolonging slow-drying performance.
Choose the Right Roller Nap
Choose a nap that matches your surface—short naps for smooth walls, medium for lightly textured, and long naps for rough surfaces—to get even coverage and reduce how much paint soaks into the roller.
Also consider the fiber material, since natural or microfiber blends hold paint differently and affect drying time.
Pick the combination that balances coverage with how long the roller stays wet between coats.
Match Nap To Surface
When you match the roller nap to the surface texture, you’ll get even coverage and fewer touch-ups. Pick a short nap (1/4″–3/8″) for smooth walls and doors, medium (1/2″) for lightly textured surfaces, and long (3/4″–1″) for rough or stucco.
Matching nap size helps paint lay down uniformly so color matching is easier and you avoid reworking patches. Test a small area first to confirm finish and absorbency.
Between coats, keep the correctly sized roller wrapped and damp; the right nap retains paint evenly and reduces waste while you wait to apply the next coat.
Consider Fiber Material
Different fibers hold and release paint in distinct ways, so pick a nap material that suits both your paint type and the surface.
You’ll want synthetic blends for water-based paints and natural or thicker fibers for oil-based or textured walls.
Consider fiber durability—stiffer, tightly woven naps last longer on rough surfaces; softer, low-pile naps give smoother finishes on trim.
Material flexibility affects how the roller loads and releases paint; flexible fibers conform to uneven areas and reduce splatter, while rigid ones maintain shape for even coats.
Choose a nap that balances durability and flexibility to keep rollers working between coats.
Prep Steps: Prime, Dampen, and Load Correctly
Before you start rolling, prime the roller, dampen it lightly, and load paint evenly so you get smooth coverage and prevent the nap from soaking up too much and drying out between coats.
Prime the roller, dampen it lightly, and load paint evenly for smooth, consistent coverage without drying out.
First, follow surface preparation steps: clean and sand so primer and paint adhere.
Stir thoroughly during color mixing to guarantee uniform pigment.
Wet the roller slightly with water (latex) or solvent (oil) and wring until damp, not dripping.
Pour paint into a tray, roll slowly to saturate the nap, then roll off excess on the tray’s slope.
Store the roller wrapped in plastic if you pause briefly.
How Long Can You Leave a Roller Between Coats?
How long can you wait between coats depends on the paint type, temperature, humidity, and how well the previous coat has dried. Most water‑based (latex) paints let you recoat in 2–4 hours, while oil‑based paints usually need 6–24 hours.
You’ll also factor in manufacturer instructions and the chosen paint color, since darker or higher‑pigment coats can appear dry sooner but may still be tacky.
If you leave a roller idle for longer than recommended, its roller durability can suffer from drying edges or matting.
Aim to check tackiness at several spots and only recoat when fully dry to touch.
Using Plastic Wrap to Keep a Roller Wet

When you take a break between coats, use food-grade plastic wrap to cover the roller so you don’t contaminate the paint. Wrap it tightly around the nap and handle to seal in moisture and prevent air from reaching the fibers.
Then store the wrapped roller in a cool, shaded spot to slow evaporation until you’re ready to resume.
Choose Food-Grade Wrap
If you want a simple, reliable way to keep a paint roller from drying out between coats, pick a food-grade plastic wrap designed to seal tightly. You’ll want wrap labeled food safety-grade because it’s made without harmful additives that could linger near surfaces you touch.
Using kitchen storage-quality film also ensures better cling and fewer tears compared with generic plastic. Keep a roll dedicated to painting to avoid contaminating food wrap.
Store it in a cool, dry spot and check the label for BPA-free or phthalate-free claims if you’re concerned. This choice guarantees performance and responsible material selection.
Wrap Roller Tightly
Once you’ve loaded the roller and finished a coat, press plastic wrap snugly against the nap so no air can reach the fibers. Wrap tightly end-to-end, twisting and sealing the edges to prevent leaks. Tuck the handle area too, but avoid compressing the core so roller ergonomics stay comfortable when you resume.
Label the wrap with the paint color if you’ll pause long. Check the wrap for punctures before use; a small tear lets the paint skin over and ruins paint texture.
When you’re ready, unwrap slowly to avoid splatter and resume painting with consistent coverage.
Store In Cool Place
Why keep the wrapped roller somewhere cool and out of direct sun? Heat speeds drying, can change paint color slightly, and warps the roller shape.
After you’ve wrapped the roller tightly in plastic wrap or a sealed bag, place it in a shaded spot or inside a cool room to preserve moisture and consistency. A basement, air-conditioned space, or insulated cooler works well for short breaks.
Don’t set the wrapped roller near windows, radiators, or hot vehicles. When you unwrap, inspect for sagging or clumping; if the roller shape’s compromised, replace it to avoid uneven application.
Wrap a Roller With Plastic and a Rubber Band
When you take a short break between coats, cover the roller tightly with a sheet of plastic and secure it with a rubber band to lock in moisture and stop paint from skinning over.
You’ll protect paint safety by preventing solvent fumes from spreading and keeping contaminants out. Wrap close to the frame without crushing the nap to maintain roller ergonomics for comfy, balanced handling when you resume.
Use a food-grade or contractor-grade plastic sheet and a snug rubber band; label the wrap if color differs. Store the wrapped roller upright or hung so pressure points don’t deform the pile.
DIY Roller Storage With Cling Film
If you liked the quick plastic-and-rubber-band trick, cling film offers a faster, tighter option for short stops. Tear a sheet, lay the roller on it, and wrap snugly from end to end, sealing both edges to lock in moisture.
Label wrapped rollers with tape if you’re doing creative color mixing to avoid accidental cross-contamination. When you resume, unwrap and roll a couple of passes on a test board; excess film can trap lint.
For longer pauses, combine this with basic roller cleaning tips: remove excess paint first and store upright to prevent flattening the nap.
Storing Rollers in Resealable Plastic Bags
While you take a break between coats, slide the roller into a resealable plastic bag and press out as much air as you can before sealing to slow drying and keep paint workable. Choose a bag large enough to avoid crushing the nap but snug enough to limit airflow. Label bags with paint color if you’ll store multiple rollers.
For longer pauses, twist the bag’s opening toward the roller end to further reduce exposure. This method complements paint roller cleaning routines by preventing wasteful drying between sessions.
These simple roller storage tips save time and preserve nap integrity for quick resume of work.
Using Damp Towels to Keep the Nap Saturated
Keep your towel just damp, not dripping, so the nap stays moist without getting waterlogged.
Lay the roller on the towel and roll it up snugly, then seal the bundle in a plastic bag or container to hold humidity.
This keeps the nap saturated and ready for the next coat without washing out the paint.
Proper Towel Dampness
Because a towel that’s too wet will drip and one that’s too dry won’t hold enough moisture, aim for a damp-but-not-sopping cloth when you wrap a roller to keep the nap saturated. You want consistent moisture so the roller maintains paint color fidelity and doesn’t sling diluted paint.
Test by wringing until the towel releases only a few drops. Consider roller diameter when selecting towel size: larger rollers need more coverage. Replace damp towels every few hours to avoid bacterial smell.
- Wring tightly, then unfold.
- Wrap snugly without compressing nap.
- Store wrapped roller flat.
- Re-moisten with room-temperature water.
Storage Technique Tips
When you wrap a roller in a damp towel, make sure the cloth covers the entire nap and stays snug without compressing the fibers so the roller keeps its shape and paint-holding ability. You’ll keep the nap saturated between coats, slowing drying and preserving texture for consistent color mixing. Change towels if they cool or dry, and store rollers flat or hanging to avoid deformation. For longer breaks, combine damp towels with plastic wrap. Don’t skip roller cleaning after finishing.
| Tip | Why it helps |
|---|---|
| Snug wrap | Maintains moisture |
| Flat storage | Prevents misshaping |
Using a Roller Tray Cover to Retain Moisture
Although it’s simple, using a roller tray cover lets you pause between coats without your roller drying out or picking up dust. You’ll keep the nap moist and ready, so paint color matching stays consistent and you won’t waste time with extra roller cleaning techniques.
Using a roller tray cover keeps the nap moist between coats so color stays consistent and cleanup is easier.
Choose a snug, disposable cover or a reusable silicone lid, press out excess air, and store the tray in shade.
- Seal edges tightly to prevent skin formation.
- Label the cover with color to avoid mix-ups.
- Use clear covers to monitor moisture.
- Replace covers if paint seeps or dries.
Keeping Rollers Wet With a Spray Bottle
If you prefer a hands-on approach after covering your tray, keep a small spray bottle of water nearby and mist the roller lightly between coats to maintain moisture in the nap. Aim for a fine mist so you don’t over-saturate the roller or drip into your paint; a damp nap keeps fibers ready for the next pass.
This method complements paint color mixing work by preventing dried edges that can alter hue when blended.
Use gentle roller cleaning techniques at the end of the session to remove trapped pigment, then rinse and store the bottle for reuse on your next project.
Using a Second Roller to Rotate During Work
Keep two rollers ready so you’ve always got a fresh one on hand. Swap them frequently to prevent buildup and give each roller a short rest.
When you’re not using a roller, wrap it or stand it upright in a covered bucket to keep it from drying out.
Keep Two Rollers Ready
When you rotate between two rollers, you cut drying time and keep your finish consistent by always using a freshly loaded tool. You’ll prepare two identical rollers and swap as one nears edge dryness, balancing drying mechanisms and Roller ergonomics so each stays efficient and comfortable.
Store the resting roller wrapped in plastic or suspended to limit air exposure. Keep a small tray for each roller to avoid cross-contamination.
- Label rollers for texture and nap.
- Keep spare frames separate.
- Monitor humidity to adjust rotation timing.
- Clean edges between swaps to prevent buildup.
Swap Rollers Frequently
Although you’ll want to keep a steady rhythm, swapping to a second roller every 10–15 minutes prevents glazing and guarantees even coverage. Rotate rollers before one starts to thin out so you’re always working with a fully loaded nap.
Use two identically loaded rollers so color mixing stays consistent across walls; label them if you’re switching hues. Alternate rollers while you reload or skim excess paint, keeping edges crisp and texture uniform.
Quick roller cleaning between swaps—wipe with a rag or brief dunk and shake—removes buildup that causes streaks. Rotating frequently cuts fatigue and maintains professional results without wasting paint.
Store Rollers Between Uses
If you plan on rotating between two rollers, store the idle one so its nap stays wet and ready for the next pass. You’ll keep a second roller handy, wrapped loosely in plastic or slid into a sealed bag to trap moisture without crushing the nap.
Match rollers to paint color and roller design so coverage stays consistent. When you swap, lay the damp roller on a protected surface or hang it by the frame.
This rotation halves downtime and reduces cleaning. Inspect the stored roller before reuse; if it’s tacky or clogged, replace it to avoid streaks and texture changes.
Workflow Strategies to Minimize Roller Downtime
Because every pause costs time and risks a dried-out roller, plan your sequence to keep the roller coated or idle-sheathed between coats. Work in zones so you finish one wall while another cures, minimizing long waits.
Keep a small tub of the same eco-friendly paints at hand to reload quickly, and have plastic wrap or a damp sleeve ready for short breaks.
Coordinate a helper to cut in edges while you roll to streamline cycles.
Use efficient roller cleaning techniques during longer pauses to reset tools without wasting paint.
Time your breaks to match drying windows and move steadily.
Protecting Rollers on Ladders and Scaffolds
When you move up a ladder or onto a scaffold, the strategies that kept rollers wet on the ground need adjustment for height and safety. You’ll secure rollers without compromising ladder safety or scaffold stability by using compact, hands-free solutions and mindful placement. Keep movement minimal and prioritize anchoring.
On ladders or scaffolds, adapt ground-level roller methods: use compact, hands-free holders and secure placement.
- Use a small roller tray with a secure hook to hang from the rung or guardrail.
- Wrap the roller in a breathable plastic sleeve and clip it to your belt.
- Rest the roller on a padded hook attached to the scaffold frame.
- Keep tools and caps within arm’s reach to avoid sudden shifts.
Transporting Partially Used Rollers Between Rooms
Although moving a partially used roller between rooms seems simple, keeping the nap evenly coated and avoiding drips takes a little planning. You’ll want to manage transport logistics: carry the roller horizontally in a sealed plastic bag or wrap it in cling film, squeezing out excess air to keep paint from pooling.
Use a small bucket lid or roller tray cover under the roller to catch drips. When walking, keep movements steady and avoid sudden stops. These steps reduce mess and drying.
Good roller maintenance during short moves preserves coating evenness and saves time when you resume painting.
Tips for Overnight Roller Storage Without Cleaning
If you need to pause overnight without cleaning, tightly wrap the roller in plastic wrap or a sealed plastic bag to keep air out.
For extra protection, place the wrapped roller in the refrigerator—cold slows paint drying.
When you’re ready, let the roller return to room temperature before using.
Wrap Rollers In Plastic
Because you’re not cleaning the roller between coats, wrapping it in plastic keeps the nap soft and paint-ready overnight without making a mess. You’ll prevent skinning and odor while preserving paint consistency, which helps if you’re doing paint color mixing later and want uniform application.
Use cling film, a resealable bag, or stretch wrap tightly around the roller and frame, sealing edges. Label if switching colors.
- Remove excess drip by rolling on cardboard.
- Wrap tightly to exclude air.
- Seal ends with tape or a clip.
- Store horizontally away from heat.
Store In Refrigerator
When you need to pause painting overnight without cleaning the roller, slipping it into the refrigerator will keep the paint from skinning and slow drying so you can pick up where you left off.
Remove excess paint by rolling on scrap cardboard, then seal the roller in a zip-top bag or airtight container for refrigerator storage. Place it on a middle shelf away from food, label if needed, and keep the door closed to maintain consistent cold preservation.
Before reuse, let the roller warm to room temperature briefly to restore nap flexibility. This method saves cleaning time for short breaks.
DIY Humid Box for Long Pauses Between Coats
Although you’ll rarely need it for quick touch-ups, a DIY humid box becomes indispensable when you’ve got long pauses between coats and can’t risk rollers drying out.
You’ll need a sealable plastic container, a shallow tray of water, and a small damp sponge to keep humidity steady without soaking the roller.
Position rollers on a rack above the water to avoid drips; cover loosely to allow slight airflow.
Monitor room temperature and avoid extreme heat.
Pay attention to paint color changes and roller texture—darker pigments or nap length affect drying time and humidity needs.
- Sealable container
- Shallow water tray
- Elevated rack
- Damp sponge
How to Use Slow-Drying Additives Safely
If you need extra working time, add a slow-drying additive sparingly and follow the manufacturer’s mix ratio and safety instructions exactly. Overuse can soften the film, extend cure time excessively, or affect adhesion.
You’ll test small batches first, matching additive type to your paint color and formulation. Stir thoroughly, note pot life, and label mixed containers.
Use only recommended amounts for the roller length you’re using—longer rollers may need slightly more mix but don’t exceed guidance.
Wear gloves and ventilate.
When switching colors or between coats, clean tools promptly; don’t rely on additives to replace proper cleaning or manufacturer guidance.
Oil-Based vs. Water-Based Paint: Roller Care
Because oil- and water-based paints cure and clean up differently, you’ll need distinct roller-care routines for each to keep nap and frame in good shape.
For water-based latex, rinse promptly with warm water, use mild detergent, and shake excess to prevent mildew.
For oil-based, use mineral spirits or appropriate solvent, ventilate the area, and never mix solvents with water during roller cleaning.
Keep labels on storage containers if you plan color mixing later, and store rollers wrapped in plastic for short breaks.
- Rinse or solvent-clean thoroughly
- Remove excess with a comb or scraper
- Store sealed and labeled
- Dry completely before reuse
Choose Slow-Evaporation Roller Covers for Oil Paints
When you’re working with oil-based paints, pick roller covers made to slow evaporation so the nap stays saturated longer and you get smoother, more consistent coverage. Choose covers labeled for solvents or oil-based formulas; they resist thinning from solvent exposure and preserve paint color integrity.
Match nap length and roller texture to the surface—short naps for smooth walls, medium for light texture—to reduce dragging and improve laydown. Store wrapped in plastic or a sealed bag between coats to maintain saturation.
Replace covers when they mat or shed, since compromised roller texture ruins finish and wastes paint.
Avoiding Lap Marks While Storing Your Roller
When you’re pausing between coats, store the roller vertically to keep paint from pooling and creating thick edges.
Wrap the roller’s ends or edges with plastic or a sleeve to maintain an even nap and prevent hard lines.
Doing both will help you avoid lap marks when you resume painting.
Store Roller Vertically
If you need to pause between coats, stand the roller upright on its end rather than laying it down—this keeps paint from pooling and helps prevent lap marks when you resume. You’ll preserve an even nap, cut touch-ups, and make roller cleaning easier afterward.
Vertical storage also limits color mixing from stray drips and reduces mess.
- Remove excess paint by rolling on scrap before storing.
- Place roller in a clean, upright container to catch drips.
- Keep cover material ventilated to avoid mildew.
- Resume painting within a short window to maintain sheen consistency.
Keep Edges Wrapped
Because paint tends to dry at exposed edges, wrap the roller’s ends with plastic or foil before you set it aside to keep the nap uniformly saturated and prevent lap marks when you resume. You’ll want a snug seal around both edges so air can’t parch fibers and compromise edge maintenance.
Press foil or cling film firmly, tuck excess, and label if you have different colors. When you unseal, rotate the roller slightly to check for dried ridges; rewet any thin spots to restore paint adhesion.
This quick habit preserves finish quality and saves time by avoiding touch-ups or uneven coverage.
Preventing Paint Waste When Saving Rollers
To prevent paint from wasted drips and messy cleanup, set up a quick system that keeps the roller covered and the excess paint contained between coats. You’ll save paint color consistency and extend roller lifespan by avoiding drying and contamination.
Seal the roller in a plastic bag or cling wrap, or store it in a sealed tray to keep air out. Wipe the frame and handle to prevent drips onto surfaces.
Seal rollers in plastic or a sealed tray and wipe the frame to prevent drips and keep air out.
When pausing longer, label the bag with the paint color to avoid mixing shades later.
- Use cling film
- Seal in a zip bag
- Keep tray covered
- Label with color
Quick Revive: Reconstitute a Slightly Dried Nap
When your roller nap has started to stiffen but hasn’t fully crusted, you can quickly revive it by rehydrating the fibers—soak the cover briefly in warm water with a drop of mild detergent, then squeeze out excess moisture and let it sit wrapped in a damp cloth for a few minutes to restore pliability and pickup.
After unwrapping, gently massage the nap to redistribute fibers and rinse until water runs clear.
Blot and spin the cover on the frame to remove drip.
Match revived roller to your paint color and check roller ergonomics—if it still rolls smoothly, you’re ready to continue.
When to Switch to a New Roller Cover Mid-Job
If a quick rehydrate doesn’t restore nap performance, it’s time to swap covers mid-job to keep finish quality and save time on fixes later. You’ll change the roller when shedding increases, texture gets uneven, or pickup drops noticeably. Switch before color matching becomes compromised; old fibers can tint fresh coats. Also swap if contamination from previous colors appears despite roller cleaning.
- Inspect nap for matting or loose fibers frequently.
- Test-roll a hidden area to confirm even laydown.
- Replace before switching hues to ensure color matching.
- Keep extra clean covers handy to avoid delays.
How Temperature and Humidity Affect Drying Time
Because temperature and humidity control how fast solvents evaporate, they directly change how long your roller and paint stay workable. You’ll notice paint skins faster in hot, dry rooms and slower in cool, humid ones.
Temperature and humidity control solvent evaporation—hot, dry rooms skin paint faster; cool, humid conditions extend workability.
For best results, focus on temperature regulation: keep the space within the paint’s recommended range so drying is predictable. Use humidity control—dehumidifiers or fans—to speed dry times or pause them when you need longer open time.
Store a roller in a sealed plastic bag or wrap to preserve moisture if conditions would otherwise dry it.
Monitor conditions and adjust technique accordingly.
Simple Safety: Avoid Solvent Fumes When Storing Rollers
Though sealing a wet roller in plastic keeps it usable, you should do it in a well-ventilated area to avoid building up solvent fumes. Vapors from many paints and cleaners can reach harmful levels in enclosed spaces.
You’ll protect your health by following simple Safety precautions when storing rollers between coats. Keep lids off containers briefly outside, use open windows or fans, and avoid confined closets. If you smell strong odors, move items outdoors.
Consider these quick steps:
- Ventilate the room continuously.
- Store rollers away from sleeping areas.
- Limit time rollers stay sealed.
- Wear a respirator if odors persist.
Safe Disposal of Heavily Soaked Roller Covers
After you’ve handled ventilation and short-term storage, you’ll need a plan for roller covers that are soaked through and no longer salvageable. If paint’s hardened or the nap’s ruined, don’t try to rescue them—contain used covers in sealed plastic bags to limit fumes and mess.
Check local regulations for disposal methods: many areas classify heavy solvent or oil-based waste as hazardous. For water-based paints, dry in a well-ventilated spot until solid, then bag and discard per municipal rules. Label bags if required.
Follow Drying prevention steps earlier to reduce waste, but when beyond saving, dispose responsibly.
Protecting Specialty Rollers (Textured or Foam)
If you’re using foam rollers, keep them sealed in a plastic bag or airtight container to stop them from drying out and losing shape.
For textured rollers, wrap the nap loosely in plastic or use a protective tube so the pattern doesn’t get crushed or clogged.
Taking these small steps will keep specialty covers ready between coats.
Store Foam Rollers Sealed
When you’re working with foam or textured rollers, keep them sealed between coats to prevent them from drying, deforming, or picking up dust that ruins the finish. Seal fresh rollers in plastic wrap or a resealable bag to trap moisture and maintain nap shape; this helps with paint roller cleaning later and complements careful roller cover selection.
Store vertically if possible to avoid pressure points.
- Wrap tightly in cling film or a zip bag.
- Squeeze out excess air to limit oxidation.
- Label contents and time to avoid overstorage.
- For oil-based paints, use airtight containers to prevent skinning.
Protect Textured Roller Naps
How do you keep textured roller naps ready for the next coat without crushing or clogging them? Treat specialty naps gently: remove excess paint with a soft-surface comb or by rolling on cardboard, then rinse thoroughly if water-based.
For textured cleaning, avoid harsh scrubbing that deforms the nap. Squeeze out moisture gently and reshape by hand, letting them air-dry on a rack or hang by the frame.
Label rollers with Roller labeling—note texture and paint type—so you grab the right one and avoid cross-contamination.
Store wrapped loosely in breathable plastic or a paper bag to protect nap integrity between coats.
Pro Gear: Roller Hoods and Storage Tubes
Want professional results and fewer interruptions? Use roller hoods and storage tubes to keep rollers ready between coats. They seal in moisture, prevent dust, and speed up roller cleaning when you switch tones after color mixing. Choose snug hoods for short breaks and rigid tubes for overnight storage.
- Fit: match hood or tube to roller diameter precisely.
- Seal: compress end caps to lock humidity in.
- Label: note paint color inside to avoid cross-contamination.
- Venting: small vents help if storing wet latex longer.
These pro tools save time and protect nap integrity without messy rinsing.
Budget-Friendly Storage Hacks for Casual Painters
If you’re painting just a room or two, cheap tricks can keep rollers fresh without pro gear. Wrap the roller tightly in plastic wrap, slip it into a zip-top bag, or stash it in a reusable plastic tub to lock in moisture.
Each option’s quick, affordable, and saves you time between coats.
Plastic Wrap Seal
When you’re taking a short break between coats, wrapping the roller tightly in plastic wrap keeps it from drying out and saves cleanup time later. You’ll protect nap and avoid extra paint removal while doing basic roller maintenance.
Press wrap snugly over the roller and handle, sealing edges to trap moisture. Store upright or hang it so the roller stays wrapped.
- Remove excess paint before wrapping.
- Use cling film that sticks well.
- Label wrap with color and time.
- Replace wrap for longer breaks to prevent odor and skin buildup.
Zip‑Top Bag
Although it’s a simple trick, slipping your paint roller into a zip-top bag keeps it moist and ready for the next coat without fuss. You’ll press out excess air, seal the bag, and stow the roller nearby for short breaks.
If you’re switching shades during color mixing, label bags to avoid cross-contamination.
For longer pauses, add a damp paper towel inside to maintain humidity without pooling paint.
When you’re done, open the bag and perform proper roller cleaning to remove residue before storage.
This method’s cheap, space-saving, and prevents wasted paint while you work steadily.
Reusable Plastic Tub
Alongside zip-top bags, a reusable plastic tub offers a sturdier, budget-friendly option for keeping rollers from drying out between coats. You’ll tuck the roller into a clean plastic container, add a damp cloth or a splash of water for latex, seal it, and store it upright. This protects nap and promotes paint preservation without waste. When you’re ready, the roller’s ready too.
- Choose a tub just big enough to avoid crushing the nap.
- Line the bottom with a damp cloth.
- Seal tightly to limit air exchange.
- Label with paint type and date.
Best Roller Covers for High-Traffic Projects
If you’re tackling high-traffic areas, pick roller covers that stand up to frequent cleaning and heavy wear without shedding or losing nap. Choose woven or knit polyester blends for durability and minimal lint; they resist matting and handle repeated roller cleaning.
For textured surfaces, opt for a medium nap (3/8″–1/2″) that holds enough paint without clogging.
Microfiber covers give a smooth, even finish and reduce color mixing problems when you switch hues mid-project. Keep spares labeled by color family to avoid contamination.
Rinse covers thoroughly after use, spin-dry, and store in a breathable bag to preserve pile.
Checklist Before Resuming Work With a Stored Roller
Before you unseal the storage, check the roller and tray for signs of drying, mildew, or contamination so you don’t drag problems back onto your fresh coat.
Inspect the nap for tackiness, odor, or trapped debris.
Confirm paint color with a small patch to verify color matching before you proceed.
Make sure any brush cleaning was done properly if you used a brush alongside the roller.
Use a clean rag and respirator if needed, and prepare fresh solvent or water.
- Check nap texture and debris
- Smell for mildew or sour paint
- Test a small color patch
- Verify brush cleaning completeness
Troubleshooting Streaks Caused by Stored Rollers
When rollers have been stored between coats, they can leave thin, uneven streaks from dried paint, trapped debris, or compressed nap — and you’ll notice these as lines, roller marks, or patchy coverage as you roll. Inspect the roller for caked paint, fuzz, or hard edges; gently lift debris and perform quick roller cleaning with water or solvent per paint type. Lightly re-fluff nap with a comb or tape, test on scrap, and watch for unintended color mixing from residue. If streaks persist, recoat with even pressure or replace the cover.
| Frustration | Hope | Action |
|---|---|---|
| ruined finish | salvageable | clean |
| visible lines | smoother coat | re-fluff |
| color bleed | consistent hue | test |
How to Tell if a Roller Is Ruined or Reusable
Although a roller might look salvageable at a glance, you’ll want to check a few key signs to decide whether to keep using it or toss it.
Feel the nap: stiffness or cemented fibers mean ruined roller durability.
Smell and residue: hardened paint or sour odor signals it’s past saving.
Test on scrap: inconsistent finish or stray fibers change your paint color and texture.
If in doubt, compare performance; a reusable roller will lay down even, consistent coats without lint.
When washable and well-stored, you’ll extend life; otherwise replace to avoid ruined results.
- Nap stiffness
- Hardened residue
- Finish test
- Performance comparison
Prevent Common Mistakes That Dry Out Roller Covers
If you want your roller covers to stay usable between coats, skip these common mistakes that let them dry out. Don’t leave a roller exposed on a tray or hung upright; cover it tightly or wrap it in plastic to retain moisture.
Avoid overworking a roller until it’s dry—stop and protect it. Don’t neglect roller cleaning when switching paint hues; poor color mixing residue can gum fibers and speed drying.
Avoid storing rollers in direct sun or near heaters. Finally, don’t press paint into the core—saturated but protected covers perform better than crusted, dried ones.
Quick Reference: Best Method by Pause Length and Paint Type
Because the right short-term storage depends on both how long you’ll pause and what paint you’re using, this quick reference lays out the fastest, most reliable method for each combination. Match pause length to paint type to avoid waste and preserve nap.
For latex, wrap in plastic for short breaks; for oil-based, sealed can works best. Use roller caps or damp towels when switching colors in Color mixing situations, and consider Brush alternatives only if detail work needs a dryer tool.
- 10–30 minutes: plastic wrap, tray covered.
- 30–90 minutes: damp towel + bag.
- 2–6 hours: sealed container.
- Overnight: clean/store.
How to Maintain Roller Performance Across Multiple Days
When you’re pausing work across several days, treat your roller like a tool you’ll use again—clean it well enough to prevent drying and buildup, but not so much that you wear out the nap.
After each session, remove excess paint with a scraper, then rinse until runoff is clear for water-based paints; for oil-based, use solvent then a light rinse.
Wrap the roller in plastic or a sealed bag and refrigerate if heat is an issue. Label bags to avoid color mixing mistakes.
Before reuse, perform gentle roller cleaning and fluffing to restore nap and check for dried specks.
Frequently Asked Questions
Can I Store a Roller Vertically Without Deforming the Nap?
Yes — you can store a roller vertically if you support it properly to avoid nap deformation. You’ll want roller storage that keeps the nap off surfaces, like a rack or hanging system, so fibers don’t get crushed or misshapen.
Will Paint Transfer if I Carry a Roller Between Rooms in a Bag?
Yes — paint transfer can happen if you carry a loaded roller in a bag. To protect surfaces and guarantee roller portability, wrap the roller in plastic or a sealed container so wet paint won’t smear or leak during transit.
How Do I Clean Rollers Used With Specialty Metallic Paints?
Think of it as giving your tools a spa day: you’ll flush metallic paint cleaning fluids (solvent or water per label), gently comb bristles, rinse until clear, spin-dry, and store—specialty roller maintenance keeps sheen and extends life.
Are Foam Rollers Ruined if Left With Paint Overnight?
Yes — if you leave foam rollers with paint overnight, they’ll suffer paint absorption and possible roller deformation; you should wrap them tightly or submerge in water/solvent promptly to prevent drying, hardening, and permanent damage.
Can I Use a Hairdryer to Speed-Dry a Roller Before Reuse?
Of course you can—if you enjoy melted napalm on fabric. You shouldn’t; a hairdryer can damage fibers and distort nap, ruining paint roller storage plans. Use gentle drying techniques instead: air-dry or wrap in plastic between coats.
Conclusion
Keep rollers from drying out and you’ll save time and money — wet rollers apply paint more evenly. Fun fact: professionals report up to a 30% faster job completion when they prevent roller drying between coats. So, wrap short breaks in plastic or wet rags, use slower-drying roller materials like woven polyester for alkyds, and store in a sealed bucket for longer pauses. With these habits you’ll keep coverage smooth and avoid wasted rollers.