How to Prep a Bathroom Wall for Painting Properly
You’ll start by thoroughly cleaning walls—use a mildew cleaner or vinegar, rinse, and dry—then fix soft spots, cracks, and holes with spackle or replace damaged drywall. Sand smooth with appropriate grit, remove dust, and spot‑prime stains with a stain‑blocking, mold‑resistant primer. Mask fixtures, ventilate well, and use satin or semi‑gloss moisture‑resistant latex paint applied after primer cures. Follow humidity‑friendly drying times for lasting results, and keep going to learn detailed tips for each step.
Quick Step‑By‑Step: How to Prep a Bathroom Wall for Painting Quickly
Before you pick up a brush, clear the room, remove fixtures, and protect surfaces—this short checklist keeps the job fast and tidy.
You’ll wipe walls with a mild cleaner, rinse, and dry to remove soap scum and oils that ruin paint adhesion. Scrape loose paint, sand rough patches, and fill holes with quick-dry spackle; sand smooth.
Mask trim and cover hardware. Make sure ventilation systems run while you work and during drying to prevent mildew and speed curing.
Choose a mildew-resistant primer for damp spots. With these steps, you’ll prep efficiently and protect bathroom decor from damage.
When to Repaint Versus Touch Up a Bathroom Wall
Now that the surface’s clean and patched, decide whether to touch up spots or repaint the whole wall. Walk the room and assess damage: isolated chips, scuffs, or small stains usually call for touch ups, especially if the original paint sheen and color match.
If wear is widespread, discoloration near bathroom fixtures, or the wall texture varies from previous repairs, repainting yields a uniform finish. Consider moisture stains, peeling, or mismatched primers—those demand full repainting.
Also factor in time and cost: touch ups are quicker, but repainting prevents repeated fixes and ensures consistent appearance and durability.
Tools and Supplies You Need Before Starting
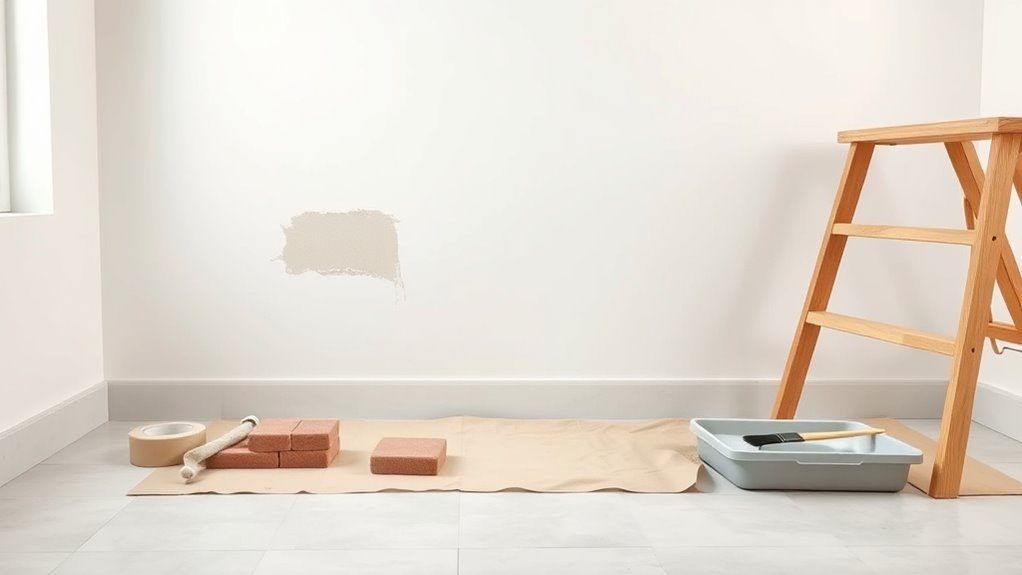
Once you’ve decided to touch up or repaint, gather the right tools and supplies so the job goes smoothly. You’ll need drop cloths, painter’s tape, a putty knife, spackle, sandpaper (various grits), a sanding block, cleaning solution, rags, and a sturdy step stool.
Protect plumbing fixtures and bathroom decor by removing or covering hardware, outlet plates, and light fixtures. Have a small roller, angled sash brush, paint tray, and a bucket for mixing if you’re patching.
Keep gloves, safety goggles, and a respirator handy. Confirm you have adequate ventilation and proper waste bags before starting.
Choosing the Right Primer and Paint for Bathrooms
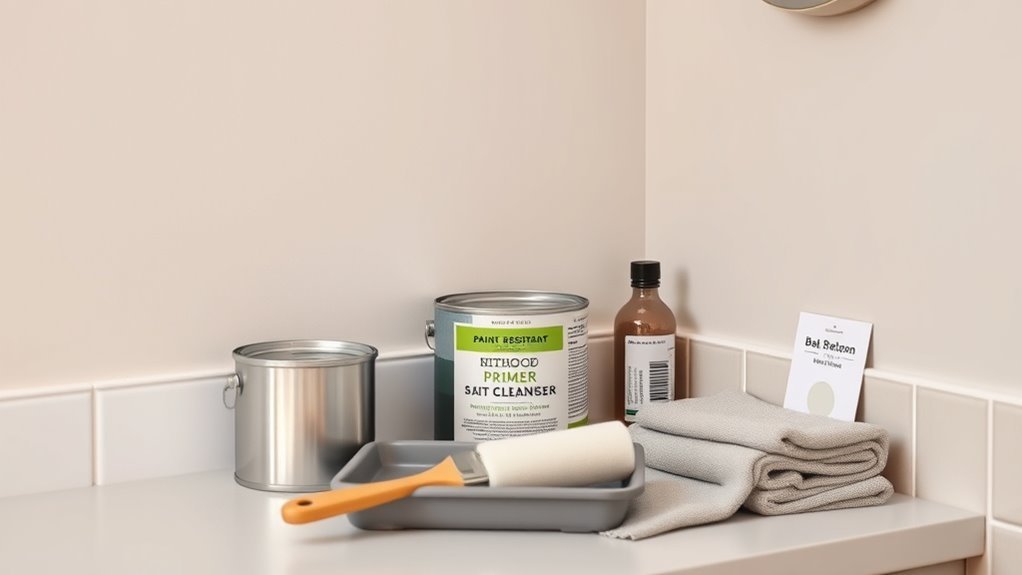
Because bathrooms face high humidity and frequent splashes, you need primer and paint formulated for moisture resistance and mildew prevention. Choose a stain-blocking, mold-inhibiting primer for porous surfaces and to seal previous bathroom wallpaper adhesive.
Because bathrooms face humidity and splashes, use moisture-resistant, mold-inhibiting primer and paint for lasting protection.
For paint, pick a satin or semi-gloss acrylic latex that cleans easily and resists moisture near shower tile. Test a small area to confirm adhesion and color. Match primer type to substrate—drywall, plaster, or tile.
Consider low-VOC for indoor air quality. Emotional reassurance comes from durable choices that protect your space and peace of mind:
- Feel confident
- Trust the finish
- Enjoy cleaner walls
- Relax in a protected bathroom
How Humidity Affects Paint Choice and Timing
When you’re picking paint for a bathroom, choose mildew-resistant, semi-gloss or satin formulations that handle moisture well.
Remember that high humidity slows drying time, so allow extra cure time between coats and before using the room.
Use good ventilation — run exhaust fans or open windows — and schedule painting for the driest part of the day to speed drying and improve adhesion.
Ideal Paint Types
How will humidity shape your paint choice and timing for a bathroom? You’ll pick paints that tolerate moisture and pair them with good bathroom ventilation for mold prevention. Choose finishes and formulations that resist mildew and hold up to steam without peeling.
Consider semi-gloss or satin for trim and walls where splashes occur; they wipe clean and reflect light. For painted ceilings, use moisture-resistant flat for subtle coverage. Use mold-inhibiting additives if needed.
Emotional touchpoints to guide your decision:
- Relief: confidence your paint fights mold
- Pride: a fresh, durable finish
- Calm: less maintenance
- Assurance: healthier air
Drying Time Considerations
Curious how humidity will stretch out your bathroom painting schedule? You’ll adjust paint choice and timing based on moisture.
High humidity slows solvent evaporation, so pick quick-drying, moisture-resistant formulas and allow extra cure time.
Use active drying techniques—like desiccant packs or a portable dehumidifier—to reduce surface moisture before and after painting.
Monitor relative humidity; aim for manufacturer-recommended ranges to avoid tacky finishes and poor adhesion.
If conditions stay damp, wait longer between coats and before reinstalling fixtures.
Good humidity control preserves sheen and durability, letting your paint perform as designed without premature peeling or mildew issues.
Ventilation And Timing
Because bathrooms trap moisture, you’ll need to coordinate ventilation and painting times to guarantee proper drying and adhesion. You should run the ventilation system before, during, and after painting to cut humidity.
Choose mold-resistant, low-VOC paint if humidity’s high, and delay work when showers raise moisture.
Plan a realistic painting schedule that allows full cure between coats.
- You’ll feel relief as humidity drops.
- You’ll appreciate steady airflow preventing peel.
- You’ll avoid frustration from tacky finishes.
- You’ll gain confidence when timing’s right.
Stick to the schedule, monitor humidity, and don’t rush drying times.
Protect Floors, Fixtures, and Hardware
Before you touch a paintbrush, cover the floor, fixtures, and hardware to prevent drips and dust from turning into permanent damage. Lay a contractor-grade drop cloth or rosin paper, taping seams so moisture won’t seep through.
Before you paint, thoroughly cover floors and fixtures with contractor-grade drop cloths and taped seams to prevent damage
Wrap towel bars, faucets, light fixtures, and decorative accents with painter’s tape and thin plastic; press tape edges firmly. Remove or loosely cover vents from ventilation systems to stop dust clogging.
Protect toilet bowls and shower pans with cardboard shields. Keep a small tray and cloth nearby to catch drips while you work.
Check coverings periodically and replace any that shift or become saturated.
Turn Off and Move Bathroom Accessories Safely
How will you move and power down accessories without causing damage or creating extra work? You’ll shut power at the switch or breaker for bathroom lighting, then label switches so you don’t trip circuits later. Turn water supply valves off to isolated plumbing fixtures where possible; drain lines by running faucets briefly.
Unplug small electronics and wrap cords to keep them dry. Move loose items to a protected bin.
- You’ll feel relief knowing electrical risks are reduced.
- You’ll appreciate fewer splatters on valuables.
- You’ll avoid accidental water messes.
- You’ll save time during cleanup and reinstallation.
Remove Fixtures and Outlet Covers
Start by removing outlet and switch covers, light fixtures, towel bars, and any other removable hardware you won’t paint around; keep screws and small parts in labeled bags so reinstallation’s easy. For safe fixture removal, turn power off, test switches, and use the right screwdriver. Label each bag with location. Handle fragile glass and bulbs gently. Keep Outlet covers and hardware organized so you won’t lose pieces. After removal, inspect mounting holes and repair as needed before priming. Below is a quick checklist table to track items and status.
| Item | Status |
|---|---|
| Outlet covers | Removed |
| Light fixture | Removed |
| Towel bar | Removed |
| Mirror | Removed |
| Switch plate | Removed |
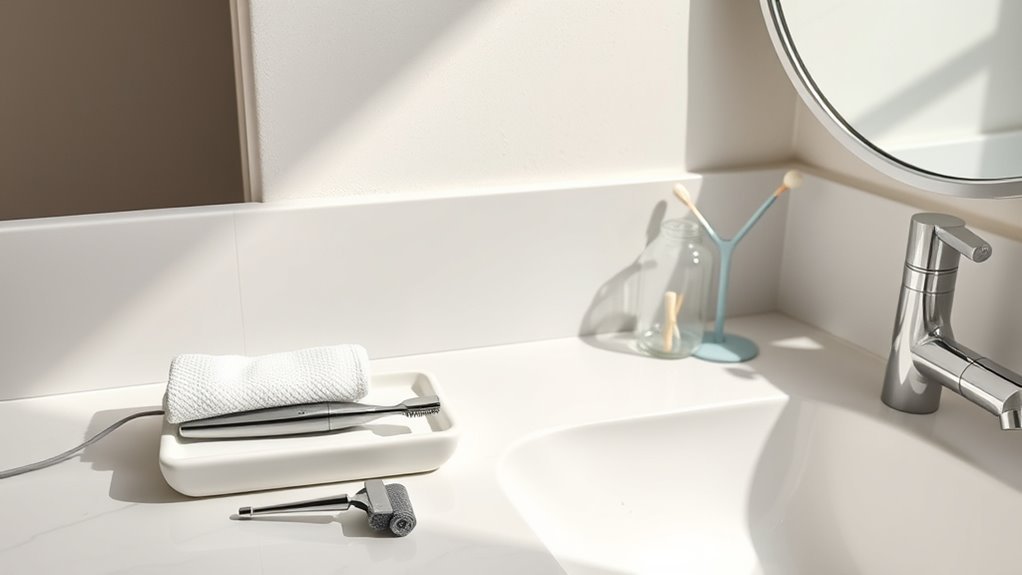
Clean Soap Scum and Grease for a Paint‑Ready Wall
Before you paint, you’ll need to remove soap scum and any greasy residue that can prevent primer and paint from sticking.
Start by scrubbing with a bathroom cleaner or a vinegar-and-water solution, then rinse thoroughly.
For stubborn grease, use a degreaser or trisodium phosphate (TSP) following the product instructions.
Remove Soap Scum
Want the paint to stick and look smooth? You’ll prioritize soap scum removal before painting.
For bathroom wall cleaning, mix warm water with a mild scrub solution, test a small area, then work methodically from top to bottom. Use nonabrasive tools to avoid gouges. Rinse thoroughly and let dry.
- Remember how gross old films look under fresh paint.
- Picture peeling or bubbling if you skip this step.
- Imagine the satisfaction of a flawless finish.
- Don’t let soap scum sabotage your work.
Follow these steps and your primer and paint will adhere reliably.
Degrease Surfaces
Since grease and soap scum repel paint, you’ll need to clarify the wall thoroughly so primer and paint can bond properly. Start by wiping loose residue with a microfiber cloth, then apply a citrus-based cleaner or trisodium phosphate solution per label directions.
Scrub stains with a soft-bristle brush, rinse well, and dry completely. Treat any mildew with a diluted bleach or specialized mildew prevention cleaner before painting.
After clarifying, inspect for remaining gloss or stains and sand lightly. Proper cleaning ensures true paint color selection and adhesion, preventing peeling and saving time on touch-ups later.
Remove Mildew and Mold Safely and Effectively
When you spot mildew or mold on a bathroom wall, act promptly to prevent stains and health risks. Wear gloves and a mask, open windows to boost bathroom ventilation, and mix a cleaner (bleach or vinegar solution) to treat affected areas. Scrub gently with a brush, rinse, and dry thoroughly.
- You’re protecting your family’s health.
- You’re stopping stubborn stains before they set.
- You’re showing pride in your space.
- You’re preventing recurring growth.
After cleaning, apply a mold-resistant primer and improve mildew prevention by fixing leaks and running the fan after showers to keep surfaces dry.
Deal With Hard Water Stains and Mineral Buildup
First, identify whether the marks on your wall are light discoloration from splashes or stubborn mineral crust left by hard water.
Use a vinegar solution or a commercial descaler to break down and remove mineral deposits, testing a small area first.
Once the buildup’s gone, rinse and dry the surface completely before any sanding or priming.
Identify Stain Types
Hard water stains and mineral buildup show up as chalky white, rusty, or cloudy deposits around faucets, showerheads, and tile grout. You can usually spot them by their texture—crusty, powdery, or crystalline rather than greasy.
You’ll want to identify whether stains are mineral, soap scum, mold, or rust before painting. Inspect under different lighting fixtures and note odor, location, and spread.
Keep your cleaning routines in mind—some stains need specific treatment.
Signs to watch for:
- Pale, brittle deposits that flake when rubbed
- Sticky, filmy layers with soap residue
- Dark, fuzzy mold spots
- Orange or brown rust streaks
Remove Mineral Deposits
Because mineral deposits are abrasive and cling to porous grout and metal, you’ll need targeted cleaners and a bit of elbow grease to remove them without damaging surfaces.
Start by testing a mild vinegar solution on an inconspicuous spot; let it sit briefly to dissolve deposits, then scrub with a soft brush.
For stubborn buildup, use a commercial descaler following label instructions and rinse thoroughly.
Dry all areas to prevent reformation.
Remove residue around fixtures and trim to protect bathroom finishes.
Doing this restores bathroom aesthetics and creates a clean, sound surface for primer and paint application.
How to Test If Paint Hides Water Damage?
When you’re checking whether paint will hide water damage, don’t rely on a quick glance—inspect and test deliberately so you can trust the result. You’re looking for stains, soft spots, or mold; clean the area, let it dry, then apply a small swatch of primer and finish coat.
Use waterproof coatings and mold resistant paints for a proper trial. Press the surface to detect softness and use a moisture meter. If the patch still shows through after drying, repairs are needed.
- You’ll feel relieved if it holds.
- You’ll feel frustrated if it bleeds.
- You’ll feel confident with proper prep.
- You’ll avoid future worry.
Identify and Document Paint Failures to Fix
Before you start patching, walk the wall and note every area where paint is peeling or flaking so you can remove loose material and assess the substrate.
Mark and photograph stains and any signs of water damage to trace their source and decide if repairs or a stain-blocking primer are needed.
Keep a simple list of locations and severity so you don’t miss spots when you prep and paint.
Peeling And Flaking
If paint is lifting in patches or curling at the edges, you’ve got peeling and flaking that needs fixing before you repaint. You’ll inspect surfaces to note Peeling causes and Flaking patterns: adhesion loss, moisture, or poor prep.
Scrape loose bits, sand edges smooth, and remove dust so new paint will hold. Don’t ignore underlying adhesion problems.
- You’ll feel frustration seeing bare plaster.
- You’ll want the wall to look proud again.
- You’ll worry about recurring flakes after repainting.
- You’ll crave a lasting, clean finish.
Document every failure so repairs match the cause.
Stains And Water Damage
How can you tell whether a dark blotch or halo is just a cosmetic stain or a sign of active water damage? Inspect texture, smell, and growth: soft, bubbling paint or musty odor signals moisture. Photograph and document locations, note nearby plumbing, and test with a moisture meter. Consider color coordination and lighting effects when assessing visibility; stains may vanish under different bulbs but still need fixing. Use the table to record quick findings.
| Location | Moisture? | Action |
|---|---|---|
| Ceiling | Yes | Investigate leak |
| Wall | No | Clean and prime |
| Trim | Yes | Replace if rotted |
Scrape Loose Paint Safely
Once you’ve cleared the area and protected fixtures, put on a dust mask and goggles and start scraping loose paint with a firm, angled scraper held at about 30 degrees to the wall. You’ll remove peeling flakes, reveal sound substrate, and improve paint adhesion for a lasting finish.
Work gently near edges and vigorously on bubbled areas, collecting debris on a drop cloth. Check for soft or damp spots that need repair before priming.
- Relief when damaged areas vanish
- Confidence in a smooth, honest surface
- Satisfaction from visible progress
- Anticipation of a flawless topcoat
Choose the Right Sandpaper Grit for Bathroom Walls
Think about the wall’s surface before you pick sandpaper: smooth drywall, textured plaster, and glossy paint all need different grits.
Use coarser grits (80–120) to remove old paint or rough spots.
Use finer grits (180–220) to smooth and prepare for primer.
Match the grit to the task and the surface to get an even, paint-ready finish.
Surface Type Matters
Because bathroom walls come in different finishes—glossy tile, semi-gloss paint, flat plaster, or textured drywall—you’ll pick sandpaper grit based on the surface, not a one-size-fits-all rule. Inspect under Bathroom lighting so you see sheen, nicks, and old gloss.
Smooth surfaces need gentler abrasion; rough or patched areas tolerate coarser grit. Improve safety with Ventilation improvements to reduce dust inhalation while sanding. Match technique to material and pressure to grit to avoid damage.
- You’ll feel confident when prep is right.
- You’ll avoid costly rework.
- You’ll protect finishes you want to keep.
- You’ll finish faster and cleaner.
Grit Selection Guide
Now that you’ve matched sanding technique to the surface, you’ll want to pick grit that fits the job. You’ll choose based on damage, finish, and paint type. Grit selection balances material removal with surface smoothness; consider abrasive compatibility with drywall, plaster, or trim. Use coarser grits for heavy scratches, mid grits for smoothing, fine grits for final prep.
| Task | Grit | Result |
|---|---|---|
| Remove old paint | 60–80 | Fast removal |
| Smooth rough areas | 100–120 | Even surface |
| Final scuff | 180–220 | Paint-ready |
Match abrasive compatibility to substrate for best results.
Sanding Techniques for Smooth, Even Surfaces
Before you paint, sanding creates the smooth, even surface that helps primer and paint adhere and hides imperfections. You’ll start with medium grit to level rough spots, then finish with fine grit for a silky feel. Work light, keep strokes even, and wipe dust often so finish coats won’t trap grit.
Consider how sanding affects color matching and paint sheen—smoother areas reflect light differently, altering perceived tone. Use a sanding block or pole sander for consistency.
- You’ll feel instant progress
- You’ll gain confidence in the finish
- You’ll avoid frustrating flaws
- You’ll enjoy professional-looking results
Repair Small Nail Holes and Pinholes
When you’ve sanded and wiped the wall, patching small nail holes and pinholes is quick and keeps your finish looking seamless. You’ll press a little spackling into each nail hole with a putty knife or your fingertip, smoothing flush with the surface.
For pinhole repair, use lightweight filler applied sparingly; tiny spots often need only one swipe. Let the filler dry fully, then sand very lightly with fine-grit sandpaper until smooth.
Remove dust, prime bare filler spots if required, and inspect under good light. Properly patched tiny defects make paint lay down evenly and look professional.
Patch Larger Cracks and Holes Like a Pro
Before you grab compound, assess the damage carefully so you know whether the crack or hole needs lightweight spackle, patching compound, or a mesh/metal patch.
Choose the proper patch materials for the job — drywall tape and joint compound for seams, setting-type compound for deep voids, and a metal or fiberglass patch for large holes.
Work methodically so the repair is strong, smooth, and ready for priming.
Assess Damage Carefully
How badly is the wall damaged? You need to inspect every inch under good bathroom lighting and consider whether poor ventilation systems once caused moisture harm. Note soft spots, peeling, mold, and hairline cracks. Decide if the issue is cosmetic or structural before you start.
- Seeing stains makes you anxious.
- Finding mold feels urgent.
- Discovering deep cracks shocks you.
- Noticing bulges frustrates you.
Document damage with photos, mark areas, and prioritize by severity. If moisture caused the problem, stop painting until you fix the source. Clear assessment prevents wasted effort and ensures lasting results.
Use Proper Patch Materials
If you want a smooth, durable finish, choose patching materials designed for the size and type of damage—lightweight spackle for hairline cracks, vinyl or setting-type joint compound for wider gaps, and a patch kit with mesh or a backing plate for large holes.
You’ll prep surfaces by cleaning tile or drywall dust, removing loose paint, and addressing issues uncovered during wallpaper removal.
Apply compound in thin layers, let each cure, then sand flush with the wall.
For big repairs, use backing support, feather edges, and prime patched areas. That prevents telegraphing through paint and guarantees a professional-looking result.
When to Replace Damaged Drywall or Plaster
When water damage, mold, sagging, large cracks, or crumbling surfaces compromise more than a small patch, you should replace the drywall or plaster rather than try to repair it. Replacing guarantees a stable substrate and prevents recurring problems.
When damage spreads—water, mold, sagging, or crumbling—replace the drywall to ensure stability and stop recurring problems.
You’ll choose drywall replacement when structural integrity is lost, insulation is wet, or mold treatment can’t assure safety. Removing and replacing lets you inspect framing, and it stops hidden rot.
- You’ll feel relief when the wall’s solid again.
- You’ll avoid recurring repairs that drain time.
- You’ll protect your family’s health.
- You’ll restore pride in your bathroom.
Treat and Seal Water‑Stained Areas
What caused the stain doesn’t matter now—you need to stop it from showing through paint. Scrub the area with a mild bleach solution to kill mold or mildew, rinse, and let it dry thoroughly.
Sand away loose fibers or bubbled paint, then inspect for soft drywall—replace if necessary.
Apply a thin, even coat of a waterproof coating designed for interior walls to seal moisture migration. Once cured, use a mold resistant finish over the sealed spot to provide extra protection in humid bathrooms.
Allow full cure between coats, and check adhesion before repainting for a lasting, stain-free result.
Use Stain‑Blocking Primer on Tannin or Rust Spots
If you spot brown tannin streaks or orange rust stains, mark them so you know where to treat.
Pick a stain‑blocking primer that’s compatible with your topcoat and safe for bathroom conditions.
Apply the primer over the spots per the label, let it cure, then seal with the finish coat.
Identify Tannin Or Rust
Notice any brownish streaks or reddish-orange dots on the drywall or wood trim; those are likely tannin bleed or rust stains and they’ll show through paint unless you block them. You’ll want to inspect surfaces closely: tannin staining from knots or cedar and rust corrosion from nails or metal fixtures both need attention.
Lightly clean the area, let it dry, then mark spots for priming. Trusting this step prevents costly rework.
- Frustration at hidden stains
- Relief after locating trouble spots
- Pride in a clean prep job
- Confidence before painting
Choose Compatible Primer
Looking for the right primer? Choose a stain‑blocking primer designed for tannin and rust to guarantee priming compatibility with problematic spots. You’ll want a product labeled “blocker” or “rust‑inhibiting” so tannin bleed and metal stains won’t resurface.
Clean and dry the area first, then apply a thin coat; these primers bond differently than standard ones, so follow manufacturer directions for drying time.
Proper selection improves paint adhesion and reduces the chance of eventual discoloration or peeling. Match primer base (oil or water) to your topcoat for best results and to keep the finish durable and even.
Apply And Seal Spots
Now that you’ve picked the right primer, it’s time to apply it to any tannin or rust spots so they won’t bleed through the new paint. You’ll clean the area, sand lightly, and use a stain‑blocking primer designed for tannin or rust.
Spot‑prime stubborn stains, let it dry fully, then inspect for penetration before repainting. This protects your Bathroom decor and keeps plumbing fixtures from leaving marks that ruin the finish.
Apply carefully, feathering edges so repaired spots blend.
- Relief: no more hidden stains
- Confidence: even finish every time
- Pride: refreshed bathroom space
- Calm: lasting results
Prime Around Trim, Fixtures, and Transitions
Before you paint the main wall, prime the narrow areas around trim, fixtures, and junctions so the finish coat adheres evenly and prevents flashing. Work with a small brush to apply a thin, even coat where moldings meet drywall, focusing on trim sealing to block tannin bleed and moisture exchange.
Use fixture masking to protect faucets, lights, and switches, but don’t encase vents—remove covers if possible. Feather primer into adjacent surfaces to avoid ridges.
Allow full drying per manufacturer instructions, then inspect for missed spots or absorbent patches and spot-prime them before moving on to the full wall.
Tape Edges and Create Clean Paint Lines
You’ll want to pick painter’s tape suited to bathroom surfaces—low-tack for fresh caulk, stronger tape for textured walls.
Prep the edges by cleaning and drying surfaces so the tape seals tightly.
Apply the tape straight, press the edge down firmly, and remove it at a 45° angle while the paint is still slightly tacky for the cleanest line.
Choose The Right Tape
Which tape you pick will determine whether your paint lines look professional or ragged. You want tape that sticks without peeling paint or leaving residue, especially near fixtures affected by plumbing maintenance and under varied bathroom lighting. Choose based on surface texture and paint type. Consider low-tack for delicate surfaces and high-adhesion for glossy trim.
- Relief when lines stay crisp and your hard work shows
- Confidence avoiding sticky residue after removal
- Pride in neat edges around fixtures and grout
- Satisfaction knowing cleanup won’t spoil finish
Test a small strip first, press firmly, and remove at a 45° angle.
Prep Surfaces Thoroughly
After cleaning and drying the wall, tape the edges firmly so paint lines stay crisp and fixtures stay protected. Press tape along trim, outlet covers, and around bathroom fixtures, sealing edges to prevent bleed.
Smooth tape over uneven wall textures; use short pieces on pronounced bumps to maintain adhesion. For caulked joints or metal trim, choose tape suited to the surface.
Mask off floors and fixtures close to the wall, keeping drop cloths tight.
Inspect taped lines from multiple angles under good light, adjusting where gaps appear. Proper taping and smoothing make painting faster and deliver professional-looking, clean paint lines.
Apply And Remove Correctly
When you press painter’s tape down firmly and remove it at the right time, you’ll get crisp, professional paint lines without extra touch-ups. You’ll want to choose tape suited for your wall and paint—low-tack for delicate surfaces. Seal the tape edge by running a putty knife along it, then paint in thin coats.
Wait until paint is dry to the touch but not fully cured before peeling back slowly at a 45° angle.
- Excitement about Color selection brightens the room.
- Relief when lines stay perfect.
- Pride after careful furniture placement.
- Satisfaction in a job done neatly.
Mask Mirrors and Glass Without Residue
Want to keep mirrors and glass spotless while you paint? Use quality painter’s tape for mirror masking, pressing edges firmly to prevent seepage.
Cover large panes with kraft paper or plastic sheeting, securing corners so wind won’t lift them.
Work from top to bottom, overlapping tape only on the frame—not the glass—to avoid adhesive transfer.
After painting, remove tape slowly at a 45-degree angle while paint is still tacky to minimize peeling.
For any leftover stickiness, apply a little rubbing alcohol or adhesive remover and wipe with a soft microfiber cloth for clean residue removal.
Protect Bathroom Fans and Light Fixtures
How will you keep fans and light fixtures from getting splattered or damaged during painting? You’ll turn off power, remove bulbs, and cover fixtures tightly. Tape the grille or glass with painter’s tape; use plastic bags or drop cloths secured with clips for larger fixtures.
Protect nearby bathroom shelving and a shower curtain from drips by shifting or covering them.
Shift or cover nearby shelving and the shower curtain to prevent paint drips and splatters.
- You’ll feel relief knowing delicate finishes are safe.
- You’ll avoid costly replacements and wasted time.
- You’ll keep clean lines around switches and trims.
- You’ll finish faster with less cleanup.
Check covers before restoring power; let paint dry fully.
Create Proper Ventilation During Prep and Painting
Because paint fumes can build up quickly in a small bathroom, you’ll set up steady airflow before you open a can. Open windows and doors to create a cross breeze, and position a box fan to pull air out.
Turn on ventilation fans and keep them running during sanding, priming, and painting.
Shield bathroom lighting with plastic so dust and paint won’t damage fixtures, but don’t block light entirely—good visibility prevents mistakes.
Use a low-odor, water-based paint when possible and take short breaks outside if you feel lightheaded.
Monitor air exchange until smells noticeably fade.
Drying Time Recommendations After Cleaning and Repairs
After cleaning, wait until the wall surface feels completely dry to the touch—this can take from a couple of hours to overnight depending on humidity.
For repairs like spackling or joint compound, follow the manufacturer’s cure times; some patches need 24–48 hours or longer before sanding and priming.
If you’re unsure, use a moisture meter or err on the side of more drying time to guarantee proper adhesion.
Surface Drying Times
Want the paint to stick and look right? Let surfaces fully dry before priming or painting. After cleaning or light sanding, wait at least 24 hours for moisture to leave; after heavier washing or steam, allow 48–72 hours.
Humidity, ventilation, and temperature change times—keep the room ventilated and warm. Consider color matching and paint sheen only once surfaces are bone-dry to avoid uneven absorption.
- Relief knowing you waited
- Pride in a smooth finish
- Confidence in true color
- Calm from predictable results
Use a moisture meter for certainty; don’t rush the process.
Repair Cure Durations
How long should you wait for patching compounds, caulk, or joint compound to cure before priming and painting? You’ll usually wait 24–72 hours for thin patches, longer for deep fills—up to a week.
Caulk typically skins in an hour but needs 24 hours to fully cure.
Joint compound drying varies with thickness and humidity; allow 48–72 hours for standard coats.
Always check manufacturer specs and touch-test for firmness.
Confirm repaired areas match surrounding bathroom wall textures before priming.
Once cured and sanded, prime to seal repairs, then consider paint color coordination to blend patched zones seamlessly with the room.
Prevent Future Mold With Moisture‑Resistant Products
Thinking about long-term protection? You’ll want moisture‑resistant solutions around bathroom fixtures to support mold prevention and peace of mind. Choose materials that block water, seal joints, and reduce humidity buildup so you don’t face frequent repairs.
For lasting peace of mind, use moisture‑resistant materials and sealed joints around fixtures to prevent water damage and mold.
- Use water‑resistant backer board to guard framing — feel secure.
- Install waterproof membranes behind tiles for calm assurance.
- Seal gaps around fixtures with silicone for lasting confidence.
- Upgrade grout to an epoxy or sealed variety to stop seepage and worry.
These steps protect substrates, simplify cleaning, and prevent mold from returning, keeping your bathroom healthy and dependable.
Select Mildew‑Resistant Primers and Paints
When you pick primers and paints, choose products labeled mildew‑ or mold‑resistant and formulated for high‑humidity rooms so the coating actively inhibits fungal growth rather than just covering stains. You’ll want mildew resistant coatings designed for bathrooms; they contain biocides and binders that limit spore adhesion and breakdown.
Check manufacturer specs for shower‑safe or bathroom‑grade ratings and low VOCs if you’re sensitive. Apply according to surface prep instructions to maximize bathroom paint durability.
Match primer chemistry to your topcoat—latex over latex, oil over oil—and store unused cans tightly sealed in a cool, dry place to preserve performance.
How Many Coats of Primer and Paint You Actually Need
Before you start painting, decide how many coats you’ll need based on surface condition, color change, and the primer/paint quality—you’ll usually need one coat of primer and one to two coats of paint.
Decide on primer and paint coats up front—usually one primer and one to two paint coats for best coverage.
If you’re covering dark color or repairing porous drywall, plan for extra primer or a third paint coat.
Smooth walls often need fewer coats than rough wall texture.
Consider how Color psychology affects finish choices—softer hues may need more coats for true depth.
Think about durability in a humid bathroom and pick mildew-resistant products.
- Relief at clean coverage
- Pride in a flawless finish
- Confidence in lasting protection
- Calm from balanced color
Brushing and Rolling Tips for Smooth Application
Pick a brush that matches the trim and a nap roller suited to your paint and wall texture so you get even coverage.
Use smooth, overlapping roller strokes and feather the edges to avoid lines.
Keep a steady wrist when cutting in with the brush.
Work while the paint is still wet so you can blend sections and maintain a uniform finish.
Choose The Right Brush
One good brush can make the difference between a streaky finish and a professional-looking bathroom wall, so choose one that matches your paint and the trim you’ll cut in. You’ll want a synthetic-bristle angled sash brush for water-based paints and natural bristles for oil.
Consider how close you’ll paint around bathroom fixtures and how varied your wall textures are; softer filaments hold more paint for smooth drywall, stiffer ones handle rough surfaces. Pick a comfortable handle and quality ferrule to avoid wobble.
Trust your brush—it’ll speed work and calm the stress of detail cuts.
- Pride in neat edges
- Calm confidence
- Satisfaction in smoothness
- Relief from drips
Master Rolling Technique
When you roll, work in overlapping W or M patterns and keep a wet edge so the paint levels evenly.
Line a quality roller with appropriate nap for your wall texture, load it evenly, and remove excess on the tray.
Roll from top to bottom in controlled passes, blending each section into the previous to avoid lap marks.
Use a brush for cut-ins around plumbing fixtures and corners, feathering into the rolled area.
Keep strokes consistent and don’t press too hard.
Let coats dry fully before recoat.
After painting, clean tools promptly to protect bathroom decor and future touch-ups.
Maintain Wet Edges
How do you keep paint from drying into visible seams? You work methodically, blending fresh strokes into the wet edge so walls look seamless. Use a consistent work pattern and the right tools to follow color trends while choosing eco-friendly paints that behave predictably.
- Follow a single direction, keep rhythm
- Reload brush or roller before edges dry
- Lightly feather overlaps to erase lines
- Pause to assess lighting and texture
You’ll feel calmer as the surface unifies. Stay patient, maintain wet edges, and trust your technique for a smooth, professional finish.
Avoid Common Prep Mistakes That Cause Peeling
Because paint can only grip a properly prepared surface, skipping steps or rushing prep is the fastest way to invite peeling. Check surfaces under bathroom lighting to spot old gloss, soap scum, and loose flakes. Use proper cleaners and degreasers, then sand and prime bare or glossy areas.
Don’t paint over mold or mildew—treat it first and guarantee Ventilation systems are running so surfaces dry fully. Avoid painting on damp walls or directly after showering.
Remove loose caulk, recaulk gaps, and allow cure time. Follow manufacturer instructions for primers and paints to ensure lasting adhesion and prevent peeling.
Address Textured Walls and Popcorn Finishes
If your bathroom has textured walls or a popcorn finish, you’ll need a different prep approach than for smooth surfaces. You’ll inspect for loose texture, wash grime with a mild detergent, and gently scrape only flaking bits.
Repair small gouges with a light skim coat and sand sparingly—too much pressure flattens the texture. Prime with a bonding primer made for textured walls or popcorn finishes to guarantee adhesion.
Don’t attempt complete removal unless you’re prepared for mess and possible asbestos testing. Embrace the texture, but prepare it carefully:
- Frustration when it flakes
- Relief after proper priming
- Pride in the result
- Calm knowing it’s stable
Prep Tiled Walls Adjacent to Painted Areas
Want clean edges where tile meets paint? You’ll protect tile surfaces and guarantee a sharp finish by starting with proper tiled maintenance.
Remove soap scum and mildew with a mild cleaner, then focus on grout cleaning using a stiff brush and appropriate cleaner so dirt won’t bleed into fresh paint. Rinse thoroughly and let everything dry.
Mask the tile edge with high-quality painter’s tape, pressing it down firmly for a crisp line. If tile is shiny, scuff lightly with fine-grit sandpaper to help tape stick.
Keep tools and cleaners off painted areas to avoid damage during prep.
Handle Caulking Gaps and Seams Before Painting
Once the tiled edges are clean and taped, check all joints, seams, and corners for missing or cracked caulk before you paint. You’ll remove old caulk, clean surfaces, and dry thoroughly.
Once edges are cleaned and taped, inspect and replace cracked caulk—clean, dry, and prep before painting.
Use proper caulking techniques: cut the nozzle, apply steady bead, and smooth with a wet finger or tool. Focus on Seam sealing where tile meets tub, wall, or trim to block moisture and guarantee a neat finish.
Let caulk cure fully per manufacturer instructions. The right prep prevents mold, peeling, and touch-ups.
Remember to use mildew-resistant silicone for bathrooms.
- Relief: a watertight edge
- Pride: smooth, clean lines
- Confidence: lasting protection
- Calm: no surprise leaks
Schedule Wall Prep During a Remodel
When you’re planning a remodel, schedule wall prep early so you can address repairs, moisture barriers, and drying times without delaying other trades. You’ll coordinate plumbers, tilers, and painters so prepping walls—patching holes, sanding, and installing vapor barriers—fits the timeline.
Prioritize areas near showers and sinks for water resistant finishes and clear them before installing fixtures. Communicate sequencing with contractors so Bathroom decor choices don’t force last-minute changes.
Allow adequate cure times for primers and sealers to avoid rework. A clear schedule prevents overlap, keeps the project on track, and guarantees the painted walls perform well long term.
Budget‑Friendly Prep Options That Still Work
Planning and scheduling wall prep during a remodel helps prevent delays, but you don’t need expensive contractors or premium materials to get solid results. You can save money while still achieving smooth wall textures and a refreshed look that complements your bathroom decor.
Focus on smart, low-cost steps: clean, sand, fill, and protect. You’ll avoid common mistakes and feel proud of the outcome.
- Clean stubborn grime to restore confidence.
- Sand rough spots to reveal calm surfaces.
- Use affordable spackle to fix dents and holes.
- Tape and drop cloths to protect fixtures and mood.
When to Call a Pro for Water or Mold Damage
If you spot persistent damp spots, recurring stains, a musty odor, or peeling paint despite basic cleanup, call a pro — these are signs water or mold has gone beyond DIY fixes.
You should hire a contractor when stains reappear, drywall softens, or paint bubbles, since hidden water damage can compromise framing and insulation. Ask for a mold inspection and a clear remediation plan before repainting.
Pros will locate leaks, test humidity and spores, remove contaminated materials safely, and recommend drying equipment. Don’t repaint over untreated problems; fixing the root cause prevents recurring damage and protects your health.
Quick Checklist to Confirm Your Wall Is Paint‑Ready
After any repairs or mold remediation, make a quick checklist to confirm the wall is truly ready for paint. You want a smooth, lasting finish that complements your bathroom decor and respects existing wall texture. Walk the room methodically and tick off each item.
- Touch surfaces for dampness and lingering odors that hint at moisture problems.
- Scan for hairline cracks, loose compound, or peeling primer.
- Feel for uneven wall texture that’ll show through thin paint.
- Confirm fixtures, switch plates, and trim are masked or removed.
Only paint once every box is checked; your patience protects the final look.
Post‑Paint Care to Protect Walls From Humidity
Because bathroom air stays humid, you’ll need a few simple habits to keep your fresh paint looking good and resisting moisture damage. Wipe splashes promptly with a microfiber cloth and use a squeegee on shower walls after use to reduce lingering dampness.
Run exhaust fans during and after showers for at least 20 minutes. If you lack ventilation, open a window briefly.
Choose fixtures and bulbs that balance bathroom lighting to avoid heat hotspots that could affect gloss.
Inspect wall texture periodically for soft spots or discoloration. Address issues early to prevent deeper moisture problems and prolong the finish.
Fix Peeling, Blistering, and Mildew After Painting
When paint peels, blisters, or mildew shows up, act quickly to stop damage and restore the finish. You’ll strip loose paint, sand edges, and treat mildew with a bleach solution or mildew cleaner.
Act quickly: strip loose paint, sand edges, and treat mildew with a bleach solution to restore the finish.
Repair substrate issues—loose Bathroom wallpaper adhesive or failing primer beneath paint can cause blisters. Rinse, dry, and use a mildew-resistant primer before repainting.
Check shower grout for leaks that drive moisture into walls; reseal grout and caulk joints.
Take these steps to prevent recurrence and regain a fresh bathroom surface.
- Frustration relieved
- Confidence restored
- Home value protected
- Peace of mind regained
Frequently Asked Questions
Can I Paint Over Wallpaper Without Removing It First?
You can sometimes paint over wallpaper, but you’ll risk bubbles, peeling, and trapped moisture; consider wallpaper removal first, then surface priming for best adhesion and durability, or use a high-build primer if removal isn’t feasible.
How Do I Prep Walls Around a Steam Shower or Sauna?
You should use moisture-resistant drywall or cement board, seal seams with waterproof tape and caulk, prime with a mildew-resistant primer, and choose high-quality waterproof paint—Steam shower preparation and Sauna wall treatment focus on ventilation and durable, vapor-proof finishes.
Are There Paint-Safe Cleaners for Vintage Lead-Based Paint Surfaces?
Yes — you can use lead paint safety–approved cleaners; you’ll pick gentle, nonabrasive vintage paint cleaning products labeled for lead-safe use, wear proper PPE, test for lead first, and follow disposal and containment procedures strictly.
Can Heated Towel Rails Affect Paint Adhesion Nearby?
Yes — heated rails can harm paint adhesion nearby; think of a sun-warmed cliff. You’ll protect surfaces with proper wall preparation, heat-resistant primer, and correct bathroom painting techniques to prevent peeling and discoloration.
How Do I Prep Ceiling-To-Wall Crown Molding Junctions for Painting?
You clean dust and caulk gaps at crown molding ceiling junctions, sand uneven spots, prime bare areas, and use painter’s tape to protect surfaces. You then apply paint with angled brushes for crisp, consistent seams and finish.
Conclusion
You’ve prepped, patched, and picked the right paint—now don’t rush the finish. Let each coat dry fully, watch for hidden damp spots, and run the fan after showers to keep mildew at bay. If stain or blistering reappears, stop and investigate: a deeper issue might be hiding beneath the surface. Stay patient, follow the checklist, and you’ll reveal a fresh, durable wall—until that next subtle clue tells you it’s time to act again.