How to Take Off Old Paint From Wall Easily
You can strip old wall paint quickly by first evaluating the wall and testing for lead if the house is older, then ventilating and wearing a respirator and gloves. Pick a method matched to the surface—sanding or steaming for drywall, heat or citrus gel for trim—work in small patches, scrape and sand gently, clean and fill imperfections, then prime. Follow safety steps for lead or chemicals, and keep going to learn tips for stubborn spots and tool choices.
Quick Guide: Pick the Right Paint-Removal Method
Before you start scraping or sanding, figure out what kind of paint and surface you’re dealing with so you can pick the quickest, safest removal method.
Before scraping or sanding, identify the paint and surface so you can choose the safest, fastest removal method.
If it’s lead-era paint, assume professional testing and avoid DIY aggressive methods. Historical techniques like heat or chemical stripping worked but may release hazards.
For latex on drywall, gentle sanding or a steamer often suffices.
On hardwood, try chemical strippers or eco-friendly solvents designed for wood to protect grain.
Test a small patch first, evaluate results, then scale up.
Match method to material to save time and prevent surface damage.
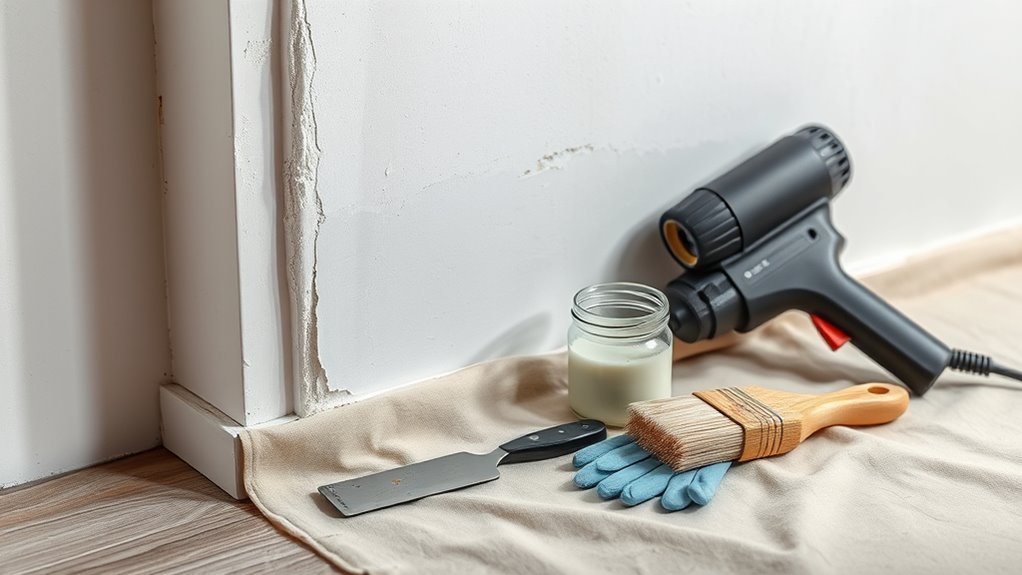
Safety Gear and Prep: What to Do Before You Start
Now that you’ve chosen the right removal method, gear up and prep the space so work goes smoothly and risks stay low. Follow safety protocols: ventilate, seal floors, and post a warning sign. Wear proper protective equipment — respirator, goggles, gloves, and coveralls — and check gear fits. Turn off HVAC, clear furniture, and keep a fire extinguisher nearby if using heat tools. Work methodically, keep tools organized, and take breaks to avoid fatigue.
| Task | Gear | Tip |
|---|---|---|
| Ventilate | Respirator | Open windows |
| Protect surfaces | Drop cloths | Tape edges |
How to Assess Wall Type and Paint Layers
Before you start stripping, check what your wall is made of—plaster, drywall, brick, or wood—since each needs a different approach. Run a small scratch or tap test and look at exposed edges to confirm the material.
Then peel back a corner or sand a tiny area to see how many paint layers you’re dealing with and whether any are lead-based.
Identify Wall Material
How can you tell what your wall’s made of and how many paint layers are hiding there? Start by inspecting wall texture and edges: smooth drywall, rough plaster, or wood grain give clues. Tap lightly—hollow sound suggests drywall over studs; solid, dense sound points to plaster or masonry.
Remove outlet covers and check inside the cavity for labels or lath. Scratch a discreet spot with a utility blade; drywall paper tears, plaster chips, wood splinters. Note paint sheen differences where layers peel; glossy layers sit atop dull ones.
Photograph findings before you begin stripping or testing further.
Determine Paint Layers
Wondering how many paint layers you’re dealing with? You’ll inspect edges, trim a tiny spot, and gently sand to reveal layers.
Look for color mixing where hues overlap; that tells you previous choices and possible stains.
Feel the surface to note wall textures—smooth, orange peel, or heavy stipple—since texture hides layers differently.
Test adhesion with tape: strong pull means stable paint; flaky pull means multiple failing coats.
Based on findings, pick removal method: sanding, chemical, or heat.
Record layer count and substrate before starting full removal to avoid surprises.
- Sand a hidden spot
- Scrape an edge
- Use tape test
- Note textures
Lead Paint: Testing & Mandatory Safety Steps
If your home was built before 1978, you should assume older paint might contain lead and get it tested before you disturb any surfaces. You’ll need certified lead testing to confirm hazards; DIY kits give initial clues but follow up with a professional for accurate results.
If tests are positive, follow strict safety procedures: seal the area, wear a NIOSH-approved respirator and disposable coveralls, and use HEPA air filtration. Keep kids and pregnant people away, avoid dry scraping, and bag debris securely.
Hire a certified lead abatement contractor for extensive work to protect your household and comply with regulations.
Use a Heat Gun Safely
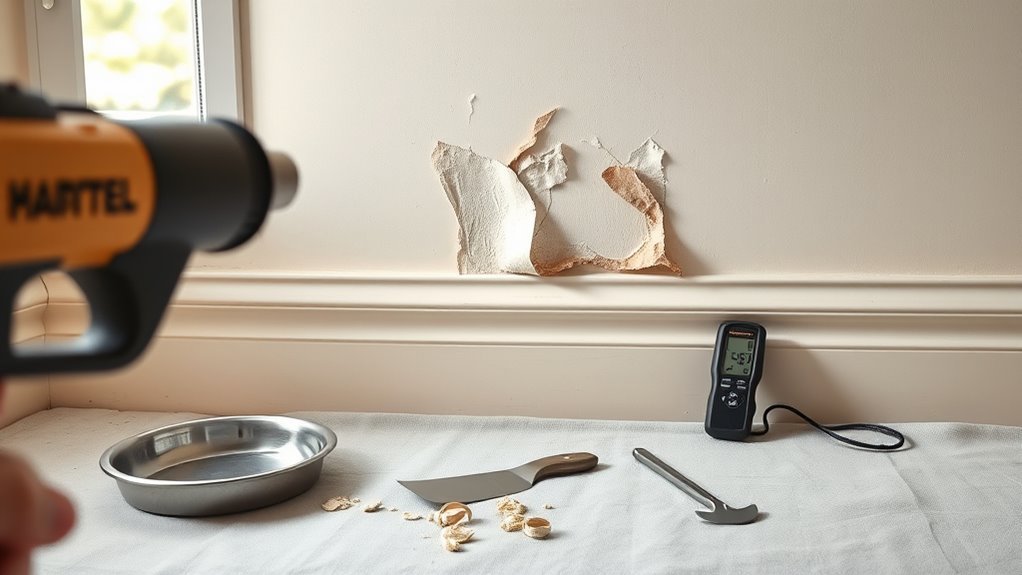
When you choose a heat gun to strip old paint, take deliberate precautions to prevent fires, toxic fumes, and surface damage. You’ll wear a respirator, gloves, and eye protection, keep a fire extinguisher nearby, and work in ventilated spaces to follow heat gun safety.
Don’t assume higher heat is faster—paint removal myths can lead to charring or blistering. Move the gun steadily, keep it 2–3 inches away, and test a small area first.
Higher heat isn’t faster—keep the gun moving, hold 2–3 inches away, and test a small area first.
- Curling paint softens and peels away.
- Smoked wood warns of excessive heat.
- Bubbling means stop and cool.
- Protective gear blocks fumes.
Apply Chemical Paint Strippers Safely
Although chemical strippers can remove stubborn paint fast, you’ll need to handle them with strict precautions to protect yourself and the surface. Read labels and choose a product suited to your wall material, ventilation, and paint type.
Prioritize chemical safety: work outdoors or with windows open, run fans, and keep children and pets away.
Wear protective gear—gloves, goggles, a respirator rated for organic vapors, and long sleeves.
Test a small area first, follow dwell times, and neutralize or rinse as directed.
Dispose of waste per local regulations and store leftovers in clearly labeled, sealed containers.
Mechanical Removal: Pick the Right Scrapers and Brushes
When you’re doing mechanical removal, pick a scraper that matches the surface—wide, stiff blades for flat walls and narrow or angled ones for trim and corners.
You’ll want durable brushes too: natural bristles for oil-based paint and stiff synthetic bristles for water-based jobs.
Using the right tools will speed the work and reduce damage to the wall.
Choose The Right Scraper
Which scraper you pick will speed the job and save your wall from unnecessary gouges. You’ll want tools that match the paint condition and preserve wall texture if you plan color matching later.
Start with a sharp putty knife for thin, flaking paint; use a rigid metal scraper for stubborn layers; choose a flexible blade for curved or delicate surfaces; pick a long-handled scraper for high areas to keep steady pressure.
Keep blades clean and replace dull ones. Test a small patch first so you don’t damage substrate while aiming for even removal and a smooth surface for repainting.
Select Durable Brush Types
Because brushes handle the finishing work after scrapers loosen most paint, pick ones built to resist wear and hold bristles firmly so you can remove stubborn residue without shedding. You’ll want nylon or polyester for water-based paints and flagged natural bristles for oil-based coatings.
Choose sizes to fit corners, trim, and flat areas so you don’t overwork surfaces. Check ferrules and handles for solid construction; loose ferrules mean shedding.
Practice basic brush maintenance after each session—cleaning, reshaping, and storing upright—to extend life. Keep a small sample brush when testing so paint color matching and texture are easier once you repaint.
Use a Power Sander Without Harming Plaster
If you want to remove old paint quickly without damaging the underlying plaster, use a power sander with the right grit and a light touch. Pick a fine-to-medium grit to respect wall texture and avoid breaking paint adhesion patterns you want to preserve.
Hold the sander flat, move steadily, and test a small area first. Wear a mask and eye protection.
- Feather edges where paint peels to blend into plaster.
- Use low speed to prevent gouging.
- Change to finer grit for final smoothing.
- Vacuum dust often to inspect progress.
Eco-Friendly Paint-Removal Options (Low‑VOC, Non‑Toxic)
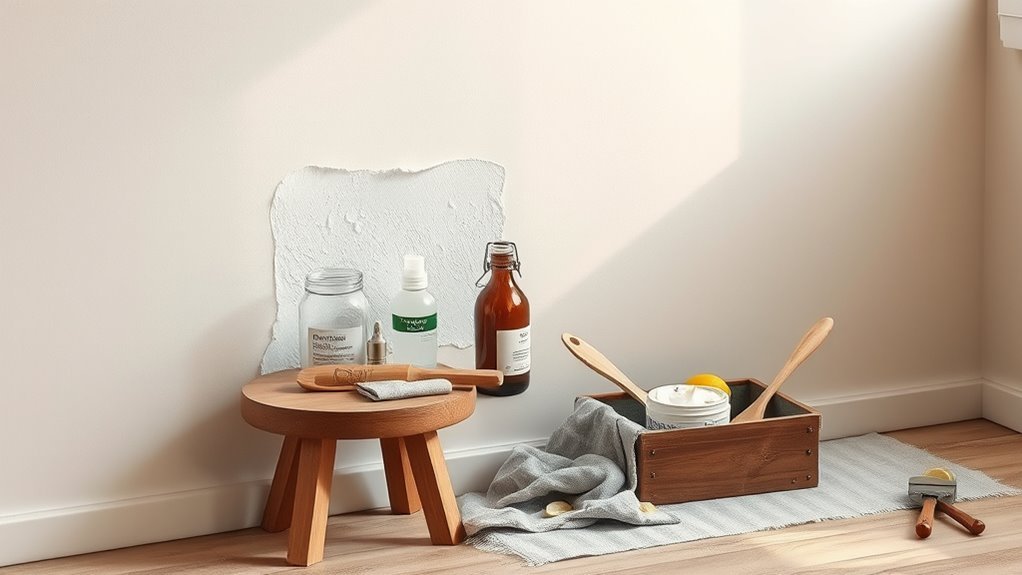
When you want to strip paint without toxic fumes or harsh chemicals, choose eco-friendly methods like low-VOC chemical strippers, citrus-based gels, or heat-removal tools designed to limit off-gassing. They work well on interior walls and are safer for you and the environment.
Opt for eco-friendly paint stripping—low-VOC strippers, citrus gels, or low-offgassing heat tools for safer indoor results.
You’ll find eco-friendly solvents labeled for indoor use and water-rinse cleanup—apply thin coats, wait per instructions, then scrape gently.
Natural paint removers such as soy- or citrus-based gels soften layers without harsh odors.
Always ventilate, wear gloves and eye protection, test a small area first, and dispose of residues per local guidelines.
Fix Stubborn Paint Spots: Steam, Razor, and Targeted Fixes
Although some paint comes off easily with a scraper, stubborn spots often need a targeted approach: use a handheld steamer to loosen old layers, a sharp razor or scraper to lift softened paint, and small, focused fixes (like spot-sanding or a dab of eco-friendly remover) for remaining residue.
You’ll work patiently, keeping surrounding finish intact and considering paint durability when deciding how aggressive to be. Aim to preserve substrate and note areas that may need color matching later.
Visualize the process:
- Steam a small patch until paint wrinkles.
- Razor-scrape softened flakes.
- Spot-sand edges lightly.
- Apply remover dab, rinse.
Clean and Repair the Surface After Stripping
After stripping, clean the surface thoroughly so repairs bond well and the new finish looks seamless.
Remove dust and residue with a vacuum and tack cloth, then wash with mild detergent or trisodium phosphate for stubborn grime.
Scrape loose bits, sand rough edges to match surrounding surface texture, and eliminate feathered ridges.
Fill holes and gouges with appropriate filler, let it cure, then sand smooth.
Check for remaining contaminants and repeat cleaning if needed.
Final sanding should create consistent surface texture to promote uniform paint adhesion.
Allow the wall to dry fully before moving on to priming or recoating.
Best Primers and Products to Recoat Exposed Surfaces
Now that the wall’s clean and patched, you’ll want to prep the surface for best adhesion—sand glossy spots, remove dust, and let any damp areas fully dry.
Choose a primer based on the substrate and remaining stains: stain-blocking for tannin or rust, bonding primers for slick surfaces, and moisture-resistant formulas for bathrooms.
I’ll walk you through primer types and quick product picks so you can pick the right one for your recoating job.
Surface Preparation Tips
When you’re ready to recoat exposed surfaces, proper prep makes the new finish last. You’ll clean, sand, and inspect so primers and topcoats adhere evenly across different wall textures and match chosen paint colors. Focus on adhesion, smoothness, and contamination-free surfaces before you prime.
- Wash with mild detergent, rinse, dry — remove grease and dust.
- Sand glossy spots and feather edges where old paint peels.
- Fill cracks and holes; sand smooth to blend with surrounding texture.
- Remove dust with a tack cloth and guarantee surfaces are fully dry before recoating.
Primer Selection Guide
Because primers control adhesion, stain-blocking, and finish uniformity, choosing the right type is the single most important step before you recoat exposed surfaces. Pick primers for your substrate, consider color matching if covering dark tones, and match formulas to wall textures to avoid show-through. Use oil-based for heavy stains, shellac for severe tannin or smoke, latex for general use, and specialty primers for masonry or metal. Test a small patch.
| Surface | Primer Type | Best Use |
|---|---|---|
| Drywall | Latex | Smooth walls |
| Stain-prone | Oil | Covers tannin |
| Smoke | Shellac | Blocks odors |
| Masonry | Masonry primer | Porous surfaces |
Rent or Buy? Which Tools Save the Most Time
If you’re tackling a big paint-removal job, deciding whether to rent or buy tools comes down to how often you’ll use them and how much time you want to save.
You’ll want an orbital sander or heat gun for stubborn layers; consider paint color and wall texture to pick attachment grit and heat settings.
Rent high-power gear for one-offs, buy if you foresee future projects. Safety gear is worth owning.
- Rental heat gun: fast for thick coats.
- Orbital sander: evens rough wall texture quickly.
- Scraper set: detailed edges.
- Shop vacuum: contains dust.
Common Mistakes and How to Avoid Them
Don’t skip proper surface prep — it makes stripping harder and ruins the finish. Pick the right remover for your paint type, or you’ll waste time and damage the wall.
And don’t ignore safety: gloves, mask, and ventilation protect you from fumes and dust.
Skipping Proper Surface Prep
- A greasy kitchen wall with flaky layers.
- Glossy bathroom tiles resisting new coats.
- Cracked drywall showing uneven patterns.
- Old wallpaper seams hiding loose paint.
Prep fixes these problems, so you get a smooth, predictable surface for removal and repainting.
Using Wrong Paint Remover
Once you’ve fixed prep problems like grease, gloss, or loose seams, the next mistake people make is picking the wrong paint remover for the job. You’ll want a remover that suits the paint texture and substrate.
Gel strippers cling to verticals and work on thick enamel, while liquid removers soak through chalky finishes. Test a small area to confirm it lifts layers without damaging drywall or wood grain.
Avoid aggressive methods that force extra sanding and complicate color matching later. Pick the correct product, follow dwell times, and remove residues thoroughly so your repainting goes smoothly.
Ignoring Safety Precautions
While you’re focused on getting paint off quickly, skipping safety steps can turn a simple project into a health or fire hazard. You need to respect safety hazards and avoid chemical exposure by prepping properly, wearing PPE, and ventilating the room. Don’t improvise with candles, open flames, or poor lighting.
- Gloves, goggles, and a respirator fitting your face.
- Open windows, use fans to push fumes out.
- Keep flammable solvents away from heat sources.
- Contain and label waste for safe disposal.
Follow instructions on product labels and stop if you feel dizzy or unwell.
Troubleshooting: Why Paint Keeps Peeling Back
If your paint keeps peeling back, it’s usually signaling a problem with surface prep, moisture, or incompatible products—so start by checking those three things first.
Inspect for blistering, bubbling, or lifting near trim, windows, and baseboards.
Test adhesion by scoring small areas and scraping; poor bond often means primer was skipped or old paint wasn’t removed.
Look for moisture sources—leaks, condensation, or rising damp—and fix them before repainting.
Make sure new paint matches substrate type and consider paint sheen differences that affect durability.
Also confirm color coordination choices won’t hide defects; contrast can reveal flaws you’ll want to correct.
Quick Checklist: Steps to Finish the Job
Because proper finishing makes the difference between a patchy repaint and a professional result, follow a compact checklist to wrap up the job efficiently. You’ll confirm surface readiness, account for historical paint analysis if needed, and minimize environmental impact while restoring the wall. Stay methodical: clean, repair, prime, and finish.
- Wash surface, remove dust and residues for adhesion.
- Scrape and sand, addressing edges and feathering old paint.
- Patch holes, apply appropriate primer after any historical paint analysis determines lead risks.
- Paint with low-VOC products, dispose of waste following environmental impact guidelines to protect health and surroundings.
Frequently Asked Questions
Can I Strip Paint From Wallpapered Walls Without Removing the Wallpaper First?
You can, but it’s tricky: wallpaper removal is usually better first; if you strip paint on wallpapered walls, you’ll risk damage. Prioritize surface preparation, test a small area, use gentle methods, and expect repairs afterward.
How Long Should I Wait Before Repainting After Using Chemical Strippers?
You should wait 24–72 hours before repainting after chemical strippers; you’ll follow chemical stripper safety, ensuring surfaces are dry, residue-free, and neutralized, and you’ll test adhesion—longer waits may be needed for deep or oil-based stripping.
Can I Remove Paint Outdoors in Cold or Rainy Weather?
You shouldn’t remove paint outdoors in cold or rainy weather; you’ll struggle. Outdoor temperature and weather conditions affect stripper performance and adhesion, so wait for dry, mild days above the product’s minimum temperature for safe, effective removal.
Will Removing Paint Affect Built-In Electrical Fixtures or Wiring?
Yes — removing paint can affect built-in electrical fixtures and wiring; you’ll prioritize electrical safety by turning power off, covering outlets, using nonconductive tools, and ensuring wiring protection to avoid damage, shocks, or code violations.
How Do I Dispose of Paint Chips, Stripper Residue, and Contaminated Rags?
You should double-bag paint chips, collect stripper residue in sealed containers, and store contaminated rags in metal cans with lids; follow local paint disposal rules, use proper safety precautions, and take hazardous waste to a disposal facility.
Conclusion
You’ve weighed gentle scraping against harsh chemicals, the slow sweat of sanding against the fast sizzle of a heat gun — and now you can choose. Don’t rush: prep carefully, test for lead, and wear protection even when the job seems small. Contrast patience with speed, caution with efficiency, and you’ll finish cleaner and safer than you started. Follow the checklist, trust your judgment, and enjoy the crisp, fresh wall that replaces the old chaos.