What Can You Use to Clean Walls With Paint Safely?
You can safely clean painted walls with gentle, nonabrasive solutions like a teaspoon of mild dish soap per quart of warm water, diluted castile soap, or a vinegar-water mix for flat paints; match cleaner strength to the finish (glossier paints handle stronger cleaners). Always test a hidden spot first, use soft cloths or sponges, rinse with plain water, and dry to avoid residue. Followup guidance will show finish-specific tips, stain removal, and safety steps.
Quick Summary: Safest Cleaning Methods for Painted Walls
When you clean painted walls, start with the gentlest methods to avoid damaging the finish: dust or vacuum with a soft brush.
Begin wall cleaning gently: dust or vacuum with a soft brush to protect the paint finish.
Then spot-test a mix of warm water and a few drops of mild dish soap in an inconspicuous area before wiping larger sections with a soft cloth or sponge.
You’ll work from top to bottom, using light pressure and rinsing the cloth frequently to avoid streaks.
For stubborn spots, try a dampened magic eraser sparingly.
These paint maintenance tips help prevent wear; set a reasonable cleaning frequency—monthly for common areas, quarterly for low-traffic rooms—to keep surfaces looking fresh.
How Paint Finish Affects What Cleaners You Can Use
The finish on your paint matters because sheen levels change how much scrubbing it can take without damage.
You’ll find glossy and semi-gloss are more scrub-resistant while flat and matte need gentler treatment.
Match cleaners accordingly—mild soap and water for flat finishes, stronger solutions or degreasers for glossier surfaces.
Sheen Levels Matter
Because sheen changes how paint repels moisture and abrasions, you need to tailor cleaners to the finish rather than treating all painted walls the same. You’ll consider sheen impact and choose milder cleaners for low-sheen surfaces to protect paint longevity. Higher sheens tolerate gentler detergents and light solvents better, but you shouldn’t assume all cleaners are safe.
| Finish | Cleaner type |
|---|---|
| Flat | Mild soap |
| Eggshell | Diluted detergent |
| Satin | Gentle all-purpose |
| Semi-gloss/Gloss | Mild solvent sparingly |
Test a hidden spot first and blot, don’t rub, to avoid damage.
Scrub Resistance Varies
Although finishes look similar at a glance, they differ in scrub resistance, so you should match your cleaner and technique to the paint’s durability.
You’ll test an inconspicuous spot before full cleaning, since high-gloss holds up to firmer scrub techniques while flat or matte paints can scuff or thin.
Use gentle pressure and a soft cloth on delicate finishes, and increase agitation only where the finish and underlying wall materials allow.
Porous or textured surfaces trap grime and need gentler, targeted approaches to avoid damage.
Adjust tools, pressure, and frequency based on finish and substrate to preserve appearance.
Suitable Cleaners Listed
Match your cleaner to the paint’s durability: high-gloss and semi-gloss can handle stronger detergents and firmer scrubbing, while satin, eggshell, and especially flat or matte finishes need milder solutions to avoid stripping binders or dulling the surface.
For durable finishes use mild all-purpose cleaners, diluted ammonia solutions, or non-abrasive commercial degreasers.
For softer finishes choose gentle dish soap in warm water, vinegar blends, or purpose-made wall cleaners.
Consider eco friendly options like castile soap or plant-based cleaners.
Homemade solutions—baking soda paste for stains or diluted vinegar for marks—work well if you test an inconspicuous spot first.
How to Test a Cleaner Without Damaging Paint
Before you bring a cleaner anywhere near your painted walls, do a quick, targeted test so you don’t risk ruining the finish.
Choose an inconspicuous spot, like behind a switch plate or inside a closet. Apply a small amount of the cleaner, blot with a soft cloth, and wait several minutes.
Check for color shift, dulling, or softened paint—this shows poor cleaner compatibility or weakened paint adhesion. Rinse the spot with water and dry it to confirm no residue remains.
If the finish looks unchanged after 24 hours, the cleaner’s safe to use; otherwise, pick a gentler option.
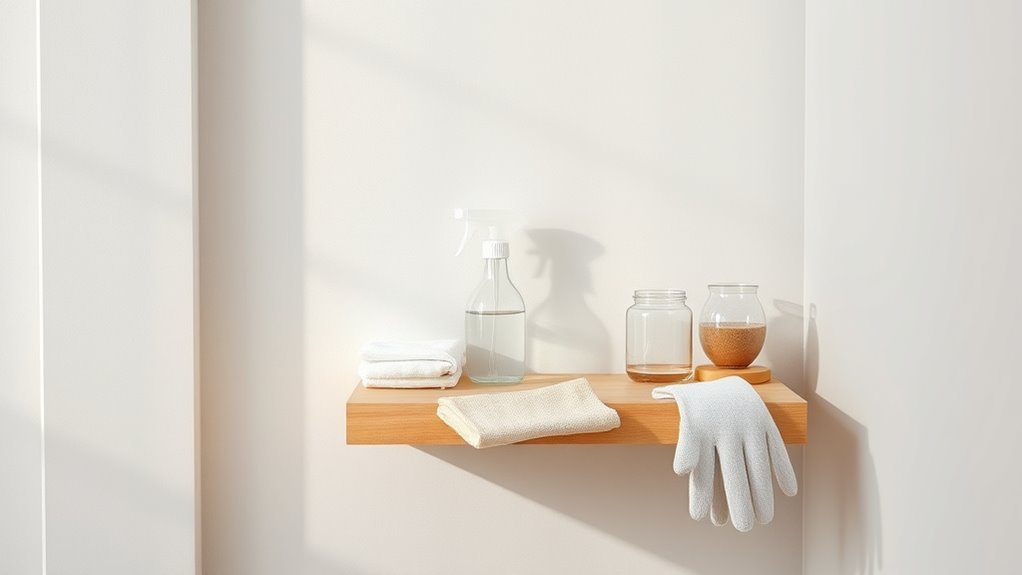
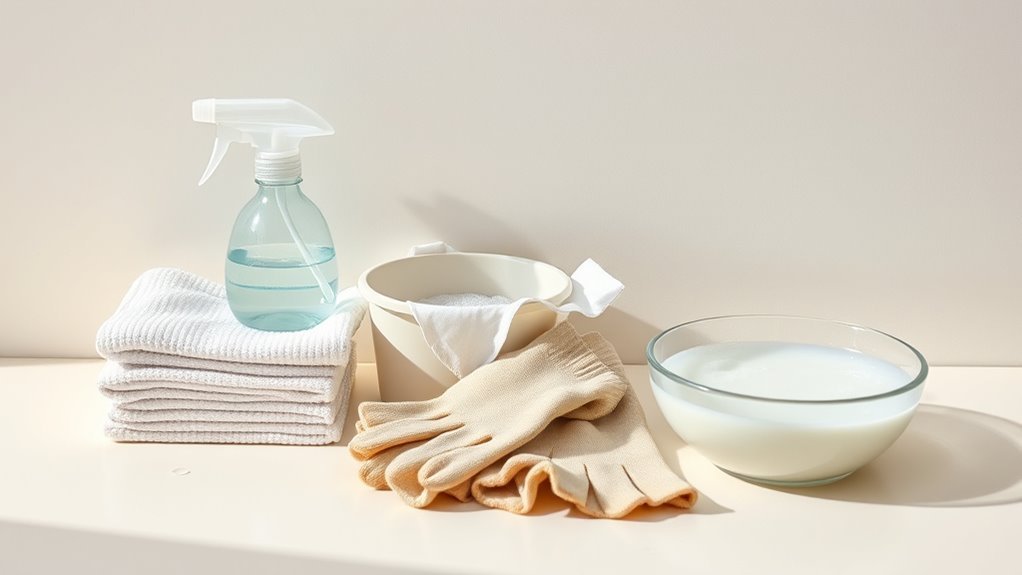
Basic Supplies to Have on Hand
Start with a small kit of reliable tools so you can tackle most wall-cleaning jobs without scrambling for supplies.
Include soft microfiber cloths, non-abrasive sponges, a bucket, a gentle liquid cleaner, and a spray bottle for diluted solutions.
Add a soft-bristle brush for stubborn spots and a telescoping handle for high areas.
Keep rubber gloves and a lint-free towel for drying.
Choose supplies suited to different wall textures—smooth, eggshell, or semi-gloss—so you don’t damage finishes.
Store everything in a caddy so you’ll grab the right cleaning tools quickly and confidently.
Preparing Painted Walls Before Cleaning
Before you start scrubbing, test a small hidden spot to check the paint’s durability so you won’t damage the finish.
Brush or wipe down walls to remove surface dust that can turn into grit when wet.
Lay drop cloths and tape trim to protect floors and woodwork while you clean.
Test Paint Durability
Although you might be enthusiastic to clean right away, always test paint durability first so you don’t damage the finish.
Pick an inconspicuous spot, like inside a closet or behind furniture, and try a small patch with your chosen cleaner and a soft cloth. Wait for it to dry and inspect for discoloration, gloss loss, or softening.
This quick check helps guarantee paint longevity and guides your choice of cleaning agent. Note how the surface protection responds—some finishes tolerate mild soap, others need gentler touch.
If any change appears, switch to a milder method or consult the paint label.
Remove Surface Dust
Brush or vacuum away loose dust and cobwebs so dirt won’t smear when you wet-clean. You’ll start with gentle dust removal tips: use a soft-bristle brush or low-suction vacuum, working top-down in sections. Lightly run microfiber cloths over flat areas to pick up remaining particles. These wall cleaning techniques prevent scratching and reduce streaks when you later apply solutions.
| Tool | Action | When to Use |
|---|---|---|
| Soft brush | Sweep downward | Dry, high areas |
| Vacuum w/ brush | Suction gently | Corners, ledges |
| Microfiber cloth | Wipe lightly | Flat surfaces, final pass |
Protect Floors And Trim
Now that you’ve removed dust and cobwebs, protect the floors and trim to keep cleaning solutions and drips from damaging surfaces.
Lay down a drop cloth or contractor-grade plastic sheeting for reliable floor protection, taping edges to baseboards so it won’t shift. Use painter’s tape along trim and window sills for trim safeguarding, pressing firmly to seal gaps without peeling fresh paint.
Cover vents and furniture with lightweight cloths, and put a folded cloth or cardboard under ladders to prevent scuffs.
Work from top to bottom so any drips fall onto protected areas, and replace coverings if they become saturated.
When Plain Water Is Enough for Painted Walls
If your painted walls just have light dust, fingerprints, or smudges from everyday use, plain water will usually do the job—no cleaners needed.
You’ll get best results using a soft microfiber cloth or sponge dampened (not dripping) and mindful of water temperature: lukewarm is ideal to dissolve oils without harming paint.
Wipe gently in a circular motion, rinse and wring your cloth often to avoid spreading dirt, and dry with a clean towel to prevent streaks.
Match cleaning frequency to traffic: high-traffic areas can be wiped weekly, low-use rooms monthly or as needed.
Mild Dish Soap Solution: Recipe and How to Use It
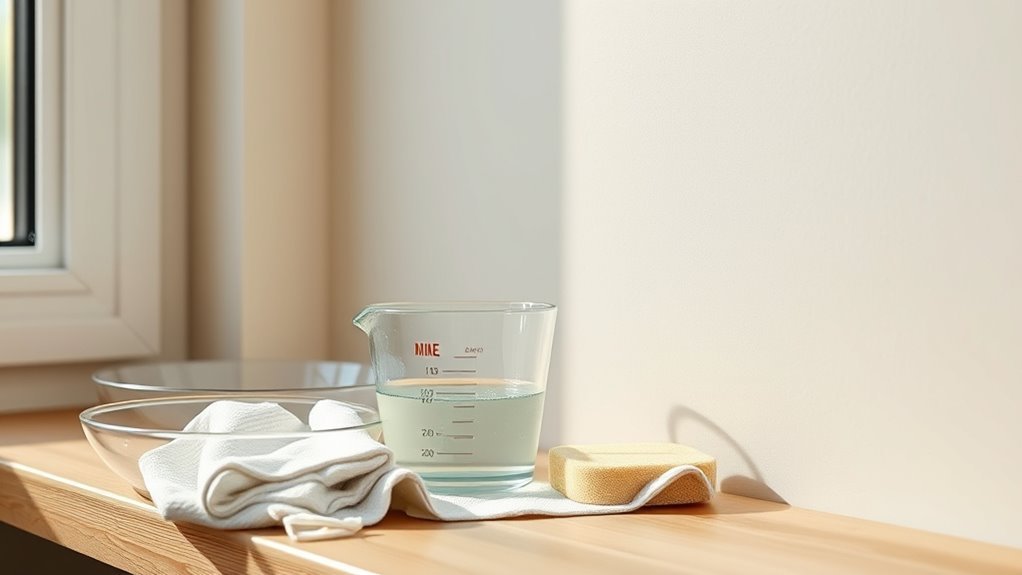
For tougher spots, mix a mild dish soap with warm water at about one teaspoon per quart so you don’t oversuds the paint.
Dip a soft cloth or sponge, wring it well, and gently wipe the wall in a circular motion, working from the bottom up to prevent streaks.
Rinse your cloth frequently and finish by wiping with plain water to remove any soap residue.
Soap-To-Water Ratio
A simple, well-balanced soap-to-water ratio makes cleaning painted walls safe and effective. You’ll usually mix one teaspoon of mild dish soap per quart (liter) of warm water for general paint maintenance; that’s gentle enough to lift dirt without harming finish.
For tougher grime, increase to two teaspoons per quart, but don’t exceed that to avoid residue. Adjust the ratio based on cleaning frequency — weekly light wipe-downs need less soap than occasional deep cleans.
Always stir gently to avoid suds, test a hidden area first, and prepare fresh solution each time for best results.
Application And Rinsing
Start by mixing one teaspoon of mild dish soap into each quart (liter) of warm water. Stir gently to avoid suds, and pour the solution into a clean bucket or spray bottle for easy use.
You’ll test a hidden spot, then work top to bottom, using a soft cloth or sponge with gentle pressure to lift dirt without abrading paint. Rinse the cloth often and change solution if it darkens.
After cleaning, rinse the wall with plain warm water to remove residue, blot dry with a microfiber towel, and inspect for missed spots.
These cleaning techniques support effective wall maintenance.
Using White Vinegar Safely on Painted Walls
Although white vinegar’s acidity makes it a strong cleaner, you can safely use it on painted walls if you dilute it properly and test a small, hidden area first.
Use a mild solution—one part vinegar to four parts water—to preserve finish and avoid softening paint. Note vinegar properties like acidity and odor so you’re prepared; wear gloves and ventilate the room.
Apply with a soft cloth, blotting rather than scrubbing, then rinse with clear water to remove residue. For stubborn spots, repeat testing before increasing strength.
Don’t use on unsealed or delicate finishes, and always dry the area promptly.
Baking Soda Paste for Scuffs and Stains
When you need to lift scuffs or light stains without damaging paint, mix baking soda with just enough water to form a spreadable paste—about two parts baking soda to one part water—and apply it gently with a soft cloth or sponge.
Test in an inconspicuous spot first to guarantee your finish won’t dull. Work in small circular motions, rinsing the cloth and checking progress frequently. Don’t scrub harshly; abrasion can remove paint.
Once the mark lifts, wipe the area with a damp microfiber cloth to remove residue and dry with a soft towel. Repeat sparingly if needed.
Commercial All‑Purpose Cleaners That Are Paint‑Safe
When you need faster cleaning than a paste, reach for commercial all‑purpose cleaners labeled paint‑safe that use mild, pH‑neutral formulas.
Look for paint‑safe spray cleaners for broad surfaces and nonabrasive wipe options for quick touchups or textured areas.
Always test a small hidden spot first to confirm compatibility.
Mild, pH‑Neutral Formulas
If you want to remove everyday dirt without risking discoloration or softening paint, choose a mild, pH-neutral all-purpose cleaner formulated for painted surfaces.
You’ll protect finishes by respecting pH levels and adjusting cleaning frequency to traffic and grime. Test a hidden spot first, dilute per label, and use a soft cloth or sponge.
- Start with a gentle solution and light pressure.
- Rinse with clean water to remove residue.
- Dry promptly to avoid streaks and spotting.
These formulas cut grease and soil without harsh alkalis or acids, so you can clean confidently and preserve painted walls.
Paint‑Safe Spray Cleaners
After choosing a mild, pH-neutral cleaner, you can turn to paint-safe spray formulas for faster spot-cleaning and higher-traffic areas.
Choose sprays labeled nonabrasive and safe for painted surfaces; test a hidden spot first.
Look for eco-friendly options with biodegradable ingredients and low VOCs to protect finish and indoor air.
Apply lightly, wait a minute, then blot or gently wipe with a soft cloth—don’t scrub.
For cost savings, compare concentrated commercial sprays you dilute to homemade cleaners like diluted castile soap or vinegar mixes, but avoid acidic recipes on sensitive paints.
Nonabrasive Wipes Options
Look for nonabrasive, paint-safe all-purpose wipes when you want quick, no-mess touchups on scuffs, fingerprints, and grime without risking the finish.
You’ll find commercial wipes labeled safe for painted surfaces; they’re convenient and controlled.
Consider nonabrasive alternatives and eco friendly options if you prefer gentler chemistry or lower waste.
Choose single-use or reusable cloth wipes depending on your priorities.
Test a hidden spot first to confirm compatibility.
Typical choices:
- Mild, residue-free all-purpose wipes for everyday marks.
- Biodegradable, eco friendly options with gentle surfactants.
- Reusable microfiber wipes dampened with paint-safe cleaner.
Why pH‑Neutral Cleaners Are Best for Painted Walls
Because painted surfaces are sensitive to strong acids and bases, using a pH-neutral cleaner helps you remove dirt without stripping paint, dulling finish, or causing discoloration.
You’ll preserve pH balance on the surface, preventing chemical reactions that break down binders or pigments. Apply gently with a soft cloth or sponge, testing a hidden spot first to confirm compatibility.
Regular, mild cleaning reduces buildup that can abrade paint, supporting paint longevity and reducing the need for touch-ups.
Choose labeled pH-neutral products or dilute mild dish soap, avoid harsh solvents, and rinse thoroughly to prevent residue from affecting the finish.
Magic Erasers: Pros and Limits on Painted Finishes
Magic erasers work by using micro-abrasive foam to lift stains through physical friction rather than chemical cleaning, so you’ll see results on scuffs and marks that cleaners can’t touch.
You should know they can remove thin layers of paint or dull glossy finishes if you scrub too hard or use them repeatedly.
Test a hidden spot first and use light pressure to minimize risk to the paint.
How They Work
Start by understanding that a “magic eraser” isn’t a chemical cleaner but a very fine, highly abrasive foam: when you dampen and rub it against painted walls, the micro‑abrasions physically lift stains, scuffs, and residue rather than dissolving them.
You’ll apply simple cleaning techniques and keep basic wall care in mind as you work. Follow steps to control pressure and coverage:
- Lightly dampen and test an inconspicuous spot.
- Use gentle, even strokes; increase pressure only if needed.
- Wipe with a damp cloth to remove grit and inspect results.
You’ll remove marks mechanically, so monitor finish and stop if texture changes.
Risks To Paint
1 key risk is that the eraser’s micro‑abrasion can thin or dull paint if you scrub too hard or use it on delicate finishes.
You’ll remove grime effectively, but overuse accelerates paint deterioration, especially on flat or low‑sheen surfaces.
Test in an inconspicuous spot, work gently, and avoid prolonged back‑and‑forth scrubbing.
Combine with milder cleaning techniques—soft cloths, diluted cleaners—for most marks.
Don’t assume all stains need aggressive treatment; abrasive action can reveal underlying primer or cause color loss.
If you see dulling, stop immediately and consider touch‑up paint or professional advice to preserve the finish.
Paint‑Safe Degreasers for Kitchen Walls
When you tackle greasy kitchen walls, choose a degreaser formulated to be paint-safe so you remove grime without stripping or discoloring the finish.
You want products that break down kitchen grease while supporting proper wall maintenance and preserving sheen. Test any cleaner in an inconspicuous spot, follow dilution instructions, and use a soft cloth or sponge.
- Mild citrus-based degreaser — cuts oil gently, rinse thoroughly.
- pH-neutral all-purpose cleaner — safe for most paints, repeatable.
- Enzymatic or soap-based formula — lifts residue without abrasion.
Always blot rather than scrub, dry the surface, and ventilate the room.
Removing Ink, Crayon, and Marker Stains From Paint
Grease and food splatters aren’t the only marks that show up on painted walls — kids, pens, and accidental posters often leave ink, crayon, or marker stains that need a different approach.
You’ll test a small hidden spot first. For ink removal techniques, dab rubbing alcohol or an ink eraser gently, blotting outward.
For crayon solutions, warm soapy water, a melamine sponge, or a gentle paste of baking soda usually lifts wax without harming paint.
For marker options, try isopropyl alcohol or specialized cleaner cautiously.
Finish by rinsing, drying, and teaching stain prevention to minimize repeat incidents.
Treating Rust and Hard‑Water Stains on Painted Walls
Rust and mineral deposits show up as orange-brown streaks or pale, crusty spots on painted walls, so you’ll want to inspect the pattern and texture to tell them apart.
For rust, you’ll use rust removers or a mix of lemon juice and salt carefully; for hard-water stains, mild acidic cleaners or commercial descalers usually work without harming paint.
Always test your chosen cleaner in an inconspicuous spot, work gently with a soft cloth or nylon brush, and rinse thoroughly to avoid damage.
Identifying Rust And Stains
A few telltale signs will help you spot rust and hard-water stains on painted walls: reddish-brown speckles or streaks for rust, and chalky white deposits or mineral rings for hard water.
Use rust identification and stain assessment to decide next steps. Check these features:
- Location — near metal fixtures suggests corrosion; under windows points to leaks.
- Texture — raised, powdery, or flaky areas indicate mineral deposits or oxidized metal.
- Color pattern — uniform brown-red vs patchy white calcification helps you differentiate causes.
Document size and progression, photograph problematic areas, and note any nearby moisture sources before treating.
Safe Removal Techniques
Start by testing a small, inconspicuous area to confirm the stain responds to treatment and that the paint won’t lift or discolor.
For rust, gently scrub with a paste of baking soda and water or a rust remover labeled safe for painted surfaces; rinse and blot dry.
For hard‑water stains, use white vinegar diluted with equal parts water, apply briefly, then rinse thoroughly.
Always work from edges inward, use soft cloths or nonabrasive pads, and avoid harsh scrubbing.
Finish with a mild detergent rinse if needed.
These cleaning techniques protect finish and support proper wall maintenance over time.
Mold and Mildew Cleaners Safe for Painted Surfaces
When mildew appears on painted walls, you’ll want cleaners that remove spores without stripping finish or discoloring paint; choose products labeled safe for painted surfaces and follow test-spotting first.
For mold prevention and mildew treatment, work promptly and gently.
- Use a diluted bleach solution (1 part bleach to 10 parts water) or a commercial mildew spray rated safe for paint; rinse thoroughly.
- Try hydrogen peroxide (3%) for sensitive paints; apply, wait, blot, and rinse.
- Use oxygen-based cleaners for stubborn areas; they’re less harsh and often paint-friendly.
Dry the area, improve ventilation, and repeat only as needed.
How to Remove Sticky Residue and Adhesive Safely
Before you try any remover, test a small hidden spot of paint to make sure the finish won’t lift or discolor.
Start with gentle options like warm soapy water, rubbing alcohol, or a citrus-based cleaner, and use a soft cloth to work the residue gently.
For stubborn adhesive, soften it with a little heat or a commercial adhesive remover and scrape carefully with a plastic tool to avoid gouging the paint.
Test Paint First
Although the paint may look tough, test a small, inconspicuous area first to see how it reacts to adhesive removers and cleaning solutions—this prevents damage and saves time.
You’ll assess paint adhesion and wall texture before treating sticky residue. Follow a simple process:
- Clean the test spot with mild soap and water, blot dry, and wait.
- Apply a tiny amount of your chosen remover, wait a minute, then blot; check for color loss, wrinkling, or softening.
- If the finish holds, continue gradually; if it fails, stop and choose a safer approach.
Document results so you don’t repeat mistakes.
Gentle Solvent Options
Now that you’ve tested the paint, you can safely tackle sticky residue using gentle solvents that won’t harm the finish.
You’ll start with mild options: a mix of warm water and dish soap or diluted white vinegar applied with a soft cloth.
For tougher adhesive, try rubbing alcohol or a small amount of mineral oil, always spot-testing first.
Work gently in circular motions, blotting rather than scrubbing. Rinse the area with clean water and dry.
These cleaning alternatives remove residue without stripping paint.
If residue persists, pause and consult stronger methods described later.
Stubborn Residue Techniques
Tackle stubborn adhesive by moving up the solvent ladder carefully: start with the gentlest options you’ve already tried, then progress to stronger, targeted techniques like citrus-based cleaners, Goo Gone, or a paste of baking soda and coconut oil, always spot-testing first.
You want methods that remove sticky residue without harming paint.
- Use warm soapy water and a soft cloth, blotting not scrubbing.
- Apply citrus cleaner or Goo Gone sparingly; let sit, then wipe away.
- Rub a baking soda–coconut oil paste gently, rinse, dry, and inspect.
These cleaning techniques preserve finish while removing adhesive safely.
Tackling Grease and Cooking Splatter on Painted Walls
Grease and cooking splatter can quickly make painted walls look grimy, but you can remove most of it without damaging the finish if you act carefully and use the right cleaners.
Start by blotting loose residue with a dry cloth. Then test a mild dish soap solution in an inconspicuous spot. Use gentle circular motions with a soft sponge, rinsing frequently.
For tougher spots, try a baking soda paste or a vinegar-water mix, applying gently. Work from bottom up to avoid streaks and dry with a microfiber cloth.
These grease removal techniques and cooking splatter solutions keep paint intact while restoring appearance.
Removing Scuff Marks Without Changing the Sheen
After removing cooking splatter, you may still see scuff marks from shoes, furniture, or moving items—these need a gentler approach so the paint’s sheen doesn’t change.
You want scuff removal techniques that lift marks without abrading or dulling finish. Test first in an inconspicuous spot, then proceed gently.
- Use a soft eraser or melamine sponge, dampened lightly, rubbing in short strokes.
- Try a mild detergent solution on a microfiber cloth, blotting rather than scrubbing.
- For stubborn scuffs, apply a tiny amount of rubbing compound, then polish and consider a clear protective coatings patch.
Always rinse and dry.
Getting Rid of Water Spots and Ring Marks
When water rings or mineral spots appear on painted walls, you can usually remove them without stripping paint—start by blotting the area with a damp microfiber cloth to lift surface residue.
Then treat remaining marks with a mild vinegar solution or a diluted non-abrasive cleaner, working gently to avoid changing the finish.
After blotting, dab a 1:1 white vinegar and water mix or a pH-neutral cleaner onto a soft cloth and test a hidden spot.
Rub lightly in circular motions until water stains fade, then rinse with clean water and dry.
For stubborn ring removal, repeat cautiously to protect the paint.
Cleaning High‑Gloss and Semi‑Gloss Painted Surfaces
Water stains and rings are usually easy to treat on most paints, but high‑gloss and semi‑gloss finishes need a gentler, more precise approach because they show streaks and scratches more readily.
You’ll want to use soft microfiber, mild detergent, and minimal pressure. Follow these focused steps:
- Test a hidden spot with diluted dish soap and water, wiping with a microfiber cloth to confirm no sheen change — high gloss techniques demand verification.
- Clean in straight strokes, rinsing cloth frequently to avoid grit causing scratches; semi gloss considerations favor less agitation.
- Dry immediately with a clean, soft cloth to prevent streaks.
Cleaning Eggshell and Satin Finishes Without Streaks
When cleaning eggshell and satin walls, you’ll want to use a gentle cleaning solution that won’t strip the finish.
Pick soft, nonabrasive tools like microfiber cloths or a sponge and rinse frequently to avoid residue.
Finish by drying and lightly polishing with a clean, dry cloth to prevent streaks.
Gentle Cleaning Solutions
Although eggshell and satin paints resist scuffs better than flat finishes, you’ll still need gentle cleaners and soft tools to remove grime without leaving streaks or dulling the sheen.
Use mild, eco-friendly options or simple homemade cleaners so you avoid harsh residues. Start with a damp cloth, work in small sections, and rinse often.
Try:
- Warm water with a few drops of dish soap for general dirt.
- Vinegar diluted 1:4 with water for greasy marks (test first).
- Baking soda paste for spot treating stubborn stains.
Pat dry or wipe with clean water to prevent streaks.
Proper Cleaning Tools
After choosing a gentle cleaner, pick tools that lift dirt without scratching or leaving streaks. Use a soft microfiber cloth or a sponge with a non-abrasive side to work in gentle, circular motions.
Have a bucket with clean water for rinsing and change it often to avoid redistributing grime. For edges and trim, a soft-bristle brush helps dislodge dirt without damage.
Avoid rough pads or stiff brushes that can mar eggshell and satin finishes. Lay down drop cloths or painter’s tape for wall protection when working near floors or fixtures.
Select quality cleaning materials to preserve the paint.
Drying And Polishing
Because eggshell and satin finishes show streaks easily, dry and polish them promptly with a clean, lint-free microfiber cloth so moisture doesn’t leave marks; work in small sections, blot excess water first, then buff in light, overlapping strokes until the surface looks even and satin-smooth.
You’ll protect sheen and extend paint life by using deliberate cleaning techniques and consistent wall maintenance.
Follow this simple sequence:
- Blot damp areas immediately, avoiding rubbing that spreads moisture.
- Use a dry microfiber to polish each section with gentle, circular motions.
- Inspect under good light, re-buff any faint streaks for uniform finish.
Cleaning Flat and Matte Paints Without Repainting
When you need to freshen flat or matte paint without repainting, gentle techniques and the right tools make all the difference. These finishes hide imperfections but can show smudges, fingerprints, and scuffs if cleaned improperly.
You’ll start with a dry dusting, then test a mild cleaning solution on an inconspicuous spot. Use light pressure, blotting rather than scrubbing, and work top to bottom to avoid streaks.
For grease, mix diluted dish soap; for marks, a baking soda paste can lift stains gently. Regular paint maintenance and simple wall protection—like chair rails or bumpers—reduce future wear.
Choosing the Right Cloths, Sponges, Brushes, and Pads
Picking the right cloths, sponges, brushes, and pads starts with matching the tool to the paint finish and the soil you need to remove. You’ll choose soft microfiber for delicate finishes, non-abrasive sponges for washable paints, and soft-bristle brushes for textured surfaces.
Think about cleaning materials and wall protection when selecting tools so you don’t introduce scratches or shine.
Use:
- Microfiber cloths for dust and light marks.
- Non-abrasive cellulose sponges for grease and scuffs.
- Soft-bristle brushes or foam pads for textured or stubborn spots.
Test in an inconspicuous area before full cleaning.
Correct Scrubbing Pressure and Motion to Protect Paint
After you’ve chosen the right tools, your hands determine how well the paint holds up—apply gentle, consistent pressure and use sweeping, circular motions rather than harsh back-and-forth scrubbing. You’ll use the correct pressure to lift dirt without abrading finish; test a hidden spot first. Keep your scrubbing motion slow and controlled, rinsing cloths frequently. These cleaning techniques preserve sheen and avoid streaks. For stubborn spots, increase pressure slightly and shorten strokes. Below is a quick reference to guide you.
| Area | Pressure | Motion |
|---|---|---|
| Flat wall | Low | Circular |
| Trim | Medium | Short sweeps |
| Stain | Slightly higher | Targeted dab and roll |
Drying and Finishing Touches After Cleaning
Once the wall’s surface looks clean, dry it promptly with a lint-free microfiber cloth or soft towel to prevent water spots and streaks.
Dry the wall promptly with a lint-free microfiber cloth or soft towel to prevent water spots and streaks.
Use gentle, overlapping strokes and change cloths when damp so you’re not reintroducing grime.
Consider these drying techniques to guarantee an even finish:
- Work top-to-bottom in sections, buffing lightly until no streaks remain.
- Open windows or use a fan to speed evaporation, avoiding direct heat that can warp paint.
- Inspect under different light angles, touching up smudges with a damp cloth then drying.
Those finishing touches keep paint looking uniform and fresh.
When Cleaning Isn’t Enough: Repairing Paint Damage
If cleaning hasn’t restored your wall’s look, you’ll need to repair the paint damage before it worsens—small chips, cracks, or peeling areas can invite moisture and make future touch-ups obvious. You’ll assess damage, sand rough edges, fill gaps with spackle, prime, then match paint. Use proper paint repair techniques and practical touch up strategies to blend repairs. Work in good light and feather edges to avoid halos.
| Damage | Fix | Tip |
|---|---|---|
| Small chip | Spackle, sand | Feather edges |
| Crack | Flexible filler | Prime first |
| Peeling | Remove, prime | Match sheen |
| Stain | Stain-blocking primer | Test patch |
How Often to Clean Painted Walls by Room
Now that you’ve handled repairs and touch-ups, plan a cleaning schedule so walls stay in good shape and you won’t need frequent fixes.
Tailor cleaning frequency to room specifics: high-traffic areas need more attention, low-use rooms less. Consider daily habits and visible soil.
- Kitchen: monthly wipe-downs and spot clean spills immediately to prevent stains and grease build-up.
- Bathroom: weekly or biweekly for damp areas to control soap scum and mildew; ventilate after use.
- Living rooms/bedrooms: dust monthly and address fingerprints or marks as they appear to keep paint fresh.
Safety and Ventilation When Using Cleaners
Because many cleaners release fumes or contain harsh chemicals, you should always ventilate the room and wear basic protection like gloves and eye protection when cleaning painted walls.
Open windows and run fans to move air; shut off HVAC if it would spread fumes through the house. Read product labels for warnings and first-aid steps, and never mix cleaning chemicals—reactive combos can create toxic gas.
Test cleaners on an inconspicuous spot to confirm paint tolerance. Keep children and pets out while you work, store products locked and upright, and rinse residues promptly to prioritize wall safety and indoor air quality.
How to Choose Products for Long‑Term Paint Care
When you pick cleaners and touch-up products with long-term paint care in mind, prioritize compatibility with your paint type, gentle formulations, and proven durability; these factors help preserve finish, color, and adhesion over time.
You’ll want long lasting products that won’t break down binders or dull sheen. Check labels, test discreetly, and favor pH-neutral or mild detergents for most finishes.
Consider manufacturer’s recommendations and color-matched touch-up kits for seamless repairs.
Follow the manufacturer’s care instructions and use color-matched touch-up kits to ensure seamless, long-lasting repairs.
- Verify compatibility with latex, oil, or specialty finishes.
- Choose gentle, pH-balanced cleaners and microfiber tools.
- Pick known, long lasting products with clear usage guidance.
Quick Troubleshooting: What to Do If Cleaning Damages Paint
If cleaning has stripped sheen, left streaks, or lifted paint, act quickly to limit further damage: blot wet areas with a soft cloth, stop using the offending cleaner, and rinse gently with plain water.
Assess paint damage once dry. For small lifts, sand lightly, prime, and touch up with matching paint.
For streaks or dulling, try a gentle rewash using milder cleaning techniques—diluted dish soap or vinegar solution—and a microfiber cloth. Test an inconspicuous spot first.
If large areas are affected or finish won’t restore, consult a professional or plan for repainting after proper surface prep to guarantee longevity.
Frequently Asked Questions
Can I Use Household Bleach on Painted Walls for Heavy Mold Removal?
You can, but you shouldn’t on painted walls: bleach can damage paint and won’t penetrate porous surfaces for thorough mold removal. Try bleach alternatives like diluted hydrogen peroxide or enzyme cleaners; test a hidden spot first.
Are Steam Cleaners Safe for Removing Stains From Painted Surfaces?
You can, but cautiously: steam cleaner effectiveness varies, and you’ll risk paint lift if steam sits too long; treat painted surface safety like guarding a fragile fresco, using low pressure, quick passes, and patch-testing first.
Will Anti-Bacterial Sprays Discolor My Painted Walls Over Time?
They generally won’t, but you should test first: spray residue can attract dirt and affect paint durability over time, so you’ll wipe off excess, use mild cleaners, and avoid frequent harsh antibacterial sprays on painted walls.
Can Paint-Safe Cleaners Be Used on Wallpaper or Painted Plaster?
Yes — you can use paint-safe cleaners on wallpaper and painted plaster, but you’ll test first; some wallpapers need gentler wallpaper care, and painted plaster tolerates mild cleaners better, so avoid abrasive or solvent-based products.
How Do Temperature and Humidity Affect Cleaning Painted Walls?
Temperature and humidity affect wall cleaning techniques because you’ll need moisture control: high heat or humidity softens paint and slows drying, so you’ll use gentler cleaners, lower moisture, and clean during cooler, drier conditions.
Conclusion
You’ve got the right tools and know-how to protect your paint—measure twice, cut once applies here: test first, clean gently, and don’t rush. Stick to mild cleaners, soft cloths or sponges, and appropriate techniques for the finish. Prep surfaces, ventilate the room, and tidy high-traffic areas more often. If a cleaner harms paint, stop, rinse, and touch up as needed. With consistent, cautious care, your walls will look fresh for years.