What Is the Difference Between Trim and Wall Paint?
You should use trim paint on high‑wear woodwork like baseboards, casings and moldings and wall paint on large, lower‑traffic surfaces because trim is formulated glossier, tougher and easier to clean while wall paint is flatter and better at hiding surface imperfections. Trim gives crisp edges and resists scuffs and brush marks; wall paints focus on uniform coverage and texture. Prepare and prime both surfaces properly, and keep going to learn how finishes, tools and prep change your results.
Quick Answer: Trim Paint vs Wall Paint
Although both are paint, trim and wall formulas serve different jobs: trim paint is tougher, glossier, and designed to resist scuffs and show brush marks, while wall paint has a flatter finish that hides imperfections and wears well across large surfaces.
You’ll choose trim color for contrast and highlight edges, considering sheen comparison and finish selection. Wall texture guides paint types and paint application methods; surface preparation matters for both.
Durability factors influence maintenance tips and lifespan. Use color coordination to balance rooms, select appropriate formulas for high-traffic areas, and follow recommended prep for best results.
Decision Checklist: Pick Trim or Wall Paint
Now that you know how trim and wall paints differ in finish, durability, and purpose, you’ll want a simple checklist to pick the right option for your project.
First, include color selection tied to finish types and texture choices so contrasts or blends work.
Check surface preparation needs—sanding, priming, repairs—before you buy.
Compare product comparisons for sheen, VOCs, and drying time.
Add paint application methods (brush, roller, spray) and estimate labor.
Factor in maintenance tips, environmental impact, and a clear cost analysis.
Finish with realistic project planning: timeline, supplies, and contingency for touch-ups.
What “Trim” Means in Painting
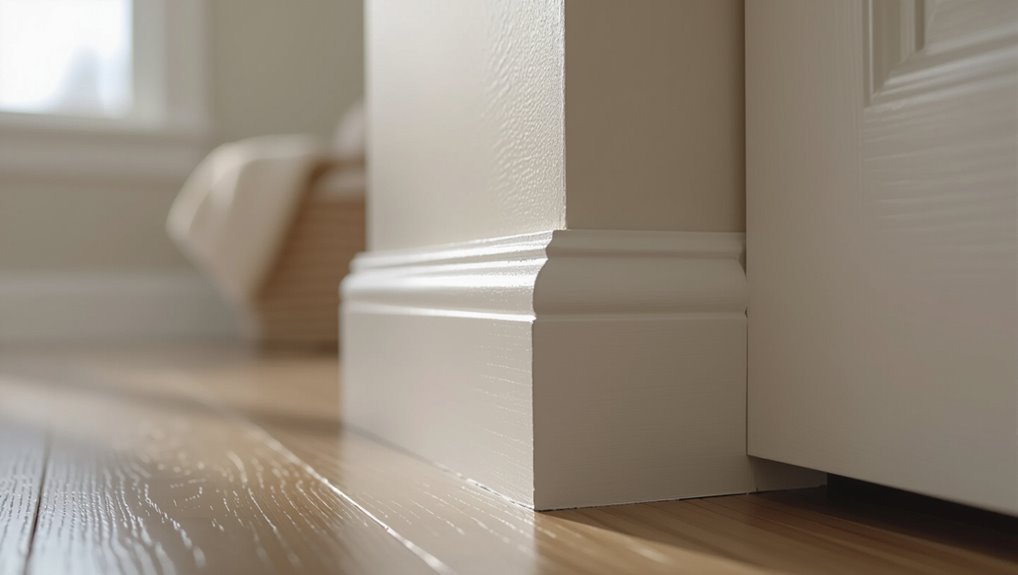
Trim in painting refers to the painted woodwork and moldings that frame and define rooms—baseboards, door and window casings, crown molding, chair rails, and stair spindles—and you’ll treat these surfaces differently than walls because of their smaller scale, higher wear, and need for crisper edges.
You’ll consider trim materials and trim profiles when choosing trim styles and trim finishes. Trim colors often contrast or complement walls, and trim applications demand specific trim techniques during trim installation.
Plan trim maintenance to protect finishes. Current trim trends favor simple profiles and durable finishes that simplify cleaning and upkeep.
- Classic crown molding
- Slim modern casings
- Durable painted baseboards
What “Wall” Means in Painting
When you hear “wall” in painting, it means the broad, vertical surfaces in a room—like drywall, plaster, concrete, or brick—that get full-coverage coatings.
Wall paint is formulated for those substrates to balance appearance with washability, stain resistance, and ease of application.
You’ll choose wall paints for their function and durability based on the room’s needs and the surface type.
Wall Paint Definition
A wall in painting refers to the main vertical surfaces you cover to define a room’s look and feel—typically large expanses like living room, bedroom, or hallway surfaces that take the majority of a paint job.
You choose wall paint types based on color selection, finish application, and texture effects while considering color psychology to set mood.
Focus on surface preparation, application techniques, and paint layering for durability.
Also weigh environmental impact and ongoing paint maintenance when selecting formulas.
Visualize common intents:
- Brightening or enlarging a space with light tones
- Adding depth with layered finishes
- Subtle texture effects for interest
Typical Wall Surfaces
Because walls come in many materials and conditions, you’ll want to identify the surface before choosing paint and prep methods. You’ll encounter drywall textures, plaster, brick, and paneling—each demanding specific surface preparation and surface cleaning. Consider texture variations and how lighting effects reveal imperfections. Your color selection and paint finishes influence paint application and perceived depth. Environmental factors like humidity affect paint adhesion, so prep and primers matter. Below is a quick reference table to guide choices.
| Surface Type | Prep Needed | Typical Finish |
|---|---|---|
| Drywall | Sand/prime | Eggshell/satin |
| Plaster | Clean/repair | Matte/satin |
| Brick | Clean/seal | Flat/semi-gloss |
| Paneling | Fill/joint | Satin/semi-gloss |
Function And Durability
Think of “wall” as both the canvas and the workhorse of a room: it needs to look good, resist wear, and handle cleaning, repairs, and moisture over time.
You’ll use a functionality comparison to choose paint applications based on usage scenarios and maintenance requirements. Consider durability factors like wear resistance, stress resistance, and finish longevity alongside environmental impacts and performance metrics.
Pick formulations that balance looks with resilience so walls endure traffic and humidity.
Visualize typical demands:
- High-traffic corridors: scuff-resistant, easy-clean finishes
- Bathrooms/kitchens: moisture-tolerant, mildew-resistant coats
- Living rooms: balanced aesthetics and long-term durability
Why Trim and Wall Paints Are Different
You’ll notice trim paint usually has a glossier finish and higher sheen than wall paint, which helps highlight edges and resist scuffs.
Trim formulas are also tougher and easier to clean so they hold up to frequent contact and washing.
In short, finish and durability are the practical reasons you’d choose different paints for trim versus walls.
Finish And Sheen
One key difference between trim and wall paint is the finish: trim usually gets a higher-sheen, more durable coat while walls use lower sheens that hide imperfections.
You’ll notice a clear sheen comparison when choosing paints: finish types determine how light reflects and how colors read. Consider sheen impact and sheen influence on appearance before you buy.
Think about finish quality alongside finish durability when picking trim versus wall options.
Visualize results with this simple list:
- High-gloss trim: crisp lines, reflective, emphasizes smooth surfaces
- Satin/eggshell walls: soft light, conceals texture
- Semi-gloss: balance of sheen and subtle reflection
Durability And Cleanability
Because trim gets more scuffs and cleaning, manufacturers formulate trim paints to be tougher and more washable than wall paints.
You’ll note durability factors like binder strength and pigment concentration influence resistance levels and finish longevity.
Cleanability comparisons show gloss and semi-gloss trims shed dirt better; flat wall paints hide imperfections but need gentler cleaning methods.
Use proper surface treatments and application techniques to improve wear patterns and extend life.
For maintenance tips, test cleaners on discreet spots and use mild detergents.
Consider environmental impact when choosing formulations and follow recommended cleaning methods to preserve appearance and performance.
Key Formulation Goals: Trim vs Wall
When formulating paints, manufacturers set different priorities for trim and wall coatings: trim paint emphasizes durability, flow and a hard, scuff-resistant finish, while wall paint focuses on coverage, hiding power and ease of application.
You’ll notice formulation differences in resin choice, pigment load and additives, which affect paint application and long-term performance. Trim formulas favor tougher binders and leveling agents; wall formulas favor higher opacity and easier rollability.
Think about planned use and traffic when choosing.
- Trim: hard, abrasion-resistant binders
- Walls: high hiding, smooth coverage
- Both: proper adhesion and curing control
Trim Paint Sheens: Common Choices
If you want trim that stands up to knocks, dings and constant contact, choosing the right sheen matters: glosses and semi-glosses give a hard, washable surface, while satin offers a slightly softer look with good durability.
You’ll weigh trim paint advantages like scuff resistance and easy cleaning against wall paint disadvantages such as lower durability.
Use a sheen comparison guide and finish selection guide to pick gloss for doors, semi-gloss for moldings, satin for softer trims.
Use a sheen comparison and finish selection guide: gloss for doors, semi-gloss for moldings, satin for softer trims.
Follow paint application methods and trim maintenance tips, apply color coordination strategies with trim color trends, and avoid wall repair techniques meant for flat walls.
Wall Paint Sheens: Which to Pick
When choosing wall paint, you’ll weigh matte and eggshell for low sheen with softer hiding and satin or semi-gloss for more durability and light reflection.
Matte hides imperfections best, eggshell gives a slight luster for living spaces, and satin or semi-gloss works well where you need wipeability.
Think about room use and how much wear the walls will see to pick the right sheen.
Matte vs. Eggshell
Choosing between matte and eggshell comes down to the look and practicality you want: matte hides surface imperfections and gives a velvety, non-reflective finish, while eggshell offers a slight sheen that’s easier to clean and shows texture less flatly.
You’ll weigh finish comparison and texture differences: matte benefits include forgiving flaws and muted light reflection; eggshell advantages give better durability and simpler maintenance tips.
For application techniques, use even strokes for matte and slightly thinner coats for eggshell.
Consider color selection and sheen preferences for rooms’ aesthetic appeal.
- Living room warmth
- High-traffic kitchens
- Low-light bedrooms
Satin, Semi-Gloss Options
Because satin and semi-gloss sit between flat and high-gloss finishes, you’ll get a balance of subtle sheen and practical durability that works well in many rooms. You’ll choose satin finish for softer sheen levels and subtle texture differences, or semi gloss finish where durability and easy cleaning matter. Pay attention to application techniques to avoid lap marks; color selection changes perceived sheen and aesthetic appeal. Follow current design trends—use satin for cozy walls, semi-gloss for trim and doors. Compare quickly:
| Choice | Best for |
|---|---|
| Satin | Living rooms, bedrooms |
| Semi-gloss | Kitchens, bathrooms |
Durability and Scuff Resistance Compared
Although both trim and wall paints protect surfaces, trim paint is formulated to take more hits and wipe-cleaning than wall paint, so you’ll notice fewer scuffs and marks over time.
In a durability comparison you’ll see trim offers greater scuff resistance, impact resistance, and wear resistance, boosting paint longevity and surface protection.
Consider environmental factors and proper application techniques to maximize finish durability and reduce maintenance requirements.
Typical differences include:
- Trim: high gloss or semi-gloss for easy wipe-downs and abrasion tolerance.
- Walls: softer sheens, more forgiving visually but less resilient.
- Care: regular cleaning and touch-ups extend lifespan.
Coverage and Hide: Walls vs Trim
When you compare coverage and opacity, trim paint usually gives a thicker, more pigmented coat that hides previous colors faster than wall paint.
Wall paints often sacrifice opacity for a smoother, more even finish over large areas, so you may need extra coats to fully cover strong hues.
Also note that trim’s higher hide helps mask minor surface imperfections, while walls benefit from paints formulated to minimize texture visibility.
Coverage And Opacity
If you want paint that hides what’s underneath, know that trim and wall paints aren’t created equal: trim paints usually offer higher opacity and better hide per coat so you’ll need fewer passes to cover stains or dark colors, while wall paints prioritize spreadability and finish, often requiring an extra coat for the same level of coverage.
You’ll consider coverage factors and opacity standards when choosing paint; application techniques affect perceived hide, and color matching interacts with finish types.
Think about sheen and formulation to meet your goals.
Useful comparisons:
- Trim: high opacity, smoother finish, fewer coats
- Walls: better flow, may need extras
- Tips: test swatches first
Surface Imperfections Hiding
Because trim paint lays down thicker and with more pigment, it hides minor dings and brush marks better than most wall paints. So, you’ll see fewer surface imperfections after one coat.
You’ll notice surface texture and texture contrast more on walls because paint absorption varies; skimmed drywall soaks thin wall paints, increasing imperfection visibility. Good surface preparation and correct application methods reduce that.
Use painting techniques that control paint layering and light reflection—thin glossy trim hides shadows, while matte walls reveal them. Match application methods to substrate, prep carefully, and layer thoughtfully to achieve finish uniformity and minimize visible flaws.
Drying vs Cure: What to Expect
Drying and curing aren’t the same thing: drying means the paint has lost its solvents and feels dry to the touch, while curing is the chemical process that gives the film its full hardness and durability.
Drying is solvent loss and touch-dry; curing is the chemical hardening that gives full durability.
You’ll notice drying times are shorter than full cure timeframes comparison suggests. Environmental factors like temperature effects and humidity levels, plus paint thickness, application methods, and surface preparation, all shape the curing process and finish appearance.
- Fast-drying trim may feel ready but needs longer to cure.
- Cold, humid conditions slow solvent evaporation and chemical crosslinking.
- Thick coats or poor prep extend both drying and curing.
How Trim Paint Hides Brush Marks
When you’re choosing trim paint, sheen and flow matter because a smoother, glossier finish helps even out brush strokes as it levels.
Your brush technique and how much paint you load on the brush also change how well the paint hides marks—light, long strokes with a properly loaded brush reduce ridges.
Together, the right sheen and a consistent application give you a cleaner, brush-mark-free trim.
Paint Sheen And Flow
If you want trim to look smooth, sheen and flow are what make brush marks vanish: higher-sheen trim paints level out as they dry and reflect light evenly, while formulas with better flow reduce visible strokes during application.
You’ll notice paint application feels different—glossier sheens hide minor ridges, satin gives subtle forgiveness, and semi-gloss offers the most reflection. Choose based on room use and lighting.
Consider additives or professional-grade trims that improve leveling.
Visualize results:
- Semi-gloss showing even reflections on moulding
- Satin softening tiny strokes under warm light
- Gloss amplifying imperfections if poorly applied
Brush Technique And Load
Because how you load and move the brush determines whether the finish looks smooth or striped, mastering technique beats relying on paint alone. You’ll control brush stroke by adjusting paint loading and paint thickness, choosing brush types suited for trim. Technique differences matter: thin coats, steady application methods, and careful surface preparation reduce visible marks. Use coverage techniques that favor short, even passes and blending edges before paint skins over. Finish application for trim often demands higher pigment and leveling agents, so practice and the right brush will hide strokes.
| Tool | Tip |
|---|---|
| Brush types | Natural or nylon-polydimide |
| Loading | Dip 1/3, tap off |
| Strokes | Light, overlapping |
| Finish | Thin coats, feather edges |
How Wall Paint Hides Surface Flaws
Wall paint hides surface flaws by filling tiny imperfections and creating a uniform finish that redirects light, so bumps and hairline cracks become less noticeable.
You control flaw visibility through surface preparation and paint application: sanding smooths texture, while correct paint thickness and finish choices affect light reflection and light absorption.
Color variations and texture contrast can mask irregularities or reveal them, so pick hues and sheens deliberately.
Consider these practical effects:
- Matte finish reduces shine, lowers light reflection, and hides small flaws.
- Eggshell balances absorption and subtle sheen for forgiving texture.
- Gloss highlights texture contrast and increases flaw visibility.
Typical Binders in Trim Paint
When you pick trim paint, the binder is the backbone—traditional alkyd (oil) binders give hard, durable films that sand and polish well.
Modern waterborne acrylic resins offer faster drying, lower odor, and improved yellowing resistance while still providing a tough finish.
Knowing the trade-offs between alkyd/oil and waterborne acrylic will help you choose the right trim paint for your project.
Alkyd And Oil Binders
- High-gloss trim resisting scuffs, easy cleaning
- Warm oil-based tones deepening color retention over time
- Controlled brushwork and thinner coats for smoother results
Waterborne Acrylic Resins
After discussing alkyd and oil binders, it’s worth noting that many modern trim paints use waterborne acrylic resins for a different balance of performance.
You’ll appreciate waterborne advantages like lower VOCs and environmental benefits while still getting strong adhesion properties and quick drying times.
Expect formulation differences that tailor sheen, flow, and hardness; those choices affect color retention and surface compatibility on wood, MDF, or previously painted surfaces.
Learn proper application techniques—brush, roller, or spray—to hit performance metrics such as durability and touch-up ease.
Compare market options to match contractor demands, budget, and long-term maintenance needs.
Typical Binders in Wall Paint
Binders are the film-forming ingredients that hold pigment and additives together and make paint stick to your walls. You’ll encounter various binders types—acrylics, vinyl-acrylics, and alkyds—each with distinct binder properties and binder functions that affect paint adhesion and color retention.
Consider how they change paint flexibility, finish durability, environmental impact, drying times, and application techniques.
- Acrylics: strong adhesion, good color retention, low VOCs, fast drying.
- Vinyl-acrylics: economical, moderate flexibility, suitable for interior walls.
- Alkyds: durable finish, slower drying times, higher VOCs, excellent leveling.
Pigment Load and Color Depth Explained
Although paint films rely on binders to hold everything together, the pigment load largely determines how deep and opaque a color will appear.
You’ll notice pigment intensity affects color vibrancy and color saturation more than binder type, so trims often get richer hues.
Formulation differences between trim and wall paints tune paint opacity and sheen variations to suit surface and light.
Trim and wall paint formulations adjust opacity and sheen to complement surfaces and lighting conditions.
Proper application techniques—thin, even coats or more concentrated coverage—change aesthetic impact and can boost finish durability.
Choosing higher pigment load improves paint longevity and visual punch, but you should balance tinting strength with purpose and layer strategy.
VOCs and Ventilation for Trim & Wall Paints
When you’re choosing paint for trim or walls, check the VOC levels and plan ventilation. Trim paints often have higher solvent content and can release stronger fumes during application and curing, while many wall paints are now formulated low-VOC or zero-VOC to minimize odors.
You should weigh VOC considerations and Environmental effects against finish needs. Use Ventilation strategies to protect Air quality and reduce Health impacts. Follow Safety measures and Application techniques that limit exposure and aid Odor management.
- Open windows, use fans, and run HVAC filters.
- Wear respirators for high-VOC trim work.
- Allow extended drying with ventilation.
Cleanability and Stain Resistance Compared
Because you’ll be touching walls more often, cleanability and stain resistance matter differently for trim and wall paints: trim usually gets tougher, oil- or hybrid-based formulas with harder finishes that scrub well, while wall paints favor softer, matte or eggshell sheens that hide imperfections but clean less aggressively.
You’ll choose trim where scuffs and fingerprints demand higher stain resistance and repeated washing; for walls you’ll prioritize appearance and concealment, accepting gentler cleaning.
In a cleanability comparison, consider finish level, binder durability, and recommended cleaning methods — pick products whose maintenance needs match each surface’s use and traffic.
Oil vs Water-Based Trim Paint: When to Use
If you’re choosing trim paint, decide first whether durability or easy cleanup matters more, because oil- and water-based formulas each have clear strengths: You’ll weigh paint types by finish durability and paint longevity, plus application techniques and surface preparation.
Oil paint gives harder finish durability and smoother flow but needs mineral spirits and longer cures. Water paint cleans with soap, dries fast, eases color matching, and suits quick projects.
Oil delivers a harder, smoother finish but needs mineral spirits and long cure times; water cleans with soap, dries fast.
Consider project budgeting and brand comparison for cost versus performance.
- Oil paint: best for high-wear trim, needs solvents, meticulous surface preparation
- Water paint: easy cleanup, faster recoats
- Compare brands for warranties and recommendations
Latex vs Acrylic Wall Paint: When to Use
You’ve just weighed oil and water-based trim choices, so now look at wall paints: latex and acrylic are both water-based but differ in binder composition and performance. You’ll choose latex for ease, lower environmental impact, faster drying times, and cost; pick acrylic when you need superior paint longevity and better adhesion on tricky surfaces. Focus on surface preparation and application techniques to maximize results. Consider color selection for fading resistance. Note acrylic drawbacks like higher cost and longer cure.
| Feature | Latex | Acrylic |
|---|---|---|
| Benefits | latex benefits | paint longevity |
| Drawbacks | lower longevity | acrylic drawbacks |
| Use | quick projects | high-wear areas |
Primer Needs for Trim Surfaces
You should check trim for porosity—raw wood, MDF, or patched areas soak up primer differently than smooth, painted surfaces.
Use a primer when porous substrates or glossy finishes threaten paint adhesion to guarantee a strong bond. Proper priming improves coverage and helps your topcoat stick and wear evenly.
Surface Porosity Assessment
When evaluating trim for primer, start by feeling and inspecting the surface: smooth, glossy surfaces like factory-finished MDF or lacquered wood often need a bonding primer, while raw or porous woods absorb more and usually benefit from a sealing or oil-based primer to prevent blotching.
You’ll assess surface texture and absorption characteristics to predict paint interaction and choose primer selection accordingly. Consider finish compatibility, environmental factors, and moisture impact during surface preparation.
Match application techniques to porosity to control paint layering and finish.
- Dense factory finishes: low absorption, require adhesion-focused primers
- Raw wood: high absorption, needs sealing primers
- Previously painted: test patch for compatibility
Adhesion And Bonding
Because trim sees more handling and edge stress than flat walls, getting primer adhesion right is essential for a durable finish.
You’ll focus on surface preparation first, removing contaminants and sanding to improve substrate compatibility. Choose bonding agents when substrates resist standard primers, and consider adhesion techniques like feathering edges and scuffing.
Understand chemical interactions between primer, paint application, and existing finishes to avoid delamination. Control environmental factors—temperature and humidity—so curing processes proceed predictably.
Use moisture barriers where needed to prevent blistering. Finally, plan paint layering to balance flexibility and hardness for long-lasting trim performance.
Primer Needs for Walls
Although some paints claim “no primer needed,” most interior walls still benefit from a primer coat to improve adhesion, hide stains, and guarantee even sheen and color, especially when you’re covering a darker hue, repairing drywall, or switching between paint types.
You’ll choose primer types based on surface preparation, adhesion properties, drying times, color selection, environmental impact, and cost effectiveness. Consider brand comparisons and application techniques to fit your project timelines.
Use a primer to seal porous spots and equalize absorbency so topcoat performs predictably.
- Tinted primer for coverage
- Stain-blocking for repairs
- Fast-dry for tight schedules
Preparing Trim Before Painting
Start by cleaning and inspecting the trim so paint will stick and the finish looks smooth.
You’ll focus on surface preparation: cleaning surfaces, evaluating condition, and removing hardware.
Use choosing tools wisely—sandpaper, sanding blocks, and brushes—to apply sanding techniques that dull gloss and feather edges.
Address dents and nail holes by patching holes with wood filler, then sand flush.
Apply caulking tips at seams for seamless joints, and mask baseboards and adjacent walls by masking edges carefully.
Finish with primer selection appropriate for material and adhesion.
That prep guarantees trim paint lays down evenly and lasts.
Preparing Walls Before Painting
Once the trim is ready, turn your attention to the walls so the whole room looks consistent and the paint adheres properly.
Once the trim is complete, focus on the walls so the room looks cohesive and paint adheres well.
You’ll start with surface preparation: inspect wall texture, note wall imperfections, and perform moisture assessment to avoid failures.
Do wall cleaning to remove dust, grease, and loose paint. Use sanding techniques for glossy spots and feathering repairs.
Apply appropriate priming techniques where stains or repairs exist, considering drying conditions and environmental factors like humidity and temperature.
Protect trim with painter’s tape before priming.
Visualize the process:
- Clean, assess, and sand
- Prime problem areas
- Confirm proper drying conditions
Best Brushes and Cutting-In Techniques
Pick a high-quality angled sash brush (2–2.5 inches for walls, 1–1.5 inches for trim and tight corners) and you’ll cut in far cleaner and faster.
You should learn brush types and cutting techniques: use angled for edge control, flat for panels.
Practice steady brush strokes and short paint layering to avoid drips. For precision painting, load the brush lightly, tap off excess, and paint in smooth strokes toward the edge.
Don’t rush or cut corners; feather edges for paint blending with adjacent surfaces.
Maintain brush care—clean thoroughly and reshape bristles—to preserve performance and consistent paint application.
Best Rollers and Nap for Walls
When you’re covering walls, choosing the right roller and nap makes the job faster and leaves a more even finish; match nap length to surface texture—short naps (1/4″–3/16″) for smooth walls, 3/8″ for lightly textured or satin finishes, and 1/2″–3/4″ for standard textured walls or eggshells—so you get proper coverage without splatter.
Pick among the best roller types: microfiber for smooth, woven for durability, and foam for gloss. Consider nap thickness for paint hold and texture blending. Use high-quality frames and extension poles to keep pressure even and reach high areas.
Choose the right roller—microfiber for smooth, woven for durability, foam for gloss—and match nap and tools for even coverage.
- Microfiber: smooth finishes
- Woven: heavy use
- Foam: glossy areas
When to Spray Trim and Walls?
You’ll usually spray the trim first so you can cut in clean edges without worrying about wall texture.
After the trim’s dry, spray the walls to get even coverage and avoid overspray on newly painted trim.
This order saves time and keeps lines crisp.
Timing For Trim First
If you’re spraying trim before the walls, aim to do it after any drywall repairs and before installing fixtures that could get in the way, so you won’t have to mask large areas twice.
You’ll balance timing considerations with drying times and room access, using trim painting techniques that prevent scuffs while you finish other work.
Spray early enough that tape and drop cloths stay intact, but not so early that subsequent trades damage the finish.
Visualize workflow:
- Spray baseboards and casings before light fixtures and outlet covers go on.
- Let coats cure between trades.
- Protect freshly painted trim during other installs.
Walls After Trim
Because the trim’s finish can still be delicate, spray your walls after trim coats have cured enough to resist scuffs but before final fixtures and heavy traffic return to the room.
You’ll coordinate paint styles and color trends so walls complement trim finish types and texture variations.
Plan surface preparation and protect trim edges when you apply walls with matching application techniques. This order preserves aesthetic appeal, simplifies touchups, and supports maintenance tips like gentle cleaning.
For design concepts and renovation ideas, spraying walls last reduces masking time and prevents streaks on trim, keeping lines crisp and professional.
Painting Trim for a Professional Finish
Start by masking and sanding the trim so paint will stick and edges stay clean; these prep steps save time and give you crisp, professional results.
You’ll choose trim color based on trim styles and room lighting, consider trim materials and textures, and plan trim preparation thoroughly.
Use precise trim techniques for corners and joints, thin coats for trim applications, and sand between layers for trim finishing.
After curing, trim maintenance keeps work durable. Follow current trim trends but prioritize durability.
Visualize the result:
- Smooth glossy finish on painted wood
- Matte modern look for metal trims
- Subtle texture for rustic styles
Painting Walls Efficiently and Evenly
| Calm | Progress | Pride |
|---|---|---|
| Clean walls | Prime | Smooth roll |
| Right roller | Wet edge | Even coat |
| Stir well | Dry times | Inspect |
| Touch up | Final pass | Admire |
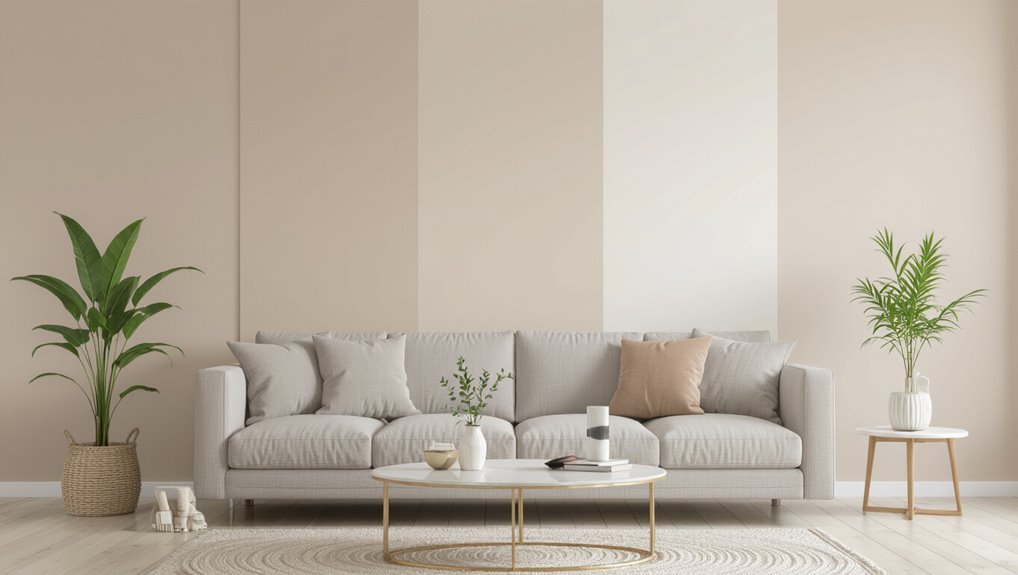
Matching Trim and Wall Colors Effectively
When you match trim and wall colors, start by checking color temperature so warm or cool tones don’t fight.
Decide whether you want contrast for definition or coordinated hues for a seamless look, and factor in the trim’s finish and width because sheen and size change how the color reads.
These choices will help you create a balanced, intentional result.
Consider Color Temperature
How do you make trim and wall colors feel cohesive? You’ll use color temperature to guide color pairing and achieve design harmony.
Consider how temperature influence shifts perception: warm trim warms a room’s aesthetic impact; cool trim calms and expands spatial perception.
Note lighting effects—natural and artificial light change emotional response and reveal undertones, so test samples at different times.
Use color psychology to match purpose (energizing or serene).
Try these scenarios to visualize choices:
- Warm beige walls with creamy warm trim for cozy, inviting spaces
- Soft gray walls with cool white trim for airy, modern rooms
- Muted green walls with warm trim for balanced, earthy comfort
Contrast Versus Coordination
Although contrast can highlight architectural details, you’ll want to balance it with coordination so the room doesn’t feel disjointed. You’ll use contrast techniques sparingly to accentuate trim while maintaining color harmony across walls and moldings.
Consider visual balance: bold trim can anchor design elements, but too much contrast disrupts spatial perception. Rely on color psychology to set mood, and make sure light reflection supports your choices.
Aim for style consistency and thematic cohesion so finishes read as intentional. Test samples under real light, then tweak tones for aesthetic appeal without sacrificing the room’s overall flow.
Finish And Trim Width
Think of trim width and finish as the punctuation of a room: they dictate how matching or contrasting colors read together. You’ll weigh trim styles and wall textures, then choose finish types and sheen variations that suit your color selection.
Consider surface preparation and paint applications to guarantee clean lines and paint longevity.
- Narrow trim with high-gloss finish types makes walls recede and emphasizes texture.
- Wide trim in matte sheen variations creates bold frames, altering perceived color balance.
- Subtle trim styles with similar paint applications blend trims into walls for a seamless, refined look.
Using Different Sheens to Create Contrast
When you want subtle yet striking separation between trim and wall, using different sheens is an easy, high-impact trick. You’ll use sheen contrast to guide light reflection and create visual hierarchy: glossy trim pops, matte walls recede. Consider finish selection for color depth and texture variation—gloss boosts saturation, flat soaks light. Paint layering can enhance room ambiance while maintaining design cohesion. Focus on aesthetic appeal and practical cleanup. Experiment in small areas first to confirm how sheen alters perceived hue and texture. Below is a quick comparison table to visualize choices.
| Trim | Wall |
|---|---|
| High gloss | Matte |
| Semi-gloss | Eggshell |
Costs: Trim Paint vs Wall Paint
Shifting from finish choices to budget, you’ll find trim paint usually costs more per gallon than wall paint because manufacturers formulate it for durability, higher gloss, and smoother application—qualities that raise production costs.
When you plan, a clear cost comparison helps you decide where to splurge. Budget considerations include quantity, prep and tools, and whether you’ll hire pros.
Compare prices per square foot, not just per can. Consider these typical differences:
- Trim often needs multiple coats and touch-up supplies.
- Wall paint covers more area with lower price-per-square-foot.
- Higher-gloss trim finishes may require better primers and brushes.
When Wall Paint Is Acceptable on Trim
You can use wall paint on trim in low-traffic rooms like guest bedrooms or formal dining areas where scuffs are unlikely.
It’s also reasonable when the wall and trim share similar sheen levels, so the finish looks cohesive.
For temporary updates or tight budgets, wall paint on trim is a practical short-term solution.
Low-Traffic Areas
In spaces like guest rooms, formal dining rooms, or adult-only bedrooms, wall paint on trim can look fine and hold up because these areas see little handling or abrasion.
You can lean into low traffic aesthetics by choosing colors and finishes that create a cohesive look without worrying about scuffs.
Consider color selection that complements walls and furnishings, then decide where simplicity wins.
Visualize typical scenarios:
- A serene guest room with matching trim and walls for a calm, unified look.
- A formal dining room where subtle trim blends with wallpaper or wainscot.
- An adult bedroom emphasizing tone-on-tone sophistication.
Similar Sheen Levels
When wall and trim share a similar sheen, they’ll reflect light the same way and the trim will blend in more naturally. So using wall paint on trim is often fine; just make certain the finish you pick still offers enough durability for the trim’s role.
You should perform a quick sheen comparison to note finish differences and their visual impact under your room’s lighting effects. Choose application techniques that guarantee even coverage and crisp edges.
Consider aesthetic choices and color harmony so trim doesn’t disappear unintentionally. Finally, weigh maintenance considerations: scuff resistance and cleanability matter even when sheen matches.
Temporary Or Budget Projects
If you’re tackling a short-term refresh or working to a tight budget, wall paint can be an acceptable choice for trim—provided you pick a washable, higher-quality wall finish and accept that it won’t stand up to heavy wear like dedicated trim paint.
For temporary updates and quick refreshes, wall paint offers cost effective solutions and affordable alternatives when durability isn’t critical.
Consider paint selection, design impact, and DIY tips to get neat edges and a professional look. Use temporary finishes for staging or renters, knowing these quick fixes may need redo sooner.
- low-traffic rooms
- short-term rentals
- staged homes
Risks of Using Trim Paint on Whole Walls
Using trim paint on whole walls can save time up front, but it often leads to visible problems: trim formulas are thicker, glossier, and less breathable, so you’ll see brush marks, uneven sheen, and increased peeling or cracking over time.
You should weigh trim paint risks against wall paint implications before committing.
Application challenges include poor leveling and longer drying that shows every stroke. Finish inconsistencies harm aesthetic outcomes and can reveal incompatible textures.
Long term effects include more frequent repairs and repainting.
Consider maintenance considerations and surface compatibility: trim paint may not adhere or age like wall-specific coatings, increasing lifecycle costs.
Touch-Up Strategies for Trim
When you touch up trim, match the sheen of the original paint so new spots don’t stand out.
Use feathering brush strokes to blend edges and avoid hard lines.
For small imperfections, sand lightly and fill gaps before repainting to get a smooth finish.
Matching Sheen Levels
Although sheen differences can seem minor, they’ll show up clearly on trim after a touch-up, so you need to match levels precisely.
You’ll perform a careful sheen comparison to preserve visual harmony and color consistency. Consider finish varieties and texture differences; light reflection changes aesthetic impact and affects maintenance needs.
Account for environmental factors like humidity and wear when selecting application techniques.
- Test small areas under natural light
- Use the same finish variety and brand for consistency
- Note how light reflection alters perceived color
Feathering Brush Strokes
If you want touch-ups to vanish into the surrounding trim, feather your brush strokes so the new paint thins gradually into the old—light pressure at the edges and slightly more paint toward the center prevents hard lines and visible ridges.
You’ll practice feathering techniques with appropriate brush types: angled sash brushes for control, smaller rounds for detail. Focus on brush control and deliberate stroke patterns, keeping paint application minimal and continuous.
Work quickly to blend edges before drying effects set in. Pause to assess under good light, rework short runs if needed, and aim for smooth finishes that read as seamless.
Repairing Small Imperfections
Start by evaluating the imperfection—run your fingertip over chips, dents, or raised brush marks to feel their size and depth—then decide whether to spot-fill, sand, or repaint the affected area.
For effective imperfection repair, focus on surface preparation: clean, degrease, and remove loose paint. Use small spatulas for putty, fine sandpaper for smoothing, and a damp cloth between steps. Match trim sheen and color for seamless touch-ups.
Visualize the process:
- Small chip: fill, sand, prime, touch up.
- Dent: deeper fill, sand, prime, repaint.
- Brush mark: light sand, wipe, feather new paint.
Touch-Up Strategies for Walls
When you’re fixing small scuffs or paint chips, having the right touch-up plan keeps repairs invisible and prevents larger repaint jobs later.
You’ll begin with surface assessment to identify dirt, loose paint, or texture differences.
Follow wall preparation: clean, sand, and prime tiny bare spots.
Use targeted repair methods—filler for gouges, feathered sanding for edges.
For paint blending and color matching, test small swatches in natural light and use the same formula if possible.
Maintain sheen consistency by using the same finish.
Don’t forget trim maintenance near edges to prevent overlap; clean lines make touch up techniques succeed.
Troubleshooting Peeling and Yellowing
First, identify whether the peeling or yellowing is on trim or wall paint so you can choose the right repair method.
Check for and fix any moisture sources—leaks, condensation, or poor ventilation—before you touch the surface.
When you repaint, use a suitable primer and the correct paint type to guarantee adhesion and prevent future discoloration.
Identify Paint Type
Paint type matters when you’re troubleshooting peeling or yellowing, because oil-based and water-based (latex) paints behave very differently under moisture, heat, and age.
You’ll inspect sheen and smell, test solvent reaction, and note drying times to ID the type quickly. Consider paint consistency and finish types when comparing samples.
Check labels for environmental impact and product recommendations; weigh cost comparison against maintenance tips. Focus on surface preparation history and application techniques that might’ve caused failure.
Use color matching sparingly to avoid extra coats. A simple solvent test, combined with these clues, tells you which paint you’re dealing with:
- Sheen and odor
- Solvent reaction
- Drying times
Address Moisture Sources
Now that you can tell whether a coating is oil- or water-based, check for moisture sources that often cause peeling and yellowing.
Inspect roofs, flashing, plumbing, and exterior walls for leaks, and repair them promptly.
Run dehumidifiers in basements and bathrooms to aid humidity control, and fix condensation on windows.
Clean damp areas and treat staining to support mold prevention before repainting.
Verify ventilation systems work—exhaust fans, attic vents, and HVAC filters—to move moist air out.
Addressing these issues stops recurring damage, preserves finishes, and gives any future paint a stable, dry substrate for lasting adhesion.
Repaint With Primer
If you’ve fixed leaks and controlled humidity, prep surfaces and apply a stain-blocking primer to stop peeling and yellowing before repainting.
You’ll choose primer types by substrate, consult primer brands, and plan project planning around drying times. Surface preparation guarantees paint adhesion and handles surface textures; proper application techniques prevent future lifts.
Work in layers: primer benefits include sealing stains and improving color matching for final coats. Consider paint layering and finish options to match trim versus wall sheen.
Keep tools clean, follow recommended drying times, and test a small area to confirm adhesion and color before full repaint.
- Sand glossy trim for adhesion
- Seal stains with oil-based primer
- Use thin, even coats
How Long Trim and Wall Paints Last
On average, trim paint lasts 5–10 years while wall paint typically endures 7–15 years, though those ranges shift with traffic, surface prep, and product quality.
Trim usually needs repainting every 5–10 years; walls often last 7–15, depending on traffic and prep.
When you plan a longevity comparison, consider maintenance tips like gentle cleaning and touchups; these extend life and preserve color retention.
Smart application techniques—proper primer, thin even coats, and correct sheen—reduce wear and boost durability.
Finishing touches such as sealing exposed edges and using durable caulk matter for trim.
Don’t ignore environmental impact: humidity, sunlight, and temperature swings accelerate fading and breakdown, so choose formulas suited to your conditions.
When to Repaint: Signs for Trim and Walls
Because trim and walls face different stresses, you’ll look for different repaint cues: peeling, cracking, or yellowing usually indicate trim needs attention, while fading, chalking, or widespread scuffs and stains signal wall paint is due.
Check wear patterns and repainting frequency: trim often needs touch-ups sooner. Consider finish types and color selection to protect paint longevity and maintain aesthetic appeal. Prioritize surface preparation to improve adhesion.
Use these visual cues:
- Trim: peeled edges, yellowed corners, glossy breakdown.
- Walls: faded expanses, chalky residue, repeated stains.
- Whole-room: uneven sheen, outdated palette, routine maintenance tips.
Choosing a Paint Brand: Performance Checklist
When you pick a paint brand, focus on measurable performance factors—coverage, durability, VOC levels, and warranty—so you get results that match your project’s demands.
Choose a paint brand based on measurable factors—coverage, durability, VOCs, and warranty—to meet your project’s needs.
You’ll evaluate paint performance through brand comparison, reading user reviews, and checking product durability ratings.
Consider finish options and color selection for aesthetic and wear needs.
Review application techniques recommended by manufacturers to guarantee smooth results and reduce waste.
Factor environmental impact and VOC certifications alongside a clear cost analysis to balance quality and price.
Finally, note maintenance tips to preserve finish longevity and confirm the warranty covers likely issues.
Budget-Friendly Paint Picks That Perform
If you need reliable paint that won’t blow your budget, you can still get good coverage, decent durability, and low VOC options without paying premium prices.
You’ll look for budget friendly brands offering affordable quality and cost effective options that deliver paint value. Consider price comparisons, smart spending, and basic budget considerations before buying.
Focus on finish, coverage, and touch-up ease.
- Store-brand latex for walls: economical choices with good coverage
- Mid-range satin or semi-gloss for trim: affordable quality, durable finish
- Low-VOC multipurpose primer: cost effective option to boost adhesion and longevity
Professional vs DIY Approaches for Trim
Decide whether to hire a pro or tackle trim yourself by weighing skill, time, and desired results: pros bring speed, flawless cutting and consistent sheen, while DIY saves money and gives you control if you’re comfortable with prep, steady brushwork, and clean lines.
You’ll compare professional techniques versus DIY methods, run a cost analysis, and assess time management needs. Good project planning covers tool selection, surface preparation, and paint quality.
Choose finish options that suit wear and style. Be honest about your skill level: pros reduce risk and save time, while careful DIY lets you learn and customize results.
Common Mistakes With Trim and Wall Paint
Mistakes with trim and wall paint often come down to a few predictable errors you can avoid: skipping proper prep, using the wrong brushes or rollers, and mismatching sheen between surfaces.
You’ll face common trim mistakes and wall paint errors if you ignore prep oversights, rush sheen selection, or overlook color matching pitfalls.
Follow paint application tips and prevent paint layering issues by planning coats and drying time so you don’t keep underestimating drying. Be ready for cleanup challenges and choose finishes wisely.
- Rushed prep leads to adhesion problems
- Wrong tools create visible streaks
- Mismatched sheen ruins contrast
Health and Environmental Trade-Offs
While choosing paint, consider how ingredients and finishes affect indoor air and long-term health: volatile organic compounds (VOCs), biocides, and heavy metals can off-gas or shed particles that worsen allergies, asthma, or chronic exposure risks.
Consider paint ingredients and finishes—VOCs, biocides, heavy metals can off‑gas or shed, harming indoor air and health
You’ll weigh health considerations against environmental impact: pick low VOC options and non toxic finishes to protect indoor air quality and household members.
Look for eco friendly paints made with sustainable materials and fewer additives.
Also plan disposal and paint recycling to reduce landfill contamination.
Balancing performance, durability, and greener choices helps you minimize health risks while reducing your project’s environmental footprint.
Reading Labels: Trim vs Wall Paint Specs
Because trim and wall paints serve different roles, you’ll want to read labels with an eye for specific specs: sheen, durability, VOC level, recommended substrate, and application method.
When you do label reading, focus on paint specifications and how they map to trim standards versus wall metrics. Do label analysis by comparing designated surfaces, abrasion resistance, and finish sheen in product comparisons.
Note VOCs and cleanup needs. Ask whether manufacturer lists brush, roller, or sprayer.
- Trim: higher durability, glossier sheen, tougher wear resistance
- Walls: lower sheen, easier touch-ups, broader color depth
Use specs to match purpose and lifespan.
Tools and Supplies Shopping List
Now that you’ve learned how to read labels to match paint specs to their designated surfaces, you’ll want to assemble the right tools and supplies to get the job done properly.
Make a list including brushes, rollers, trays, drop cloths, sandpaper, primer, and compatible paint types for trim and walls. Use shopping tips: buy sample sizes for color selection and compare brands for coverage and VOCs.
Plan surface preparation supplies and select application techniques—angled brushes for trim, nap rollers for walls. Choose finish options based on traffic and maintenance considerations.
Keep receipts for brand comparisons and returns.
Recommended Next Steps for Your Project
Once you’ve got your supplies and samples, set a clear sequence: prep surfaces, prime where needed, paint trim first for crisp edges, then roll walls, and finish with touch-ups and cleanup.
Decide on color selection now so you stick to it; test swatches under different light. Create a realistic project timeline to avoid rushing coats.
- Work in small sections, keeping a wet edge for seamless blending.
- Use low-tack tape and drop cloths to protect floors and hardware.
- Keep a checklist for drying times, second coats, and final inspection.
Follow this plan, and you’ll get professional-looking results without surprises.
Frequently Asked Questions
Can I Use Exterior-Grade Trim Paint Indoors?
Yes — you can use exterior-grade trim paint indoors, but you’ll sacrifice interior durability benefits and might alter trim aesthetics; choose low-VOC formulations and guarantee proper ventilation, since exterior paints prioritize weather resistance over indoor finishes.
How Do Metallic or Faux Finishes Affect Trim Paint Choice?
Metallic sheen or faux texture demand durable, high-build trim paint so details pop; you’ll choose smooth, standoff-friendly formulas and possibly glazing techniques to preserve texture, avoid brush marks, and guarantee consistent reflective effects.
Will Humidity in Bathrooms Require Special Trim Paint?
Yes — you should worry: bathroom humidity can wreck weak finishes, so choose trim paint with mold-resistant, high-durability formulas. You’ll pick semi-gloss or enamel for trim paint durability, lasting through steam, cleaning, and constant moisture.
Are Washable Paints Safe for Children’s Rooms on Trim?
Yes, you can use washable paints on trim in children’s rooms; they boost child safety by reducing exposure to harmful residues and improve paint durability for frequent cleaning, so choose low-VOC, durable formulations and proper ventilation.
Can Spray Booth Techniques Improve Trim Paint Finish?
Like a jeweler polishing a gem, you’ll see spray booth advantages boost trim paint application—your finish gets smoother, more even, less overspray, and faster drying, so you’ll achieve factory-quality results with fewer brush marks and touch-ups.
Conclusion
You’ve probably believed trim paint is just fancier wall paint—but the truth is sharper: trim’s tougher, glossier, and made to stand up to touch and cleaning, while wall paint forgives flaws and soothes a room. That difference matters more than you think. Choose purpose over looks, because picking the wrong paint can sour your effort and waste time. Trust the specs, test a swatch, and feel the satisfaction when finish and function finally match.