How to Remove Exterior Paint From Brick Without Damage
You can remove exterior paint from brick without damage by starting with the gentlest options and working up only as needed. Test a small area, use soft brushes and mild, low‑VOC chemical strippers, rinse often, and stop if mortar weakens. Try a heat gun on low with steady motion or hand scraping for stubborn spots; reserve abrasive blasting for last. Protect yourself, nearby plants, and contain runoff. Keep going to learn how to assess brick condition and pick the right method.
What Problem Does Paint on Exterior Brick Cause?
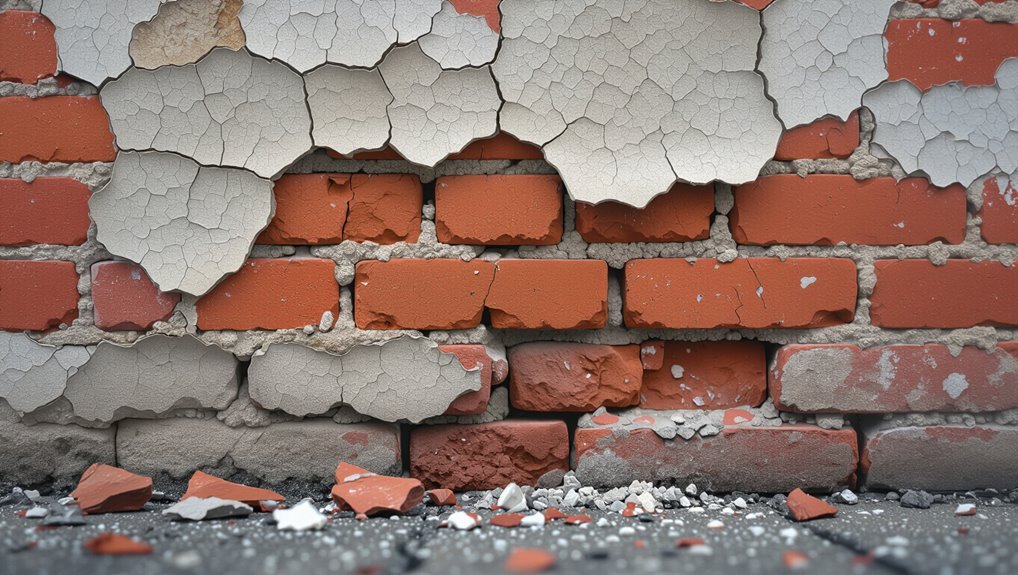
When paint covers exterior brick, it traps moisture and hides the masonry’s natural ability to breathe, which can lead to peeling, efflorescence, and accelerated mortar decay.
You’ll notice paint deterioration accelerating as trapped water freezes or salts migrate, compromising structural joints.
The aesthetic impact is immediate and lasting: blotchy, flaking surfaces mask brick character and often force costly restoration to return the wall to sound condition.
Quick Answer: Safest Way to Remove Paint From Exterior Brick
Start by testing a small, inconspicuous area so you can see how the brick and mortar react.
Use gentle, low-pressure methods first—soft scrubbing with a mild chemical stripper or a garden hose and brush—before trying anything harsher.
That way you’ll protect the brick’s texture and avoid unnecessary damage.
Test A Small Area
Because every brick and paint job reacts differently, you should test a small, inconspicuous area first to find the safest effective method.
Try several test methods—chemical stripper, heat-free scraping, or gentle abrasion—on a hidden patch. Note how different paint types respond and how the mortar and brick surface react.
Record results, then choose the least invasive approach that removes paint without harming the brick.
Use Low-Pressure Methods
Low-pressure methods give you the safest way to remove paint from exterior brick without gouging mortar or etching the surface. You’ll use gentle techniques like soft-bristle brushes and low-PSI washers, paired with effective tools such as chemical strippers or poultices. Work systematically, rinse frequently, and stop if mortar weakens.
| Technique | Tool |
|---|---|
| Brushing | Soft brush |
| Washing | Low-PSI washer |
| Stripping | Poultice/stripper |
When to Remove Paint vs. Leave It Painted
Decide whether to strip paint from brick by weighing condition, appearance goals, and long-term maintenance:
if the paint is flaking, trapping moisture, or hiding historic masonry you want to restore, removal makes sense;
if the coating’s intact, breathable, and you prefer the current look, leaving it painted can be the smarter, lower-risk choice.
Also factor paint color considerations and historical significance when choosing.
How to Assess Brick Condition Before Work
Before you start stripping paint, take a close look at the brick and mortar to identify damage, moisture issues, and previous repairs that will affect how you proceed.
Use brick inspection techniques: probe loose mortar, check for spalling, efflorescence, and rising damp.
Document cracks and bowing when evaluating structural integrity.
Prioritize repairs and consult a mason before aggressive paint removal.
How to Test Paint Adhesion and Thickness on Brick
Start by checking small, discreet areas to see how firmly the paint sticks and how many coats you’ll need to remove.
You’ll perform simple adhesion testing and gauge paint adhesion and thickness with gentle scraping, a razor cut test, or a small scraper.
Note layers and stubborn spots before choosing a method.
- Frustration
- Relief
- Determination
- Caution
- Confidence
Make a Small Test Patch (Why It’s Critical)
Because brick and paint interact in unpredictable ways, you should make a small test patch to confirm which removal method will work and how much effort it’ll take.
You’ll evaluate surface reaction, mortar impact, and cleanup ease.
The test patch importance can’t be overstated: it guides safe selection among paint removal techniques, prevents damage, and estimates time and materials before committing to larger areas.
Which Paint Types Are on Your Brick and Why It Matters
What kind of paint did someone use on your brick, and how it was applied will determine the removal approach you choose.
You’ll assess latex versus oil-based coatings, thickness, and surface prep because paint adhesion varies with brick types and porosity.
That affects stripper choice and pressure settings.
- Frustration
- Relief
- Urgency
- Caution
- Confidence
How Mortar Type Affects Your Removal Options
If your mortar’s soft or crumbly, you’ll need gentler paint-removal methods than you’d on hard, dense mortar, because aggressive scraping or high-pressure washing can damage joints and loosen bricks.
Assess mortar composition—lime-rich mixes are softer; portland-cement mixes are tougher. That affects tool choice, chemical strippers, and drying times.
Also note mortar texture influences paint adhesion and how thoroughly you must clean before refinishing.
When to Hire a Preservation or Masonry Pro
When should you call in a preservation or masonry pro? You should hire help when historic brick, failing mortar, or complex preservation techniques are involved, or when DIY risks further damage.
Pros bring masonry expertise and careful methods.
- Fear of ruining heritage
- Overwhelmed by deterioration
- Need precise restoration
- Emotional attachment to home
- Want guaranteed results
Safety Gear Checklist for Exterior Paint Removal
Before you start scraping or blasting paint off brick, gear up with the right protective equipment to keep yourself and the site safe.
Wear a respirator rated for dust and fumes, safety goggles, heavy-duty gloves, long sleeves, and steel-toe boots.
Use hearing protection for power tools, a hard hat if working on scaffolding, and disposable coveralls.
Check gear for defects before use.
Containment and Protecting Plants and Soil
Before you start stripping paint, protect nearby plants by covering them with plastic sheeting or tarps and gently misting foliage to keep dust from settling.
Set up barriers and use absorbent pads or a catchment system to contain runoff and collect scraping debris.
Dispose of contaminated material properly so soil and waterways stay safe.
Protecting Nearby Vegetation
Start by creating a clear barrier between the work area and any plants or grass so paint chips, stripper, and runoff can’t reach roots or leaves; use heavy-duty plastic sheeting, drop cloths, or cardboard weighted down with bricks and tape seams tightly to the masonry.
You’ll prioritize plant protection and landscaping considerations while trimming, wetting soil, and using gentle tools.
- Protect fragile blooms
- Shield young roots
- Preserve mulch
- Calm worried neighbors
- Save your hard work
Containing Runoff And Debris
Because runoff and debris can quickly damage your plants and contaminate soil, set up a continuous containment zone around the work area and keep it sealed as you work.
Lay heavy-duty plastic or tarps, secure edges with sandbags, and funnel liquid to a collection container for proper disposal.
Use brushes and vacuums for debris containment and follow local runoff management rules to protect soil and waterways.
Chemical Strippers That Work on Brick
When paint won’t budge with scrapers and heat, chemical strippers give you a practical way to dissolve coatings on brick so you can remove them more efficiently.
You’ll learn eco friendly options and product comparisons to pick potent, appropriate formulas. Test small areas, follow safety instructions, and rinse thoroughly.
- Relief as paint softens
- Confidence in choice
- Satisfaction with progress
- Pride in restored brick
- Calm after cleanup
Choosing a Low‑VOC or Biodegradable Stripper
When choosing a low‑VOC or biodegradable stripper, check the product ingredients for glycol ethers, methylene chloride, or other toxic solvents and prefer citrus‑based, soy, or alkaline formulations.
Consider the environmental impact on soil and nearby plants, and whether the stripper breaks down safely or requires special disposal.
You’ll also want to confirm VOC ratings and any eco‑certifications to balance effectiveness with safety.
Product Ingredients To Check
Choosing a low‑VOC or biodegradable stripper means looking beyond marketing claims and checking the label for specific ingredients and certifications. You’ll want formulas that minimize health and environmental risks while still lifting paint effectively.
Check for safer solvents, citrus or soy bases, and certification seals when comparing paint removal products and eco friendly options.
- Relief that you chose safer chemicals
- Confidence in clear labeling
- Pride in thoughtful selection
- Calm during application
- Satisfaction with results
Environmental Impact Considerations
Because the stripper you pick affects more than just your brick, prioritize low‑VOC or biodegradable formulas to reduce air and water pollution and limit indoor odor during application.
You should choose products made from sustainable materials, follow eco friendly practices for containment and disposal, wear minimal protective gear when safe, and avoid runoff.
Proper selection and handling protect surrounding soil, plants, and local waterways.
How to Apply Chemical Stripper Safely
If you’ll be using a chemical stripper, prepare the area and yourself before you open the container: wear gloves, eye protection, and a respirator; ventilate; test a small spot; read the label; and keep pets away.
Prioritize chemical safety, consider stripper alternatives when possible, and work steadily to avoid brick damage.
Prioritize safety, explore gentler alternatives, and take steady, careful steps to protect your bricks.
- Fear of fumes
- Relief at progress
- Anxiety about stains
- Satisfaction when clean
- Pride in careful work
Neutralize and Rinse Strippers Safely
1 minute of careful neutralizing and rinsing will save you hours of cleanup and prevent long-term brick damage.
After stripper use, apply manufacturer-recommended neutralizing agents evenly, scrubbing grout and pores gently.
Rinse with low-pressure water, working top to bottom, and repeat until runoff is clear and pH is neutral.
Dry and inspect for residue; repeat neutralize and rinsing techniques if needed to protect the masonry.
Heat Methods: Using Heat Guns on Brick
You can use a heat gun to soften exterior paint on brick, but you’ll need the right technique to avoid scorching mortar or blasting off flakes too aggressively.
Keep the nozzle moving, work in small sections, and hold the gun at a safe distance to loosen paint without overheating the surface.
Wear heat-resistant gloves, eye protection, and cover nearby plants and fixtures to protect them from heat and falling debris.
Proper Heat Gun Technique
Start by choosing a heat gun with adjustable temperature and a wide nozzle so you can control heat without scorching the brick.
You’ll focus on gentle heat application, steady movement, and precise temperature control to soften paint, then scrape carefully.
- Relief as old paint peels
- Confidence with steady technique
- Satisfaction in revealed brick
- Pride in careful control
- Calm from predictable results
Safety And Surface Protection
Because heat can easily damage brick, mortar, or nearby surfaces, take deliberate precautions before you fire up the gun.
You’ll wear heat-resistant gloves, eye protection, and a respirator; those safety precautions prevent burns and inhalation.
Set up protective barriers—fireproof drop cloths and shields—to protect plants, wood trim, and windows.
Keep a fire extinguisher handy and monitor brick temperature continuously.
Why Infrared Heaters Are Gentler Than Open Flame
Although both methods apply heat to loosen paint, infrared heaters heat the brick and paint more evenly and with finer control than an open flame.
Infrared heaters provide steadier, gentler heat than open flames, loosening paint evenly with greater control and less risk.
You’ll appreciate infrared advantages: steady, deep heating that reduces cracking, less soot, and safer work pace, while minimizing flame risks.
You’ll feel confident, relieved, cautious, empowered, and satisfied.
- confident
- relieved
- cautious
- empowered
- satisfied
Don’t Use Torches: Why Open Flame Risks Brick
Don’t use torches on brick — the intense heat can crack or spall the surface and weaken the fired clay.
You’ll also risk damaging mortar joints, which can lead to loose bricks and compromised structural integrity.
Stick to gentler methods to avoid creating costly repairs or safety hazards.
Fire-Caused Brick Damage
Fire can do more than scorch paint—it’s a fast way to permanently damage brick and mortar, so you shouldn’t use torches or open flames to strip exterior paint.
You’ll risk spalling, color loss, weakened face, trapped heat damage, and ruined fire safety plans that complicate brick restoration.
- Panic at sudden cracking
- Regret irreversible discoloration
- Fear hidden hollows
- Anger over ruined texture
- Worry about safety compromises
Mortar And Structural Risks
When you apply an open flame to painted brick, the intense, uneven heat can crack mortar joints and weaken the bond between bricks, compromising the wall’s structural integrity. You shouldn’t torch brick; doing so jeopardizes mortar integrity and structural stability. Use chemical strippers or gentle mechanical methods instead.
| Risk | Cause | Result |
|---|---|---|
| Cracked mortar | Uneven heat | Loose bricks |
| Spalling | Thermal shock | Surface loss |
| Hidden damage | Mortar weakening | Collapse risk |
Hand Scraping and Brushes That Won’t Damage Brick
Start by evaluating the paint’s condition and the brick’s texture so you can choose the gentlest tools that’ll do the job.
You’ll favor hand tools and soft nylon brick brushes, scraping gently to protect edges and mortar. Work slowly, test a small area, and stop if surface crumbles.
- Relief at progress
- Pride in careful work
- Calm focus
- Cautionary respect
- Satisfaction at restored brick
When Abrasive Blasting Is Appropriate
You should consider abrasive blasting only when paint is stubborn, the brick is hard-fired, and other gentler methods have failed.
Be aware blasting can etch or pit softer brick and damage mortar if you’re not careful.
We’ll cover how to assess surface hardness, control pressure, and weigh the risks before you proceed.
When To Choose Blasting
If your brick has multiple coats of paint, deep crevices, or thick, stubborn layers, abrasive blasting can be the fastest, most thorough option.
You’ll choose blasting when other paint removal techniques fail, when time is tight, and when a stripped, consistent finish matters.
Prioritize blasting safety and hire pros if you’re unsure.
- Relief
- Confidence
- Urgency
- Pride
- Calm
Risks And Surface Concerns
Because abrasive blasting strips material aggressively, you need to weigh risks to the brick and surrounding surfaces before deciding it’s the right method.
Assess surface integrity—soft, crumbly mortar, thin brick, or historic finishes may be damaged.
Consider potential chemical reactions with residues or coatings and how blast media might embed or react.
Use testing, low-pressure trials, and protective measures to limit harm.
Choosing Soda vs. Gentler Blasting Media
When weighing soda blasting against gentler media like crushed walnut shells or dry ice, consider how each removes paint without harming the brick’s surface.
Weigh soda blasting versus gentler media—balance removal power with surface care to protect brick and preserve aesthetics
You’ll balance effectiveness, surface sensitivity, cleanup, and environmental concerns to protect masonry and aesthetics.
- Relief at gentle restoration
- Confidence in controlled removal
- Anxiety about hidden damage
- Satisfaction from clean brick
- Caution toward aggressive methods
Setting Pressure and Nozzle Distance to Avoid Spalling
You’ll want to work within an ideal pressure range to strip paint without blasting the brick surface.
Keep the nozzle at the correct distance—too close and you’ll cause spalling, too far and the media won’t remove paint effectively.
Start low, test a small area, and adjust pressure and distance until you get clean removal without damage.
Optimal Pressure Range
If you crank the pressure too high or hold the nozzle too close, the blast can chip the brick face and loosen mortar, so dial in a balanced setting that cleans paint without causing spalling.
You’ll test pressure settings gradually, use ideal techniques, and watch for fines and dust as signs to back off.
- Fear of damage
- Pride in restoration
- Relief when done
- Frustration avoided
- Satisfaction preserved
Correct Nozzle Distance
Keep the nozzle at a steady 12–18 inches from the brick surface to remove paint effectively without blasting the masonry; hold it farther back for softer mortar or older, crumbly bricks and closer only after testing on a small, inconspicuous area.
You’ll combine correct distance control with lower nozzle pressure, sweep evenly, and adjust incrementally so you strip paint without causing spalling or surface damage.
Pressure Washing Safely (Risks and Limits)
While pressure washing can blast away loose paint and grime quickly, it also risks damaging brick, mortar, and historic finishes if you use too much pressure or the wrong nozzle.
You should test pressure washer settings, combine gentle paint removal techniques, and stop at the first sign of erosion.
Balance force with care to protect masonry.
- Heartache at lost detail
- Panic over pitting
- Relief with success
- Pride in preservation
- Regret avoided
Tools Checklist for DIY Brick Paint Removal
Before you start scraping or blasting, make sure you’ve got the right tools on hand: sturdy scrapers, wire brushes, chisels, and a putty knife for detail work.
Don’t forget protective gear like gloves, eye protection, a respirator, and knee pads to keep you safe while you work. Having these essentials ready will speed the job and reduce the risk of injury.
Essential Hand Tools
Tools matter when you’re removing exterior paint from brick, and having the right hand tools will make the job faster, safer, and neater.
You’ll rely on tried paint removal techniques and essential equipment to scrape, chip, and detail without harming brick.
- Stiff nylon brush — satisfying grit
- Metal scraper — decisive control
- Putty knife — delicate finesse
- Wire brush — gritty resolve
- Handheld rasp — steady restoration
Protective Gear Essentials
Safety gear is your first line of defense when you’re stripping paint from brick, so wear items that protect skin, lungs, eyes, and hearing while letting you move and work precisely.
Use a respirator rated for dust/chemical fumes, safety goggles, ear protection, chemical-resistant gloves, and coveralls.
Follow safety precautions: ventilate, keep a first-aid kit nearby, and inspect equipment before use.
Step‑by‑Step: Removing Paint From a Full Exterior Wall
Start at one corner and work in manageable sections so you can maintain consistent pressure and technique across the whole wall.
Begin at a corner and work in small sections to keep pressure and technique even across the wall.
You’ll strip paint systematically, assess brick aesthetics, and monitor paint lifespan as you progress.
Move scaffolding, apply remover, wait, scrub, rinse, and repeat until uniform.
Maintain rhythm to avoid damage and fatigue.
- relief
- pride
- anticipation
- frustration
- triumph
Protecting and Repairing Mortar Joints During Work
Because mortar is softer than brick and can be easily damaged during paint removal, you’ll want to shield and repair joints before you apply aggressive methods.
Use tape, plastic, or removable foam to provide mortar joint protection, and hand-tool loose or crumbling mortar.
Do mortar joint repair with compatible mortar, curing properly.
Work slowly around joints to avoid chipping brick or widening gaps.
Avoiding Efflorescence, Stains, and Discoloration
When you remove paint from brick, preventing efflorescence and staining means controlling moisture and avoiding harsh cleaners that can leave residues.
Keep the wall dry, rinse thoroughly, and test any chemical on an inconspicuous area first. You’ll focus on efflorescence prevention and improving stain resistance by using gentle cleaners, proper drying, and sealing when appropriate.
- Relief: you saved the brick
- Pride: surfaces restored
- Calm: no white salt blooms
- Confidence: stains won’t return
- Satisfaction: clean, lasting finish
Removing Paint From Brick With Lime‑Based Mortar (Historic Walls)
If your brick wall uses lime-based mortar, treat paint removal gently to protect the softer joints and historic fabric; lime mortars are porous and less rigid than modern cement, so aggressive scraping, power washing, or strong alkali strippers can damage joints and draw salts into the masonry.
Use mild, low‑alkaline poultices or gentle steam, test small areas, and consult historic preservation guidance before proceeding.
Dealing With Stubborn Paint in Mortar Lines and Crevices
Though the bricks may come clean with gentle methods, paint lodged in mortar joints and crevices often needs targeted, patient work to avoid damaging the softer mortar.
Gentle cleaning reveals brick while patient, targeted scraping preserves the mortar’s texture and strength.
You’ll use controlled mortar cleaning techniques and delicate crevice tools, scraping gently, testing small areas, and rinsing frequently to preserve texture and strength.
- Frustration when progress stalls
- Relief with each reveal
- Pride in careful work
- Tension easing as mortar clears
- Satisfaction at restored detail
How to Repoint and Patch After Paint Removal
Once the paint and mortar residue are cleared, you’ll want to repair any damaged joints and small brick chips before sealing or repainting.
Inspect mortar lines, rake out loose material, and use compatible mortar repair mixes to repoint.
For chips, apply appropriate patch techniques—epoxy or color-matched mortar—shaping and tooling to match texture.
Cure fully, then blend repairs before final finish.
Cleaning Brick After Paint Removal Without Harming Texture
After you’ve stripped the paint, start with gentle bristle brushing to loosen residue without scrubbing away the brick’s texture.
You’ll then rinse the surface with a mild detergent solution, using a low-pressure spray to avoid etching.
Work in small sections and re-brush any stubborn spots rather than increasing pressure.
Gentle Bristle Brushing
Start by choosing a soft-bristled brush—nylon or natural fiber works best—and sweep the brick in short, even strokes to lift lingering paint particles without digging into the surface.
Use proper bristle types and brushing techniques to protect texture and mortar lines. Stay gentle, check progress, and avoid scrubbing hard.
- Relief
- Satisfaction
- Confidence
- Calm
- Pride
Mild Detergent Rinse
Begin by mixing a mild detergent with warm water in a bucket—about one tablespoon of dish soap per gallon—to create a gentle cleaning solution that won’t erode brick texture or mortar. You’ll test detergent effectiveness, scrub softly, then follow rinsing techniques:
| Step | Action |
|---|---|
| 1 | Apply solution |
| 2 | Soft scrub |
| 3 | Rinse thoroughly |
| 4 | Inspect finish |
How to Test for Lead Paint and Legal Disposal Steps
Want to know if the old paint on your brick is hazardous? You should do lead testing with EPA-approved kits or a certified inspector, then follow local disposal regulations for paint chips and contaminated materials to protect people and property.
- Fear for family safety
- Relief from knowing
- Urgency to act responsibly
- Frustration with rules
- Confidence after compliance
Containing and Disposing Paint Waste and Slurry
When you remove paint from brick, keep waste and slurry contained to prevent contamination.
Lay heavy plastic sheeting, seal edges, and collect slurry with absorbent pads.
Label containers and avoid storm drains.
Treat paint waste as hazardous if lead-tested positive; follow local disposal methods and transfer to authorized facilities.
Clean tools on contained surfaces and document disposal steps for compliance.
Drying Time Before Sealing or Repainting
After you remove paint and clean the brick, give any primer or sealer the manufacturer’s recommended cure time rather than rushing a recoat.
Check the product’s listed recoat window so you don’t trap moisture or prevent proper bonding.
Always verify the brick’s moisture content with a meter or the plastic-sheet test before sealing or repainting.
Cure Time Vs. Recoat Time
Although paint may feel dry to the touch within hours, cure time—the period needed for the coating to reach full hardness and adhesion—can take days to weeks.
You should wait for that before sealing or repainting to avoid trapping solvents or causing adhesion failures.
You’ll use recoat time for scheduling; respect cure time to prevent peeling, bubbles, or costly redo.
- Frustration
- Relief
- Patience
- Pride
- Confidence
Moisture Check Before Sealing
You’ve waited for the paint to cure, but before you seal or recoat you need to check the brick and mortar for moisture; trapped damp will ruin adhesion and finish.
Use a moisture meter and test multiple spots, watch for hidden moisture sources like downspouts or rising damp, and allow full drying.
Choose sealing techniques suited to measured dryness to avoid peeling.
When and How to Apply a Breathable Masonry Sealer
When brick has been fully cleaned and allowed to dry, you’ll want to apply a breathable masonry sealer to protect the surface without trapping moisture inside the wall.
Use breathable sealers and judge application timing by local humidity and masonry dryness.
Work with a roller or sprayer, two thin coats, and gentle overlap.
- Relief
- Confidence
- Pride
- Calm
- Satisfaction
Decide: Refinish or Leave Brick Bare After Cleaning
Now that the masonry sealer’s dried and the brick’s clean, decide whether to refinish or leave the surface bare. You’ll weigh appearance, protection, and maintenance. Consider refinishing options like breathable stain or paint vs embracing bare brick’s natural look. Use this quick comparison to clarify priorities and next steps.
| Goal | Benefit | Trade-off |
|---|---|---|
| Appearance | Custom color | Recoat needed |
| Protection | Weather resistance | Alters look |
| Maintenance | Easier cleaning | Possible upkeep |
| Character | Authentic texture | Less uniform finish |
Cost Comparison: DIY vs Pro Brick Paint Removal
Because removing paint from brick can be labor- and time-intensive, you’ll want to compare up-front costs, ongoing expenses, and the value of your time before choosing DIY or a pro.
Weigh upfront costs, ongoing expenses, and your time carefully before choosing DIY or hiring a pro.
Do a clear cost analysis and get multiple professional estimates to weigh tool rental, materials, disposal, and warranty.
- Overwhelmed by price
- Proud if you save
- Worried about mistakes
- Relieved with a guarantee
- Frustrated by delays
Common Mistakes That Cause Spalling, Cracking, or Staining
If you rush into paint removal or skip proper prep, you’ll easily damage the brick—common mistakes like using high-pressure washing, harsh chemical strippers, or metal wire brushes can cause spalling, cracking, or stubborn stains. You should follow safe paint removal techniques, learn spalling causes, focus on cracking prevention, and try tested staining solutions.
| Mistake | Harm |
|---|---|
| High pressure | Spalling |
| Wire brush | Cracking |
Troubleshooting: Brick Flakes or Powders After Removal
When paint removal leaves behind flaky or powdery brick, you’ve likely exposed weakened mortar or a degraded face that needs immediate attention to prevent further erosion and dusting.
If paint peels to flaky, powdery brick, stop cleaning and get expert restoration before mortar and face deteriorate further
You should assess damage, stop aggressive cleaning, and consult pros for brick restoration techniques to address paint removal challenges.
- Frustration at fragile surfaces
- Worry over spreading dust
- Urgency to act now
- Relief with expert help
- Hope for restored beauty
Maintenance Tips to Keep Brick in Good Shape
Noticing flaky or powdery brick after paint removal signals damage, but you can still protect and prolong your masonry with a few routine maintenance steps.
Inspect yearly, repoint mortar, and clear vegetation. Use gentle cleaning and breathable sealers sparingly.
Keep gutters functioning to avoid moisture. Document repairs and follow a simple maintenance routine for consistent brick care that prevents future deterioration.
Frequently Asked Questions
Can Paint Removal Change Brick Color Long-Term?
Yes — you might see color fading or altered tones long-term if aggressive stripping or chemicals erode brick or mortar; you’ll also sometimes have stubborn paint residue that changes appearance even after cleaning, so proceed carefully.
Will Removing Paint Affect Home Resale or Historic Designation?
Absolutely—removing paint can affect home value and historical integrity, but it won’t always wreck everything; you should check local rules, document original materials, hire pros, and disclose changes to avoid surprises at sale.
Can Wildlife or Pets Be Harmed During Removal Work?
Yes — wildlife safety and pet protection matter; you’ll prevent harm by isolating work areas, using non-toxic methods, containing debris, and keeping animals away until surfaces dry and residues are cleaned, monitoring for stress or exposure signs.
How to Handle Graffiti Repeatedly Appearing After Cleaning?
When graffiti keeps returning, you’ll plant deterrents like fresh murals and textured coatings, and you’ll build momentum through graffiti prevention and community engagement — enlist neighbors, report quickly, and maintain proud, well-lit spaces to deter vandals.
Are There Weather Conditions That Invalidate Removal Methods?
Yes — extreme temperatures and high humidity can invalidate methods; you’ll avoid freezing or >90°F work, consider temperature considerations for solutions and drying, and account for humidity effects that slow drying, reduce adhesion, or increase runoff.
Conclusion
You’ve probably heard that stripping paint will always wreck brick, but that’s not true — with the right tests, gentle methods, and care you can reveal sound masonry without destroying it. Trusting quick fixes or aggressive blasting often causes spalling, so investigate adhesion, mortar condition, and old paint layers first. Doing this will protect the brick’s history and value, and you’ll feel the relief of saving rather than sacrificing your home’s true face.