Can You Clear Coat Latex Paint? Best Protective Options
Yes — you can clear coat latex paint to boost durability, UV resistance, and cleanability, as long as the paint is fully dry and the surface is cleaned and lightly scuffed first. Use a compatible water‑based polyurethane or acrylic clear for best adhesion and minimal yellowing; avoid shellac or oil enamels that can lift or yellow. Apply thin, even coats with light sanding between them and follow cure times, and keep going for more tips on choosing and applying finishes.
Quick Answer: Can You Clear Coat Latex Paint?
Yes — you can clear coat latex paint, and doing so often improves durability, stain resistance, and appearance.
You’ll see latex paint benefits like longer life and easier cleaning when you apply proper clear coat techniques.
Choose a compatible clear finish, prep the surface by cleaning and scuffing, and apply thin, even coats.
Let each coat dry fully before light sanding and recoat.
When Clear Coating Latex Paint Makes Sense
If you want added protection or a different finish, clear coating latex paint makes sense in several situations: high-traffic areas like trim and doors, surfaces exposed to moisture (bathrooms, kitchens), furniture and cabinetry that need scuff- and stain-resistance, or painted outdoor projects where UV and weather protection help longevity.
- Pick clear coat types for gloss or matte
- Match application methods to surface
- Prep and sand lightly first
- Test compatibility on scrap paint
When to Skip a Clear Coat and Repaint Instead
If the surface has severe damage like deep scratches, peeling, or rot, you’ll want to address those issues rather than just clear coat over them.
Likewise, if you’re planning a significant color change, clear coating the old shade will only hide the problem temporarily.
In those cases, it’s smarter to strip and repaint so the finish and color are done right.
Severe Surface Damage
When damage goes beyond surface scratches—like deep gouges, extensive blistering, or widespread adhesion failure, you should skip applying a clear coat and plan on repainting instead.
You’ll need full removal and proper surface repair, especially after severe weathering.
Consider these steps for deciding:
- Assess substrate integrity
- Remove loose paint to bare material
- Repair or replace damaged sections
- Prime and repaint fully
Significant Color Change
Because a clear coat can’t reliably correct major shifts in hue or value, you should skip it and repaint when the original color has changed noticeably across large areas.
If you notice a significant color change or unexpected hue shifts, repainting lets you match tones and restore uniform coverage.
Clear coats will only magnify inconsistencies, so address color first, then protect.
How Latex Paint Cures (And Why It Matters)
While the paint might feel dry to the touch within an hour, latex cures through a slower process of water evaporation and polymer film formation.
Although it feels dry quickly, latex paint cures slowly as water evaporates and polymer films form.
That difference affects durability, adhesion, and how soon you can recoat or handle the surface. You should understand latex paint chemistry and the curing process:
- Surface dries fast
- Full cure takes days–weeks
- Handle gently until cured
- Curing affects finish longevity
Clear Finishes Compatible With Latex Paint
Now that you know how latex paint cures and why you must wait for a full film to form, you’ll want to pick a clear finish that won’t interfere with that process or the paint’s adhesion.
Choose water-based polyurethanes or acrylic clear coats for best clear coat compatibility; they suit most latex paint types, dry without yellowing, and preserve sheen while adding abrasion and moisture resistance.
Finishes to Avoid Over Latex Paint
When you’re finishing over latex paint, steer clear of high-gloss oil enamels because they can crack and yellow.
Don’t use shellac-based finishes either, since they react poorly with waterborne paints and can cause lifting.
Also avoid solvent-based polyurethanes unless the latex is fully cured and you prime first, because solvents can soften the underlying paint.
High-Gloss Oil Enamels
Even though high-gloss oil enamels can look durable, you shouldn’t apply them directly over latex paint because they’re prone to poor adhesion, yellowing, and solvent-related issues that can cause peeling or uneven gloss.
You’ll want alternatives despite high gloss durability and oil enamel advantages:
- They may yellow over time.
- Solvents can attack latex.
- Adhesion often fails.
- Restoration gets tricky.
Shellac-Based Finishes
Although shellac can dry quickly and build a glossy surface, you shouldn’t apply shellac-based finishes directly over latex paint because they often fail to bond, blush with moisture, and can lift or wrinkle as solvents interact with the latex film.
You’ll find shellac advantages like fast cure and clarity, but shellac drawbacks and poor shellac compatibility make shellac application risky; consider shellac alternatives instead.
Solvent-Based Polyurethanes
Because solvent-based polyurethanes rely on strong organic solvents to cure, you shouldn’t apply them directly over latex paint. Those solvents can soften, lift, or wrinkle the latex film and cause poor adhesion, clouding, or long-term failure.
You can, however, consider alternatives and careful prep:
- Identify compatible solvent types and test on scrap.
- Sand and degloss before sealing.
- Use a water-based polyurethane instead.
- Follow proper application techniques and curing times.
Water-Based Polyurethane vs. Polycrylic: Pros & Cons
When you’re choosing a water-based clear coat, polycrylic and water-based polyurethane both offer low-odor, quick-drying protection—but they differ in hardness, clarity, and application feel, so the right pick depends on the surface and the look you want.
You’ll appreciate water based advantages like non-yellowing clarity and easier cleanup, while polycrylic disadvantages include lower abrasion resistance; choose polyurethane for durability, polycrylic for delicate finishes.
Acrylic Polyurethane vs. Polycrylic: Which to Choose?
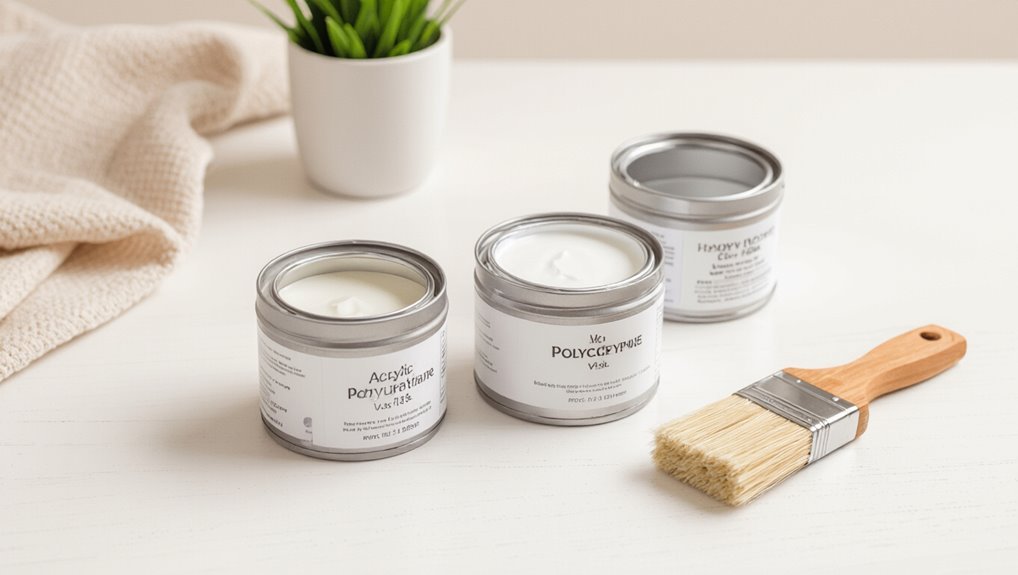
When you’re choosing between acrylic polyurethane and polycrylic, think about how tough the finish needs to be and how it will age.
Acrylic polyurethane generally offers superior durability and wear resistance for high-traffic surfaces, while polycrylic resists yellowing better over time on light-colored paints.
Consider the use and appearance you want to prioritize before you pick one.
Durability And Wear Resistance
If you need a clear coat that stands up to heavy use, choosing between acrylic polyurethane and polycrylic comes down to how much abrasion, chemical exposure, and UV you expect.
Acrylic polyurethane delivers tougher, more chemical- and scratch-resistant protection, while polycrylic offers easier cleanup and less yellowing but sacrifices some long-term durability.
- You’ll want durability testing before finishing
- Polyurethane wins in wear resistance
- Polycrylic suits low-traffic pieces
- Consider expected cleaning and chemicals
Appearance And Yellowing
Curious how clear coats change the look of your latex paint over time?
You’ll find acrylic polyurethane keeps color truer for appearance preservation, resisting solvents and abrasion.
Polycrylic dries clear and feels lighter but can yellow less indoors; however, oil-based urethanes tend to yellow more.
For yellowing prevention choose a water-based acrylic polyurethane for the best balance of clarity and durability.
Oil-Based Polyurethane: Compatibility Risks
Although oil-based polyurethane gives a tough, glossy finish, it can react poorly with latex paint if the paint isn’t fully cured or properly prepared.
Oil-based polyurethane gives a tough glossy finish but can react poorly with uncured or unprepared latex paint.
You should know compatibility issues and refine application techniques to avoid problems:
- Test a small, hidden area first.
- Sand and degloss latex before coating.
- Allow full cure time per paint manufacturer.
- Use a bonding primer if unsure.
Exterior Varnishes for Latex-Painted Trim and Siding
When you’re protecting latex-painted trim and siding outdoors, pick an exterior varnish that’s formulated for flexible surfaces and UV resistance to prevent cracking and ambering over time.
You’ll want a marine- or spar-grade product for exterior durability, apply thin coats, and sand between layers.
Test a small area first to confirm paint compatibility and adhesion before finishing larger sections.
Wax and Furniture Topcoats Over Latex Paint
After sealing exterior trim with a spar varnish, you might consider softer finishes for indoor latex-painted furniture. Waxes and furniture topcoats offer a different balance of protection, sheen, and repairability.
After using spar varnish outside, choose softer waxes or topcoats indoors for easier touch-ups and a gentler sheen.
You’ll choose based on use and look:
- Use paste wax for subtle luster and easy touch-ups.
- Apply thin coats for even furniture protection.
- Buff after wax application.
- Recoat annually for durability.
Clear Lacquer and Shellac: Problems With Latex
If you try brushing clear lacquer or shellac over latex paint, you’ll often run into adhesion and lifting problems because the solvents and formulation differences prevent a reliable bond; shellac, in particular, can blush or re-dissolve water-based finishes, while lacquer’s solvents can soften or wrinkle latex films. You’ll face Lacquer compatibility issues and Shellac limitations, so test first.
| Pain | Risk | Fix |
|---|---|---|
| Frustration | Peeling | Test |
| Dislike | Blushing | Sand |
| Regret | Softening | Primer |
Choosing High-Gloss Clears for Durability
When you need maximum durability, high-gloss acrylic clears give you strong UV resistance and easy maintenance.
For extreme wear and a glass-like finish, consider polyester enamel coatings, which cure to an exceptionally hard surface.
Compare application methods and pot life so you pick the clear that fits your project’s demands.
High-Gloss Acrylic Clears
Although high-gloss acrylic clears look brilliant, you should pick one rated for abrasion and UV resistance to get lasting durability; these formulations resist yellowing, hold up under cleaning, and maintain a hard, protective film that preserves your latex paint beneath.
You’ll enjoy high gloss finishes and acrylic durability when you:
- choose a UV-stable formula
- check abrasion ratings
- test adhesion on scrap
- apply thin, even coats
Polyester Enamel Coatings
After considering high-gloss acrylic clears, you might prefer polyester enamel coatings when durability is your top priority; they cure to an exceptionally hard, glass-like finish that resists abrasion, solvents, and long-term yellowing far better than most acrylics.
You’ll appreciate polyester benefits for heavy-use surfaces, but you’ll need controlled application techniques, proper ventilation, and expert spraying to avoid runs, orange peel, or adhesion problems on latex-painted substrates.
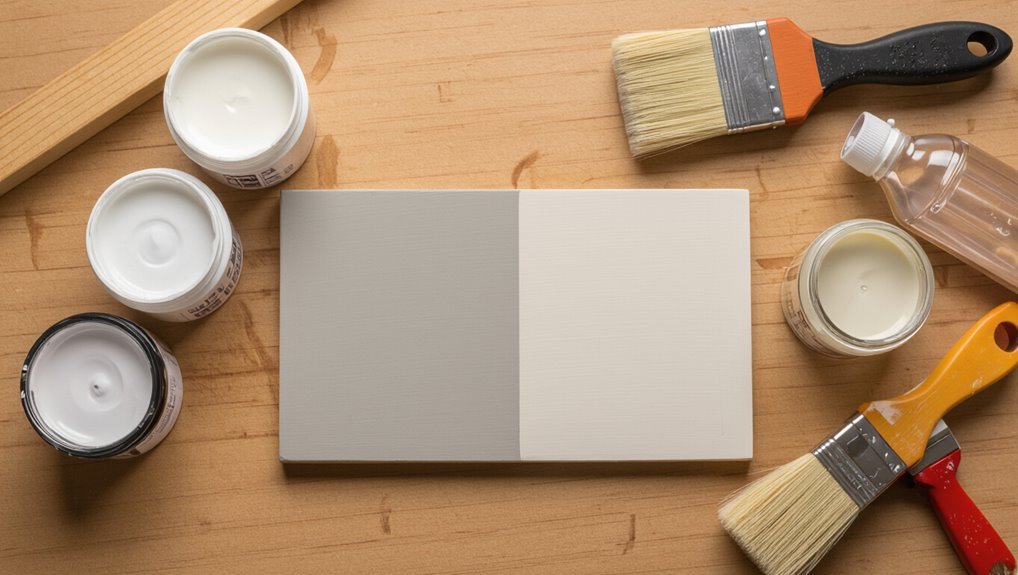
Choosing Matte or Satin Clears to Preserve Look
Finish choice matters: picking a matte or satin clear will determine how your painted surface reads under light and how much of the original texture shows through.
You’ll choose based on sheen preference and durability:
- matte finish hides imperfections and keeps color muted
- satin finish adds depth with low sheen
- both protect without altering pigment much
- test a small area before committing
UV-Resistant Clears for Sun-Exposed Latex Paint
When your latex-painted surface faces direct sunlight, choose a UV-resistant clear to prevent fading, chalking, and breakdown of binders; these clears contain UV absorbers or blockers that extend color life and maintain film integrity.
You’ll address Sun exposure effects and Environmental factors, improving Clear coat longevity and Paint surface compatibility.
Use UV protection techniques, consider Outdoor application challenges, follow Maintenance tips, and enjoy Protective layer benefits.
Moisture-Resistant Finishes for Kitchens and Bathrooms
In kitchens and bathrooms you’ll want clear coats that block water and stand up to frequent cleaning.
Choose water-resistant clear coats to protect paint from splashes and steam, and look for topcoats with mold-inhibiting additives to prevent mildew growth.
I’ll cover how to pick and apply those finishes for the best long-term protection.
Water-Resistant Clear Coats
Because kitchens and bathrooms face constant humidity and splashes, you’ll want a clear coat that actually resists moisture without yellowing or peeling.
Choose water-resistant options and follow proper application techniques to guarantee durability.
Consider:
- Water-based polyurethane for low odor and clarity
- Acrylic varnish for flexibility
- Spar urethane for tougher protection
- Epoxy clear for high-wear areas
Mold-Inhibiting Topcoats
Since kitchens and bathrooms live in constant humidity, you’ll want a topcoat that not only sheds moisture but also resists mold growth; mold-inhibiting finishes incorporate biocides or moisture-barrier technology to keep surfaces sanitary and intact. You’ll choose mold resistant options for longevity and cleaner air. Consider these topcoat benefits:
| Feature | Benefit |
|---|---|
| Biocide | Prevents growth |
| Barrier | Blocks moisture |
| Finish | Easy clean |
| VOC | Low odor |
Heat-Resistant Clears for Stoves and Radiators
When your stove or radiator needs protection from high heat and frequent handling, choose a clear coating rated specifically for elevated temperatures; these products resist yellowing, blistering, and loss of adhesion where ordinary finishes fail.
You’ll want to confirm heat resistance and paint compatibility before applying.
Consider options:
- High-temp clear lacquer for quick cure
- Silicone-based clears for extreme heat
- Ceramic sprays for radiant surfaces
- Epoxy variants where allowed
Abrasion-Resistant Options for High-Traffic Areas
For areas that see constant foot traffic, furniture movement, or frequent cleaning, pick a clear latex coating formulated for abrasion resistance so your finish keeps looking good longer.
You’ll want products labeled for high traffic durability and scuff resistance.
Apply two thin coats, sand lightly between, and cure fully to maximize surface protection.
Regular maintenance cleans extend lifespan without compromising clarity.
Indoor vs. Outdoor Clear-Coat Selection Guide
When choosing a clear coat, you’ll need to treat indoor and outdoor surfaces differently—cleaning, sanding, and priming requirements change with exposure.
Outdoor clear coats must resist UV, moisture, and temperature swings, while indoor options focus more on low odor and the finish sheens you prefer.
Keep those trade-offs in mind so you pick a product that protects the substrate and suits the space.
Surface Preparation Differences
Although indoor and outdoor projects both need a clean, stable base, the specifics of surface prep change a lot depending on exposure and finish requirements.
You’ll assess surface types and choose preparation methods to address adhesion concerns. Consider coating compatibility, application techniques, finish selection, and ongoing maintenance routines.
- Clean and degrease
- Sand for tooth
- Prime problematic areas
- Remove loose paint
UV And Weather Resistance
You’ve prepped the surface correctly, and now you need to match the clear coat to the environment it’ll face.
For outdoor projects, pick weatherproof coating options with UV protection strategies—acrylic urethanes or marine varnishes resist fading and moisture.
Indoors, prioritize low-VOC, non-yellowing clear coats that still offer basic UV defense for sunlit rooms.
Match product specs to exposure for lasting results.
Indoor Fume And Finish
Because indoor projects hang on air quality as much as appearance, pick a clear coat that balances low odor with the finish you want.
You’ll consider fume control and finish maintenance when choosing indoor vs. outdoor products.
- Water-based poly for low fumes
- Low-VOC spray for quick coats
- High-gloss for easy cleaning
- Matte for subtle look and protection
Surface Checklist: Walls, Furniture, Trim, Metal
Before you open the can, walk each surface—walls, furniture, trim, and metal—with a quick checklist so you know what prep each needs; note cracks, glossy finishes, loose paint, rust, or stains that’ll affect adhesion.
For wall preparation assess porosity; check furniture finish for sealing or sanding; confirm trim protection needs and masking; evaluate metal coating condition and remove loose rust or flaking before clear coating.
Preparing Latex-Painted Surfaces for Clear Coating
Before you clear coat, clean the latex-painted surface thoroughly to remove dirt, grease, and chalking.
Lightly sand to promote adhesion, and wipe away dust before you proceed.
If the paint is glossy, use a deglazer to remove the sheen so the clear coat bonds properly.
Clean Surface Thoroughly
Start by removing dust, grease, and chalky residues so the clear coat will adhere and look smooth.
You’ll tackle surface contaminants with the right cleaning tools, then rinse and dry thoroughly. Follow a simple sequence:
- Vacuum or brush loose debris
- Degrease with mild detergent
- Rinse with clean water
- Dry with lint-free cloths before clear coating
Sand For Adhesion
1 key step to guarantee your clear coat bonds is sanding the latex surface to create a slight tooth—scuffing removes gloss and loosens any remaining contaminants so the clear will mechanically grip the paint.
You’ll choose sand types and grit selection, use proper sanding tools, and apply consistent sanding methods.
Follow adhesion techniques, confirm finish compatibility, and consider paint layering during surface preparation.
Remove Gloss With Deglazer
Prep the surface with a liquid deglazer to strip the remaining gloss and dissolve light contaminants that sanding alone won’t remove.
You’ll use deglazer techniques for consistent gloss removal before clear coating.
Follow steps:
- Wear gloves and ventilate workspace
- Apply with a clean cloth, working small areas
- Wipe off residue promptly
- Let surface fully dry before clear coat application
How Long to Wait Before Applying a Clear Coat?
Before you apply a clear coat, make sure the latex paint is fully cured—not just dry to the touch—because curing determines adhesion and durability; typically that means waiting 24 to 48 hours for light traffic and up to 7 days for a fully cured surface, depending on temperature, humidity, paint thickness, and manufacturer recommendations.
You’ll follow proper drying times and suited application techniques to avoid trapping solvents or causing adhesion failures.
Cleaning and Degreasing Before Clear Coating
Before you clear coat latex paint, you’ll want to remove dust, sanding residue, and any loose particles with a tack cloth or damp microfiber.
Then strip oils and grease using an appropriate solvent—like denatured alcohol for light contaminants or a dedicated citrus or mineral spirits degreaser for heavier film.
Proper cleaning and the right solvent choice guarantee adhesion and a smooth finish.
Surface Cleaning Methods
Cleaning and degreasing the surface is essential to getting a smooth, durable clear coat — any dirt, oil, or residue will show through and can cause adhesion failures.
You’ll use proper surface preparation and cleaning techniques, chosen cleaning tools, and suitable cleaning solutions to handle grime removal and stain removal.
Keep consistent dust control and cleaning frequency for surface maintenance.
- Wipe loose dust
- Wet-clean stains
- Scrub grease
- Final residue removal
Degreasing Solvent Options
When you’re prepping for a clear coat, pick a degreasing solvent that matches the substrate and the type of contamination so you get reliable adhesion and no surface haze. You’ll use degreasing techniques and select solvent types based on grease, wax, or silicone residues. Test small areas, wipe with clean cloths, and let surfaces fully dry.
| Contaminant | Solvent | Notes |
|---|---|---|
| Grease | Citrus degreaser | Mild, low odor |
| Silicone | Mineral spirits | Effective, use ventilation |
| Wax | Isopropyl alcohol | Fast-evaporating |
| Dirt | Soap + water | Rinse thoroughly |
Light Sanding and Scuffing: When and How
Light sanding and scuffing help the clear coat adhere and smooth out minor imperfections, so you’ll want to do them whenever the surface feels glossy, has dust nibs, or after curing for 24–48 hours.
- Choose sanding grit choices for light sanding techniques and smoothing imperfections.
- Use gentle scuffing methods to boost adhesion improvement strategies.
- Follow surface preparation tips and paint layering techniques.
- Consider finish compatibility concerns before clear coating.
Using Adhesion Promoters and Primers
You’ll want primer whenever you’re coating glossy, bare, or repaired surfaces to guarantee the latex clear coat sticks and lasts.
Choose the right adhesion promoter—shellac, bonding primers, or specialty adhesion primers—based on substrate and follow label instructions for thinning and compatibility.
Apply evenly, watch recommended flash and cure times, and lightly sand between coats for best adhesion and drying.
When To Use Primer
Although latex clear coats bond well to many painted surfaces, you’ll still want to use a primer or adhesion promoter whenever the substrate is glossy, bare, stained, or otherwise hard for paint to grab onto.
Choose primer types based on surface and primer applications for adhesion, sealing, or stain blocking. Consider:
- Glossy finishes
- Bare wood or metal
- Tannin-stained surfaces
- High-wear areas
Types Of Adhesion Promoters
When you need paint to stick to a tricky surface, choose the right adhesion promoter—each type’s chemistry and purpose differs, so picking one for metal, plastic, or previously painted surfaces matters. You’ll use adhesion techniques that improve surface compatibility: solvent-based for plastics, etching primers for metal, and universal primers for repainting.
| Type | Best for | Note |
|---|---|---|
| Solvent | Plastic | Flexible |
| Etch | Metal | Corrosion control |
| Universal | Repaint | Versatile |
Application Tips And Drying
Start by prepping the surface thoroughly—clean, degloss, and remove contaminants—so the adhesion promoter or primer bonds properly; apply thin, even coats with light cross-hatching and follow the manufacturer’s recoat and flash times to avoid trapping solvents or causing fish-eyes.
Use proper application techniques and respect drying times:
- Sand between coats for mechanical bite
- Maintain recommended temperature and humidity
- Use tack cloths before recoating
- Test adhesion on a small area first
Brush, Roller, or Spray: Application Pros and Cons
Choosing between a brush, roller, or sprayer comes down to the surface, finish, and how much time you want to spend—each method gives different coverage, texture, and control.
You’ll use brush techniques for edges and detail, roller efficiency on flats, and spray application for smooth finish consistency.
Consider surface texture, paint compatibility, drying times, and pick appropriate application tools for best results.
Applying Thin Coats and Managing Dry Times
Apply thin, even layers so the latex clears level smoothly without sagging.
Wait the manufacturer’s recommended drying interval between coats to avoid trapping moisture and to guarantee proper adhesion.
Work wet edge to wet edge to prevent lap marks and check that each coat is dry to the touch before continuing.
Thin Layer Application
Work in thin, even passes so each coat cures uniformly and avoids runs, drips, or trapped solvent that lengthens dry time.
You’ll use thin layer techniques and proper application tools to control film build. Follow small, deliberate motions and inspect between coats.
- Use a high-quality brush
- Try a dense foam roller
- Consider a fine spray
- Lightly feather edges
Optimal Drying Intervals
After laying each thin, even coat, you’ll need to let it dry to the point where it can accept the next pass without lifting or showing brush marks.
Check tackiness after the manufacturer’s recommended drying time; if it feels set, proceed. Longer curing process improves adhesion and reduces trapped solvents.
Wait between coats rather than forcing speed, and monitor temperature and humidity for consistent results.
Preventing Lap Marks
1 simple rule prevents most lap marks: keep each coat thin and maintain a wet edge so you always blend into still-wet paint.
You’ll get better lap mark prevention and avoid streaking by timing coats and working quickly.
Tips:
- Use thin, even passes
- Keep a wet edge
- Watch tack times between coats
- Work in consistent light to avoid streaks and avoid streaks
Temperature and Humidity Guidelines
Because clear-coat latex cures through evaporation and coalescence, you need to control temperature and humidity while you’re applying and drying it.
Monitor temperature effects: aim for manufacturer-recommended ranges (usually 50–85°F) to guarantee proper film formation.
Watch humidity impacts: avoid high humidity and condensation, which slow drying and cause cloudiness.
Work during stable conditions and use ventilation or dehumidifiers as needed.
How Many Clear Coat Layers Do You Need?
Now that you’ve got temperature and humidity under control, decide how many clear-coat layers you need based on protection, appearance, and the product’s instructions.
Choose by weighing layer thickness, application method, drying time, finish type, surface compatibility, environmental factors, product selection, and durability comparison:
- One for light protection and minimal change
- Two for standard durability and shine
- Three for heavy wear or outdoors
- Extra thin coats reduce blush and runs
Troubleshooting: Bubbling, Peeling, and Blush
If your clear coat shows bubbling, peeling, or a milky blush, don’t panic—you can usually diagnose the cause and fix it without stripping everything.
Check for bubbling issues from trapped solvents, peeling concerns tied to poor prep, and blush effects caused by humidity.
Use straightforward troubleshooting techniques to assess surface flaws, paint integrity, finish compatibility, moisture impacts, adhesion problems, and environmental factors.
Fixing Poor Adhesion or Uneven Sheen
After you’ve ruled out bubbles, peeling, and blush, tackle adhesion and uneven sheen methodically: start by testing small areas with denatured alcohol or a scotch-brite pad to see if the clear coat scuffs or lifts.
Then assess whether the problem stems from inadequate sanding, incompatible primers or paints, or contaminants like silicone or oil.
- Clean and re-degrease affected spots
- Lightly scuff and feather edges
- Use a compatible primer or adhesion promoter
- Recoat for sheen adjustment and cure recommendations
Long-Term Maintenance of Clear-Coated Surfaces
Proper maintenance will keep your clear-coated latex surfaces looking sharp and help the finish last years instead of months.
You should clean gently with mild soap and water, avoid harsh abrasives, and dry thoroughly.
Use maintenance tips like periodic inspections for scratches and UV damage, apply compatible polish sparingly, and protect from prolonged sun or moisture to maximize surface longevity.
Recoat vs. Strip: Handling a Failed Clear Coat
When a clear coat fails—showing peeling, severe scratching, or widespread clouding, you’ve got two choices: recoat or strip and start over.
When a clear coat fails—peeling, deep scratches, or clouding—decide: recoat carefully or strip and restart.
Evaluate surface integrity, assess product compatibility, then choose repair techniques. Consider finish longevity and coating performance when planning reapplication strategies.
- Inspect for adhesion and contamination
- Test small recoat patch
- Strip to bare substrate if compromised
- Follow supplier prep guidelines
Cost Comparison of Popular Clear-Coat Options
Having decided whether to recoat or strip, you’ll next weigh the costs of common clear-coat systems so your repair choice matches your budget and performance needs. You’ll get a clear cost breakdown and side-by-side product comparisons to compare upfront materials, labor, and longevity.
| Type | Avg Price | Lifespan |
|---|---|---|
| Acrylic | $15–30 | 2–4 yrs |
| Polyurethane | $20–50 | 4–8 yrs |
| Spar Varnish | $25–60 | 3–6 yrs |
Product Recommendations: Dresser, Trim, Deck
For a dresser, trim, and deck you’ll want clear-coat choices tuned to each surface: choose a durable, low-yellowing water-based polyurethane for indoor dressers to protect against wear and preserve color;
pick a fast-drying, thin-film acrylic or wipe-on varnish for delicate trim to avoid brush marks and buildup;
and select a marine-grade spar varnish or exterior polyurethane with UV inhibitors for decks to resist sun and moisture.
- Dresser finishes: water-based polyurethane
- Trim protection: thin-film acrylic or wipe-on varnish
- Deck durability: marine spar varnish or exterior polyurethane
- Application tip: test on scrap and follow manufacturer cure times
Safety and Ventilation When Applying Clears
Because clears emit volatile solvents and fine spray particles, you should ventilate work areas and wear appropriate PPE before you start, not after.
Because clears emit volatile solvents and fine spray particles, ventilate and don PPE before starting, not after.
For safety gear, use respirators and goggles.
Follow ventilation tips and airflow management: open windows, use fans, and seal doors.
Plan workspace preparation, application techniques, and drying times to minimize fume exposure.
Observe health precautions and avoid prolonged exposure.
Low-VOC and Environmental Alternatives
Reducing fumes and protecting your health goes hand in hand with choosing low-VOC and environmentally friendly clear coatings.
You’ll want eco friendly options that still seal and protect without harsh solvents. Consider:
- Water-based clear coats for low odor and durability
- Plant-derived natural sealants for gentle protection
- Biodegradable coatings where biodegradability matters
- Reclaimed-material sustainable finishes to minimize impact
Quick Decision Flowchart: Pick the Right Clear Coat
Which clear coat is right for your project? Use a simple flow: choose based on indoor/outdoor, sheen, and durability needs.
Match clear coat types (polycrylic, water-based polyurethane, oil-based varnish) to substrate and exposure.
Pick compatible application techniques—spray for smooth surfaces, brush for edges, wipe for thin coats.
Test adhesion on scrap, then proceed with recommended drying times.
FAQ: Common Quick Questions About Clear Coats
Wondering which clear coat fits your project best? You’ll find quick answers to boost clear coat benefits and extend latex paint longevity.
- Which type is best? Water-based for indoors, oil for heavy wear.
- Do you need primer? Usually not for sound latex paint.
- How many coats? Two thin coats work well.
- Dry time concerns? Follow product labels for recoat intervals.
Frequently Asked Questions
Can You Clear Coat Latex-Painted Children’s Toys or High-Saliva Items?
Yes—you can clear coat latex-painted toys, but you should choose non-toxic, food-safe sealers and test for child safety; doing so improves paint durability and protects finishes, yet follow curing times and manufacturer safety labels.
Will Clear Coats Yellow Over Dark-Colored Latex Paints?
Yes — clear coats can yellow over dark-colored latex paints, but you’ll often avoid it by choosing low-yellowing formulations; consider yellowing factors like UV exposure, solvent type, and dark paint compatibility when selecting clear finishes.
Can You Mix Different Clear-Coat Brands on the Same Project?
Yes — but don’t assume compatibility; you’ll test first. Investigate brand performance differences, mix only when products list compatible chemistries. Clear coat incompatibility can cause peeling, so always spot-test for clear coat compatibility.
Do Clear Coats Affect Fire-Retardant or Anti-Microbial Paint Properties?
Yes — clear coats can alter fire retardant efficacy and antimicrobial properties; you’ll need a compatible, breathable, certified topcoat that won’t block additives or VOCs. Test samples to confirm preserved performance before finishing the whole project.
How Does Clear Coating Affect Paint Warranty or Manufacturer Coverage?
Applying a clear coat can void warranties if it contradicts manufacturer recommendations; you should check warranty implications first. If the maker permits clear coats or provides approved products, your coverage’s typically preserved, otherwise it may be denied.
Conclusion
You can clear coat latex paint when you need extra durability or a different sheen, but don’t bother if the finish is failing—strip or repaint instead. If you worry clear coats yellow or trap moisture, use a water-based polyurethane or acrylic varnish made for latex; they dry clear and breathe. Always sand lightly and test first. With proper prep, a clear finish boosts protection and longevity without compromising color or adhesion.