What Causes Moisture on Interior Walls? Common Reasons
You’re seeing moisture on your interior walls because water’s getting in or condensing there—from roof or pipe leaks, rising damp from the ground, or warm moist air hitting cold surfaces. Poor ventilation, everyday activities like cooking and showering, indoor plants, and blocked vents raise humidity and make condensation worse. Structural issues like cold bridging, damaged render, or a faulty damp-proof course let external water penetrate. Keep going to learn practical checks, fixes, and when to call a pro.
Why Walls Get Damp: Quick Overview
When you notice damp patches on interior walls, it’s usually because water’s getting in or humidity’s not being controlled—common causes include leaks from roofs or pipes, rising damp from the ground, and condensation from poor ventilation.
You should use damp detection tools to identify sources quickly, fix breaches, and apply moisture prevention measures like membrane barriers and improved drainage to stop recurrence.
Condensation and Interior Wall Moisture
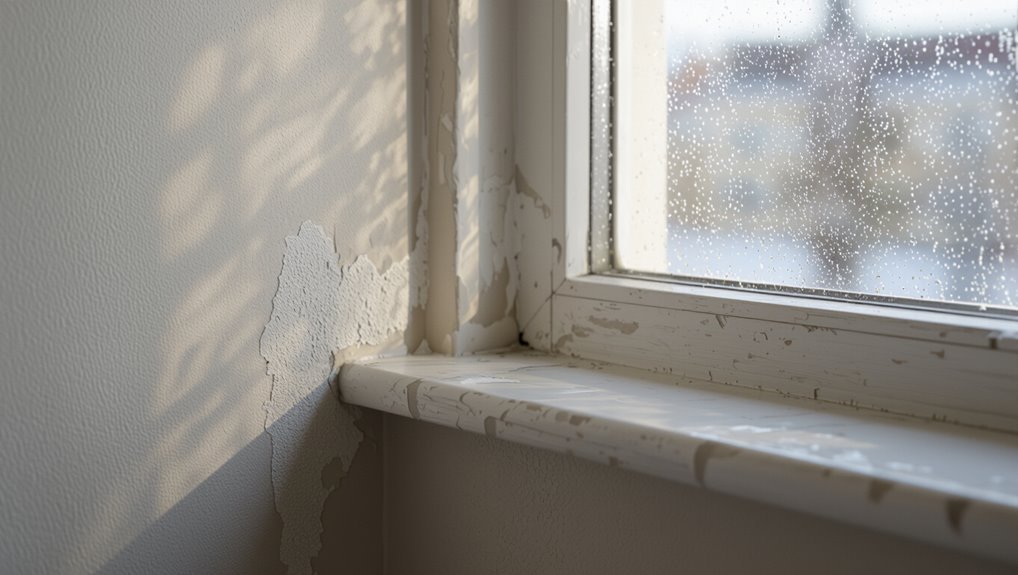
When warm, moisture‑laden air meets a cold interior wall, you’ll get condensation that shows up as wet patches or streaks.
If your home has high indoor humidity and you don’t vent bathrooms, kitchens, or dryers properly, that moisture keeps building on surfaces.
Check ventilation paths and reduce humidity to stop repeated condensation on walls.
Warm Air Meets Cold
If warm, humid indoor air hits a cold interior wall, it cools quickly and releases moisture as condensation on the surface; you’ll often see this as damp patches, water droplets, or even mold along windows, exterior walls, and behind furniture.
You should check insulation types and moisture barriers — inadequate insulation or missing barriers lets cold spots form, so warm air condenses on those colder wall areas.
High Indoor Humidity
Because your home generates moisture from cooking, showering, and breathing, indoor humidity can rise enough to leave condensation on interior walls, windows, and ceilings.
You’ll notice damp patches where warm, moist air cools.
Reduce problems with humidity control measures: use dehumidifiers, exhaust fans, and limit drying clothes indoors.
Be careful with indoor plants; they add moisture, so group or relocate them if needed.
Poor Ventilation Paths
Poorly routed or blocked ventilation lets that indoor moisture hang around long enough to condense on interior walls. You should inspect vents, clear pathways, and install proper airflow solutions to prevent cold spots. Managing humidity control with fans or dehumidifiers helps.
| Issue | Cause | Fix |
|---|---|---|
| Blocked vent | Lint/debris | Clean regularly |
| Poor routing | Wrong ducting | Reroute ducts |
| No exhaust | No fan | Install fan |
Poor Ventilation and Humid Rooms
If you keep windows closed and rooms cluttered, stagnant air pockets will trap moisture against your walls.
High indoor humidity from cooking, showers, or drying clothes increases that trapped moisture and raises condensation risk.
Make sure your exhaust fans are properly sized and vented, because inadequate fans won’t remove the humid air effectively.
Stagnant Air Pockets
When rooms don’t get enough fresh air, pockets of humid, stagnant air form along interior walls and encourage condensation and mold growth.
You’ll notice cooler wall surfaces collect droplets where stagnant air lingers, and moisture buildup darkens paint or wallpaper.
You can reduce this by improving airflow: open windows briefly, run exhaust fans, and reposition furniture to prevent trapped air against walls.
High Indoor Humidity
Because indoor activities like cooking, showering, and drying clothes release lots of moisture, high indoor humidity becomes a persistent source of wall condensation and mold growth.
You’ll notice damp patches if you don’t manage humidity control; furniture and paint suffer.
Improve airflow, use dehumidifiers, and install proper moisture barriers where walls meet exterior surfaces to prevent long-term damage and health risks.
Inadequate Exhausting Fans
Although you might run a shower or boil pasta without thinking, failing to vent that moist air lets humidity cling to walls and feed mold growth.
You should install and use proper exhaust fans to reduce condensation; prioritize exhaust fan importance when choosing capacity and placement.
Regular maintenance and timely ventilation solutions stop persistent damp, protect paint and insulation, and prevent costly repairs.
Everyday Activities That Raise Indoor Humidity
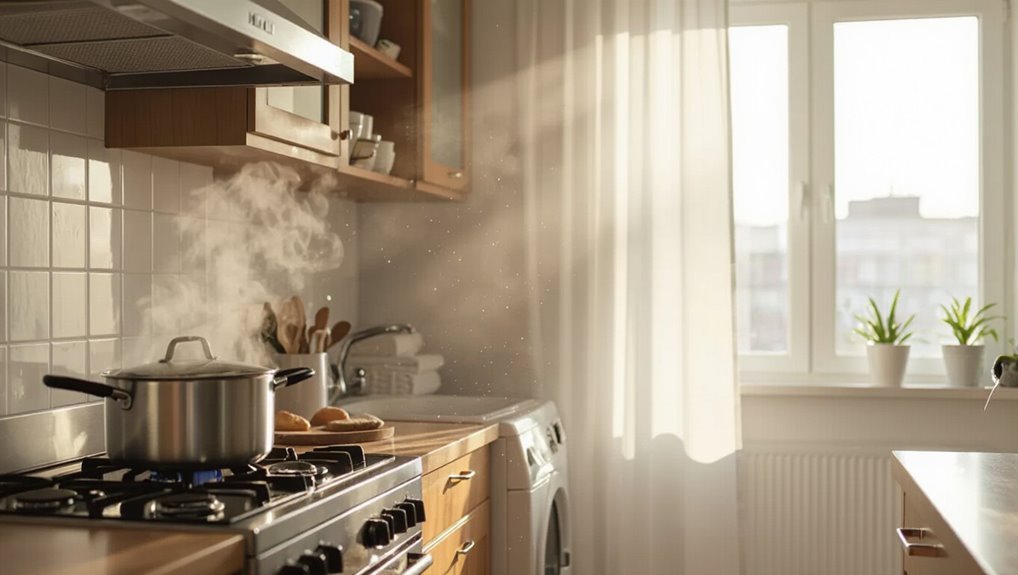
If you run hot showers, cook without lids, or dry clothes indoors, you’ll noticeably raise the humidity inside your home—everyday tasks release a surprising amount of water vapor that can linger on walls and furnishings.
You produce shower steam and cooking humidity, plus laundry drying, indoor plants, aquarium maintenance, breathing activities, heating systems, and fireplace use all add moisture; ventilate and exhaust to control it.
Cold Bridging and Thermal Leaks in Walls
When you have gaps in insulation, structural components that pierce the thermal layer, or poorly sealed junctions, cold bridging lets outside chill reach interior surfaces and can make walls damp.
You’ll notice cold spots, condensation, and peeling paint where thermal insulation is compromised.
Fixing leaks and improving seals restores energy efficiency, reduces moisture, and prevents mold growth on interior walls.
Rising Damp From Ground Moisture
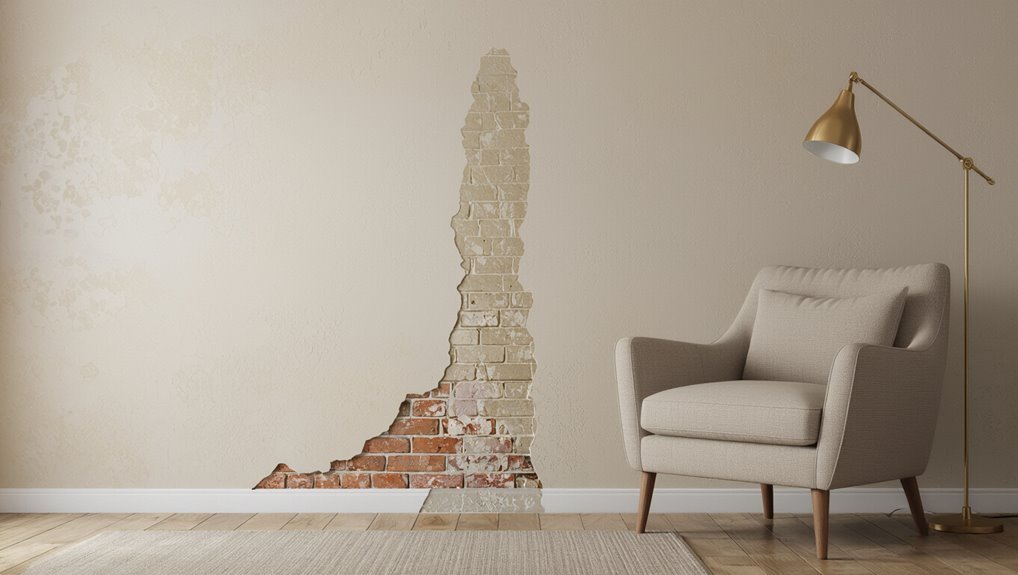
Because masonry and soil stay wet, ground moisture can travel up through porous floors and walls and leave you with salt stains, flaking plaster, and a musty smell at the base of interior walls.
You’ll notice rising damp where moisture rises from foundations.
Check for:
- salt crystals
- peeling paint
- crumbling plaster
- damp skirting
- persistent odors
Penetrating Damp From Exterior Defects
When you see damp patches after rain, check for exterior defects that let water in.
Damaged render, faulty roof flashings, and blocked or broken gutters are common causes that channel water toward walls.
Fixing these external faults often stops penetrating damp before it reaches your interior.
Damaged External Render
If your exterior render has cracks, holes, or delaminated sections, rain will penetrate the barrier and drive moisture into the wall fabric, showing up as damp patches, peeling paint, or salt stains inside.
You should carry out an exterior inspection to check moisture barriers and repair promptly.
- Look for hairline cracks
- Check render adhesion
- Assess joints and seals
- Note salt efflorescence
- Monitor recurring damp
Faulty Roof Flashings
A single failed flashing can let water track under tiles or around chimneys and rooflights.
So you’ll often see damp patches on internal walls, staining, or plaster softening directly below the defect.
Check flashing installation during roof maintenance, since poor joins or sealant gaps defeat moisture barriers.
You should address defects promptly, using proven weatherproofing techniques to prevent penetrating damp and interior damage.
Blocked Or Broken Gutters
One common exterior defect that leads to penetrating damp is blocked or broken gutters, which let rainwater overspill or run down walls instead of being carried away.
You should check gutter maintenance and guarantee proper water drainage to prevent stains and mold.
- Inspect for debris
- Repair leaks promptly
- Guarantee correct fall
- Replace damaged sections
- Schedule regular cleaning
Roof, Gutter, and Flashing Leaks Below Walls
When roof flashing, gutters, or downspouts fail, water can travel down the exterior and seep into the wall cavity below, leaving stains, peeling paint, or soft drywall inside your home.
You should schedule roof inspection and gutter maintenance, pursue flashing repairs and leak detection, use moisture mapping and drainage solutions, add waterproof barriers, select durable building materials, and manage humidity control to protect structural integrity.
Leaking Plumbing Behind Walls
Trace hidden leaks quickly: plumbing behind walls can drip or burst without obvious signs, then soak studs, insulation, and drywall before you notice.
You should schedule a plumbing inspection and use professional leak detection if you see stains, musty odors, bubbling paint, warped trim, or unexplained high water bills.
- water stains
- mold growth
- soft drywall
- warped floors
- sudden bill spikes
Window and Door Frame Leaks
If water’s getting into your home around window or door frames, it often soaks into the jambs, trim, and nearby drywall before you notice obvious signs.
Check window seals, frame maintenance, and moisture barriers.
Poor insulation quality and air leaks worsen damp.
Fix drainage issues, use proper sealant application, and employ weatherproofing techniques to stop leaks and protect interior walls.
Missing or Damaged Damp-Proof Course (DPC)
Because the damp-proof course stops ground moisture from rising into walls, a missing or damaged DPC lets salt-laden damp climb into your interior plaster and paint.
A missing or damaged DPC lets salt-laden ground moisture rise into your plaster and paint—inspect and replace promptly.
You should inspect for failed damp proof installation and replace moisture barriers promptly.
- Salt staining on skirting
- Flaking paint
- Damp smell
- Cold, damp patches
- Rising tide line on plaster
Renovations That Expose Walls to Moisture
When you strip back finishes, reroute plumbing, or open cavities during renovations, you can suddenly expose walls to rain, leaking pipes, or damp masonry that wasn’t a problem before. You’ll need to identify moisture sources and manage renovation impacts quickly to prevent staining, mold, or structural decay.
| Issue | Action |
|---|---|
| Rain ingress | Temporary sealing |
| Pipe leaks | Fast repair |
| Damp masonry | Drying & treatment |
| Open cavities | Protect & monitor |
Blocked Cavity Vents and Wet Cavities
If cavity vents get blocked, you’ll lose the airflow that keeps wall cavities dry.
That trapped, stagnant air lets moisture build up between the layers.
You should check vents and clear obstructions to prevent wet cavities from causing mold or decay.
Blocked Airflow Causes
Although it’s easy to overlook, blocked airflow in wall cavities can seriously raise interior moisture levels by trapping damp air and preventing proper drying.
You’ll want to address airflow obstruction to restore humidity control and prevent mold. Check vents, insulation, and debris.
Tips:
- Inspect cavity vents
- Clear external obstructions
- Remove insulation blockages
- Guarantee vent routing
- Use moisture meters
Moisture Trapped Between
Blocked or poorly routed cavity vents don’t just reduce airflow—they can trap moisture between wall layers and create persistently wet cavities that won’t dry out on their own.
You’ll notice staining, mold, or damp plaster when moisture sources like leaks or high indoor humidity meet compromised wall insulation.
Inspect vents, clear blockages, and repair flashing or seals so trapped cavities can dry and stay dry.
Failed Exterior Finishes and Paint Issues
Sometimes a small crack or peeling patch on the outside can be the first sign that exterior finishes and paint have failed, letting water reach the wall assembly.
A tiny crack or peeling spot can signal failed exterior finishes, letting water into the wall assembly.
You’ll see paint peeling, surface moisture, and material degradation that cause exterior leaks and paint failure, worsened by weather impact and insulation issues.
- failed finishes
- paint peeling
- exterior leaks
- surface moisture
- material degradation
Basement Humidity Affecting Upper Walls
Exterior paint failures can let water into wall assemblies, but moisture problems don’t stop at the surface — they can originate below.
If your basement lacks proper basement insulation or ventilation, rising humidity can migrate into upper walls, causing damp spots and mold.
You should install vapor barriers, improve humidity control with a dehumidifier, and seal penetrations to stop moisture transfer upward.
Uninsulated Cold Pipes and Appliance Condensation
If you notice water forming on walls near plumbing or appliances, uninsulated cold pipes are often the culprit because their cool surfaces attract room humidity.
Appliances like refrigerators and washing machines can also transfer moisture to nearby walls when they vent warm, humid air.
Insulating pipes and improving appliance seals or ventilation can stop that surface condensation before it soaks into drywall.
Cold Pipe Surface Condensation
When warm, humid indoor air touches a cold, uninsulated pipe or appliance surface, you’ll see water form quickly as the air cools and its moisture condenses. This often happens on refrigeration lines, exposed plumbing, and the metal casings of HVAC equipment.
You can reduce damage with pipe insulation and simple condensation prevention steps:
- Insulate exposed pipes
- Add vapor barriers
- Improve room ventilation
- Control indoor humidity
- Routinely inspect fittings
Appliance Moisture Transfer
Because uninsulated cold appliance components drop below the air’s dew point, you’ll often see water form on refrigeration lines, ice makers, and freezer exteriors as warm, humid indoor air contacts their surfaces. You should check appliance placement to avoid trapping humid air and improve moisture management around units.
| Issue | Impact |
|---|---|
| Condensation | Wall staining |
| Drips | Mold risk |
| Pooling | Flooring damage |
| Corrosion | Appliance failure |
Preventive Insulation Measures
To prevent condensation on cold appliance lines and pipes, add insulating sleeves or wrap foam tape around exposed surfaces so warm room air can’t reach temperatures below the dew point.
You should use proper insulation materials and install thermal barriers to stop moisture transfer.
Consider these steps:
- Measure pipe lengths
- Choose closed-cell insulation
- Seal joints
- Avoid gaps
- Maintain ventilation
Indoor Plants, Aquariums, and Added Humidity
Although indoor plants, aquariums, and humidifiers add life and comfort to your home, they can also raise indoor humidity enough to cause condensation on walls.
You should balance plant care and aquarium maintenance with proper humidity control: ventilate rooms, avoid overwatering, cover tanks, and use a dehumidifier or monitor to support effective moisture management so walls stay dry and damage risk stays low.
How Persistent Moisture Creates Mold-Friendly Conditions
When air doesn’t move in poor ventilation zones, you’ll get pockets of humid, stagnant air that let spores settle and grow.
Chronic condensation build-up on cold surfaces keeps walls damp long enough for mold to take hold.
Hidden water intrusion from leaks or capillary rise can keep materials continuously wet, so you should inspect behind finishes and around penetrations.
Poor Ventilation Zones
Poorly ventilated zones—like closets, behind furniture, or the corners of bathrooms—trap humidity and let moisture linger on interior walls, creating the steady dampness mold needs to take hold.
You should improve air circulation and moisture control to prevent growth.
- Open doors periodically
- Use exhaust fans
- Move furniture away from walls
- Run a dehumidifier
- Inspect hidden spaces regularly
Chronic Condensation Build-Up
If warm, humid air keeps contacting cool interior surfaces, condensation will form repeatedly and soak wall materials over time.
You’ll notice chronic condensation where cooking, showering, or drying clothes raise indoor humidity. That persistent dampness feeds mold and damages paint, insulation, and studs.
Identify moisture sources, improve ventilation, and use dehumidification to stop recurring wetness before structural decay and health issues arise.
Hidden Water Intrusion
Because hidden leaks and rising damp stay out of sight, they quietly keep wall cavities wet and create perfect conditions for mold to take hold.
You’ll miss signs until stains, musty odors, or peeling paint appear. Use moisture mapping to locate trouble.
Check for:
- plumbing failures
- roof or flashing breaches
- basement seepage
- poor grading
- clogged gutters
Condensation vs. Penetrating vs. Rising Damp: Quick Guide
When you see damp patches on interior walls, identify whether it’s condensation, penetrating damp, or rising damp so you can fix the root cause rather than just treat symptoms.
Condensation shows surface damp from indoor humidity; penetrating damp comes from external leaks through masonry; rising damp draws ground moisture up through foundations.
Match repairs, ventilation, or damp-proofing and choose appropriate wall treatments after diagnosing moisture sources.
Simple Checks Homeowners Can Do Now
Anyone can run a few quick checks to narrow down why a wall’s damp patches keep appearing.
Anyone can run quick checks to pinpoint recurring damp patches and decide next steps.
Do these basic moisture detection steps and inspect finishes before changing wall treatments:
- Look for leaks under sinks and around window frames.
- Smell for musty odours near affected areas.
- Check external gutters and downpipes.
- Tap walls to find hollow spots.
- Monitor humidity with a cheap hygrometer.
Short-Term Fixes to Stop Immediate Damp
If you need to stop damp fast, act on visible sources and control indoor moisture immediately: ventilate rooms, wipe condensation, fix leaks temporarily with sealant, and move wet items outside.
Start a dehumidifier installation or rent one to lower humidity now. Use temporary plastic sheeting as a moisture barrier over damp spots and keep airflow steady until you arrange proper repairs.
Long-Term Repairs and When to Call a Pro
Because quick fixes only buy time, you’ll want durable solutions that address the root cause—whether that’s rising damp, penetrating damp, plumbing leaks, or condensation from poor insulation and ventilation.
You should seek long term solutions and a professional assessment when damage is recurrent or structural.
Consider repairs such as:
- Replace damaged plaster
- Repair drains/fascias
- Install damp-proof course
- Refix flashing
- Upgrade insulation and ventilation
Preventive Steps to Keep Walls Dry
After arranging long-term repairs, you’ll want to stop moisture problems before they start by adopting simple preventive measures. Seal gaps, install moisture barriers, and improve ventilation. Use proper insulation techniques and maintain gutters. Check for leaks regularly and run exhaust fans during humidity spikes.
| Action | Frequency | Benefit |
|---|---|---|
| Seal gaps | Annually | Prevents ingress |
| Ventilate | Daily | Reduces condensation |
| Inspect gutters | Seasonally | Directs water away |
Frequently Asked Questions
Can Wall Moisture Cause Electrical Hazards or Fires?
Yes — you can face electrical hazards and fires when wall moisture reaches wiring or outlets. Moisture promotes mold growth and indicates insulation failure, which can corrode connections, short circuits, and increase risk unless you address it promptly.
Can Moisture Damage Structural Timber Framing?
Yes — if you don’t address persistent moisture, it’ll promote timber decay and mold growth, weakening framing, causing rot, reducing load capacity, and forcing costly repairs; you should fix leaks, improve ventilation, and dry affected timber promptly.
Will Moisture Ruin Wallpaper Adhesion Long-Term?
In a damp basement condo you’d see paste peel; yes, moisture will ruin wallpaper adhesion long-term. Vinyl, non-woven and paper wallpaper react differently, so control moisture levels or the adhesive and seams will fail.
Can Pets or Pests Contribute to Wall Dampness?
Yes — pets and pests can contribute to wall dampness. If you don’t maintain pet hygiene, odors and moisture build; neglecting pest control lets infestations create leaks, nesting moisture, or damage that raises humidity and promotes damp walls.
How Does Seasonal Temperature Change Affect Moisture Recurrence?
Like seasonal tides, you’ll see moisture return as temperatures swing; colder surfaces raise humidity levels and trigger condensation issues, so you’ll notice recurring damp patches when warm, moist air meets cool walls during seasonal changes.
Conclusion
You can curb interior wall moisture with small changes: improve ventilation, run exhaust fans, fix leaks, and add insulation where you spot cold bridges. Notably, homes with poor ventilation can have indoor humidity 30–50% higher than well-ventilated houses, boosting condensation risk. If short-term fixes don’t help or you see mold, call a pro—timely action avoids bigger repairs. Start with simple checks and stay proactive to keep walls dry and healthy.