What to Do If Paint Dries Out (Easy Fix Methods)
If your paint’s dried out, first check smell and texture—discard if foul or curdled. Remove any skin, stir gently, then strain to catch lumps. Match solvent to the paint: water for latex, mineral spirits or thinner for oils, and add tiny amounts while stirring until it smooths. Test on scrap to confirm adhesion and color. Wear gloves and ventilate the area. Follow disposal rules for unusable paint, and keep going here to learn proper techniques and safety tips.
How to Use This Guide
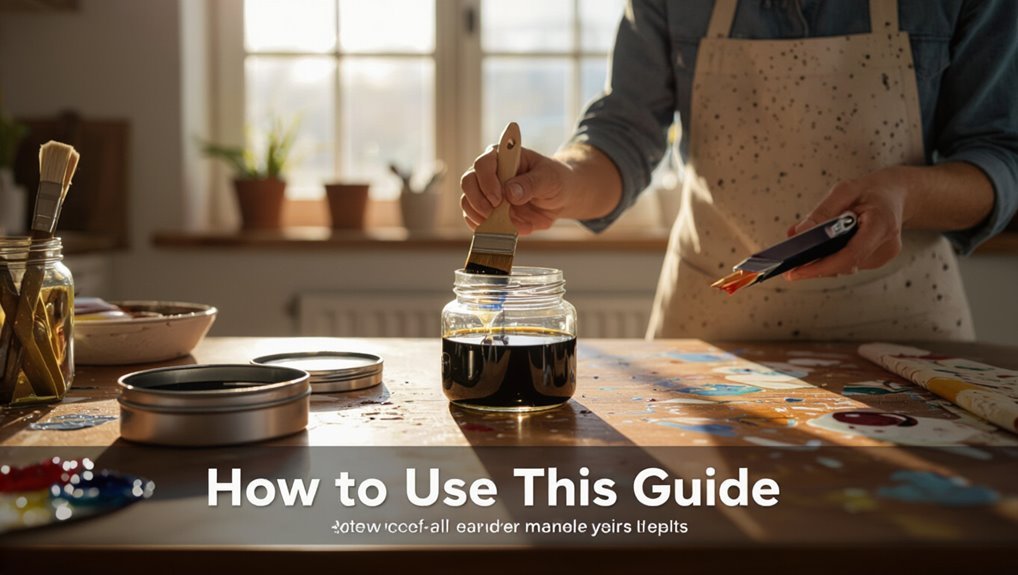
Before you jump in, skim the guide to spot the sections that match your paint type and situation—latex, oil, water-based, or craft paints—and start with the troubleshooting steps for that category.
You’ll follow clear, stepwise fixes, learn how to store leftovers correctly, and adopt simple paint maintenance routines to prevent drying.
Use the matching section for product-specific tips and safety notes.
Quick Salvage Steps: Check, Thin, Test
Start by inspecting the paint’s consistency to see if it’s lumpy, skinning, or just too thick.
If it’s salvageable, thin it with the proper solvent for that paint type and mix thoroughly.
Test a small patch to confirm flow and adhesion before using it on your project.
Inspect Paint Consistency
When you pull the can lid, check the paint’s texture and smell—you’re looking for skinning, clumps, separation, or a sour odor that signals spoilage.
Stir gently and note paint texture changes: smooth, gritty, or ropey.
Decide if paint restoration is viable—minor separation and thin skins can often be revived; pervasive curdling or foul smell means discard and replace for reliable results.
Use Proper Thinner
If the paint looks mostly sound after your inspection but feels too thick or tacky, you can often rescue it by using the correct thinner.
Choose proper thinner types for your paint base, measure sparingly, stir gently, and follow thinner application techniques to avoid over-thinning.
- Match solvent to paint
- Use small additions
- Stir slowly
- Keep ventilation
- Note pot life changes
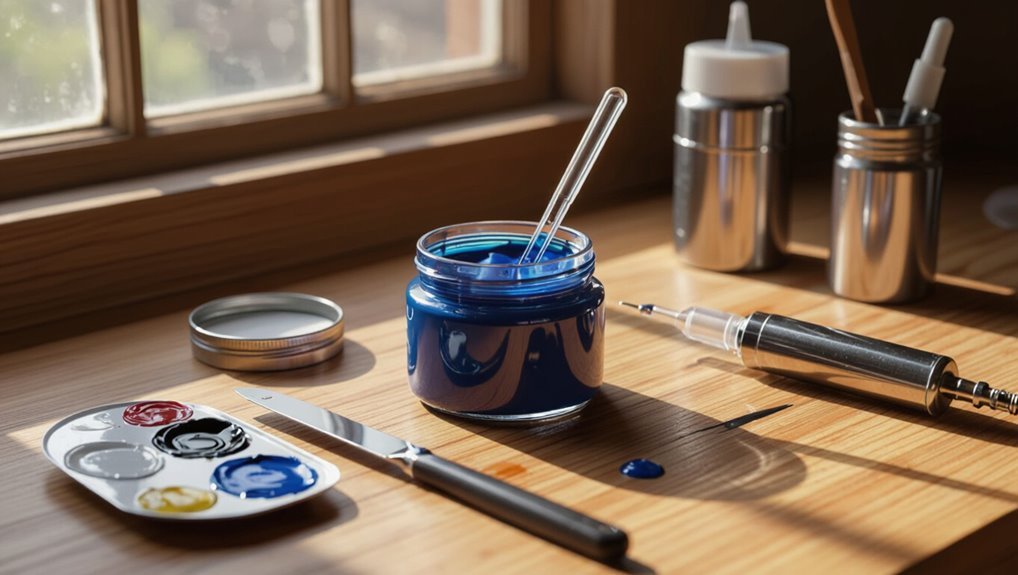
Perform Small Test Patch
Before you commit to restoring the whole can, make a small test patch to confirm your thinning worked and the finish will cure properly; pick an inconspicuous scrap or an inside corner, apply the thinned paint sparingly, let it dry fully, and inspect for adhesion, color shift, texture, and tackiness.
After drying, do a test patch for adhesion and a color comparison to the original, noting any differences.
How to Quickly Test If Paint Is Salvageable
First, sniff the paint and feel its texture—fresh paint has a mild odor and a smooth, creamy feel.
Then stir it well and check the consistency; it should flow and coat like when it was new.
If you’re unsure, apply a small amount from the can to a scrap surface to see how it dries before committing to a full job.
Smell And Texture
Two quick checks — smell and texture — will tell you almost immediately whether paint is worth saving.
Use a simple smell assessment and texture evaluation to decide fast. Check for sour, chemical odors and grainy or lumpy feel.
- Sniff near the lid
- Note any rotten/stale scent
- Rub a bit on your finger
- Look for separation or clumps
- Discard if moldy smell
Stirring And Consistency
When you open the can, give the paint a good stir — you’ll quickly learn if it’s salvageable by watching how it recombines.
Use proper stirring techniques: scrape the bottom, lift solids, and mix until uniform.
For a quick consistency assessment, check flow off the stick and smoothness on a test surface. If it breaks or clumps, it’s likely unsalvageable.
Small Can Test
If stirring shows the paint might come back together but you’re still unsure, use a small can test to check salvageability without wasting a whole bucket.
Scoop a bit into a small can, add solvent or water, stir, then assess paint texture and coverage. If it blends smoothly, it’s usable; if it stays clumpy, discard.
- Scoop sample
- Add solvent/water
- Stir thoroughly
- Check paint texture
- Test coverage
Tools You’ll Need to Revive Paint
You’ll only need a handful of basic tools to bring dried paint back to life: a clean container for mixing, a stir stick or drill-mounted mixer, a fine mesh strainer, and the appropriate solvent or medium for the paint type (water for latex, paint thinner or mineral spirits for oil). Use these essential tools and reviving techniques carefully.
| Tool | Purpose |
|---|---|
| Stir/mixer | Recombine solids |
| Strainer | Remove lumps |
How to Safely Open a Stuck Paint Can
Grab a flat screwdriver or a dedicated paint can opener and a rubber mallet before you try to loosen the lid—using the right tools makes the job quicker and prevents damage to the can or spills.
Use careful opening techniques and protect surfaces. Don’t force metal. Try gentle taps and pry points.
- Tap rim evenly
- Pry at seams
- Rotate while prying
- Wipe dried paint
- Wear gloves
Why Paint Dries Out and When It Happens
Paint dries out for a few common reasons you should know: exposure to heat, sun, or low humidity speeds evaporation, while application mistakes like leaving lids off or skimping on stirring introduce air and contaminants.
Old paint can also thicken or separate as its shelf life ends, so check dates and storage conditions.
Knowing these causes helps you prevent or fix dried paint before it’s ruined.
Environmental Causes
When paint dries out faster than you expect, it’s usually because of the conditions around it—temperature, humidity, airflow, and sunlight all speed up solvent loss and curing.
You should watch climate effects and humidity levels; hot, dry, or windy environments accelerate skinning and waste. Reduce exposure or slow curing to salvage paint.
- High temperature
- Low humidity
- Strong airflow
- Direct sunlight
- Drying heaters
Application Mistakes
If you apply too-thin coats, use the wrong thinner, or overload the brush, you’ll trigger premature skinning and wasted paint; these errors change solvent balance and film thickness so drying happens unevenly and faster than planned.
Watch for common application errors: rushing, poor tool choice, or inconsistent paint application.
You can prevent ruined batches by correcting technique, thinning properly, and maintaining steady strokes.
Product Shelf Life
Shelf life hinges on chemistry and storage: solvents evaporate, binders break down, and contaminants let paint thicken or skin over, so you’ll see problems long before the can is empty.
You can extend paint longevity with proper storage tips and inspection. Check cans regularly, note purchase dates, and discard when smell or texture change.
- Store upright, sealed
- Avoid freezing
- Keep cool, dry
- Use airtight liners
- Label dates
How to Assess the Condition: Skin, Clumps, or Fully Hardened
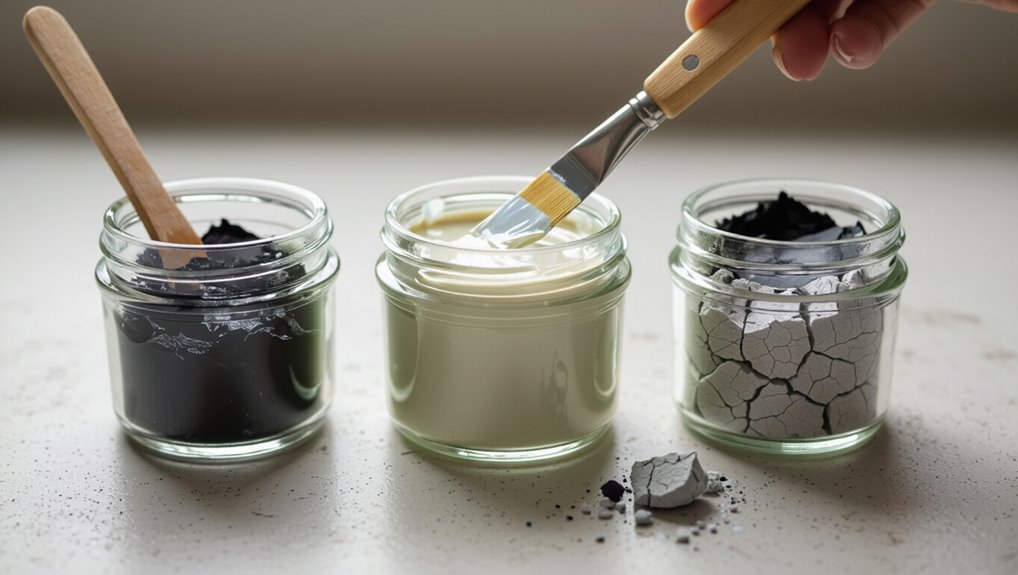
Wondering whether your paint is recoverable? Check paint texture first: gently press the surface with a clean stir stick.
A flexible skin peels off—container beneath may still be usable. If you find clumps or grainy bits, the body’s compromised.
A fully hardened surface that resists pressure means the entire batch is ruined and needs replacement. Act based on resistance and appearance.
How to Reconstitute Paint With a Partial Skin
When you find a flexible skin on top of mostly-usable paint, don’t toss the can—remove the skin gently with a clean stir stick or gloved fingers, then strain the remaining paint through a fine mesh to catch any small bits.
Use careful rehydration techniques to address paint skinning causes and save usable material.
- Remove skin
- Strain paint
- Add solvent sparingly
- Mix gently
- Test finish
Stirring Techniques to Rehydrate Thick Paint
If your paint’s thickened but not fully dried, stir slowly and deliberately so you don’t whip in air; use a flat stir stick or a drill-mounted paint mixer on low speed, scraping the can’s bottom and sides to reincorporate settled pigments and binders.
Continue gentle stirring until consistency evens, using proven stirring techniques to restore paint hydration without introducing bubbles or overworking the material.
How to Thin Water-Based Paint (Latex) Safely
Before you add anything, check the paint’s consistency by stirring and scooping a bit with a stick to see how it coats.
If it’s too thick, add water very gradually—start with a tablespoon per pint and mix thoroughly.
Keep testing as you go until the paint flows smoothly without becoming runny.
Check Paint Consistency
Although dried or thickened latex can look hopeless, you can often restore its workability by checking and adjusting the consistency carefully.
Start by stirring the paint thoroughly to re-incorporate any settled solids, then dip a clean stick or brush to assess flow and thickness — it should coat without sagging or beading.
- Check paint texture visually
- Note paint viscosity by flow
- Remove skin before testing
- Warm slightly if cold
- Strain out lumps
Add Water Gradually
Start by adding water slowly—just a few teaspoons at a time—while stirring continuously so you can see how the paint thins and avoid over-diluting. You’ll monitor water ratio and use gradual addition to restore consistency. This paint hydration approach is a safe restoration technique; test, wait, and repeat until you reach smooth, usable latex paint.
| Step | Tip |
|---|---|
| 1 | Test small |
| 2 | Stir well |
| 3 | Add slowly |
| 4 | Wait |
| 5 | Retest |
How to Thin Oil-Based Paint to Revive It Safely
Revive oil-based paint by thinning it cautiously—use only the manufacturer-recommended solvent (usually mineral spirits or paint thinner), add it slowly, and mix thoroughly until you reach the original consistency.
You’ll respect oil paint characteristics and apply proper thinning techniques to restore flow without over‑diluting.
- Check label for solvent type
- Work in ventilated area
- Add solvent dropwise
- Stir with clean stick
- Test on scrap surface
When to Avoid Adding Solvent or Water
After you’ve tried thinning oil paint carefully, know that some situations call for no more solvent or water—adding liquid can ruin paint that’s structurally compromised, already too old, or contaminated.
You should stop if paint flakes, smells foul, or shows mold. Opt for disposal or professional salvage instead of further thinning techniques.
Prioritize paint preservation by testing small samples and documenting age and storage before acting.
What Solvents Work for Clumpy Latex vs. Oil Paint
If your latex paint has clumped, you’ll usually loosen it with warm water and a bit of dish soap or a commercial latex thinner rather than harsh solvents.
For oil-based paint you’ll need mineral spirits or turpentine to thin and clean up, used sparingly and in a well-ventilated area.
Always follow safety guidelines for gloves, ventilation, and proper disposal of used solvents and rags.
Solvents For Clumpy Latex
When latex paint turns clumpy, water and mild solvents are your best first tools because latex is water-based and won’t respond to strong organic solvents the way oil paints do.
You can revive small amounts using gentle solvent types and mechanical stirring; avoid harsh chemicals.
- Warm water soak
- Dish soap solution
- Mild ammonia mix
- Latex-compatible commercial thinner
- Straining and stirring
Thinners For Oil Paint
Because oil paint uses organic binders, you’ll need stronger solvents than those you’d use for latex; mineral spirits, turpentine, and odorless mineral spirits (OMS) dissolve the oil binders and will thin or re-liquefy clumpy oil paint, while solvents like acetone or lacquer thinner are too aggressive for most artists’ paints and can damage pigments and varnishes.
Choose thinner types based on solvent properties, drying time, and smell.
Safety And Disposal
Although solvents can revive clumpy paint, you’ll need to handle and dispose of them carefully to protect yourself and the environment.
- Follow safety guidelines: wear protective gear and practice solvent safety.
- Separate latex and oil; know paint hazards before disposal.
- Use designated hazardous waste drop-offs for paint disposal.
- Explore recycling options or reconditioning small cans.
- Minimize environmental impact; never pour solvents down drains.
When to Add Mineral Spirits or Turpentine
How do you know it’s time to add mineral spirits or turpentine?
Check paint consistency: if it’s thickened but not fully cured and still soluble, you can thin small amounts.
For oil-based paints, follow mineral spirits usage guidelines; for tougher skinning, consider controlled turpentine application.
Test a scrap, mix gradually, and stop when flow and sheen match original.
How to Use Denatured Alcohol for Certain Paints
If your shellac or some lacquer-based paints have started to thicken, denatured alcohol can often revive them.
Use conservative dilution—start with about 5–10% alcohol by volume and test before adding more—then thin and stir until you reach the working consistency.
Apply with a clean brush or cloth and clean tools and spills immediately with alcohol to avoid damage.
Paint Types That Respond
When paint starts to skin over or thicken, knowing which formulations respond to denatured alcohol can save you time and product—acrylics and water-based inks are the usual candidates, while oil-based and alkyd paints won’t be revived this way.
You’ll find denatured alcohol works for many water-based finishes but not enamel paint or oil paint.
- acrylic paint
- latex paint
- spray paint
- chalk paint
- primer paint
Proper Dilution Ratios
Because dried or thickened water-based paints need careful thinning, you’ll want to follow specific dilution ratios rather than guessing with drops at a time.
Use denatured alcohol only for compatible solvents; measure small test batches (10–20% solvent) to assess paint viscosity.
Apply dilution techniques, proper mixing, and restoration methods to restore paint consistency.
These thinning ratios are practical salvage strategies for paint restoration.
Application And Cleanup
Anyone handling dried water-based paints should test denatured alcohol on a small sample first, applying it sparingly with a clean brush or cloth to dissolve skinning or thin sticky spots without over-thinning the batch.
Use careful application techniques and follow cleanup tips to protect finish and tools.
- Work in ventilated area
- Dab, don’t soak
- Stir gently after treatment
- Wipe excess promptly
- Dispose rags safely
How to Use Paint Extender or Retarder
If your paint is drying too fast, adding an extender (also called a retarder) slows the curing so you get more working time and smoother blends.
Use small amounts per manufacturer instructions, testing mixes on a scrap.
Start with small amounts, follow the maker’s directions, and test each mix on scrap before use.
Combine this with paint preservation techniques and cautious paint mixing strategies to avoid altering color or adhesion.
Stir thoroughly and use within recommended pot life.
Using Warm Water and Heat Sources Correctly
If your water-based paint has begun to thicken, try reviving it with a little warm (not hot) water and stir gently until the consistency returns.
Be careful with heat—avoid direct flames or high temperatures that can scald the paint or alter its properties.
Use low, controlled warmth like a warm room or a bowl of warm water to gently loosen dried edges without damaging the paint.
Warm Water Revival
When paint starts to skin over in the can, you can often revive it by gently warming and stirring with warm water—this loosens dried particles and restores flow without breaking down binders.
You’ll use warm water benefits while monitoring paint temperature to avoid over‑thinning.
- Remove lid and skim skin
- Warm water bath for the can
- Stir thoroughly
- Check consistency
- Strain before use
Safe Heat Application
Although you want to warm paint gently, use only controlled heat sources and constant monitoring to avoid ruining the finish or creating a safety hazard.
You should warm cans slowly—warm water baths, hair dryers on low, or heated rooms—keeping lids loose and stirring frequently.
Follow basic safety tips: never leave heat unattended, keep flammables away, and use protective gloves and ventilation.
How Mesh Strainers and Filters Save Your Paint
Because dried clumps and debris can wreck a smooth finish, using mesh strainers and filters keeps your paint usable and your results consistent.
Using mesh strainers and filters prevents dried clumps and debris from ruining your finish, keeping paint usable and consistent.
You’ll extend paint life with simple paint preservation techniques and enjoy clear filter benefits that prevent clogs and wasted paint.
Use these steps:
- Strain before pouring
- Use fine and coarse filters
- Replace clogged mesh
- Clean strainers promptly
- Store filtered paint airtight
How to Match Consistency to Your Application Method
If you’re aiming for a professional finish, match your paint’s viscosity to your application method so it flows and levels correctly.
You’ll assess paint types and choose consistency matching based on application tools—brush, roller, sprayer—and desired paint thickness.
Use proper mixing techniques and consider drying conditions before application.
Use revival techniques sparingly to adjust body; never over-thin for faster work.
Reviving Paint for Brushes, Rollers, and Sprayers
Whether you’re tackling touch-ups with a brush, covering walls with a roller, or spraying a whole room, you can usually revive slightly dried paint so it performs like fresh—just match your revival method to the tool and paint type.
- Use gentle brush care and small stir mixing techniques.
- Soak and comb dried brushes.
- Follow roller maintenance tips.
- Perform sprayer cleaning.
- Use paint additives, proper paint storage, and drying prevention for paint longevity.
How to Thin Paint for Spray Equipment Safely
When you need to thin paint for a sprayer, pick the thinner recommended for your paint type so you don’t clog or damage the equipment.
Measure viscosity with a viscosity cup or flow test and add thinner in small increments until you hit the target.
Always test the spray pattern on cardboard before starting the job to confirm atomization and coverage.
Choose The Right Thinner
Because spray systems vary, choosing the right thinner matters for performance and safety; you’ll need a solvent that matches the paint’s chemistry, the spray equipment, and ventilation constraints.
- Know thinner types (water, solvent, universal)
- Read manufacturer recommendations
- Match thinner to paint base
- Use proper PPE and ventilation
- Apply correct thinning techniques slowly and test spray
Measure Viscosity Correctly
After you’ve picked the right thinner for your paint and equipment, measure viscosity properly so your spray gun performs reliably and you avoid runs, clogging, or wasted material.
Use viscosity measurement techniques like flow cups or a viscometer, record readings, and compare to manufacturer specs.
Perform a quick paint consistency evaluation after thinning, adjust gradually, and document ratios to repeat successful mixes.
Test Spray Pattern First
Before you commit to a full pass, test the spray pattern on a scrap surface or cardboard to verify atomization, fan width, and droplet size.
Adjust thinner, pressure, and tip size, then repeat until satisfied. Proper spray nozzle maintenance and paint sprayer calibration prevent clogging and uneven coverage.
- Check fan symmetry
- Inspect droplets
- Adjust pressure
- Clean nozzle
- Re-test pattern
How to Clean and Reuse Hardened Brushes
Don’t toss that stiff brush—many hardened brushes can be revived with the right approach.
Start by soaking bristles in warm, soapy water or mineral spirits depending on paint type, then gently work with a comb or old fork.
Soak bristles in warm, soapy water or mineral spirits, then gently comb with a fork to revive them.
Rinse, reshape, and dry flat.
These cleaning techniques support brush preservation, extend tool life, and restore performance so you can reuse brushes confidently.
How to Deal With Paint That Smells Off
Why does your paint smell off, and what should you do about it?
You should identify smell sources—old solvents, contamination, or spoilage—and act fast.
Use odor neutralizers and safety measures:
- Ventilate the area immediately
- Smell-test briefly with caution
- Add approved odor neutralizers sparingly
- Discard paint if rotten or moldy
- Store remaining paint sealed and cool
Testing Revived Paint on a Small Surface
After dealing with odors and confirming your paint isn’t spoiled, you should test the revived paint on a small, inconspicuous surface to confirm color, adhesion, and finish.
Choose a hidden test area, apply a thin coat, let it dry fully, then check paint adhesion by rubbing gently and inspecting for tackiness, flaking, or uneven finish before committing to larger sections.
How to Test Color Accuracy After Reviving
Once you’ve revived the paint, make a swatch on a card so you can move and compare it easily.
Observe the color while it’s wet, then let the swatch fully dry to see the true tone.
Compare wet vs. dried swatches side by side to confirm the match before applying to your project.
Swatch Test On Card
Make a small swatch on a card to check the true color after you revive dried paint.
Use a swatch card to judge color accuracy before committing. Let it dry fully, view under natural light, and compare against your palette.
- Apply a thin layer
- Label paint and date
- Note sheen and opacity
- Photograph for reference
- Test on designated surface
Compare Wet Vs. Dried
Now that you’ve checked a swatch card and let the revived paint dry, compare the wet and dried samples side by side to confirm color accuracy.
Hold both samples under the same light, view at different angles, and let the dried paint fully cure before judging.
Note any shifts in hue, sheen, or opacity, and decide if further adjustment or a fresh mix is needed.
Troubleshooting: Paint Still Grainy After Thinning
If thinning hasn’t smoothed out your paint and it still feels grainy, don’t assume the thinner or ratio is the only problem—you’ll want to check pigment settling, inadequate mixing, or incompatible additives next.
- Check for pigment settling that causes grainy texture.
- Re-mix thoroughly, scraping sides and bottom.
- Try alternate thinning techniques and small test batches.
- Filter paint through a fine mesh.
- Replace old pigments or additives that clump.
Troubleshooting: Paint Separates After Stirring
If your paint separates into watery and thick layers after stirring, check for excess water first because it breaks the binder and causes separation.
If you confirm too much water, don’t keep stirring—let the paint settle and carefully pour off the thin layer.
To fix the remaining paint, add a compatible additive or coalescing agent in small doses and mix thoroughly until it re-emulsifies.
Check For Excess Water
Start by looking for excess water in the can—paint that separates after stirring often has too much water added, which thins the binder and causes pigment to drop out.
- Inspect surface for watery layer and clumps.
- Smell for sourness indicating breakdown.
- Lift a small sample to check consistency.
- Note storage history to prevent excess moisture.
- Gently decant clear liquid to aid paint preservation.
Fix With Compatible Additive
When paint separates after stirring, you can usually revive it by adding a compatible additive that restores binder consistency and re-suspends pigments. You’ll pick additive types based on paint chemistry, do small compatibility testing, and add slowly while stirring. If it won’t rebind, replace the batch.
| Additive | Use | Notes |
|---|---|---|
| Binder booster | Restore | Check label |
| Flow agent | Smooth | Low dose |
| Dispersant | Re-suspend | Mix well |
| Solvent | Thin | Test first |
| Replacement | Last resort | Salvage only |
Troubleshooting: Revived Paint Won’t Dry Properly
Though reviving dried paint can feel like a win, you’ll sometimes find the mixture stays tacky or never fully cures—and that’s usually a sign of a deeper issue.
Check these causes and fixes quickly so paint drying completes and future paint storage avoids repeats:
- Old or contaminated solvent
- Wrong additive or ratio
- Poor ventilation or low temperature
- Thick application layers
- Contaminated can or tools
Common Mistakes That Ruin Attempted Revivals
Don’t dump water straight into dried paint—you’ll just thin the binder and make a gloopy mess that won’t re-emulsify.
Don’t try to speed things up with a heat gun or direct heat, because that can scorch the pigments and ruin the finish.
Instead, learn the proper rehydration steps so you don’t undo any chance of recovery.
Adding Water Directly
Pouring water straight into a dried paint container seems like an easy fix, but it often does more harm than good.
You’ll dilute binders, ruin water ratio balance, and misjudge paint viscosity.
Don’t panic—avoid these mistakes:
- Adding too much at once
- Forgetting to stir thoroughly
- Using hot tap water
- Ignoring manufacturer guidance
- Applying salvaged paint immediately
Using Heat To Rehydrate
When you try to speed up rehydration with heat, you’re often inviting trouble—excessive temperature can cook the binders, change pigment chemistry, and make the paint unusable even if it looks fluid again.
Don’t blast cans with direct heat or open flames. Controlled, gentle heat is rare and risky; improper heat application sabotages paint rejuvenation, causing separation, odor, or permanent color shifts you can’t reverse.
How Long Revived Paint Will Last in the Can
How long revived paint will last in the can depends on how well you restored it and how you seal it afterward; expect anything from weeks to a year.
Monitor smell and consistency, and note original paint shelf life and proper can storage.
- Check for odor
- Stir before use
- Seal lid tightly
- Label with date
- Keep cool, dry
How to Store Revived Paint to Prevent Repeat Drying
If you want to keep revived paint usable, store it airtight in a clean, small container and keep it cool and dry; that minimizes air exposure and temperature swings that cause re-drying.
For paint storage, use airtight containers with proper sealing, choose a stable storage location away from sunlight, and practice humidity control and temperature regulation to maximize paint preservation and extend shelf life.
How to Label and Track Paint Shelf Life
Start by giving each container a clear, permanent label that includes the paint color name or code, the date you opened or revived it, and the product batch or tint number if available.
- Note paint expiration estimates per manufacturer
- Record dates for shelf life tracking
- Track opened vs. sealed status
- Log thinning or reviving actions
- Store photos of labels for quick reference
When Dried Paint Can Be Reused as a Tint Base
When dried paint still contains enough pigment and the binder isn’t completely broken down, you can often grind or dissolve it to use as a tint base for new batches.
If dried paint still holds pigment and binder, grind or dissolve it to reuse as a tint base.
Assess the paint’s flexibility, adhesion, and color depth first, because crumbly, powdery, or chemically separated paint won’t rebind reliably and can weaken the new finish.
| Test | Result |
|---|---|
| Flexibility | Bendable |
| Color depth | Strong |
You’ll use it for color mixing only if tests pass.
How to Salvage Small Amounts for Touch-Ups
You can usually rescue a few tablespoons of dried paint for touch-ups by rehydrating and straining it carefully; work on a clean surface, scrape loose skin into a container, add a compatible thinner or water a little at a time, stir or shake until smooth, then pass the mixture through a fine mesh or nylon stocking to remove grit before testing on a scrap.
- Use small batches
- Match sheen and color
- Stir thoroughly
- Store sealed jars for paint storage
- Note touch up techniques and date
How to Decide Between Reviving and Replacing Paint
Wondering whether to try reviving dried paint or just buy a new can? You’ll weigh color match, smell, texture, and how long it’s sat. Try simple reviving techniques for recent cans; replace if severely separated or foul. Good paint storage extends life, so factor age and project importance when deciding.
| Factor | Action |
|---|---|
| Age | Assess |
| Smell | Replace |
| Texture | Revive |
| Color match | Replace |
| Project size | Decide |
Cost-Effective Supplies for Regular Paint Maintenance
A few inexpensive tools will keep your paint usable and save you money over time: good paint storage, paint preservation and simple maintenance routines extend paint longevity.
Use budget supplies for paint care, proper sealing, and managing environmental factors.
Use affordable supplies to seal, protect, and control conditions—simple steps that keep paint fresh and usable longer.
- Tight lids and plastic wrap
- Funnel and strainers
- Small airtight jars
- Labels and marker
- Moisture absorbers
Eco-Friendly Disposal When Salvage Fails
When those inexpensive storage tricks and quick fixes can’t revive dried paint, you’ll need to dispose of what’s left responsibly to avoid harm to people and the environment.
Check local guidelines for eco friendly options like solidifying latex with kitty litter for curbside trash, or taking oil-based or unknown cans to hazardous waste collection.
Label containers and never pour paint down drains.
When to Choose Recycling vs. Hazardous Waste Drop-Off
Know the difference between recycling and hazardous-waste drop-off so you can dispose of paint safely and legally: choose recycling for clean, uncontaminated latex cans or small amounts of leftover water-based paint that your local program accepts, and head to a hazardous-waste facility for oil‑based, heavily contaminated, or unidentified paints that can harm the environment or sanitation workers.
Know whether paints belong in recycling or at hazardous-waste drop-off — recycle clean latex; take oil‑based or contaminated cans to hazardous waste.
- Check local recycling guidelines
- Seal and label cans
- Keep liquids uncontaminated
- Use hazardous disposal for oil-based
- Transport per facility rules
Safety Precautions When Using Solvents
Because solvents can be flammable, toxic, and volatile, you should treat them with care: follow label instructions, minimize spills, and keep ignition sources away. Be aware of solvent hazards and use appropriate protective equipment.
| Risk | Action |
|---|---|
| Fire | Store in cool area |
| Poisoning | Avoid inhalation |
| Skin contact | Wash immediately |
Ventilation and Protective Gear You Should Use
Although solvents evaporate quickly, you should always work where fresh air circulates and use fans or open windows to keep fumes from building up.
Use proper ventilation techniques and wear protective gear to limit exposure.
Use proper ventilation and protective gear to limit solvent exposure—keep air moving and cover skin, eyes, and lungs.
Consider these basics:
- NIOSH-rated respirator for strong fumes
- Gloves resistant to solvents
- Safety goggles
- Long sleeves and pants
- Portable exhaust fan or window placement
How Professionals Handle Dried or Thick Paint
When paint has thickened or crusted, pros don’t guess — they assess the type, cure level, and substrate before picking a fix.
You’ll see them test small areas, choose appropriate solvents or reconstituting agents, and scrape or strain as needed.
Follow paint restoration techniques and professional tips: document product info, use proper PPE, and decide between restoration or safe disposal based on results.
Quick Decision Checklist Before You Toss a Can
Before you toss a can, run a quick checklist to decide if it’s salvageable:
- Check lid seal and rust—poor seal shortens paint lifespan.
- Smell test for sour or off odors.
- Stir consistency; thin with recommended reducer if usable.
- Look for mold or contamination inside can.
- Review paint storage history: temperature swings and age.
Frequently Asked Questions
Can Revived Paint Be Used for Food-Contact Surfaces Like Cabinets or Toys?
No, you shouldn’t use revived paint on food-contact surfaces; you risk food safety and compromised paint integrity. Even if it looks fine, contaminants or altered binders can leach—choose fresh, labeled food-safe coatings instead.
Will Reviving Paint Change Its VOC or Safety Profile Long-Term?
Yes — reviving paint can alter paint properties and long-term VOCs, so you’ll face safety concerns; additives or solvents may increase emissions and change adhesion, durability, and toxicity, so test and ventilate accordingly.
Can Old Paint Causes Allergic Reactions Even After Thinning?
Yes — you can still react: like sneezing and itching, like rashes and coughing, old paint can cause allergic symptoms even after thinning; paint toxicity or degraded binders can still trigger sensitivities, so avoid exposure and test first.
Is There a Risk of Mold Growth in Revived Water-Based Paint?
Yes — you can risk mold growth in revived water-based paint if contaminated; you should prevent it by practicing mold prevention, using clean tools, adding preservative if needed, and maintaining proper paint storage in cool, sealed conditions.
Can Paint Additives Affect Compatibility With Topcoats or Primers?
Right off the bat, you bet: paint additives can cause compatibility issues with topcoats or primers. Don’t throw the baby out with the bathwater—drying agents or other additives can alter film formation, affecting application techniques and finish.
Conclusion
You’ve checked, thinned, and tested — and maybe luck, timing, or a little solvent pulled the paint back from the brink. You’ll open the can, stir, strain, and try a brush stroke; if it flows, you’re back in business, and if it doesn’t, you’ll know when to let it go. Trust the steps, trust your nose, and trust that a quick fix can turn a near-miss into a ready-to-use color.