How to Remove Dried-On Paint Effectively at Home
First identify the paint type and surface so you pick a safe method: water and soap or rubbing alcohol for latex, mineral spirits for oil/enamel, or a commercial stripper for stubborn spray paint. Test a remover on an inconspicuous spot, work with a plastic scraper or nylon brush, and use warm water, gentle heat, or sanding as needed. Wear gloves and ventilate the area, protect surrounding finishes, and follow disposal rules — keep going for step-by-step tips and product picks.
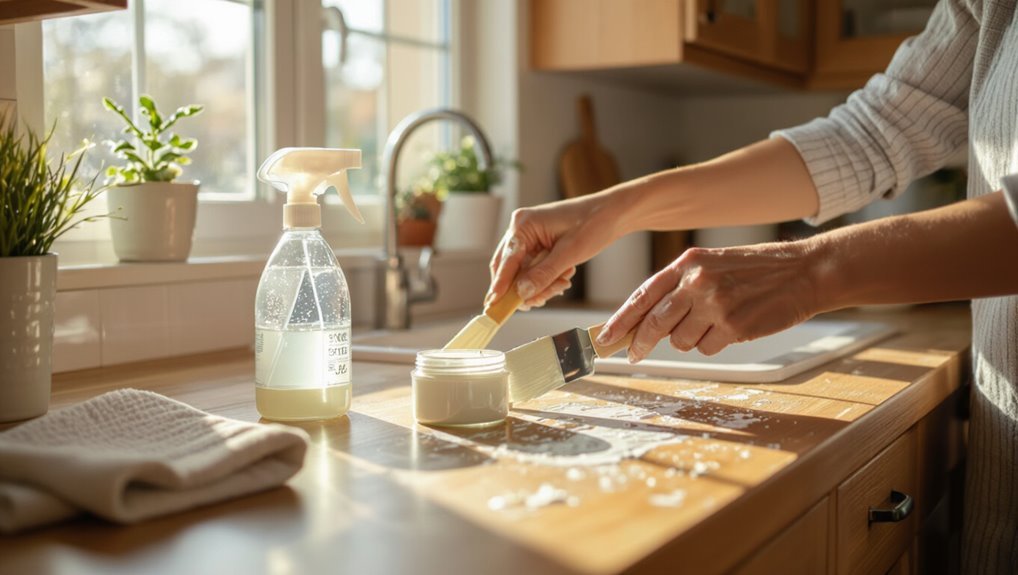
Quick Overview: What Works for Dried Paint
Start by evaluating the paint type and surface—knowing whether it’s latex or oil-based and what you’re working on (wood, metal, fabric, or skin) tells you which removers and methods will work.
You’ll choose DIY Techniques like gentle scraping, soaking, or sanding, and favor Eco Friendly Solutions such as vinegar, citrus solvents, or biodegradable cleaners to protect surfaces and reduce fumes while removing dried paint effectively.
Fastest Method to Remove Dried Paint
The fastest way to remove dried paint depends on the paint type and the surface: for latex on nonporous surfaces you’ll often get the quickest results with a solvent like rubbing alcohol or a citrus-based remover plus a scraper, while oil-based paints usually respond fastest to mineral spirits or a commercial paint stripper applied with a plastic scraper and nylon brush.
Use steady pressure, test first, and follow effective techniques.
Identify the Paint: Latex, Oil, Enamel, Spray
First figure out the paint base—latex, oil, enamel, or spray—since that dictates which solvents will work.
Note how long it took to dry: fast-drying spray or latex behaves differently than slow-curing oil or enamel.
Finally, test adhesion by scraping a small edge to see if it flakes or stays put before choosing a removal method.
Determine Paint Base
Wondering which type of paint you’re dealing with? You’ll test paint properties—smell, sheen, and solvent reaction—to decide base and guarantee paint compatibility with removers.
Use simple tests:
- Latex: water softens, low odor.
- Oil/enamel: mineral spirits dissolve, glossy finish.
- Spray: fast-drying, varied solvents; check label for base.
Check Drying Time
Because drying times vary by formula and conditions, you’ll use how quickly paint skins over and hardens as a key clue to its type: latex usually dries to the touch in 30 minutes to an hour but can take days to fully cure, oil/enamel stays tacky for several hours to a day and often smells stronger, and spray paints dry very fast on the surface yet may still cure underneath depending on the solvent.
| Type | Surface dry | Full cure |
|---|---|---|
| Latex | 30–60 min | Days |
| Oil/Enamel | Hours–1 day | Weeks |
| Spray | Minutes | Variable |
Check drying time to distinguish paint types before removing dried-on paint.
Test Adhesion Method
Start by gently testing adhesion to figure out what kind of paint you’re up against: press a piece of clear tape onto a discreet painted spot, rub firmly, then peel it off—if paint lifts, it’s likely latex or a weakly bonded enamel; if it stays, it’s probably oil-based or fully cured spray paint.
Use this adhesion test to guide removal and check surface compatibility.
- Choose solvents matched to paint type
- Protect substrate before scraping
- Spot-test cleaners first
Match the Method to the Surface Material
When you tackle dried-on paint, match your removal method to the surface—what works on metal or glass can damage wood, fabric, or plastic—so pick a technique that removes the paint without harming the material underneath.
Assess surface compatibility and material sensitivity: use gentle solvents or mechanical scraping for hard, nonporous items, milder cleaners or heat for finished wood, and spot-test on fabrics or plastics first.
Safety First: Ventilation, PPE, and Fire Risk
Before you remove dried paint, make safety your priority: work in a well-ventilated area, wear appropriate PPE, and keep flammable materials and ignition sources away from solvents or heat tools.
Before removing dried paint, prioritize safety: ventilate the area, wear PPE, and keep solvents and heat sources away.
Use ventilation techniques, proper personal protective equipment, observe fire safety, and follow safe paint storage.
Keep exits clear and have a fire extinguisher nearby.
- Open windows and use fans
- Use gloves and respirator
- Store paints in cool, sealed containers
Tools and Supplies You’ll Need
Now that you’ve got safety covered, gather the right tools and supplies so the job goes quickly and without damage.
You’ll need plastic scrapers, putty knives, wire brushes, microfiber cloths, chemical strippers or heat tools appropriate for the surface, gloves, goggles, and drop cloths.
Choose products based on paint removal techniques and consult lists of the best cleaning supplies for specific surfaces.
Why Test on an Inconspicuous Spot
Why test on an inconspicuous spot? You’ll confirm safe methods and avoid surprises by checking test results in hidden areas first. Small trials reveal color change, finish damage, or residue before you commit.
- Preserve visible surfaces by isolating risk
- Compare cleaners and tools discreetly
- Save time by identifying effective approaches early
Soften Dried Latex Paint With Soap and Water
Start with a bowl of warm water mixed with a few drops of dish soap to soften the dried latex paint.
Use a soft cloth or nylon scrubber and gentle circular motions to lift the paint without damaging the surface.
Rinse the area, reapply the soapy solution as needed, and repeat until the paint loosens.
Warm Soapy Solution
Soak the dried latex paint with a warm, soapy solution to soften it enough for gentle removal. Use mild detergent in soapy water, let it sit briefly, then blot loosened spots.
You’ll avoid harsh chemicals and protect surfaces while prepping for final cleanup.
- Choose lukewarm water and gentle soap
- Allow 5–10 minutes of dwell time
- Pat, don’t rub, to preserve the substrate
Gentle Scrubbing Technique
Work the softened paint gently with a soft-bristled brush or non-abrasive sponge, using small circular motions to lift the residue without harming the surface.
Apply gentle pressure, staying mindful of edges and trim.
Use a soft bristle tool for stubborn spots, loosening paint gradually.
Pause to check progress often so you don’t scrub too hard or damage the finish.
Rinse And Repeat
After loosening as much paint as you can with gentle scrubbing, rinse the area with warm, soapy water and repeat the soft-brushing cycle until the residue lifts.
You’ll adjust rinse techniques based on paint thickness, using gentle pressure and fresh water each pass. Stay patient; thin layers come off quicker, thicker spots need more cycles.
- Assess paint thickness
- Control water flow
- Use soft brushes
Break Down Oil-Based Paint With Mineral Spirits
Start by ventilating the area and wearing gloves and eye protection.
Then pour a small amount of mineral spirits onto a clean rag to test a hidden spot for finish compatibility.
Dab and gently rub dried oil-based paint, letting solvent sit briefly to aid paint breakdown.
Wipe softened residue with clean rags, repeat as needed, and dispose of used rags safely per local regulations.
Strip Enamel: Using Commercial Paint Removers
When you need to strip enamel, pick a remover formulated for your paint type and surface so you get effective results without damage.
Wear gloves, eye protection, and a respirator, and work in a well-ventilated area to protect yourself from fumes and chemical burns.
Apply the product according to the label—test a small spot, follow dwell times, and use the recommended tools for safe, thorough removal.
Choose Right Remover
If you’re tackling enamel that’s stubbornly baked on, commercial paint removers can save hours of scraping and sanding.
You’ll compare remover types, weigh remover effectiveness versus natural alternatives, and match commercial products to DIY solutions.
Consider substrates and follow application techniques for best results.
- Test small area first
- Match remover to paint type
- Time exposure per instructions
Safety Precautions Needed
Because commercial paint removers contain strong solvents and caustic chemicals, you’ll need to take strict safety measures before you begin.
Wear chemical-resistant gloves, eye protection, and a respirator rated for organic vapors. Work in a well-ventilated area, cover nearby surfaces, and keep children and pets away.
Follow label instructions precisely, store products securely, and dispose of waste per local regulations for safe handling and paint removal techniques.
Proper Application Techniques
Start by testing the remover on a small, inconspicuous spot to confirm it lifts the enamel without harming the underlying surface.
Use proper techniques: apply thin, even coats, wait manufacturer time, then scrape gently.
Protect surrounding areas and ventilate.
Choose application methods suited to the remover—brush, pad, or spray—following PPE and disposal instructions.
- Thin, even coats
- Timed dwell
- Gentle scraping
Removing Spray Paint From Metal Surfaces
When you’re tackling spray paint on metal, choose a method that matches the finish and paint type to avoid damaging the surface.
Inspect for coatings, then test solvent compatibility. Use mild solvents or citrus removers for thin layers; for stubborn spots, apply commercial paint stripper or gently sand with fine grit.
Follow spray paint techniques and metal surface considerations: protect vents, wear PPE, and rinse thoroughly.
Removing Dried Paint From Hardwood Floors Safely
Before you start, test any solvent in an inconspicuous spot to make sure it won’t damage the finish.
If the finish holds up, work slowly with gentle scraping tools like a plastic putty knife or nylon scraper to lift paint without gouging the wood.
Take your time and stop if the finish starts to soften or discolor.
Test Solvent Inconspicuously
Pick a small, hidden spot—like inside a closet or beneath a piece of furniture—and test your chosen solvent there first to make sure it won’t damage the finish or stain the wood.
You should always test solvent in inconspicuous areas before wider use. Check results, wait for drying, then proceed only if finish is intact.
- Observe color change
- Smell for strong reaction
- Note finish texture
Use Gentle Scraping Tools
If the solvent test showed the finish held up, you can move on to gentle scraping to lift dried paint without harming the hardwood.
Use gentle tools like plastic scrapers, a putty knife with a taped edge, or a credit card to ease under flakes.
Work with the grain, apply light pressure, and vary scraping techniques gently—stop if you see finish damage and reassess.
Getting Dried Paint Off Painted Walls
Removing dried paint from painted walls is doable without wrecking the finish, but you’ll need to match your method to the paint type and how stubborn the spot is.
You’ll assess wall texture analysis and consider paint color matching before proceeding.
Test a small area, use gentle solvents or soft scraping, and blend touch-ups to hide repairs.
- Test first
- Match color
- Feather edges
Removing Paint From Plaster and Drywall
Walls and trim made of plaster or drywall need a gentler, more controlled approach than painted surfaces because their porous, brittle nature can crack or gouge under aggressive scraping.
You’ll use mild cleaning techniques, test paint types, and perform careful paint removal.
Do damage assessment, then apply plaster repair or drywall patching.
Prioritize surface preparation, restoration methods, protective coatings, and matching surface finishes.
Cleaning Painted Baseboards and Trim
Before you start on baseboards and trim, clear the area and protect floors and nearby surfaces with drop cloths or painter’s tape.
Use gentle, safe removal methods—like a plastic scraper, warm soapy water, or a mild solvent tested in an inconspicuous spot—so you don’t damage the finish.
Work in small sections and wipe away residue as you go to keep the trim clean and undamaged.
Prep And Protect Surroundings
While you prep to clean painted baseboards and trim, clear furniture and cover floors with drop cloths or plastic sheeting so dust and cleaning solution don’t damage nearby surfaces.
Use surface preparation and protective coverings, keep workspace organization for surrounding cleanup, and plan for damage prevention, paint containment, area ventilation, and tool arrangement.
- Mark work zones
- Seal vents and doorways
- Line tool trays and buckets
Safe Paint Removal Methods
Now that your work area is sealed and protected, you can move on to removing dried-on paint from baseboards and trim using safe, controlled methods.
Use eco friendly methods and natural solvents—non toxic solutions like citrus or soy removers—and gentle techniques with safe scrubbing pads.
Choose biodegradable options to create minimal waste, prioritize surface preservation, and consider effective alternatives for green cleaning.
Removing Paint From Glass Without Scratching
If paint’s dried on glass, you can remove it safely without scratching by choosing the right tools and working patiently; soft scrapers, solvent-soaked cloths, and gentle scraping angles do most of the work while protecting the surface.
Use glass protection and appropriate paint solvents, testing first. Work outward from edges, lift flakes, rinse residue.
- Test area first
- Use plastic razor
- Wipe with solvent-safe cloth
Cleaning Windowsills and Frames
Start by removing loose debris and dust from the windowsill and frame with a stiff brush or vacuum.
Then wipe the area with a damp cloth to reveal any stuck-on paint or grime.
You’ll use gentle cleaning solutions for paint removal, follow frame maintenance steps, apply surface protection, employ drying techniques, and use restoration tips and repaint strategies to finish smart window care.
Removing Paint From Clothing and Fabric
Accidents happen, but you can usually salvage painted clothing and fabric by acting quickly and choosing the right treatment for the paint type—water-based paints rinse out more easily, while oil-based or enamel paints need solvents and more care.
Act fast — water-based paints rinse out easily; oil- or enamel-based paints require solvents and extra care.
Pat, scrape, pretreat with dish soap or solvent, launder per label, and test hidden areas for fabric preservation and effective stain removal.
- Act quickly
- Test solvent
- Follow care label
Removing Paint From Upholstery and Carpets
Start by identifying whether the paint is water-based or oil-based, since that determines what solvents and techniques will work.
You’ll clean gently to avoid damaging fibers, using blotting and mild detergents before trying stronger treatments.
Always test any cleaning solution on an inconspicuous spot first to check for colorfastness and fabric damage.
Assess The Paint Type
How can you tell what kind of paint you’re dealing with on upholstery or carpet?
Inspect paint characteristics: gloss, texture, and smell to judge solvent or water base and expected paint adhesion.
Consider fabric pile and backing for penetration risk.
- Water-based often softens with damp cloth
- Solvent-based usually resists water
- Thick, textured coats indicate stronger adhesion
Clean Carefully And Test
Once you’ve identified the paint type and inspected the fabric, test-clean a hidden spot to see how the material reacts and to avoid wider damage.
Use gentle cleaning techniques—dab, blot, and lift rather than scrub.
Try water-based solutions first; use solvent sparingly.
Record testing methods and wait to dry fully before evaluating.
If color or texture changes, stop and consult a professional.
Removing Paint From Ceramic and Porcelain
Although ceramic and porcelain are durable, dried paint can bond stubbornly to their glazed surfaces. You’ll need gentle abrasion and the right solvent to lift it without scratching.
You’ll protect finishes by working slowly, testing solvents, and rinsing thoroughly to maintain ceramic care and porcelain protection.
- Use soft scrapers and nonabrasive pads.
- Test acetone on a hidden spot.
- Rinse and dry completely.
Cleaning Paint From Metal Tools and Hardware
You’ll find metal tools and hardware respond differently than ceramic: their finishes tolerate tougher scraping and stronger solvents, but you still need care to avoid damaging moving parts or protective coatings.
Use scrapers, wire brushes, or chemical strippers sparingly, protect joints, and rinse thoroughly.
Choose solvent safe for the finish, dry and lubricate moving parts, and adopt regular paint removal techniques to support metal tool maintenance.
Removing Paint From Plastic Safely
Plastics vary widely, so you should first identify the type to avoid cracking or warping.
Test any solvent on an inconspicuous spot to confirm compatibility before proceeding.
Use gentle scraping, soft brushes, and mild solvents or plastic-safe cleaners to remove paint without damaging the surface.
Assess Plastic Type
Before you start scraping or applying solvents, identify what kind of plastic you’re dealing with so you can choose a safe method that won’t melt, discolor, or weaken it.
Check plastic characteristics—surface texture, flexibility, recycling code—and run compatibility checks mentally before proceeding.
- Hard vs flexible: different risks
- Visible codes: guide solvent choice
- Finish and color: predict discoloration
Test Solvent Compatibility
How will you know a solvent’s safe for your plastic? You’ll match solvent types to the plastic ID, then perform small-area tests.
Use test methods like spot testing hidden edges, timing exposure, and checking for softening, discoloration, or warping. Note results, rinse thoroughly, and choose the mildest solvent that removed paint without damage.
Keep records for future reference.
Gentle Removal Techniques
Now that you’ve confirmed a solvent won’t damage the material, focus on gentle removal methods that prioritize the plastic’s surface.
Use gentle techniques with soft materials and test paint solvents on small areas. Prefer natural solutions when possible, use cushioning layers beneath work, and employ cleaning cloths for residue management to avoid scratches.
- Protect surface compatibility with tests
- Cushioning layers prevent dents
- Blot with cleaning cloths
Removing Paint From Masonry and Brick
While masonry and brick resist many cleaners, you can remove dried-on paint effectively with the right approach and tools; use masonry techniques like gentle scrubbing with stiff brushes and mild chemical strippers made for masonry.
Test a small area, work in sections, rinse thoroughly, and avoid abrasive grinding that damages mortar.
Prioritize brick preservation by sealing and matching repairs after paint removal.
When to Use Heat: Heat Guns and Hair Dryers
After you’ve tried masonry-safe scrubbing and strippers and stubborn paint remains, consider using controlled heat to soften the coating for easier removal.
You’ll use a heat gun or hair dryer with steady heat application, keeping a safe distance to avoid scorching. Move slowly, test a small area, wear protection, and ventilate well.
- Test temperature first
- Maintain safe distance
- Ventilate and protect
Mechanical Removal: Scrapers, Sandpaper, Pads
You can often remove dried paint simply by scraping, sanding, or using abrasive pads, but each tool needs the right technique.
Learn proper scraper angles and pressure, pick sandpaper grit from coarse to fine based on paint thickness and surface hardness, and choose non-scratch or heavy-duty pads for delicate or stubborn areas.
Start with the least aggressive option and step up only if needed to avoid damaging the substrate.
Best Scraper Techniques
Grab the right tool for the job: a flat razor scraper for glass and smooth surfaces, a flexible putty knife for trim and moulding, and varying grits of sandpaper or sanding pads for wood and painted metal.
You’ll use proper scraping techniques and choose scraper materials to avoid gouges, work with paint layers, and prepare surfaces efficiently.
- Work with the grain
- Keep blade angle low
- Swap damaged blades promptly
Choosing Sandpaper Grit
Pick a grit that matches how much paint you need to remove and the surface you’re working on.
Start coarse (60–80) for thick layers, move to medium (120–150) for smoothing, then fine (220+) for finishing.
Use progressive grit selection and proper sanding techniques to avoid gouging.
Test on a hidden spot, keep consistent pressure, and change grit based on results.
Abrasive Pad Options
Compare abrasive pads by material, grit, and designed use so you can match the pad to the paint type and surface without damaging it.
You’ll pick abrasive pad types that suit metal, wood, or plastic. Use pad material comparisons to balance aggressiveness and finish. Test discreetly, then proceed slowly.
- Nylon abrasive: flexible, less aggressive
- Scotch-Brite: finishing, non-scratch
- Steel wool: aggressive, leaves residue
Choose a Chemical Remover: Types and Safety
Which chemical remover suits your job depends on the surface, paint type, and how long it’s been dried—so choose deliberately. You’ll weigh chemical remover options and follow remover safety tips: ventilate, wear gloves, test a small area. Use solvent for oil-based, caustic gel for thick layers, and biodegradable stripper for sensitive surfaces.
| Fear | Relief | Action |
|---|---|---|
| Shock | Hope | Test |
| Harm | Safety | Ventilate |
Homemade Solutions: Vinegar, Alcohol, Baking Soda
When commercial strippers aren’t available or you’re working on small spots, you can often soften or lift dried paint with simple household items like white vinegar, rubbing alcohol, or a baking soda paste.
You’ll test small areas, apply gently, and repeat as needed. Homemade remedies work best on thin layers; consider surface type before proceeding.
Test a small area, apply gently, and repeat as needed; homemade remedies suit thin paint and delicate surfaces.
- vinegar benefits: mild acid for softening
- alcohol effectiveness: cuts through fresh film
- baking soda: abrasive paste for scuffing
Eco-Friendly and Low-Toxicity Removers
You can choose plant-based solvents like citrus-based cleaners or soy formulations to soften dried paint without harsh fumes.
Use low-toxicity application tips—work in a ventilated area, wear gloves, and test a small spot first.
These choices cut environmental impact while keeping cleanup safer for you and your home.
Plant-Based Solvent Options
Although they work more slowly than harsh chemicals, plant-based solvents give you an effective, low-toxicity way to soften and lift dried paint without the strong fumes or environmental harm; common options include citrus-derived d-limonene, soy-based removers, and ethyl lactate, each suited to different paint types and surfaces.
You’ll prefer eco friendly alternatives made from natural ingredients for safer cleanup.
- Citrus (d-limonene): good for oils
- Soy-based: gentle on finishes
- Ethyl lactate: versatile on acrylics
Low-Toxicity Application Tips
After choosing a plant-based remover that fits the paint and surface, apply it carefully to minimize exposure and protect finishes.
Wear gloves and a respirator if recommended, test a hidden spot, and work in ventilated areas.
Use minimal product, blot rather than scrub aggressively, and neutralize residues per instructions.
These low toxicity alternatives and eco friendly solutions reduce harm while preserving results.
Protect Surrounding Surfaces While You Work
Before you start scraping or applying solvents, lay down protective barriers to keep floors, trim, and hardware safe from drips and abrasions.
You’ll focus on surface protection and area preparation: use masking tape for edges, drop cloths for floors, and furniture covers for items nearby to keep workspace organization tight and prevent accidental damage.
- Masking tape for precise edges
- Drop cloths for floors
- Furniture covers for items nearby
Common Mistakes That Damage Surfaces
1 common mistake is rushing the job — if you start scraping or solvent-application too aggressively, you’ll gouge wood, lift trim paint, or etch finishes.
You should prioritize surface protection, test paint compatibility and surface testing first, choose proper removal techniques and tool selection, consider material considerations and drying factors, use safe cleaning solutions, follow correct application methods, and focus on damage prevention.
Finishing After Removal: Sanding, Cleaning, Priming
Once the dried paint’s gone, you’ll want to sand smoothly between coats to feather edges and create a uniform surface.
Wipe away all dust and debris before any new layer to guarantee proper adhesion.
Finally, pick a primer that’s compatible with the substrate and topcoat to lock in adhesion and block stains.
Sand Smoothly Between Coats
Sand the surface lightly between coats to knock down imperfections and help the next layer adhere properly.
You’ll use gentle sanding techniques to dull gloss, level ridges, and improve paint adhesion without cutting through the finish. Work evenly, test with fingertips, and switch grits as needed.
- Use fine-grit for smoothing
- Feather edges for uniformity
- Maintain light, consistent pressure
Remove Dust And Debris
Before you move on to priming, clear away all dust and debris so your next coats will bond without flaws.
Use a vacuum with a brush attachment, then wipe surfaces with a tack cloth or damp microfiber for effective dust removal.
Inspect corners and crevices, repeat as needed.
Good debris management prevents imperfections and guarantees a smooth, long-lasting finish.
Choose Proper Primer Type
With the surface clean and free of dust, choose a primer that matches both the paint type you’ll use and the substrate you’re covering.
You’ll pick primer types for adhesion, stain-blocking, or rust prevention. Check surface compatibility labels, dry times, and compatibility with topcoat.
Apply evenly and sand lightly between coats for a smooth finish.
- Adhesion
- Stain blocking
- Material match
Repairing Small Nicks and Gouges
Start by evaluating each nick and gouge to determine how deep it goes and whether bare wood or metal is exposed—you’ll treat shallow paint chips differently from deeper damage that needs filler.
Clean area, sand smooth, and apply appropriate filler for deep gouges.
After curing, sand level, prime, then use targeted repair techniques and feathered paint touches to blend the patch with surrounding finish.
Timing: How Long to Wait Before Repainting
When the filler and primer feel dry to the touch, wait the manufacturer’s recommended cure time before you repaint so the new coat bonds properly.
You should follow repainting tips and timing considerations to avoid adhesion failure, tackiness, or uneven finish.
Check label temperatures and humidity, and test a small area before committing.
- Follow cure times precisely
- Monitor environment
- Do a test patch
When to Call a Professional Restorer
If the paint damage is extensive, affects a textured or complex surface, or involves underlying rust, rot, or structural issues, call a professional restorer—trying DIY fixes in those cases can make repairs worse or more expensive.
You should get a professional assessment to confirm scope, learn safe restoration options, and avoid hidden damage.
Then follow the restorer’s plan for durable, compliant results.
Cost Trade-Offs: DIY Supplies vs Hiring Pros
Budget is the key factor you’ll weigh when deciding between buying DIY supplies and hiring a pro: purchasing cleaners, scrapers, chemical strippers, protective gear, and rental tools can run from a few dozen to several hundred dollars, while a professional restore can cost considerably more but bundles labor, expertise, and often warranty-backed results.
You’ll compare DIY Cost Benefit and Professional Pricing.
- Upfront tool and material savings
- Time, risk, and skill trade-offs
- Long-term value vs immediate convenience
Dispose of Paint Chips and Chemicals Safely
Dispose of paint chips and leftover chemicals carefully to protect your health and the environment: many flakes contain lead or other toxic pigments, and solvents can contaminate soil and water. You should use labeled containers, follow local hazardous-waste rules, choose eco friendly disposal options, and seek paint recycling programs.
| Action | Resource |
|---|---|
| Contain chips | Sealed bags |
| Store liquids | Original cans |
| Drop-off | Hazardous waste site |
| Recycle | Paint recycling centers |
Quick Fixes for Emergencies and Fresh Spills
When a spill happens, act fast: blot fresh paint with a clean cloth or paper towel to lift as much as you can without spreading it. Then flush water-based paints with warm soapy water or dab solvent-based spots with a small amount of appropriate solvent on a cloth.
Act fast: blot fresh paint immediately, rinse water-based with soapy water, or dab solvent-based spots gently.
For emergency cleanup of fresh spills, stay calm and follow these steps:
- Protect surfaces and ventilate the area.
- Test solvents on an inconspicuous spot.
- Work outward from the stain to avoid spreading.
Troubleshooting: When Paint Won’t Budge
If your quick fixes don’t lift the paint, don’t panic—stubborn, dried-on paint just needs a different approach.
Assess surface type and age, then try stronger paint removal techniques: plastic scrapers, heat gun on low, or solvent-soaked cloths.
Work in small areas, test solvents first, and address paint adhesion challenges by softening edges before scraping.
Repeat cautiously until paint releases.
Preventing Dried Paint Problems While Painting
Because dried paint is much easier to prevent than remove, set up to avoid problems before you open the can: choose the right paint and tools for the surface, work in manageable sections, keep edges wet with consistent brush or roller strokes, and wipe spills immediately with a damp cloth.
Use paint preparation tips and proper painting techniques to avoid fixes.
- Plan stages
- Keep tools clean
- Control drying conditions
Best Products to Buy (And Where to Get Them)
Start with a few key products that will actually save you time and frustration: a quality solvent (mineral spirits for oil-based paint or an appropriate water-based cleaner), a sharp metal putty knife, fine-grit sandpaper or sanding sponge, and a concentrated paint remover for stubborn spots.
Buy paint removal tools at hardware stores or online; look for eco friendly options like citrus or soy-based removers for indoor use.
Frequently Asked Questions
Can Dried Paint Damage Antique Finishes or Patina?
Yes — you can damage antique finishes or patina if you’re careless; in antique restoration you’ll check paint compatibility, test solvents, and proceed gently so cleaning or stripping won’t strip original finish, color, or historic value.
How to Remove Paint From Electrical Outlets and Switches Safely?
Picture yourself by a socket, gloves on, and you’ll use paint removal techniques gently: shut power, remove cover, scrape or use solvent sparingly, dry fully, then restore; prioritize electrical safety and test before reenergizing.
Can Paint Removal Void Furniture or Appliance Warranties?
Yes — you can void warranty coverage if you use improper methods or harsh solvents; check manufacturer terms. Different paint types and removal techniques might be excluded, so don’t assume repairs or DIY alterations won’t affect coverage.
What Precautions for Pets and Plants During Paint Removal?
You should isolate pets, use pet-safe cleaners, and guarantee pet safety by keeping food and water uncontaminated; cover or relocate plants for plant protection, ventilate well, and avoid leaving toxic residues where animals or foliage can contact them.
How to Handle Lead-Based Paint Dust During Removal?
Like handling a live wire, you’ll treat lead-based paint dust with extreme care: use lead safety gear, seal rooms for dust containment, run HEPA vacuums, wet-wipe surfaces, and dispose waste sealed to protect family and pets.
Conclusion
You’ve got this—tackle dried paint like a pro by matching the remover to the paint and surface, wearing PPE, and working in a ventilated spot. Start with gentler options and step up to solvents or heat when needed, testing first. Treat stubborn spots with patience; scrape, resoften, repeat. Prevent future headaches with drop cloths and prompt cleanup. Think of cleanup as gardening: a little regular weeding saves a jungle of trouble later.