How to Paint a Brick Wall: Complete Exterior and Interior Guide
You can paint brick successfully by prepping, repairing, priming and using masonry-specific paints. Clear and protect the area, clean or pressure-wash the brick, and tuckpoint or patch damaged mortar. Let everything dry, apply a masonry primer, then two thin coats of exterior or heat-safe interior paint with brushes for edges and rollers for flats. Pick proper weather and allow full cure. Keep up seasonal touch-ups and cleaning, and continue below to learn step-by-step techniques and troubleshooting.
Quick Step-by-Step: How to Paint Brick
Start by clearing the area and protecting floors and nearby surfaces with drop cloths or plastic sheeting.
Inspect and clean the brick, repair mortar, then prime.
Inspect and clean brickwork, repair damaged mortar, then apply a suitable primer for lasting, even coverage.
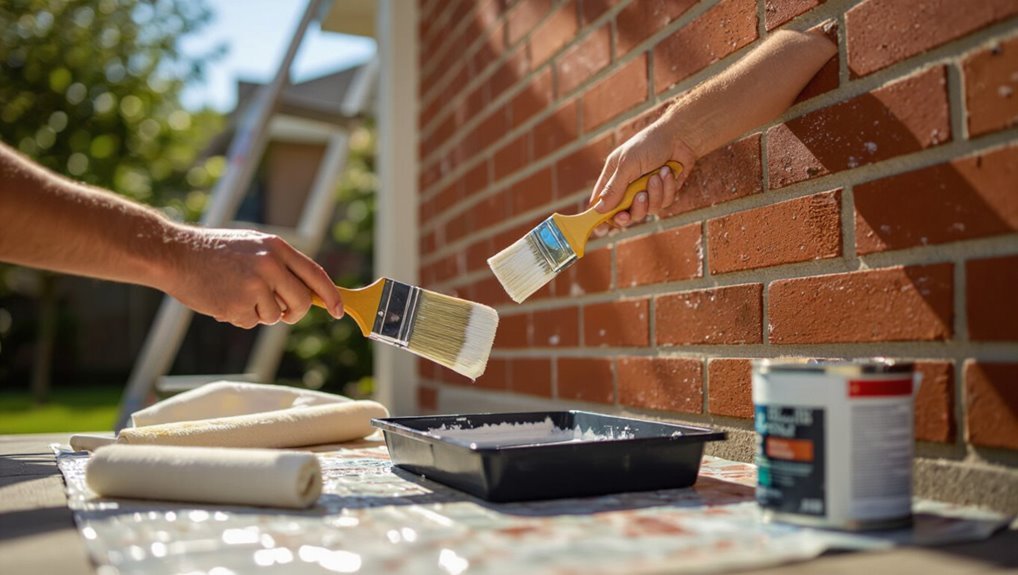
Use proper brush techniques for edges and a roller for large areas.
Apply two thin coats, allowing drying between.
Finish by removing tape, touching up, and evaluating color selection under different light before declaring the job complete.
When Should You Paint Brick: And What to Expect?
You should paint brick when you see peeling, efflorescence, or lots of staining that cleaning can’t fix.
Pick a stretch of dry, mild weather—ideally 50–85°F with low humidity—so primers and paints cure properly.
Expect paint to last 5–15 years depending on product, exposure, and prep quality.
Signs It’s Time
If mortar is crumbling, paint is flaking, or the brick has darkened unevenly, it’s time to contemplate painting—these visible signs mean the surface is degrading or aesthetic needs have changed.
You should also act if efflorescence, mold, or spalling appears, or if you want updated color trends.
Address structural issues first, then follow maintenance tips to prep, repair, prime, and choose durable paint.
Weather And Timing
Although brick holds paint well, timing matters: you should plan around weather conditions and seasonal considerations.
Check forecast checks for clear days, follow temperature guidelines, and account for humidity levels to control drying time.
Consider climate impact on cure and choose ideal timing—spring or fall in moderate climates—to avoid extreme heat, cold, or rain that’ll ruin adhesion and finish.
Paint Longevity Expectations
When you paint brick, expect the finish to change over time—most properly prepped and high-quality paint jobs last 10 to 15 years on exterior brick, while interiors can hold up longer depending on wear and moisture.
You’ll judge paint durability by fading, peeling, and mortar condition.
Plan repainting cycles, follow maintenance tips like cleaning and touch-ups, and address moisture to extend life.
Tools & Materials for Painting Brick (Masonry-Specific)
Gather the right tools and materials before you touch the brick so the job goes smoothly: you’ll need a stiff-bristle brush or wire brush for cleaning, a pressure washer or hose for rinsing, masonry cleaner or trisodium phosphate for stubborn stains, a quality masonry primer and exterior masonry paint, caulk or mortar repair compound for cracks, breathable masonry-specific sealant if required, plus safety gear (gloves, goggles, dust mask) and application tools like rollers with a thick nap, a masonry brush, and a pump sprayer for large areas.
Use proper brush types for edges, choose compatible paint finishes, and keep mortar tools, patching trowel, mixing bucket, and extension poles handy.
Choose Paint & Primer for Interior vs. Exterior Brick
Now that your tools, cleaning supplies, and repair materials are ready, you’ll need to pick products suited to whether the brick is inside or outside.
For interior paint, choose breathable, low-VOC masonry or acrylic latex formulated for indoor use to avoid trapping moisture.
For exterior primer, use a masonry-specific, weather-resistant primer that promotes adhesion and seals porous brick before topcoat application.
Inspect Brick & Mortar: What to Fix First
Before you start painting, you should inspect the brick and mortar for loose joints, cracked bricks, and signs of water damage.
Tap or probe mortar to find loose sections and note any bricks with visible cracks.
Address these issues first so your paint job adheres properly and lasts longer.
Check For Loose Mortar
Tap the joints along the wall to find loose mortar—if a hollow sound or crumbling powder comes back, the mortar needs attention before you paint.
You’ll remove failing mortar, brush debris from joints, and repoint where needed to restore mortar integrity.
Match mortar color and tooling to preserve brick texture, then let repairs cure fully so paint bonds evenly and lasts.
Identify Cracked Bricks
After you’ve repaired loose mortar, scan the bricks themselves for cracks or fractures that could let moisture in and undermine your paint.
Mark hairline and larger cracks, tapping to detect hollow spots. Small chips may be cosmetic, but advancing brick deterioration signals compromised structural integrity.
Replace severely cracked bricks or consult a mason; minor cracks can be filled and sealed before priming and painting.
Look For Water Damage
Anyone can spot water damage if you know what to look for: dark stains, efflorescence (white powdery deposits), spalling (flaking or crumbling brick faces), and soft or eroded mortar joints are clear signs moisture’s been at work.
Check for water stains inside and out, trace moisture sources like leaking gutters or poor flashing, and repair mortar or replace bricks before painting to prevent trapped damp.
Clean Brick So Paint Will Stick
Before you apply primer or paint, make sure the brick is clean and dry so the coating will adhere properly.
Use appropriate brick cleaning techniques and cleaning solutions to remove dirt, mildew, and efflorescence. Test a small area first. Rinse thoroughly and let dry fully.
- Pressure wash low setting
- Scrub with detergent
- Use muriatic or masonry cleaner cautiously
- Spot-treat stains
Repair Mortar & Patch Damaged Brick
Tuckpoint and patch damaged areas before priming so your paint job lasts—remove loose mortar with a chisel or grinder, clear out joints to a uniform depth, and replace it with fresh mortar or a ready-made tuckpointing mix that matches the brick’s texture and color.
Choose appropriate mortar types, use proper patch techniques for cracks or spalls, cure fully, then sand or tool joints smooth before painting.
Masking & Priming: Setup for Even Coverage
Before you paint, clean the brick thoroughly to remove dust, efflorescence, and loose mortar so the primer and paint will adhere.
Lay tape along trim and windows and spread drop cloths to protect surrounding surfaces.
Choose a masonry primer suited to your brick type and porosity—use a stain-blocking primer for efflorescence or a high-adhesion primer for smooth surfaces.
Surface Cleaning Prep
Think of masking and priming as the setup that guarantees even coverage and a professional finish; you’ll tape edges, protect surrounding surfaces, and choose a primer suited for masonry so the paint sticks and wears well.
Clean first: remove surface stains with appropriate cleaning solutions, consider pressure washing or eco friendly options, and allow full drying time for proper surface preparation.
- Inspect for loose mortar
- Pre-treat stains
- Rinse thoroughly
- Verify dryness before priming
Tape And Dropcloth Placement
1. You’ll protect adjacent surfaces by using proper tape techniques and choosing appropriate dropcloth types. Apply painter’s tape to trim and edges, pressing seams firmly to prevent bleed.
Lay heavier canvas cloths over furniture and plastic for dusty areas, securing edges with low-tack tape. Leave pathways clear, overlap dropcloths, and remove tape while paint is tacky for clean lines.
Primer Selection Tips
Now that edges are masked and dropcloths are set, pick a primer that matches your brick’s condition and the paint you’ll use.
You’ll choose based on porosity, previous coatings, exterior vs interior, and desired finish. Consider primer types and plan primer application for consistent absorption and adhesion.
- Test a small area first
- Use masonry or bonding primers
- Thin coats, brush into mortar
- Allow full cure before painting
Paint Exterior Brick: Step-by-Step
Start by preparing the surface so your paint will stick and last: clean the brick thoroughly with a stiff brush and detergent or a pressure washer on low to remove dirt, mold, and loose mortar, then let it dry completely before repairing cracks or repointing where needed. Choose color selection, test texture effects, prime, roll or back-brush, and seal.
| Step | Action |
|---|---|
| 1 | Clean |
| 2 | Repair |
| 3 | Prime |
| 4 | Paint |
| 5 | Seal |
Paint Interior Brick & Fireplaces: Step-by-Step – Troubleshooting & Care
Exterior prep steps will help, but painting interior brick and fireplaces brings different challenges you’ll want to address before you open a can.
Exterior prep helps, but interior brick and fireplaces pose unique challenges to consider before you open a can.
You’ll choose color selection for fireplace aesthetics, weigh texture considerations, pick fire resistant options and protective coatings, and plan seasonal painting.
Follow maintenance tips, know paint removal methods, and troubleshoot peeling or soot stains.
- Test color and texture
- Use heat-safe primers
- Schedule seasonal touch-ups
- Keep cleaning routine
Frequently Asked Questions
Can Painted Brick Be Returned to Its Natural Look Later?
Yes — you can restore painted brick, though results vary. You’ll use removal techniques like chemical strippers, pressure washing, or sanding; restoration options include cleaning mortar, re-pointing, and sealing to reveal and protect the natural brick.
Will Painting Brick Affect My Home’s Resale Value?
Better safe than sorry: your paint color and how well you preserve brick texture can help or hurt resale—buyers sometimes love updated looks, but you’ll want neutral choices and professional prep so it doesn’t reduce perceived value.
Can I Paint Over Brick With Existing Lead-Based Paint?
Yes—you can paint over brick with existing lead-based paint, but you should follow lead paint safety: hire certified abatement or encapsulate using approved brick painting techniques, seal thoroughly, wear PPE, and notify buyers or authorities as required.
How Long Before I Can Hang Items on Freshly Painted Brick?
You should wait at least 24–48 hours before hanging lightweight items, but delay 7 days for heavy fixtures to guarantee proper drying time and paint adhesion; always follow your paint’s cure recommendations and use proper anchors.
Does Painted Exterior Brick Require Seasonal Maintenance?
Yes—you’ll need seasonal maintenance. You should inspect for chips, recoat to preserve color retention, and check the moisture barrier each year; prompt touch-ups and resealing will keep painted exterior brick looking and performing its best.
Conclusion
You’ve got this—painting brick isn’t rocket science, and a fresh coat can transform your space faster than you can say “wow!” Start by choosing the right primer and paint, repair any damaged mortar or bricks, and prep surfaces thoroughly to guarantee long-lasting results. Work methodically, let each coat dry, and don’t skip maintenance. With patience and the proper tools, your interior or exterior brick will look renewed and protected for years to come.