What’s Orange Peel Paint: Meaning, Causes, and Fixes Explained
You’ll spot orange peel paint by the tiny, uniform bumps that make a glossy surface look dimpled like orange skin. It’s usually caused by spray technique, wrong thinning or nozzle choice, and fast drying from heat or airflow. Mild cases can be wet-sanded and polished; heavy texture needs block-sanding and recoating or a pro’s touch. Check spray distance, pressure, and environment to prevent it, and keep going to learn step-by-step fixes and prevention tips.
What Is Orange Peel Paint?
Orange peel paint describes a textured finish that looks like the skin of an orange: tiny bumps and dimples formed as the paint dries.
You’ll recognize it by paint characteristics like uniform, subtle texture and reduced sheen.
You can replicate or avoid it by adjusting application techniques—spray pressure, atomization, viscosity, and drying conditions—so you control texture intentionally rather than accidentally.
What Orange Peel Looks Like (Photos and Descriptions)
You’ll see orange peel best in close-up texture photos that highlight the tiny, uneven bumps.
Compare those to surface comparison shots to notice how orange peel differs from smooth or orange-peel-light finishes.
Use both types of images to judge severity and decide if refinishing is needed.
Close-Up Texture Photos
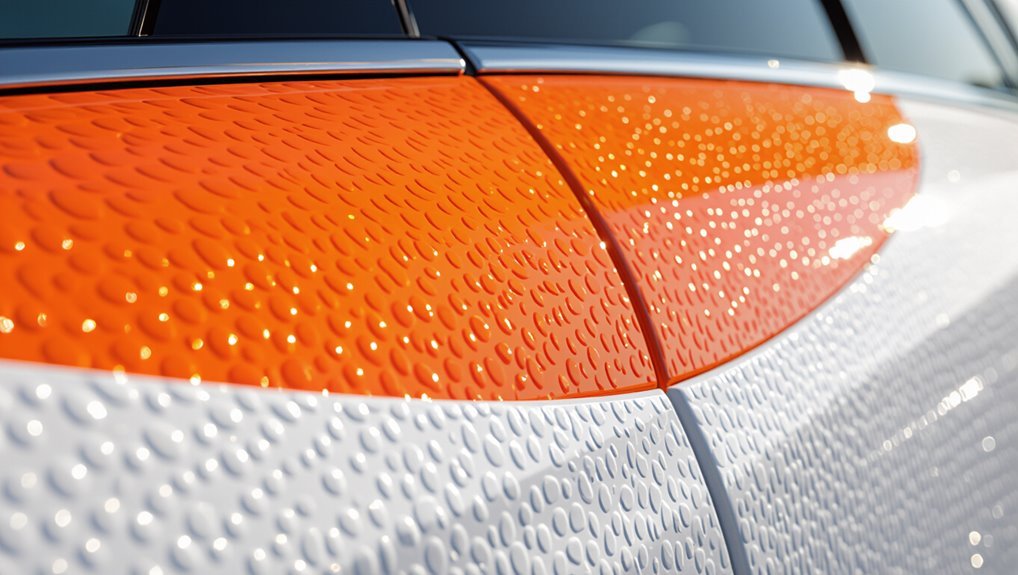
Think of orange peel as a subtle, dimpled skin on painted surfaces; in close-up photos it shows a pattern of tiny hemispherical bumps and shallow valleys that catch light unevenly.
You examine texture analysis shots and use photo comparison to spot uniformity, bump size, and sheen variance.
Zoomed-in images help you decide if sanding or recoat will restore smoothness quickly and accurately.
Surface Comparison Shots
Having examined close-up texture shots, now compare different surfaces side-by-side to see how orange peel varies across lighting, distance, and application methods.
You’ll notice raw drywall, sanded panels, and glossy trim show distinct patterns.
Photos with notes highlight how surface preparation and tool selection influence visibility.
Use comparison shots to decide sanding levels, primer choice, and spray settings before full-scale refinishing.
Quick Fixes for Mild Orange Peel
If the orange peel is light and localized, you can usually correct it without stripping the whole panel.
Quick tip: start with a texture assessment under good light to map affected areas.
Wet-sand gently with fine grit, polish with a dual-action polisher and appropriate compound, then finish with a fine polish and sealant.
Work gradually and recheck often to avoid cutting through clearcoat.
How to Tell Intentional Texture From a Defect
Look closely at the surface: intentional texture will be even and consistent across the area, while a defect usually looks irregular or patchy.
Check for repeating tool marks or patterns that match other finished areas—that’s a sign the texture was applied on purpose.
Finally, compare the finish to surrounding design elements and fixtures to see if the texture complements the room or stands out as a mistake.
Evenness And Consistency
Even when orange peel is applied on purpose, you should be able to tell it’s intentional by its evenness and consistency across the surface; the texture will repeat uniformly, with similar bump size, spacing, and sheen from panel to panel.
You can judge intent by consistent paint application and proper surface preparation—no random blotches, runs, or thin spots.
Uniform finish signals control, not defect.
Intentional Tool Marks
One way to tell intentional texture from a defect is by reading the tool marks: intentional orange peel will show consistent spray patterns, overlap rhythms, and directional strokes that repeat across panels, while accidental defects are random, abrupt, or mismatched.
You’ll spot intentional texture when marks align as deliberate artistic expression, with controlled repetition and rhythm, not chaotic blemishes or isolated flaws.
Design And Finish Match
When evaluating whether orange peel is intentional, compare the texture to the overall design and finish: an intentional treatment will harmonize with the paint’s sheen, color depth, and the vehicle’s styling cues, while an accidental defect will stand out as inconsistent or out of place. You’ll check color harmony and texture balance to decide if it’s deliberate or a flaw.
| Feel | Mood | Signal |
|---|---|---|
| Smooth | Calm | Intentional |
| Dull | Sad | Defect |
| Matte | Rugged | Intentional |
| Glossy | Bright | Intentional |
Simple Tests to Rate Orange Peel Severity
Before you decide whether to sand or strip, run a few quick, repeatable tests to gauge how bad the orange peel is.
Use a simple severity scale: visually compare distance and shadow, then run your hand to judge texture evaluation.
Measure peak height with a straightedge and feel for roughness.
Photograph and note lighting to track changes before you act.
When You Can Repair Without Re-Spraying
If the orange peel is shallow, isolated to a small area, and the basecoat and clearcoat are intact, you can often repair it without re-spraying by using wet-sanding and polishing to blend the texture back into the surrounding panel.
You’ll assess severity, choose appropriate repair techniques like fine-grit wet-sanding, compounding, and polishing, and adjust expectations.
Minor issues often result from poor spray adjustments rather than substrate failure.
Dry Sanding: Step-By-Step for Light Orange Peel
Start by gathering the right tools: a range of fine-grit dry sandpapers (800–2000 grit), a sanding block, clean microfiber towels, a good light source, and a rubbing compound for finishing.
You’ll perform careful surface preparation, dry sanding progressively with light pressure, using proper sanding techniques to level orange peel.
Finish by cleaning, inspecting under light, then buffing with compound for a smooth, consistent sheen.
Wet Sanding: Techniques for Medium to Heavy Orange Peel
Having smoothed light orange peel with dry sanding, you’ll need a wetter, more aggressive approach for medium to heavy orange peel: wet sanding uses water-lubricated abrasive to remove larger texture without cutting into the base coat.
Use progressively finer grits, keep surfaces flooded, and work evenly across panels.
Match wet sanding techniques to orange peel severity, checking frequently to avoid oversanding and expose primer.
Polishing and Rubbing Compounds to Restore Gloss
Now you’ll choose the right compound for your paint—coarser cuts for heavy orange peel, finer polishes for finishing.
Use controlled, overlapping passes with proper speed and pressure to remove sanding marks without burning the clear coat.
Finish with aftercare: remove residue, apply sealant or wax, and follow maintenance tips to keep the gloss lasting.
Choosing The Right Compound
When you’ve decided to tackle orange peel, choosing the right compound is critical because the wrong one can leave swirl marks or remove too much clear coat; pick a compound based on the clear coat’s hardness and the texture severity.
For compound selection, match abrasive level to defects. Learn basic application techniques, start with less aggressive formulas, and test on an inconspicuous spot before full treatment.
Proper Polishing Technique
Start by working in small sections so you can control pressure and inspect results frequently; you’ll get a smoother finish if you polish methodically rather than rushing across the panel. Use correct polishing techniques and thorough surface preparation before compounds. Work slowly, test abrasives, and wipe residue.
| Step | Tool | Tip |
|---|---|---|
| 1 | Pad | Clean |
| 2 | Compound | Low speed |
| 3 | Buff | Inspect |
| 4 | Repeat | Light pressure |
Aftercare And Protection
Although you’ve already refined the surface, you’ll need to follow a short aftercare routine to lock in gloss and protect your work: apply a finishing polish or rubbing compound sparingly, work it in with a soft pad at low speed, then remove residue and inspect the panel for uniform shine and any remaining defects.
Then use recommended aftercare techniques and apply protective coatings or sealant to preserve gloss and resist contamination.
When to Block Sand and Recoat Instead of Polishing
If the orange peel is heavy, deep, or the clear coat has adhesion problems, you’ll need to block sand and recoat rather than try to polish it out. You should use pre sanding techniques, clean substrate, and consider alternative finishing to guarantee adhesion. Block sand to level, then recoat for durable smoothness.
| Step | Action | Tip |
|---|---|---|
| 1 | Inspect | Assess depth |
| 2 | Sand | Use graded grit |
| 3 | Clean | Remove dust |
| 4 | Prime | Check adhesion |
| 5 | Recoat | Match system |
Re-Spraying: Adjust Equipment and Technique
When you re-spray, adjust your gun setup and technique to match the corrected surface and the paint’s viscosity so you get even coverage without runs.
You’ll refine spray patterns and make precise nozzle adjustments to control atomization and overlap. Move consistently, maintain proper distance and speed, and test on panels first to confirm uniform laydown, avoiding heavy passes that cause sagging.
Gun Types and Nozzle Sizes That Reduce Orange Peel
You’ll want to pick the right gun type—HVLP and LVLP give softer atomization, while airless and air-assisted systems can lay down thicker coats faster.
Match nozzle size to your material and viscosity: smaller tips for thinner paints, larger for heavier coatings.
I’ll explain practical size guidelines and how each gun affects orange peel next.
HVLP Vs. LVLP
Curious which spray system cuts orange peel best?
You’ll find HVLP advantages include higher transfer efficiency and gentler atomization, giving smoother laydown with less overspray.
LVLP benefits are lower air consumption and similar fine finish at reduced pressure, useful on smaller compressors and touch-ups.
Choose based on your compressor, coating viscosity, and project size to minimize orange peel effectively.
Airless And Air-Assisted
Although airless systems atomize paint differently than HVLP or LVLP, you can still cut orange peel by choosing the right gun and tip size for your coating and pressure.
For sprayer selection and coating application, consider these practical steps:
- Match gun type to viscosity.
- Reduce pressure to smooth finish.
- Use air-assisted for finer atomization.
- Test on panels before full spray.
Nozzle Size Guidelines
When selecting a gun and tip, match nozzle size to the coating’s viscosity and your desired finish: smaller orifices produce finer atomization and less orange peel on thin lacquers and stains, while thicker materials need larger nozzles to avoid clogging and excessive pressure that roughens the surface. You’ll pick nozzle types and spray patterns to balance flow and atomization for smooth results.
| Gun Type | Nozzle Size | Recommended Coating |
|---|---|---|
| HVLP | .8–1.4 mm | Lacquers, stains |
| Airless | .015–.021 | Heavy paints |
| Air-assisted | .011–.017 | Enamels, primers |
Air Pressure and Fluid Settings: Atomization Basics
Because atomization hinges on balancing air pressure and fluid flow, you’ll need to understand how those two settings interact before you start adjusting the gun.
You’ll use atomization techniques informed by basic fluid dynamics to get consistent spray patterns. Start low, increase air to break droplets, then tweak fluid for coverage. Monitor fan and needle settings for smooth overlap.
- Test
- Observe
- Adjust
- Repeat
Paint Viscosity: How to Measure and Adjust Reducers
After you’ve got atomization dialing in—air pressure breaking droplets and fluid flow giving coverage—you’ll need to set paint viscosity to match that spray behavior.
You’ll measure with a cup or viscometer—paint viscosity measurement gives seconds and target ranges.
Use reducer adjustment techniques slowly: thin in small increments, test spray, and recheck viscosity.
Aim for consistent flow without runs to minimize orange peel.
Fast-Drying Coatings and Why They Increase Orange Peel Risk
When you use fast-drying coatings, the solvent leaves the film quickly, so the surface skins over before it can level out.
That rapid evaporation cuts the paint’s flowability, preventing brush or spray marks from smoothing.
Together, faster solvent loss and reduced film flow raise your orange peel risk.
Faster Solvent Evaporation
If solvents evaporate quickly, the paint skin sets before the liquid has a chance to level out, and you’ll see the surface texture lock in the ripples and dimples that cause orange peel.
You should monitor solvent temperature and evaporation rate to avoid this. Fast drying from hot conditions or high-VOC solvents increases risk.
- Lower solvent temperature
- Control airflow
- Use slower solvents
- Adjust spray technique
Reduced Film Flowability
Fast solvent loss doesn’t just lock in surface texture — it also reduces the coating’s film flowability, which is the paint’s ability to smooth out before it sets.
You’ll notice increased orange peel when high application speed or too-thick film thickness prevent leveling time.
Slow your spray, thin appropriately, or choose slower-solvent formulations so the film can flow and self-level before skinning over.
Temperature, Humidity, and Airflow: Environmental Causes
Although you might focus on materials and technique, temperature, humidity, and airflow have a direct impact on how paint flows and levels on a surface.
You’ll notice temperature effects and humidity levels change drying times and paint behavior; airflow influence alters leveling.
Consider these environmental conditions to prevent orange peel:
- High temp — fast drying
- Low temp — slow cure
- High humidity — blushing
- Strong airflow — surface skinning
Substrate Prep Mistakes That Worsen Texture
When you skip or rush substrate prep, you’re practically inviting orange peel—dust, oils, loose paint, and uneven sanding keep new coatings from bonding and leveling properly.
You must follow proper substrate preparation: clean, decontaminate, and remove loose material.
Inadequate sanding or skipping texture assessment leaves microscopic highs and lows, so your finish won’t flow out, amplifying orange peel instead of fixing it.
Primer and Sealer Choices to Improve Leveling
To reduce orange peel, you’ll want to pick the right primer and sealer. High-build primers fill imperfections and give you a smoother base, while sandable sealers let you level the surface between coats without stripping the adhesion.
Use them together to create a flat, uniform substrate before your topcoat.
High-Build Primers
If you want smoother, more forgiving surfaces before spraying your topcoat, high‑build primers are the go-to choice because they fill minor imperfections and improve overall leveling.
You’ll see primer benefits in faster coverage and fewer coats, ideal for high build applications. Use them to improve spray flow and hide texture.
- Fills low spots
- Reduces orange peel
- Speeds topcoat
- Eases sanding
Sandable Sealers
Although they look similar to standard primers, sandable sealers give you a smoother base that levels quickly and takes sanding without clogging. This allows you to remove texture and imperfections before your topcoat.
You’ll choose the right product for substrate and follow wet-film thickness, drying times, and proper sanding grits.
Proper application techniques and light feathering cuts orange peel and guarantees uniform adhesion for a flawless finish.
Common Spray Technique Errors That Create Orange Peel
Spray too close, too far, or too fast and you’ll see orange peel appear in minutes; most texture problems come from basic technique errors.
You can fix them by controlling spray distance and nozzle angle, using steady strokes, and tuning pressure.
Common errors to check:
- Inconsistent speed
- Wrong spray distance
- Improper nozzle angle
- Excessive pressure
Identifying Orange Peel vs. Runs, Fisheyes, and Orange Skin
Texture matters: you’ll spot orange peel as a uniformly bumpy, dimpled surface that feels like the skin of an orange, while runs are gravity-driven streaks of excess paint.
Fisheyes are small circular voids caused by surface contamination, and orange skin can be a broader, subtle roughness from improper atomization.
For orange peel identification, perform a texture comparison using angled light and fingertip rub to distinguish defects.
Tools and Consumables Every DIYer Needs
When you’re preparing to tackle orange peel, having the right tools and consumables on hand keeps the job efficient and helps prevent common defects.
You’ll want DIY Essentials: quality spray gun, respirator, masking supplies, sandpaper, and touch-up materials.
Practice good Tool Maintenance to extend gear life and guarantee consistent finish.
- Spray gun
- Respirator
- Abrasives
- Masking tape
Preventive Checklist to Avoid Orange Peel
Start by preparing the surface thoroughly—clean, sand, and remove any dust or grease so the paint lays smooth.
Use the correct spray technique next: keep a consistent distance, overlap passes, and maintain the right pressure and speed.
Follow these steps and you’ll cut the risk of orange peel before you even spray.
Surface Preparation First
1 key step before you ever pick up a spray gun is prepping the surface properly, because even perfect technique can’t hide dust, grease, or uneven primer.
You should focus on surface preparation techniques and substrate cleanliness to prevent orange peel.
Do these checks:
- Clean with solvent
- Sand to uniform profile
- Remove dust with tack cloth
- Inspect for contaminants and repair
Correct Spray Technique
Now that the surface is clean and evenly prepared, focus on your spray technique to keep orange peel from forming.
Hold the gun perpendicular, maintain consistent spray angle across panels, and use steady, overlapping passes.
Practice distance control—usually 6–10 inches depending on tip size—and keep moving to avoid buildup.
Adjust fluid and air settings for a fine, even atomization before painting.
Cost and Time: DIY Fixes vs. Hiring a Pro
While a DIY repair can cut labor costs and let you work on your schedule, it often takes longer than you expect and can eat into your free time if you’re inexperienced.
DIY repairs save labor costs and offer flexibility, but often take longer and consume unexpected free time.
Hiring a pro costs more upfront but usually finishes faster and delivers a predictable timeline and warranty.
Consider DIY vs. Professional and Cost Analysis:
- Tools and materials expense
- Time investment
- Quality consistency
- Warranty and liability
Pro Tips for Cars and Furniture From Experienced Sprayers
A handful of practical tips from experienced sprayers will save you time and prevent common orange-peel mistakes on cars and furniture:
Use proper spray techniques—consistent distance, overlap, and speed—to control surface finishes.
Prioritize equipment maintenance and smart product selection.
Combine DIY strategies with professional tips: test panels, thin coats, correct temps, and patience to get smooth, durable results.
Troubleshooting Flowchart: Pick the Right Fix
You’ve learned the techniques and prep that prevent most orange peel issues; when problems still show up, use a clear troubleshooting flowchart to pick the right fix.
Follow concise steps to identify cause, apply targeted troubleshooting techniques, and adjust spray patterns or sanding strategy accordingly.
- Inspect texture
- Check spray setup
- Adjust pressure/pattern
- Recoat or wet-sand
Summary: Action Plan to Diagnose and Fix Orange Peel
Because you can usually narrow orange peel down quickly, follow a tight action plan: inspect finish, compare to a diagnostic checklist, test spray settings and material mix, then choose repair techniques—buffing for minor texture, block-sanding and recoat for moderate, or spot-respray for severe.
Verify cure and environment, retest a small area, then complete the chosen repair and recheck the result.
Frequently Asked Questions
What Causes Orange Peel in Water-Based vs. Solvent-Based Paints?
Water-based paints orange-peel when you spray too fast, thin coats, or skip surface preparation; solvent-based tends to orange-peel from fast solvent flash, poor technique, or contaminated surfaces. You’ll fix both by improving application techniques.
Can Orange Peel Affect Paint Durability or Adhesion Long-Term?
Yes — you’ll see reduced paint longevity if orange peel traps moisture or dirt, and uneven surface texture can hinder coating adhesion over time; you’ll need proper sanding, priming, and recoating to restore durability and bond.
Are There Health or VOC Concerns When Correcting Orange Peel?
Yes — you’ll face VOC exposure and dust risks when correcting orange peel, so you’ll need ventilation requirements met, wear respirators, goggles, gloves, and follow safety precautions, using containment and proper filters to protect your health.
Can Additives or Extenders Completely Prevent Orange Peel?
No — you won’t magically banish orange peel. Like seasoning, additive types and extender benefits help smooth flow and leveling, but they can’t completely prevent texture; proper technique, spray settings, and environmental control still matter.
Is Orange Peel More Common With Certain Paint Colors or Sheens?
Yes — you’ll notice orange peel more with flat or darker colors because they hide light reflections; improper paint application and poor surface preparation make it worse, so you’ll prep thoroughly and adjust technique to minimize texture.
Conclusion
You’ve learned what orange peel is, how to spot it, and the quick fixes and pro options to smooth it out. Want to tackle it yourself or call in a pro? Start by testing severity, then pick a matching fix—sanding and buffing for mild cases, block-sanding and repainting for worse ones. With the right tools and patience, you can restore a smooth, glossy finish without wasting time or money.