Why Did Paint Bubble: Causes, Prevention, and Repair Tips
If your paint bubbled, it’s usually from trapped moisture, heat-driven solvent outgassing, or poor adhesion from dirty or incompatible surfaces. You’ll spot small, uniform bubbles from fast drying or sun, and larger blisters where moisture or adhesion failed. Fixing it means removing loose paint, drying and repairing the substrate, priming with a compatible primer, then recoating under proper humidity and temperature. Follow these checks and steps now, and keep going to learn the best prevention and repair techniques.
Guide Purpose: An Informational How‑To
Because paint bubbling can signal anything from a minor cosmetic issue to hidden moisture damage, this guide helps you diagnose causes and choose the right fix.
You’ll learn how paint types affect adhesion, when surface prep matters, and which application techniques reduce bubbles.
Follow concise steps to identify root causes, pick appropriate materials, and apply corrections so you prevent recurrence and restore a smooth finish.
Quick Diagnosis and Fix for Paint Bubbles
When you spot paint bubbles, act fast: identify their size, location, and pattern to narrow down the cause—small, uniform bubbles usually mean solvent outgassing or brushing in hot sun; larger, blistered patches suggest trapped moisture or poor adhesion. Diagnose bubbling types, remove loose paint, sand, prime, and repaint to restore finish and preserve paint longevity.
| Sign | Quick Fix |
|---|---|
| Small uniform | Sand lightly |
| Large blisters | Scrape to sound paint |
| Localized | Dry and spot-prime |
| Widespread | Strip and recoat |
Causes of Paint Bubbles: Overview
When you see paint bubbling, it usually stems from two main problems: trapped moisture under the coating or surface contamination that prevents proper adhesion.
Trapped moisture can come from leaks, high humidity, or painting over damp substrates.
Contamination like dirt, grease, or old loose paint creates weak spots where bubbles form.
Trapped Moisture
If you seal paint over a damp surface, tiny pockets of water or moisture vapor can get trapped beneath the film and form bubbles as the paint cures or the substrate dries.
You should identify moisture sources like leaks, high humidity, or wet substrates before painting.
Trapped moisture drives bubble formation, lifting paint and causing blisters; dry and ventilate thoroughly to prevent recurrence.
Surface Contamination
Because contaminants like oil, dirt, or wax prevent paint from bonding properly, you’ll often see bubbles form where the coating can’t adhere to the substrate.
You should perform thorough surface cleaning before painting, removing contamination sources such as grease, silicone, or old polish.
Skipping this step lets coatings lift, trap air, and bubble; prep and solvent wiping guarantee stronger adhesion and fewer failures.
How Moisture Causes Paint Bubbles
When you paint over trapped surface moisture, the water turns to vapor and forms bubbles beneath the coating.
High humidity during application can slow drying and let moisture migrate into the film, increasing blistering risk.
Painting on a damp substrate can prevent proper adhesion and create pockets that push the paint away from the surface.
Trapped Surface Moisture
Ever wondered why paint peels off in little blisters even though the surface looked dry? You might’ve trapped moisture beneath coatings during hurried prep.
Use moisture detection and a careful surface assessment to catch wet spots before painting.
- Check with a moisture meter on suspect areas.
- Remove and dry affected layers completely.
- Reapply primer designed for damp-prone surfaces.
High Humidity Effects
If you paint during high humidity, trapped moisture in the air can slow drying and turn into vapor beneath the film, causing bubbles to form as the coating cures.
You’ll notice humidity effects most when coatings can’t off-gas quickly. Control ventilation, use dehumidifiers, and schedule jobs for lower-humidity windows.
Good moisture management prevents blistering and guarantees proper adhesion and finish.
Damp Substrate Issues
High humidity isn’t the only moisture problem — painting over a damp substrate creates its own set of bubbles.
You’ll see trapped water push film away as paint cures, especially in porous materials.
Prevent by controlling damp conditions and improving moisture management before coating.
- Dry substrate fully
- Use vapor barriers
- Test moisture levels before painting
How Heat and Sun Trigger Bubbling
When sunlight heats paint, the top layer warms and expands faster than the underlying material, creating stress that forces blistering or bubbling.
You’ll see bubbles where heat exposure repeatedly cycles, especially on south- or west-facing surfaces.
Sun damage breaks binders and softens film, letting moisture or trapped air push pockets outward.
Cool nights then crack and lift weakened paint, worsening blisters.
Poor Surface Prep and Bubble Formation
Because paint only sticks to a clean, dry, and properly primed substrate, skipping prep sets you up for bubbling down the line.
Because paint bonds only to clean, dry, properly primed surfaces, skip prep and you invite bubbling later.
You must do thorough surface cleaning, address moisture, and choose correct primer selection to promote adhesion.
Follow these steps to avoid trapped contaminants and poor bonding:
- Clean and degloss surfaces
- Repair and dry substrates
- Match primer selection to substrate
Incompatible Paint Layers and Blistering
If you apply a paint over a primer that isn’t compatible, the layers can fail and cause blistering.
You’ll also see solvent-reaction blisters when a new topcoat traps solvents in the underlying layer.
Check product compatibility and allow proper cure times to prevent these problems.
Poor Primer-Paint Compatibility
Although primers are meant to create a stable base, incompatible primer-paint combinations can trap solvents or prevent proper adhesion, which leads to bubbling and blistering.
You should check primer selection and test paint adhesion before full application.
Consider these steps:
- Match primer chemistry to topcoat
- Do adhesion tests on samples
- Sand and clean between layers to guarantee bonding
Solvent Reaction Blisters
When you apply a new paint layer that dissolves or softens the one beneath it, trapped solvents can form blisters as the lower film reflows and releases gases.
You’ll see solvent reaction blisters where incompatible solvent types in successive coats react, causing blister formation and lift.
To prevent it, match solvent profiles, allow thorough drying, and test small areas before full recoating.
Top Moisture Sources to Check First
Because paint bubbles almost always point to moisture, start by checking the most common water sources first so you can narrow down the problem quickly.
Because paint bubbles usually signal moisture, check common water sources first to quickly pinpoint the problem.
You’ll want to inspect obvious moisture sources and monitor humidity levels to confirm persistent dampness.
Check these first:
- Roof leaks or flashing failures
- Plumbing joints, under-sink areas, and appliance connections
- Ground drainage, grading, and exterior water intrusion
How Condensation Creates Wall and Ceiling Bubbles
If warm, moist indoor air hits a cooler wall or ceiling surface, it can condense into tiny droplets that seep into paint layers and lift them away from the substrate.
You’ll notice bubbling where condensation effects concentrate—especially on poorly insulated or ventilated surfaces.
Control humidity, improve ventilation, and use vapor-resistant paints as part of moisture management to prevent recurring paint failure.
Plumbing, Roof, and Hidden Moisture Leaks
Although you mightn’t see a leak, slow plumbing drips, roof failures, and hidden moisture paths can trap water behind paint and cause bubbles to appear long before stains show up.
You should use leak detection, inspect roof penetrations, and control humidity for moisture management. Quick fixes prevent bigger repairs.
- Check pipes and joints
- Inspect attic and roof decks
- Use moisture meters and sensors
Exterior Causes: Siding, Flashing, and Trapped Moisture
Leaks inside the house often start outside, so check the exterior when you find bubbling paint.
Inspect siding materials for rot or gaps that trap water. Verify flashing types around windows and roof intersections; damaged flashing lets moisture in.
Confirm moisture barriers are intact behind cladding. Address trapped dampness before repainting to restore proper paint adhesion and prevent recurring bubbles.
Painting Conditions That Cause Bubbles
When you paint in high humidity, the solvent in the paint can’t evaporate properly and bubbles are more likely to form.
You’ll also get bubbling if you apply paint over damp or wet surfaces because trapped moisture turns to vapor under the film.
Check humidity and surface dryness before you start to avoid these problems.
Painting In High Humidity
If you’re painting in high humidity, moisture in the air slows the paint’s drying and can trap water beneath the surface, which causes bubbles to form as the finish tries to cure.
Controlling humidity or postponing the job is often the simplest fix. You should monitor humidity effects and use moisture management strategies to avoid bubbling.
- Wait for lower humidity
- Use dehumidifiers
- Increase ventilation
Applying Over-Damp Surfaces
Humidity and damp substrates are related but different problems: even on a low-humidity day, painting over walls, wood, or concrete that’s still damp will trap moisture under the fresh coat and cause bubbling as the paint tries to cure.
You should perform moisture testing, wait for complete surface drying, and only paint when readings show acceptable levels, preventing bubbling and adhesion failure.
Solvent/Oil vs. Latex Coatings: Compatibility Risks
Although solvent-based and latex paints can look similar once dry, they often clash beneath the surface when you layer them improperly.
Solvent and latex paints may appear identical when dry, but beneath the surface they can react and fail.
You’ll face compatibility concerns and unexpected coating interactions that trap solvents, soften layers, or prevent adhesion.
Prevent problems by testing and following product guidelines.
- Test a small area first
- Use appropriate primers
- Allow full cure times
Cosmetic vs. Structural Bubbling: Signs to Watch
When you spot bubbles in paint, you need to determine whether they’re cosmetic—surface blemishes that affect appearance only—or structural, which signal deeper adhesion or substrate failure; distinguishing the two guides whether you can simply touch up or must strip and recoat.
You’ll check cosmetic signs like isolated, shallow blisters versus structural signs such as widespread lifting, soft substrate, bubble differences in texture, then choose effect analysis and repair methods.
Inspecting Paint Bubbles: A Severity Checklist
Before you decide on repairs, walk the surface with a simple severity checklist to categorize each bubble by size, number, location, and texture.
Use clear inspection techniques to note whether bubble types indicate moisture, adhesion failure, or heat damage.
Prioritize areas affecting structure or spreading quickly.
- Small, isolated bubbles: monitor
- Clustered or spreading: escalate
- Soft, squishy bubbles: urgent
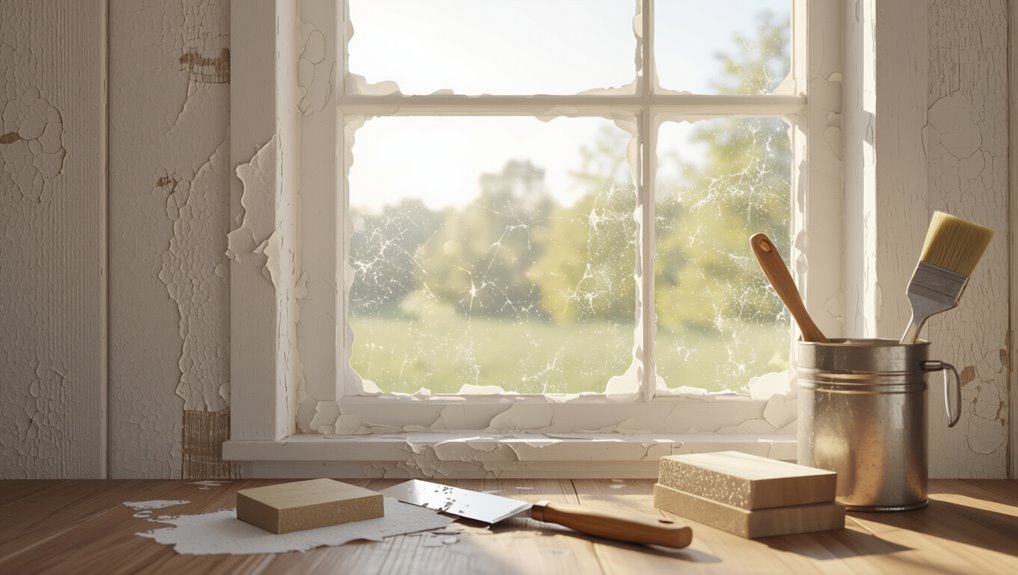
Tools & Materials for Repair
Before you start fixing bubbles, gather the essential repair tools—scrapers, sandpaper, putty knife, and a primer-rated brush or roller.
Choose recommended paint materials that match the surface and finish, including a quality primer and compatible topcoat.
Don’t forget safety gear essentials like gloves, eye protection, and a respirator for proper ventilation.
Essential Repair Tools
If you’re tackling paint bubbling, you’ll need a compact set of reliable tools and materials to strip, prep, and refinish the surface properly.
You’ll use proven repair techniques and essential equipment to remove blisters, sand smooth, and seal the substrate. Carry safety gear, scrapers, and sanding blocks; keep sealant and primer handy for effective repairs.
- Scrapers and sanders
- Putty knife and filler
- Respirator and gloves
Recommended Paint Materials
When you’re repairing bubbled paint, choose materials that match the job so the fix lasts: pick high-quality primers, breathable sealers, and compatible topcoats.
Match old paint finishes and test adhesion.
Consider eco friendly options like low-VOC primers and water-based paints for interiors.
Use appropriate putty and fine sandpaper, and buy small sample cans to confirm color and finish before committing.
Safety Gear Essentials
Although the repair sounds simple, you’ll need proper safety gear to protect your lungs, eyes, and skin from dust, solvents, and paint fumes.
Wear safety goggles and a respirator, plus protective gloves and long sleeves. Keep a first-aid kit nearby. Proper gear prevents irritation and long-term harm.
- NIOSH-rated respirator
- Safety goggles
- Protective gloves
Repairing Small Interior Paint Bubbles
Start by identifying small, isolated bubbles on interior walls so you know whether you can fix them yourself or need a pro.
Assess paint texture and bubble size; press lightly to check adhesion.
For sound areas, sand, clean, prime, and repaint with matching sheen.
For slightly compromised spots, cut out loose paint, feather edges, fill, sand, prime, then repaint for a seamless finish.
Fixing Large Blisters and Peeling Areas
When you spot large blisters or peeling paint, first assess the root cause—moisture, adhesion failure, or structural issues—to stop the problem from coming back.
Once you’ve identified and fixed the source, scrape away loose paint, sand the area, prime with the right product, and repaint.
Follow proper prep and ventilation to guarantee a durable finish.
Assess Root Cause
If you’re dealing with large blisters or peeling areas, the first step is to identify why the paint failed so you don’t just patch symptoms.
You’ll inspect substrate, moisture, and prior coatings to find causes of bubble formation and poor paint adhesion. Then plan targeted fixes before repainting.
- Check moisture sources
- Examine surface contamination
- Verify previous coating compatibility
Prepare And Repaint
Strip away loose paint and blisters down to a firmly bonded edge, then clean and dry the exposed substrate so your repairs will stick.
You’ll fill cracks or gouges with an appropriate patching compound, sand smooth, and prime bare areas with a compatible primer before applying topcoats.
Match paint finishes and consider surface textures when feathering edges; apply thin, even coats, allow full cure, then inspect for adhesion.
Surface Prep Checklist Before Repainting
Before you open a can of paint, inspect and prepare the surface methodically: clean off dirt and grease, remove loose or flaking paint, sand glossy areas for bite, and repair holes or cracks so the new coat can adhere evenly.
You’ll perform Surface inspection, Adhesion testing, check Environmental conditions and Material compatibility, then organize Tools, plan Application techniques, Paint layering, Finish types, Primer selection, and Cleaning methods.
- Check adhesion and substrate
- Organize tools and cleaning supplies
- Note conditions for application
Choosing Primer to Prevent Future Bubbles
Choose a primer based on the surface you’re painting—wood, drywall, metal, and previously painted areas each need different adhesion and sealing properties.
You’ll also want to pick between oil-based primers, which block stains and stick to glossy or problematic surfaces, and latex primers, which dry faster and suit most interior jobs.
Matching the right primer to the substrate and topcoat will greatly reduce the chance of future bubbling.
Surface-Specific Primer Selection
When you match primer to the substrate—metal, bare wood, previously painted drywall, or glossy laminate—you cut the risk of future bubbling dramatically.
Choose primer types that guarantee surface compatibility and proper adhesion. Pick high-adhesion primers for slick surfaces, stain-blocking for tannin-rich wood, and drywall-specific primers for porous gypsum.
- Slick/glossy surfaces: adhesion primer
- Wood: stain-blocking primer
- Drywall: porous-surface primer
Oil Vs. Latex Primers
If you’re deciding between oil and latex primers to prevent paint bubbling, focus on how each handles adhesion, moisture, and substrate movement: you’ll choose oil primer benefits for stubborn stains, tannin bleed, and better sealing on raw wood or metal;
pick latex primer advantages for flexible adhesion on drywall, faster drying, and moisture tolerance.
Match primer to surface and environment to avoid future bubbles.
Best Paints for High‑Moisture Rooms
Because high humidity and frequent temperature swings stress coatings more than most rooms, you’ll want paints formulated to resist moisture, mildew, and peeling.
Choose paints that create a true moisture barrier and are mildew resistant. Pick satin or semi-gloss for washability; use bathroom-specific formulations.
Consider these options:
- Acrylic latex with mildew-resistant additives
- Epoxy or marine-grade for extreme dampness
- Mold-inhibiting semi-gloss finishes
How to Avoid Bubbles When Painting Exteriors
Before you start, make sure the exterior surface is clean, dry, and free of loose paint or mildew so the new coat can adhere properly.
Check the forecast and pick a stretch of mild, low-humidity days to avoid trapping moisture under the paint.
Taking those two steps will drastically cut the chance of bubbles forming.
Surface Preparation Essentials
When you skip proper prep, trapped moisture and loose contaminants turn into paint bubbles quickly. So start by cleaning, scraping, and sanding the surface until it’s sound and dry.
You’ll focus on surface cleaning and product selection: choose compatible primers, strip loose paint, and verify dryness before coating.
- Remove dirt and mildew
- Sand and feather edges
- Use correct primer type
Choose Right Weather Conditions
Now that you’ve prepped the surface, pick weather that helps—not hurts—your paint. Choose mild, dry days and avoid direct sun, high humidity, or winds that trap moisture.
Monitor local weather patterns and plan around seasonal changes to guarantee consistent drying. If forecasts shift, postpone work; rushing in poor conditions causes bubbles, adhesion problems, and wasted effort.
Proper Drying and Curing Practices
Although it might seem simple, letting paint dry and cure correctly is one of the most important steps to prevent bubbling. You should follow the manufacturer’s recommended dry times, control temperature and humidity, and avoid stacking or re-coating too soon.
Use proper drying techniques and respect curing times to guarantee adhesion and finish.
- Allow full dry per label
- Maintain stable environment
- Wait before recoating
How to Paint in Hot or Humid Conditions
If you’re painting in hot or humid conditions, take extra steps to control drying so paint can bond properly and avoid bubbling.
Work during cooler times, use slow-evaporation formulas, and favor thin coats.
Paint in cooler hours, choose slow-evaporation formulas, and apply thin, even coats for better adhesion.
Adjust spray techniques for lower pressure and overlap.
Monitor humidity and provide ventilation importance with fans or dehumidifiers.
Let each coat cure fully before recoating to prevent trapped moisture.
Temporary Fixes vs. Permanent Repairs
When you’re facing paint bubbling, deciding between a quick temporary fix and a long-term repair comes down to how deep the problem runs, how much time and money you can invest, and whether you want the surface to last.
You’ll choose temporary solutions for speed, but opt for long term fixes when damage is structural or recurring.
- Quick sand and spot-prime
- Recoat after drying
- Strip, repair, repaint
When to Call a Pro for Persistent Bubbling
Temporary fixes can get you by, but persistent bubbling signals deeper issues that usually need a pro’s eye.
If bubbling spreads, returns after repairs, or coincides with moisture, mold, or structural movement, get a bubbling diagnosis.
You should seek professional intervention when symptoms persist despite DIY attempts, when safety or hidden damage is likely, or when warranties and resale value are at stake.
DIY vs. Pro: Cost Estimate Ranges
Because costs vary widely based on the cause and scope, you’ll want a clear comparison of DIY versus hiring a pro before deciding.
Use DIY Budgeting for materials and time; weigh Professional Pricing for labor and guarantees.
Do a Cost Comparison and Value Assessment to decide.
- Low-cost DIY: materials, patching, time
- Mid-range pro: surface prep, repaint
- High-end pro: repairs, warranty
Maintenance Tips to Prevent Repeat Bubbling
If you want to keep paint bubbles from coming back, follow a few simple maintenance habits: keep surfaces clean and dry, inspect for moisture or damaged caulk, and touch up compromised spots promptly so small issues don’t turn into larger failures.
Use bubbling prevention techniques like regular washing, quick repairs, and humidity control.
Adopt surface care strategies—seal edges, monitor vents, and schedule seasonal checks.
Common Mistakes That Cause Repeat Bubbles
Those maintenance habits will cut down on bubbles, but repeating the same mistakes can still undo your work.
You’ll cause repeat bubbling when you skip surface prep, trap moisture, or ignore old flaking layers—each harms paint adhesion and raises surface tension problems.
Fix habits, not just spots.
- Skipping cleaning or sanding
- Painting over damp areas
- Ignoring loose or peeling paint
Choosing Compatible Products and Reading Labels
When you pick paints, primers, and sealers that are made to work together, you’ll avoid chemical clashes and adhesion failures that cause bubbling.
Check product compatibility on technical data sheets and packaging; match solvent bases (water vs. oil) and recommend topcoats.
Read labels for surface prep, recoat windows, and temperature limits.
Prioritize label importance to prevent surprises and guarantee lasting finishes.
Checklist: Diagnose, Repair, and Prevent Paint Bubbles
Start with a quick inspection checklist you can follow step by step to diagnose, repair, and prevent paint bubbles: note the bubble size and pattern, check for underlying moisture or contamination, confirm coating compatibility and cure times, test adhesion with a small scrape, and record environmental conditions at application.
Follow this concise plan using paint types and surface conditions to guide repairs.
- Inspect and document
- Repair and sand
- Prevent with proper prep
Frequently Asked Questions
Can Wallpaper Cause Paint Bubbling After Being Removed?
Yes — wallpaper removal can cause paint bubbling if you peel or scrape improperly, or expose underlying moisture. You’ll damage the substrate, trap moisture, and invite moisture damage; you’ll need proper prep and drying before repainting.
Do Insects or Pests Cause Paint to Bubble?
Pest problems prompt peeling: yes, insects can cause paint bubbling. If insect damage undermines paint adhesion, you’ll see blisters or flakes. You’ll need to treat infestations, repair surfaces, and repaint for proper protection.
Can Nearby Chemical Fumes Make Paint Blister?
Yes — chemical fumes can make paint blister: you’ll trigger chemical reactions that break adhesion and, combined with moisture issues, cause bubbles. Avoid strong solvents near painted surfaces and guarantee ventilation to prevent damage.
Will Smoke or Nicotine Stains Lead to Future Bubbling?
Yes — smoke effects and nicotine residue can cause future bubbling if they prevent proper adhesion or trap moisture; you’ll need thorough cleaning and priming with a stain-blocking primer to avoid peeling and blistering later.
Does Underlying Lead Paint Affect New Paint Adhesion?
Yes — if you’re painting over lead paint without proper surface preparation, new paint won’t adhere well and may bubble or peel; you’ll need compatible paint type, thorough cleaning, priming, encapsulation, or professional abatement first.
Conclusion
Like a roof that’s weathered storms, your walls tell a story — and peeling bubbles are just one chapter. You’ve learned to spot moisture, heat, bad prep, and wrong products, and you can act: test, dry, scrape, prime, and repaint with compatible materials. Keep routine checks and don’t rush repairs. Do this, and your paint will stay as steady as a lighthouse beam — guiding your space back to calm, not chaos.