How to Decrease Humidity in Basement: Practical Moisture Control Tips
You can cut basement humidity fast by improving ventilation, running a properly sized dehumidifier set to about 45–50%, and sealing cracks or gaps with masonry caulk or hydraulic cement. Grade soil and fix gutters to divert groundwater, add exterior or interior drainage if needed, and insulate cold pipes to stop condensation. Elevate storage and toss moldy porous items. Follow a seasonal maintenance routine and keep monitoring with a hygrometer to stay ahead — more practical steps and cost choices follow.
Basement Humidity: Quick Wins to Try Today
Want faster results? You can boost humidity control by improving air circulation with fans and ventilation systems, adding moisture barriers and sealing cracks, and using air purifiers.
Combine simple drainage solutions outside, upgrade basement insulation for thermal regulation, and position vents to promote flow.
These quick wins reduce dampness and make further diagnosis easier without major renovations.
Diagnose Basement Humidity Levels
Start by measuring the relative humidity with a hygrometer so you know if levels are too high.
Then inspect the space to identify moisture sources like leaks, condensation, or poor drainage.
Once you’ve got those facts, you can target the right fixes.
Measure Relative Humidity
How humid is your basement right now—and how do you know?
Use simple humidity measurement techniques: place a digital hygrometer, or several, around the space and log readings morning and evening.
Compare to 30–50% ideal range. Calibrate devices and note trends.
Use humidity control devices like dehumidifiers with built-in hygrometers or smart sensors to monitor and auto-adjust levels.
Identify Moisture Sources
Detecting where moisture’s coming from is the most important step in fixing a humid basement, because you can’t control what you haven’t found.
Walk the space after rain, check walls, floors, and joints for leaks, and inspect gutters and grading.
Note plumbing drips, soil vapor, and condensation issues on cold pipes or windows.
Document moisture sources and prioritize fixes.
Understand Where Basement Moisture Comes From
Because basements sit below grade and interact constantly with the surrounding soil and air, moisture can enter from several clear sources: groundwater seeping through foundation walls or floors, condensation from warm indoor air meeting cool surfaces, roof or gutter leaks that channel water down to the foundation, and plumbing or appliance leaks inside the space.
You’ll assess moisture sources by considering basement types, soil moisture, seasonal changes, water barriers, drainage solutions, ventilation strategies, and humidity control.
Measure Moisture With Hygrometers and Moisture Meters
Now that you know where moisture comes from, you need reliable tools to quantify it. Use hygrometers—analog, digital, and smart models—to track relative humidity in zones.
Pair with moisture meters for wood and concrete to check dampness. Compare hygrometer types and moisture meter accuracy before buying.
Calibrate devices regularly, record readings, and act when levels exceed recommended baselines to prevent mold.
Find and Fix Leaks, Cracks, and Rising Moisture
Start by inspecting your foundation walls for damp spots, efflorescence, or visible cracks.
Seal any gaps and fractures with appropriate masonry caulk or hydraulic cement to stop water intrusion.
If moisture is coming up from the floor, address rising damp with a proper vapor barrier or professional damp-proofing.
Inspect Foundation Walls
While you’re in the basement, closely inspect the foundation walls for cracks, efflorescence, water stains, and soft spots—these signs point to leaks or rising moisture that need prompt attention. Do a foundation inspection regularly to spot wall deterioration, note locations, and plan repairs or professional assessment.
| Issue | Indicator | Action |
|---|---|---|
| Crack | Visible gap | Mark, monitor |
| Efflorescence | White salt | Photograph, assess |
| Soft spot | Crumbling | Avoid load, call pro |
Seal Cracks And Gaps
Because even tiny gaps let damp air and water into your basement, seal them promptly to stop humidity at its source.
Do a thorough crack inspection, clean and dry areas, then apply appropriate sealant. Focus on perimeter joints, pipe penetrations, and wall-floor seams.
- Prioritize visible cracks.
- Use proper gap sealing materials.
- Reinspect after curing.
Address Rising Dampness
If you want to stop persistent moisture from undermining your basement, locate and fix the sources of rising dampness promptly.
Inspect walls, floors, and exterior grading for leaks, cracked masonry, or clogged gutters. Identify rising dampness causes like poor drainage or failed membranes.
Repair cracks, regrade soil, extend downspouts, and install a French drain or vapor barrier as effective solutions to control moisture.
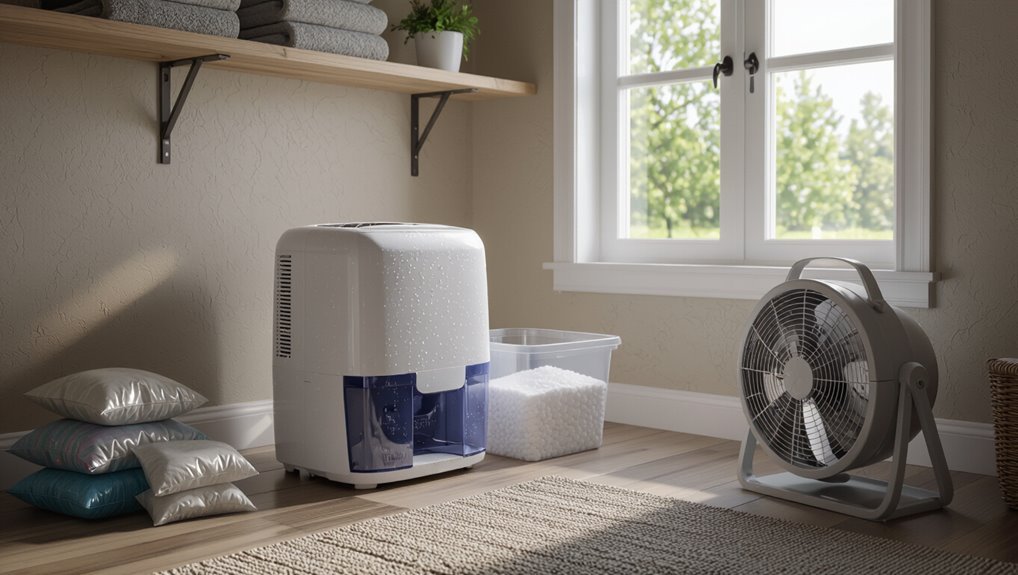
Improve Airflow: Ventilation Tips for Drying Basements
When you boost airflow in your basement, damp air moves out faster and drying speeds up, preventing mold and musty odors from taking hold.
You’ll assess airflow patterns, open vents, and use fans or balanced ventilation systems to create steady exchange. Don’t block intake paths; aim for cross-ventilation to move air across damp surfaces.
- Place floor fans strategically.
- Install window vents.
- Keep pathways clear.
Pick the Right Dehumidifier (By Basement Size)
How big is your basement and how damp does it get? Match dehumidifier types to room size: portable for small, mid-capacity for medium, whole-house for large. Consider size considerations like extraction rate and temperature range. Choose based on square footage and moisture load.
| Size | Dehumidifier Types | Extraction (pint/day) |
|---|---|---|
| Small | Portable | 20-30 |
| Medium | Mid-capacity | 30-50 |
| Large | Whole-house | 50+ |
Best Dehumidifier Placement and Settings
Place your dehumidifier near the dampest area but away from walls and obstructions to guarantee proper airflow and clearance.
Set it to about 45–50% relative humidity to control mold without overworking the unit, and adjust slightly based on conditions.
Make sure vents are unobstructed and you allow a few feet of clearance on all sides for efficient performance.
Ideal Unit Location
If your basement’s layout lets you pick the spot, put the dehumidifier where it can pull and exhaust air freely — ideally near the center of the dampest area or along the long axis of the room, several feet from walls and obstructions.
Choose unit types and placement strategies that match room size, airflow, and drain options.
- Centered airflow
- Near source of moisture
- Accessible for maintenance
Optimal Humidity Settings
Because basements stay cooler and trap moisture, you’ll want to set your dehumidifier to a level that prevents dampness without over-drying the air — generally 45–50% relative humidity for finished spaces and 50–60% for unfinished cellars.
Aim for ideal humidity levels, use a reliable hygrometer, and choose humidity control strategies like continuous or auto mode.
Adjust slightly for comfort and storage needs.
Airflow And Clearance
When you set up a dehumidifier, give it room to breathe—keep at least 6–12 inches of clearance on all sides and avoid blocking the intake or exhaust with furniture, boxes, or laundry.
You’ll improve air circulation and efficiency by respecting clearance height and placement.
Follow simple steps:
- Center unit away from walls.
- Elevate slightly for airflow.
- Keep vents unobstructed.
Reduce Basement Condensation by Controlling Temperature
Controlling basement temperature cuts condensation by reducing the gap between warm indoor air and cold surfaces, so you’ll prevent moisture from forming on walls and windows.
Use consistent temperature regulation and targeted heating to keep surfaces above dew point.
Combine this with humidity control via a dehumidifier and ventilation.
Monitor with a thermostat and hygrometer, and adjust settings to maintain steady, moderate conditions.
Seal Floors and Walls: Materials and Methods
Start by evaluating the surface condition of your basement floors and walls so you know if they need cleaning, patching, or leveling before sealing.
Choose sealers that match the material and moisture levels—concrete epoxy or waterproof masonry coatings work for different situations.
Apply sealers with proper techniques (primer when needed, recommended thickness, and correct curing times) to guarantee a long-lasting barrier against humidity.
Assess Surface Condition
Before you seal floors and walls, inspect every surface for cracks, efflorescence, loose paint, mold, and moisture stains so you know what repairs and prep the job will require.
Perform a thorough surface inspection and moisture assessment to prioritize fixes and ventilation.
Then check:
- Crack size and location
- Salt deposits or efflorescence
- Active damp spots or mold growth
Choose Appropriate Sealers
When selecting sealers for basement floors and walls, focus on products designed for masonry and high-moisture environments so you get durable, vapor-resistant protection.
Choose waterproof coatings labeled for below-grade use and compare sealant types like acrylic, epoxy, and silane/siloxane for breathability, adhesion, and longevity.
Read technical datasheets, match product capabilities to your substrate, and prioritize proven moisture resistance.
Apply Proper Sealing Techniques
Although surface choice and product selection matter, how you apply sealers determines whether they actually stop moisture and last. So follow techniques that match the material and conditions.
You’ll prep, choose sealing materials for substrate, and use proper sealing methods to avoid failures.
Steps:
- Clean and dry thoroughly.
- Prime and apply compatible sealer.
- Tool, cure, and inspect for gaps.
Waterproof Exterior Walls & Drainage Options
Because water entering from the outside is the main culprit for basement moisture, you’ll want to focus on waterproofing exterior walls and ensuring proper drainage to keep soil water away from your foundation.
Use exterior waterproofing membranes, seal cracks, and install weeping tiles or French drains.
Grade soil away from the foundation, add gravel trenches, and choose drainage solutions that direct water safely downhill from your home.
Fix Gutters and Downspouts to Keep Water Away
If your gutters and downspouts aren’t channeling rain away from the foundation, you’ll see more basement dampness and potential damage; check them regularly for clogs, leaks, and misalignment.
You’ll perform gutter maintenance, repair leaks, and add downspout extensions to direct flow.
- Clean debris quarterly.
- Seal joints and replace sagging sections.
- Install extensions to discharge water away.
Grade & Landscaping Fixes to Prevent Groundwater
Fixing gutters and downspouts helps, but water can still pool against your foundation if the surrounding grade directs runoff toward the house. You should use soil grading and grading slopes to shed water, add landscaping barriers and foundation landscaping, plant moisture resistant plants, and plan rainwater management. Consider drainage solutions and a sump pump for persistent groundwater control.
| Action | Purpose | Materials |
|---|---|---|
| Regrade | Redirect runoff | Soil, gravel |
| Barrier | Block seepage | French drain |
| Plants | Absorb moisture | Native, drought-tolerant |
Insulate Pipes and Cold Surfaces to Prevent Sweating
When humid basement air touches cold pipes or ductwork, moisture condenses on those surfaces and can drip, stain, or feed mold growth.
Insulating them cuts that contact and stops sweating before it starts. You should add pipe insulation to raise the surface temperature and prevent condensation.
- Choose closed-cell foam for wet areas.
- Seal joints and seams.
- Insulate accessible cold walls.
Vent Basement Appliances: Dryers, Sumps, and HVAC Tips
Make sure you vent your dryer outdoors to keep moist air from raising basement humidity.
Check that sump pump pits and drains have proper venting and screens so they don’t trap or funnel moisture into the space.
Also inspect HVAC and appliance ducts for leaks or blockages that can spread damp air.
Vent Dryer Outdoors
Run your dryer vent to the outdoors instead of into the basement so moist, warm air—and lint—don’t raise indoor humidity or feed mold.
Proper dryer venting improves moisture control and indoor air quality; seal joints, use rigid ducting, and clean the lint trap regularly to prevent blockages.
- Use rigid, short ducts
- Seal and insulate connections
- Clean vents quarterly
Maintain Sump Pump Vents
Dryer vents are a big source of basement moisture, but sump pump and appliance vents also play a role in humidity control and indoor air quality.
Check sump pump vents for obstructions, rodents, and proper caps during routine sump pump maintenance.
Schedule vent cleaning to remove debris and mold.
Seal gaps and guarantee vents direct moist air outdoors to reduce basement humidity and protect equipment.
Prevent and Remove Mold Safely
If you spot mold in your basement, act quickly to stop it from spreading and damaging materials; limiting moisture and removing contaminated items are your first priorities.
You should focus on mold prevention and safe removal by isolating the area, increasing ventilation, and disposing of porous debris.
Follow protective measures and use appropriate cleaners or call a pro for extensive infestations.
- Isolate area
- Ventilate well
- Dispose porous items
Storage Solutions That Protect Belongings From Moisture
When you store items in sealed, elevated containers and keep them off the concrete floor, you cut the risk of moisture damage and mold growth.
Use air tight containers, add moisture absorbing materials like silica packs, and elevate boxes on furniture risers or shelving.
For valuable or sensitive items, choose climate controlled storage to maintain stable humidity and prevent long‑term deterioration.
Seasonal Maintenance Checklist for Low Humidity Year‑Round
Storing items properly helps, but you also need a seasonal routine to keep basement humidity low year‑round.
Do seasonal inspections and regular humidity monitoring so you catch issues early.
Follow this checklist:
- Clean drains, sump, and gutters each spring.
- Service dehumidifier filters and coils before summer.
- Inspect seals, vents, and insulation in fall to prevent winter moisture.
When to Call a Pro and Expected Cost Trade‑Offs
Because basement humidity problems can hide behind walls and under floors, you should call a professional if you see recurring dampness, mold growth, persistent musty odors, water stains, or if DIY fixes don’t keep moisture in check.
A certified inspector will perform a moisture assessment, recommend fixes, and provide professional services.
Expect trade‑offs: higher upfront costs for lasting repairs versus ongoing DIY expenses and risk of incomplete solutions.
Frequently Asked Questions
Can Houseplants Reduce Basement Humidity Effectively?
They can help a bit, but houseplants benefits for humidity reduction are limited; you’ll need dehumidifiers, ventilation, and sealing for meaningful results, while plants add mild moisture uptake, improved air quality, and aesthetic appeal.
Will a Dehumidifier Raise My Electricity Bill Significantly?
Yes — but not dramatically. You’ll see higher energy consumption, yet if you buy a right-sized, efficient model and run it sensibly, the cost efficiency keeps bills reasonable, so you won’t be bankrupting your basement empire.
Can Paint or Sealants Trap Moisture and Cause Problems Later?
Yes — paint or sealants can trap moisture and cause problems later. You’ll reduce moisture traps only if you assess sealant effectiveness, use breathable products where needed, and guarantee surfaces are dry and properly prepared before application.
Are There Health Concerns From Long-Term Low Humidity in Basements?
Like a dry desert morning, you’ll notice health risks from prolonged low humidity: dry skin, irritated airways, and increased virus transmission; paradoxically, reducing humidity improperly can still encourage mold growth in hidden, damp pockets.
How Do Humid Climates Affect Basement Waterproofing Longevity?
Humid climates shorten waterproofing materials’ lifespan because high humidity levels drive persistent moisture, promote mold and corrosion, and force materials to cycle through wetting and drying; you’ll need robust materials, better drainage, and regular inspections.
Conclusion
You can cut basement humidity and protect your stuff with a few targeted steps. Did you know basements are 50–70% more likely to develop mold than upper floors? Start by measuring humidity with a hygrometer, seal visible cracks, run a dehumidifier, and store items off the floor in airtight bins. Tackle leaks promptly, clean mold safely, and keep up seasonal checks. Call a pro if problems persist—early fixes save money and hassle.