Do I Need a Primer Paint: When and Why You Should Use It
You’ll need primer whenever you’re painting bare, porous, stained, or glossy surfaces because it helps paint stick, blocks bleed‑through, seals pores, and evens out sheen for a durable finish. You can skip primer on clean, smooth walls when you’re recoating the same color and sheen, but always spot‑prime stains or repairs. Choose oil, latex, shellac, or specialty primers for specific substrates and ventilation needs, and follow prep and drying times if you want pro results—keep going to learn how.
Quick Answer: Do You Need Primer?
Need primer? You might, depending on surface, stains, or drastic color changes.
You’ll weigh primer types—latex, oil-based, shellac—against your goals. Consider adhesion, stain blocking, and sheen uniformity.
Choose proper application techniques: brush for edges, roller for flats, or sprayer for speed.
If surface is sound and color similar, you can often skip primer.
When You Must Use Primer
If your project involves bare wood, new drywall, metal, or heavy stains, you should use a primer to guarantee adhesion and proper coverage. You’ll need specific primer types and precise application techniques for porous, glossy, or stained surfaces.
| Surface | Primer | Notes |
|---|---|---|
| Wood | Oil/latex | Seals grain |
| Metal | Rust-inhibitor | Prevents corrosion |
| Drywall | PVA | Blocks pores |
When You Can Skip Primer
If your walls are smooth and already have good, intact paint, you can often skip primer.
You’ll especially be fine when you’re recoating with the same color and sheen.
Just clean the surface and spot-prime any patched or stained areas before painting.
Smooth, Previously Painted Walls
Wondering whether you can skip primer on smooth, previously painted walls? If the surface is clean, intact, and you’re not changing sheen or covering stains, you can often skip primer. Focus on texture considerations and proper wall preparation to guarantee adhesion and even finish.
| Condition | Action |
|---|---|
| Clean | No primer usually |
| Damaged | Repair first |
| Stained | Use primer |
| Glossy | Sand, then paint |
Same-Color Recoats
After prepping smooth, previously painted walls, you can often skip primer when you’re repainting with the same color and similar sheen.
You’ll save time and enjoy same color benefits if the old finish is sound.
Use proper recoat techniques to guarantee adhesion and uniformity:
- Clean surface
- Light sanding
- Use quality paint
- Apply thin, even coats
What Primer Actually Does
Primer seals porous surfaces so your topcoat goes on smooth and uses less paint.
It also creates a tacky layer that helps new paint grip better to tricky materials.
Plus, primer locks down stains and tannins so they don’t bleed through your finish.
Surface Sealing Benefits
Because paint soaks into porous materials and can be ruined by moisture, a good primer seals the surface to give paint something uniform to adhere to.
You’ll improve surface preparation and boost moisture resistance while reducing bleed-through.
Consider these sealing benefits:
- Blocks stains
- Limits moisture entry
- Evens porosity
- Reduces coats needed
You’ll get a more durable, consistent finish.
Adhesion Improvement Mechanism
Sealing the surface also sets the stage for better adhesion by creating a consistent layer that paint can grip; the primer fills tiny pores and irregularities so your topcoat bonds evenly instead of grabbing at isolated high spots.
You’ll see adhesion science at work: primers act as bonding agents, matching surface chemistry and texture so the paint mechanically and chemically adheres, reducing peeling and improving durability.
Stain Blocking Function
Stains are the enemy of a clean-looking paint job, and a good primer stops them from bleeding through so your topcoat stays true to its color and finish.
You’ll rely on primer for stain prevention, color sealing, moisture barrier benefits, and proper surface preparation. Use primers to lock problem areas, then paint confidently.
- Seal stains
- Block tannins
- Prevent mold
- Guarantee adhesion
How Primer Improves Adhesion and Durability
When you prime a surface before painting, the primer creates a stable, bondable layer that helps the topcoat stick evenly and resist peeling; this improved adhesion also spreads stress across the finish so chips and wear show less quickly, extending the life of your paint job. You’ll use adhesion techniques and consider durability factors to prevent failures.
| Benefit | Result |
|---|---|
| Bonding | Stronger topcoat grip |
| Stress spread | Less chipping |
| Moisture barrier | Reduced peeling |
| Longevity | Extended finish life |
How Primer Evens Out Porous and Repaired Surfaces
Although a fresh coat of paint can look great, primer is what fills tiny pores and smooths patched areas so your topcoat goes on evenly; it prevents the paint from soaking in unevenly and hides texture differences from repairs so you get a uniform finish.
You’ll notice improved surface texture and reduced paint absorption.
Benefits:
- Seals porous spots
- Levels repairs
- Improves coverage
- Guarantees uniform sheen
How Primer Blocks Stains, Tannins, and Old Colors
Because old marks and tannin bleed-through can ruin fresh paint, you’ll want a primer that seals and blocks them before you topcoat.
You’ll use stain-blocking primers to prevent bleed-through from knots, water stains, and smoke, achieving stain prevention and reliable color consistency.
Apply per instructions, let dry fully, then inspect; a blocked substrate keeps your topcoat true and lasting.
Types of Primer (Overview)
Think of primer as the foundation for your paint job: different types suit different surfaces and problems, so picking the right one saves time and improves results.
You’ll choose primer types based on surface, adhesion, sealing, and longevity. Consider primer characteristics like drying time and stain blocking.
Key options to compare:
- Bonding
- Stain-blocking
- Sealer
- Specialty
Oil-Based vs. Latex Primer: Pros and Cons
You’ll want to weigh oil-based primers’ strong adhesion and stain-blocking power against latex primers’ faster drying, easier cleanup, and lower odor.
Oil primers excel on dense woods and high-traffic areas, while latex works well on drywall and previously painted surfaces.
Knowing these strengths helps you pick the right primer for the job.
Oil-Based Primer Advantages
When you need maximum adhesion and stain-blocking power, oil-based primers are the go-to choice for many pros. You’ll get oil based durability and oil based versatility for tough surfaces.
They seal knots, block tannins, and smooth porous wood.
Consider these advantages:
- Superior adhesion
- Stain blocking
- Long-term toughness
- Sandable smoothness
Latex Primer Benefits
Although oil-based primers shine on tough stains and bare wood, latex primers bring their own set of advantages that make them a smart choice for many projects. You’ll enjoy easier cleanup, faster drying, lower odor, and flexibility. Consider latex primer advantages and latex primer applications like drywall, previously painted surfaces, and lightly stained wood.
| Feature | Benefit |
|---|---|
| Cleanup | Soap & water |
| Dry time | Fast |
| Odor | Low |
| Flexibility | Resists cracking |
| Surface | Drywall, painted wood |
Shellac and Bonding Primers: When to Choose Them
Need a primer that really grabs tough surfaces or blocks stubborn stains? You’ll choose shellac or a bonding primer when you need quick stain blocking and adhesion.
Shellac advantages include fast drying and odor-sealing; bonding techniques help paint stick to slick or glossy substrates.
- Stain blocking
- Fast cure
- Slick surfaces
- Problem spots
Choosing Primer by Topcoat (Latex, Oil, Enamel)
Pick a primer that’s compatible with the topcoat you plan to use—latex primers pair best with latex paints, while oil-based primers give enamel or oil topcoats the best adhesion and durability.
Consider the surface type too, since glossy, bare wood, or patched drywall each need different primer properties to seal and promote bonding.
Choosing the right combo saves you from peeling, uneven sheen, or poor coverage down the line.
Matching Primer To Topcoat
Wondering which primer works best with your topcoat? You’ll pick primers for primer color compatibility and primer finish matching so your latex, oil, or enamel topcoat adheres and looks right.
Consider these quick rules:
- Latex topcoat → water-based primer
- Oil topcoat → oil-based primer
- Enamel → high-adhesion primer
- Tint primer to offset topcoat shade
Primer For Surface Type
When you’re matching primer to a topcoat, think about the coating chemistry and the surface you’re covering: latex paints pair best with water‑based primers, oil topcoats need oil‑based primers for proper adhesion and stain blocking, and enamel finishes benefit from high‑adhesion or bonding primers that resist chipping and show-through.
Choose primer by surface (drywall, wood, metal), adjust primer application techniques for texture, and consider primer color selection to improve coverage.
Primer for Drywall and New Plaster
How should you treat brand-new drywall or freshly troweled plaster before painting?
You should prime to seal porous surfaces, control plaster moisture, and create uniform drywall texture for topcoats. Use a quality drywall primer or an acrylic sealer, wait for proper drying, and sand lightly if needed.
Steps:
- Inspect surface
- Apply primer
- Check moisture
- Sand and touch up
Primer for Bare Wood, Knots, and Resinous Boards
After sealing drywall and fresh plaster, turn your attention to bare wood, knots, and resinous boards, which behave very differently under paint.
You should prioritize wood surface preparation: sand, clean, and use a quality oil- or shellac-based primer to block tannins.
Apply targeted knot sealing techniques before priming to stop bleed-through and guarantee even topcoat adhesion and finish.
Primer for Metal, Galvanized Surfaces, and Rust Prevention
Because metal reacts differently than wood, you’ll need a primer that bonds to slick surfaces, blocks corrosion, and promotes adhesion for the topcoat.
Choose a primer that bonds to slick metal, stops corrosion, and ensures strong topcoat adhesion.
You should focus on metal corrosion control and meticulous surface preparation. Use a rust-inhibiting or zinc-rich primer, then follow with paint.
Steps to follow:
- Clean
- Degrease
- Remove rust
- Apply primer evenly
Primer for Masonry, Brick, and Concrete
Masonry, brick, and concrete are porous and alkaline, so you’ll want a primer formulated to seal pores, neutralize alkalinity, and promote adhesion for your topcoat.
Choose a masonry primer benefits product that resists efflorescence, reduces moisture migration, and evens porosity.
For reliable results, follow concrete surface preparation: clean, repair cracks, remove loose material, and guarantee the substrate is dry before priming and painting.
Primer for Previously Painted Surfaces and Color Changes
Thinking about repainting a wall that already has paint? You should prime when changing hues or covering stains to guarantee color consistency and finish uniformity.
Consider reasons to prime:
Consider these key reasons to prime before painting: color shifts, stains, chalky/glossy surfaces, and patched areas.
- Dark-to-light color shifts
- Stain or tannin bleed-through
- Chalky or glossy existing finish
- Porous patched areas
A quality primer promotes even coverage and reduces coats needed.
Spot-Priming vs. Full-Surface Priming: When to Do Each
Wondering whether to prime just the repaired spots or the whole wall?
You’ll use spot priming techniques for small repairs, stains, or when texture and color match is easy; it saves time and material.
Choose full surface advantages when coverage, uniform sheen, or drastic color changes are needed—it guarantees consistent adhesion and prevents flash-through, saving repainting later.
How Primer Affects Sheen and Hiding
What primer you choose can change the final sheen and how glossy or flat your topcoat looks, so you’ll want to match primer type to the finish you’re after.
A good primer also boosts hiding power, reducing the number of finish coats needed to cover stains or strong colors.
You can even tint primer slightly to improve coverage and color accuracy when applying a bold or very light final shade.
Primer And Final Sheen
How will your choice of primer change the final sheen and coverage of your paint?
You’ll notice primer application techniques and primer color selection affect gloss evenness and hiding. Use the right base to control reflectivity.
- Matte primers reduce shine
- Gloss primers boost sheen
- Tinted primers improve tinting
- High-build primers smooth surface
Choose accordingly to match finish.
Improving Paint Hiding
Why does primer matter so much for hiding?
You’ll get more uniform coverage because proper primer application seals porous surfaces and evens paint texture, reducing the number of finish coats.
Primer blocks stains and creates a consistent base sheen so topcoat pigments sit evenly.
With correct primer you save time, cut costs, and achieve true color with fewer coats.
Primer Tinting Effects
Wondering whether tinting primer really matters? You’ll see how primer color and tint variations influence finish impact and hiding.
Match tint to surface compatibility and adjust application techniques for even coverage. Mind drying times to avoid sheen shifts.
Consider:
- Light tint for bright topcoats
- Mid tint for balanced hiding
- Dark tint for deep colors
- Universal tint for varied surfaces
Coverage Rates: How Much Primer You’ll Need
Coverage rates tell you how much primer you’ll need to buy and how many coats to plan for.
Check the label for coverage calculations (sq ft per gallon) and factor surface texture, porosity, and primer types—oil, latex, or stain-blocking.
Measure area, divide by coverage, then add 10–20% for waste and extra coats. Round up so you won’t run short.
Surface Prep Checklist Before Priming
Before you grab the primer, make sure you clean and degrease the surface so paint will stick properly.
Fix any dents, holes, or cracks and let repairs dry fully.
Then sand to remove gloss and create a key for the primer.
Clean And Degrease
Scrub the surface thoroughly to remove dirt, grease, wax, and old residues so the primer can bond—any contaminant left behind will cause peeling or poor adhesion.
Use simple cleaning techniques and appropriate degreasing solutions, then rinse and dry fully.
Follow this checklist:
- Wipe loose dust
- Apply degreaser
- Rinse thoroughly
- Dry before priming
Repair Surface Imperfections
Once the surface is clean and dry, you’ll want to fix dents, cracks, and gouges so the primer and paint lay down smoothly.
For proper surface preparation, choose appropriate fillers, apply in thin layers, and let each cure.
Use basic repair techniques: press-in putty for small holes, patching compound for larger damage, and scrape away loose material before priming.
Sand And Remove Gloss
Sand the surface and strip off any gloss so the primer can bond properly; high-sheen paint repels primers and you’ll get poor adhesion and visible defects if you skip this step.
Use proper sanding techniques for effective gloss removal and clean dust before priming.
Follow this checklist:
- Degrease surface
- Use 120–220 grit
- Feather edges
- Vacuum and tack wipe
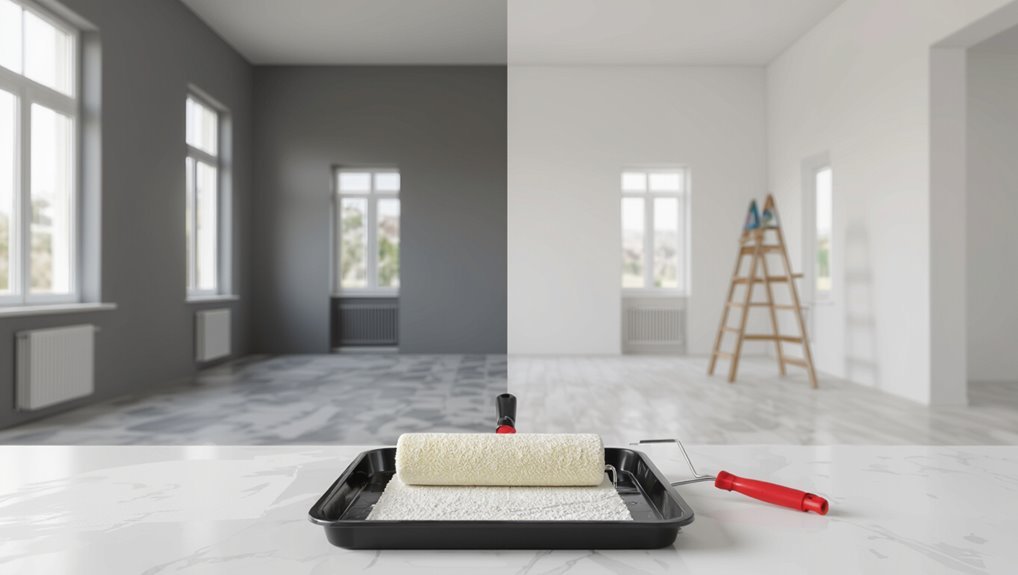
How to Apply Primer: Brush, Roller, Sprayer
Choose the right application method to match your surface, the primer type, and the finish you want—brush for edges and detail, roller for large flat areas, and sprayer for fast, even coverage on complex or textured surfaces.
With proper surface preparation, use specific brush techniques for corners, smooth roller application for even coats, and sprayer tips for consistent atomization.
Match primer types to substrate.
Drying and Recoat Times
Because drying times depend on primer chemistry, temperature, humidity, and film thickness, you should check the product label and local conditions before planning your next step.
Use proper drying techniques to speed cure and avoid trapping solvents. Typical recoat intervals vary; follow label guidance.
Consider:
- Ambient temp
- Humidity level
- Film thickness
- Ventilation for faster drying
Common Priming Mistakes and Fixes
What common missteps do painters make when priming, and how can you fix them quickly?
You skip surface prep, overload the brush, or ignore manufacturer’s drying times. Correct these by cleaning and sanding, using proper application techniques—thin, even coats—and honoring recoat windows.
Address common misconceptions like “one coat fits all.” Test adhesion and adjust primer type for the surface before painting.
Troubleshooting Primer-Related Problems
You’ve fixed the usual priming mistakes, but sometimes problems still pop up once paint goes on.
Troubleshoot primer-related issues by checking primer application, surface compatibility, and drying times.
If paint peels or looks uneven, inspect primer application, surface compatibility, and proper drying before repainting.
Consider product selection or primer alternatives if paint adhesion fails. Also weigh environmental impact when switching products.
- Check surface prep
- Verify drying times
- Test adhesion
- Review product selection
Eco-Friendly and Low‑VOC Primer Options
Looking for a primer that cuts fumes and environmental impact without sacrificing performance? You can choose low‑VOC or zero‑VOC primers made from sustainable materials; they dry fast and reduce odor. Follow proper application techniques—thin coats, adequate ventilation, and correct drying time—to get full coverage and adhesion.
| Type | Best for | Notes |
|---|---|---|
| Low‑VOC | Interior walls | Balanced performance |
| Zero‑VOC | Sensitive spaces | Minimal odor |
| Plant‑based | Eco projects | Biobased binders |
Quick Primer Decision Checklist
First check the surface condition for stains, damage, or bare patches that need sealing.
Then confirm your paint type—latex over latex or oil over oil—to guarantee proper adhesion.
If either check fails, you’ll want to prime before painting.
Surface Condition Check
Why check the surface? You’ll spot issues that affect surface preparation and primer selection.
Inspect for:
- Cracks or peeling paint.
- Stains, tannin bleed, or rust.
- Porosity differences (bare wood, glossy surfaces).
- Mold, mildew, or contamination.
If any item applies, prep the area (clean, sand, repair) and choose the appropriate primer before painting.
Paint Type Match
Because different paint types bond and behave differently, you’ll want to match your primer to the paint you plan to use—latex over latex, oil-based primer under oil paints, and specialty primers when using enamels or high-gloss finishes.
Check paint compatibility before you buy: base and primer chemistry affects adhesion and durability.
Let your finish selection guide primer choice to prevent peeling, sheen mismatch, or poor coverage.
Frequently Asked Questions
Can Primer Be Tinted to Match My Final Paint Color?
Yes — you can tint primer to match final paint; think of primer as the soil you color to grow the same flowers. You’ll use tinting options for better color matching, improving coverage and uniformity before topcoat.
How Long Can I Store Leftover Primer Safely?
You can store leftover primer safely for about 1–3 years depending on container types, but always check the expiration date. Follow storage tips: seal tightly, keep cool/dry, avoid freezing, and follow reuse guidelines before applying.
Does Primer Prevent Mold and Mildew Growth?
Yes — primer can help prevent mold and mildew growth when it’s formulated for mold prevention and mildew resistance; you’ll reduce spores and improve adhesion, though severe or damp conditions usually need additional remediation and moisture control.
Can I Sand Primer Before Applying Topcoat?
“Measure twice, cut once.” Yes—you can sand primer before topcoat; choose sanding techniques based on primer types, use fine grit for smoothness, clean dust thoroughly, and avoid over-sanding to preserve adhesion and uniform finish.
Will Primer Affect Paint Odor During Curing?
Yes — primer can reduce paint odor during curing and you’ll notice less smell, faster; low-VOC primers cut odor more, and some primers can slightly shorten perceived curing time by sealing substrates and reducing off-gassing from topcoats.
Conclusion
Think of primer like a foundation for a house: skip it and your paint won’t stand up as well. You’ll need primer for bare wood, metal, drastic color changes, stains, or tricky surfaces. You can skip it on well-sealed walls with the same paint type and color or when using paint-and-primer products. When you use the right primer, your finish will look better and last longer—so choose based on surface, problem, and environmental needs.