Can You Mix Acrylic and Latex Paint? What You Need to Know
Yes—you can mix acrylic and latex paint for many interior jobs, but you’ll need to be careful. Both are water‑based so they’ll blend physically, yet their binders and drying times differ, which can alter sheen, adhesion, and durability. Always test small patches, match sheens, stir well, and keep mixes under about 20–30% of one into the other. If you want reliable results, follow a pre‑mix checklist and learn which surfaces and ratios work best.
Can You Mix Acrylic and Latex Paint? Quick Verdict
Wondering whether you can mix acrylic and latex paint? You can, but you’ll want clear mixing techniques and to confirm paint compatibility first.
Both are water-based, so they blend physically, yet finish, drying time, and adhesion can differ.
Test small batches and apply samples to the designated surface. If results match expectations, proceed; if not, keep them separate or adjust formulation.
Why (And When) That Quick Answer Matters
Mixing acrylic and latex paint isn’t just a theoretical option — it matters because your project’s surface, timeline, and desired finish will determine whether the blend helps or hurts.
You should weigh compatibility considerations and appropriate mixing techniques before you start.
- Surface type
- Drying time
- Finish consistency
- Longevity expectations
Acrylic Vs. Latex: How the Chemistry Differs
When you compare acrylic and latex, the key differences start with their binders: acrylics use acrylic polymer resins while latex paints typically use vinyl acrylic or other water-based polymers.
That change in binder alters the polymer structure, affecting flexibility, adhesion, and durability.
Knowing those chemistry basics helps you predict how the paints will behave if you try to mix or apply them.
Binder Chemistry Differences
Although both acrylic and latex paints are called “water-based,” their binders are chemically distinct and determine performance in different ways.
You should note:
- binder types and polymer properties affect adhesion properties and drying effects.
- chemical reactions during curing influence paint formulations and application methods.
- compatibility factors guide mixing techniques.
- performance testing confirms long-term results and practical compatibility.
Water-Based Polymer Structures
Think of acrylic and latex paints as two different families of waterborne polymers: acrylics are made from acrylic or methacrylic monomers that form hard, glassy resins, while latex (often vinyl acrylic or styrene‑acrylic) uses softer copolymers with more flexible chains.
You’ll notice polymer properties affect durability, adhesion, and sheen, so choose based on proposed paint applications — exterior longevity versus interior flexibility.
How Water‑Based Binders Determine Compatibility
You need to know that acrylic and latex paints use different water‑based binders, which affects how they behave when mixed.
These binders have different particle sizes and chemistry that control coalescing — the process where particles fuse into a continuous film.
Understanding those differences tells you whether two paints will form a stable, uniform film or separate and fail.
Binder Chemistry Differences
Because acrylic and latex paints rely on different polymers as binders, their chemistry determines whether they’ll mingle or separate, and that chemistry affects adhesion, flexibility, and drying.
You should note binder properties drive paint compatibility. Consider these factors:
- Polymer polarity
- Tg (glass changeover)
- Crosslinking potential
- Solvent and pH tolerance
Coalescing And Film Formation
While both acrylic and latex paints are water‑based, their binders form films differently, and that difference largely decides whether two paints will blend into a single, durable coat. You’ll check coalescing agents and film properties: incompatible coalescence causes poor adhesion, cracking, or wrinkling. Choose compatible binders or test small areas before full mixing.
| Binder Type | Coalescing Need | Expected Film Properties |
|---|---|---|
| Acrylic | Low | Flexible, durable |
| Vinyl Latex | Higher | Less elastic |
Safe Mixing Scenarios for Interior Walls
If your interior walls need touch-ups or a new coat and the existing paint is water-based, you can safely blend acrylic and latex paints in many cases.
Use these safe mixing techniques for interior wall applications:
- Test a small patch for adhesion and sheen.
- Match sheen and pigment load.
- Stir thoroughly; avoid solvents.
- Apply thin, even coats and monitor drying.
Why Mixing Is Risky on Trim and Cabinets
When you mix acrylic and latex on trim or cabinets, you risk poor adhesion because the binders can react differently and cause peeling.
You’ll also notice uneven sheens and reduced durability since one type may resist wear or yellowing less than the other.
For high-touch, visible surfaces, that inconsistency can mean more frequent touch-ups or refinishing.
Adhesion And Compatibility
Trim and cabinets demand tough adhesion, so don’t assume acrylic and latex will bond the same way.
You’ll face adhesion challenges linked to differing paint properties and must weigh compatibility factors before blending.
Consider these points and cautious mixing techniques:
- Surface prep impacts bond.
- Primer choice mediates differences.
- Small test patches reveal issues.
- Avoid heavy dilution that alters film.
Finish And Durability
Durability matters most on trim and cabinets, and mixing acrylic and latex paints can undermine the hard, uniform finish you want. You’ll risk uneven cure, reduced finish longevity, and inconsistent sheens. For a clear durability comparison, rely on like-for-like formulas or test small areas before committing; trim needs predictable, hard-wearing coatings.
| Issue | Effect |
|---|---|
| Uneven cure | Soft spots |
| Sheen mismatch | Visible blotches |
| Longevity loss | Early wear |
Using Water‑Based Acrylic With Latex Primers: Yes or No?
Although water‑based acrylic and latex primers are often lumped together, they’re not identical — and that matters when you’re choosing a topcoat.
Acrylic and latex primers may both be water‑based, but they differ — choose your topcoat accordingly.
You can usually use water based compatibility to mix them, but check label instructions to guarantee proper paint adhesion.
Consider:
- Surface prep
- Primer cure time
- Manufacturer recommendations
- Test patch before full application
Oil‑Based Paint: Why It Won’t Mix With Latex/Acrylic
Because oil‑based paints dry by a chemical reaction that creates a hard, nonporous film, they won’t properly bond with water‑based latex or acrylic coatings. You’ll face oil based challenges, compatibility concerns, adhesion issues, differing drying times, and paint performance tradeoffs. Consider mixing techniques avoided, latex limitations, acrylic properties, environmental impact, and safety measures before attempting any crossover.
| Issue | Cause | Result |
|---|---|---|
| Bonding | Film chemistry | Fail |
| Cleanup | Solvents | Hazard |
| Curing | Time mismatch | Problems |
| VOCs | Oil solvents | Impact |
| Tools | Contamination | Waste |
How Mixing Affects Adhesion and Durability
When you mix different paint bases, you change how the coating bonds to the surface and to itself. This directly affects both adhesion and long‑term performance.
You may face adhesion issues and durability concerns; check compatibility and prep well.
- Poor bonding
- Flaking risk
- Uneven wear
- Shortened lifespan
How Mixing Changes Drying Time and Cure
Mixing paint bases doesn’t just alter adhesion and durability; it also changes how fast the coating sheds solvents and develops its full hardness.
You’ll notice drying time and curing process vary with paint types, environmental factors and temperature effects.
Humidity impact slows cure; application techniques and surface preparation influence solvent escape and film formation.
Test mixes under job conditions to predict realistic cure schedules.
How Mixing Alters Sheen and Finish
If you blend acrylic and latex, expect the combined film to show different sheen levels than either product alone.
You’ll notice sheen variation and subtle changes in finish texture that affect reflectivity and touch.
Consider:
- Satin may flatten.
- Gloss can become muted.
- Eggshell picks up irregular highlights.
- Matte might gain slight sheen.
Plan tests before full application.
Blending Cans to Match Color: Practical Tips
1 simple test can save you a lot of rework: blend small amounts from the cans you want to match, apply them side-by-side on a card or the actual surface, and observe the color in the planned light and at different drying stages.
Use measured ratios, record mixes, and try tinting in tiny increments. These blending techniques help achieve reliable color matching without guessing.
How Much Mixing Before Performance Drops Off
You can safely mix small amounts of acrylic into latex (or vice versa) at ratios like 10–20% without seeing much change in performance.
Watch for signs of loss—poor adhesion, longer drying, increased tackiness, or uneven sheen—which tell you the blend is too high.
If performance drops, try tinting with smaller increments, add the original base to rebalance, or strip and restart with compatible paint.
Recommended Mix Ratios
Most DIYers stick to a rule of thumb: don’t exceed about 20–30% acrylic added to a latex base (or vice versa) before you start seeing changes in drying time, adhesion, and sheen.
Use careful mixing techniques and follow paint ratios.
Practical guide:
- 10% for slight tinting
- 20% for moderate adjustment
- 30% upper limit
- Test small patch first
Signs Of Performance Loss
After following those mix ratios and testing a small patch, watch for clear signs that performance is slipping as you push past the 20–30% range.
You’ll notice thinner coverage, longer drying, reduced flexibility and more visible brushstrokes.
These performance indicators point to mixing consequences: adhesion loss, color shift and reduced durability.
Stop increasing acrylic proportion once defects emerge to avoid failed finishes.
Reversing Or Improving Mix
When you start to see the performance clues—thinner coverage, longer dry times, loss of flexibility—you can usually reverse or improve the mix by dialing back acrylic content and restoring balance with latex or by adding a compatible extender or conditioner.
Use these steps to target reversing adhesion and improving durability:
- Test small ratios.
- Add latex gradually.
- Use extender/conditioner.
- Re-test performance.
Tools and Containers for Safe On‑Site Mixing
If you’re mixing acrylic and latex on-site, pick sturdy, clearly labeled containers and dedicated stirring tools to prevent contamination and confusion.
For on-site tools, prioritize container selection that shows mixing ratios and material compatibility.
Follow safety precautions: gloves, masks, and spill trays.
Always use gloves, masks, and spill trays to protect people and surfaces during on-site mixing and application.
Coordinate mixing techniques with application methods and include notes in project planning to track batches and avoid cross-contamination.
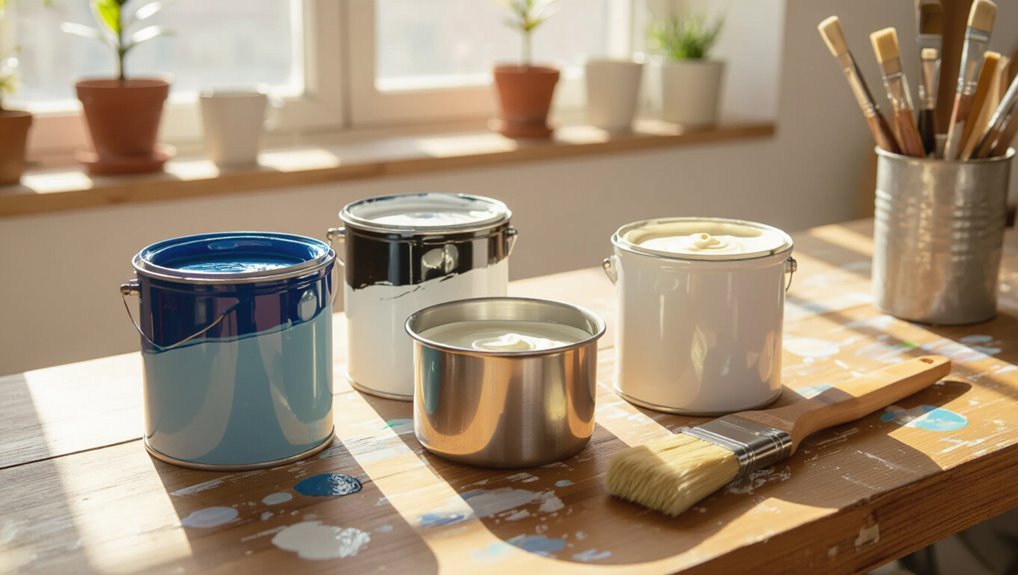
Step‑By‑Step: Make a Small Mixed Sample
Start by gathering small, clearly labeled jars, a dedicated stir stick, and a scrap piece of your actual substrate for testing; you’ll want enough material for a few teaspoons of each paint and room to stir without splashing.
Use careful sample preparation and simple mixing techniques:
- Pour measured teaspoons.
- Mix equal parts.
- Note ratios on jars.
- Let dry, observe color and texture.
Test Adhesion: A 3‑Minute Patch Checklist
Adhesion matters: before you commit to a full project, give your mixed paint a 3‑minute patch test on the actual substrate to confirm it bonds and dries properly.
Apply a small square, label wet time, wait three minutes, then rub gently with a cloth.
Use this quick adhesion testing routine to evaluate adhesion, observe lift or tack, and decide whether primer or reformulation is needed.
Check Drying and Leveling in a Test Patch
Drying and leveling reveal whether your mixed acrylic/latex blend will look and perform the way you expect—so apply a small, even test patch and watch how the surface skins, flows, and settles over the next 30–60 minutes.
Apply a small, even test patch and watch the mix skin, flow, and settle over 30–60 minutes.
- Note sheen change using test patch techniques.
- Press lightly for tackiness.
- Observe flow lines and leveling.
- Record drying time evaluation and any surface defects before proceeding.
When to Add Water, Thinner, or Extender
If your paint feels too thick for your brush or roller, you’ll want to thin it slightly so it levels smoothly.
Use clean water for water-based paints, a manufacturer-recommended thinner for stronger reduction, or an extender/retarder when you need more open time without weakening the film.
Always test the thinned mix on a small patch to confirm coverage and drying before committing to the whole job.
When To Thin Paint
Knowing when to thin paint matters because the right consistency affects flow, coverage, and finish—thin too much and you lose hiding power, thin too little and you get brush marks or poor leveling.
Use thinning techniques and check paint viscosity; thin only when needed.
- Test on cardboard.
- Follow manufacturer limits.
- Aim for brushable flow.
- Recoat only when dry.
Using Extenders Or Water
When paint feels too stiff to spread smoothly or shows visible brush or roller marks, you’ll want to contemplate adding a little water, a manufacturer-approved thinner, or an acrylic extender to improve flow and leveling; choose the right additive based on the paint type, application method, and the manufacturer’s thinning limits.
Balance water effects and extender advantages, observe mixing ratios for paint consistency, monitor drying times, and weigh performance impact and compatibility factors.
Tinting Latex With Acrylic Pigments: What Works
Although acrylic pigments and latex base share water as a carrier, not every acrylic additive will mix reliably with latex paint. You can successfully tint latex with artist-grade acrylic pigments or water-based acrylic tints, but you should avoid heavy-bodied acrylics, solvent-based mixes, and untested concentrates that can destabilize the latex binder.
Acrylic pigments can tint latex paint, but avoid heavy-bodied, solvent-based, or untested mixes that may destabilize the binder.
- Use artist-grade acrylic tints.
- Test small batches.
- Prioritize pigment compatibility.
- Follow tinting techniques.
Storing Mixed Paint: Shelf Life and Tips
When you mix acrylic and latex paint, know that storage time varies — expect usable life to be shorter than unmixed cans and follow storage duration guidelines on the label.
Keep mixed paint in airtight, opaque containers and choose metal or high-density plastic jars with tight seals to prevent contamination and skinning.
Check for signs of spoilage like foul odor, mold, separation that won’t remix, or a grainy texture before using.
Storage Duration Guidelines
Because mixed acrylic and latex paints combine different chemistries, their shelf life can be shorter and more variable than that of unmixed cans.
You should treat mixed paint as a temporary supply rather than long-term storage.
Follow these storage duration guidelines:
- Label mix date and contents.
- Store cool, stable storage conditions.
- Use within 3–6 months.
- Discard if separation, odor, or skin forms.
Proper Container Selection
If you want mixed acrylic and latex paint to last those few months, pick containers that seal tightly, resist corrosion, and fit the amount you’re storing.
Choose container types like metal pails with gasket lids or food-grade plastic jars.
Label paint ratios, note compatibility testing, keep mixing tools clean, follow safety precautions, plan volume considerations, use proper storage solutions, and follow cleanup methods promptly.
Signs Of Spoilage
Now that you’ve picked the right containers and labeled mixes, watch for clear signs your blended acrylic-latex paint has gone bad.
Check these spoilage indicators to avoid paint deterioration:
- Foul or sour odor indicating bacterial growth.
- Thick clumps or separation that don’t re-emulsify.
- Mold or visible discoloration.
- Curdled texture or flaky film when stirred.
Troubleshooting After Mixing: Common Problems
When mixed paints don’t behave as expected, you’ll usually spot the issue quickly—poor adhesion, uneven drying, or unpredictable sheen are the common culprits.
You should assess compatibility, check dry times, and review mixing techniques to identify causes.
Test small areas, monitor temperature and humidity, and note separation or clumping.
Early detection aids problem prevention and helps you decide whether to thin, remix, or discard the batch.
Fixing Streaks, Peeling, and Poor Coverage
Although mixed paint can save time and money, streaks, peeling, and poor coverage are fixable if you act methodically.
Although mixed paint saves time and money, streaks, peeling, and poor coverage are fixable with methodical steps.
Use these steps for streak prevention, coverage enhancement, peeling solutions, adhesion improvement, finish techniques, durability tips, application methods, and surface preparation:
- Sand and clean surface preparation.
- Prime for adhesion improvement.
- Thin or adjust application methods.
- Recoat with proper finish techniques for durability tips.
Painting Over Mixed Layers: Best Practices
If you’re covering mixed acrylic-and-latex layers, start by evaluating the existing surface for adhesion, texture, and sheen so you know whether you’ll need sanding, priming, or a different approach to get a uniform topcoat.
Then test layer compatibility, sand glossy spots, clean surface, and choose paint application techniques—brush, roller, or sprayer—matching viscosity.
Work in thin, even coats and allow full drying between layers.
When to Prime Instead of Mixing Paints
Because mixing paints can’t fix every surface issue, prime whenever the existing finish or substrate will compromise adhesion, coverage, or durability.
You’ll get priming benefits that outweigh mixing drawbacks in many cases.
Consider priming when:
- Stains or tannins bleed through
- Surface is glossy or slick
- You switch from oil to water-based paints
- Porous or repaired areas need sealing
Primers & Binders That Bridge Paint Types
If you’re worried about adhesion between acrylic and latex, a bonding primer will do the heavy lifting and create a stable surface.
You can also use universal acrylic binders to help different paint chemistries play nice without full reformulation.
Both options let you avoid messy mixing while getting reliable coverage and durability.
Bonding Primers Work
When you’re switching between acrylic and latex, a quality bonding primer lets the new paint grab hold of the old surface so coats adhere evenly and last longer.
You’ll use bonding agents during primer application after surface preparation. Consider paint compatibility, adhesion testing, mixing techniques, performance evaluation, coating thickness, drying conditions, and environmental factors.
- Prep
- Prime
- Test
- Paint
Universal Acrylic Binders
Universal acrylic binders act as a versatile bridge between paint systems, letting you top latex with acrylic or vice versa without worrying about adhesion issues. You’ll use universal binders to improve bonding, reduce bleeding, and gain acrylic advantages like flexibility and durability. Choose a compatible primer, apply per instructions, and sand lightly between coats for best results.
| Benefit | Result |
|---|---|
| Bonding | Strong adhesion |
| Flexibility | Crack resistance |
| Durability | Longer life |
How Pros Handle Mismatched Paint Cans
Although mismatched cans can look like a headache, pros treat them methodically: you’ll separate by base (acrylic vs. latex), check VOC and sheen labels, and test a small blend before committing.
Although mismatched cans seem daunting, pros separate by base, check labels, and test a small blend first.
- Assess paint compatibility and paint properties.
- Use conservative mixing techniques.
- Note drying time and adhesion.
- Record batches and professional insights for consistency.
Cost Vs. Convenience: Is Mixing Worth It?
You can save money upfront by mixing acrylic and latex, but weigh that against potential quality loss and uneven coverage.
Mixing can cut your time sourcing matching cans, yet it may add labor later if you need extra coats or repairs.
Consider long-term maintenance costs—touch-ups, peeling, or premature repainting can erase any initial savings.
Cost Compared To Quality
If you’re weighing whether to mix acrylic and latex paint, consider how much time and money you’ll actually save versus potential trade-offs in finish and durability.
You want cost efficiency without sacrificing quality longevity. Evaluate:
- Price per can vs. expected lifespan.
- Coverage differences.
- Repair frequency costs.
- Resale or aesthetic impact on value.
Mix only if savings outweigh risks.
Time And Labor Tradeoffs
Cost savings matter, but you also need to weigh time and labor before mixing acrylic and latex paint.
You’ll consider time efficiency versus labor costs, choose mixing strategies that match project timelines, and assess skill levels for technique variations.
Preparation importance is critical to avoid delays.
Do a clear risk assessment so you’re certain convenience outweighs added effort before you proceed.
Long-Term Maintenance Costs
While mixing acrylic and latex might save you time upfront, think about how it affects long-term maintenance costs and convenience. Blended coatings can behave unpredictably over years, meaning more touch-ups, recoats, or even full repaints sooner than with a single compatible product.
- Reduced cost efficiency if fixes pile up.
- Higher maintenance frequency expected.
- Uncertain adhesion increases labor.
- Replacement cycles shorten, raising lifetime expense.
VOCs and Environmental Considerations When Mixing
Because acrylic and latex paints use different formulations, mixing them can change the VOC profile of the final blend and affect indoor air quality.
You should follow VOC regulations, weigh environmental impact and health considerations, and adopt sustainable practices.
Plan paint disposal, use safety measures to limit chemical exposure, choose eco-friendly options when possible, and practice responsible mixing to protect air quality and wellbeing.
Safety and Cleanup After Mixing Paints
After considering VOCs and disposal, you’ll want to focus on safety and cleanup to protect yourself and your space.
After addressing VOCs and disposal, prioritize safety: gloves, goggles, ventilation, proper cleanup, and regulated waste disposal.
- Wear gloves, goggles, and a mask—basic safety precautions.
- Ventilate the area to reduce fumes.
- Use approved cleanup methods: water for latex, appropriate solvent for acrylic.
- Dispose of rags and waste per local regulations to prevent hazards and contamination.
When to Call a Pro Instead of DIY Mixing?
If your project needs complex surface prep—like extensive sanding, repairing drywall, or dealing with lead paint—you should call a pro who knows the right primers and safety steps.
For large areas, multi-room jobs, or any high-risk surfaces (exteriors exposed to weather, high-moisture rooms, or commercial spaces), a professional will save time and prevent costly mistakes.
When in doubt about scale or safety, hiring an experienced painter is the smarter choice.
Complex Surface Preparations
When walls or trim show extensive cracking, mildew, flaking, or previous coatings like oil-based paint or lead, you should seriously consider hiring a pro rather than attempting to mix acrylic and latex yourself.
You’ll want experts for advanced surface preparation techniques and compatibility testing.
Consider these reasons:
- Lead-safe remediation
- Mold abatement
- Proper stripping/priming
- Structural repair
Large Or High-Risk Jobs
Because large or high-risk painting jobs multiply the consequences of mistakes, you should strongly consider hiring a pro instead of experimenting with mixed paints yourself.
For projects with extensive square footage, specialty coatings, or strict timelines, professionals manage large job considerations and reduce mixing risks.
You’ll avoid adhesion failures, color mismatches, and costly rework by relying on expertise, proper equipment, and warranty-backed results.
Real Examples: Successful Mixes and Failures
Although acrylic and latex are both water-based, you’ll see wildly different results depending on brand, surface, and proportions — here are real-world successes and failures to help you decide when mixing is worth the risk.
Although both water-based, mixing acrylic and latex yields wildly different outcomes—brand, surface, and ratio make all the difference.
You’ll learn successful combinations, common mixing challenges, and when to stop.
Examples:
- Trim acrylic + latex gloss — good.
- Interior walls mixed — patchy.
- Small craft blends — fine.
- Exterior mix — fails.
Quick Pre‑Mix Checklist You Can Use Now
You’ve seen what can go right and wrong mixing acrylic and latex, so now grab a quick checklist to reduce surprises before you open the cans.
Check paint types and compatibility factors, note mixing techniques and preparation steps, confirm color matching and expected drying times, review application methods, and record performance metrics.
Test a small sample patch before full application.
Myths About Mixing Acrylic and Latex: Busted
Wondering whether acrylic and latex paints are secretly interchangeable? You’ll want myth debunking and clear paint compatibility info. Don’t ignore mixing misconceptions or product instructions.
- Color blending can work, but expect finish variations.
- Drying times differ; plan application techniques.
- Performance issues may appear from adhesion challenges.
- Test small areas to confirm results and avoid surprises.
Mix, Prime, or Rebuy: A Final Decision Flow
Ready to decide whether to mix, prime, or rebuy? Use compatibility tests and testing procedures first: assess surface preparation, adhesion challenges, and finish variations.
Try dilution strategies and mixing techniques on small samples to judge color blending and application methods.
Test dilution and mixing on small samples to evaluate color blending and application before full-scale use.
Run quick performance assessments; if failures occur, prime properly or rebuy matching chemistry.
Follow this flow to reduce risk and guarantee durable results.
Frequently Asked Questions
Can Mixed Paint Be Used on Exterior Siding Long-Term?
Yes — you can, but you shouldn’t unless you test first: you’ll compromise paint durability and weather resistance if formulations clash, so you’ll want compatible products, proper prep, and occasional touch-ups to maintain long-term protection and appearance.
Does Mixing Affect Fire Resistance or Flame Spread Ratings?
No — mixing generally won’t improve fire safety; you’ll likely keep the original flame spread characteristics of the dominant formulation. Check paint compatibility and manufacturer data sheets, since additives or incompatible layers can alter ratings unexpectedly.
Can I Mix Paints to Create Faux Textures or Metallic Effects?
Like a chef blending spices, you can mix paints to create faux finishes and metallic sheens; you’ll experiment with ratios, additives, and layering, but test samples first since adhesion, drying, and final texture can vary.
Will Mixed Paint Interfere With Mold-Resistant Coatings?
Yes — mixed paint can interfere with mold-resistant coatings by reducing paint adhesion and weakening coating durability; you’ll need compatible formulations, proper primers, and tests to verify the mold barrier remains effective and long-lasting on your surfaces.
Can Pet-Safe or Low-Voc Labels Be Altered by Mixing?
About 78% of consumers misread labels, so yes — mixing can change pet-safe or low-VOC claims. You’ll compromise paint safety and alter VOC levels, so don’t assume original certifications still apply after blending.
Conclusion
So, yes — you can sometimes mix acrylic and latex, but don’t faff about like a paint‑mixing pirate expecting treasure. When binders behave, the combo can save a trip to the store; when they don’t, you’ll get peeling, flaking, and the kind of drama usually reserved for reality TV. Do a test patch, read labels like a detective, and if in doubt, prime or rebuy — fewer heartbreaks that way.