How to Remove Permanent Marker From Wall Without Damaging Paint
You can remove permanent marker without harming paint by first identifying the finish and testing cleaners in a hidden spot. Open windows, wear gloves, and work gently from the edges inward with a microfiber cloth. Try rubbing alcohol or hand sanitizer, a baking soda paste, or non‑gel toothpaste, blotting rather than scrubbing, then rinse and pat dry. Use a damp Magic Eraser cautiously on durable finishes. Keep going for step‑by‑step techniques and precautions to finish the job safely.
Why This Is a How‑To Guide for Removing Permanent Marker From Painted Walls
Because permanent marker soaks into paint and looks like it’s stuck there forever, you need a practical, step-by-step approach to remove it without damaging the finish.
You’ll follow clear marker removal techniques that prioritize paint preservation tips, assess stain severity, test solutions on hidden spots, work gently from edges inward, and stop once the mark lifts to avoid overworking the surface.
Quick Answer : Safest Way to Remove Permanent Marker From Painted Walls
Generally, the safest way to remove permanent marker from painted walls is to start with a mild, nonabrasive method—test a hidden spot, then try rubbing alcohol or a baking soda paste applied gently with a soft cloth, working from the stain’s edge inward and stopping as soon as the marker lifts to avoid damaging the paint.
You’ll protect finishes, follow painting tips, and reduce future marks with marker prevention.
Identify Your Wall Paint Type Before You Start
Before you start applying solvents or scrubbing, figure out what type of paint you’re working with—different finishes react differently to cleaners.
Check labels, ask your builder, or test a hidden spot with water and a mild cleaner. Identifying paint types guides your choice of solvent and tools, helps prevent damage, and guarantees proper wall care so removal is effective and safe.
How Paint Finish (Flat → Gloss) Changes Your Approach
If your wall has a flat finish it’ll hide imperfections but absorb marker ink more, while glossier paints resist staining and let you lift marks with gentler methods; adjust pressure, solvents, and tools accordingly so you remove the ink without damaging the surface.
| Finish | Approach |
|---|---|
| Flat | Light solvent, blot |
| Eggshell | Mild scrubbing |
| Semi-gloss | Gentle cleaners |
| Gloss | Minimal abrasion, gloss cleaning techniques |
Understand paint finish impacts and test first.
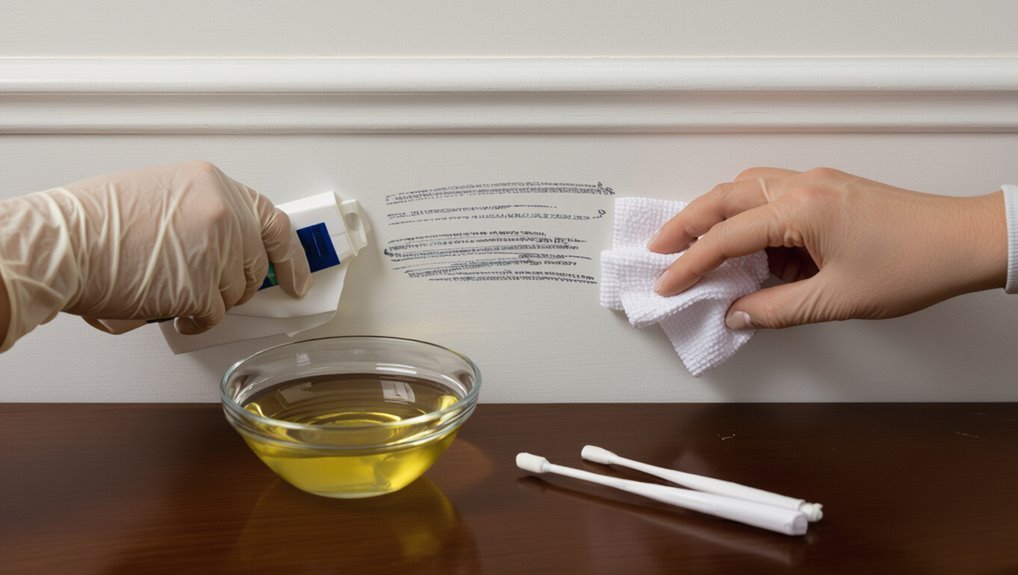
Safety First: Ventilation, Gloves, and Surface Protection
Before you start removing marker, make sure the room is well ventilated by opening windows and running a fan to move fumes out.
Put on chemical-resistant gloves to protect your skin and lay down drop cloths or plastic sheeting to shield floors and furniture.
These simple steps cut exposure and keep cleanup tidy while you work.
Proper Ventilation Indoors
When you tackle permanent marker removal indoors, prioritize airflow by opening windows and running a fan to dilute fumes; solvents like rubbing alcohol and acetone can give off strong odors and should never be used in a stuffy room.
Keep doors open to create cross‑ventilation, monitor air quality, and step outside if you feel lightheaded.
Proper ventilation is essential for indoor safety while cleaning.
Glove And Surface Protection
1 simple set of gloves and a few sheets of protective cover can prevent a small cleanup from turning into a bigger mess. Use safety gear, like nitrile gloves and eye protection, and lay drop cloths for wall protection. Work near an open window. Stop and change gloves if solvents soak through.
| Item | Purpose | Tip |
|---|---|---|
| Gloves | Protect skin | Nitrile |
| Cloth | Catch drips | Tape edges |
| Vent | Clear fumes | Window open |
How to Do a Spot Test in an Inconspicuous Area
Pick a tiny, hidden spot—behind a light switch plate, inside a closet corner, or along a baseboard—and test your chosen cleaner there first.
Gently apply a small amount, wait a few minutes, then blot with a soft cloth. If paint softens, discolors, or lifts, stop.
A proper spot test in an inconspicuous area confirms the cleaner’s safety before wider use.
Tools & Supplies for Removing Marker From Walls
Gather a few reliable tools and supplies before you start so you can work efficiently and avoid damaging the paint.
You’ll need soft microfiber cloths, gentle sponges, a spray bottle, painter’s tape, and a plastic scraper.
Keep a mild detergent, baking soda, and nonabrasive cleaner for marker removal techniques, plus eco friendly solutions like vinegar diluted with water for safer, effective cleaning.
Removing Permanent Marker With Rubbing Alcohol (Step‑By‑Step)
Dampen a microfiber cloth with isopropyl rubbing alcohol and gently blot the marker stain—don’t rub hard yet, since that can spread the ink or harm the paint.
Work from the edges toward the center, switching to a clean cloth as ink lifts.
If residue remains, repeat in short bursts, then rinse with a damp cloth and dry.
This technique aids safe stain removal.
Removing Permanent Marker With Baking Soda Paste
Make a thick paste by mixing baking soda with a little water until it holds together.
Test the paste on an inconspicuous spot of painted wall to make sure it won’t lift or discolor the paint.
If it’s safe, gently rub the marker stain with the paste and wipe or rinse the area clean.
Make Baking Soda Paste
Combine baking soda and a little water into a thick paste you can spread easily over the marker stain.
Use about two parts baking soda to one part water for a workable consistency.
For paste application, scoop a small amount onto a soft cloth or sponge, press gently onto the mark, and avoid scrubbing harshly.
Let it sit briefly before wiping clean.
Test Paint Inconspicuously
Before you apply the baking soda paste to the visible stain, test it on a hidden spot to make sure the paint won’t dull or discolor; pick a corner or inside trim, dab a little paste, wait a few minutes, then wipe it off to check the finish.
This simple paint compatibility testing step lets you try marker removal techniques safely and avoid ruining visible paint.
Gently Rub And Rinse
Once your paint test shows no damage, dampen a soft cloth or sponge and apply a small amount of the baking soda paste to the stained area; you’ll want gentle pressure—firm enough to lift the ink but light enough to avoid abrading the paint.
Rub in small circular motions using gentle techniques, rinse with clean water, pat dry, and repeat if needed for effective solutions.
Removing Permanent Marker With Non‑Gel Toothpaste
Non‑gel toothpaste works as a mild abrasive and solvent that can lift permanent‑marker stains without harsh chemicals.
You can often remove marks using items you already have at home. Apply a small amount to a soft cloth, gently rub the mark, then wipe with a damp cloth.
Test first on an inconspicuous spot to confirm toothpaste effectiveness as an alternative cleaning method.
Using White Vinegar for Mild Permanent‑Marker Stains
White vinegar works because its acetic acid helps break down the ink’s oils and pigments, making mild stains easier to lift.
You’ll want to dampen a cloth or cotton ball with vinegar, gently rub the mark in small circular motions, and avoid saturating the wall.
Wipe the area with a clean damp cloth to remove residue and pat dry to check if a second pass is needed.
Why White Vinegar Works
Vinegar works on mild permanent‑marker stains because its acetic acid breaks down the dye’s bonds and dissolves the pigment so you can lift it with a cloth.
You’ll appreciate vinegar properties and cleaning effectiveness when stains weaken quickly.
Consider these benefits:
- Non‑toxic solvent action
- Paint‑safe pH for many finishes
- Low residue, easy rinsing
Application And Removal Tips
Dampen a soft cloth with a small amount of plain vinegar and test it on an inconspicuous spot to make sure the finish won’t lift; if the paint holds, gently blot the marker stain—don’t scrub—to let the acid break down the pigment.
Then wipe with a clean damp cloth and repeat as needed until the mark fades.
Use marker prevention tips like clear coatings, and follow effective cleaning techniques promptly.
Hand Sanitizer Gel as a Solvent Option
Hand sanitizer gel can remove permanent marker because it contains alcohol that breaks down ink pigments; you’ll find it convenient since most households already have some. You’ll dab, rub gently, and wipe until ink lifts.
Consider these steps for safe removal:
- Test on hidden spot.
- Use small dab, wait seconds.
- Blot with clean cloth.
Also note hand sanitizer’s alternative uses for quick spot cleaning.
Magic Eraser Use and Precautions on Painted Walls
Before using a Magic Eraser, know when to avoid it—don’t use it on glossy, delicate, or freshly painted surfaces because it can dull or strip the finish.
Wet the pad lightly and squeeze out excess water so you use gentle pressure rather than soaking the wall.
Test a hidden spot first and wipe in small, controlled strokes to protect the paint.
When To Avoid Use
If your wall has flat, matte, or delicate paint, don’t reach for a Magic Eraser—its abrasive surface can remove finish and leave noticeable sheen differences.
You should avoid use when preserving finish; prioritize marker removal techniques that focus on paint preservation tips.
- Test hidden spot first
- Skip textured or thinly coated areas
- Use gentler alternatives if unsure
Proper Wetting Technique
When you use a Magic Eraser on painted walls, dampen it just enough that it feels cool and pliable—don’t soak it; excess water can drip into seams and soften paint. Use gentle pressure, test a hidden spot, and employ controlled wetting techniques and absorption methods to lift marker without abrasion.
| Step | Action | Tip |
|---|---|---|
| 1 | Dampen | Wring well |
| 2 | Test | Hidden spot |
| 3 | Blot | Replace pad |
| 4 | Rinse | Air dry |
Protecting Paint Finish
Although a Magic Eraser can remove stubborn marker, you should treat it like fine sandpaper on painted walls and use it sparingly to avoid dulling or removing the finish.
You’ll preserve paint protection and simplify wall maintenance by following steps:
- Test a hidden spot first.
- Lightly dab; don’t scrub.
- Rinse residue and pat dry.
Commercial Graffiti Removers: What to Try and What to Avoid
Because commercial graffiti removers vary widely in strength and chemistry, you’ll want to choose one that matches your wall’s surface and the marker type.
Test a small hidden spot first. Favor water-based commercial products labeled safe for painted surfaces and low-VOC formulas. Avoid harsh solvents that strip paint.
If you prefer gentler options, consider natural alternatives like citrus-based cleaners or rubbing alcohol cautiously.
Using Acetone (Nail Polish Remover) Safely on Painted Walls
If you decide to try acetone-based nail polish remover, start cautiously since it’s a strong solvent that can dull or remove paint if misused.
Test a hidden spot first to check paint compatibility. Use a cotton swab, blot don’t rub, and ventilate the area.
Consider acetone alternatives if unsure.
- Test first
- Blot gently
- Ventilate well
Lacquer Thinner: Why It’s Risky for Paint
Be careful with lacquer thinner because it can eat into the paint surface and leave dull spots or bare patches.
If you use it, you’re risking chemical paint stripping that can remove not just the marker but the finish underneath.
Test a hidden area first and have touch-up paint ready in case the thinner removes more than you planned.
Paint Surface Damage
When you reach for lacquer thinner to strip permanent marker, remember it’s a powerful solvent that can easily damage painted surfaces; it dissolves paint binders and quickly softens or lifts the finish.
You’ll want to focus on paint preservation techniques and gentle surface restoration methods:
- Test in an inconspicuous spot.
- Blot, don’t rub aggressively.
- Use milder cleaners first.
Chemical Paint Stripping
You might be tempted to reach for lacquer thinner because it removes marker and other stubborn stains fast, but it attacks paint binders and can strip finishes in seconds.
You should prioritize chemical safety: test a hidden spot, wear gloves and ventilate.
Consider paint compatibility—thinner can ruin latex, enamel, or clear coats.
Opt for gentler removers or professional advice.
Using Baby Oil or WD‑40 to Lift Marker Safely
Although oil-based products can feel risky on painted surfaces, baby oil and WD‑40 both dissolve permanent marker ink without heavy scrubbing, so they’re worth trying on a small test spot first.
You’ll use them sparingly to lift marks.
- Apply small amount.
- Gently blot—don’t rub.
- Wipe residue and dry.
Keywords: baby oil benefits, wd 40 effectiveness
Using Professional Stain‑Lifting Pens: Brands and How to Apply
Because they’re formulated for targeted ink removal, professional stain‑lifting pens give you controlled, low‑risk results on walls. You’ll choose from pro professional brands, test a hidden spot, and use proper application techniques: gentle strokes, brief dwell time, blotting. Follow label directions and reapply sparingly until the mark lifts.
| Brand | Tip | Use |
|---|---|---|
| Brand A | Fine | Spot treat |
| Brand B | Medium | Blot gently |
| Brand C | Broad | Short strokes |
Best Approach for Fresh Marker vs. Dried Marker Stains
When a marker stain is fresh, act quickly and blot gently to lift ink before it soaks in; for dried marks, you’ll need more deliberate methods—soft abrasion, stronger solvents, or repeated treatments—because the pigment has bonded with the wall surface.
- Use mild cleaners first for fresh stains.
- Escalate to alcohol or magic eraser for older marks.
- Test spotwise to protect paint when using marker removal techniques.
Working on Textured Walls Without Harming Texture
Start by checking your wall’s texture and paint finish so you know what it can handle.
Test any cleaner in an inconspicuous spot to make sure it won’t strip or discolor the surface.
When you work the stain, use gentle agitation—soft cloths or a soft-bristled brush—to lift marker without flattening the texture.
Assess Texture And Paint
Before you touch any cleaner, take a close look at the wall’s texture and paint finish so you can choose a method that removes marker without flattening or discoloring the surface.
You’ll do a quick texture assessment and confirm paint compatibility, then proceed gently.
- Note roughness level.
- Identify finish (matte, satin, gloss).
- Prioritize non-abrasive approaches.
Test Cleaner Inconspicuously
Now that you’ve checked texture and finish, pick a small, hidden spot—behind furniture or near a corner—to try your cleaner so you won’t damage visible areas.
Use gentle test methods: apply a tiny amount, wait, then blot. Inspect for color change, sheen loss, or texture alteration.
Repeat in other inconspicuous areas until you confirm the product is safe for the whole wall.
Use Gentle Agitation Techniques
Move gently and deliberately when agitating a textured wall—use soft, circular motions with a dampened microfiber cloth or a soft-bristled brush to lift marker without flattening the texture.
You’ll use gentle scrubbing techniques and effective agitation methods to avoid damage.
- Test a hidden spot.
- Work small areas.
- Rinse and blot frequently.
Removing Marker From Trim, Baseboards, and Moldings
Trim, baseboards, and moldings get scuffed and marked because they’re at eye level and take the brunt of everyday use.
But you can usually remove permanent marker from them without repainting. Use gentle marker removal techniques: test a small area, try rubbing alcohol or a magic eraser, wipe with a damp cloth, and dry.
Follow trim cleaning tips to avoid finish damage.
Removing Marker From Painted Doors and Cabinets Safely
When a painted door or cabinet gets marked, you can usually lift permanent marker without stripping the finish.
Use gentle marker removal techniques on painted surfaces, testing first.
Always test gentle marker-removal methods on painted surfaces before treating the whole area.
Follow steps:
- Dab isopropyl alcohol with a soft cloth.
- Try a magic eraser gently in small strokes.
- Rinse, dry, and inspect; repeat if needed, avoiding scrubbing that damages paint.
What to Do If Cleaning Smudges or Spreads the Ink
If your cleaning smudges or spreads the ink, stop and blot the area with a dry cloth to lift excess marker without rubbing.
Try a gentle solvent like rubbing alcohol or a specialized cleaner on a test spot, applying it sparingly with a cotton swab.
Rinse the spot with water, let it dry, and reassess before repeating.
Stop And Blot
Stop cleaning the area as soon as the ink smears or spreads and gently blot the mark with a clean, dry cloth or paper towel to lift excess pigment without rubbing it deeper into the wall.
For effective marker removal while keeping wall protection in mind:
- Blot outward from the center.
- Use fresh cloth sections.
- Pause and assess before repeating.
Use Gentle Solvents
Reach for a gentle solvent if blotting only shifts the ink or leaves a faint stain; start with mild options like rubbing alcohol, hand sanitizer, or a diluted dish soap solution applied sparingly to a cotton ball or soft cloth.
Test an inconspicuous spot, dab gently, and work outward. Use light pressure, change to clean cloths, and follow effective techniques to avoid spreading or damaging paint.
Rinse And Reassess
Once you see smudging or the ink spreading, rinse the area with plain water and gently pat it dry so you can judge the true extent of the stain; drying prevents solvents from continuing to lift and smear the marker.
Then follow these steps:
- Stop and assess damage without rubbing.
- Apply spot-test of milder cleaner.
- Note results and adjust your marker prevention strategies and wall care tips.
How Long to Wait Between Cleaning Attempts
If you’re unsure whether a cleaning attempt worked, wait at least 10–15 minutes before trying again so the solvent can lift the stain and the surface can dry enough to show real results; for gentler cleaners or painted surfaces, extend that to 30–60 minutes to avoid over-saturating the paint or causing damage.
Treat this waiting period as part of your cleaning frequency plan to prevent overworking paint.
Blending and Spot‑Painting: When Touch‑Up Is the Right Move
After you’ve given cleaners time to work and the area’s dry, assess whether the marker faintly shows or the finish looks uneven—sometimes removal leaves a ghost that cleaning won’t fix.
You’ll decide between blending techniques and spot painting. Consider:
- Feather edges outward.
- Use minimal coats.
- Check under different light.
How to Match Paint Color and Finish for Seamless Touch‑Ups
Start by locating the paint code or label from when the wall was last painted so you can get an exact color match.
Always test the matched paint on a small hidden spot to confirm the hue and how it reacts when dry.
Make sure the sheen and texture match the surrounding finish so the touch‑up blends seamlessly.
Identify Existing Paint Code
When you need a seamless touch-up, the first step is to identify the exact paint code and finish so your repair blends invisibly with the wall.
You’ll use paint color identification alongside your marker removal techniques notes.
Steps:
- Find leftover cans or labels.
- Photograph wall in natural light.
- Take a swatch to a paint store for code matching and finish verification.
Test Small Hidden Area
Although you’ve identified the paint code, you’ll want to test a small hidden area to confirm the color and finish match under real conditions; this quick trial prevents noticeable touch-up mistakes. Use simple test methods, record spot effectiveness, and inspect in different light.
| Location | Method | Result |
|---|---|---|
| Behind trim | Dab brush | OK |
| Closet corner | Roller | Good |
| Baseboard gap | Spray | Poor |
| Outlet edge | Finger | Fair |
Match Sheen And Texture
Because a wall’s finish affects how light reflects and how repairs blend, match both the paint sheen and surface texture before you touch up; otherwise the color can look wrong even if the hue is exact.
You should focus on texture matching and recognizing sheen variations.
Steps:
- Inspect finish and texture.
- Use same sheen and tool.
- Feather edges for seamless blend.
When to Avoid DIY: Signs You Need a Pro or Repainting
If the stain is large, soaked in deeply, or sits on textured or delicate paint, you’ll want to call a pro or plan to repaint—DIY fixes often can’t fully restore those surfaces.
Look for signs of damage: paint bubbling, bleeding through, visible primer, or lingering odor.
If multiple layers or large areas are affected, know when to call and avoid wasting time on ineffective DIY attempts.
When to Call a Professional Restorer or Painter
When DIY methods won’t cut it, bring in a professional restorer or painter to avoid further damage and get reliable results.
When DIY fails, call a professional restorer or painter to prevent damage and ensure reliable results.
You should call when stains persist, paint is compromised, or historic finishes are at risk. A pro provides professional evaluation and outlines restoration options.
- Persistent staining
- Flaking or peeling paint
- Valuable or historic surfaces
Quick Temporary Fixes When You Can’t Clean Immediately
If you can’t clean the marker right away, cover the mark with masking tape to keep it from smudging or spreading.
You can also dab a small amount of rubbing alcohol on a cotton ball and gently blot around the edges to create a temporary guard against further staining.
These quick steps buy you time until you can perform a proper removal.
Temporary Masking Tape Cover
Although you can’t clean the mark right away, temporarily covering it with masking tape buys you time and keeps the stain from spreading or rubbing onto other surfaces.
Use temporary tape techniques to protect paint and note alternative marker solutions for later cleanup.
- Press tape edges firmly.
- Replace if soiled.
- Clean promptly when possible.
Rubbing Alcohol Spot Guard
Alongside masking tape, rubbing alcohol makes a handy short-term shield for permanent marker spots you can’t treat right away. You dab alcohol lightly, test a hidden area, then cover and monitor — balancing rubbing alcohol effectiveness with spot guard benefits to prevent spread until you clean.
| Action | Result |
|---|---|
| Dab | Test |
| Cover | Protect |
| Monitor | Wait |
| Clean | Restore |
Eco‑Friendly, Low‑VOC Removal Options for Sensitive Homes
Because you want to avoid harsh fumes and chemical residues in sensitive homes, choose low‑VOC, eco‑friendly methods for removing permanent marker from walls.
For sensitive homes, opt for low‑VOC, eco‑friendly methods to remove permanent marker safely.
You can safely try:
- Vinegar and baking soda paste — gentle, eco friendly methods for lifting ink.
- Rubbing alcohol diluted with water — low VOC solvents alternative.
- Melamine sponge with light pressure — nonchemical, low‑risk cleanup.
Cost: DIY vs. Pro Removal vs. Repaint
You can often fix small marker stains with affordable DIY supplies like rubbing alcohol, magic erasers, or touch-up paint.
If the mark’s large or on delicate finishes, a pro service will cost more but can save time and reduce risk of damage.
We’ll compare typical DIY supply costs against professional pricing and the expense of a full repaint so you can choose the smartest option.
DIY Supplies Cost
Compare three cost paths before you pick a method: DIY supplies, professional removal, or a repaint.
You’ll weigh diy supply costs and budget friendly options—cleaners, rags, and touch-up paint. Estimate total spend versus time.
Consider:
- Household cleaners and erasers
- Specialty removers
- Small repaint kit
Choose the cheapest effective route for your wall’s finish and stain severity.
Professional Service Pricing
1 clear way to decide whether to hire a pro is to line up the real costs: labor and service fees, travel or disposal charges, and any guarantees that affect long-term value.
Compare professional service cost to DIY supply expenses and repainting.
Consider pricing factors like time, stain severity, warranty, and paint matching.
Choose the option that minimizes total cost and risk.
Troubleshooting: Stubborn Stains That Resist Every Method
Even when you’ve tried every trick in the book, some permanent marker stains cling stubbornly to walls—but don’t give up yet.
You’ll assess stubborn stains, try varied cleaning techniques, and protect paint. Prioritize gentle steps, then escalate carefully:
- Re-evaluate product compatibility.
- Spot-test stronger solvent.
- Consider professional restoration if paint weakens.
How to Safely Use Heat (Hair Dryer) to Soften Marker
If stronger solvents or gentle scrubbing haven’t budged the ink, heat can help soften permanent marker for easier removal—use a hair dryer on low to medium heat, keep it moving, and hold it several inches from the wall to avoid overheating paint.
Test a hidden spot first, aim for brief heat application, then blot softened ink with a microfiber cloth and repeat as needed for safe marker removal.
Avoiding Common Mistakes That Strip or Dull Paint Finish
Many common cleaning mistakes will strip or dull your paint finish quickly, so take a careful, measured approach: avoid abrasive scrubbers, harsh chemicals, and prolonged soaking.
Test products in an inconspicuous spot, and stop at the first sign of finish damage.
- Use gentle cleaning techniques.
- Prioritize paint protection with mild solvents.
- Blot, don’t rub; monitor finish constantly.
When to Re‑Inspect Walls After Cleaning Attempts (Timing Guide)
After you finish a cleaning attempt, give the wall a little time before checking your work—most solvents need several minutes to lift stains and another few minutes to evaporate so you can see the true result.
Wait 10–15 minutes for re inspection timing, then reassess under good light.
Repeat only as needed, keeping wall cleaning frequency low to avoid paint wear; space attempts 30–60 minutes.
Preventing Marker Incidents: Tips for Kids and Markers
Because kids are curious and markers are tempting, set up clear boundaries and easy alternatives so incidents hardly happen in the first place.
You should use marker supervision and offer creative alternatives to protect walls. Follow these steps:
- Provide washable markers and paper zones.
- Teach rules and praise good choices.
- Store permanent markers out of reach and lock up supplies.
Documenting Damage and Repair Steps for Landlords or Insurance
When you find permanent marker on a rental wall, act quickly and document everything for landlords or insurers:
Take dated photos from multiple angles, note the marker color and affected area measurements, and record the time you discovered it and any steps you took to clean or contain the stain.
Keep concise damage documentation and create repair records listing materials, costs, contractor contact info, and dates for claims.
Real‑Life Examples: Short Case Studies and Before/After Results
Good documentation makes it easier to learn from real cases, so let’s look at a few short examples showing what works and what doesn’t.
Good documentation helps you learn from real cases—brief examples show what works and what doesn’t.
You’ll see marker removal techniques tested in successful case studies with clear before/after photos and notes.
- Small scribble: mild solvent, no paint loss.
- Dark streak: repeated gentle cleanings.
- Large mark: spot primer then touch-up.
Recommended Products by Paint Type and Stain Severity
For each paint type and stain severity, pick products that match the finish and the marker’s permanence so you don’t damage the wall while removing the ink.
For flat or matte paints, start with gentle cleaners (mild soap, magic eraser alternative).
For eggshell/semi-gloss, use isopropyl alcohol or baking soda paste.
For severe stains, consider commercial solvent removers.
These product recommendations minimize risk.
Resources: How‑To Videos, Manufacturer Guides, and Supply Links
Although you can often remove marker with common household items, you’ll get better, safer results by watching a few short how‑to videos, checking manufacturer cleaning guides, and using supplier links to buy the right products.
Get better, safer marker removal: watch short how‑to videos, check manufacturer guides, and buy the right products.
Use these resources to follow proven steps and choose safe cleaners and tools.
- video tutorials
- manufacturer guides
- product recommendations
Frequently Asked Questions
Can Permanent Marker Bleed Through Latex Paint to the Drywall Underneath?
Yes — it can. You’ll find some marker types penetrate poorly cured or low paint durability, so ink may bleed through to drywall. You’ll want to test, seal, or strip affected layers before staining spreads.
Will Marker Removers Affect Wallpaper Adhesives or Printed Wallpaper Designs?
Yes — you’ll risk damaging wallpapers: removers can weaken adhesive strength and fade printed designs. Test on an inconspicuous spot first, choose gentle solvents for delicate wallpaper types, and blot rather than rub to minimize harm.
Can I Safely Remove Marker From Painted Ceilings While Standing on a Ladder?
About 70% of ladder accidents involve falls—so yes, you can safely remove marker from painted ceilings if you prioritize ladder safety, secure a stable ladder, use gentle cleaners, and protect the ceiling with soft cloths for ceiling protection.
Do Any Removal Methods Void My Home Insurance or Warranty on Paintwork?
Generally, they won’t, but you should check your insurance policies and paint warranties because using harsh solvents or causing DIY damage can void coverage or warranty claims, so don’t use unapproved chemicals and document approved repairs.
How Do I Remove Marker From Painted Metallic or Enamel Radiators?
You’ll gently use isopropyl alcohol or a magic eraser for marker removal techniques on painted metallic or enamel radiators; test first, work in small areas, rinse and dry, and follow radiator cleaning tips to avoid damage and streaks.
Conclusion
You can usually remove permanent marker from painted walls without ruining the finish if you work carefully, test first, and pick a method suited to your paint type. For example, a renter in Boston used isopropyl alcohol on a hidden patch, gently wiped away a small scribble, then touched up the tiny dull spot with matching paint—no landlord dispute. Stay patient, ventilate, wear gloves, and document before/after for landlords or insurance.