How to Hang a Big Painting on the Wall Safely
You’ll protect your art and wall by locating studs, measuring the painting, and estimating its true weight (frame, glass, hardware) before you lift it. Choose anchors or a French cleat rated for that load and match them to your wall type—drywall, plaster, or masonry—and use two people for large pieces. Reinforce weak frames, use corrosion‑resistant screws, and test stability. Follow these steps and tips now, and you’ll find detailed methods and safety checks to finish the job right.
How to Safely Hang a Large Painting: Step‑By‑Step
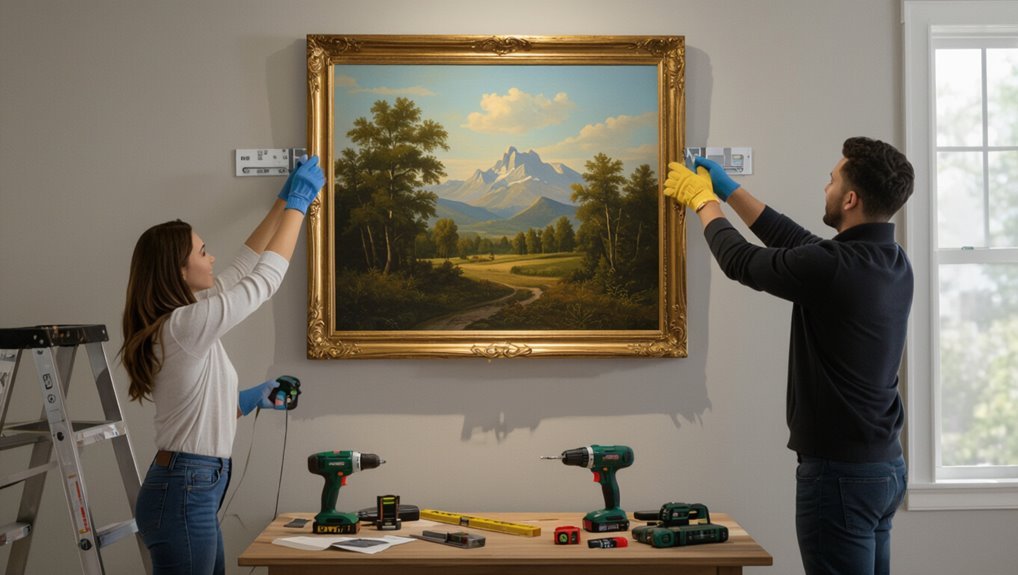
Before you start, gather the right tools and check the wall so the mounting will be secure: a stud finder, level, tape measure, pencil, appropriate anchors or screws, and someone to help hold the painting.
You mark height, locate studs, measure spacing, and choose anchors.
With careful wall preparation and art safety in mind, you drill, fasten hardware, and hang the piece, then confirm level and stability.
Does Your Painting Need Special Mounting?
Wondering if your painting needs special mounting? Check its age, frame integrity, and value—fragile canvases or heavy frames often require reinforced hangers or French cleats to protect art preservation.
If you rent or have delicate plaster, choose mounts that minimize wall damage and allow safe removal.
For mixed-media or irregular backs, consult a framer to tailor hardware and prevent stress to the piece.
Measure the Painting and Estimate Its Real Weight
Start by measuring the height and width of the frame so you know the exact dimensions you’re working with.
Then estimate the actual hanging weight by accounting for the frame, glass or canvas, backing, and any hardware.
That weight determines the type of anchors and hangers you’ll need to keep the painting secure.
Measure Height And Width
Once you’ve got the painting on a flat surface, measure its height and width with a tape measure and note the depth at the frame or stretcher bars; these three dimensions tell you how much wall space it will occupy and help you decide placement.
Use those measurements to plan hanging techniques, mark stud locations, and visualize proportions so wall stability and sightlines are ideal.
Estimate Actual Hanging Weight
With the painting measured, the next step is to estimate how much it actually weighs so you can pick appropriate hardware.
Weigh canvas, frame, glass, and hanging hardware separately if possible, then add.
Consider weight distribution—heavy frames shift loads; wider D-rings or two-point hangers improve painting stability.
Round up for safety, and choose anchors and screws rated above that estimated total.
Identify Your Wall Type: Drywall, Plaster, Concrete, Brick
Before you pick hardware or mark drill points, figure out what type of wall you’re dealing with—drywall, plaster, concrete, or brick—because each needs different anchors and techniques. Check drywall types, plaster characteristics, concrete textures, and brick surfaces to choose anchors and tools that match.
| Wall Type | Look | Recommended Anchor |
|---|---|---|
| Drywall | Smooth | Toggle/anchor |
| Plaster | Cracks | Molly screw |
| Concrete/Brick | Rough | Masonry anchor |
Why Finding Studs Matters for Heavy Paintings
Because studs are the structural backbone behind your wall, you get far more secure support for heavy paintings when you anchor into them rather than rely on drywall alone.
You’ll protect art, prevent accidents, and honor wall stability importance by choosing anchors that engage framing. Learn stud location techniques before hanging so you don’t risk damage or injury.
- Relief: safety preserved
- Pride: handiwork secured
- Calm: worry removed
Quick Ways to Locate Studs Accurately
Start by running a stud finder across the wall; it’ll give you fast, reliable marks for where to anchor your hardware.
If you don’t have a detector, check around electrical outlets—studs are usually beside them and can guide your placement.
Mark the spots, then confirm with a small pilot hole before you hang the painting.
Use A Stud Finder
A stud finder is the quickest, most reliable tool for locating the vertical framing behind drywall, and using one properly will save you time and prevent guesswork when hanging a heavy painting.
You’ll scan slowly, mark multiple stud location points, and double-check edges.
Use stud finder tips: calibrate, move steadily, confirm with a small pilot hole.
- Relief
- Confidence
- Pride
Check Electrical Outlets
Wondering where the studs sit without dragging out a stud finder? Check nearby electrical outlet location: outlets are usually mounted to studs’ side.
Remove the cover, look for the screw or box edge, then mark vertically above it to find the stud line.
Turn power off first for electrical safety, use a flashlight, and patch the small hole after marking.
When to Call a Pro for Structural or Load Issues
If your wall shows cracks, bulging, or you suspect the studs or drywall can’t handle the weight, call a professional before you hang the painting.
You’ll want a professional assessment of structural integrity and load capacity; they’ll verify safety protocols, recommend reinforcement, and prevent damage or injury.
- Fear of collapse
- Relief from uncertainty
- Confidence in safety
Choose Hanging Hardware by Weight and Wall Type
When choosing hardware, match the painting’s weight and your wall type so your fasteners actually hold—wood studs take heavy-duty screws or lag bolts, drywall alone needs anchors rated for the load, and masonry calls for masonry anchors or sleeves.
You’ll assess hanging hardware options and wall type considerations, measure weight, locate supports, and pick appropriately rated fasteners so the artwork stays secure and level.
Anchors vs. Screws vs. Bolts: Which to Use?
For drywall, you’ll typically use anchors to spread the load and prevent the fastener from pulling out.
If you’re screwing into studs or a wooden surface, screws are strong and simple.
For brick, concrete, or stone, you should use masonry bolts or anchors made for that material.
Anchors For Drywall
Although screws can hold light frames, anchors give you the extra grip drywall often lacks, and bolts are reserved for the heaviest pieces or studs.
Choose anchors based on drywall types and anchor materials; toggle, molly, and plastic anchors each suit different loads. Pick one that matches weight and wall feel so your painting stays secure and you stay calm.
- Fear of failure
- Relief of safety
- Pride in craft
Screws For Wood
1 good screw in solid wood will hold far more than a drywall anchor ever could, so you’ll usually choose screws when you can hit a stud or a wooden surface.
Pick screw types appropriate to load and finish, predrill to avoid splitting, and check weight ratings for your painting.
Use longer, thicker screws for heavy pieces and install into center of studs for best support.
Bolts For Masonry
When you can’t hit wood and your wall’s made of concrete, brick, or block, bolts and masonry anchors give you the reliable hold screws won’t.
You should choose bolt types for weight, drill correct hole size, and follow masonry installation steps. Use expansion anchors or sleeve anchors for heavy frames, and torque bolts to spec so the painting stays safe.
- Relief: secure confidence
- Pride: flawless display
- Calm: no sagging
Best Picture Hooks and Hangers for Heavy Frames
Choosing the right hooks and hangers is the single most important step to keep a heavy frame secure and your wall intact.
Match hook capacity to picture weight, consider frame materials and distribution of load, and use hangers rated above the expected weight.
Opt for heavy-duty, corrosion-resistant hardware, drive anchors into studs or proper masonry, and check periodically for loosening.
Compare D‑Rings, Hanging Wire, and Cleats
D‑rings, hanging wire, and cleats each handle weight and alignment differently, so pick the one that matches your painting’s size, weight, and wall type.
You’ll choose based on D rings advantages for stability, Hanging wire pros for slight adjustability, and Cleat benefits for rigidity.
Always check Weight considerations and wall anchors before mounting.
- Pride when it’s perfect
- Relief when it’s secure
- Joy every time you look
When to Use a French Cleat
If your painting is heavy, large, or you want perfectly flush, secure mounting, use a French cleat—its interlocking boards spread weight across studs and keep the piece rigid and level with minimal fuss.
You’ll choose this when weight, security, and alignment matter.
Learn French cleat benefits and follow straightforward French cleat installation steps: locate studs, cut matching angles, screw both halves securely, then hang and level.
Preparing Glass‑Covered or Delicate Works for Hanging
When you’re dealing with glass-covered or delicate works, take extra steps to protect both the piece and anyone who moves it: secure the glass, pad fragile edges, and plan a mounting that prevents pressure points or rattling.
Handle glass-covered and delicate works with care: secure glazing, pad edges, and mount to avoid pressure or rattling.
You’ll handle these pieces with care, prioritize glass safety and artwork preservation, and communicate risks to helpers.
- Heart-stopping fragility
- Quiet reverence
- Protective resolve
Reinforce Frames: Backing, Braces, and Best Practices
Before you hang that large piece, add a rigid backing to protect the canvas and keep the frame square.
Install corner braces to prevent twisting and distribute stress at the joints.
Finally, use proper hanging hardware rated for the painting’s weight so your work stays secure.
Add Rigid Backing
Adding a rigid backing is one of the most effective steps you can take to keep a large painting square, stable, and safe on the wall.
Choose rigid materials like plywood or foamboard; match backing types to frame size and weight. You’ll reduce warping and protect the canvas.
- Feel secure every time you glance.
- Enjoy calm, confident display.
- Protect memories with pride.
Install Corner Braces
Bolt on corner braces to lock a large frame square and keep your canvas from twisting or loosening over time.
Choose appropriate corner brace types—L-brackets, flat braces, or adjustable metal plates—matching frame size and weight.
Use precise installation techniques: pre-drill pilot holes, countersink screws, and clamp braces flush.
Check squareness and tighten evenly so the frame stays rigid without stressing the stretcher bars.
Use Proper Hanging Hardware
Secure your painting with the right hanging hardware to protect both the artwork and your wall. You’ll reinforce frames with sturdy backing, D-rings, and braided wire.
Follow hanging techniques that match weight, and take safety precautions like anchoring into studs. Use braces for corners and test mounts before release to avoid accidents and preserve your piece.
- Pride in a secure display
- Relief from worry
- Joy in lasting beauty
Choose Screwdrivers, Drills, and Drill Bits for Hanging
Before you start drilling, pick tools that match the wall type and the painting’s weight so the fasteners you install will actually hold.
Choose screwdriver types (Phillips, flat, and square) that fit screws to avoid stripping.
Use the correct screwdriver heads—Phillips, flat, or square—to fit screws snugly and prevent stripping.
Match drill sizes to anchors and screws; use a hammer drill for masonry and a cordless drill for drywall.
Keep sharp, appropriate drill bits and extra tips handy.
Where to Hang: Eye Level and Composition Rules
Where should you hang your painting so it looks intentional and feels right in the room?
You’ll aim for eye level as a baseline, then follow composition rules for balance with furniture, focal points, and sightlines.
Position to invite viewing, not obstruct movement. Consider scale, lighting, and nearby elements to enhance mood.
- Warmth: invites coziness
- Drama: demands attention
- Calm: soothes the space
Measure and Transfer Hanging Points to the Wall
Start by finding and marking the center of the frame so you know where your hanging hardware should line up.
Measure from that center to each anchor point on the frame, then record those distances.
Transfer those measurements to the wall and mark the anchor spots before you drill.
Mark Frame Center
1. You’ll mark the frame center precisely: measure width, find midpoint, and note center measurement on the top rail.
Check frame alignment against the wall level so the painting hangs true. Don’t guess — mark clearly for the next step.
- Pride in a perfectly centered piece
- Relief knowing it won’t tilt
- Joy when it transforms the room
Transfer Anchor Measurements
Now that you’ve marked the frame center and confirmed it’s level, measure from that mark to each hanging point on the back of the frame and transfer those distances to the wall. Use reliable measurement techniques, note anchor types, and mark pilot holes. Confirm with a level before drilling.
| Distance | Wall mark |
|---|---|
| Left | ✔ |
| Right | ✔ |
Use a Level and Plumb Line to Keep the Painting Straight
Once you’ve marked the hanging points, use a level and a plumb line to make sure the painting sits perfectly straight; the level checks horizontal alignment while the plumb line confirms vertical true, and together they prevent the subtle tilt that makes a big piece look off.
Check level calibration, hang temporarily, then step back and adjust until perfect.
- Pride at symmetry
- Calm from order
- Joy in balance
Install a Stud Screw or Lag Bolt: Step‑By‑Step
First, locate studs accurately with a reliable stud finder so your fastener has solid backing.
Pick the correct stud screw or lag bolt size and length for your wall type and the painting’s weight.
Then drill a pilot hole and securely tighten the bolt so the hanger sits flush and stable.
Find Studs Accurately
Before you drill, locate the stud precisely so your screw or lag bolt bites into solid framing instead of just drywall.
Use stud finder techniques reliably, confirm stud spacing (typically 16″ or 24″), and tap to verify a solid sound.
Mark center and recheck before drilling.
- Relief knowing it’s secure
- Confidence in every strike
- Pride in a job done right
Choose Correct Fastener
Now that you’ve located the stud, pick a fastener sized for the painting’s weight and the stud material—typically a 2.5″–3.5″ wood screw for moderate loads or a 3/8″ lag bolt for heavier pieces.
Make sure the diameter and length let the threads bite fully into the framing behind the drywall. Choose appropriate fastener types, match load ratings, predrill a pilot hole, and follow basic installation tips for secure, long‑term support.
Drill And Secure Bolt
Grab your drill and the properly sized screw or lag bolt. Position the bolt over the marked stud spot, and drive it in slowly so the threads bite evenly and the head sits flush with the hanger or mounting plate.
Use steady drill techniques, check alignment, and test pull to verify secure installation.
- Relief at a job done right
- Pride in lasting safety
- Calm confidence
Use Toggle Bolts or Molly Anchors in Drywall: Steps
Whether you’re hanging a heavy painting or a long shelf, using toggle bolts or molly anchors gives drywall the strength it needs. Use stud finder, drill correct hole, insert anchor, expand/tighten, then hang. Know toggle bolt benefits and molly anchor types before choosing.
| Step | Tool | Tip |
|---|---|---|
| 1 | Stud finder | Locate cavity |
| 2 | Drill | Right bit |
| 3 | Insert | Push anchor |
| 4 | Expand | Tighten bolt |
| 5 | Hang | Check level |
Drill and Anchor Into Masonry: Step‑By‑Step
When working with masonry, pick a carbide masonry bit that matches your anchor diameter so holes are the right size.
Mark the spot, clamp a guide if needed, and drill straight and steady to the proper depth.
Tap the anchor in until it’s flush and secure before hanging the painting.
Choose Correct Drill Bit
Picking the right drill bit is the single most important step before you start drilling into masonry, because the bit type and size determine hole integrity and anchor grip.
You’ll choose between carbide masonry bits and SDS types, matching drill bit types to anchor specs and drill bit sizes to the anchor diameter so anchors hold securely.
- Relief: confidence you won’t fail
- Pride: a job done right
- Calm: no unexpected falls
Mark And Drill Precisely
Now that you’ve matched the right bit and anchor, it’s time to mark and drill precisely so the anchor sits true and the painting won’t shift.
Use simple marking techniques: measure twice, level once, and pencil-dot the center. Clamp a guide or use tape for cleaner edges.
Follow drilling tips: start slow, maintain perpendicular alignment, clear dust frequently, and stop at correct depth.
Insert Anchor Securely
Although masonry can feel unforgiving, you can set anchors securely by taking steady, methodical steps and keeping alignment true.
Choose appropriate anchor types, drill the correct diameter, and clear dust. Tap anchors flush, tighten slowly, and test hold before hanging.
Follow installation tips to avoid cracks and slippage.
- Relief when it grips
- Confidence in alignment
- Pride in a safe finish
Mount Multi‑Panel and Gallery Groupings Securely
When you hang multi‑panel artworks or gallery groupings, plan the layout and anchoring before you touch the wall so each piece aligns and stays secure.
Measure and mark spacing, use a level and template, and choose anchors rated for total weight.
Install a rail or French cleats for multi panel arrangements, or use matching hangers for a cohesive gallery layout to keep panels straight and stable.
Hang Very Large Canvases With Minimal Wall Damage
Before you pick up the canvas, check what your wall is made of and locate studs or masonry so you know what it can bear.
Use the right anchors or bolts for that material—toggle bolts for hollow walls, masonry anchors for brick or concrete—to keep the load off the drywall.
Protect the finish with padding, felt pads, or small plywood backing so the hardware won’t chip or dent the surface.
Assess Wall Structure
Since a very large canvas concentrates weight and stress on a few points, start by identifying what your wall is made of and where its studs or solid backing lie.
Check wall integrity visually and with a stud finder, and gather installation tools before you begin.
- Relief when studs hold firm
- Anxiety eased by clear planning
- Confidence from solid preparation
Use Anchors Or Bolts
Now that you’ve located studs or solid backing, choose anchors or bolts sized for the canvas weight and wall material to keep the load off fragile drywall.
Use heavy-duty anchor types like toggle, molly, or sleeve anchors where studs aren’t available.
Select bolt materials—stainless steel or galvanized—for corrosion resistance and strength.
Torque securely, double-check level, and hang with two fasteners for stability.
Protect Wall Finish
Although the hardware and studs will carry the weight, you’ll want to minimize scuffs, scratches, and paint stress where the canvas meets the wall; use felt pads, a French cleat system, or a narrow plywood ledger to distribute pressure and keep the finish intact.
You’ll protect wall finish protection and prevent surface damage while keeping art stable and pristine.
- Pride in preserved walls
- Relief from worry
- Joy in flawless display
Anti‑Tilt and Earthquake Hardware for Extra Security
When you want extra protection beyond a sturdy hanger, anti-tilt and earthquake hardware keeps large paintings from tipping or sliding during vibrations or a quake.
You should install anti-tilt mechanisms at the frame base and secure earthquake straps to studs or masonry.
Use adjustable, tested products, follow manufacturer torque and weight ratings, and test stability gently after installation to guarantee proper restraint.
Protect Walls and Floors During Installation
Start by laying down a drop cloth or cardboard to catch dust, paint chips, and scratches, and put felt pads or a soft blanket where the frame or ladder might rest against the wall.
Lay down a drop cloth or cardboard, use felt pads or a soft blanket to protect walls and floors.
You’ll protect wall protection points and use sturdy floor coverings. Guard edges, tape down covers, and keep tools organized to prevent slips and dents.
- Relief: safe and calm
- Pride: cared-for space
- Confidence: damage avoided
Two‑Person Lift Techniques for Heavy or Awkward Pieces
With the floor and wall protections in place, bring in a partner before you handle any heavy or awkward piece—lifting solo increases the risk of drops, strains, and damage.
You’ll use team coordination, clear communication strategies, agreed positioning tips, and specific lifting techniques.
Focus on balance points, leverage methods, and safety precautions, rehearsing practice lifts so you both move smoothly and prevent accidents.
Using Temporary Supports While You Fasten the Painting
Use stable temporary supports like padded brackets or adjustable stands so the frame won’t slip while you work.
Position the supports to balance the weight evenly, checking that the painting sits level before you let go.
Once it’s held securely, fasten your permanent hardware without rushing.
Choose Stable Temporary Supports
Clamps, a sturdy ladder, or a helper can hold the painting steady while you attach permanent hardware, so pick supports that match the weight and size of the piece.
Use solid temporary supports for painting stability, and test each one briefly before letting go.
Stay calm, focused, and safe.
- Relief when it’s secure
- Pride in careful work
- Comfort knowing it won’t fall
Position Supports For Balance
Start by setting two or three temporary supports so the painting rests evenly and won’t tilt while you work. Use simple balance techniques and non-slip support materials like foam, blocks, or wedges. Check level frequently and adjust supports to distribute weight. Keep hands clear when you fasten.
| Support | Purpose |
|---|---|
| Foam | Cushion |
| Block | Height |
| Wedge | Angle |
| Clamp | Hold |
| Pad | Protect |
Secure Painting Before Fastening
Before you tighten any hardware, set two or three temporary supports under the painting so it stays perfectly aligned while you work.
You’ll steady the frame, verify level, and prevent scratches as you secure painting to the wall.
Keep hands clear, check fasteners, then remove supports.
Use temporary supports until bolts feel solid and the artwork won’t shift.
- Relief
- Pride
- Calm
Common Mistakes That Cause Falls and How to Avoid Them
Because most falls happen from simple oversights, you can prevent them by recognizing the common mistakes: using the wrong hardware for your wall type, misjudging the painting’s weight, relying on a single fastener, and ignoring quality of anchors or frames. Use common pitfalls awareness and safety precautions.
| Mistake | Risk | Fix |
|---|---|---|
| Wrong hardware | Slip | Match wall |
| Underestimate weight | Pull-out | Weigh |
| Single fastener | Fall | Use multiple |
| Cheap anchors | Fail | Upgrade |
| Poor frame | Bend | Reinforce |
Quick Checklist to Verify a Secure Installation
When you’ve finished hanging the painting, run through a concise checklist to confirm every component is secure:
You’ll want clear checklist items that reassure you the frame, hardware, and wall anchors are holding.
Test gently, listen for creaks, and feel for movement so you can trust the result.
- Touch the frame; imagine relief.
- Inspect anchors; breathe easier.
- Tug slightly; smile.
Inspecting and Maintaining Mounts Over Time
As your painting settles into its spot, keep checking the mounts at regular intervals so small issues don’t become big problems: look for loosening screws, frayed wire, bent hooks, or anchors shifting in the wall, and note any new creaks or tilt.
Schedule mount inspections every few months, tighten fittings, replace worn hardware, and follow simple maintenance tips to prevent failure and keep the artwork secure.
What to Do If a Hanger Fails or Wall Shows Damage
If a hanger fails or you spot wall damage, first make sure the area is safe and remove the painting and anyone from beneath it.
Take out loose screws, nails, or anchors so they don’t cause further harm.
Then assess the damage and repair or reinforce the wall and hardware before rehanging.
Assess Immediate Safety
What should you do right away if a hanger fails or the wall looks damaged? Stop, step back, and perform a quick risk assessment; prioritize safety precautions for people and pets.
Check for falling hazards, electrical concerns, and structural instability. If unsure, evacuate the area and call help.
- Heart racing, hands trembling
- Fear of injury or loss
- Urgent need for certainty
Remove Loose Hardware
Start by carefully removing any loose hardware so the area stops posing an immediate risk. You should wear gloves and eye protection, document damage, and set fasteners aside for hardware inspection.
Don’t yank pieces from the wall; loosen screws gently. Follow safety precautions to keep the painting and people safe, then pause before planning repairs or reinforcement.
Repair And Reinforce
When a hanger fails or the wall shows damage, stop and assess the problem before hanging anything else.
You’ll inspect frame stability, remove loose debris, and plan wall preparation.
Repair plaster or drywall, reinforce studs or add a backing, and replace hardware with rated anchors.
Take it slow—your painting and wall deserve secure care.
- Fear of loss
- Relief when fixed
- Pride in protection
Patching and Repairing Holes After Removal
After you remove the painting and hardware, assess the wall for the types and sizes of holes so you can choose the right repair method.
For small nail holes, fill with spackle, sand, and touch up paint.
For larger anchor or drywall damage, use a patch kit or drywall compound and mesh, then sand and prime.
Proper hole patching and wall repair restore a clean finish.
Hang Art in Rentals Without Making Permanent Holes
You can display large art in a rental without drilling permanent holes by using damage-free hanging solutions and strategic placement; command strips rated for the painting’s weight, picture-hanging hooks designed for drywall, and adhesive rails let you mount heavy pieces securely, while leaning the piece on a mantel or console provides a foolproof no-hardware option.
Use removable adhesives and wall safe hooks carefully.
- Feel proud of your space.
- Keep security without sacrifice.
- Enjoy renter-friendly style.
Framed Prints vs. Stretched Canvas: Best Practices
Curious which is right for your space?
You’ll choose framed prints when you want protection, easier hanging hardware options, and a sleeker edge—ideal for fragile paper.
Pick stretched canvas for a lightweight, frameless look that resists warping and often needs D-rings or cleats.
Consider wall type, weight capacity, and how easily you’ll swap or secure the piece for safety.
Lighting and Placement Tips for Safety and Preservation
When placing a large painting, think about light and room traffic together so you’ll protect the work and keep people safe; position art away from direct sun, use soft lighting techniques, and allow clear pathways to avoid bumps.
Use conservation-grade hanging hardware and proven preservation methods to minimize risk and aging.
- Awe when light reveals texture
- Calm knowing it’s secure
- Pride in thoughtful placement
Climate and Humidity Tips for Protecting Paintings
Because paint, canvas, and frames react to moisture, keeping stable temperature and humidity is critical to prevent warping, cracking, and mold; aim for about 18–22°C (65–72°F) and 45–55% relative humidity, and monitor conditions with a reliable hygrometer.
You should use climate control like humidifiers or dehumidifiers to maintain steady humidity levels, avoid rapid swings, and position paintings away from vents, windows, and exterior walls.
Insure and Document Valuable or Fragile Artwork
If your painting is valuable or fragile, document its condition and arrange insurance before you hang it so you’re protected against theft, damage, or environmental loss.
You should photograph, note provenance, and get a written appraisal; follow solid documentation practices and secure art insurance that covers transit and display.
Keep records accessible and share copies with your insurer and emergency contacts.
- Heart-sinking loss avoided
- Quiet confidence restored
- Calm after damage prevented
Cost Estimates: DIY Hardware vs. Professional Install
While you can often save money by buying anchors, wire, and hooks and hanging a painting yourself, compare that with the added cost of a professional installer who brings specialized hardware, structural knowledge, and insurance for heavy or valuable pieces.
You’ll weigh DIY Costs — basic Hardware Options and simple Installation Methods — against Professional Fees, faster, safer results, and reduced liability for valuables.
How to Choose a Reliable Art Installer or Handyman
Start by checking credentials and experience so you know the person you hire can handle heavy or valuable art safely.
Ask for references, verify art installer qualifications, and confirm handyman experience with similar installs.
Get written quotes, insurance proof, and timelines.
Trust your instincts; choose someone who communicates clearly and respects your piece.
- Relief that it’s safe
- Confidence in their skill
- Joy when it’s perfect
Case Studies: Room Setups and Recommended Methods
When you’re planning placements, these brief case studies show real room setups and the mounting methods that worked best for each, so you can match solutions to your space and artwork. You’ll see how room aesthetics and wall considerations guide choices — drywall anchors for living rooms, masonry bolts for brick, and French cleats for high-traffic areas.
| Room | Wall | Method |
|---|---|---|
| Living room | Drywall | Anchors |
| Brick foyer | Masonry | Bolts |
| Hallway | Mixed | French cleat |
Cheat Sheet: Hardware, Weight Limits, and Quick Steps
Those case studies show how wall type and traffic shape your mounting choice, and now you’ll get the quick, practical rundown: which hardware to pick, the weight each option supports, and the basic steps to install it safely.
You’ll learn art placement and safety tips: pick anchors for drywall, screws for studs, toggle bolts for heavy pieces; measure, level, and secure.
- Relief
- Confidence
- Pride
Frequently Asked Questions
Can I Hang a Heavy Painting From a Suspended Ceiling Grid?
No — you shouldn’t hang a heavy painting from a suspended ceiling grid; it won’t support the load. You’ll need to secure to structural members or use anchors that guarantee proper weight distribution and prevent grid damage or collapse.
How Do I Transport a Large Painting Through Narrow Stairwells Safely?
I once slid a framed mirror like a sail through a gale; you’ll use transport techniques and stairwell precautions: pad corners, measure turns, remove doors, recruit a spotter, angle diagonally, keep it upright, and secure with straps for safe passage.
Will Hanging a Painting Affect Home Insurance Premiums?
Yes — hanging a painting can affect premiums if it changes insurance coverage or increases damage liability risk. You should tell your insurer, document value, secure proper hanging, and consider additional coverage or endorsements to avoid surprises.
Can Magnets or Velcro Support a Framed Painting Long-Term?
No, you shouldn’t rely on magnets or Velcro long-term; magnetic strength often won’t hold framed weight and Velcro durability degrades over time. You should use proper hardware and anchors to secure heavy frames safely.
Are There Legal Restrictions for Hanging Art in Commercial Spaces?
Yes — you’ll face zoning, building-code and landlord rules, plus copyright and insurance quirks; don’t pretend “art ownership” erases permits, and check “wall materials” limits, or you’ll pay fines, repair costs, or awkward legal fees.
Conclusion
You’ve done the homework—measured, matched hardware, and picked the right wall—so hang that painting like you mean it. Think of yourself as a ship’s captain: you wouldn’t trust fragile cargo to flimsy rigging, and your wall deserves the same respect. When in doubt, call a pro. With studs found, anchors chosen, and safety checked, your artwork will sit proud and secure—transforming the room without risking a crash landing.