How to Paint Wall to Ceiling Like a Professional
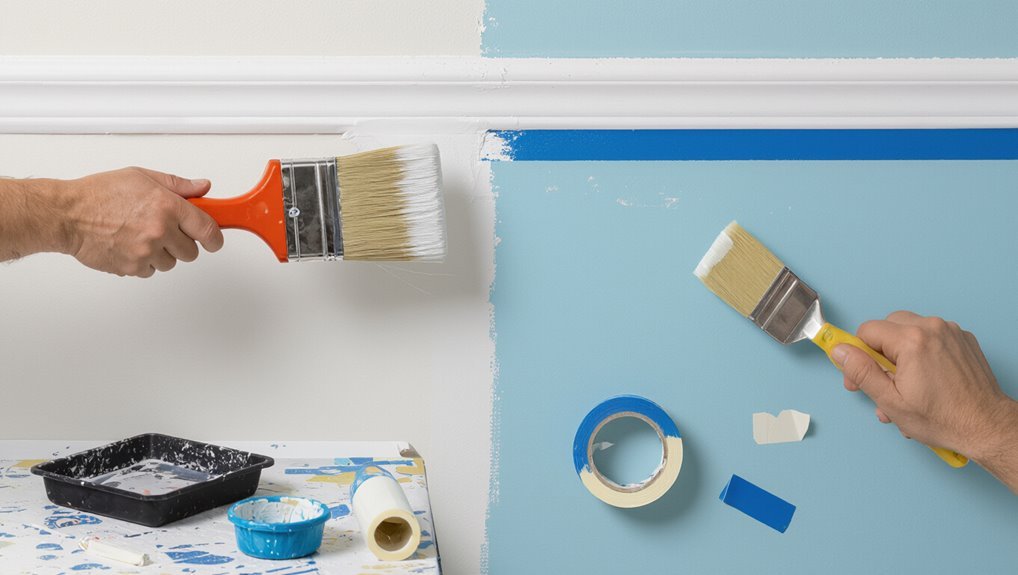
You can get razor‑sharp wall‑to‑ceiling lines by prepping, steady cutting, and the right tools. Clean, sand, and prime surfaces, repair cracks, then tape or use a trim guide where edges need protection. Hold an angled brush like a pencil, use a mini roller to blend, and keep wet edges by working in small sections. Press tape firmly and remove at a 45° angle while tacky. Follow safety steps for high areas, and continue for pro tips and techniques.
When to Cut In vs. Use Tape for Wall-to-Ceiling Lines
Deciding whether to cut in or use tape comes down to the finish you want, your skill level, and how much prep you’re willing to do.
You’ll use cutting techniques when you want control and speed if you’re steady with a brush.
Choose tape alternatives like edging tools or low-tack strips when you need cleaner lines without expert skill or extra sanding.
Choose Brushes, Rollers, and Trim Tools for Wall-to-Ceiling Work
Choosing the right brushes, rollers, and trim tools makes cutting in at the ceiling far easier and gives you a professional edge. You’ll pick brushes for crisp edges, compare roller types for texture and coverage, and use trim tools to steady lines. Choose quality and match tools to paint and surface for clean, efficient results.
| Tool | Purpose | Tip |
|---|---|---|
| Angled brush | Edges | Soft bristles |
| Mini roller | Smooth coverage | 1/4″ nap |
| Trim guide | Steady line | Hold firmly |
Pick the Best Painter’s Tape and Masking Alternatives
After you’ve got the right brushes and rollers, protect ceilings, trim, and hardware with the proper painter’s tape and masking options.
Choose tape types for surface sensitivity—delicate, multi-surface, or exterior.
Use plastic sheeting, paper, and drop cloths as masking techniques for larger areas.
For corners and textured surfaces, opt for low-tack or specialty tapes to avoid damaging finishes when removed.
Apply Tape to Prevent Paint Bleed
Before you lay tape, press it firmly along the edge you want protected so paint can’t seep underneath; run a plastic putty knife or your fingernail over the seam to guarantee full contact, especially on textured or uneven surfaces.
After taping, smooth edges, remove dust, and avoid stretching. Use consistent tape application pressure for bleed prevention.
Remove tape while paint is tacky, pulling at a 45° angle.
Prep Ceilings and Walls: Cleaning, Sanding, and Priming
Before you start rolling, make certain you clean ceilings and walls thoroughly to remove dust, grease, and cobwebs.
Sand any rough spots so the surface is smooth and the paint will adhere properly.
Then apply a quality primer to guarantee even coverage and true color payoff.
Clean Surfaces Thoroughly
Because a smooth, durable finish starts with the surface beneath it, you should clean, sand, and prime ceilings and walls thoroughly so paint will adhere evenly and look professional.
Use surface preparation steps: remove dust, grease, and cobwebs with appropriate cleaning techniques, rinse and let dry, repair imperfections, and sand glossy spots.
Clean surfaces thoroughly to guarantee consistent adhesion and a flawless result.
Prime For Even Coverage
When you’ve cleaned and sanded the surfaces, prime them to seal porous areas and create a uniform base so paint goes on smoothly and needs fewer coats.
Choose a primer that complements your color selection and surface type.
Apply evenly with the right roller technique, cutting in edges first, then rolling in consistent overlapping strokes.
Let primer dry fully before painting.
Fix Cracks, Seams, and Texture That Ruin Straight Lines
Start by properly prepping the surface so patching materials will bond and your lines stay crisp.
Repair cracks and seams with the right filler and feather the edges until they’re smooth and invisible.
Match the surrounding texture before priming so your paint job looks factory-finished.
Prep Surface Properly
One clear step separates amateur and professional-looking paint jobs: prep the surface so cracks, seams, and texture won’t betray your straight lines.
You’ll perform a quick surface inspection, remove dust and loose material, sand high spots, and decide required repair techniques.
Tape vulnerable edges, skim minor texture where needed, and prime repaired areas so paint lays smooth and lines stay crisp.
Repair Cracks Seamlessly
Cracks and uneven seams will shout at the finished job, so you’ll want to address them cleanly before painting.
Do a quick crack assessment: probe edges, widen hairlines slightly, and remove loose debris.
Use an appropriate filler and apply seamless filling technique in thin layers, sanding between coats.
Prime repaired areas, then inspect lines once more so your paint job reads crisp and continuous.
Match Texture Smoothly
Texture makes or breaks the look of your paint lines, so match it carefully before you paint.
You’ll repair seams and cracks, sand lightly, and apply matching joint compound or texture spray. Test on a scrap, feather edges, and sand between coats.
For clean shifts use texture matching first, then color-matched primer and careful paint blending to hide joins and preserve crisp lines.
Set Up Your Workspace for Steady Cutting-In
Set up a clean, well-lit area before you load your brush so you’ll keep steady edges while cutting in.
Arrange tools within arm’s reach, tape protected edges, and remove obstacles to prioritize workspace organization.
Sit or steady your elbow against a ladder rail for balance, keep wiping cloths handy, and breathe slowly to maintain a steady hand for consistent, crisp wall-to-ceiling lines.
Master the Two-Step Hand-Cutting Technique for Wall-to-Ceiling Lines
Start by cutting a thin guide line along the ceiling edge. Then follow with a slightly wider pass to fill and smooth the line—this two-step approach gives you crisp, even wall-to-ceiling joints without relying on tape or a steady hand alone.
You’ll practice cutting techniques that control paint load and angle, and prioritize brush selection for clean edges, consistent pressure, and minimal touch-ups.
Use an Angled Sash Brush Like a Pro
Choose the right angled sash brush for the job so you get clean lines and consistent coverage.
Hold the brush like a pencil with a relaxed grip to control strokes and pressure.
Use short, confident cutting-in motions to blend edges without excess paint.
Choose The Right Angle
Want cleaner edges and fewer touch-ups? Choose the right angle to guide paint smoothly along the joint.
Test angle techniques on scrap trim to see coverage and control. Pair that stance with proper brush selection—an angled sash brush sized to the trim—so paint lays flat without drips.
Adjust angle slightly as you progress to maintain a crisp, consistent line.
Master Brush Holding
A good grip on an angled sash brush makes precise strokes feel effortless, so hold it like a pencil about an inch or two from the ferrule and let the bristles lead the cut-in.
You’ll control edges and flow through steady brush grip and confident hand positioning.
- Calm — you feel control.
- Proud — lines look clean.
- Focused — work feels intentional.
Perfect Cutting-In Technique
Sharp corners and clean edges make a room look finished, and cutting in with an angled sash brush gives you that control.
Position the brush with consistent brush angles, load it lightly, and steady your wrist. Use short, confident strokes, feathering the edge into the ceiling.
Practice cutting techniques along trim before tackling whole walls to build speed and accuracy.
Roller-and-Brush Combo for Speed and Clean Edges
Combining a roller with a brush speeds the job and gives you crisp edges without extra touch-ups.
So start by cutting in the trim and corners with a steady brush before rolling the field.
Use a consistent roller technique and prioritize edge precision to blend brush strokes into the rolled surface, keeping lines sharp and fast.
- Relief: confidence
- Pride: flawless
- Joy: clean finish
Reverse-Tape Method for High-Contrast Ceilings
When you’re painting a high-contrast ceiling, try the reverse-tape method to keep crisp lines without constant touch-ups; you’ll apply tape to the ceiling shape first, paint the wall color up to the tape, then remove it and finish the ceiling for a clean, professional edge. Use the reverse tape technique for high contrast painting.
| Step | Action |
|---|---|
| 1 | Tape ceiling edge |
| 2 | Paint wall to tape |
| 3 | Remove tape, paint ceiling |
Keep Drips and Lap Marks Off the Ceiling
When you paint near the ceiling, use a steady brush angle and light pressure to keep bristles from flicking drips up.
Work back toward the cut edge so each stroke blends into wet paint instead of overlapping a dried strip. That way you’ll avoid lap marks and get a clean, uniform finish.
Brush Technique Near Edges
Anyone can end up with drips or lap marks if they don’t control their brush near the ceiling, so learn to load, angle, and feather your strokes to keep paint where it belongs.
You’ll manage brush pressure and edge control by practicing short, light strokes and keeping a clean, slightly loaded brush tip.
- Calm: steady hand
- Confident: soft angle
- Proud: flawless line
Maintain Wet Paint Edges
If you want a clean ceiling and seamless walls, keep the paint edge wet as you work so new strokes blend without lap marks or drips.
Use wet edge techniques: work in small sections, reload your brush or roller before the edge dries, and feather overlaps.
Maintain a steady pace, check for drips immediately, and focus on maintaining consistency in pressure and paint load.
How Many Coats and When to Re-Cut the Edge
Count on most interior walls needing two coats for even coverage, but you’ll decide whether to add a third based on color change, finish, and surface porosity.
Watch paint drying between coats, and let your color selection guide opacity needs.
Re-cut edges when previous coat’s film is tack-free but not fully cured to avoid dragging.
- Relief
- Pride
- Confidence
Clean-Up and Invisible Touch-Ups: Blending and Spot Fixes
Now that your coats are set, you’ll focus on feathering paint edges to blend new work into existing surfaces without hard lines.
Pay attention to matching sheen and texture so touch-ups disappear under different light angles.
Use tiny, targeted spot repairs and the right tool—brush, roller, or sponge—to make fixes invisible.
Feathering Paint Edges
When your brush or roller leaves a hard edge, gently feathering the paint will erase the line and make the repair invisible.
Use subtle feathering techniques and slow, light strokes for seamless blending edges. Work wet-to-wet, soften with a dry brush, and step back to inspect.
- Relief: you’ll feel calm.
- Pride: it looks professional.
- Confidence: you’ll tackle the rest.
Matching Sheen Texture
After you’ve feathered and blended paint edges, matching the sheen becomes the small detail that keeps repairs invisible.
Compare sheen types under the same light, then test small swatches to verify gloss and finish align.
For texture matching, use identical rollers or brushes and light stipple or knockdown techniques as needed.
Work quickly while paint is wet for seamless integration.
Invisible Spot Repairs
Tackle invisible spot repairs by cleaning the area, feathering the edges, and matching both color and sheen so the fix disappears into the surrounding surface.
You’ll prep, test, and blend until invisible repairs yield seamless finishes that calm the eye and restore confidence.
- Relief: small flaws vanish
- Pride: your skill shows
- Calm: room feels whole
Handle Textured Ceilings and Uneven Joints
Deal with textured ceilings and uneven joints by evaluating the surface first so you know whether to skim, sand, or spot-treat.
Small bumps and seams can often be blended with a light sanding and caulk, while heavy texture or pronounced joints may need a thin skim coat of joint compound before priming.
Use textured ceiling techniques and uneven joint solutions: sand, caulk, feather compound, then prime and paint.
Working Safely on Tall Walls and High Ceilings
Once you’ve smoothed seams and prepped ceilings, you’ll face the challenge of reaching tall walls and high ceilings safely.
You’ll need proper safety gear and guarantee ladder stability before every move. Use scaffolding for long jobs, keep tools within reach, and avoid overreaching.
- Respect height fears.
- Trust your equipment.
- Celebrate steady progress.
Seven Cutting-In Mistakes and How to Avoid Them
Cutting in well sets the tone for the whole paint job, and avoiding these seven common mistakes will save you time and give you crisp, professional edges.
Watch for overloading the brush, skimping on quality, wrong angle, rushing, poor tape use, uneven pressure, and skipping practice.
Use cutting technique tips, steady wrist motion, clean edges, and learn from common brush errors to get flawless seams.
When to Call a Pro vs. Finish It Yourself
When should you call a pro and when can you confidently finish the job yourself? Weigh complexity, safety, cost comparisons, and your schedule.
If ceilings are high, damaged, or you lack time, hire help; if prep is minor and project timelines suit you, DIY.
- Pride — you’ll feel accomplished.
- Fear — avoid risky jobs.
- Relief — save money or time.
Quick 6-Step Cheat Sheet for a Crisp Wall-to-Ceiling Line
If you decide to tackle the painting yourself, this quick 6-step cheat sheet will help you get a razor-sharp wall-to-ceiling line without needing pro-level tools.
1) Clean and use wall preparation techniques.
2) Choose ideal color combinations.
3) Tape precisely.
4) Cut with a steady hand.
5) Roll carefully.
6) Remove tape while paint’s tacky for a crisp finish.
Frequently Asked Questions
Can I Paint Textured Ceilings Without Changing Ceiling Paint Finish?
Yes — you can. You’ll use textured ceiling techniques to preserve texture while choosing ceiling paint options that match sheen and adhesion, so the finish stays consistent; test first and use proper rollers and careful cutting-in for best results.
How Does Humidity Affect Dry Time and Edge Crispness?
Think of a slow tide: high humidity levels lengthen dry time and blur edges, so you’ll use drying techniques like dehumidifiers, fans, and thinner coats to speed curing and preserve crisp edges while you paint confidently.
What Paint Finish Hides Wall Imperfections Best Near Edges?
Matte finish hides imperfections best near edges because it diffuses light, though satin finish offers slightly better durability; you’ll choose matte for camouflage and pick satin if you need easier cleaning while accepting more visible flaws.
Can I Use Leftover Paint From Different Brands for Touching up Edges?
A neighbor mixed two leftover brands once and got visible sheen differences, so don’t. You’ll test brand compatibility, thin with same base, and use feathering touch up techniques to blend edges for a near-invisible repair.
How Long Should Newly Painted Edges Cure Before Hanging Artwork?
Wait 24 to 48 hours for typical latex; oil needs up to 7 days for full cure time. Before artwork placement, press a corner lightly—if paint resists denting and feels dry, you can hang frames confidently.
Conclusion
Think of your wall-to-ceiling line as the shoreline between sky and land: with the right tools you’ll paint a calm horizon, but rush it and waves of bleed will muddy the view. You’ve learned when to cut in or tape, which brushes and tapes to trust, and how to prep and stay safe. Walk the edge slowly, correct mistakes like a careful tide, and you’ll leave a coastline so crisp even the gulls would admire it.