How to Remove Paint From Furniture Without Damaging Finish
Act fast: blot fresh paint with a cloth to avoid spreading, then clean latex with soap and water or use mineral spirits for oil-based paint. First identify your furniture finish—varnish, wax, or polyurethane—so you pick a safe solvent. Always test the product in a hidden spot and work gently with plastic scrapers, soft cloths, or fine pads to lift paint without scratching. Rinse and dry, repeat as needed, and keep going to learn careful repair and prevention tips.
Quick Fix: Remove Fresh Paint From Furniture
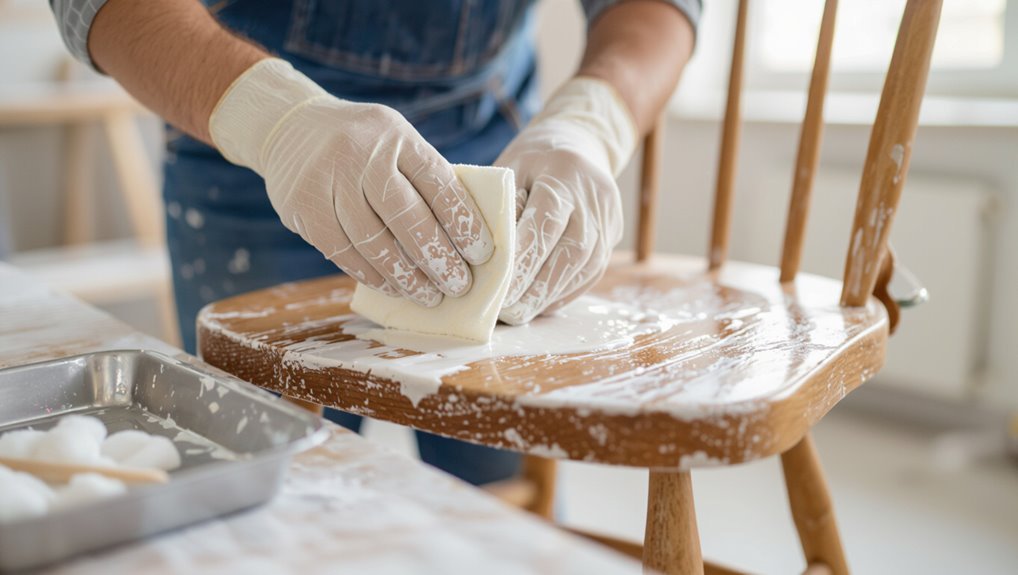
If you just spilled paint on furniture, act fast—fresh paint comes off far easier than dried.
Blot excess with a clean cloth, don’t rub.
Blot up spills gently with a clean cloth—never rub, to avoid spreading or embedding paint.
Use mild soap and water for latex, or a small dab of mineral spirits for oil-based, testing out of sight first.
Rinse, dry, and repeat as needed.
These quick solutions minimize damage and save time.
What Type of Finish Is on Your Furniture?
Wondering what finish your furniture has? You’ll check by touch, sheen, and age—different furniture types use varied finish materials. Match feel to finish before removing paint to avoid damage. Use this quick guide.
| Finish | Feel | Common furniture types |
|---|---|---|
| Varnish | Hard, glossy | Antique wood |
| Wax | Soft, low sheen | Vintage pieces |
| Poly | Smooth, durable | Modern tables |
Identifying Paint: Latex, Oil, or Spray?
How can you tell whether a painted surface is latex, oil, or spray?
Look for clues: latex feels slightly flexible and cleans with water, oil has a hardened, glossy feel and resists water, spray coatings are thin and even.
For paint identification, inspect sheen, smell, and edge build.
Knowing paint types guides removal choices so you protect the underlying finish.
Test a Hidden Spot Safely First
Want to avoid surprises? Always try test methods on hidden areas before treating visible surfaces.
You’ll pick a small, inconspicuous spot—inside a drawer or underside—apply the solvent or remover briefly, then blot and wait. That reveals reaction, adhesion, or finish damage without risking the main piece.
Repeat with any different products you plan to use.
Tools & Supplies for Removing Paint
Before you start stripping, make sure you’ve got protective gear like gloves, goggles, and a respirator to keep fumes and dust off you.
Pick your chemical stripper and tools—scrapers, brushes, and sandpaper—based on the paint type and the furniture’s finish.
I’ll walk you through choosing safe products and the right tools for each situation.
Protective Gear Essentials
Because paint removal exposes you to dust, fumes, and sharp tools, you’ll want the right protective gear on hand before you start. Wear protective gloves, safety goggles, a respirator mask or dust mask, a work apron, knee pads, and use ventilation fans and protective dropcloths to protect yourself and surroundings.
| Item | Purpose | When to Use |
|---|---|---|
| Gloves | Hand protection | Always |
| Goggles | Eye protection | Always |
| Respirator | Fume/dust | Chemical or sanding |
| Apron | Clothing | All tasks |
| Knee pads | Comfort | Low work |
Chemical And Tool Selection
When you choose chemicals and tools, match them to the paint type, the furniture’s material, and the finish you want to preserve; using the wrong stripper or abrasive can damage wood, metal, or veneers.
Assess chemical compatibility with finishes, test a small area, and pick tools for tool effectiveness—plastic scrapers, brass brushes, and fine-grit pads minimize harm.
Follow manufacturer instructions and dispose of wastes properly.
Protecting Your Work Area and Yourself
Set up a clear, well-ventilated workspace and put on the right protective gear—gloves, goggles, and a respirator if you’re stripping solvent-based paint—to keep dust and fumes away from you and your home.
Seal the work area with drop cloths and tape, ventilate continuously, and use a HEPA-filter vacuum for cleanup.
Prioritize personal safety: avoid eating, drinking, or smoking nearby.
When to Call a Professional
If the paint removal has left deep gouges, structural damage, or widespread chemical stains, you should step back and assess the severity before continuing.
When the repair needs specialized tools, refinishing skills, or risk of lowering the furniture’s value, it’s time to hire a professional.
A pro can save you time and prevent costly mistakes on valuable or fragile pieces.
Assess Damage Severity
Start by examining the finish, wood integrity, and hardware to judge how serious the paint problem is—you’ll avoid wasted effort by recognizing when the job exceeds DIY scope.
Use damage assessment to note peeling, deep stains, structural rot, or compromised joints.
Look for severity indicators like unstable veneers, rusted screws, or finish loss over repairs; document findings before deciding next steps.
When To HireProfessionals
Once you’ve documented damage and weighed repair options, decide when the job needs a pro: call an expert if the paint removal risks harming structural integrity, delicate veneers, original finishes, or historic value.
You should seek professional services when stains, layers, or active deterioration exceed DIY skills.
Get an expert evaluation to define scope, costs, and preservation methods before you start.
Soften and Remove Fresh Latex Paint
Trap fresh latex paint quickly by acting while it’s still wet: blot excess with a clean, damp cloth, then apply warm, soapy water to soften the residue.
Gently rub with a soft cloth or sponge, rinsing often. For stubborn spots, use a plastic scraper at low angle.
These fresh paint removal techniques protect finishes and prevent spreading—work carefully until the surface looks clean and damp.
Remove Dried Latex Paint (Gentle Methods)
Start by evaluating how thick the dried latex is so you can choose the least aggressive method that will work.
Test any solvent or remover on an inconspicuous spot to make sure it won’t damage the finish.
If the paint is flaky, use a plastic scraper or a putty knife gently to lift it away.
Assess Paint Thickness
Before you begin removing dried latex paint, take a close look to assess how thick the coating is—this determines which gentle methods will work and how much effort you’ll need.
Gently scrape a small edge with a fingernail or plastic scraper to gauge paint thickness. Use simple measurement techniques—visual layers, edge lift, or calipers for precision—to decide between softening, peeling, or light abrasion.
Test Solvent First
Wondering if a solvent will damage your finish? You should try a small test application in an inconspicuous spot before proceeding.
Use appropriate solvent types—mild water-based or mineral spirits depending on finish—and wait for full drying to inspect gloss, color, and texture.
If damage appears, stop and choose a gentler option or consult a pro; if not, continue carefully.
Use Gentle Scraping
Work slowly and use gentle scraping to lift dried latex without harming the wood or finish. You’ll use gentle scraping techniques and recommended scraping tools to ease paint away.
Steps:
- Soften edges with warm, damp cloth.
- Gently push paint off with a plastic scraper or putty knife.
- Clean residue with mild solvent, then buff finish to restore shine.
Removing Oil-Based Paint From Wood & Metal
Oil-based paint sticks to surfaces and needs stronger solvents and a bit more elbow grease than water-based finishes. You’ll use targeted oil paint removal on wood grain and metal paint stripping for rusted hardware, testing solvents, scraping gently, and finishing with mild cleaner.
| Wood | Solvent | Tool |
|---|---|---|
| Varnish | Mineral spirits | Scraper |
| Metal | Paint stripper | Wire brush |
Removing Spray Paint From Lacquered Surfaces
Before you start, check whether the lacquer finish will tolerate solvents or abrasives so you don’t damage the original coating.
Test any solvent on an inconspicuous spot and wait for it to fully dry to see if the lacquer softens or discolors.
If the test is safe, proceed with gentle removal methods—soft cloths, mild solvent applied sparingly, or light mechanical action—working slowly to preserve the lacquer.
Assess Finish Compatibility
If you’re dealing with spray paint on a lacquered piece, first confirm whether the existing lacquer is solvent- or water-resistant so you don’t damage the factory finish.
You should inspect finish types and perform compatibility testing before proceeding.
- Identify lacquer sheen and age.
- Note previous repairs or topcoats.
- Match remover to lacquer resistance and label instructions.
Test Solvent Spot
Now that you’ve identified the lacquer type and noted any previous work, you’re ready to test a solvent spot to see how the finish reacts.
Choose appropriate solvent types (denatured alcohol, lacquer thinner, or mineral spirits) and apply a tiny amount to an inconspicuous area.
Wait, blot, and inspect for softening, color change, or dulling.
Record results and proceed accordingly.
Use Gentle Removal Techniques
Start by working gently and patiently: when removing spray paint from a lacquered surface, you want to avoid aggressive scraping or strong solvents that can strip the lacquer beneath.
Use gentle solvents and soft cloths, and follow steps:
- Test solvent on hidden area.
- Dab paint with soft cloths, don’t rub hard.
- Rinse and dry, repeating sparingly until clean.
Using Solvents Safely (Acetone, Mineral Spirits, Alcohol)
Solvents like acetone, mineral spirits, and denatured alcohol dissolve different types of paint and varnish, so you’ll choose the one that matches the finish you’re removing and the substrate you’re protecting.
Identify solvent types, test in an inconspicuous spot, wear gloves and eye protection, work in ventilation, and use minimal amounts.
Neutralize residues, dispose rags safely, and stop if finish softens.
Heat and Steam: Nonchemical Methods
While chemical strippers work on many finishes, heat and steam give you a nonchemical alternative that softens paint for scraping or peeling without introducing solvents.
Heat and steam offer a solvent-free way to soften paint for gentle scraping or peeling.
You’ll control steam application and heat settings to protect veneers and inlays.
- Test a low heat setting first.
- Use a steam application tool gently.
- Work small areas, peeling softened paint carefully.
Mechanical Methods Without Scratching
If you want to strip paint without scratching wood, choose tools and motions that prioritize control and even pressure.
Use fine-grit sanding techniques with a sanding block, moving with the grain and testing pressure often.
Combine gentle scraping methods—plastic scrapers, putty knives held shallow—with soft abrasive pads.
Work slowly, check progress, and stop before bare wood shows to protect the finish.
Remove Paint From Stained or Varnished Wood
Removing paint from stained or varnished wood requires care to preserve the underlying finish, so start by testing a small, inconspicuous area to see how the wood responds.
You’ll follow gentle steps for stain removal and wood restoration:
- Soften paint with a citrus stripper, then gently lift with a plastic scraper.
- Clean residue with mineral spirits.
- Lightly sand and touch up finish.
Remove Paint From Painted Furniture Without Stripping the Undercoat
1 simple trick will help you lift top-coat paint without stripping the undercoat: soften the fresh or tacky layer just enough to peel or scrub it away while protecting what’s beneath.
You’ll use gentle heat or a citrus-based remover, test discreetly, and scrape with a plastic tool.
These paint removal techniques prioritize furniture preservation, minimizing abrasion and preserving seam edges and original base color.
Repairing and Protecting the Finish After Removal
Begin by evaluating the exposed surface for nicks, gouges, or residual finish so you know what needs repair before you seal it.
Then follow steps for finish restoration and apply protective coatings appropriately:
- Clean and sand gently to smooth defects.
- Fill and blend with matching filler.
- Seal with thin coats, sanding lightly between layers to guarantee durability and uniform sheen.
Refinish Small Areas Without Repainting the Whole Piece
Touch up small areas by matching finish and blending carefully so the repair disappears into the surrounding surface.
You’ll use fine-grit sanding, stain or tinted varnish, and a small brush or sponge to feather edges.
Practice furniture refinishing techniques on scrap wood, keep solvents minimal, and follow paint removal tips to protect surrounding finish.
Blend coats, let cure, then lightly buff for uniform sheen.
Removing Paint From Upholstery & Fabric Trim on Furniture
Removing paint from upholstery and fabric trim requires more care than working on wood because solvents can stain, weaken fibers, or spread the mess; you’ll want to act quickly, test any cleaner on an inconspicuous spot, and choose a method that matches the paint type and fabric.
- Blot fresh spots with mild soap and water.
- Use solvent cautiously, testing for upholstery care and colorfastness.
- Rinse, blot, and consider professional cleaning for delicate fabric protection.
Preventing Future Paint Accidents and Drips
To avoid repeat mishaps, lay down drop cloths or plastic sheeting before you start painting.
Keep paint cans and brushes properly capped and sealed when you’re not using them to prevent drips and accidental spills.
These simple steps will save you time and keep your furniture cleaner.
Use Drop Cloths
A sturdy drop cloth can save you hours of cleanup and protect floors, rugs, and nearby furniture from accidental splatters and drips; lay it down before you open a can of paint and make sure it extends beyond your work area so stray brush strokes and spills land on fabric, not flooring.
- Choose canvas for reusable drop cloth benefits.
- Secure edges for floor protection.
- Fold for spot coverage and easy removal.
Keep Properly Capped
Keep paint cans capped when you’re not using them to stop drips, spills, and wasted paint.
Seal lids tightly after each use, wipe rims clean, and store cans upright in a cool, dry spot.
That simple habit aids paint preservation, reduces accidental splatters, and protects your workspace.
It’s an easy furniture care practice that prevents damage and saves cleanup time.
Cost and Time Estimates for Common Jobs
Although exact figures vary by project size and method, you can expect typical paint-removal jobs to fall into clear cost and time ranges so you can plan effectively.
Although exact figures vary, paint-removal projects generally fit clear cost and time ranges for planning.
You’ll evaluate cost breakdown, job difficulty, material considerations, tool expenses, labor costs, preparation time, cleanup efforts, and project duration.
Typical examples:
- Small chair: low cost, 1–3 hours
- Table: moderate cost, 3–8 hours
- Cabinet: higher cost, 8–20 hours
Troubleshooting: Discoloration, Blisters, and Next Steps
When you see discoloration or blistering after stripping paint, don’t assume the surface is ruined—these signs usually point to specific causes you can fix.
Identify discoloration causes: tannin bleed, chemical reactions, or uneven sanding.
For blistering solutions, dry thoroughly, remove loose finish, sand lightly, and apply compatible primer.
If stains persist, test a stain-blocking primer or consult a pro before refinishing.
Frequently Asked Questions
Can Paint Remover Harm Antique Finishes’ Value?
Yes — you can damage value if you use harsh strippers; you’re altering original surfaces and historic patina. For antique restoration, test methods, use gentle solvents or mechanical care, and respect original paint effects to preserve worth.
Can Hair Dryers Melt Synthetic Veneers?
Yes, you can melt synthetic veneers with a hair dryer if you overheat them; you should use hair dryer safety, low heat, and keep moving to protect synthetic veneer durability and avoid warping or adhesive failure.
Are There Eco-Friendly Paint Removers That Actually Work?
You’ll breathe easier knowing yes, eco-friendly paint removers work: natural alternatives like citrus, soy, and alkaline gels compare well in effectiveness comparison to solvents, though you’ll sometimes need longer dwell time and gentle scraping.
How to Remove Paint From Hardware Without Removing Patina?
Use gentle paint removal techniques like solvents on cotton swabs, dental picks, or a heat gun on low to lift paint while preserving hardware integrity; you’ll avoid harsh abrasives and test inconspicuously to protect patina.
Can Pets Be Harmed by Common Paint-Removal Residues?
Yes — think of your home as a garden where toxic puddles hide; you’ll protect pets by recognizing residue toxicity, keeping animals away, ventilating, wiping surfaces, and using pet-safe cleaners so their safety isn’t compromised.
Conclusion
You’ve got this—start by identifying the finish, test a hidden spot, and pick the gentlest method that worked in that test. Work slowly with the right tools and cleaners, and don’t rush or you’ll scratch the surface; a stitch in time saves nine. If problems pop up, pause and reassess or call a pro. With patience and care, you can remove paint without ruining the finish and keep your furniture looking great.