How to Paint Bubbles Underwater for Artistic Effects
You’ll start by blocking soft circles or ovals, then build depth with a specular highlight, rim light, and a faint internal sheen; use hard edges for near bubbles and soft edges for distant ones, glazing cool tints for depth and warm highlights for sparkle. Vary sizes and cluster density to suggest buoyancy, keep silhouettes clean, and tweak brush pressure for rhythm. Use heavy cold‑press paper or transparent digital layers for overlays, and keep going to learn more advanced steps.
What You’ll Paint: Single Bubble to Reef Clusters
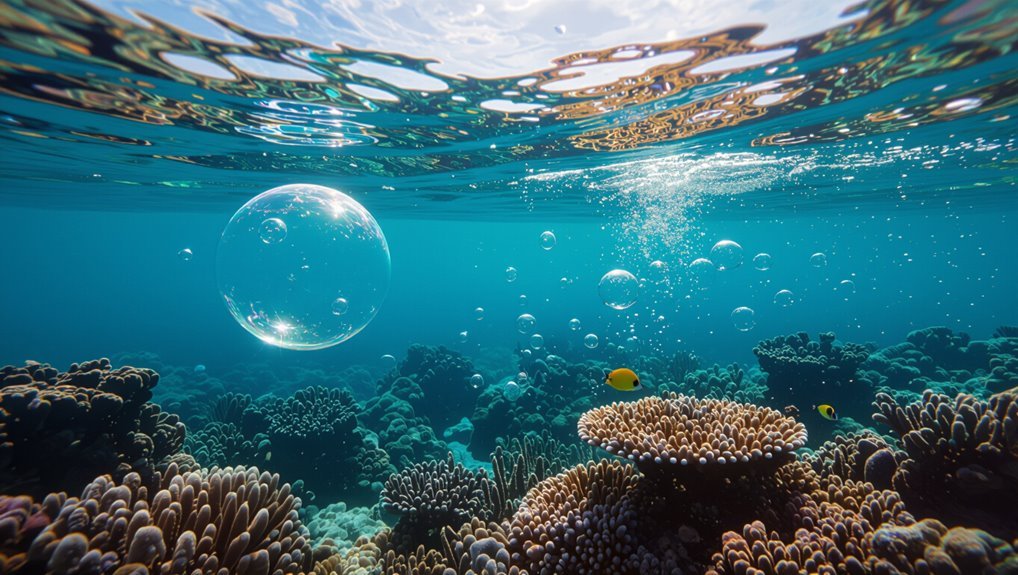
Whether you’re aiming for a solitary sphere that catches the light or a bustling cluster drifting through reef tangles, knowing your subject narrows your approach.
You’ll choose scale, translucency, and reflections to convey mood; bubble symbolism can suggest fragility or joy.
Let artistic inspiration guide composition: single bubbles focus on detail, clusters emphasize rhythm and depth, and both demand careful value and edge control.
Quick, Repeatable Workflow to Paint One Bubble
Start by blocking in the base shape and placement so you know how the bubble sits in the scene.
Then add crisp highlights and subtle reflections to sell the form and water surface interaction.
With that order you’ll get a quick, repeatable result every time.
Base Shape And Placement
When you block in a bubble, think simple: a soft-edged circle or oval that sits where light would naturally gather.
Place shapes with attention to bubble anatomy—thin edge, fuller midsection—and use size and overlap to convey depth.
From an artistic perspective, vary scale and spacing to suggest currents.
Keep silhouettes clean so later layers of highlights and translucency read clearly.
Highlights And Reflections
A quick, repeatable way to add highlights and reflections is to think in three simple marks: a crisp specular highlight, a soft rim light, and a subtle internal sheen—apply them in that order and tweak opacity to taste.
You’ll place the specular where light hits, add rim light opposing background, then paint internal sheen.
Use varied highlight techniques and study reflection dynamics for believability.
Single-Bubble Step-by-Step (Tiny Glittering Cluster Intro)
Start by prepping a tiny glittering cluster as your focal anchor, arranging a few small highlights and soft edges to catch the light.
Then paint the single bubble over that cluster, blocking in its base tone, rim highlight, and subtle inner reflection.
Finish by refining the edges and adding a faint specular sparkle so the bubble reads as both translucent and buoyant.
Preparing The Tiny Cluster
If you want a delicate, single-bubble cluster that glints like a tiny jewel, gather your smallest brushes, a fine-point tool, and a dab of iridescent paint before you begin; having everything at hand keeps you from smudging the wet surface as you work.
- Sketch bubble composition lightly
- Plan cluster dynamics and spacing
- Mix diluted highlights and cores
- Test tiny reflections on scrap paper
Painting The Single Bubble
Now that your tiny cluster is sketched and your highlights mixed, focus on painting the single bubble that will catch the eye. You’ll glaze edges, add reflected color, and sharpen a tiny highlight to suggest bubble symbolism and movement. Let this focal bubble borrow hues from nearby forms—draw on artistic inspirations to make it read luminous and believable.
| Step | Action | Tip |
|---|---|---|
| 1 | Glaze edge | Soft brush |
| 2 | Add color | Reflect nearby |
| 3 | Sharpen highlight | Small round |
| 4 | Soften shadow | Feather stroke |
| 5 | Final check | Adjust contrast |
Painting a Large Reflective Bubble: Step-by-Step
When you paint a large reflective bubble underwater, focus on capturing its form and the way light bends across its surface; emphasize bubble dynamics, light interaction, reflective surfaces, and shape distortion while using color theory and texture variation for underwater ambiance and artistic interpretation to strengthen visual storytelling and composition techniques.
- Plan highlights and mirrored reflections
- Map distortions and edges
- Layer translucent glazes
- Balance surrounding contrast
Types of Underwater Bubbles and When to Use Them
Bubbles come in many shapes and personalities, and choosing the right type will help you tell the story of your underwater scene. You’ll select bubble shapes, sizes, colors, movements, interactions, reflections, textures, dynamics, patterns, and compositions to convey mood.
| Type | Mood | Use |
|---|---|---|
| Small | Calm | Background |
| Large | Dramatic | Focal |
| Cluster | Playful | Motion |
| Foamy | Chaotic | Surface |
Physics That Shapes Bubble Appearance
Because water, pressure, and light all act on bubbles at once, their shapes and surfaces tell you a lot about the forces at play.
You observe bubble dynamics: surface tension versus air pressure, buoyancy effects, and gas composition.
Environmental factors and temperature influence bubble lifespan.
Light refraction hints at the color spectrum without detailing optics—you use these cues to paint believable underwater forms.
- surface tension
- buoyancy effects
- gas composition
- temperature influence
How Underwater Light Affects Bubbles
Although light dims and shifts as it travels through water, it still sculpts every bubble you paint by altering brightness, color, and edge contrast.
You’ll use underwater light to define form: stronger highlights where rays hit, softer gradations elsewhere.
Observe bubble dynamics—specular glints, rim brilliance, internal reflections—and translate those into controlled values and subtle color shifts to sell depth without overworking details.
Choosing the Right Medium for Bubble Effects
You’ll want to pick a medium that bonds well with your painting surface so your bubbles don’t crack or lift.
Consider how transparent each medium is and whether it lets you build subtle layered highlights and reflections.
Test layering behavior so you know which tools give you crisp edges versus soft, diffused forms.
Medium Compatibility With Surface
When planning bubble effects, match your painting medium to the surface so the bubbles sit naturally and last longer. You’ll consider medium types, substrate compatibility, surface textures, and surface preparation to control paint interactions.
Adjust medium viscosity, drying times, and application methods. Use precise layering techniques and blending options for stable results.
- Canvas vs primed panel
- Smooth vs rough textures
- Fast vs slow drying media
- Brushing, glazing, stippling
Transparency And Layering
Because bubbles rely on subtle shifts in light and depth, choose a medium that gives you reliable transparency and predictable layering behavior.
You’ll pick glazes or thin acrylic washes to mimic bubble physics, letting each translucent pass alter color and refraction.
Use deliberate layering techniques: let layers dry, vary opacity, and avoid muddiness so bubbles read as luminous, floating forms within water.
Essential Brushes & Tools for Oils and Acrylics
If you want crisp edges and soft shifts for underwater bubbles, choose brushes that match the effect—rounds and liners for sharp highlights, filberts and flats for soft blends.
You’ll select essential tools for oils and acrylics, consider paint mediums, surface preparation, paint consistency, layering methods, brush techniques, color mixing, texture applications, brush shapes, and cleaning brushes.
Choose the right brushes, mediums, surfaces, and techniques—prepare, blend, layer, and clean for flawless oil and acrylic results
- Round brushes
- Filberts
- Flats
- Liners
Watercolor Tools & Wet-on-Wet Techniques for Soft Bubbles
Pick a heavyweight, cold-pressed paper and a mix of round and mop brushes so you’ve got the absorbency and control needed for soft-edged bubbles.
Practice granulating washes by blending pigment and water on the paper to create texture, then use tilted boards and brush strokes to regulate how the wash pools.
Keep your water load consistent and lift or add clean water sparingly to shape edges without muddying the colors.
Choosing Paper & Brushes
When you want soft, translucent bubbles underwater, start with the right paper and brushes: choose 300–640 gsm (140–300 lb) cold-pressed watercolor paper for good absorption and gentle texture, and use a couple of round brushes—sizes 6–10—and a large mop or wash brush to lay wet fields; these tools let you control the wet-on-wet bleed that creates those delicate, airy edges.
- paper selection: 300–640 gsm cold-pressed
- brush types: rounds (6–10) + mop
- test water load on scraps first
- keep brushes soft and responsive
Mixing Granulation Washes
Now that you’ve settled on paper and brushes, it’s time to mix granulating washes that give bubbles their underwater texture.
You’ll test pigment ratios and water to exploit granulation techniques, layering subtle color shifts.
Use diluted mixes for soft edges and slightly thicker, textured washes for core sparkle.
Keep mixes sparse, label variants, and practice wash applications on scrap before committing to the painting.
Controlling Water Flow
Because water dictates how pigment spreads, controlling flow is the key to soft, believable underwater bubbles; you’ll use a mix of tools—spritzers, blotters, soft brushes, and graded washes—plus deliberate wet-on-wet timing to guide edges, blooms, and the gentle feathering that makes bubbles read as buoyant and translucent.
You’ll manage fluid dynamics to shape water textures and subtle highlights.
- spritzer for controlled diffusion
- blotter to lift blooms
- soft brush to nudge edges
- graded wash for depth and fade
Digital Brushes and Layer Setups (Photoshop/Procreate)
1 useful setup can speed your bubble workflow: pick a few versatile brushes and organize layers by function so you can paint, refine, and adjust without redoing work.
Choose digital brush types for soft edges, hard highlights, and texture. Use layer blending modes for glow, reflection, and occlusion.
Label groups: Base, Light, Rim, Refine, and Effects to keep edits non-destructive.
Quick Brushes and Presets to Speed Things Up
A handful of well-chosen brushes and a couple of custom presets will cut your bubble-painting time in half by letting you block, shade, and add highlights without switching tools.
Use quick brush techniques and embrace digital presets benefits to streamline workflow, maintain consistency, and iterate fast.
- Base round brush
- Soft airbrush for fades
- Specular highlight brush
- Rim light preset
Painting Bubble Edges: Hard vs Soft Focus
How sharp should the edge of a bubble feel in your scene? You’ll choose hard edges for nearby, crisp bubbles and soft edges for distant or out-of-focus ones.
Combine both: paint a defined rim with a harder brush, then feather outward with a softer brush or lowered opacity to suggest translucency and depth.
Adjust edge contrast to sell proximity without overworking highlights.
Placing Highlights for Believable Shine
Now that you’ve settled on edge hardness to suggest distance, place highlights to sell the bubble’s material and light interaction.
Now that edge hardness reads distance, add concise highlights to convey material, curvature, and light interaction.
You’ll use highlight techniques to read light direction, curvature, and water refraction; keep marks concise. Focus shine placement where surfaces face the light, soften toward edges, and vary intensity for realism.
- small crescent near light source
- faint rim on far side
- soft diffuse fill
- sharp tiny speculars
Inner Core Brightness and Specular Glints
Place the bright core where the bubble catches transmitted light so it reads as a volume rather than a flat circle.
Adjust specular glint intensity to match your light source—stronger glints sell a glossy, wet surface while softer ones suggest diffused water.
Add a thin edge rim highlight opposite the core to define the shell and boost contrast.
Bright Core Placement
Bright cores sit at the heart of each bubble and define its perceived depth, so position them where the light path through the water would be strongest—typically offset toward the viewer-facing side and slightly up from the geometric center.
Use bright core theory to boost bubble luminosity and guide placement.
- offset toward viewer
- slightly above center
- follow dominant light angle
- vary by bubble size
Specular Glint Intensity
With your bright core set, sharpen the bubble’s inner core by dialing its specular glint intensity—this tells viewers whether the bubble feels glassy, oily, or soft.
Increase intensity for crisp specular highlights on tiny reflective surfaces, reduce it for muted, waxy looks.
Balance contrast and size to suggest material, and test against surrounding light so the core reads believable without overpowering the scene.
Edge Rim Highlight
When you dial the inner core brightness and specular glints, the rim’s highlight becomes the thing that sells a bubble’s thickness and curvature.
You’ll nudge edge rim techniques to define silhouette, balance inner core glow, and place tiny specular glints.
Contrast and softness tune bubble texture, making it read as air, water, or soap.
- thin bright rim
- soft falloff inside
- sharp tiny glints
- subtle color bleed
Adding Refraction and Background Distortion in Bubbles
Because a bubble acts like a tiny lens, you’ll see the scene behind it bend and shift — and capturing that distortion sells the illusion of a real, underwater sphere. Use refraction techniques and careful background layering to paint warped shapes and color shifts. Practice subtle blur, inverted highlights, and contrast adjustments.
| Element | Effect |
|---|---|
| Background | Warped |
| Highlight | Bright |
| Blur | Soft |
| Contrast | Adjusted |
| Edge | Crisp |
Suggesting Translucent Shells Without Hard Outlines
If you want a bubble to read as delicate and translucent rather than outlined, soften the edges, let internal color show through, and rely on shifts in value instead of a hard contour to define the shell.
You’ll suggest translucent textures and subtle shell variations by hinting highlights, blurring rim tones, and using layered glazes.
- soft rim gradients
- faint internal color
- broken highlight spots
- layered glazes
Color Choices: Bubbles in Shallow vs Deep Water
While shallow-water bubbles pick up warm, bright highlights from sunlight and nearby reef colors, deep-water bubbles read cooler and dimmer, reflecting the blue-green dominance and attenuated light. You’ll choose shallow colors for sparkle and joy, deep colors for mystery and calm.
| Emotion | Tone | Choice |
|---|---|---|
| Joy | Warm | Shallow colors |
| Calm | Cool | Deep colors |
| Wonder | Soft | Mixed |
Using Complementary Colors to Make Bubbles Pop
When you place a bubble against its complementary hue, its edges and highlights instantly read brighter and more defined.
So use opposites on the color wheel to make underwater bubbles pop without overworking details. You’ll leverage color theory to boost visual impact, contrast, and focus while keeping shapes simple.
- Choose opposite hues for rim glow
- Use muted backgrounds
- Punch highlights with warm/cool pairs
- Keep reflections minimal
Layering Tips: Glazes, Washes, Digital Opacity Tricks
Although glazing and washes seem subtle, they’re the fastest way to build believable depth in underwater bubbles.
Use glaze techniques and wash applications with careful brush selection to control transparency effects and texture variety.
Layer glazes and washes with the right brushes to shape transparent depths and varied textures.
In digital layering, rely on opacity adjustments and color blending for smooth shifts.
Prioritize medium exploration—oil, watercolor, or pixels—and focus on light simulation to sell volume without overworking the piece.
Creating Motion Trails and Rising Paths for Depth
Because motion sells buoyancy, start by planning each bubble’s path before you mark a single highlight.
You’ll map motion dynamics with light, blur, and subtle trails to indicate rising speed and visual depth.
Keep strokes economical, align highlights to a vanishing point, and vary opacity to suggest distance.
- Short luminous streaks
- Soft trailing blur
- Fading opacity gradient
- Directional highlight placement
Grouping Bubbles: Clusters, Strings, Scattered Patterns
Think about how cluster density techniques let you vary bubble size and spacing to suggest different sources and currents.
Use staggered string placement to create natural rising lines without making every bubble line perfectly straight.
Combine tight clusters and loose scattering to control focal points and visual rhythm.
Cluster Density Techniques
When arranging bubbles, decide whether you want concentrated clumps, vertical strings, or a looser scatter—each pattern changes rhythm and depth in your scene.
You’ll use bubble clustering and density variation to guide artistic layering and composition strategies. Balance color harmonization, visual depth, texture interplay, and reflective surfaces to sell realism.
- Tight clusters for focal interest
- Graduated density for depth
- Sparse scatter for breathability
- Overlapping layers for richness
Staggered String Placement
From clustered clumps or loose scatter, you can shift focus by arranging bubbles into staggered strings that lead the eye and suggest vertical movement.
You’ll place bubbles with varied spacing and size to create convincing bubble placement, guiding viewers upward.
Vary opacity and timing to build visual rhythm, cluster occasional offshoots, and keep edges soft so strings feel buoyant and natural.
Scaling and Perspective Rules for Believable Sizes
Because bubbles obey simple laws of size and distance, you can make them read believably by matching their scale to the scene’s perspective and underwater conditions.
Use clear bubble proportions and cues for depth perception so viewers judge distance quickly.
- Reduce size with distance
- Soften contrast farther away
- Increase overlap for clustering
- Match light refraction to depth
Composing Bubbles Around Submerged Portraits
When you frame a submerged portrait, position bubbles to complement the subject’s face and gesture without obscuring key features.
Use the bubble flow to lead the eye through the composition—upward trails can echo hair movement or facial tilt.
Keep sizes and spacing consistent with perspective so the bubbles feel integrated, not pasted on.
Framing The Subject
Start by deciding where you want the viewer’s eye to rest and arrange bubbles to lead it there; position clusters, trails, and single spheres so they frame the face or body without obscuring key features.
You’ll use bubble composition and subject balance to emphasize poses, highlights, and gaze. Aim for contrast, spacing, and scale to support the portrait.
- Cluster near hairline
- Trail toward gaze
- Single accents by shoulder
- Empty space for balance
Integrating Bubble Flow
Although you’ll arrange individual clusters and lone spheres, think of bubble flow as a living current that wraps the portrait and guides the eye; choreograph trails so they curve around the head and shoulders, lift toward the surface, and vary in density to suggest movement without cluttering key features.
You’ll place highlights and soft edges to emphasize bubble dynamics, maintain underwater aesthetics, and guarantee the face remains focal.
Integrating Bubbles Into Coral Reef Scenes
Because coral reefs are bustling with life and varied textures, you’ll want your bubbles to feel like they’re part of the scene rather than pasted on top.
Match bubble sizes to scale, tint reflections with coral colors, and vary opacity near algae. Place clusters near crevices to suggest currents.
- small near polyps
- medium over sponge fields
- large in open water
- scattered along reef edges
Painting Bubbles Interacting With Fish and Divers
When you show bubbles interacting with fish and divers, make their behavior look purposeful: bubbles should scatter around fins, stream from a diver’s regulator, skirt a curious fish’s snout, and distort as they rise past bodies. Use bubble interactions, underwater dynamics, fish behavior, diver perspectives, light diffusion, aquatic ecosystems, visual storytelling, artistic techniques, color theory, emotional impact.
| Fin trails | Regulator stream | Curious snout |
|---|---|---|
| Scatter | Stream | Skirt |
| Distort | Rise | Shift |
| Glimmer | Burst | Pivot |
How to Imply Bubble Bursts and Dissipating Foam
After placing bubbles around fins, regulators, and snouts, you’ll want to indicate what happens as they meet the surface or other objects: bursts and foam are shown through sudden shape changes, scattering highlights, and fading edges.
Use bubble dynamics cues and varied foam texture to denote rupture and spread.
- Jagged rim fragments
- Scattered specular flecks
- Rapidly thinning halos
- Mottled froth patterns
Rendering Bubble Reflections of Complex Scenes
If you want convincing underwater bubbles, let their surfaces mirror the scene around them—warped, inverted, and punctuated by bright specular highlights where light strikes most directly.
You’ll study bubble physics to place distortions and chromatic shifts, then apply reflection techniques: sample nearby colors, curve them by sphere math, compress distant details, and add crisp highlights and soft rim glows to sell transparency and depth.
Troubleshooting Washed-Out Bubbles and Low Contrast
If your bubbles look washed-out, adjust their color values by increasing midtone contrast and nudging saturation where reflections need to pop.
Use crisp edge-definition techniques like subtle rim highlights and sharper inner contours to separate bubbles from the water.
Together these tweaks restore depth and make each bubble read clearly against the background.
Color Value Adjustment
One key fix for washed-out bubbles is to manage value contrast—make the highlights brighter and the surrounding midtones darker so the bubbles read clearly against the water.
You’ll use color theory to pick complementary hues and shift values for depth. Adjust layer opacity, push highlights, deepen local shadow, and desaturate background to boost bubble clarity.
- Increase highlight value
- Darken surrounding midtones
- Reduce background saturation
- Tweak layer opacity
Edge Definition Techniques
Edges make bubbles read as solid forms instead of faint blips, so sharpen them deliberately: boost rim contrast with thin hard highlights, add a faint inner shadow where the bubble meets water, and crisp the silhouette by refining the anti-aliased border or painting a subtle darker ring to separate it from low-contrast backgrounds.
Then balance edge blending and soft shifts so you keep realism without muddying contrast.
Avoiding an Unintentional “Cartoon Bubble” Look
While capturing the delicate translucence of underwater bubbles, you’ll want to steer clear of overly crisp outlines, flat highlights, or uniform gradients that instantly read as cartoonish; instead, focus on subtle value shifts, soft rim lighting, and the way surrounding water distorts and refracts light through the bubble.
Use bubble aesthetics and depth perception to keep things believable.
Use bubble aesthetics and depth cues to sell believability—soft edges, subtle highlights, and light refracting through water.
- vary edge softness
- break highlights subtly
- add internal refraction
- suggest surrounding distortion
Speed Techniques for Adding Believable Bubbles to Sketches
Start with quick shape gestures to map where the bubbles sit and how they travel through the water.
Use rapid value blocks to establish light, mid, and dark areas so the spheres read as three-dimensional fast.
With those two steps you’ll block in believable bubbles without overworking the sketch.
Quick Shape Gestures
Loosen your wrist and sketch confident, simple arcs and circles to indicate bubbles quickly—think about rhythm and overlap rather than perfect geometry.
You’ll use gesture techniques to capture bubble dynamics, convey motion, and vary sizes fast. Use light pressure, repeat strokes, and prioritize groupings over detail.
- quick arcs
- overlapping circles
- size variation
- conveyed motion
Rapid Value Blocks
When you block in values rapidly, you give your bubble sketches instant volume and focus without getting bogged down in edges or highlights. Use quick tonal masses to suggest bubble physics, color theory, and composition techniques that hint at bubble symbolism and cultural associations. Balance artistic styles, historical context, and ecological significance to guide viewer perception and emotional resonance.
| Tone | Shape | Edge |
|---|---|---|
| Dark | Round | Soft |
| Light | Oval | Hard |
Texture Mediums and Pastes for Tactile Bubbles
A handful of texture mediums and pastes can turn flat, painted circles into tactile bubbles you can see, feel, and catch light on; choose heavy-body gels for raised, glossy domes, modeling paste for matte, sculpted forms, and transparent mediums when you want color to show through.
You’ll control texture application to increase bubble dimension and tactile realism.
- Heavy-body gel for gloss
- Modeling paste for shape
- Transparent gel for hue
- Slow-dry medium for blending
Achieving Glassy Bubble Transparency With Limited Palettes
Keep your palette tight so you can predict how colors mix and maintain the bubble’s subtle translucency.
Rely on a few cool tones and a warm accent to suggest depth without muddying the glassy look.
Place crisp, bright highlights where the light hits to sell the reflective surface.
Simplify Your Color Choices
Although you might be tempted to load a palette with every hue, limiting your colors will help you read and render the subtle transparencies of underwater bubbles more clearly.
You’ll choose a restrained set to maintain color harmony and control mood influence, letting value shifts suggest depth and translucence.
- cool base, one warm accent
- two values per hue
- neutral grays for balance
- tiny chroma pops for edges
Emphasize Reflective Highlights
Now that you’ve pared your palette, make reflective highlights the tool that sells a bubble’s glassy look—bright, sharp spots and subtle rim glows carry most of the visual information about curvature and transparency.
You’ll study bubble anatomy, match color temperature to light sources, use highlight techniques and layering methods to control shine intensity, and suggest reflective surfaces and optical effects with minimal texture effects to suit varied artistic styles.
Emphasizing Mood: Warm vs Cool Bubble Lighting
When you choose warm or cool lighting for your bubbles, you change the scene’s emotional temperature: warm highlights (yellows, oranges) make the water feel cozy, intimate, or sunlit, while cool tones (blues, greens) push the mood toward calm, mysterious, or clinical.
Choosing warm or cool bubble lighting shifts emotional temperature—warm feels cozy and sunlit; cool reads calm, mysterious, or clinical.
You’ll use warm lighting or cool lighting to control emotional impact, color temperature, atmospheric effects, mood setting, light dynamics, and visual contrast.
- Use warm rim highlights
- Shift midtones cooler
- Boost contrast near edges
- Balance reflections and tint
Using Ambient Occlusion to Anchor Bubbles in Space
If you want your bubbles to sit convincingly in the scene, add ambient occlusion to suggest where water and objects block light and create subtle shadowed contact areas. You’ll use ambient shading to hint at tiny dark rims, increasing spatial depth and weight. Keep occlusion soft, scale it to bubble size, and blend gently so bubbles read grounded without losing translucence.
| Calm | Dark | Float |
| Soft | Deep | Rest |
| Cool | Quiet | Hold |
| Subtle | Quietus | Sink |
| Gentle | Quiet | Anchor |
When to Use Hard White Highlights vs Soft Bloom
Having anchored bubbles with soft occlusion, you’ll next decide how highlights read against that weight: hard white speculars give a crisp, jewel-like snap that reads as a strong, focused light source, while soft bloom suggests scattered, diffused glow within the water column.
Use hard highlights for contrast; use soft bloom for atmosphere.
- crisp reflections
- subtle halos
- directional light cues
- layered depth effects
Color-Correcting and Compositing Bubbled Layers Digitally
Because bubbles sit between light and water, you’ll want to treat their layers as separate visual elements when you color-correct and composite them, adjusting hue, contrast, and blend modes so each ring, core, and highlight reads clearly against the background.
| Element | Mode | Tip |
|---|---|---|
| Ring | Overlay | refine color blending |
| Core | Screen | boost luminance |
| Highlight | Add | subtle layer effects |
Reference-Gathering: Photos and Videos to Collect
Start by collecting a focused set of references you can actually study while painting: close-up photos of single bubbles, wide-angle shots showing bubbles in context, high-speed video of bubble formation and rise, and reference lighting setups that match your scene.
Use diverse reference sources for visual inspiration and note camera angles, scale, motion, and surface reflections.
- close-ups
- wide shots
- high-speed clips
- lighting setups
Exercises to Train Your Eye for Bubble Light & Shape
Start by watching real bubbles in a glass of water or a video clip and note how shape and speed change.
Sketch simplified forms quickly to lock in the basic silhouette before adding details.
Then study how light refracts through each bubble—where highlights, shadows, and color shifts fall—and copy those cues in your sketches.
Observe Real Bubbles
When you study real bubbles closely, you’ll notice subtle shifts in shape and light that a single glance will miss; spend time watching bubbles form, rise, pause, and pop so your eye learns their rhythms and reflective patterns.
Use bubble behavior as a visual reference to record highlights, shadows, and motion cues.
- note edge highlights
- map internal reflections
- time ascent speed
- compare sizes
Sketch Simplified Forms
After watching real bubbles, you’ll want to train your eye to reduce what you see into simple shapes and light patterns; this makes painting them faster and more accurate.
Practice quick thumbnail studies, using sketch techniques that capture contour, highlight, and core shadow.
Focus on form simplification: block spheres, mark reflective crescents, and trace overlapping forms so composition and value read instantly before detailed rendering.
Study Light Refraction
Because bubbles bend and split light so noticeably, training your eye to see refraction is the next essential step; practice simple exercises that isolate how highlights, rim light, and distorted background shapes shift across a sphere.
You’ll study light behavior and underwater optics by observing, sketching, and comparing variations.
- Trace highlight positions
- Map rim-light thickness
- Sketch background distortion
- Compare sizes and angles
Common Beginner Mistakes and Quick Fixes
Mistakes happen fast when you’re learning to paint bubbles underwater, but most are easy to fix if you catch them early.
You’ll face common misconceptions about highlights and bubble anatomy, like painting perfect circles or ignoring rim light.
Fixes: soften edges, add subtle distortions, adjust transparency, lift or glaze highlights, and check surrounding refractions.
Practice small studies to correct scale and contrast.
Adapting Techniques for Plein Air vs Studio Painting
Once you’ve practiced fixing common bubble errors, shift focus to how your working environment changes the process: plein air sessions force faster decisions and looser marks, while studio work lets you refine edges and layer glazes.
Use plein air techniques for bold composition strategies and environmental effects; apply studio methods for careful color palette, lighting considerations, texture application, and deliberate brush selection.
Embrace plein air boldness for environment-driven choices; reserve studio time for refined palettes, textures, and deliberate brushwork.
- Plein air techniques
- Studio methods
- Color palette, lighting considerations
- Brush selection, texture application, composition strategies
Scaling Techniques for Print and Large-Format Work
When you scale your bubble artwork for print or large-format work, keep resolution high so fine highlights and translucent edges don’t pixelate.
You’ll also need to adjust color calibration for the specific printer and substrate to preserve the delicate blues and specular highlights.
Test prints at target sizes will show whether you need to tweak resolution or profiles before the final run.
Maintain Resolution Integrity
Many artists underestimate how file resolution affects print clarity, so you should start by setting your document to the correct pixel dimensions and DPI for the final output.
Use resolution techniques focused on preserving detail as you scale, avoid upscaling artifacts, and keep sharp edges for bubble highlights.
- Start at target DPI
- Work in lossless formats
- Use smart resizing
- Inspect at 100%
Adjust Color Calibration
After you’ve secured resolution and detail, make sure your color calibration matches the scale and output device so the bubbles look consistent in print.
You’ll apply color theory to preserve visual contrast and emotional impact, adapting artistic style and painting practices for light interaction.
Choose medium choice and layering techniques to control texture variation, maintaining composition balance across formats.
Using Bubbles as Focal Points in Abstract Pieces
You can make bubbles anchor an abstract piece by treating them as deliberate visual punctuation: scale a few larger, crisply rendered spheres against softer, suggestive forms to give the eye a stable place to land.
Use a few crisply rendered bubbles as visual punctuation—larger anchors amid softer, suggestive forms for focus.
Use bubble symbolism and abstract inspiration to suggest mood without narrative. Balance contrast, edge clarity, color temperature, and spacing.
- high contrast
- crisp edges
- warm/cool shifts
- measured spacing
Storytelling With Bubble Placement
Someone placing bubbles in a composition can tell a story through their size, rhythm, and pathway—small clustered bubbles whisper intimacy or motion, while larger solitary spheres read as moments of pause or revelation.
You choose placement to guide the eye, suggesting depth, tension, or relief.
Use bubble storytelling and deliberate bubble symbolism to create narrative beats, lead movement, and cue emotional shifts without words.
Presets, Brush Packs, and Time-Saving Assets for Digital Art
One smart way to speed your bubble-filled underwater scenes is to lean on presets, brush packs, and other time-saving assets that let you focus on composition and storytelling rather than reinventing effects.
Use preset usage to standardize highlights, refine brush selection for varied bubbles, and organize digital assets to boost workflow efficiency with time saving techniques.
- Artistic resources: bubble brushes
- Creative shortcuts: layer styles
- Digital painting: texture packs
- Workflow efficiency: asset libraries
When to Stylize Bubbles vs Prioritize Realism
Although realistic bubbles can sell the weight and physics of a scene, stylized bubbles often better serve mood, readability, or a specific art direction—so decide based on your goal.
You’ll pick realistic bubbles when physics, scale, or believability matter. Use stylized bubbles to emphasize bubble symbolism, enhance composition, or match your palette.
Let artistic choices guide how literal or expressive you get.
Layering Bubbles With Other Underwater Effects
When you layer bubbles with other underwater effects—like light shafts, particulate haze, and caustics—think about depth and hierarchy so each element reads clearly; bubbles should never compete with primary focal points but can reinforce them by matching scale, contrast, and motion.
You’ll control bubble interaction and overall underwater composition by planning overlap, blur, color, and motion cues.
- overlap order
- edge softness
- color temperature
- motion rhythm
Next Projects to Build Your Bubble Painting Portfolio
As you move from studies to a cohesive body of work, pick projects that showcase different bubble behaviors, lighting conditions, and compositional roles so prospective clients and galleries can quickly grasp your range.
Plan themed series: micro bubble close-ups, dramatic backlit streams, interaction with marine life, and mixed-media experiments.
Each project should highlight varied bubble painting techniques and support clear artistic portfolio expansion.
Frequently Asked Questions
How Do I Paint Bubbles Coming From a Cracked Underwater Helmet?
Start by sketching bubble texture shapes from the crack, vary sizes and overlap, then paint highlights and translucent cores. Add soft underwater reflections on each bubble, subtle motion blur, and rim light to sell depth and realism.
Can I Simulate Bubbles in Gouache or Casein?
Yes—you can simulate bubbles in gouache or casein. You’ll build bubble texture with layered opaque highlights, subtle washes, and controlled lifts; use delicate color blending for reflective hues, soft edges, and believable translucency in each sphere.
How Do I Remove Stray White Highlights Without Repainting?
About 70% of edits are minor fixes, so you can remove stray white highlights without repainting: use highlight removal techniques like clone/heal or dodger/burn carefully; digital editing tips include working on duplicated layers and masking.
What File Formats Preserve Bubble Layer Transparency Best?
PNG advantages: you’ll keep full transparency with smaller files and web compatibility, while TIFF options give layered, high-quality transparency for print and archival work; you’ll choose PNG for web, TIFF for maximum fidelity and editing flexibility.
How Do I Photograph My Painting to Accurately Capture Bubble Shine?
You’ll photograph bubble shine by using specific lighting techniques, making subtle angle adjustments, optimizing camera settings, and controlling background considerations; position a soft backlight, use low ISO, small aperture, tripod, and tweak angles until highlights pop.
Conclusion
You’ve learned how to paint everything from a lone, glittering bubble to reef clusters, and you’re ready to plunge in. Keep practicing the quick, repeatable steps for single bubbles, then scale up to reflective giants and layered scenes. Mix presets and brushes to save time, and decide when to stylize or chase realism. Let these techniques be your oxygen—breathe life into each underwater moment and build a standout bubble portfolio.