How to Remove Wallpaper Glue From Walls Before Painting Properly
You’ll remove all tacky glue before painting by softening residue with warm water, a sponge, or a steamer, then wiping and gently scraping with a plastic putty knife; use vinegar, dish soap, or a commercial remover for stubborn spots, rinse top-to-bottom, dry fully, and sand/patch any gouges with suitable filler before priming with a high-quality primer. Test a small area first, wear gloves and ventilate, and keep going to learn more tips for tough spots and finishing.
Quick Checklist: Best Way to Remove Wallpaper Glue
Start with the essentials: gather a scoring tool or razor, a sponge, hot water, a bucket, a wallpaper remover solution or vinegar, and a few clean rags.
You’ll choose removal techniques based on adhesive types, test a small patch, soften glue, scrape gently, rinse residue, and dry thoroughly.
Keep ventilation on and protective gloves handy for safe, efficient work.
How to Tell If Wallpaper Glue Is Still on the Wall
Look closely for visible residue or discoloration—sticky patches, cloudy areas, or darker spots usually mean glue is still there.
Run your hand over the wall to check for tacky texture or roughness that can stop new paint from sticking.
If paint flakes or peels when you touch it, you’ve got adhesion issues to address before refinishing.
Visible Residue Or Discoloration
When you run your hand over the wall or shine a light across it, you’ll notice any tacky patches, shiny spots, or faint outlines where paper once sat—those are signs glue is still present.
You’ll spot glue residue and discoloration effects as uneven tones or sticky streaks.
Check for:
- faint halos
- glossy spots
- darker stains
- peeling edges
- powdery film
Texture And Paint Adhesion Issues
If wallpaper glue is still clinging to the wall, you’ll notice changes in texture—rough patches, tacky spots, or areas that feel slightly raised—and these inconsistencies can prevent new paint from adhering evenly.
Check different texture types by running your hand and a fingernail; tackiness or flaking signals adhesion problems.
Sand, clean, or prime affected zones before painting to guarantee uniform coverage and durability.
Why You Must Remove Wallpaper Glue Before Painting
Because leftover wallpaper paste creates an uneven, nonporous surface, you can’t just slap primer and paint over it and expect a lasting finish.
You need proper removal techniques because different adhesive types affect adhesion, texture, and durability. Remove glue to prevent peeling, blotches, and mold, and to guarantee even coverage.
- Poor adhesion
- Visible texture
- Stain bleed
- Moisture traps
- Compromised finish
Tools and Materials for Removing Wallpaper Glue
Before you start scraping, gather the right tools and materials so the job goes quickly and without damaging the wall.
You’ll need a putty knife, scraper, sponge, bucket, spray bottle, drop cloths, gloves, and safety goggles.
Add wallpaper remover solution or fabric softener for different adhesive types, plus a plastic scraper for delicate surfaces.
Match tools to removal techniques for best results.
Test One Small Area to Choose the Right Method
Start by testing a small, inconspicuous patch to see how the adhesive and wall finish react to your chosen remover.
You’ll do wall testing to confirm compatibility and guide method selection before scaling up.
- Pick a hidden corner
- Apply remover briefly
- Wait recommended dwell time
- Inspect for damage
- Note effectiveness and adjust approach
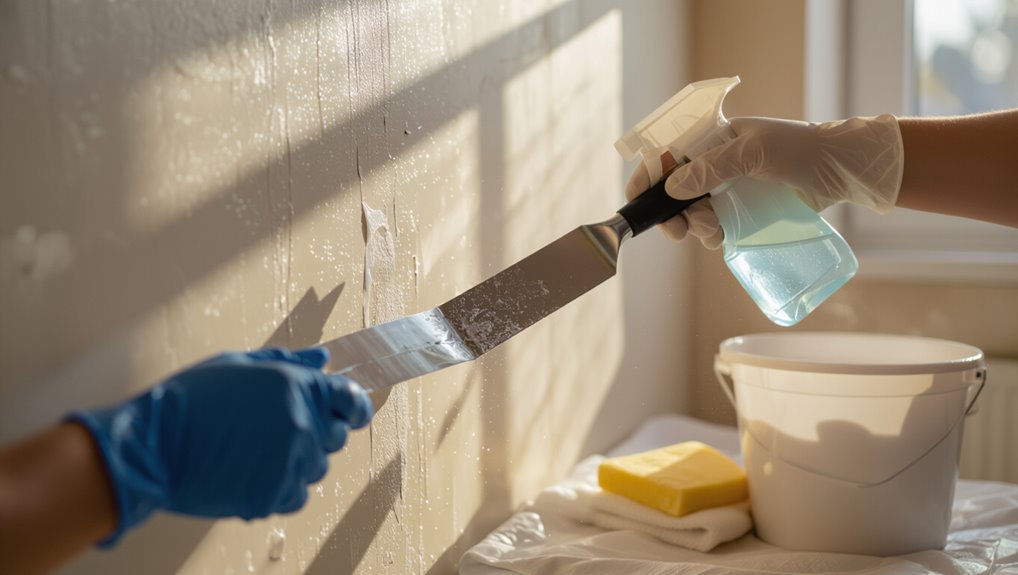
Soften Adhesive With Warm Water and a Sponge
1. You’ll soften remaining adhesive by soaking a sponge in warm water and pressing it against the glue for several minutes.
Use gentle sponge techniques—work in small sections, rewet frequently, and scrub in circular motions to lift residue without damaging drywall.
Wipe away loosened paste with a clean damp sponge, then let the wall dry before sanding or priming.
Use a Wallpaper Steamer for Stubborn Glue
If warm water and a sponge won’t budge the glue, bring in a wallpaper steamer to tackle stubborn residue—it’s designed to penetrate and loosen adhesive quickly without harsh chemicals.
You’ll control steam temperature to suit adhesive types and avoid damage. Follow safety and timing guidelines, then scrape gently.
Adjust steamer heat to the adhesive, follow safety/timing, then gently steam and scrape away residue.
- Test a hidden spot
- Use moderate steam
- Keep steamer moving
- Scrape with a plastic tool
- Wipe residue away
Apply Commercial Removers Safe for Drywall or Plaster
Pick a commercial remover labeled safe for drywall or plaster so you don’t damage the surface.
Test it in an inconspicuous spot, waiting the recommended time to check for softening or discoloration.
After use, neutralize per the product instructions and rinse the wall thoroughly to remove residue.
Choose Drywall/Plaster-Safe Formula
Wondering which commercial remover won’t damage your walls? You’ll pick a drywall/plaster-safe formula by checking ingredient lists, matching adhesive properties to removal techniques, and preferring pH-neutral, low-solvent options.
Use products labeled safe for drywall or plaster and follow instructions.
- pH-neutral
- Low solvent
- Biodegradable
- Suitable for painted surfaces
- Manufacturer safety rating
Test Remover Inconspicuously
How do you know a remover is safe for your wall until you try it? You’ll use small test techniques on a hidden patch to check finish reaction and adhesive evaluation. Wait, inspect, and note softening or damage. Record results, then decide.
| Spot | Remover | Result |
|---|---|---|
| Corner | Mild | OK |
| Outlet | Strong | Damage |
| Behind trim | Medium | Softened |
Neutralize And Rinse Thoroughly
Once the solvent has loosened the adhesive, neutralize and rinse promptly to stop chemical action and protect drywall or plaster. Follow the remover’s directions for dilution, use clean water and a mild neutralizer if recommended, and work from top to bottom so residue doesn’t streak.
You’ll remove glue residue and finish wall preparation by rinsing, blotting, and allowing full drying.
- Test edges first
- Use gentle scrub
- Rinse thoroughly
- Blot excess water
- Let dry completely
Make and Use DIY Glue-Removal Solutions
If the store-bought removers are out of reach, you can mix simple DIY solutions that soften paste so it scrapes away easily; common blends use warm water with dish soap, vinegar, baking soda, or a bit of fabric softener. You’ll combine DIY solutions and natural ingredients, apply gently, let soak, then wipe.
| Comfort | Ease | Relief |
|---|---|---|
| Warmth | Foam | Clean |
| Calm | Soft | Fresh |
Scrape Wallpaper Glue Without Damaging the Wall
Start by gently scraping with a plastic putty knife or a credit card to lift dried glue without gouging the wall.
If the residue resists, soften it with a damp sponge or your DIY solution, let it sit briefly, then scrape again.
Work in small sections and rinse as you go to avoid overworking the surface.
Gentle Dry Scraping
Although you’ll be working carefully, dry scraping is an efficient way to lift stubborn glue without harming drywall or plaster.
Use gentle techniques and cautious scraping methods to preserve the surface. You’ll want to:
- Hold a flexible putty knife at a low angle
- Test a small area first
- Work in short strokes
- Keep pressure light
- Clean blades often
Wet Soften And Remove
Soften the glue with moisture before you scrape so it lifts easily and won’t gouge the wall—apply a sponge, spray bottle, or steam to rehydrate the adhesive.
Let it soak a few minutes, then scrape gently with a flexible putty knife.
Match removal techniques to adhesive types: water-soluble pastes respond to warm water, while stronger glues may need a commercial solvent or repeated moistening and careful scraping.
Rinse and Neutralize Wallpaper Glue Residue
After you’ve loosened the paper and scraped away the bulk of the paste, rinse the wall to remove remaining glue and any cleaning solution so paint or new wallpaper will stick properly.
You’ll neutralize pH, reduce adhesive residue effects, and finish glue removal techniques with clean water and a vinegar rinse if needed.
- Use clean water
- Wring sponge often
- Apply white vinegar
- Dry thoroughly
- Recheck for tackiness
Repair Surface Damage After Glue Removal
Now that the glue’s gone, check the wall for any damage—look for holes, gouges, and uneven seams.
You’ll want to fill holes and gouges with spackle or joint compound, then let it dry.
Finally, sand seams and patched areas smooth so the surface is ready for primer or paint.
Assess Wall Surface Damage
When you’ve removed the wallpaper glue, inspect the wall closely for gouges, raised seams, or thin spots that the adhesive and removal process might’ve exposed.
Do a careful wall inspection and surface assessment to prioritize repairs, note texture differences, and plan sanding or priming before painting.
- Mark damaged areas
- Check for loose paper
- Feel for soft spots
- Note uneven texture
- Photograph for reference
Patch Holes And Gouges
Repairing holes and gouges is a straightforward step that gets your walls ready for smooth finishing and painting. You’ll select patch techniques based on depth and adhesive types used previously, remove loose debris, apply appropriate filler, and feather edges for an even repair.
| Damage | Filler | Cure Time |
|---|---|---|
| Small | Spackling | 30–60 min |
| Large | Joint compound | 24 hrs |
Sand And Smooth Seams
Start by running a light sanding over seams and any remaining glue residue to level the surface and reveal low spots you’ll need to fill.
Use gentle sanding techniques and focus on smoothing connections between patches.
Then clean dust and inspect.
- Use 120–220 grit sandpaper
- Sand with the grain
- Feather edges for smooth connections
- Vacuum and tack cloth
- Reinspect before priming
Sand and Feather Seams for a Smooth Finish
After the filler’s dried, sand the seams flush with the surrounding wall using a fine-grit block or pole sander.
Then feather the edges by easing pressure as you move outward so the repair blends invisibly into the paint surface.
Use proper sanding techniques: keep the sander flat, check progress from multiple angles, and feathering edges until shifts feel seamless.
Clean dust before painting.
Prime Treated Walls for Best Paint Adhesion
Before you paint, make sure the wall is completely clean and dry so the primer can bond properly.
Use a high-quality primer designed for previously treated or patched surfaces to lock in repairs and promote adhesion.
Don’t forget to feather and sand the edges of your repairs so the primer and paint go on smoothly and invisibly.
Clean, Dry Surface
Once the wall is clean and completely dry, you should prime any areas that were treated for glue removal so paint will stick evenly and resist stains.
You’ll confirm proper adhesive removal techniques and complete wall surface preparation before priming.
Do these quick checks:
- Inspect for residue
- Sand rough spots
- Wipe with a tack cloth
- Mask edges
- Allow full cure time
Use High-Quality Primer
Choose a high-quality primer designed for sealed or previously treated surfaces so your paint will adhere evenly and resist bleed-through; this step bonds the wall, hides any lingering stains, and creates a uniform base for topcoats.
You’ll appreciate primer benefits like improved adhesion and stain blocking. For effective surface preparation, apply evenly, follow drying times, and use recommended products to guarantee durable, professional-looking paint results.
Feather And Sand Edges
Feather and sand the edges where you removed glue or skim-coated repairs so the shift between treated and untreated areas is smooth and invisible under primer.
You’ll use feather techniques to taper compound and pick sand options for a fine, even finish.
- Use a broad knife for feathering
- Start with 120-grit sanding
- Finish with 220-grit for smoothness
- Vacuum dust thoroughly
- Prime before painting
Choose Paint Types After Removing Wallpaper Glue
After you’ve removed the wallpaper glue and the surface is clean and dry, pick a paint that matches the room’s use and your finish preference—satin or eggshell for durability and easy cleaning in high-traffic areas, matte for ceilings and low-traffic walls, and semi-gloss for trim and bathrooms where moisture is a concern.
Consider paint finishes and color selection; test swatches under real light, then prime patched areas before rolling.
If Glue Won’t Budge: Fixes, Stains, and Odors
If stubborn glue won’t budge with water and a scraper, try targeted fixes—enzymatic cleaners or a mix of warm vinegar and dish soap can break down residue without harming paint, while a steam machine loosens old adhesive for easier scraping.
- Test glue removal techniques on a small area first
- Use enzymatic cleaners for organic residue
- Apply vinegar/soap for mild adhesive
- Steam for deep-set glue
- Treat stains and odors promptly with baking soda or odor eliminator
Safety: Ventilation, PPE, and Safe Disposal
Because solvents, steam, and loosened adhesive can release fumes and particles, make sure you ventilate the room well and wear proper PPE—gloves, eye protection, and a respirator or mask rated for organic vapors or fine dust when needed—to protect your lungs and skin while you work.
Use ventilation tips like cross‑ventilation and fans, follow personal protective equipment guidance, and follow safe disposal methods for adhesive waste and contaminated rags, noting health considerations.
When to Hire a Pro: Damage, Mold, or Time Limits
When you spot extensive wall damage, visible mold, or you’re working under a tight deadline, call a pro—these situations need specialized tools, testing, and experience to avoid making things worse or creating health hazards.
If walls show major damage, visible mold, unknown leaks, or you’re pressed for time, hire a pro.
- Structural repairs beyond DIY
- Visible mold requiring mold remediation
- Unknown water sources or stains
- Limited time; prioritize time management
- Electrical or plumbing behind walls
Frequently Asked Questions
Can Wallpaper Glue Harbor Allergens or Cause Respiratory Issues Later?
Yes — you can experience allergen sensitivity from old wallpaper glue; it can trap mold or release particles that harm respiratory health, so you should clean thoroughly, ventilate, and wear a mask to reduce risks.
Will Removing Glue Affect Built-In Trim or Molding Finishes?
A painter’s job went wrong once: you can damage finishes if you don’t use trim protection and gentle methods, so you’ll protect edges, use mild solvents, and prioritize molding preservation to avoid sanding or stripping.
Can Heated Tools (Hairdryer) Replace a Steamer Safely?
You can, but a hairdryer won’t match a steamer’s tool effectiveness; you’ll need higher heat settings, longer exposure, and careful technique. You’ll risk uneven softening and potential paint or trim damage if you rush.
How Long Should Paint Cure Before Rehanging Wallpaper or Decor?
Better safe than sorry: you should wait at least two weeks for full paint curing before rehanging wallpaper or decor, since paint curing affects wallpaper adhesion; humidity and paint type can stretch that timeframe, so check manufacturer’s guidance.
Are There Eco-Friendly Commercial Removers Available?
Yes — you can buy eco friendly options: biodegradable commercial removers labeled low‑VOC or plant‑based. You’ll also find natural alternatives like vinegar, baking soda paste, or enzyme cleaners that gently break down adhesive without harsh chemicals.
Conclusion
You’ve now got the know-how to strip away stubborn wallpaper glue and prep your walls like a pro. Test a small patch, pick the right tool—steam, remover, or a damp sponge—and sand or primer-seal any residue before painting. If stains, odors, or damage persist, don’t be shy about calling a professional. Keep safety first with ventilation and gloves. Now grab your wallpaper scraper and maybe a trusty feathered quill for flair, and get painting.