How to Paint a Mountain on a Wall for a Scenic Mural
Decide if a mountain mural fits your room, measure the wall, and map composition with a grid or projector before you paint. Pick a style—silhouette, layered ranges, or painterly washes—and choose cool, desaturated tones for distant peaks and warmer, higher-contrast hues for foreground. Prep and prime the surface, block in large shapes, then add shadows, snowcaps, and texture with dry-brushing and glazing. Seal with UV varnish for durability; keep going to pick up tips on tools, timing, and fixes.
Decide If a Mountain Mural Fits Your Room
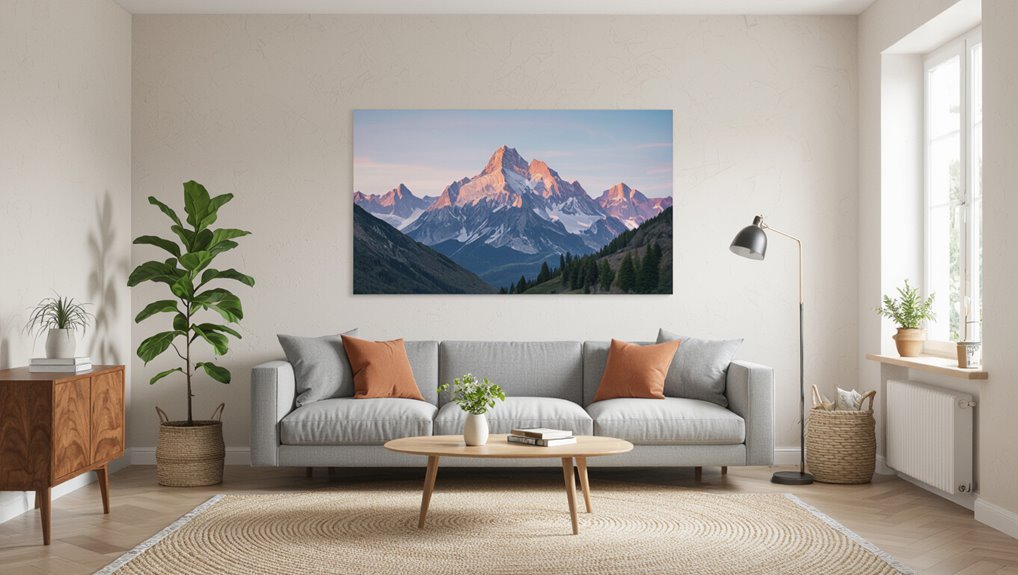
Wondering whether a mountain mural will work in your space? You’ll assess scale, light, and furniture placement to see if mountain styles suit your room themes.
Pick a style—graphic peaks, watercolor washes, or realistic ranges—that aligns with decor and mood. If the mural complements colors and traffic flow, go ahead; if it clashes, try a smaller vignette or different motif.
Measure the Wall and Plan a Composition
First, measure the wall height and width so you know the exact canvas you’re working with.
Then sketch a few composition layouts to test mountain placement, horizon line, and focal points.
Use those measurements and sketches to plan scale and detail before you start painting.
Measure Wall Dimensions
Start by measuring the wall’s width and height with a tape measure, noting any doors, windows, outlets, or baseboards that interrupt the surface.
Record precise wall measurements and think about mural scaling for proportions. Use a simple grid or scale ratio to translate dimensions to your sketch.
- Note obstructions.
- Calculate scale ratio.
- Mark key reference points.
Sketch Composition Layout
Measure the wall again at eye level and transfer those dimensions to your sketch so you can plan composition with real proportions.
Use your grid or scale ratio from the previous step to place major elements—peak lines, foreground slopes, and focal points—relative to doors, windows, and outlets so nothing important ends up awkwardly cut off.
Then apply sketch techniques to refine composition elements, mark sightlines, balance mass, and verify focal clarity.
Choose a Style: Silhouette, Layered Range, or Painterly
Decide whether you want a bold silhouette, a soft layered range, or a loose painterly finish before you start.
For a silhouette, focus on strong, readable shapes; for layered range, plan color shifts to create depth; and for painterly, choose brushes and strokes that build texture.
Use that choice to guide your color palette, edge work, and brush techniques.
Silhouette Shape Basics
When you pick a silhouette style for your mountain mural, you set the visual mood: a bold single-shape silhouette reads graphic and modern, a layered range gives depth with overlapping planes, and a painterly approach uses loose, textured strokes for a natural feel.
You’ll use silhouette techniques and shape variations to simplify forms and convey scale.
- Simplify contours.
- Vary peaks.
- Emphasize negative space.
Layered Color Depth
Now that you’ve settled on silhouette shapes, start thinking about how color layers will define distance and mood.
Use layering techniques and color blending to create tonal variations that guide depth perception and atmospheric perspective.
Balance shadow play with highlights for visual impact, and maintain color harmony across ranges.
You’ll adjust opacity and edge softness to reinforce receding planes without overworking details.
Painterly Brush Techniques
You’ll pick a painterly approach that fits your mural’s mood—Silhouette for bold shapes, Layered Range for controlled depth, or Painterly for expressive strokes—and commit to its brush logic before you begin.
Decide painterly techniques and brush selection early, then work confidently:
- Limit palette to support form.
- Vary stroke speed for texture.
- Use edges to guide focus.
Estimate Cost and Time for Your Mountain Mural
Because a clear estimate keeps the project on track, start by breaking the mural into measurable parts—surface prep, base coats, details, and protective finish—so you can assign time and costs to each phase.
Calculate materials, tools, and labor, add contingency for mistakes, and track budget considerations.
Create a timeline with milestones to aid time management and adjust estimates as you progress.
Choose Paints and Brushes for Depth (Colors & Finishes)
Start by selecting a limited palette of base, mid, and highlight colors so you can mix consistent gradients that give your mountains real depth; choose cool, muted hues for distant ranges and warmer, more saturated tones for foreground peaks.
Use color theory to plan contrast and finishes, and match brush types to texture.
Use color theory to plan contrast and finishes, and pair brush types to texture for cohesive, expressive landscapes.
- Flat for base
- Filbert/round for blending
- Dry-brush for texture
Prepare Your Wall for a Mountain Mural (Clean, Prime, Mark)
Before you start painting, clean the wall thoroughly to remove dust, grease, and loose paint so your mural will adhere and look smooth.
If the surface is porous or stained, prime it to create an even base.
Lightly mark your layout with pencil or chalk so you can position peaks and horizons accurately.
Clean Surface Thoroughly
1 clear sweep of the wall makes the rest of the mural easier: wipe down dust and grime, scrape off loose paint or flaking texture, and rinse away residues so primer and paint adhere properly.
Use proper cleaning techniques for effective wall preparation.
Then follow these steps for a reliable surface:
- Remove debris and dust.
- Degrease stains.
- Repair cracks and sand smooth.
Mark Layout Lightly
With a clean, smooth surface and primer dried, lightly marking your layout gives the mural direction without committing you to firm lines.
Use simple marking techniques—pencil, chalk, low-tack tape—to map horizon, peaks, and major forms.
Employ layout tools like a level, ruler, and projector for accuracy.
Keep marks faint so you can adjust composition and erase or paint over them easily later.
Transfer a Sketch to the Wall: Grid, Projector, and Tracing
Start by choosing the transfer method that fits your space and budget—grid, projector, or simple tracing—and set up your wall so it’s clean, dry, and primed for accurate lines.
Start by picking a transfer method—grid, projector, or tracing—and prepare your wall: clean, dry, primed.
Use sketch techniques suited to scale and note wall preparation. Then follow these precise steps:
- Measure and mark reference points.
- Transfer contours accurately.
- Check proportions, adjust before painting.
Block In Base Shapes and Midtones to Set Volume
Now that your sketch is accurately on the wall, begin blocking in the major masses and midtones to establish the mountain’s volume.
Use large brushes to lay down base shapes with flat, even strokes, keeping edges soft where planes meet.
Keep values consistent, simplify forms, and step back frequently.
These midtones will guide later shading without adding texture yet.
Paint Ridgelines, Rock Texture, and Snowcaps
Now you’ll define sharp ridgelines with crisp, confident strokes to separate planes and catch light.
Use varied brushwork and subtle value shifts to suggest rock texture without overworking the surface.
Finish by painting snowcap highlights where light strikes, keeping edges clean to make them read from a distance.
Defining Sharp Ridgelines
Although ridgelines can seem delicate, you’ll give them strength by painting crisp edges, suggesting rock texture, and adding believable snowcaps; these three elements work together to define the mountain’s silhouette and catch the viewer’s eye.
- Emphasize sharp angles to read ridgelines from distance.
- Layer midtones and darks to create ridge depth.
- Use short, directional strokes for rock texture and edge clarity.
Painting Snowcap Highlights
Snowcap highlights bring mountains to life, so pick a cool, slightly desaturated white and apply it sparingly along the sun-facing ridges where snow would naturally collect.
Use a thin brush and confident, short strokes to follow the ridge angles, leaving some underlying rock texture visible to suggest wind-scoured snow and believable volume.
Then vary snowcap techniques, glazing edges, dry-brushing texture, and select subtle highlight colors to unify the scene.
Make Mountains Recede: Color and Value for Atmosphere
When you want distant peaks to sit back in the scene, cool their colors and lighten their values so they read as farther away; atmospheric perspective reduces contrast, mutes saturation, and shifts hues toward blue-gray.
Applying paler, cooler washes to receding ranges will make them convincingly distant. Use color harmony and subtle gradients to sell depth.
- Cool tints
- Lower contrast
- Desaturate gradually
Paint Shadows, Highlights, and Define the Light Source
Having pushed distant ranges back with cooler, paler washes, you now need to establish where the light is coming from so shadows and highlights read consistently across the whole scene.
Decide light direction, then use shadow techniques to paint consistent cast and form shadows.
Plan highlight placement for edges and ridges, maintain contrast balance, reinforce depth perception, and tweak color harmony so tones feel unified.
Blend Transitions and Textures With Simple Brush Techniques
Once you’ve blocked in light and shadow, blend shifts and add texture with a few simple brush moves that keep the mountain believable without overworking it.
Use controlled brush blending and quick texture techniques to suggest ridges, scree, and snow. Work from large to small, vary pressure, and step back often.
- Large washes
- Drybrush ridges
- Soft edge lifts
Finish and Protect Your Mural; Common Fixes (Drips, Streaks)
1 final step is protecting your work: seal the paint with the right clear coat and fix small flaws like drips or streaks before they cure.
Inspect under good light, sand tiny ridges, and feather touch-ups. Choose UV-resistant varnish and appropriate mural sealing techniques for surface and traffic.
Address common mural mistakes—overworking edges or heavy layers—then apply even coats to protect and unify your scene.
Adapt Mural Designs for Kids’ Rooms, Small Spaces, and Large Walls
When you tailor a mountain mural to its setting, think about scale, color, and playfulness so the design feels intentional—bright, simplified peaks and friendly characters work for kids’ rooms, while muted palettes and layered depth suit small or large walls differently.
Tailor mountain murals by scale, color, and playfulness—bright, simplified peaks for kids; muted, layered depth for any wall.
You’ll honor kids’ preferences and space limitations by choosing motifs, contrast, and focal points that match function.
- Simplify
- Layer
- Accent
Frequently Asked Questions
Can I Paint a Mountain Mural on Wallpapered Walls?
Yes — you can, but you’ll need proper wall preparation: remove loose seams, sand, and apply a suitable primer. Choose paint types compatible with wallpaper (acrylic or latex) and test adhesion before committing to the full mural.
How Do I Light the Mural for Best Visibility at Night?
Think of light as sunrise: you’ll use ambient lighting for soft glow, then add mural spotlights to sculpt peaks and textures. Mount adjustable, dimmable fixtures, aim from above and sides, and avoid harsh direct glare for balance.
What’s the Best Way to Incorporate a Window or Door Into the Design?
Place window framing to integrate with peaks and horizon, and plan door placement for natural access and sightlines; you’ll align trim colors, continue mural lines across openings, and use ledges or shutters to enhance depth and flow.
Can I Use Spray Paint or Aerosols for Texture and Speed?
Yes—you can use spray paint techniques and aerosol textures for speed and grit; you’ll mask areas, work in light layers, control drips, and blend with brushes or sponges, but test surfaces and ventilation before committing to large passages.
How Do I Age or Distress the Mural for a Vintage Look?
Right off the bat, you’ll sand, glaze, and scuff layers to distress the mural—use distressing techniques like dry-brushing, crackle medium, and diluted washes; blend vintage finishes, then seal lightly so it looks worn but stays protected.
Conclusion
You’ve learned how to plan, paint, and protect a mountain mural, so you can transform any wall into a peaceful vista. Start small if you’re unsure, pick a style that matches your room, and build depth with thoughtful color, light, and texture. Take your time blending and fixing mistakes, and seal the work when you’re happy. Step back often and trust the process—you’ll feel as steady and hopeful as a summit seen at sunrise.