Why Do We Texture Walls? The Practical and Aesthetic Reasons Explained
You texture walls to hide flaws, boost durability, and add visual depth so rooms look better and stand up to everyday wear. Textures mask joints, patchwork, and dents while improving impact resistance and noise diffusion. They create mood and tactile interest, letting light play across surfaces for a richer finish that can complement trim and flooring. Texturing can save prep time in remodels but complicate repairs, and if you keep going you’ll find when each approach makes the most sense.
Quick Answer Why We Texture Walls
You texture walls because it boosts durability and hides imperfections while giving rooms character and depth.
You’ll get practical benefits like easier maintenance and sound dampening, plus aesthetic perks such as enhanced light play and visual interest.
Here’s a quick snapshot of the most common advantages to contemplate.
One-sentence summary of practical and aesthetic reasons
Because textured walls hide imperfections, improve acoustics, and add visual depth, they offer both practical benefits and aesthetic appeal in one simple treatment.
You choose texture when you want durability, easier maintenance, and noise reduction alongside style; texture transforms flat surfaces into tactile, forgiving backdrops.
Snapshot of most common benefits
Practical perks and visual payoff make texturing walls a smart choice: it hides blemishes, cuts down on visible wear, and softens echo so rooms feel quieter.
You get durability, style, and easier upkeep while creating mood.
- Comforting warmth that invites you in
- Pride in a polished, lived-in look
- Relief from constant touch-ups
- Calm from reduced noise and glare
Basic Understanding What Is Wall Texture?
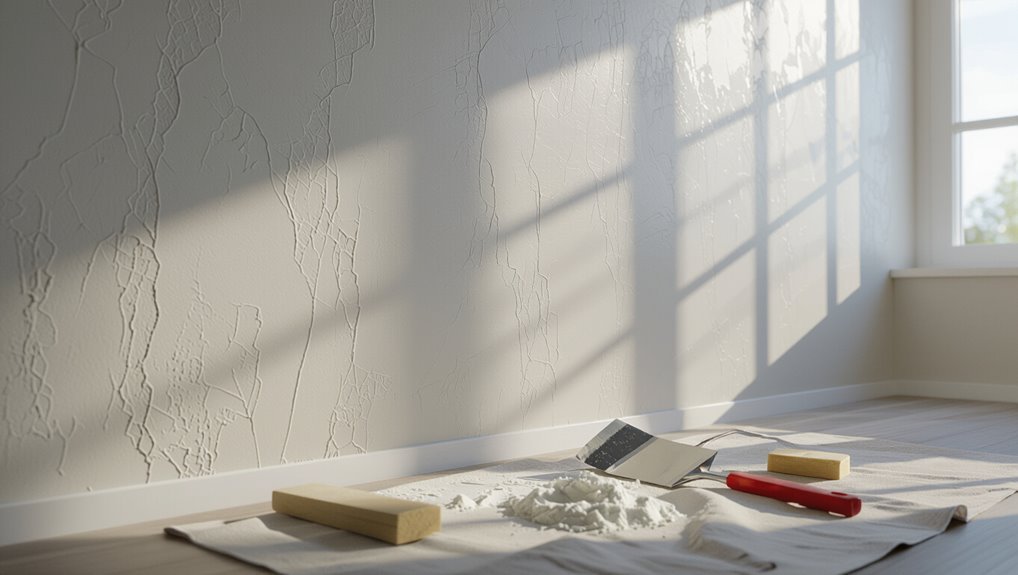
Wall texture is the intentional pattern or finish you see on plaster or drywall, from subtle swirls to raised stipples. It helps mask imperfections while adding character.
You create these effects by applying joint compound or texture premix with tools like brushes, rollers, spray guns, or trowels and then shaping or flattening it to the desired look.
Knowing the basic materials and tools makes it easier to choose a texture that fits your skill level and design goals.
Definition and common types of wall texture (skip trowel, knockdown, orange peel, popcorn, Venetian)
When you talk about wall texture, you mean the deliberate surface finish applied to drywall or plaster that adds visual interest and hides imperfections.
Common types include skip trowel, knockdown, orange peel, popcorn, and Venetian plaster, each offering a different look and level of depth.
You choose texture to set mood, mask flaws, and influence light play.
- Cozy warmth
- Dynamic character
- Timeless elegance
- Practical calm
How wall texture is created (materials and tools)
You’ve seen how textures set mood and hide flaws; creating those effects comes down to a few basic materials and tools you’ll use on drywall or plaster.
You’ll need joint compound or texture premix, water, and sometimes sand or additives.
Tools include trowels, knives, hawks, brushes, rollers, spray guns, and knockdown knives.
Practice and the right tools control pattern and depth.
Practical Reasons for Texturing Walls
When you texture a wall, you’re masking imperfections, hiding patchwork and reducing visible joints so surfaces look smoother with less prep.
Textures also add toughness—improving impact resistance, paint adhesion, and overall longevity.
Plus, certain finishes help dampen sound and diffuse noise for a quieter room.
Concealing imperfections and surface irregularities
Although smooth drywall can look sleek, it also highlights every bump, seam and patch; texturing hides those flaws so your walls look consistent without costly rework.
You’ll mask uneven patches, joint lines and minor repairs with a subtle finish that distracts the eye. That means less time sanding, fewer skim coats, and a finished surface that reads uniform even on imperfect substrates.
Durability and impact resistance
Because textured finishes add thickness and a slight cushioning effect, they help walls resist dings, scuffs, and small impacts that would mar smooth drywall.
You’ll find textured surfaces tolerate daily wear better, reducing visible damage and lowering repair frequency. That resilience makes textured walls ideal for high-traffic rooms, entryways, and kids’ areas, where durability matters as much as appearance.
Acoustic dampening and sound diffusion
If you want to cut echo and soften noise, textured wall finishes can help by breaking up sound waves before they bounce back into a room.
You’ll notice less reverberation in living spaces, home theaters, or offices. By scattering and absorbing sound, textures reduce harsh reflections and improve speech clarity without heavy acoustic treatments, offering a simple, aesthetic way to tame acoustics.
Hiding patchwork and reducing visible joints
When you patch drywall or join new panels, textured finishes hide seams and imperfections by breaking up straight lines and blending edges into the surrounding surface.
You’ll mask uneven compound work, hairline cracks, and mismatched board edges so repairs don’t draw attention.
Texture creates visual complexity that disguises minor flaws, letting walls look cohesive without costly full-surface refinishing.
Improving paint adhesion and longevity
Although it might seem purely decorative, texture gives paint a better surface to grab onto, so your finish sticks longer and resists peeling.
You’ll find textured walls help paint bond by increasing surface area and hiding minor adhesion flaws. That reduces flaking, extends intervals between repaints, and keeps color uniform.
With proper prep, texture improves durability and lowers long-term maintenance.
Aesthetic Reasons for Texturing Walls
You can use texture to add depth and visual interest that makes flat walls feel more dynamic.
It helps define a style or mood—modern, rustic, Mediterranean—while manipulating light and shadow to enhance architectural features.
Coordinate textures with trim, flooring, and fixtures so the whole room reads as a deliberate, cohesive design.
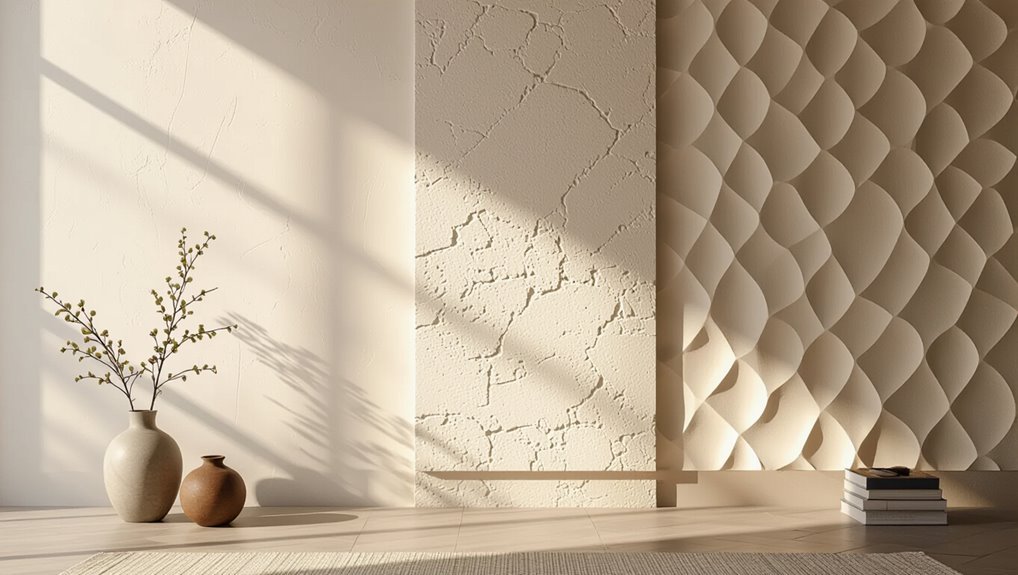
Adding depth, dimension, and visual interest
Texture brings a room to life by creating depth and dimension that flat paint just can’t match. You’ll notice how shadows and highlights change with light, making surfaces feel tactile and layered.
Textures break monotony, guide the eye, and emphasize architectural features. By choosing scale and pattern, you can add visual interest without overwhelming the space, keeping rooms engaging and balanced.
Creating style and mood (modern, rustic, Mediterranean, etc.)
When you pick a wall finish, it does more than cover surfaces—it sets the room’s personality.
You choose textures to echo styles: sleek plaster for modern calm, rough stone for rustic warmth, troweled stucco for Mediterranean charm, or subtle suede for cozy elegance.
Textures guide emotion and reinforce design intent.
- calm and minimalist
- warm and inviting
- sun-soaked and relaxed
- intimate and refined
Manipulating light and shadow for architectural effect
Although subtle at first glance, textured walls can dramatically shape how light and shadow play across a room, so pick finishes that deliberate highlight or soften architectural lines.
You’ll use ridges, stipple, or smooth relief to emphasize cornices, niches, and columns. Directional lighting casts pronounced relief on coarse textures, while low-sheen, fine textures yield gentle gradations, altering perceived depth and warmth.
Coordinating texture with trim, flooring, and fixtures
If you want your space to feel intentional, match wall textures to trim, flooring, and fixtures so each element supports the others rather than competes.
You’ll balance smooth trim with subtle wall texture, echo flooring grain with directional finishes, and pair metallic fixtures with low-sheen plaster.
Thoughtful contrasts and repeated motifs tie the room together, creating cohesion without monotony and reinforcing your design narrative.
When to Texture vs. When to Keep Smooth Decision Guide
Think about each room’s function—you’re likely to want textured finishes in hallways and living rooms for durability and visual interest, but smoother walls often work better in bedrooms and modern kitchens for a clean look.
Check the surface and substrate: rough or damaged drywall can benefit from texture, while new, well-prepped walls are ideal for a smooth finish.
Finally, weigh your renovation stage and cost versus benefit—textures can hide flaws and save prep time in remodels, but on a new build the extra labor and materials mightn’t be worth it.
Room-by-room recommendations (living room, bedroom, kitchen, bathroom, hallway)
When deciding whether to texture or keep walls smooth, consider each room’s function, lighting, and desired mood—textured finishes add warmth and hide imperfections, while smooth walls feel modern and make colors read truer.
In living rooms favor subtle texture for coziness; bedrooms suit soft textures or smooth for calm; kitchens and bathrooms need smooth, washable surfaces; hallways can take durable texture to mask wear.
Surface condition and substrate considerations
Because the condition of your walls and the materials beneath the finish determine both how well a texture will adhere and how much prep you’ll need, assess substrate soundness before deciding to texture or keep walls smooth.
Check for cracks, moisture, loose plaster, or uneven joints.
Smooth, stable drywall often stays smooth; damaged or mismatched substrates benefit from texture to hide imperfections and reduce prep time.
Renovation stage: new build vs. remodel
If you’re working on a new build, you can plan substrates, joints, and finishes with texture in mind; in a remodel, existing conditions often dictate whether you can reasonably add texture or should leave walls smooth.
On new builds, you’ll coordinate trades and choose textures freely. In remodels, assess patching, changes, and matching; sometimes smoothing is smarter for time and consistency.
Cost vs. benefit analysis
Having weighed how new builds let you plan textures while remodels force compromises, you’ll now look at the practical trade-offs between texturing and keeping walls smooth. You’ll compare costs, maintenance, resale impact, and style flexibility to decide.
| Factor | Texture | Smooth |
|---|---|---|
| Cost | Moderate | Lower |
| Maintenance | Hides flaws | Easier cleaning |
| Resale/style | Trendy | Timeless |
How Wall Texture Affects Painting and Finishing
When you’re painting textured walls, pick paints and sheens that hide imperfections without blowing out the texture’s detail.
Use rollers with thicker naps, brushes for edges, or an airless sprayer depending on the texture, and plan for extra coats and touch-ups.
Choose colors and contrast levels to either highlight the texture with shadows or minimize it with flatter, closer-toned hues.
Choosing paints and sheens for textured walls
How does texture change the way paint looks and performs on your walls?
You’ll pick flatter sheens to hide imperfections and reduce glare, while satin or eggshell adds washability without highlighting peaks.
Use thicker, high-build paints to guarantee even coverage over grooves.
Matte finishes mask flaws; semi-gloss suits trim or high-contact areas.
Always test a sample on the actual textured surface.
Application methods and tools for painting texture
Picking the right paint and sheen is only part of the job — the way you apply it will determine how the texture reads and how durable the finish is.
Use brushes for edges, rollers with appropriate nap for even coverage, and sprayers for deep crevices.
Work in consistent directions, backroll sprayed areas, and avoid overworking wet paint to preserve texture definition and longevity.
Color selection tips to enhance or minimize texture
Any color you choose will change how texture reads, so think about whether you want to highlight or hide the surface before you buy paint.
Pick lighter, matte hues to soften texture; deep, glossy tones will emphasize peaks.
Test samples on the wall at different times of day to confirm effect and mood.
- Delight in subtlety
- Embrace dramatic contrast
- Seek calming uniformity
- Avoid accidental harshness
Step-by-Step: How Texture Is Applied (Overview)
Before you start texturing, you’ll prep the surface by cleaning, patching holes, and priming so the finish adheres properly.
You’ll choose the right tools and materials—sprayers, trowels, hoppers, masks—and follow safety steps.
Then you’ll apply texture by spraying, troweling, or hand techniques and finish with controlled drying, sanding, and sealing.
Surface preparation (cleaning, patching, priming)
Although it might seem tedious, you’ll get the best, longest-lasting texture by cleaning, patching, and priming the surface first.
Remove dust, grease, and loose paint so texture adheres. Fill holes and cracks, sand smooth, and feather edges for an even base.
Apply an appropriate primer to seal porous areas and guarantee uniform absorption, which prevents bubbling and uneven finish.
Tools, materials, and safety considerations
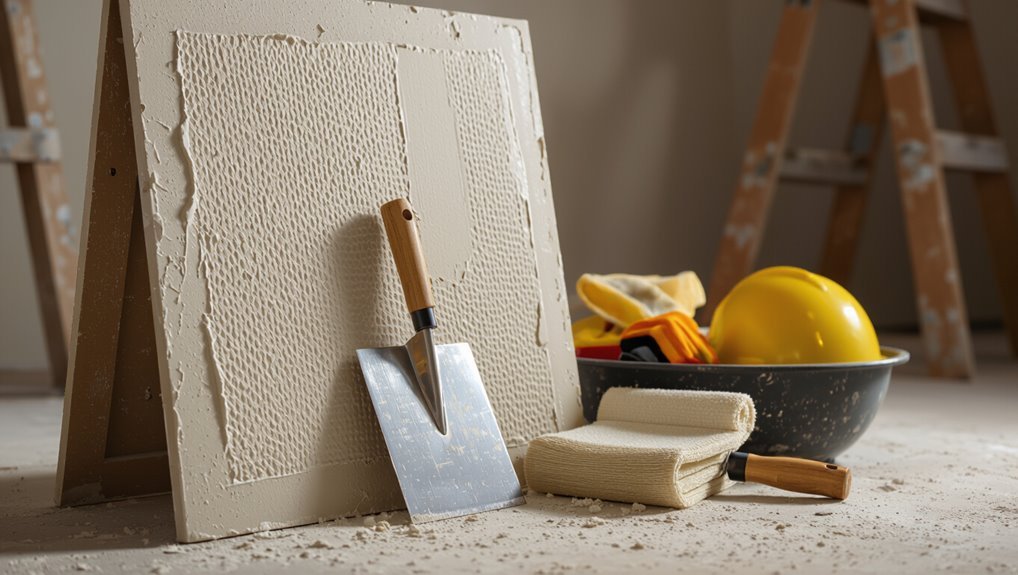
You’ll need a few basic tools—sprayers or hopper guns for large areas, trowels and knives for knockdown or skip trowel textures, various rollers and brushes for stippling, plus mixing buckets, strainers, and extension poles—to apply texture efficiently and consistently.
Choose quality joint compound or premixed textures, wear respirators, goggles, gloves, and use drop cloths to protect floors.
- Confidence
- Pride
- Calm
- Satisfaction
Common application techniques (spray, trowel, hand-apply)
Having your tools ready and safety gear on, you’ll next choose the application method that fits the surface, desired look, and project scale.
You can spray for fast, even coverage and varied patterns; trowel for durable, sculpted finishes; or hand-apply for subtle, controlled textures and repairs.
Match technique to material, access, and skill to guarantee consistent results.
Drying, sanding, and finishing steps
Let the texture cure fully before you touch it: drying time depends on material, coat thickness, temperature, and humidity, so expect anywhere from a few hours to a couple of days.
Then sand lightly to blend highs and remove nibs, using fine-grit paper.
Clean dust, prime patched areas, and apply finish—paint or sealant—matching sheen and using even strokes for a uniform, durable result.
Common Mistakes and Problems With Wall Texturing
Watch for common missteps that can ruin a textured finish, like over-texturing or inconsistent patterns that make walls look amateurish.
If you skip proper preparation, textures can peel or crack, and choosing the wrong texture for the room or substrate often causes performance problems.
Repairs are also tricky—matching existing texture takes skill, so plan with maintenance and future fixes in mind.
Over-texturing or inconsistent texture patterns
When you pile on heavy texture or apply different patterns unevenly, the wall stops reading as a cohesive surface and starts shouting inconsistently.
You’ll create visual noise that overwhelms decor, hides architectural lines, and frustrates attempts to paint or refinish.
Stick to a consistent approach, balance texture scale with room size, and test samples so surfaces feel intentional instead of chaotic.
Poor preparation leading to peeling or cracking
Over-texturing or mismatched patterns can call attention to sloppy technique, but poor prep will make even careful work fall apart: if you don’t clean, prime, or repair surfaces first, texture won’t adhere and will soon peel or crack.
You should remove dust, flaking paint, and grease, patch holes, and use the right primer so the finish bonds and stays durable.
Wrong texture type for the room or substrate
If you pick a texture that doesn’t suit the room or substrate, you’ll end up with a finish that looks off or fails prematurely.
Choose lightweight, moisture-resistant textures for bathrooms and kitchens; use durable, low-profile textures on high-traffic walls.
Match texture to substrate—thinset or smooth drywall won’t hold heavy knockdown.
Picking wrong textures wastes time, money, and creates maintenance headaches.
Repair challenges and matching existing texture
Because textures age, settle, and get painted over, repairing a patch so it disappears into the surrounding wall is often harder than you expect.
You’ll struggle to match compound mix, tool marks, thickness, and paint sheen. Test blends on scrap, keep notes on technique and materials, and feather edges carefully.
If uncertain, consult a pro to avoid obvious touch-up spots.
Prevention and Best Practices
Before you texture, make sure you prep surfaces thoroughly—fix cracks, remove loose paint, and prime so the finish lasts.
Pick a texture that matches the room’s use and your style, and decide whether the job is worth a pro’s precision or a DIY weekend.
Once finished, follow simple maintenance routines to protect the surface and catch issues early.
Preparing surfaces to avoid future problems
1 essential step in texturing walls is thorough surface preparation, since small oversights today create major problems later.
You should clean, repair cracks, remove loose paint, and sand uneven spots.
Prime porous areas and guarantee surfaces are dry to prevent blistering, peeling, or mold.
Use appropriate fillers, follow drying times, and inspect under good light so the texture adheres and lasts.
Choosing the right texture for function and style
When you pick a texture, think about how the room will be used and how much maintenance you’re willing to do. Textured finishes can hide flaws and add grip in wet areas, but some collect dust or are harder to repaint.
Choose smooth for formal rooms, durable knockdown or orange peel in high-traffic spaces, and slip-resistant patterns for bathrooms and garages to balance style and function.
Hiring professionals vs. DIY: when to call a pro
If you’ve never troweled together a smooth skim coat or managed a compressor for spray texture, call a pro—complex textures, structural repairs, and projects that affect insulation or moisture barriers demand experienced hands and the right tools.
You can DIY simple knockdown or paint-over textures, but hire pros for riskier, time-sensitive, or high-visibility work.
- Relief from stress
- Pride in flawless results
- Protection of your home
- Confidence in warranties
Maintenance tips for textured walls
Keep a simple maintenance routine to preserve textured walls and avoid costly repairs: dust or vacuum them monthly, spot-clean stains promptly with a soft sponge and mild detergent, and touch up paint chips as soon as you see them to prevent moisture intrusion.
Inspect for cracks or mold quarterly, address humidity with ventilation or dehumidifiers, and use gentle tools to avoid damaging texture when cleaning or repainting.
Cost, Time, and ROI Considerations
You’ll want to weigh typical cost ranges for different textures and room sizes so you can budget accurately.
Consider how long a DIY project will take versus hiring pros, and factor labor into the total.
Also think about how texture choices can affect resale value and what local buyers prefer.
Typical cost ranges by texture type and room size
Because texture type, room size, and finish complexity all influence labor and materials, estimating costs takes a few clear factors into account:
You’ll see rough ranges: simple knockdown for a small room is economical; heavy Venetian plaster in a large living area costs more. Choose based on budget and desired impact.
| Texture | Typical range |
|---|---|
| Light (small room) | $200–$600 |
| Heavy (large room) | $1,500–$5,000 |
Time estimates for DIY and professional jobs
Estimating how long a texture project will take depends on whether you’re tackling it yourself or hiring pros, the room size, and the finish complexity—simple orange peel in a 10×10 room can be done in a day by an experienced DIYer,
while ornate Venetian plaster in a large living area may take contractors several days to a week.
Plan for prep, drying, sanding, and paint; factor skill level and cleanup.
Impact on resale value and buyer preferences
While textured walls can add character, they can also affect how quickly and profitably your home sells—buyers often favor smooth, neutral finishes that feel modern and move-in ready.
You should assess local market trends before committing; in older neighborhoods, texture can be charming, but in competitive markets it may lower offers or require sanding and skim-coating, adding time and cost to your ROI.
Case Examples and Scenarios
Consider three practical scenarios to help you choose the right texture: fixing imperfect drywall in a rental unit, upgrading a home for resale with subtle texture, and creating a stylistic feature wall.
You’ll see different costs, time commitments, and visual impacts for each case. Use these examples to match technique and finish to your goal.
Scenario A: Fixing imperfect drywall in a rental unit
When you move into a rental with imperfect drywall, small flaws like nail pops, uneven tape lines, or dinged corners are usually quicker and cheaper to fix than you think. Addressing them promptly keeps the unit looking cared-for and can prevent disputes at move-out.
Patch, sand, and apply light texture to blend; match paint, document repairs with photos, and notify your landlord if larger issues appear.
Scenario B: Upgrading a home for resale with subtle texture
If you’re prepping a house for sale, adding subtle wall texture can boost perceived quality without alienating buyers. Small, tasteful finishes hide minor imperfections, create depth in photos, and make rooms feel finished.
You’ll choose neutral, low-contrast textures, keep ceilings smooth, and apply consistent finishes throughout. Subtle texture suggests care and reduces repainting costs for buyers, improving marketability.
Scenario C: Using texture to create a stylistic feature wall
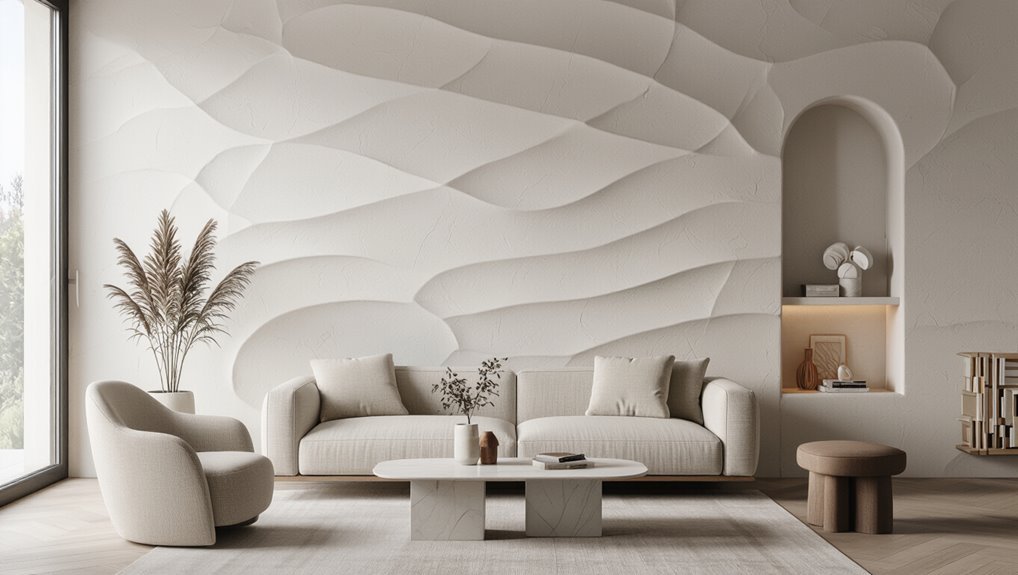
After using subtle texture to appeal broadly, you can make a bolder choice: create a stylistic feature wall that anchors a room and expresses personality.
Choose a texture—painted plaster, board-and-batten, or geometric panels—that complements furnishings. Use scale, contrast, and a focused color to draw attention.
Keep other walls simple so the feature remains intentional, not overwhelming, and balances the space.
Frequently Asked Questions
You’ll get clear answers here to common concerns like whether texture permanently hides cracks or stains and if textured walls can be made smooth again.
You’ll also learn whether textured drywall looks dated, which DIY texture is easiest, and how texture affects dust and allergies.
Use these FAQs to decide what’s best for your space.
Does texture hide cracks and stains permanently?
While texture can mask small hairline cracks and discoloration by breaking up light and drawing the eye, it doesn’t permanently fix structural damage or deep stains.
You’ll still need proper repair or stain-blocking primers to stop issues from returning. Texture is a cosmetic concealment—address underlying causes, replace compromised drywall or plaster, and treat stains at the source for lasting results.
Can textured walls be made smooth again?
Curious whether you can turn textured walls back to smooth ones? Yes—you can.
You’ll sand or skim-coat the texture, clean and prime thoroughly, then finish with joint compound, sand smooth, and repaint.
Some textures require more work or a professional touch. Expect dust, time, and patching; assess underlying damage first so the result stays flat and durable.
Is textured drywall outdated?
Is textured drywall out of style? It depends on your taste and the home.
Textures can feel dated in some modern minimalist spaces, yet they add character, hide flaws, and improve acoustics.
You’ll want smoother finishes for contemporary looks, but textured walls still work in intermediary, rustic, or traditional designs.
Choose based on function, lighting, and overall decor.
What is the easiest texture for DIYers?
Because you’re just getting started, knockdown and orange peel are the easiest textures for DIYers to tackle—both hide imperfections, don’t demand perfect trowel skills, and use simple tools like a hopper gun, brush, or knockdown knife.
You’ll prep, spray or apply compound, let it set, then lightly knock down or leave the stipple.
Practice on scrap drywall first for consistent results.
How does texture affect allergy and dust accumulation?
If you’ve tried knockdown or orange peel, you’ve likely noticed how texture changes how a wall collects dust and allergens.
Rough textures trap more particles in crevices, so you’ll need more frequent dusting. Smooth, satin finishes shed dust and are easier to wipe clean, helping allergy sufferers.
Sealed textures resist moisture and mold, reducing irritant buildup in the long term.