
How Many Coats of Paint Does an Exterior Wall Actually Need?
You’ll usually need two quality finish coats on an exterior wall after solid prep. If you’re painting bare wood, fresh stucco, or stain-prone spots, you should use primer and then apply two coats. If coverage looks thin around edges or repairs, add an extra coat. Prime chalky, peeling, or stained areas for better adhesion, and always prep for moisture, cracks, and flaking. For specific siding or stucco plans, you’ll want the details next.
Quick Answer: How Many Coats for Exterior Walls?
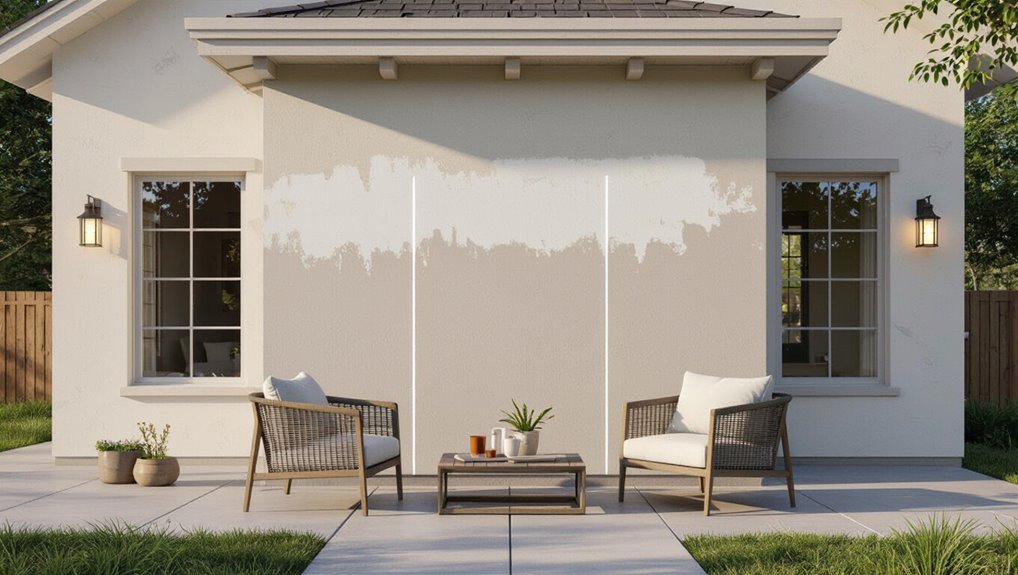
Wondering how many coats you need? For most exterior walls, you’ll apply 2 coats of quality exterior paint after prep.
If you’re covering bare wood, fresh stucco, or stubborn stains, you’ll often need a primer plus 2 coats for solid paint durability. You should also add an extra coat if coverage looks thin, especially around edges, repairs, and patched spots.
Climate factors matter: hot sun, freeze-thaw cycles, driving rain, and high humidity can demand more build to resist fading, cracking, and peeling.
Choose proper product thickness and follow the can’s coverage guidance.
How to Read the Exterior Surface Before Painting
Before you buy paint, inspect the surface condition closely and note any flaking, peeling, or damage.
Then check for moisture, cracks, and soft spots that could ruin adhesion if you paint over them.
Finally, identify the type of existing coating so you can choose the right primer and sheen.
Inspect Surface Condition Carefully
Start by inspecting the wall up close, because the surface condition you find determines how well paint will bond and how many coats you’ll need. You’re doing surface preparation through damage assessment: look for peeling edges, chalky residue, loose caulk, blistering, rust stains, and mildew spots. Feel for roughness with your hand, and scrape where paint lifts—if it comes off easily, you’ll need better prep. Use this quick guide as you decide what to tackle first:
| What you see | Likely issue | Prep focus |
|---|---|---|
| Flaking | Poor bond | Scrape, prime |
| Blisters | Trapped moisture | Remove, seal |
| Cracks | Movement | Fill, sand |
| Stains | Bleed-through | Block primer |
| Chalky | Weathering | Wash, recoat |
Check For Moisture And Cracks
Check the exterior wall for moisture and cracks at eye level and from the corners, where water usually travels.
Look for dark stains, soft spots, peeling edges, and any damp sheen after a recent rain.
Do simple moisture detection by pressing a dry cloth against suspected areas; if it picks up dampness, pause and investigate.
Scan along mortar lines, around windows, and near downspouts.
For crack assessment, watch for hairline surface cracks versus wider gaps or shifting seams.
Tap gently and note hollow sounds or flaking.
Address issues before you start painting.
Identify Existing Coatings Type
Take a close look at the exterior wall’s surface to identify what kind of coating you’re dealing with, because the right prep—and the number of paint coats you’ll need—depends on it.
Check for peeling flakes, chalky residue, or blistering; these clues point to worn latex, oil-based paint, or failing masonry sealer.
Press masking tape onto a small spot, then pull—if it lifts paint, you’ve got loose coatings.
If the finish looks thick and glossy, it may be oil or stain. If it’s porous and dusty, expect masonry paint or sealers.
Plan surface preparation accordingly before you repaint.
Bare Wood or Masonry: Add These Extra Coats
If the wall is bare wood, you should seal it first so the paint won’t soak in unevenly.
If it’s masonry, you need to prime it for proper bonding before you add finish coats.
Doing these extra steps helps your topcoat adhere better and last longer outdoors.
Seal Bare Wood First
Before you paint, seal any bare wood so moisture can’t soak into the grain and ruin your finish. This is where solid wood treatment matters most.
Scrape off loose fibers, sand smooth, and remove dust. Then apply an exterior-rated sealer or primer specifically for bare wood; don’t rely on paint alone.
Use sealing techniques that wet the surface evenly—brush or roll in thin coats, and pay extra attention to end grain and knots.
Let each coat dry fully, then lightly scuff if needed. Once sealed, your topcoat goes on cleaner and lasts longer.
Prime Masonry For Bonding
Prime masonry before you topcoat to create a strong, paint-ready bond and prevent premature peeling or chalking. You need prime for surface preparation, especially on porous brick, block, or concrete where moisture and dust can interfere.
Clean the surface first: scrape loose material, wash, and let it dry completely.
Then choose the right bonding agents—typically a masonry primer or block filler with sealant qualities. Apply an even coat with a roller or sprayer, covering edges and mortar joints.
If the wall drinks primer quickly, add a second coat for consistent coverage. Let it cure before topcoating.
Old Paint Conditions That Change Your Coat Count
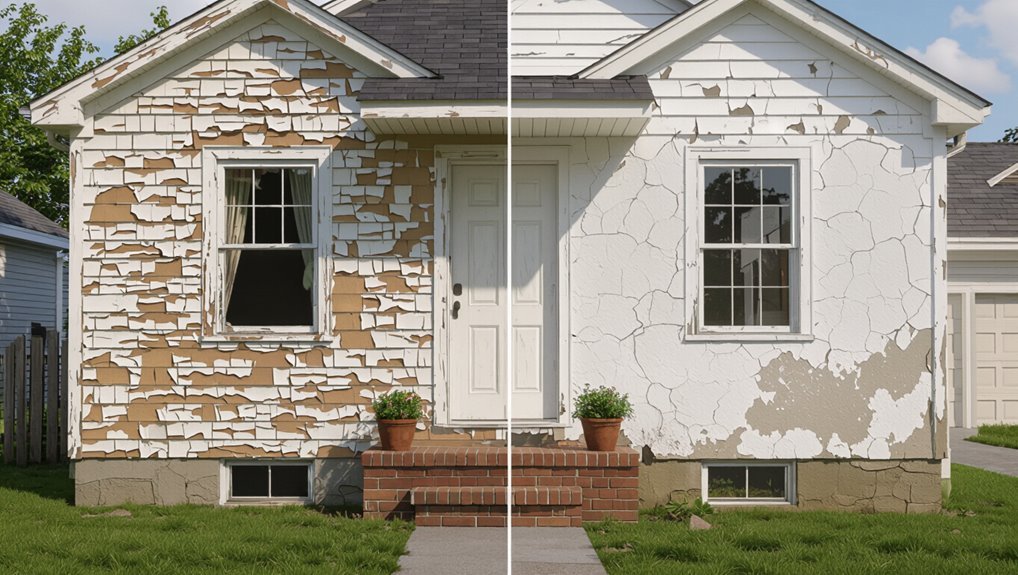
Old paint conditions can dramatically change how many coats you need, because they affect how well new paint bonds and how much hiding power you’ll get.
If your surface is blistered, you must use paint removal techniques like scraping and spot sanding to remove loose edges, then follow surface preparation tips: clean, dry, and feather around boundaries.
Chalky or fading paint reduces adhesion, so you’ll need thorough washing and abrasion before coating.
Rusted spots demand aggressive cleaning to stop bleed-through.
Peeling paint often forces extra coats because you’ll lose uniformity and cover repairs.
Prime First or Skip Primer: Use This Rule
Prime first if the surface is chalky, stained, or peeling, because primer helps paint stick and look even longer.
Skip primer only when the existing coating is clean, sound, and compatible with your new paint so you’re not wasting product.
Before you pick your coat count, check adhesion and coverage together—then choose prime or skip.
Prime For Better Adhesion
Primer acts like a bridge between your wall and your topcoat, helping paint bond instead of peeling or blistering later.
If you want stronger adhesion techniques, prime the full, cleaned surface before you roll or spray. You’ll lock down dust, chalky residue, and uneven porosity so the topcoat can grip consistently.
Don’t skimp on primer benefits: it creates a uniform base, improves coverage, and reduces flashing by evening out suction.
Apply primer evenly, follow dry times, and let it cure as directed before painting. You’ll end up with a tougher exterior finish that lasts.
Skip Primer When Appropriate
You can skip primer when the surface already provides a stable, compatible base for your topcoat—so long as you follow the prep checklist and choose the right paint system. If the existing paint is sound, clean, and not chalky, you can reduce labor and enjoy cost savings. Still, you must get surface preparation right: remove mildew, sand gloss, caulk gaps, and confirm adhesion. Pay attention to weather considerations; painting in dry, mild conditions protects paint durability and your project timeline. Use sound application techniques, like feathering edges and proper drying times.
| Scenario | Action |
|---|---|
| Existing paint intact | skip primer |
| Bare wood/metal | prime first |
| Rusted or peeling areas | spot-prime |
Primer Types: Adhesion, Stain Blocking, and Coverage
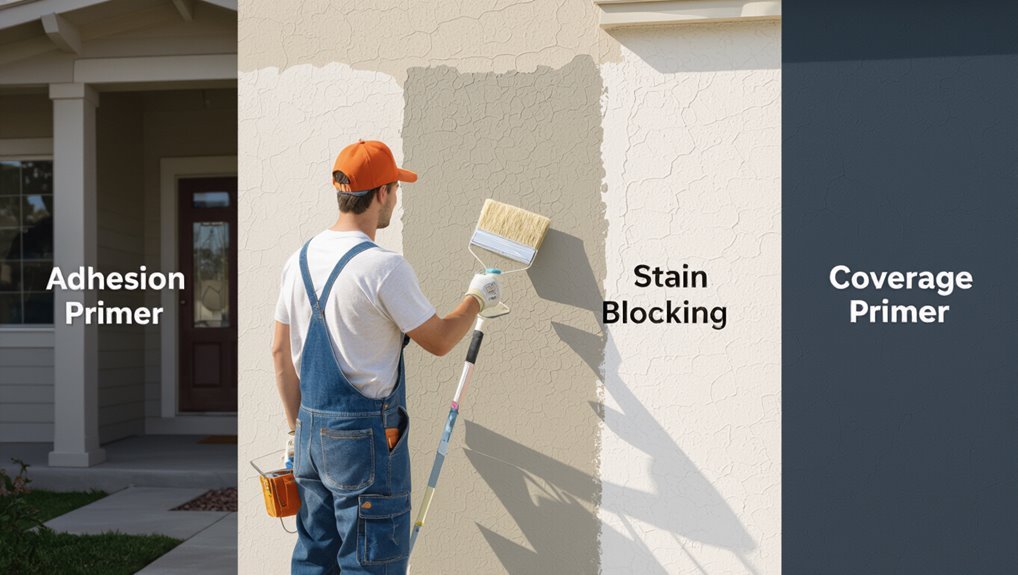
Choosing the right exterior primer determines whether your topcoat bonds tightly, resists discoloration, and covers evenly. Focus on adhesion benefits when surfaces are chalky, glossy, or slightly worn; choose primers formulated to grip and seal for durable bond.
Choose the right exterior primer for tight bonding, fewer discoloration issues, and even coverage—especially on chalky, glossy, or worn surfaces.
If you see rust, water marks, or tannin bleeding, prioritize stain blocking so spots don’t bleed through new color.
For coverage techniques, pick a primer matched to the substrate’s porosity: block, fill, and level so you need fewer topcoats.
Use primer comparisons by checking labels for stain resistance, bond strength, and recommended spreading rate.
Pick Paint Sheen for Better Exterior Hiding
After you’ve prepped and primed, pick the right paint sheen so it hides well and performs outdoors.
For better hiding, choose a satin or eggshell paint finish; the slight sheen resists scuffs and keeps surfaces looking even. If the wall has minor dents or patch marks, matte can camouflage them better, but you must balance that with cleaning needs.
Higher sheen reflects light, so imperfections show. Prioritize exterior durability: in sun-heavy spots or near doors, lean satin for tougher performance while still masking uneven texture.
Paint Type Matters: Latex vs Oil vs Specialty
You need to know how latex vs oil behaves before you count coats, because latex dries fast, while oil-based paint bonds differently and often needs longer curing.
You should pick specialty exterior coatings—like elastomeric or masonry paint—when you’re dealing with cracks, weathered surfaces, or porous materials.
Choose the right type up front and you’ll avoid wasted coats and get more consistent coverage.
Latex Vs Oil Differences
When you compare latex and oil paints for exterior walls, the differences show up in how they dry, how they bond, and how they handle moisture.
Latex dries faster, so you can recoat sooner and it flexes slightly as wood and siding expand. You also get strong latex advantages like easy soap-and-water cleanup and lower odor.
Oil paints cure slower, forming a harder film that can resist scuffs better. That’s where oil durability comes in: it often holds up on properly primed, smooth surfaces.
Still, oil needs careful ventilation and longer drying times before the next coat.
Specialty Coatings For Exteriors
Choosing the right specialty coating for an exterior wall means you match the paint system to the surface and the conditions, not just the finish you want.
Use specialty primers to bond to brick, stucco, or siding and to seal stains.
If you need camouflage for old cracks, textured coatings add grip and hide imperfections while shedding minor wear.
For moisture-prone zones, pick high performance finishes rated for UV and mildew resistance.
When sustainability matters, choose eco friendly options that still cure hard and resist fading.
You control durability by selecting compatibility, not by chasing sheen.
Weather Exposure: Sun, Rain, and Wind Impacts
Even though exterior paint looks solid at first, sun, rain, and wind constantly stress the coating and shorten its life. You face UV exposure that drives sun damage, making pigments fade and binders chalky as surface temperature swings with seasonal changes. Then rain delivers moisture retention and rain effects, soaking seams and slowing adhesion. Wind adds wind erosion, blasting grit that scratches cured film and opens pores for more water.
| Weather factor | Main impact |
|---|---|
| Sun/UV | Sun damage, fade |
| Rain | Moisture retention |
| Wind | Wind erosion |
| Cycles | Surface temperature |
| Result | Lower paint longevity |
Temperature and Dry Time Between Exterior Coats
You’ll get the best results when you paint in an ideal temperature range, typically around 50–85°F (10–29°C).
You should check the label for the required dry time window and wait long enough between coats so the surface cures rather than skins over.
If temperatures drop or humidity rises, you’ll likely need extra drying time before applying the next coat.
Ideal Temperature Range
Aim to paint when temperatures stay between 50°F and 85°F (10°C to 29°C), since this range helps paint flow, cure, and resist early issues like blistering or poor adhesion.
You want stable weather because temperature effects can shift how your coating levels and bonds.
In ideal conditions, cooler air slows curing, making paint feel tacky longer and raising the risk of dirt pickup.
Hotter surfaces can flash-dry the top layer, trapping moisture underneath and weakening adhesion.
Check the forecast, avoid direct sun on walls, and pause if temperatures will swing quickly.
Required Dry Time Window
Once the wall sits within the 50°F–85°F range, you still need a proper dry time window before adding another exterior coat.
You should follow the product’s label, but plan for several hours of dry time, then verify it feels firm, not tacky.
Don’t rush if weather conditions are changing—humidity, rain, and falling temps slow evaporation and can trap solvents.
Check wind too; gusts can cool the surface and extend curing.
If a forecast calls for overnight lows below the minimum, wait longer or reschedule.
When in doubt, test a small section before coating the full wall.
Apply Each Exterior Coat for Smooth, Even Coverage
Apply the first exterior coat evenly across the entire wall, keeping a steady pace so you don’t leave lap marks or thin spots.
Focus on smooth application and even distribution from top to bottom, overlapping each stroke about a few inches. Use a roller for broad areas, then brush edges and corners immediately so they blend while wet.
Work in manageable sections, and maintain consistent pressure to avoid streaks. If you notice flashing, stop and rework the area quickly, rather than letting it dry unevenly.
Let the coat cure fully before starting the next one.
When to Add a Third Coat (Hiding Checklist)
Before you mix and start your third exterior coat, check whether the first two layers truly hide the wall.
Hold a flashlight at a low angle and look for flashing, streaks, or uneven sheen. Step back and compare the surface to the original color from different directions to spot thin spots.
If you still see substrate, old stains, or sharp edges, you need better hiding techniques, not just more paint.
Test with a small area using your chosen color blend, then re-check after it dries.
Persistent color contrast means two coats aren’t enough—add the third and feather edges carefully.
Spot-Prime Repairs and Blend Them Into Coats
After you finish hiding check, handle problem areas first by spot-priming repairs and bare spots. You want tight edges so the patch doesn’t flash after topcoat. Use spot prime techniques: feather primer onto sound paint, then let it dry fully. Lightly scuff cured primer, wipe dust, and recoat so you blend repairs into surrounding coats.
| Step | Goal | Tip |
|---|---|---|
| Prime | Seal bare spots | Feather outward |
| Scuff | Improve adhesion | Use fine grit |
| Topcoat | Match sheen | Blend softly |
| Dry | Prevent lifting | Wait fully |
Coverage Math: Square Footage to Exterior Paint
Getting the right amount of exterior paint starts with simple coverage math based on square footage. First, take accurate exterior measurements of your wall area, then subtract openings like windows and doors.
Next, check the paint can’s stated paint coverage, usually in square feet per gallon per coat. Multiply your net wall square footage by the number of coats you plan, then divide by the coverage per gallon to get total gallons.
Add 10–15% extra for weathering, texture, and cutting-in. Use the same units throughout, and recheck your calculations before buying.
Why Exterior Walls Often Need More Coats
Even when your coverage math looks straightforward, exterior walls often demand more coats because outdoor conditions work against the paint. You face environmental factors like sun intensity, rain impact, and temperature swings that push coatings to dry unevenly and lose adhesion faster. To protect paint longevity, you need extra build so the finish resists fading, chalking, and mildew staining. Consider how each layer handles stress before the next one closes gaps.
| Environmental factor | What extra coat helps |
|---|---|
| UV exposure | Better color stability |
| Heavy rain | Tighter water barrier |
| Freezing/thawing | Improved flexibility |
| Wind-driven dust | Smoother, sealed finish |
| Humidity cycles | More consistent curing |
Causes of Peeling, Streaks, and Thin Spots
Peeling, streaks, and thin spots usually show up when something disrupts bonding or film build, and you often spot them before the paint ever fully “sets.”
Peeling, streaks, and thin spots often begin when bonding or film build is disrupted, revealing issues before the paint fully sets.
The most common causes include painting over dirty or chalky surfaces, skipping proper prep (like scraping loose paint and priming), applying coats that are too thin, or rushing drying time in poor weather.
For streak prevention, you keep a steady pace, maintain even roller/brush pressure, and avoid overworking wet paint.
For thin spot remedies, you recognize poor coverage from quick recoat gaps.
Good surface preparation prevents many peeling causes and helps your coating hold.
Sand, Scrape, and Recoat Only the Problem Areas
Sand, scrape, and recoat only the problem areas to fix weak spots without reworking the whole wall.
Start with thorough problem area identification: look for peeling edges, soft chalking, rust spots, and blistered paint.
Use a scraper to remove all loose material until you reach solid, sound coating.
Sand feathered boundaries so new paint bonds smoothly.
Wipe away dust, then spot-prime bare wood, metal, or patched sections as needed.
Finally, recoat those areas with the same sheen system, blending outward for a seamless look.
This targeted repair saves time, materials, and labor.
Coat Plan by Finish: Siding vs Stucco
Once you know how many coats your wall needs overall, you still have to plan them based on the surface—so your coat schedule changes depending on whether you’re painting siding or stucco.
For siding, focus on tight prep and adhesion; primer helps you lock down chalky areas and boost siding durability, especially on wood, vinyl, or fiber cement. You’ll often use thinner finish coats but keep coverage consistent, because seams and edges drink paint.
For stucco, you prioritize an even base since porous texture can over-absorb. Use the right primer, then apply finish coats at proper thickness to reduce flashing and improve stucco maintenance.
Build a Repaint Schedule by Exterior Finish Type
Your repaint schedule should change based on what you’re painting, because each exterior finish ages differently under sun, rain, and temperature swings.
You’ll protect your exterior lifespan by matching timing to your paint finish and substrate. Start by noting finish type, then check trim caulk, chalking, and blistering every spring and fall.
Use these anchors, and adjust after inspections:
- Vinyl or coated siding: repaint lightly every 7–10 years.
- Stucco: touch up annually; plan full coats at 5–8 years.
- Wood: prime and repaint every 3–6 years, especially near ground exposure.
Frequently Asked Questions
Can I Paint Exterior Walls in One Thick Coat?
No—you shouldn’t. You’ll struggle with adhesion and uneven drying when you rely on thick application. For exterior walls, applying paint in proper coats lets coverage level out, improves durability, and reduces peeling or blistering.
How Long Should I Wait After Pressure Washing Before Painting?
Wait 24–48 hours after pressure washing, depending on weather and drying time, before painting. Confirm surface preparation is complete: rinse thoroughly, fix cracks, and let everything dry until no damp spots remain.
Do I Need to Remove All Peeling Paint Before Coating?
Yes—you need to remove all peeling paint. Think of loose flakes as cracks in a promise; they break paint adhesion. Scrape, sand smooth, then prime bare spots. Seal any remaining edges so coating bonds tightly and won’t lift again.
What Happens if I Don’T Match Paint Brand or Sheen?
If you don’t match paint brand or sheen, you risk color compatibility issues, uneven drying, and peeling. Different sheen differences can make patches stand out and reflect light inconsistently, ruining the finish. Always prime and follow manufacturer specs.
Will Exterior Primer Make Paint Last Longer in Harsh Climates?
Yes—exterior primer can help your paint last longer in harsh climates. You’ll seal porous surfaces, improve adhesion, and smooth coverage. With proper climate considerations like temperature swings and humidity, you’ll reduce peeling, fading, and blistering over time.
Conclusion
By now, you’ve probably realized there’s no magic number—your exterior decides it. If your wall’s bare, rough, or stained, you’re signing up for extra coats and solid priming. If it’s in good shape, you can usually stick to two topcoats. But here’s the suspense: one missed patch can turn into peeling streaks later. So read the surface, spot the problem areas, and plan your coats before you roll.
