
How to Fix Wall Corners Before Painting for Sharp, Clean Lines
Inspect your corners for dents, cracks, and loose tape, then press any flexing drywall back in place. Scrape off flaking paint and failing filler, fill hairline cracks with quick-dry corner compound, and pack dents in thin layers, feathering outward. Sand smooth with a block for crisp edges, seal tiny gaps with caulk, then spot-prime and let it dry fully. Cut in carefully with an angled brush, using tape if needed, so your lines stay sharp—keep going to master the steps.
Diagnose Wall Corner Damage Before You Patch
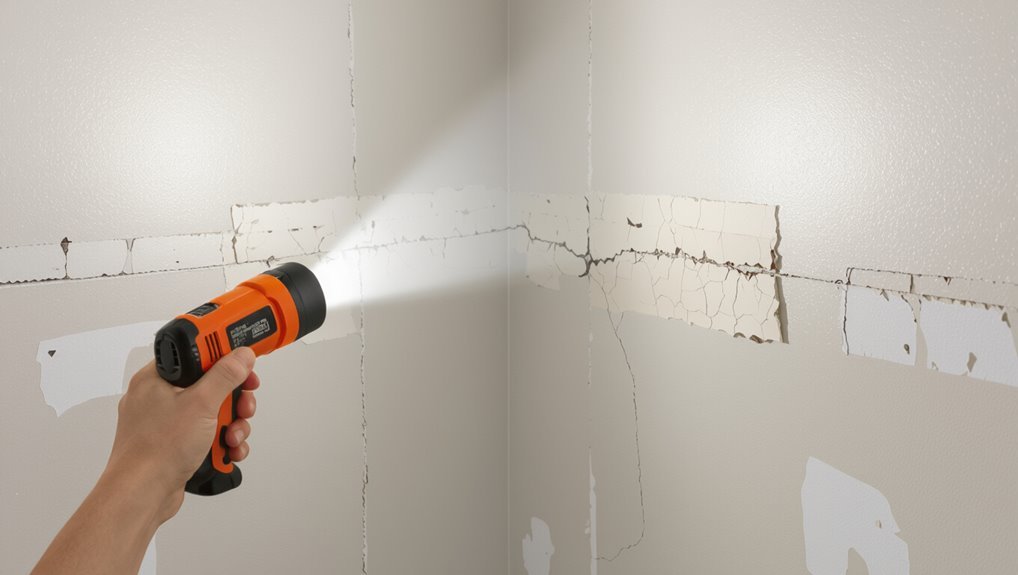
Before you grab a patch, inspect the corner closely for the real type of damage—dents, crumbling drywall, separated seams, or cracking from framing movement.
Inspect the corner closely first—look for dents, crumbling drywall, seam separation, or cracks tied to framing movement.
You spot corner damage by checking both faces, running your hand along the edges, and looking for gaps where tape failed. If you see loose drywall, test it gently; if it flexes, you’ll need to secure it before smoothing.
For separated seams, peel back bubbles and remove failing tape so the substrate stays solid.
You diagnose cracking by tracing it to framing shifts. Then you plan repair techniques that match the cause.
Choose Tools for Sharp Corner Lines
To get truly sharp wall corners, you need the right tools before you start smoothing. Pick corner tools that create clean edges: a rigid metal corner trowel or a set of angle tools for 90-degree lines.
Choose a sharp-edged putty knife to apply compound without dragging or rounding the corner. Use painter’s tape to mask both sides so your line precision stays consistent.
A small sanding block with firm edges helps you refine afterward, but keep pressure light. Finally, use a utility knife to trim dried compound precisely, then recheck alignment.
Pick Primer, Patch, and Caulk by Surface
Pick primer based on your surface—drywall, plaster, wood, or masonry—so it grips instead of peeling.
Match your patch compound to that same material and choose caulk that’s meant for the same surface and the corner gaps you’re sealing.
Once everything matches, you’ll get a smooth corner that holds up under paint.
Choose Primer For Surface Type
Choosing the right primer, patch, and caulk for your wall’s surface type prevents corner flashing and peeling after you paint. Match primer types to the substrate so you get proper surface compatibility: use drywall primer on fresh drywall, stain-blocking primer on water or smoke marks, and bonding primer on slick paint or repairs. For plaster, select a breathable masonry-compatible primer. For masonry or brick, choose a masonry primer that grips and resists moisture. Prime corners last after filling, and let it cure fully.
| Surface | Primer choice | Result |
|---|---|---|
| Drywall | Drywall primer | Smooth grip |
| Stains | Stain-blocking | No bleed |
| Slick paint | Bonding primer | Strong bond |
Patch And Caulk Matching Materials
Matching the right patch and caulk to your wall surface is what keeps corner repairs from cracking, flashing, or letting moisture creep back in.
Pick patch materials that mirror your wall: drywall patch compounds for drywall, masonry patch for brick or concrete, and flexible fillers for hairline gaps.
Then choose caulk types suited to the job: latex/acrylic for interior seams, paintable silicone for better moisture resistance, and flexible, non-shrinking options where corners move.
Prime any patch area if your primer step called for it.
Smooth, feather edges, caulk the joint, and let everything cure before painting.
Protect Floors, Trim, and Outlets First
Before you paint, cover your floors with drop cloths so drips don’t stain them.
Mask the trim edges with tape and press it down firmly for clean lines.
Then shield outlets and switches with painter’s tape or outlet covers so paint won’t get inside or on the faces.
Cover Floors With Drop Cloths
Lay down drop cloths across the entire floor before you touch a paintbrush, so you catch drips and accidental splatters.
Before you start wall corner work, clear clutter and protect your floor protection area around the baseboards. Use canvas or heavy plastic drop cloths, and overlap seams so paint can’t seep through.
Tuck edges under shoe trim or weight them with painter’s tape or masking paper where tape won’t stick to fresh areas. Put absorbent layers under roller paths to prevent puddles.
When you move tools, keep a clean step zone on the drop cloths.
Mask Trim Edges With Tape
With your floors protected, mask trim edges so paint doesn’t creep where you don’t want it. Use painter’s tape for clean boundaries, then tighten your tape application along caulk lines and corners. Press firmly, but don’t stretch—good masking techniques prevent gaps.
Before you roll, do a quick edge sealing pass with a thin, paintable caulk or a light brush of paint along the tape edge. This keeps bleed from traveling under the tape.
- Apply tape straight, overlapping slightly at corners.
- Press the edge with a putty knife for a tight seal.
- Remove tape after paint skins, pulling back low and slow.
Shield Outlets And Switches
1. Before you paint, protect outlets and switches so sharp corners stay crisp. Unplug devices, then loosen and remove outlet covers and switch plates. Put screws in a cup so you don’t lose them. Cover the opened boxes with painter’s tape, pressing edges tightly where the wall meets the device. If you can’t remove hardware, tape around it anyway and keep paint from sneaking behind.
| Surface | What to cover |
|---|---|
| Outlet openings | Tape over box edges |
| Switch area | Tape around switch plates |
| Floor near cords | Drop cloth only |
After masking, paint and let dry, then reinstall.
Remove Loose Paint and Old Filler
Scrape off any loose paint and flaking filler at the wall corners before you start priming. Use firm paint scraping with a putty knife, then switch to sandpaper to smooth the remaining edges. Your goal is solid surface preparation so new coatings won’t lift.
- Pull up anything that moves—rock-solid corners only.
- Feather ridges and remove powdery filler until you hit firm substrate.
- Vacuum and wipe dust with a damp cloth, then let it dry fully.
Cut Back Flaking Edges for Strong Bonding
Before you paint, scrape off any loose, peeling paint until you hit solid edges.
Then feather the remaining edges so the surface flows smoothly instead of leaving a hard lip that won’t bond well.
This gives your primer or filler a stronger grip and helps prevent the corner from lifting again.
Remove Loose, Peeling Paint
You need to remove anything that won’t hold still, so start by cutting back loose, peeling paint to the firm layer beneath. Use a putty knife to scrape until you hit solid paint or drywall.
Don’t just skim the surface; you must eliminate peeling edges so new coating can grip. Work in small sections and wipe dust as you go.
- Scrape off loose paint firmly, working along corners and seams.
- Cut back peeling edges in a tight border, then smooth transitions.
- Vacuum and wipe with a damp cloth to remove residue.
Let the surface dry completely before you continue.
Feather Edges For Adhesion
Once you’ve removed the loose sections, focus on feathering the remaining flaking edges so your new paint has a gradual shift to grip.
Use feathering techniques with 120–180 grit sandpaper, shaving back each edge until the shift feels smooth to the touch.
Don’t stop at the visible flake—cut back an extra inch so you remove weakened paint layers.
Vacuum dust, then wipe with a damp cloth and let dry fully.
For adhesion improvement, apply a primer suited to old, damaged drywall or plaster, and keep corners slightly damp-bonded before painting.
Scrape Texture So Corner Paint Stays Crisp
Scrape loose, bumpy texture along the wall corner so the paint can lay flat and stay crisp.
During corner preparation, use texture scraping to remove ridges that shadow under fresh coats. Then focus on a clean edge line so the brush and roller don’t snag.
Use texture scraping to remove ridges that shadow under fresh coats, then refine a clean edge line for smooth brush and roller work.
- Press a sharp putty knife lightly and shave off loose bumps only.
- Vacuum and wipe the corner, removing dust from texture scraping.
- Re-check with side light; repeat scraping until the corner looks uniform.
Fix Hairline Corner Cracks Fast
You’ll need to patch and feather the crack edges so the corner shifts smoothly.
Press on a quick-dry corner filler, then fill any pinholes after it sets.
Once it’s dry, lightly sand the area to blend it, and you’re ready to paint.
Patch And Feather Crack Edges
Patch and feathering crack edges starts with opening the hairline corner just enough to catch loose material, then vacuuming out dust.
Do a quick crack assessment first, so you know whether the edge crumbles or just needs smoothing.
Next, you patch: apply a thin joint compound, pressing it into the gap, and let it dry.
Then use feathering techniques to blend the patch outward in layers until the corner feels seamless.
Finally, sand lightly, wipe clean, and recheck the edge under light.
Use:
- Thin patch
- Layered feather
- Light sand
Apply Quick-Dry Corner Filler
Apply quick-dry corner filler to hairline cracks once the edge is clean and dry, so you can stop further crumbling before you paint. You’ll get fast drying options, letting you move on quickly.
Squeeze or apply a thin bead into the crack, then press it in with a putty knife for an ideal application. Feather the edges lightly so the corner line stays sharp, not bulged. Let the filler set until it’s fully firm, usually within minutes.
If you spot pinholes, add a second light coat, then smooth again. Wipe away dust before priming.
Patch Dents and Gouges With Spackle
Start by cleaning the dent or gouge so the spackle can bond well—wipe off dust, paint flakes, and loose drywall paper with a dry cloth, then lightly sand the area until it feels smooth.
Now you’re ready for spackle application for a solid corner repair. Press spackle into the low spot with a putty knife, slightly overfilling so you can shave it flush. Smooth the surface, then let it dry fully before sanding again.
Press spackle into the low spot with a putty knife, slightly overfill, smooth, and let it dry fully before sanding flush.
To keep it crisp, follow:
1) Fill in layers if deep
2) Feather edges outward
3) Sand to match the surrounding wall.
Rebuild Chipped Drywall Edges Straight
When your drywall edge is chipped, you need to rebuild the bevel so it looks crisp again.
Pack joint compound in thin layers, using a taping knife to feather each pass outward for a smooth shift.
Let it dry fully between coats, then sand the surface until the corner feels straight and even.
Repairing Chipped Drywall Bevels
Rebuild chipped drywall bevels by shaving back any loose paper and crumbling edges until you reach solid, straight drywall along the corner.
Use drywall repair techniques: score the damaged bevel, then scrape with a utility knife to define clean borders.
Vacuum dust, then wipe lightly so the patch sticks.
For corner finishing tips, keep edges tight and don’t overfill.
Mix setting-type compound or apply a thin edge patch, pressing it firmly into the bevel and feathering only to the bevel edges.
Check alignment, let cure, and repeat for stubborn gaps.
1) Shave to solid drywall
2) Clean dust fully
3) Patch, cure, recheck
Feathering Joint Compound Smoothly
Once you’ve trimmed back to solid, straight drywall, you can feather the joint compound so the corner looks smooth instead of patched.
Apply a thin layer with a 4–6 in knife, starting at the damaged edge and pulling outward. Use feathering techniques: keep light pressure, blend into the surrounding wall, and avoid ridges.
Let it dry fully, then sand with a pole sander or sanding block until no edges catch. Wipe dust, apply a second skim coat, and feather wider than before.
Follow smoothing tips—work cleanly, change blades, and check under angled light before priming.
Square Up Bowed Corners Before Painting
Square up bowed wall corners before you paint by checking the gap with a straightedge and marking the high spots.
Use wall measurement strategies to confirm the corner’s true alignment, then apply corner alignment techniques as you build back the low areas.
Don’t chase perfection with paint—fix the geometry first.
- Snap chalk lines from floor to ceiling to spot bowing patterns.
- Mark highs with a pencil, then apply joint compound to the lows.
- Recheck with the straightedge, tightening your corner alignment techniques until gaps stay even.
Let it set, then prime and paint.
Sand Uneven Angles With Corner Blocks
Pick corner blocks that promise a tight fit so your corners don’t wobble.
Check for high spots, mark them clearly, and then sand those areas until the block sits flush.
After that, blend the edges outward so the corner shifts smoothly and looks straight.
Choose Corner Blocks For Tight Fits
Start by selecting corner blocks sized for your wall corners so you can close small gaps instead of trying to “build” them with caulk. You should choose the right corner block types for your corner’s angle, whether it’s a squared edge, beveled, or flexible fit.
Use these installation tips to lock everything in:
1) Dry-fit multiple blocks and note which seam nearly disappears.
2) Check block plumb and press firmly into place.
3) Fill only pinholes with lightweight filler, then let it cure.
When you match size and alignment up front, your corners tighten fast and stay clean.
Mark High Spots For Sanding
After you’ve chosen corner blocks for tight fits and dry-fitted the best seam, you’re ready to spot where the surface still sticks out. Press a straightedge along each corner side and watch for gaps.
You want to locate high spots before you start sanding. Use a pencil or painter’s tape to circle every bump and jot its location with marking methods—“top,” “mid,” or “near seam.”
Then remove the blocks, apply filler only where needed, and let it cure. Use sanding techniques that keep pressure even, knocking down marked highs until the straightedge just touches everywhere.
Blend Edges For Smooth Corners
Once you’ve marked the high spots and dry-fitted your corner blocks, you can blend the edges so the corners read as clean, straight lines.
Use corner blending techniques with a sanding block to soften any uneven angle without rounding the corner itself.
Try these steps:
- Lightly sand the overlap area until high ridges disappear.
- Feather the patch outward 2–3 inches to build a seamless connection.
- Wipe dust, then check with a straightedge for straight, sharp reads.
Repeat edge smoothing methods as needed, using minimal pressure.
When it feels flat and the line stays crisp, you’re ready to prime.
Fill Corner Seams With Setting Compound
Mix a small batch of setting compound and press it into the corner seam so it fully covers the gap and bridges any hairline cracks.
Use firm pressure with a putty knife, then scrape off excess to keep the line crisp. For corner seam repair, work in thin layers; set and dry fully before adding more.
Follow solid setting compound techniques: keep your knife angles consistent, feather the edges outward, and wipe the blade clean between passes.
After it cures, sand lightly until the corner feels smooth and the seam disappears. Remove dust before priming.
Reinforce Weak Joints With Mesh Tape
After you’ve filled the corner seams, apply mesh tape directly over the weak joint lines.
Press the tape firmly into the compound so it bonds securely and stays flat.
Smooth out any bubbles or wrinkles before the surface dries.
Apply Mesh Tape To Joints
Press mesh tape firmly over each corner joint and seam where the drywall looks weak or cracks have formed. This mesh tape application supports your corner joint reinforcement and keeps tiny breaks from spreading.
Use a steady hand and work in sections so the tape stays aligned. If gaps show, overlap pieces slightly and smooth out wrinkles immediately.
To stay on track:
- Measure tape length before cutting.
- Center tape over every seam line and inside corner.
- Lightly press along the full run to seat it evenly.
Once the tape is on, you’re ready for the next step.
Press Firmly For Secure Bond
Secure a strong hold by pressing the mesh tape firmly into the joint compound so it bonds along the entire seam.
You should press with steady pressure, not quick taps, so the tape seats evenly in the weak corner. If the compound starts to squeeze up, that’s fine—just smooth it down immediately.
Use consistent bonding techniques: embed the tape, remove air pockets, then skim a thin topcoat over it.
Choose compatible adhesive types or compounds for your wall material so the bond stays tight through sanding.
Let it cure fully before you feather and paint.
Use Paper Tape for Smoother Corner Repairs
Before you lay down joint compound, apply paper tape along the wall corner so the seam stays crisp when you sand and paint. This simple step gives strong paper tape benefits, helping you avoid wavy edges and keep the line sharp.
Apply paper tape to wall corners before joint compound so seams stay crisp, sanding is easier, and paint lines come out sharp and smooth.
Use reliable tape application techniques:
- Dry-fit the strip to the full corner length.
- Press it into the angle, smoothing both sides without stretching.
- Apply compound over the tape, then feather immediately.
As it dries, you’ll sand faster with fewer dips, making the corner ready for clean, straight paint.
Blend Patch Layers to Prevent Ridges
Blend patch layers gradually so you don’t build up a stubborn ridge at the corner.
After your first coat sets, scuff it lightly with fine sandpaper, then wipe dust away. Apply the next thin layer, feathering wider than the last so the edges disappear into the surrounding wall.
Use patch blending techniques—work from the center outward and keep your knife pressure consistent. Let each layer fully dry before sanding again.
Stop when the surface feels level under your hand and the corner line stays crisp. Finish with seamless texture application, matching the wall’s existing pattern.
Caulk Tiny Gaps Spackle Can’t Fill
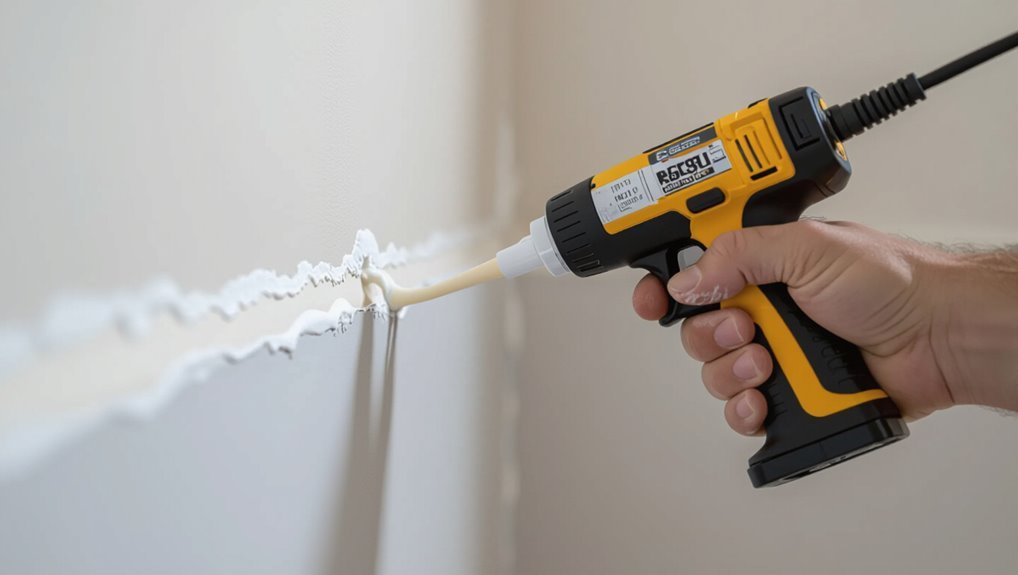
Even after you’ve patched and sanded, tiny voids around the corner can still show through—so caulk is your fix when spackle won’t bite.
You need careful caulk application to lock down hairline cracks and prevent shadow lines. Do this before paint so gap sealing stays invisible.
Careful caulk locks hairline cracks and prevents shadow lines—seal gaps before paint so repairs stay invisible.
- Run a thin bead along the corner seam, pressing lightly to fill every micro-gap.
- Tool the caulk with a damp finger or putty knife, keeping a straight edge.
- Let it cure fully, then lightly sand only the dried high spots.
Stay consistent, and your corner stays crisp under primer and color.
Use Flexible Caulk vs Rigid Sealant
Pick flexible caulk when your corners might move, since rigid sealant can crack as the wall shifts.
Make sure you fill the joint properly so you don’t leave gaps, then smooth it until it’s knife-ready.
When you’re done, you’ll get a clean corner that’s ready for skim coating and paint.
Choose Flexible Caulk For Movement
Before you paint, you need a sealant that can keep up with the wall’s small shifts, so choose flexible caulk instead of rigid sealant.
When your corners flex with temperature or settling, rigid products crack and ruin your crisp lines. Flexible options stay pliable, providing a real movement allowance where edges meet.
To select the right caulk, follow these steps:
- Pick a paintable, mildew-resistant acrylic or silicone-latex blend.
- Confirm the label states it’s for trim, drywall, or corner seams.
- Apply a continuous bead, then tool it smoothly before it skins over.
Prevent Gaps With Proper Fill
To prevent gaps in wall corners, you need the right fill material—because rigid sealant can crack the moment the drywall or trim moves.
Focus on gap prevention by matching caulk selection to your surface compatibility. Choose flexible options like paintable caulk; use it for most drywall and trim joints.
Compare fill types: elastomeric or acrylic-latex for corners, not rigid filler.
When you apply, clean debris, then tool the bead thin and continuous. Use caulk application methods that press into the seam, wipe excess, and let it cure fully before painting.
This seals micro-movements without pulling away.
Ensure Smooth Knife-Ready Finish
A smooth, knife-ready corner starts with the right joint compound choice: use flexible, paintable caulk instead of rigid sealant at drywall and trim edges.
You want movement without cracking, so your smoothing techniques stay intact.
Do these steps for sharp corner preparation:
- Caulk the seam lightly, then tool it with a damp finger or caulk knife.
- Overfill with joint compound, feather edges wide, and let it cure fully.
- Sand with consistent pressure, wipe dust, then re-check for pinholes before priming.
When you repeat skim-and-sand, your knife glides and the corner stays clean.
Follow Dry Times to Avoid Shrink Cracks
Once the joint compound sets, stick to the dry times on your product label—rushing the next step can trap moisture inside the patch and trigger shrink cracks in wall corners.
Your dry time considerations start right after you feather the repair, because compound thickness and humidity slow curing. Check the label for temperature and recoat timing, and wait until the surface feels fully dry and uniform, not cool or rubbery.
If the corner still looks slightly darker or soft, give it more time. Proper shrink crack prevention means patience, even between coats.
Sand Repairs to Feather the Edges
Sand the repair until the edges blend seamlessly with the surrounding drywall. Use sanding techniques that protect your corner preparation and support tight corner alignment.
Apply feathering methods by sanding from the patch outward, reducing ridges with light pressure. Keep checking the wall under angled light to judge edge blending and smoothing tips for clean lines.
1) Start with 120–150 grit to knock down high spots, then switch to finer grit.
2) Maintain consistent feather width for even surface finishing.
3) Blend connections, then verify texture matching before painting.
These drywall repair strategies help you match original texture, hide seams, and prevent visible edges.
Prevent Sanding Waves on Corner Faces
When you control your filler feather edges, you prevent ridges that show up later.
Only sand the corner faces, and keep your passes light so you don’t thin the surface unevenly.
Then check the area in angled light for flatness, and spot-fix any waves before you paint.
Control Filler Feather Edges
Before you start blending filler into the surrounding drywall, keep each feather edge thin and controlled so it won’t “telegraph” through paint.
After your filler application, stop short of the corners’ face and taper outward, not inward. Use light, overlapping passes with a clean taping knife for consistent edge blending, then let it firm up before checking.
To prevent sanding waves, follow this approach:
- Apply less filler than you think you need.
- Feather wider with each pass while staying thin.
- Stop to inspect the edge under raking light.
Sand Only Corner Faces
After you’ve feathered the filler edges, focus your sanding on the corner faces themselves—leave the surrounding planes alone so you don’t create a shallow dish that later shows under paint.
Use tight, controlled strokes and light pressure; you’re shaping the corner, not widening it.
Try corner sanding techniques: wrap sandpaper around a sanding block or a flexible foam block to keep edges crisp, then sand just the face area, working top to bottom.
Stop frequently, wipe dust, and check for waviness. Aim for consistent corner face finishes with smooth, even grit transfer.
Check Light For Flatness
Hold a bright work light so it hits the corner face from a low angle, then watch closely as you move along the wall. If the sheen breaks in ripples, your sanding left waves. Don’t guess—check flatness before priming or paint locks in flaws.
- Sweep the light across the corner edge and the adjacent wall texture.
- Mark any dips or bumps with a pencil X.
- Re-sand only the high spots, then re-check the same light angle.
Keep repeating until the surface stays uniformly dull with no shifting shadows. You’ll get crisp, straight lines when you paint.
Check Alignment With a Straightedge
Grab a straightedge and confirm that each corner line actually meets in a true plane—don’t guess. Run the edge along both walls at the corner, then slide it up and down to spot gaps, rocking, or daylight.
Use straightedge measurement tips: mark where the straightedge stops short, and compare both sides at the same height. If the straightedge bridges cleanly, your corner alignment techniques are working.
If it doesn’t, note the pattern—tight at the top but loose at the bottom—or inconsistent contact. Fixing alignment now prevents paint ridges later.
Mark High Spots and Rework Quickly
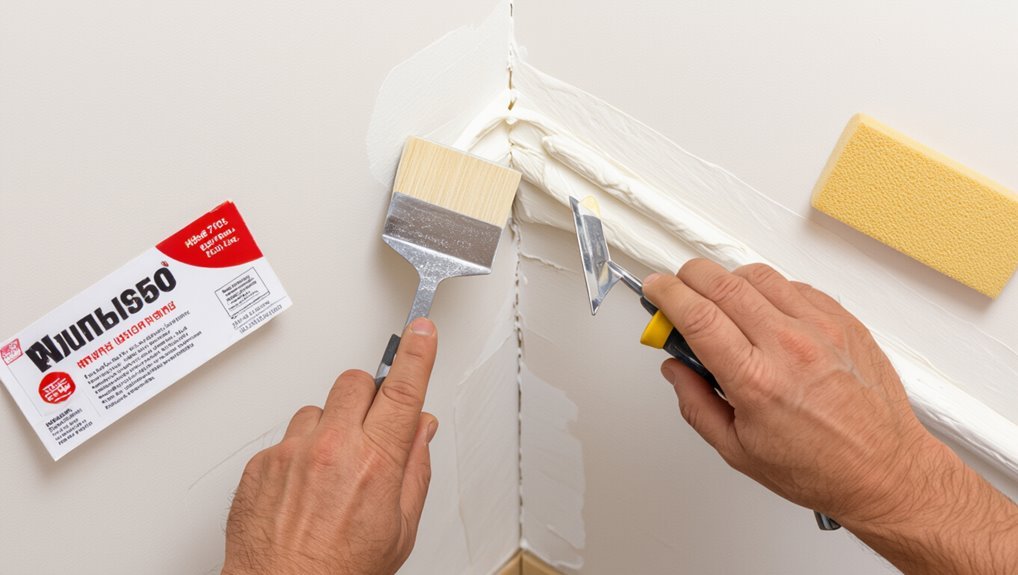
Once you’ve confirmed where the straightedge shows gaps or rocking, you can mark the offending high spots so you don’t chase paint later. Use a pencil to circle bumps along the seam, then check corner alignment again after each correction.
Work fast: you’ll get cleaner edges by reworking small areas instead of broad fills.
- Lightly score the high point outline so you spot it during sanding techniques.
- Feather a thin skim compound over the mark, pressing tight to support corner alignment.
- Sand, recheck with the straightedge, and repeat until the line stays true.
Scrub and Remove All Corner Dust
Before you paint, scrape any loose debris from the corners and get the edges clean.
Then vacuum along the lines and wipe the corners with a slightly damp cloth to pull out dust you can’t see.
Let everything dry completely before you move on.
Scrape Loose Debris Thoroughly
Scrape loose debris thoroughly so your paint can bond to solid wall material. You need solid contact at the corner, not dust that flakes later.
Use smart debris removal techniques: pull the scraper lightly along every edge, then repeat until nothing lifts. After scrubbing, inspect with a bright light at an angle; any grit means more work.
Follow these corner maintenance tips as you clear the perimeter:
- Scrape with a 2–3 inch putty knife.
- Feather scrape lines inward, not outward.
- Wipe with a damp cloth until cloth stays clean.
Then let the corner dry fully before priming.
Vacuum and Follow Edges
Now vacuum right along every corner seam and edge so you lift the fine dust that scraping leaves behind.
Use a crevice tool to chase debris out of tight lines, and don’t rush—move slowly to capture grit.
After vacuuming, run the nozzle lightly over the surrounding area so no powder remains to mar paint. This step is central to effective corner cleaning techniques, because even tiny particles can cause bumps or poor adhesion.
For sharp results, follow up with quick edge preparation tips: recheck corners under bright light, then vacuum again where you see residue.
Let it fully clear before patching or priming.
Wipe Corners With Damp Cloth
Wipe the corners with a slightly damp cloth, pressing into the seam to lift any remaining dust that vacuuming missed. This quick step strengthens your cleaning techniques, improves corner maintenance, and supports dust removal so paint won’t cling to grit.
Work methodically along each vertical and horizontal joint, then rinse or swap the cloth as it loads up. Focus on the spots that trap powder behind trim and along previous patch edges.
- Press firmly, but don’t flood the drywall.
- Make slow passes, then buff dry.
- Inspect for dull dust residue.
This protects corner aesthetics and keeps your lines crisp.
Prime Corner Repairs for Even Sheen
Before you paint, you need to prime those repaired wall corners so the patch and surrounding drywall reflect light evenly.
Use solid priming techniques: feather the edges with a fine brush, then roll primer across the entire corner area, not just the patch. This helps you lock in repairs and keeps sheen consistency consistent.
Let the primer cure fully, then inspect under angled light to spot dull or glossy zones. If needed, apply a second thin coat, always feathering outward.
When the surface looks uniform and dry, you’re ready for paint, knowing the corner won’t flash or shadow.
Spot-Prime Stains or Water-Damaged Spots
After you prime the corners for even sheen, you’ll want to spot-prime any stains or water-damaged spots so they don’t bleed through your finish coat.
First, inspect the drywall and look for rust lines, tannin streaks, or discoloration from water damage; then do stain removal with the right cleaner and let it dry fully.
Next, feather the edges so the patch blends. Finally, apply a stain-blocking primer directly over the marks, covering slightly beyond them.
Use these steps:
- Clean, rinse, and dry hard.
- Sand lightly to dull the surface.
- Spot-prime and let cure before painting.
Avoid Flashing With Proper Temp and Humidity
Controlling temperature and humidity helps you avoid flashing and uneven sheen as your primer cures.
Before painting, check the room and plan your temperature control: keep walls within the product’s recommended range, and avoid heaters blowing directly on corners.
Use humidity management by keeping relative humidity steady, ideally below the primer’s limit. If it’s damp, run a dehumidifier and seal HVAC drafts so moisture doesn’t spike mid-cure.
Only recoat when the primer is fully dry to the touch and uniform in color—don’t rush.
Consistent conditions prevent patchy gloss and visible flashes.
Pick Paint That Won’t Blur Corner Edges
Choose a paint system designed for crisp detail so your corner edges stay sharp instead of softening or blending.
You’ll get cleaner results when you pick the right paint finishes and handle your color selection carefully.
Start by selecting a low-sag, fast-drying interior wall paint with a matte or eggshell finish—glossier coats can exaggerate imperfections.
Select a low-sag, fast-drying interior wall paint in matte or eggshell—glossier coats can highlight imperfections.
Next, thin only as the label allows, so your edge doesn’t feather.
Then test on scrap board or spare drywall, letting it cure before judging.
- Choose matte/eggshell paint finishes
- Use proper thinning limits
- Test color selection and sheen
Cut In Corners With a Crisp Brush Technique
Once your paint is ready, you can cut in corners by loading a small amount onto a high-quality angled brush and keeping a light grip so you control the edge.
You start at the top and pull the bristles along the corner line, letting the brush angle do the work. Use brush control to keep your stroke steady, and stop before paint pools.
If you need coverage, reload and feather outward slightly, without crossing into the adjacent area. For tight inside corners, press gently, then lift cleanly at the end.
This corner technique keeps edges sharp.
Tape Along Corner Lines Without Bleed
Tape along corner lines so you can paint with clean separation. Before you roll, use solid taping techniques that support bleed prevention. You’ll get sharper results when you press tape down firmly at the corner, not just on the flat wall.
Tape along corner lines for clean separation—press firmly and seal edges to help prevent bleed while you paint.
- Wipe dust and let surfaces dry so paint can’t creep under the tape.
- Apply tape with steady pressure, sealing the edge along the corner line.
- Burnish lightly with a plastic tool, then check for gaps before painting.
If you spot lifted corners, re-tape immediately. When paint starts to dry, keep pressure consistent to maintain that crisp line.
Make Clean Cut-Ins at the Corner Edge
Before you roll paint, make crisp cut-ins along the corner edge so your top coat looks intentional instead of muddy.
You’ll get that by using solid corner preparation techniques: inspect the seam, sand ridges smooth, and wipe dust.
Load a high-quality angled brush with paint, then tap off excess so it won’t flood.
Start at the top, press lightly into the corner, and pull a steady line down, keeping the brush tip aligned with the edge.
Use paint application strategies—thin coats and minimal re-dipping—then feather lightly at the end to avoid a visible stop.
Let it dry before rolling.
Remove Painter’s Tape at the Right Moment
Wait until the cut-in feels dry to the touch—then remove the painter’s tape while the paint is still slightly pliable. This is your tape removal timing moment, and it’s key for paint edge precision.
If you wait too long, the edge can tear or leave a ridge; if you pull early, it smears.
Use these steps:
- Lift a tape corner and peel back at a low, steady angle.
- Keep the tape parallel to the wall so the cut stays sharp.
- Watch for strings of paint; stop if you see stretching, then pause and re-peel.
Fix Corner Paint Line Issues Immediately
Once you spot a jagged edge, bubbles, or a lifted line along the corner, fix it immediately—don’t let it fully cure.
Use a sharp scraper to remove the loose corner paint, then lightly sand the area until it feels even.
Vacuum or wipe away dust with a damp cloth, and let it dry.
If you see tiny ridges, feather them outward with a sanding block for clean edge finishing.
Apply a thin skim of joint compound or spackle, then smooth it with a putty knife following the corner line.
Recheck under bright light, and repaint only after it’s dry.
Touch Up Seams Without Thick Buildup
After you’ve flattened the lifted paint and feathered the edge, you can touch up the seam without creating a bulky ridge that will show through your new coat.
Use these touch up techniques for tight corners and seamless blending:
- Apply a thin skim coat of joint compound only over the seam, keeping pressure light.
- When dry, sand with a fine sponge in wide, circular passes to blend edges.
- Wipe dust, then spot-prime the repaired area with a feathered brush stroke.
Check under side light as you work; if you see a line, repeat a thinner layer instead of adding more thickness.
Final Inspect: Straight Lines and Smooth Transitions
When you think the wall is ready, do a final inspect before you paint, because small flaws show up fast once light hits the surface.
Stand back, then move along every corner, checking the straightness of edges with eye level and side lighting.
Run your hand lightly across seams and repaired spots; you want zero ridges, bumps, or gaps.
If you spot a shadow line, re-sand that area and feather it outward until it blends.
Use clean tack cloth to remove dust.
Follow final touches and smart painting tips so changes stay smooth.
Common Mistakes That Ruin Corner Sharpness
Even small corner errors can wreck sharp lines, so you need to spot them before paint locks everything in. Most sharpness failures come from avoidable slipups: poor surface preparation, sloppy tool selection, and ignoring texture considerations.
Even small corner errors can ruin sharp lines—spot surface issues early, before paint sets, to keep edges crisp and clean.
Check your work under lighting effects to reveal shadowy ridges. Then correct these mistakes:
- Skip corner cleaning, leaving dust that breaks edge alignment.
- Use wrong paint consistency, causing runs and feathered edges.
- Ignore adhesive quality or finish types, so tape peels or seals unevenly.
Also, mind paint layering; don’t overload before it cures. Focus on finish types and surface prep so corners stay crisp.
Prep for Multiple Paint Coats on Corners
Getting corners ready for multiple paint coats starts with building a smooth, stable edge you can recoat without losing sharpness. Use solid corner preparation techniques: scrape loose material, then fill gaps with joint compound in thin layers.
Let each layer fully cure, and lightly sand only until flat and crisp—don’t round the edge. Address any pinholes with a second skim coat, then prime the area so the next coat bonds evenly.
Follow a multiple coat strategy: apply paint in even passes, keep a wet edge, and let cures prevent dragging or lifting.
Clean Up Dust and Re-Prime Before Next Coat
After you sand, you still need to remove every bit of dust before the next coat. If you skip dust removal, your sharp corner lines will look dull and uneven.
Wipe the surface with a damp microfiber cloth, then vacuum edges and seams. Let everything dry completely, because trapped moisture ruins adhesion.
Next, you’ll do primer application to lock down any remaining grit and create a uniform base.
Follow this order:
- Vacuum, then wipe—no powder left.
- Dry thoroughly; check corners by feel.
- Apply primer evenly, feathering into adjoining paint.
Quick Touch-Ups for Tiny Cracks During Painting
Stop and fix tiny cracks as soon as you spot them so they don’t telegraph through your finish.
While you’re painting, pause and wipe the area with a dry cloth to remove dust.
Press spackle or lightweight filler directly into the crack, then smooth it flush with a putty knife.
If the crack is narrow, you can use a small brush to apply crack repair compound, building it up lightly.
Let it dry fully, then sand with fine-grit paper until smooth.
Dab matching paint using touch up techniques, feathering edges outward, and blend with a light, dry brush.
Frequently Asked Questions
Should I Remove Baseboards to Repair and Sharpen Inside Wall Corners?
You usually don’t need baseboard removal for inside wall corner fixes. Do corner repairs first: scrape loose paint, fill gaps, caulk, and sand smooth. If a gap runs behind the baseboard or it’s damaged, then remove it for a tight line.
How Do I Stop Corner Paint From Cracking After Spackle or Setting Compound Cures?
Stop corner paint cracking by sealing gaps with flexible joint compound, not just spackle techniques. You might worry about drying time—thin layers cure faster. Apply a tight corner bead or tape, feather edges, then prime and paint with a smooth roller.
Can I Use Lightweight Spackle on Drywall Corners That Receive Frequent Impacts?
Yes—you can use lightweight spackle, but only if you reinforce corners first. Apply fiberglas tape or metal corner bead, fill thin layers, and let it cure fully, so you improve impact resistance and corner durability against frequent impacts.
What’s the Best Method to Keep Corner Edges Perfectly Square Around Outlets?
To keep corner edges perfectly square around outlets, use careful corner trimming: install outlet boxes slightly recessed, protect with painter’s tape, then apply thin joint compound, feather both faces, and sand with a small sanding block for sharp, clean edges.
How Long Should I Wait Before Caulking Once the Patch and Primer Are Dry?
Wait until your patch primer feels fully dry, typically 1–2 hours for touch-dry and 24 hours for curing. For caulk timing, apply only once it’s hard, clean, and dust-free, so the joint seals and paint bonds.
Conclusion
Before you paint, you should take a few minutes to diagnose damage, remove loose material, and use caulk/patching that matches your wall surface. Sharp corner lines come from clean, well-primed edges and careful multiple coats—rushing usually creates shadowy gaps later. Interesting fact: studies from the U.S. Department of Housing and Urban Development link moisture problems to paint failure, so sealing corners properly helps prevent future peeling. Finish by cleaning dust and re-priming before your next coat.
