
How Long Does Waterproof Paint Take to Dry Before It’s Ready?
You’ll usually feel waterproof paint dry to the touch in about 1 to 4 hours, depending on temperature, humidity, and how thick you applied it. That’s “surface dry,” not maximum protection. For full cure and best water resistance, plan on 3 to 7 days or longer. Recoat only after the coat feels tack-free, often after 4 to 8 hours, and avoid rain or heavy moisture until it fully cures so it performs right. Keep going for more specifics.
How Long Does Waterproof Paint Take to Dry?
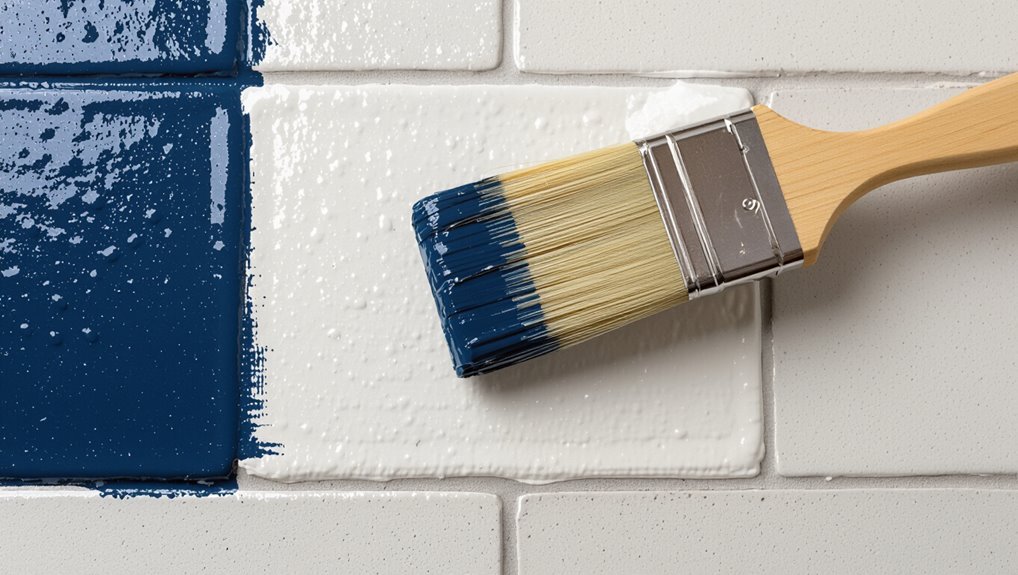
Waterproof paint usually dries to the touch in about 1 to 4 hours, but the exact time depends on the product and conditions like temperature, humidity, and how thickly you apply it.
You should follow product instructions, use correct application techniques, and prioritize surface preparation for best results.
Different paint types, like acrylic or epoxy, dry at different speeds, so check labels.
Temperature effects matter: warmer areas speed drying, while cold slows it.
Watch humidity levels; high moisture can extend dry time.
If you use drying equipment like fans or dehumidifiers, monitor airflow.
Practice safety precautions, then plan simple maintenance tips to keep the finish intact.
Waterproof Paint Dry Time vs Full Cure Time
You’ll usually notice waterproof paint feels dry to the touch long before it reaches full cure, so don’t mistake surface dryness for strength.
Surface dry happens in hours under normal conditions, but full cure can take days and depends on temperature, humidity, and proper ventilation.
If you want the best waterproof performance, plan around full cure time—not just when you can touch the paint without sticking.
Dry To Touch Timeline
Most waterproof paint feels dry to the touch in about 1 to 2 hours, but that “dry” doesn’t mean it’s fully cured. You’ll typically notice the surface stops feeling tacky and can handle light contact.
For best paint longevity, you should still wait before heavy use, scrubbing, or stacking. Drying speed depends on thickness, ventilation, temperature, and humidity—so follow your label closely.
If you rushed surface preparation, moisture or dust can slow drying and weaken adhesion.
Plan for a practical window of readiness before exposure to rain, splashes, or submersion.
Surface Dry Versus Cure
Even though waterproof paint may feel dry to the touch in about 1–2 hours, it isn’t necessarily cured yet—“dry” just means the top layer has set. You still need full cure to maximize paint performance. Your surface preparation and correct paint application affect how soon skin forms and how well it bonds.
| What you notice | What it really means |
|---|---|
| Touch-dry | Surface layer set |
| Matte look | Volatiles escaping |
| Light tack | Underlayer still curing |
Environmental factors, coating thickness, and drying techniques matter most. Use proper application tools and choose the right product selection to avoid soft spots.
Full Cure Conditions And Time
After the surface feels dry, waterproof paint still needs full cure before it reaches maximum water and abrasion resistance. You’ll usually wait 3–7 days, sometimes longer in cool, humid, or poorly ventilated conditions.
For best results, keep the area at moderate temperatures and steady airflow, and avoid washing, flooding, or heavy handling during curing. You also need correct film thickness; thicker coats take longer and can reduce paint adhesion if trapped moisture remains.
Let each coat set fully, then cure the whole system before exposure. If you rush, you weaken durability and performance.
How Long Until Waterproof Paint Recoat?
You can usually recoat waterproof paint once the first layer feels dry to the touch, but you should always check the label for the exact dry time between coats.
Aim to stay within the recommended recoat window—if you go too soon you can trap moisture, and if you wait too long you may need to lightly scuff the surface first.
Make your timing match your surface conditions: temperature, humidity, and whether the substrate is fully dry all affect how long you should wait.
Dry Time Between Coats
Drying time between coats for waterproof paint depends on the specific product, humidity, and temperature, but most coatings need about 4–8 hours before you recoat.
Use drying techniques that support even cure: let the surface fully flash-dry, avoid pooling, and keep airflow steady.
You should confirm the coat feels dry to the touch and doesn’t tack when you lightly press an inconspicuous area.
Follow your label’s recoat time if it’s longer.
With proper paint application—thin, even layers—you reduce waiting time and prevent defects, runs, or trapped moisture.
Recoat Window And Timing
Most waterproof paints give you a recoat window of about 4–8 hours, but timing depends on the product’s tech specs, temperature, and humidity.
Check the label and wait until the coat feels tack-free and won’t transfer when lightly touched. If you recoat too soon, you can trap moisture and soften edges; too late may reduce adhesion and dull waterproof paint benefits.
Use consistent application techniques: thin, even passes, proper brush or roller loading, and avoid overworking the surface.
When in doubt, extend the wait and test a small spot first.
Surface Conditions Matter
Surface conditions strongly affect how long you should wait before recoating waterproof paint.
Before your next paint application, focus on surface preparation: remove dust, grease, and flaking areas, then confirm moisture levels are low.
Environmental factors like humidity, rain exposure, and cool air can slow drying, especially with high-film paint types.
You should use drying techniques that match your substrate compatibility, since porous surfaces can trap moisture.
Control temperature with steady temperature control and improve airflow using ventilation methods.
If your system uses curing agents, respect their schedule.
Always recoat only when the coat feels firm and fully dry.
How Many Coats Affect Waterproof Paint Drying?
The number of coats you apply can greatly change how fast waterproof paint sets and cures. Your coats impact drying because each layer traps moisture and slows evaporation, especially if you rush. Use drying techniques: let each coat tack up fully, keep airflow steady, and avoid cold, humid air. Two thin, even coats often outperform multiple heavy passes.
| Coats | Dry-to-touch | Fully cured |
|---|---|---|
| 1 | 1-2 hrs | 24-48 hrs |
| 2 | 2-4 hrs | 48-72 hrs |
| 3 | 4-6 hrs | 72+ hrs |
Thin Coats vs Thick Coats: Drying Differences
When you apply thin coats, the layer holds less moisture and usually dries faster, so you can move on sooner.
If you go thick, the trapped moisture takes longer to escape and you’ll wait for the deeper layers to fully cure.
To control drying time, you should aim for thinner coats and build coverage gradually.
Thin Coats Dry Faster
Thin coats dry faster because they expose less paint thickness to evaporation, so moisture escapes quickly.
When you use proper application techniques, you spread waterproof paint evenly and keep coat thickness low. You’ll notice the surface tacks sooner, which helps you judge when it’s ready for handling without disturbing the film.
If you add another light layer after the first one flashes off, you maintain a smooth finish while reducing total dry time.
Avoid piling on paint; thick edges and drips trap moisture and slow the cycle.
Thick Coats Take Longer Drying
Thick coats take longer to dry because the extra paint depth traps moisture and slows evaporation. You should adjust your application techniques: apply thinner layers instead of piling on coating thickness at once.
Check surface preparation so water and dust don’t seal underneath. Your drying conditions matter most—environmental factors like humidity levels and temperature impact slow curing.
Use the right application tools to avoid overloading rollers or brushes. If you use paint additives or drying agents, follow label ratios so they work efficiently.
Consider drying conditions between coats and let each layer fully set before adding more.
How Long to Wait Before Waterproof Paint Gets Wet?
Before you let waterproof paint get wet, you need to wait long enough for it to form a complete surface seal.
Dry time varies by temperature, humidity, and waterproof paint types, so you should test after the stated cure window. If you rush, water can break the film and ruin the barrier.
Dry time varies with temperature and humidity—test after the cure window to ensure the film fully seals and resists water.
Use these quick checks and adjust your application techniques:
- Touch-dry isn’t enough; look for a firm, matte finish
- Wait longer in cool or humid conditions
- Apply light recoat only after earlier layers set
- Protect the surface from splashes for at least the first day
When Is Waterproof Paint Safe for Heavy Water?
Waterproof paint usually becomes safe for heavy water only after it fully cures, not just after it feels dry—typically about 3 to 7 days for most coatings.
You must follow proper application techniques, including full coverage and correct film thickness, so water can’t slip into weak spots.
Start with solid surface preparation: clean, dry, and free of dust, grease, or peeling paint.
Environmental factors matter; high humidity, low temperatures, or poor airflow slow curing, so extend wait times.
Choose product selection aligned with your water exposure.
After curing, use maintenance tips like gentle cleaning and inspect for scratches.
Pick finish options like matte or satin that maintain sealing.
Test It: Touch-Dry vs Ready-to-Water
How can you tell whether your waterproof paint is truly ready? Don’t trust the timer; you need quick testing methods. Touch-dry only means the top feels set, but readiness depends on drying factors, temperature effects, humidity levels, and airflow impact.
After your paint application, wait the label time, then check again for cool, firm curing. Use these checks before you expose to water:
- Light finger press: tacky means wait longer
- Inspect for uniform sheen: streaks signal under-cure
- Compare sections: thicker coating thickness dries slower
- Re-check surface preparation: contamination can trap moisture
Use the right paint types and environmental conditions for best results.
Flex Test: Check Waterproof Paint Readiness
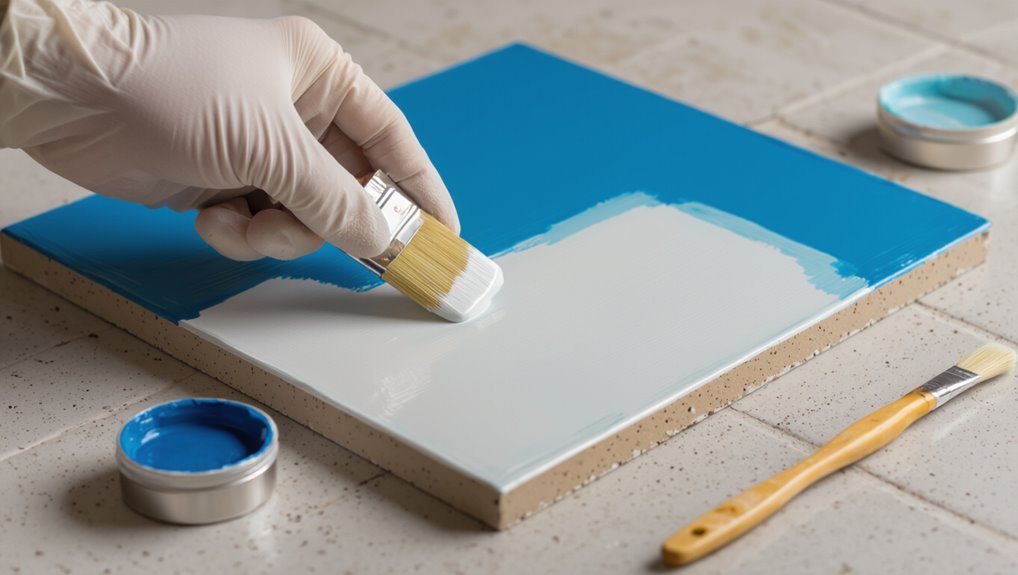
Once the paint feels dry, you should do a flex dry test by gently bending or flexing the painted surface.
You’ll know it’s ready when there’s no tackiness, no cracking, and no flaking.
If you spot any give, stickiness, or lift at the surface, you should let it cure longer before exposing it to water.
Perform A Flex Dry Test
After the paint feels dry to the touch, you can run a simple flex dry test to check readiness for exposure. You’re confirming flexibility testing and evaluating paint adhesion without rushing the job.
Lightly press and gently bend a painted area (or a small hidden section) while the surface remains at the recommended cure stage. If it stays firm, you’re close to being ready.
- Choose a small, discreet spot first
- Press firmly, then release slowly
- Look for any cracking, separation, or soft spots
- Repeat if you suspect uneven curing
Confirm No Tack Or Flaking
Before you treat the surface as fully ready, confirm you’ve got no tack or flaking by lightly touching and gently flexing a test area.
Run your fingertip over the painted spot; if it feels sticky, keep waiting.
Then flex the substrate slightly near the test patch. If you see powder, chips, or lifted edges, stop and let it cure longer.
Checking for tack or flaking protects paint adhesion and prevents peeling once the job goes live.
If needed, use drying techniques like proper ventilation and controlled temperature to speed curing, then repeat the flex test until the surface stays firm.
Water-Bead Test for Waterproof Coating
To verify a waterproof coating, run a water-bead test by spritzing a small, inconspicuous section and watching how the droplets behave.
Spritz a small spot and watch the droplets—tight beads that resist soaking indicate a solid waterproof coating. Recheck after drying.
You want tight, rounded beads that sit on top instead of soaking in. Check the surface in a few minutes, then again after the paint finishes drying, to judge water bead effectiveness and coating longevity.
- Look for beading vs. spreading or darkening
- Use consistent spray distance and angle
- Wipe lightly only after beads hold steady
- Repeat on edges, seams, and corners
Tape-Test Timing for Waterproof Paint Strength
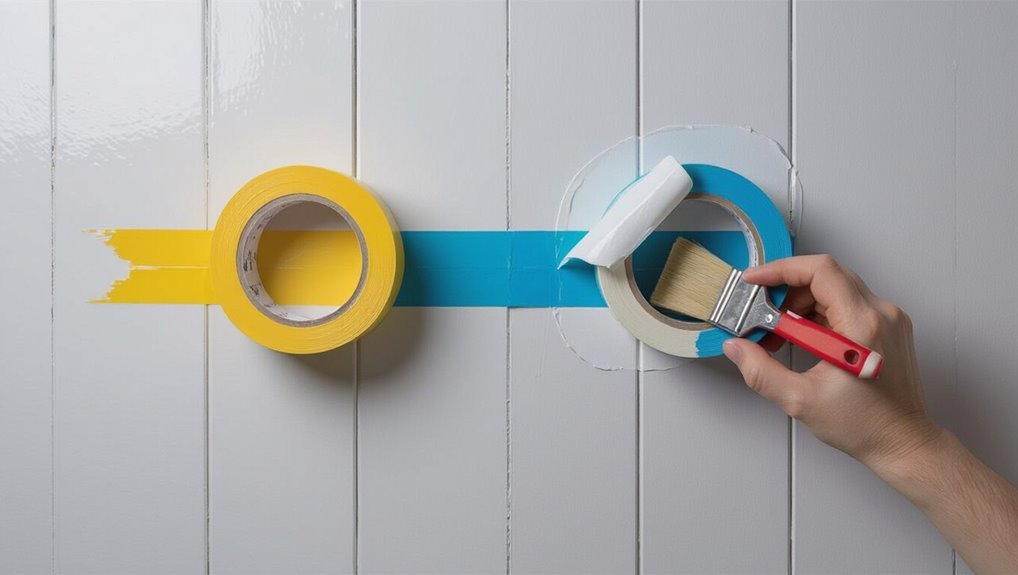
Once your waterproof coating has skinned over and stopped feeling tacky, you can use a tape test to gauge how strong the bond is before full service.
Press painter’s tape firmly on a small, inconspicuous area, then pull it back at a steady angle after about 15–30 minutes. If paint stays put, you’ve passed a preliminary strength assessment and adhesion quality looks solid.
If it lifts or flakes, wait longer and repeat. Use solid application technique, keep edges sealed, and account for environmental factors like temperature, humidity, and airflow during the surface evaluation.
What Causes Wrinkles While Waterproof Paint Dries?
If you see wrinkles while waterproof paint dries, it’s usually because the surface is drying unevenly and the film can’t relax smoothly.
When moisture gets trapped under the paint layer, pressure builds and the coating buckles, creating those wavy folds.
You can prevent this by applying thinner coats and making sure each layer dries fully before you add the next.
Causes Of Wrinkling During Drying
- humidity levels and air circulation, since poor airflow can skin the top while the bottom lags
- temperature fluctuations, which distort curing and worsen surface texture
- paint thickness, because thick coats pull as they set
- substrate compatibility, since weak bonding shifts during drying techniques
Also, uneven surface texture or inconsistent coverage lets the film contract differently.
Moisture Trapped Under Film
Wrinkles often form when moisture gets trapped under the waterproof paint film as it dries and cures. You can create this problem when you apply thick coats, skip surface drying, or paint over dew, damp concrete, or oily residue.
As the top layer skins over, trapped water expands or migrates, buckling the film. To prevent it, use moisture prevention techniques: check humidity and weather, pre-dry the substrate, and seal small pores first.
Also choose proper paint application methods—thin, even layers, correct mixing, and adequate flash times between coats.
Why Waterproof Paint Turns Tacky After Drying
Even after waterproof paint feels dry, it can turn tacky when moisture or solvents get trapped in the film faster than they can fully escape.
You notice this tacky paint causes once the surface cures unevenly. If you rush drying, trap humidity under layers, or apply too thick, drying issues start.
Use thinner coats, add ventilation, and respect recoat times to help solvents off-gas.
Common reasons include:
- Thick applications that seal in liquid
- Poor airflow during cure
- Wrong temperature or humidity swings
- Recoating before the base fully stabilizes
Why Waterproof Paint Looks Cloudy or Hazy
Waterproof paint can look cloudy or hazy when the coating forms a film before trapped moisture, solvents, or air bubbles fully escape.
You’ll often notice a cloudy appearance when humidity is high or temperatures drop, slowing evaporation. If you apply thick coats or don’t stir and mix properly, you trap wet material beneath the surface, creating a hazy finish that dulls color.
You may also see haziness after rain or condensation hits the paint while it’s still curing.
Let each coat dry as directed, and apply thinner layers for clearer results.
Fix Peeling After Waterproof Paint Cures
If your waterproof paint has cured and started peeling, you can still salvage the job by fixing the cause, not just the symptom.
First, scrape off all loose flakes, then sand to dull the edges and dust thoroughly.
Next, check for trapped moisture, grease, or chalky substrate that breaks paint adhesion.
Use these steps to improve peeling prevention:
- Dry the surface fully, then test with tape.
- Clean with the right degreaser or cleaner.
- Prime if the base is porous or damaged.
- Recoat in thin, even layers and let each layer cure.
When to Paint Over Cleaned Surfaces
You need to check that the surface is completely dry before you start repainting, since moisture can ruin adhesion.
Wait the recommended time after cleaning and drying, and don’t apply the next coat until the first is ready to bond properly.
Follow the paint’s cure time—proper curing is what guarantees strong bonding and helps prevent peeling.
Check Surface Dryness Completely
Before you paint over a cleaned surface, make sure it’s truly dry all the way through—not just on top.
Surface moisture can hide under caulk lines, pores, or old patching, and trapped dampness ruins adhesion.
Use these drying techniques to verify readiness:
- Press a clean glove or tape against the area and check for any tack or transfer
- Wipe with a dry cloth, then re-wipe; if it picks up moisture, wait
- Use a fan or gentle heat to drive out remaining dampness
- Inspect corners, edges, and seams closely for lingering dark spots
Wait Before Applying New Coat
After you’ve confirmed the surface is fully dry, give it a little extra time before you apply the first waterproof paint coat—especially on patchwork, seams, or areas that held moisture.
You want to prevent trapped dampness that can weaken adhesion and create bubbles. Wait until you can touch without any coolness or tackiness, then plan your application techniques around ventilation and steady temperature.
Work in ideal conditions: avoid rain, high humidity, and dust-laden air.
If you need a second coat, follow the label’s recoat window, and lightly clean off any overspray.
Cure Time For Proper Bond
Once you’ve cleaned the surface and removed all residue, the paint still needs time to cure through the layer you’re coating over. You get proper bond only when you match cure temperature, humidity effects, and environmental factors.
Start by confirming surface preparation and substrate compatibility, not just “dry to touch.” Then follow safe drying techniques and use moisture barriers to prevent trapped water.
Consider these checkpoints:
- Check paint thickness before recoating
- Follow application methods and recommended cure windows
- Verify paint additives and recoat timing
- Use proper drying techniques, avoiding condensation
Surface Moisture Limits Before Waterproofing
Surface moisture determines whether waterproof paint bonds or fails, so you should treat the substrate like a “dry-to-the-touch, not just dry-looking” problem. Do moisture detection with plastic-sheet or meter checks, then control climate considerations before you start surface preparation. If trapped water remains, bond strength drops regardless of paint selection, drying equipment, or application methods. Use consistent painting techniques and plan for environmental impact by avoiding unnecessary rework.
| Moisture level | What to do |
|---|---|
| Slight damp | Delay coating |
| Damp spots | Dry thoroughly |
| Wet surface | Stop, investigate |
Drying Time on Concrete (What to Expect)
On concrete, your waterproof paint dries slower or faster based on the surface’s porosity and how much moisture it holds.
You also need to watch humidity and temperature, since warmer, drier air usually speeds curing while cool, damp conditions slow it down.
Before you apply another coat, test the surface and wait until it feels fully dry and no longer tacky.
Concrete Porosity Impacts Drying
Concrete porosity strongly affects how long waterproof paint takes to dry, because the slab’s tiny pores control how quickly moisture escapes and how evenly the coating sets.
You’ll see faster drying on denser concrete types, but you must watch moisture levels, surface texture, and your paint application.
- Measure moisture before coating to protect paint adhesion.
- Adjust coating thickness so trapped vapor can leave.
- Match drying agents to porous spots and cracks.
- Use careful surface preparation to stabilize paint adhesion across pores.
Environmental factors still influence evaporation rate, but porosity sets the baseline drying window.
Humidity And Temperature Affect Curing
Humidity and temperature strongly shape how long waterproof paint takes to cure on concrete, because they control how quickly water trapped under and within the coating can evaporate.
Higher humidity levels slow evaporation, extending the curing process. If you work in cool temperatures, expect longer set times and reduced paint performance until the coating fully equilibrates.
Temperature fluctuations also matter: warm days and cold nights can trap moisture, weakening adhesion. Your drying conditions depend on environmental factors like airflow and sun exposure, so use consistent application techniques and recheck surface preparation.
Before sealing or trafficking, allow extra time during damp, chilly weather.
Drying Time on Brick (Practical Timeline)
Once you finish applying waterproof paint to brick, you’ll usually feel it set to the touch within 1–3 hours, depending on temperature, wind, and how porous the brick is.
After that, you still need time before it’s ready to repel water reliably. Use smart drying techniques and watch the brick surface closely.
- Let it rest 24 hours before light contact or rain exposure.
- Aim for 48 hours for stronger, fuller protection.
- Keep airflow steady; avoid trapping moisture.
- Don’t recoat until the previous layer feels fully dry.
Cold, damp weather stretches this timeline; warm, dry conditions speed it up.
Drying Time on Wood (Before Exposure)
After you coat the wood, you’ll typically feel the waterproof paint set to the touch in about 1–4 hours, but full curing takes longer before you expose it to real weather.
Your wood preparation strongly affects timing: sand smooth, remove dust, and let the surface dry completely.
Sand it smooth, clear away all dust, and ensure the surface is fully dry—your wood prep directly affects how well the coating adheres and performs.
After your paint application, keep the piece sheltered and well ventilated; avoid heavy handling for at least 24 hours to prevent dents, smears, or fingerprints.
For best waterproof performance, wait 3–7 days, depending on thickness, temperature, and humidity, before rain, splashes, or ground contact.
Drying Time on Metal (Rust + Drying)
Before you paint rusted metal, you prep the surface by removing flaking rust, cleaning, and drying it so the coating can bond.
On metal, waterproof paint often feels touch-dry in about 1–4 hours, but full dry usually takes 24 hours or more depending on temperature and humidity.
After that, you wait for full cure—often several days—because touch-dry doesn’t mean it’s fully waterproof yet.
Surface Prep For Rusted Metal
Start by treating rust as a contamination, not a surface feature: you need to remove loose flakes, scale, and any flaking paint so the coating can grip metal instead of coating over powder. This is rust prevention and solid metal preparation.
Clear away debris with a wire brush, sanding, or blasting; then wipe the surface clean and dry. If pits remain, fill and feather edges so you don’t trap corrosion under the finish.
- Remove all loose rust flakes
- Grind smooth any pitted areas
- Degrease with a suitable cleaner
- Rinse/wipe and let fully dry before coating
Typical Dry Times On Metal
Typical drying on rusted metal depends on how much corrosion you left behind and how well you prepped the surface: paint usually “sets” to the touch in about 1–3 hours, but full cure often takes 24–72 hours (sometimes longer in cool, damp conditions).
On bare or pitted areas, you’ll see slower drying because moisture and pores keep bleeding through. You can speed things up by improving metal surface preparation: grind rust, remove dust, and keep the metal dry.
Good rust prevention techniques, like primers or rust converters, also help the coating dry more evenly and resist reflash.
Full Cure Versus Touch Dry
Once the waterproof paint feels dry to the touch, that doesn’t mean it’s fully cured—on metal, those two stages often happen at different speeds. You can start handling soon, but full protection comes later.
- Touch-dry can take hours, yet full cure may take days
- Rust and surface moisture slow curing under the top film
- Temperature and humidity are key drying factors
- Your application techniques—thin coats vs heavy layers—change timing
Wait for full cure before washing, scraping, or exposing to weather. If you rush, you risk tackiness, dull spots, or reduced waterproofing.
Drying Time on Plaster (Absorption Effects)
When you apply waterproof paint to plaster, the surface’s absorption rate strongly affects how long it takes to dry.
If your plaster absorption pulls moisture quickly, the coat stiffens sooner, but it can also leave a patchy surface finish unless you maintain even coverage.
On highly absorbent, fresh plaster, you’ll often see faster early drying and need extra coats to lock in water resistance.
If the plaster is dense or previously sealed, moisture escapes slowly, so drying stretches out.
You should allow longer between coats when the surface feels cool or looks uniformly glossy.
Drying Time on Tile (Seam and Texture Tips)
On tile, waterproof paint usually dries faster along smooth faces, but seams and grout lines take longer because they hold texture, dips, and trapped moisture.
On tile, waterproof paint dries faster on smooth areas, but seams and grout lines take longer due to texture and trapped moisture.
You’ll notice drying variations based on the tile surface, texture considerations, and your paint application method. To speed readiness, focus on adhesion factors and watch moisture levels:
- Apply thin, even coats; don’t flood grout lines
- Feather edges over ridges to reduce texture traps
- Let each coat flash-dry before re-coating
- Inspect substrate influence where tiles flex or settle
If grout remains cool or tacky, wait longer.
Vertical Surfaces: How Long to Dry
For vertical surfaces, waterproof paint dries a bit slower than on flat tile because gravity can encourage thicker spots and slight runs. You’ll usually feel it “set” in 2–6 hours, but you shouldn’t treat it as fully ready until it cures for 24–72 hours, depending on humidity and airflow.
Watch your vertical surface texture: if it looks glossy or tacky at edges, give it more time.
Use paint application techniques that minimize drips—thin, even coats, back-brush gently, and keep the roller pressure light.
Avoid stacking coats too quickly; recoat only when the previous layer feels dry.
Floors: How Long Until Foot Traffic?
After you apply waterproof paint to a floor, you can usually walk on it in 24 hours if it feels dry and firm.
Wait another 2–7 days before placing furniture so you don’t leave dents or scuffs, especially with heavier items.
For full durability and heavy traffic, let the coating fully cure for about 7–14 days before you push it hard.
Typical Dry Time For Walking
Once waterproof paint feels dry to the touch, you still shouldn’t rush into walking on the coated floor right away.
Even when it’s touch-dry, you need time for full paint durability and a stable surface texture. Start with light steps, then build up gradually.
Check these points before you commit:
- Dry-to-walk time varies by temperature and humidity
- Wait longer for thicker coats or more layers
- Avoid dragging shoes to protect the finish
- Use visual cues: matte uniformity and no tackiness
If it’s still tacky, pause and let it cure longer.
Waiting For Furniture Placement
Touch-dry waterproof paint can still shift under weight, so you shouldn’t set furniture on it as soon as it feels dry.
Wait until the floor stops feeling tacky and you can walk past without scuffing. For safer furniture placement, plan your furniture arrangement first: map where each piece will land, then move items in one smooth session.
Use gliders or cardboard to prevent point pressure and protect fresh coating edges. If you must stage temporarily, place a protective layer between the paint and furniture feet and check for marks before continuing.
Full Cure Before Heavy Traffic
Even if waterproof paint feels dry, you should wait for full cure before letting people walk with heavy foot traffic across your floors.
Dry-to-touch doesn’t equal hardness, so rushing can cause scuffs, dents, and early peeling. For waterproof paint maintenance, treat cure time as part of your schedule, not an afterthought.
Use solid drying techniques to stabilize the coat, then test lightly in low-traffic zones first.
- Check label cure window, not just set time
- Keep room ventilated and temps steady
- Avoid dragging items; use runners or socks
- Do a 24–48 hour light-walk test first
Indoor vs Outdoor Drying: Key Differences
When you apply waterproof paint, where you use it changes how fast it cures—so you’ll need to adjust your expectations.
Indoors, indoor humidity can trap moisture, slowing surface set and extending wait time before normal use. You may also see uneven drying if airflow is weak.
Outdoors, conditions shift constantly, and your progress depends on outdoor temperature and wind that helps drive off solvent and moisture. In direct sun, drying can speed up, but sudden evening cooling can add delays.
Always check the label, touch-test lightly, and avoid re-coating until the surface feels consistently dry.
Temperature Effects on Waterproof Paint Cure
You’ll notice temperature strongly affects waterproof paint cure time.
Warmer conditions speed up curing, while cooler temperatures slow it down and can extend drying.
If you want faster results, you should keep the area comfortably warm during the process.
Temperature Speeds Or Slows
Temperature plays a key role in how fast waterproof paint cures, and it directly affects your drying and recoat timeline. When it’s warm, molecules move faster, and your waterproof layer sets up sooner.
You can use drying techniques that keep the surface evenly heated, but avoid overheating that causes skinning and weak bonding. In cooler spots, curing slows and can trap moisture, raising environmental impacts from extended ventilation needs.
Keep an eye on airflow too, since temperature plus air movement changes the rate.
- Warmer temps speed curing
- Even heat improves adhesion
- Cold slows moisture release
- High heat risks surface skinning
Cooler Conditions Extend Drying
Cooler conditions can stretch the drying and curing time of waterproof paint because slower molecular movement delays the film-forming process. You’ll notice temperature effects interacting with humidity effects: damp, chilly air keeps the surface tacky longer. Use airflow tips to steady drying without blasting; gentle ventilation helps water escape and supports even film buildup. For winter timing, plan extra days before exposure. For summer timing, warmer air can shorten waits, but you still watch curing factors like substrate moisture and thickness. Apply in thin coats with proper application techniques, letting each layer set.
| Condition | Expectation | What to do |
|---|---|---|
| Cool | Longer cure | Vent lightly |
| Humid | Slower drying | Wait longer |
| Dry/cool | Moderate | Thin coats |
| Wet/cold | Risk tack | Recoat later |
| Breezy | Faster surface | Maintain airflow |
Warmth Improves Cure Time
Warm air speeds up waterproof paint curing because heat increases molecular movement and helps the binder form a tighter, less tacky film. You’ll usually notice faster readiness when you maintain moderate warmth instead of chilly air.
Keep in mind that temperature affects how curing agents activate and how drying additives release volatiles.
- Aim for steady, warm conditions to avoid slow spots
- Stir or mix thoroughly so heat distributes evenly
- Don’t overheat; blistering can ruin adhesion
- Let it cure fully before heavy water exposure
Check the label for specific temperature ranges, then plan your work accordingly.
Humidity Effects on Waterproof Paint Drying
Humidity strongly affects how long waterproof paint takes to dry, and you’ll notice the difference as moisture slows evaporation.
In your drying environment, higher humidity keeps water trapped in the coating. That delays surface dry time and can extend the full cure window.
You may also see tackiness that feels sticky longer than expected, especially on thick layers or nonporous surfaces.
When humidity drops, evaporation speeds up, and the paint forms a firmer film sooner.
Watch weather, avoid painting in damp mornings, and consider indoor ventilation only to control moisture—not to blast airflow.
Airflow Tips to Dry Waterproof Paint Faster
To speed up drying without compromising adhesion, increase airflow around the painted surface. You’ll dry faster when you move air steadily, not aggressively.
Try these airflow techniques to prevent tacky spots and speed curing while using safe drying aids.
- Position a fan 1–2 feet away to circulate air across, not directly onto, fresh paint.
- Keep air moving along edges and corners where moisture traps form.
- Use a gentle cross-breeze by opening nearby windows briefly.
- Elevate the piece or make sure paint isn’t sealed against plastic.
Monitor touch-dry progress and pause airflow if the surface skins too quickly.
Dehumidifiers and Fans: What Works Best
Using the right mix of dehumidifiers and fans helps waterproof paint dry faster without sacrificing adhesion. Set your dehumidifier settings based on target humidity levels; keep moisture control tight to prevent tackiness.
You should run it alongside steady fans to support air circulation in your drying environment. Use smart fan placement: aim fans across the surface, not directly blasting edges, and create airflow improvement without splatter.
For ideal conditions, maintain temperature regulation so solvents evaporate evenly. If you use drying accelerators, confirm they’re compatible and avoid overheating.
Check drying environment regularly, adjust dehumidifier settings, and keep airflow consistent.
Does Rain Ruin Fresh Waterproof Coating?
Rain can ruin fresh waterproof coating if it hits the surface before the product forms a full protective film. If you face rain exposure early, water can interrupt curing, lift pigment, or create weak spots.
To protect your work, you should act fast and plan your coverage so the coating can build strength.
- Check product label for cure window
- Shield the surface with a tarp or cover
- Avoid puddles and splashes during curing
- Reinspect edges after any rainfall
Outdoor Timing: When Rain Is Risky
Before you hang the area up outside, you should check the dry window in the product instructions and plan around it.
If rain is coming sooner than the paint’s recommended cure time, you risk exposing the coating to moisture and uneven drying.
Keep an eye on the forecast and wait to paint until you’ve got enough dry weather exposure.
Check Dry Window Before Rain
So you’ve got fresh waterproof paint on an outdoor surface—how can you tell when it’s actually safe from rain? Don’t guess; you need a dry window and good rain protection.
Start by checking the product label for coverage time, then do quick touch tests in a hidden spot. You’ll know it’s ready when the surface feels firm, not tacky, and doesn’t transfer color.
- Check label cure vs. dry time
- Perform a light fingertip test
- Watch for dulling or tackiness return
- Plan paint selection for your weather
If clouds move in, extend your waiting time before exposure.
Avoid Wet Weather Exposure
Even if your waterproof paint says it’s “dry to the touch,” you still shouldn’t risk wet weather too soon. You need time for curing, so delay until forecasts stay dry, especially after high humidity effects. Start by nailing surface preparation, because weak paint adhesion fails fast when rain hits. Use temperature considerations to choose warm, stable conditions. Apply methods that match your paint thickness; thick coats take longer. Use drying techniques like gentle airflow, and prioritize ventilation importance. Review environmental factors daily.
| Risk | Cause | Fix |
|---|---|---|
| Drips | wet weather | wait 24+ hrs |
| Peeling | poor prep | clean, sand |
| Soft coat | humidity | ventilate |
Drying Waterproof Paint in Cold Weather
When the temperature drops, waterproof paint dries much more slowly because the chemical processes that form the protective film need warmth to work efficiently.
You’ll face cold weather effects that create real drying challenges, especially on damp surfaces. To help it set properly, you should:
- Check the label for minimum application temperature
- Apply in thin coats instead of heavy layers
- Keep airflow steady, but protect from wind chill
- Cure longer than normal before exposure
If you rush, the film won’t form fully and water resistance suffers.
Plan your timing and conditions carefully.
Drying Waterproof Paint in Hot Weather
Hot weather changes how waterproof paint dries, speeding up surface set while sometimes slowing the full film formation beneath. You’ll feel this as the topcoat turns tack-free quickly, yet deeper layers still need time.
In hot weather, waterproof paint sets quickly on top but may still need extra time beneath for full film formation.
Watch the heat effects: intense sun and dry wind can create a thin crust that traps moisture, so bubbles or soft spots can appear later.
Use drying techniques that slow the extremes—paint early morning, keep a steady thickness, and shade the area after brushing.
If needed, mist lightly around the workspace (not the wet surface) and allow longer cure before heavy exposure.
Winter Timing: Dry-to-Ready Expectations
In winter, waterproof paint usually feels dry to the touch much sooner than it fully cures, so you should plan around cure time, not just surface set.
Cold, damp air slows chemical hardening, so drying waterproof coats may still be vulnerable while they look set. Track temperature and airflow, then give extra time before rain, washdown, or heavy handling to protect paint performance.
- Check drying times at your actual winter conditions
- Keep coats protected from frost and condensation
- Avoid stacking or press-contact too soon
- Inspect for tackiness before use
If you rush, you risk peeling or reduced water resistance.
Summer Timing: What “Cured” Means
Summer heat can make waterproof paint feel dry fast, but “cured” means the coating has finished its full chemical hardening, not just set on top. You’re looking for the cured definition: strength and water resistance that develop after drying. With summer humidity, evaporation slows inside the film, so cure time often stretches. Don’t judge by touch alone; test gently for hardness and no tack. Use this quick guide:
| Check | What you see | Meaning |
|---|---|---|
| Touch | No tack | Initial dry |
| Hardness | Firm surface | Near cure |
| Smell | Fades | Solvent leaving |
| Water | Beads | Still curing |
| Flex | No soft give | Fully cured |
How Long to Wait Before Sealing Over It
Now that you understand what “cured” really means, you can decide when to seal over waterproof paint with confidence.
Don’t rush—your drying factors control bond strength. Wait until the coating feels fully cured, not just touch-dry, so the sealer won’t trap moisture or cause peeling.
- Check the label’s cure time; follow it first
- Test a hidden spot for tackiness after 24–48 hours
- Use compatible sealing techniques (same chemistry, if possible)
- Apply thin coats and keep airflow steady
If you see tack or smell solvent, wait longer before sealing.
How Long to Wait Before Adding a Second Coat
Before you add a second coat of waterproof paint, give the first coat enough time to dry and start curing so you don’t trap solvent or weaken the bond. You should wait based on drying factors like temperature, humidity, airflow, and film thickness; typically 4–8 hours for many products, but follow your label. Test by gently touching an inconspicuous area—if it’s tack-free, you’re ready.
| Drying factors | Typical wait | Ready signs |
|---|---|---|
| Warm, dry air | 4–6 hrs | No tack |
| Cool, humid | 6–10 hrs | Firm surface |
| Thick coat | Longer | Even sheen |
Can You Speed Up Waterproof Paint Drying?
Yes—you can often speed up waterproof paint drying, but you need to do it in ways that don’t harm adhesion or trapped solvent curing.
Use smart drying techniques and watch environmental factors closely so the coating sets evenly.
- Apply thinner layers instead of a thick coat
- Increase airflow with a fan, not high-heat blasting
- Keep temperature steady within the label range
- Avoid direct sun, which can skin the surface too fast
Check for tack-free feel before handling.
If you rush, you risk soft curing underneath and weaker waterproof performance.
Best Safe Ways to Speed Waterproof Paint
To speed up waterproof paint safely, focus on improving evaporation and curing conditions without stressing the film.
Start with strong surface preparation, so the coating bonds and dries evenly.
Use air circulation with fans to boost quick drying, but keep airflow gentle and consistent.
Use gentle, consistent fan airflow to boost drying speed while preventing uneven curing or stress on the waterproof film.
Maintain humidity control in your drying environment; aim for moderate, stable conditions.
If needed, use drying equipment like a low-temperature heater or infrared system for controlled heat application.
Consider compatible paint additives from the manufacturer to shorten cure time.
Always follow label cure requirements and monitor results.
What Not to Do: Rushing Before Cure
Even if your waterproof paint feels dry to the touch, don’t treat that as a finish line. Rushing the cure process causes peeling, dull spots, and weak water resistance—classic common mistakes.
You may think quicker layering or early handling “can’t hurt,” but it often does. Avoid these traps:
- Recoat before the recommended cure time
- Touch or wrap the surface too soon
- Apply heat to “fix” tackiness
- Seal or expose it to water early
If you wait, you let layers fully set and lock in durability.
How to Tell If Waterproof Paint Is Fully Cured
How do you know when waterproof paint is truly fully cured, not just dry? Use clear cure indicators: perform moisture detection by taping plastic overnight; any clouding means it’s still wet underneath. Do a surface assessment—no tack, no color transfer, firm edges, and stable paint consistency. Check temperature and humidity; environmental factors can slow curing even when drying techniques look fine. Compare paint types and application methods; thicker coats and poor prep cure slower. Test with a gentle fingernail drag and flex the surface slightly.
| Cure check | What you see | Meaning |
|---|---|---|
| No tack | matte, firm | cured |
| No transfer | clean cloth | cured |
| Plastic test | no moisture | cured |
| Rub test | no smears | cured |
Waterproof Coating Type: Cementitious Dry Times
Cementitious waterproof coatings cure differently than paint films because they rely on hydration and chemical bonding rather than just evaporation.
You should plan drying times based on temperature, humidity, and thickness. Cementitious applications often feel dry sooner, but readiness comes with continued hydration of cementitious binders and proper moisture balance.
Use curing agents to support consistent chemical reactions, especially on porous surfaces.
Use curing agents to maintain consistent hydration on porous surfaces, improving chemical bonding and reducing uneven performance.
- Aim for initial set before heavy handling
- Keep surfaces damp to prevent premature shrinkage
- Expect slower cure in cool, dry, or windy conditions
- Verify coverage thickness before stressing the coating
Epoxy Waterproof Coating: Dry and Cure Timing
Epoxy waterproof coatings don’t just “dry”—they cure through a chemical reaction between the resin and hardener, so timing depends on mix ratio, temperature, humidity, and film thickness.
You must plan project planning by scheduling pot life and recoat windows, not just touch-dry moments.
Start with surface preparation: clean, dry, and properly roughen so paint adhesion locks in.
Use correct application techniques and thin, even coats for uniform curing.
Watch environmental factors like cold, damp air, and wind; they slow cure.
Choose paint selection wisely and match curing agents.
If you use drying accelerators, follow directions carefully for best finish quality and waterproofing methods.
Acrylic and Polyurethane Waterproof Paint Timelines
Once you understand how epoxy waterproof coatings cure, you can plan acrylic and polyurethane systems the same way—but they follow different rules.
You’ll typically wait longer for polyurethane between coats, then longer for full cure before water exposure. Use these checkpoints:
- Check acrylic properties: touch-dry fast, but cure takes days
- Use polyurethane benefits: tougher, slower curing for waterproofing
- Practice application techniques: thin layers, proper ventilation
- Prioritize surface preparation: clean, dry substrates for best performance ratings
Consider environmental impact, color options, cost considerations, and brand comparisons.
Follow maintenance tips to keep it sealed.
Frequently Asked Questions
Can I Apply Waterproof Paint Over Old, Failing Coatings Safely?
Yes, you can, but only if the old coating is sound. Scrape off failing areas, clean, and sand for coating adhesion. Check surface compatibility with your waterproof paint’s label; then prime if needed and let everything dry completely before topcoating.
What Happens if I Paint in Direct Sun During the Drying Phase?
You’ll think direct sun won’t hurt, but it can. Sun exposure effects include rapid skinning, trapping moisture, and weaker bonds; temperature impact makes drying uneven, causes bubbling or peeling. Shade the surface and let it cure steadily per the label.
How Do I Remove Waterproof Paint That’s Dried Before It Cures?
To remove waterproof paint that’s dried before it cures, use paint removal techniques like scraping, then apply a chemical stripper or solvent suited to the paint type. If it’s stubborn, try warm soapy water, then repeat dried paint solutions gently.
Does Solvent Smell Mean the Waterproof Coat Isn’T Dry Yet?
If you smell solvent, it’s like a lingering fog—it usually means the coating still isn’t fully cured. Wait as solvent evaporation continues, and the paint odor fades. Touch lightly; if it feels tacky, give it more time.
What Surface Prep Most Reduces Waterproof Paint Dry-Time Problems?
You’ll reduce waterproof paint dry-time problems most by prepping surfaces: clean off dirt and rust, degloss shiny paint, fill cracks, and remove chalky coatings. Let surfaces match good paint conditions—fully cured, dry, and properly primed.
Conclusion
Before you trust your waterproof finish, wait out both dry time and full cure time. Let the surface skin over first, then give it enough hours (or days) to fully harden so water can’t sneak in. Recoat only when the paint feels ready—usually after it dries to the touch and stops getting tacky. Thin coats dry faster than thick ones, and different coatings (cementitious, epoxy, acrylic) follow their own clocks. Seriously—don’t rush it; patience is your best waterproofing tool—like drying lava.
