Can Exterior Brick Be Painted
Yes — you can paint exterior brick, but you’ll want to weigh condition, moisture risk, and local rules first. Leave sound, sealed historic masonry unpainted when preservation matters. Choose breathable masonry paint or primers for porous brick, and fix cracks, efflorescence, and flashing before coating. Painting can boost curb appeal yet affect resale depending on neighborhood taste and maintenance. Use low‑VOC options and get permits or HOA approval; keep going to learn practical prep, color, and care tips.
Should You Paint Your Exterior Brick?
Whether you want a fresh look or need to protect weathered mortar, painting exterior brick can be a smart choice—but it isn’t always necessary. You should weigh condition, style, and long-term goals: sound brick often fares better unpainted, while porous or crumbling masonry may benefit from a breathable coating.
Consider historical preservation—painting can obscure original craftsmanship and reduce restoration value. Also factor in environmental impact: choose low-VOC paints and proper disposal to limit harm.
If you rent or plan to revert, check regulations and costs. Make a test patch, consult a pro for structural issues, then decide.
When Painted Brick Boosts Curb Appeal
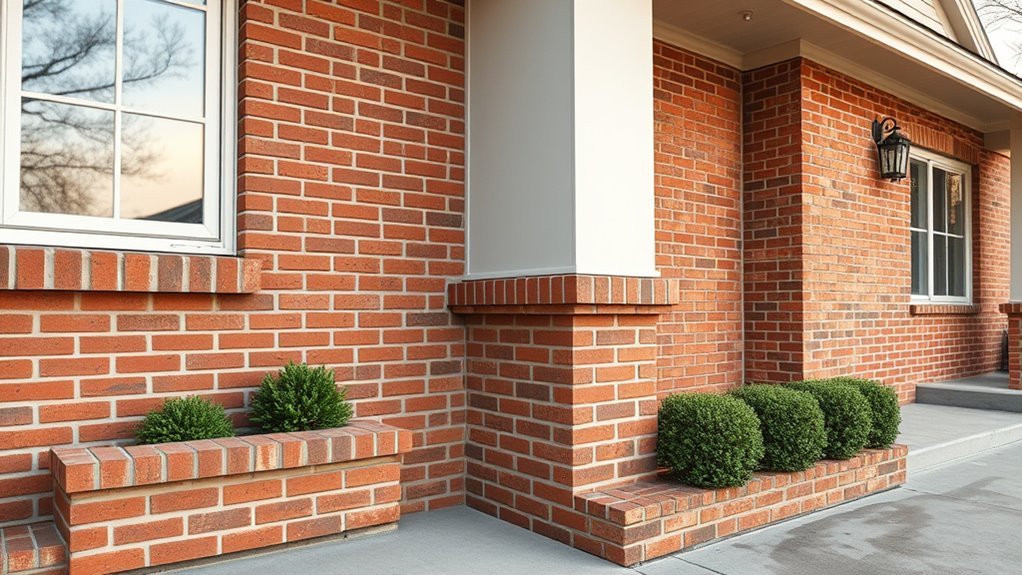
You’ll boost curb appeal by choosing a color that complements your home’s style and neighborhood. Think about how light or dark tones, plus warm or cool hues, change the visual weight of the facade.
Also pick a finish that balances the look you want with durability—low-sheen paints hide imperfections and shed dirt better than flat finishes.
Color Choices Impact Appeal
How can a simple color change transform your home’s curb appeal? You choose tones that highlight architectural details and respect historical preservation while embracing modern trends. Neutral palettes enlarge sightlines; bold accents add personality. Consider eco-friendly options like low-VOC paints to protect surfaces and the environment.
- Pick a base tone that complements roof and landscaping.
- Use contrasting trim to define windows and entryways.
- Test swatches at different times to gauge light effects.
- Coordinate with neighborhood style to enhance resale value.
Thoughtful color choices make your painted brick inviting, balanced, and lasting in visual impact.
Finish Types And Durability
When you choose the right finish for painted brick, you’re balancing look with long-term performance. You’ll pick a finish based on brick texture—rougher surfaces need thicker, matte or low-sheen coatings to hide irregularities and resist peeling.
Smooth brick accepts glossier paint sheen for easier cleaning and a sharper appearance. Use elastomeric or masonry-specific paints where moisture or movement is a concern; they stretch and seal better than standard acrylics.
Always prime porous brick to improve adhesion. Maintain the finish with periodic inspections and targeted touch-ups to preserve curb appeal and avoid costly full repaints down the line.
When to Leave Brick Unpainted
Although painted brick can refresh a home’s look, there are times you should leave the brick alone: historic masonry with original character, well-maintained brick that doesn’t need protection, and surfaces where paint would trap moisture or hide structural issues.
Although fresh paint can brighten brick, sometimes preserving original masonry or avoiding moisture-trapping paint is wiser.
You should respect historical preservation and avoid unnecessary paint removal that damages patina. Consider leaving brick unpainted when:
- The facade has documented historic value and guidelines prohibit alteration.
- Brick is in excellent condition with sealed mortar and no efflorescence.
- You suspect moisture problems that paint would worsen.
- Previous paint covers unresolved structural defects.
Will Painting Affect Resale Value?
You’ll want to think about how painted brick changes curb appeal—some buyers love the fresh look while others prefer original masonry.
Market preferences can shift by neighborhood and price point, so check comparable homes before deciding.
Also factor in repainting and maintenance costs, since future touch-ups can affect a buyer’s perception of upkeep.
Curb Appeal Impact
If buyers drive up and see fresh, well-applied paint on brick, they’ll often perceive the home as better cared for and more modern, which can boost curb appeal and potentially increase resale value. You can align paint with garden landscaping and interior decor to create a cohesive look that feels intentional.
Consider these practical effects:
- Makes the facade look updated and moves focus from dated brick.
- Highlights architectural details like trim and entryways.
- Encourages buyers to imagine personalizing spaces without renovation.
- Risks alienating buyers if color choices clash with neighborhood character.
Choose neutral, complementary colors and quality application.
Market Preferences Shift
Beyond immediate curb appeal, paint choices can shape how your home performs in the market: buyers’ preferences shift over time, and what reads as modern and well-kept today might feel dated to future shoppers.
You’ll want to track local market trends and see whether painted brick is common or rare in comparable listings. If most buyers in your area favor original brick, painting could shrink your pool; if they’re leaning toward painted façades, it might boost interest.
Think about target buyers, neighborhood character, and recent sales photos so your decision aligns with prevailing consumer preferences.
Repainting Maintenance Costs
One important cost to weigh is ongoing repainting and upkeep. You’ll want a clear cost analysis to estimate repaint intervals, product quality, and labor.
Painted brick can boost curb appeal but requires commitment; buyers may prefer original brick in some markets. Use maintenance tips to stretch intervals: choose breathable masonry paint, prep well, and address mortar damage quickly.
Consider resale: repainting can increase appeal if done tastefully, but frequent touch-ups may signal deferred maintenance.
- Frequency: inspect every 5–7 years
- Materials: invest in masonry-grade paint
- Labor: factor professional vs DIY
- Budget: include contingency for repairs
Permits, Local Rules, and HOA Guidelines
Because exterior paint changes affect a home’s appearance and local standards, you should check permits, municipal rules, and your HOA’s covenants before starting work. Review permit regulations for historic districts and exterior alterations; some municipalities require applications, fees, or inspections.
Confirm HOA restrictions on color palettes, finish types, and vendor approvals—violations can trigger fines or forced reversal. Ask your local building department and request HOA architectural committee guidance in writing.
Keep copies of approvals, approved color codes, and any required permits on site. Following rules avoids delays, fines, and costly repaint removals while protecting neighborhood standards.
Decision Checklist: Is Painting Right for You?
If you’re weighing whether to paint your exterior brick, start by matching goals to realities: assess the brick’s condition, long-term maintenance needs, aesthetic priorities, and any budget or timing constraints. Decide using this quick checklist so you can choose confidently.
Match your goals to brick condition, maintenance, aesthetics, and budget before deciding to paint exterior brick.
- Condition: Is mortar intact and brick sound, or will repairs negate painting benefits?
- Aesthetics: Do you want a modern uniform look or to preserve original texture for Historical preservation?
- Maintenance: Are you ready for repainting cycles, or prefer low-upkeep natural brick?
- Materials: Consider breathability and Eco friendly options like low-VOC paints to protect masonry and the environment.
How to Test If Your Brick Will Take Paint
Before you commit, run a few simple tests to see whether paint will adhere and how the brick will look afterward.
Start by cleaning a small area with a mild detergent and water; if grime lifts easily, paint will likely bond.
Do a water test: pour a cup on the brick—if it beads, sealers or etching may be needed.
Tape a 6×6” sample patch using primer and your chosen eco friendly coatings, then inspect after 48 hours for peeling.
Photograph the result for comparison and consult local historical preservation guidelines before altering any protected masonry.
Types of Paint for Exterior Brick
Once your tests show the brick will accept paint, choose a coating that matches the surface, climate, and desired look. You’ll pick between breathable masonry paints, elastomeric coatings for hairline crack protection, acrylic latex for ease and durability, or mineral silicate paints for longevity and vapor permeability.
Consider historical preservation needs—silicates suit older masonry. Also weigh eco-friendly options like low-VOC acrylics or natural lime paints. Match finish and flexibility to thermal movement. Choose products specified for exterior brick and follow substrate prep.
Here’s a quick comparison to help you decide:
- Breathable masonry paint
- Elastomeric coating
- Acrylic latex
- Mineral silicate
Primer Choices for Masonry
While masonry paints can stick to clean brick, choosing the right primer makes adhesion, coverage, and durability much more reliable—especially on porous, previously painted, or efflorescence-prone surfaces.
You’ll pick a specialty masonry primer for bare brick, a stain-blocking primer for efflorescence marks, or a bonding primer for slick, previously painted areas. Consider latex primers for ease and lower Environmental impact, or alkyd primers where oil-based durability is needed.
If you’re working on vintage structures, balance Historical preservation standards with primer choice and test small areas first. Always follow manufacturer drying times and substrate preparation for best results.
Breathable vs. Non‑Breathable Coatings: Which to Use
If your brick wall still lets moisture move through it, you’ll want a breathable coating that sheds rain but allows trapped vapor to escape. You should choose breathable limewash or mineral paint for porous masonry to avoid blistering and mortar damage.
Non‑breathable acrylics seal pores, which can trap moisture and harm old brick. Consider environmental impact and historical preservation when picking coatings—use low‑VOC products for both goals.
Choose based on brick condition and climate.
- Breathable mineral paints: vapor‑permeable, traditional.
- Limewash: very breathable, historically appropriate.
- Acrylics: durable but non‑breathable.
- Siloxane: water‑repellent, semi‑breathable.
Preparing Brick: Surface Prep Steps
Before you paint, inspect the brick for cracks, spalling, or loose mortar and repair any damage so the coating will stick properly.
Next, clean the surface thoroughly with a pressure washer or stiff brush and masonry cleaner to remove dirt, efflorescence, and mildew.
Finally, etch or roughen glazed or smooth areas as needed so the paint bonds evenly.
Inspect For Damage
Want your painted brick to last? Inspect carefully for cracks, spalling, loose mortar, and signs that texture patterns have been altered over time. You’ll protect both finish and structural integrity while respecting historical preservation if applicable. Note any areas needing repair before painting.
- Check mortar joints for gaps and crumbling.
- Look for hairline and larger brick cracks, tapping to find hollow sounds.
- Identify spalled or flaking brick faces that won’t hold paint.
- Mark areas with moisture stains or efflorescence for further investigation.
Record findings, prioritize repairs, and don’t paint until all damage’s addressed.
Clean And Etch
Once you’ve repaired mortar and addressed cracks, it’s time to clean and etch the brick so paint will adhere properly. Start by sweeping loose debris, then pressure-wash at low to medium pressure to avoid damaging mortar.
Use a masonry cleaner or trisodium phosphate for stubborn stains, following manufacturer instructions for safe surface preparation. Scrub efflorescence with a stiff brush and a diluted vinegar solution or a commercial efflorescence removal product, rinsing thoroughly.
Allow the brick to dry completely—usually 48–72 hours—before priming. Proper cleaning and etching guarantee consistent adhesion, prevent peeling, and extend the lifespan of your paint job.
Removing Efflorescence, Dirt, and Old Coatings
How do you get brick ready to accept paint? You’ll start with proper surface cleaning to remove dirt, mildew, and loose paint.
How do you get brick ready to accept paint? Begin with thorough cleaning to remove dirt, mildew, and loose paint.
For efflorescence removal, dry-brush salts first, then rinse; use a mild acid wash only if stubborn.
Strip flaky coatings with a chemical stripper or a power washer set to low to avoid damage.
Let masonry fully dry—moisture will ruin adhesion.
Finally, inspect for hidden residue and repeat cleaning where needed.
Follow with a masonry primer before painting.
- Dry-brush salts
- Rinse and mild acid wash
- Strip old coatings
- Fully dry before priming
Repairing Cracks and Mortar Before Painting
After cleaning and priming, inspect the brickwork for cracks, gaps, and deteriorated mortar that will compromise paint adhesion and weatherproofing. You’ll want to remove loose mortar, undercut joints if needed, and brush away debris.
Use matching mortar or a pre-mixed repair compound to repoint joints, packing it firmly and tooling for a flush finish. Small hairline cracks can be filled with a compatible masonry caulk.
Let repairs cure fully, then sand lightly where necessary. Proper surface preparation guarantees paint bonds evenly and maintains weather resistance.
Only paint once repairs are stable and moisture won’t be trapped.
Choosing Paint Finish and Color for Brick
Now that the surface is sound, you’ll want to pick the right finish and color for your brick. Consider durability and sheen—flat hides imperfections, satin or low-luster resists dirt better.
And choose a color that complements your home’s architecture and surrounding landscape. Test samples on different walls and view them at multiple times of day before committing.
Finish Type Considerations
Because brick has a strong texture and will show every sheen, you should pick a finish and color that balance durability, maintenance, and the look you want. Consider finish type for wear, breathability, and historical preservation needs; choose eco-friendly options like low-VOC masonry paints when appropriate.
- Matte — conceals texture, low sheen
- Satin — easier to clean, moderate sheen
- Semi-gloss — durable, highlights detail
- Breathable masonry coating — moisture control
Choose the finish based on the specific needs of your project, keeping in mind the benefits and limitations of each option.
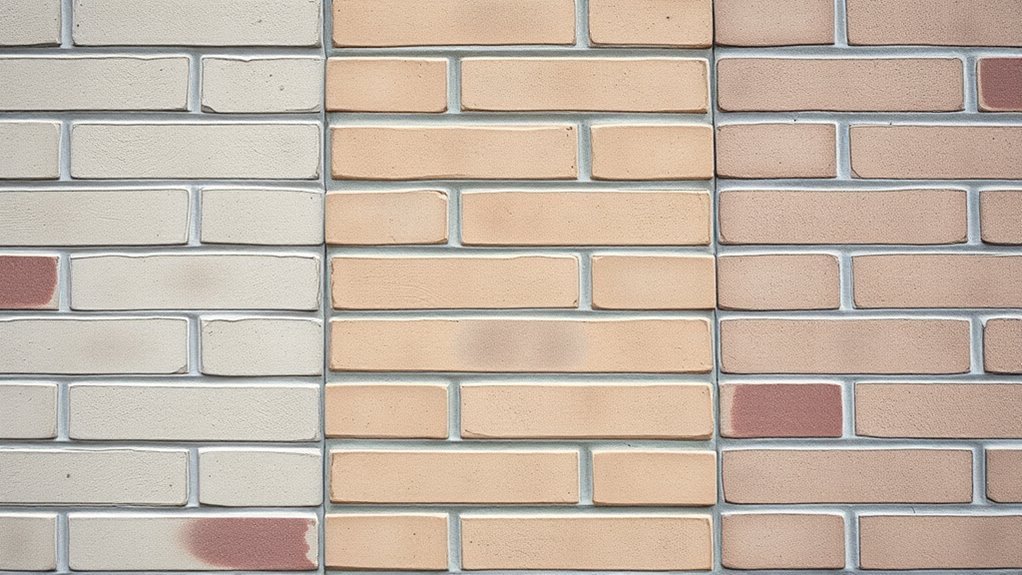
Color Selection Tips
When you pick a color for painted brick, think about how light, texture, and surrounding materials will change its appearance throughout the day.
Choose tones that complement rooflines, trim, and landscaping while testing samples on different walls and at different times.
Matte finishes hide imperfections; satin adds subtle sheen.
Consider local climate: intense sun accelerates color fading, so pick UV-resistant paints and lighter shades to reduce heat absorption.
Factor in maintenance and natural aging—accept that patina will develop.
Keep mortar contrast in mind; slightly darker or lighter hues preserve texture.
Document chosen formulas for future touch-ups.
Tools and Equipment for Painting Brick
Before you start painting brick, gather the right tools so the job goes smoothly and the finish lasts. You’ll balance modern efficiency with concerns like historical preservation and environmental impact when choosing supplies. Pick quality items that minimize waste and avoid damaging masonry.
- Pressure washer or stiff-bristle brush for cleaning mortar joints and removing loose paint.
- Masonry primer and breathable paint labeled for exterior brick to protect historic fabric.
- Rollers, angled brushes, and masonry sprayer for even coverage in crevices.
- Safety gear: respirator, gloves, drop cloths, and eco-friendly disposal bags.
Step‑By‑Step DIY Brick Painting
Once you’ve prepped and primed the surface, tackle the painting in organized stages so you don’t miss spots or overload the brick. Start at the top and work downward, cutting in mortar lines with a small brush to respect brick texture.
Begin at the top, work downward in stages, cutting mortar lines first to avoid missed spots or overload.
Use a roller for broad faces, pressing firmly to reach pores without pooling. Apply thin, even coats and allow full drying between layers to improve paint adhesion.
Inspect for missed crevices and feather edges to blend joins. After final drying, seal trims and clean tools.
Maintain ventilation and check weather; avoid painting in direct sun or below freezing.
When to Hire a Pro Painter or Mason
If your bricks show structural cracks or crumbling mortar, you should call a mason before painting to prevent bigger problems.
If the surface needs extensive repointing, sealing, or complex prep like efflorescence removal, a pro painter or mason can guarantee proper repairs and long-lasting results.
Don’t try to paint over serious damage—you’ll save time and money by getting expert help first.
Structural Or Mortar Issues
When you spot crumbling mortar, large hairline cracks, or bricks that feel loose, don’t assume paint will fix it — these are signs of structural or mortar problems that need a pro. You should address structural issues and mortar repair before painting to prevent water intrusion and further damage.
A mason or structural contractor will assess load-bearing concerns, check for shifting, and recommend tuckpointing or stabilization.
- Assess cracks for movement or settlement.
- Replace or re-secure loose bricks.
- Perform professional mortar repair (tuckpointing).
- Consult a structural pro for load issues.
Complex Surface Preparation
How do you know the surface prep is beyond DIY? If brick shows uneven texture patterns, deep staining, or previous failed coatings, call a pro.
You’ll want someone who assesses porosity, removes incompatible sealers, and addresses hidden damage without harming brick or mortar.
Hire a mason for tuckpointing or replacing spalled units; hire a painter experienced with masonry for specialized cleaning, priming, and breathable coatings.
For older homes, insist on expertise in historical accuracy to preserve character and meet local guidelines.
A professional saves time, prevents costly mistakes, and guarantees the finished paint adheres and breathes properly.
Cost Estimates: DIY vs. Pro
Although you can save money by tackling exterior brick painting yourself, you’ll want to compare realistic costs—materials, tools, surface prep, and your time—against professional bids that include labor, warranty, and cleanup.
You’ll weigh Historical preservation concerns and Environmental impact when choosing coatings and contractors, since specialty paints or breathable coatings cost more but protect masonry and reduce emissions.
Calculate hours for prep, masking, and multiple coats when DIY; pros charge per square foot but offer speed and expertise.
Consider warranty value and disposal fees.
- Materials and tools
- Prep and repairs
- Labor and warranty
- Disposal and compliance
How Long Painted Brick Typically Lasts
After you weigh costs and warranties, you’ll want a realistic expectation of lifespan so you can plan maintenance and budget for repainting. Painted brick often lasts 7–15 years depending on paint quality, prep, and climate. If you’re near coastlines or in freeze–thaw regions, weather resistance matters more. Historic homes under historical preservation review may need breathable coatings and careful color choices, which can affect longevity. Below is a quick durability guide.
| Condition | Expected Lifespan |
|---|---|
| High sun/low moisture | 10–15 years |
| Freeze–thaw/coastal | 7–10 years |
| Well-prepared, premium paint | 12–15 years |
Routine Maintenance for Painted Masonry
Want your painted brick to keep looking its best? You’ll inspect surfaces yearly, address chips promptly, and use gentle cleaners to protect mortar and finish. Respect historical preservation guidelines if your home’s older; consult pros before major changes. Choose eco friendly coatings and breathable paints to avoid trapped moisture.
Inspect painted brick annually, spot-repair chips, use gentle cleaners, and choose breathable, eco-friendly coatings—consult pros for historic homes.
- Wash with mild detergent and soft brush every 12–24 months.
- Touch up small chips with matching, breathable paint.
- Repoint deteriorated mortar following preservation best practices.
- Recoat every 8–12 years or sooner if wear appears, using eco friendly coatings.
How to Remove Paint From Brick
Keeping painted brick looking good sometimes means removing paint entirely — whether you’re correcting a botched color, restoring historic masonry, or preparing for a breathable finish. Start by testing a small area to assess brick texture and paint adhesion.
Use a chemical stripper rated for masonry or a low-pressure hot water wash; avoid high-pressure blasting that can erode mortar and alter brick texture. Scrape gently with a stiff nylon brush or plastic scraper, then rinse thoroughly.
For stubborn spots, repeat stripping and soft abrasion. After removal, let the wall dry fully and inspect for damage before deciding on any new coating.
Preventing Moisture and Trapped Water
Before you paint, check the brick and mortar for cracks or crumbling that could let water in.
Choose breathable masonry paint so moisture can escape instead of getting trapped behind the finish.
Also confirm flashing and other roof or window details are sound to keep water from running into the wall.
Check Brick and Mortar
Because trapped moisture can wreck a paint job, check every brick and mortar joint for cracks, spalling, or missing mortar and repair them before you paint. You’ll want to assess brick texture and match mortar color when repointing so repairs blend and shed water properly.
Clean loose debris, probe for soft spots, and replace deteriorated mortar with compatible mix. Prioritize flashing, sills, and joints where water accumulates.
- Inspect all walls top to bottom for hairline cracks.
- Tap bricks to find hollow sounds.
- Note mismatched mortar color for later touch-ups.
- Seal repaired joints to prevent future water ingress.
Use Breathable Paint
How will paint choices affect moisture escape from your brickwork? You should pick a breathable masonry paint so vapor can migrate outward, preventing trapped water that causes freeze-thaw damage and efflorescence.
Breathable formulations balance weather resistance with permeability, letting moisture leave while shedding liquid rain. That balance preserves mortar and reduces peeling, boosting paint longevity.
Before you paint, confirm the product’s vapor-permeability rating and compatibility with existing masonry. Apply according to manufacturer instructions, avoiding impermeable sealers or oil-based coatings that lock moisture in.
Proper breathable paint helps your exterior brick last and perform without creating hidden moisture problems.
Ensure Proper Flashing
When you’re prepping to paint or repair exterior brick, make sure flashing is correctly installed and continuous so water is directed away from vulnerable joints and structural gaps. You’ll prevent trapped moisture that causes efflorescence, freeze-thaw damage, and paint failure.
Proper flashing respects historical preservation by avoiding invasive fixes, and reduces environmental impact by minimizing future repairs and material waste. Inspect, seal, and replace damaged drip edges, step flashing, and counterflashing before painting.
Follow these steps:
- Check existing flashing for gaps and corrosion.
- Verify overlap and pitch for positive drainage.
- Use compatible, breathable sealants.
- Replace compromised sections promptly.
Will Painting Affect Insulation or Energy Use?
If you paint your exterior brick, it won’t directly change the wall’s core insulation, but the paint can influence heat absorption, surface temperatures, and how the wall sheds moisture — all factors that affect energy use.
You’ll alter solar reflectivity: lighter paints reduce heat gain, lowering cooling loads, while darker tones do the opposite.
Breathable, vapor-permeable coatings help prevent trapped moisture that can degrade insulation performance over time.
Consider environmental impact when choosing products and balance energy goals with historical authenticity for older homes.
Proper color and coating choices can modestly improve energy efficiency without changing structural insulation.
Common Mistakes That Reduce Paint Life
Why would your freshly painted brick start failing sooner than expected? You can unintentionally shorten paint life by skipping prep or using wrong products. Check these common mistakes so you don’t repeat them:
- Painting over dirt, mildew, or efflorescence — poor prep traps moisture.
- Using impermeable or interior-grade paint — it prevents brick from breathing.
- Neglecting surrounding work like lawn maintenance and clogged gutters — splashback and damp encourage peel.
- Damaging finish with improper garden lighting installation or scaffolding that scrapes wet paint.
Avoid these errors, and your exterior paint will last far longer.
Best Practices for Historic or Heritage Brick
Those common mistakes are even more damaging on historic or heritage brick, so treat these surfaces with extra care and respect. You’ll consult local historical preservation guidelines before any work, since original mortar, texture, and color often matter legally and culturally.
On historic brick, proceed with extra care—follow preservation guidelines to protect original mortar, texture, and color.
Test a small, inconspicuous area to assess adhesion and moisture migration, and use breathable primers and paints formulated for masonry to preserve paint durability without trapping damp.
Repair mortar with matching composition, avoid sandblasting, and document changes. If in doubt, hire a conservation specialist.
Your careful approach protects structural integrity, aesthetic authenticity, and long-term performance.
Eco‑Friendly Paints and Disposal Options
Because exterior work can affect both your home’s finish and the environment, choose low‑VOC or zero‑VOC masonry paints and primers that reduce fumes and off‑gassing while still resisting moisture and mildew. You’ll want eco friendly options like mineral‑silicate paints, water‑based acrylics, and natural limewash for breathable protection.
Plan Disposal methods before you start to avoid contaminating soil or drains.
- Return unused paint to manufacturer take‑back programs.
- Use municipal hazardous waste drop‑offs for leftover solvent‑based products.
- Let small water‑based cans dry, then recycle with metal waste.
- Donate usable paint to community groups or reuse centers.
Color Trends and Styles for Painted Brick
When you pick a color for painted brick, think about how it will change the home’s mood, curb appeal, and perceived scale. Choose warm neutrals to cozy a cottage, cool grays to modernize, or deep charcoal to dramatize architectural lines.
Preserve character by testing shades that respect historical preservation guidelines, especially in older districts. Accent trims, doors, or mortar washes can add contrast without overwhelming.
For sustainability, select low‑VOC, Eco friendly options and durable exterior coatings to reduce repainting frequency. Sample large swatches in different light, then live with the hue several days before committing.
Painted Brick vs. Stucco or Siding: A Comparison
Although painted brick, stucco, and siding can all refresh a home’s exterior, they differ in maintenance, durability, appearance, and cost—so pick based on your climate, budget, and desired look. You’ll weigh upkeep, lifespan, and aesthetics: painted brick masks flaws and suits historical preservation when done sensitively; stucco offers seamless texture but can crack in freeze–thaw zones; siding is cost-effective and easy to replace.
Consider eco-friendly options like low-VOC paints or recycled siding. Decide by your tolerance for maintenance and regional weather.
- Maintenance needs
- Durability and repair
- Visual style
- Environmental impact
Frequently Asked Questions
Can Painted Brick Cause Indoor Humidity Issues?
Yes — painted brick can cause indoor humidity issues if coatings trap moisture. You’ll face indoor moisture and breathability concerns when impermeable paints block vapor escape, promoting dampness, mold growth, and reducing wall drying capacity unless breathable finishes’re used.
Is Painted Brick More Prone to Mold Growth?
About 30% of painted masonry shows moisture issues, so yes, you’re more prone to mold if water’s trapped; inspect brick surface, guarantee proper paint adhesion, and use breathable coatings and good drainage to minimize growth.
Can You Paint Brick in Freezing or Very Hot Weather?
You shouldn’t paint brick in freezing or very hot weather; temperature effects harm paint adhesion, causing poor curing, blistering, or peeling. Wait for moderate temperatures and stable conditions so paint bonds correctly and lasts.
Will Paint Hide Historic or Decorative Brick Patterns?
Yes — paint can conceal details. You’ll watch brick color swallow decorative patterns, softening or hiding relief and mortar contrasts; subtle textures vanish beneath layers, so choose finishes and colors that preserve or highlight those historic details.
Are There Insurance Implications for Painted Brick?
Yes — you could face insurance implications for painted brick; check painting regulations and policy details, since insurers may limit coverage or affect insurance claims if paint causes moisture issues, improper work, or violates local rules.
Conclusion
Deciding whether to paint your exterior brick isn’t just a practical call—it’s a gentle transformation. You’re not covering history so much as giving it a fresh handshake with the street, softening aged edges and inviting new life. If you’re courting curb appeal or quietly modernizing, paint can be the whisper of change that soothes and excites. Just tread kindly: respect heritage, check rules, choose eco-friendly products, and let the house wear its new mood gracefully.