Can You Spray Latex Paint
Yes — you can spray latex paint successfully if you prep, pick the right sprayer and tip, and control viscosity and environment. Clean and prime surfaces, thin only as manufacturer recommends (usually 5–10%), and test on scrap to dial tip size, pressure, and distance. Use proper ventilation, PPE, and immediate sprayer cleanup to avoid clogs. For large or detailed jobs, practice technique first; keep going to learn tips on tools, troubleshooting, and finish timing.
Can You Spray Latex Paint? Quick Answer

Yes—you can spray latex paint, and many pros do it to get fast, even coverage on large surfaces. You’ll find sprayers cut application time and reduce brush marks, letting you control atomization for fine color mixing on custom jobs.
Yes—you can spray latex paint for fast, even coverage; pros use sprayers to cut time and reduce brush marks.
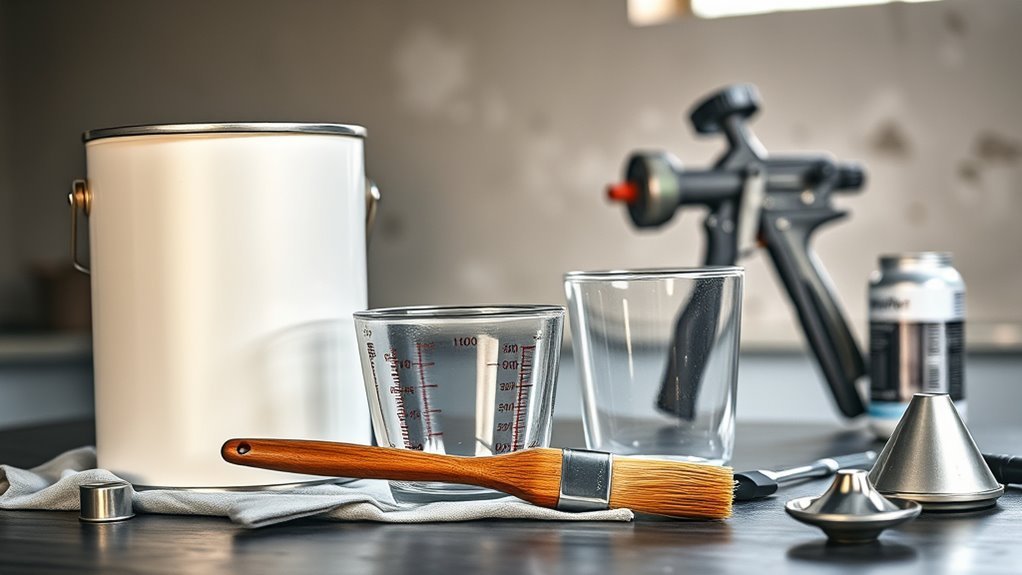
Prep matters: thin the paint as your sprayer recommends, strain it, and mask thoroughly to avoid overspray.
You’ll also use spray techniques to achieve texture enhancement when desired, like light stippling or layering.
Clean the equipment promptly to prevent clogs, and test on scrap material so you can adjust pressure and nozzle size before tackling the main surface.
When Spraying Latex Works : And When It Doesn’t
When should you reach for a sprayer, and when is brushing or rolling the smarter choice? You’ll want a sprayer for large, flat surfaces—fences, exterior walls, and furniture—because it saves time and gives a smooth finish.
Use a brush or roller for trim, textured walls, and detailed work where control matters or overspray is risky. Consider color matching needs: touch-ups after spraying can be tricky if you can’t replicate spray texture.
Also think about paint storage and how long you’ll keep leftover thinned latex—extended storage after thinning can affect performance, so plan accordingly.
Why Latex Behaves Differently From Oil-Based Paint
You’ll notice latex dries by water evaporation, so it skins over and sets faster than oil-based paints that cure by oxidation.
That different drying dynamic changes how the film forms, making latex films more prone to surface tension issues and visible overlap marks.
Knowing this helps you adjust spray technique and thinning to get a smooth, even coat.
Water-Based Drying Dynamics
Although both go on wet, latex and oil-based paints dry by different chemistry: latex paint cures as water evaporates and polymers coalesce into a film.
Oil-based paint dries through oxidation of its oils.
You’ll notice latex’s drying speed depends on temperature, humidity, and airflow; high humidity slows evaporation and prolongs tackiness.
Because solvents differ, thinning, color mixing, and paint storage practices change—don’t mix oil tints into water-based batches, and seal latex cans tightly to limit water loss.
When spraying, account for faster surface skinning that can trap solvents underneath, affecting recoat times and finish consistency.
Film Formation Differences
How does latex form a durable film so differently than oil-based paint? You rely on latex polymers that coalesce as water evaporates, creating a flexible, interlocking film rather than the solvent-driven oxidation cure of oils.
That flexibility resists cracking and tolerates expansion, but it can affect sheen and color matching versus oil finishes.
Application technique and thinning influence film build and edge resolution when you spray.
Latex’s lower VOCs reduce environmental impact, making cleanup easier and safer.
You’ll still choose primers or additives for adhesion and hardness when needed, balancing durability, appearance, and eco-friendly goals.
Measuring Viscosity: Is Your Latex Spray-Ready?
If you want smooth results from a paint sprayer, check your latex paint’s viscosity before you start—too thick and it won’t atomize, too thin and you’ll get runs and poor coverage.
Check latex paint viscosity before spraying—too thick won’t atomize, too thin causes runs and weak coverage.
You’ll use a simple viscosity cup or flow cup to time how long paint takes to run out; compare that to manufacturer specs.
Take note of temperature and humidity because they affect drying time and can influence how the spray performs.
Maintain samples for color matching after spraying to confirm consistency.
Record measurements so you can reproduce spray-ready viscosity across batches and avoid surprises on the job.
When to Thin Latex Paint : And When Not To
Knowing when to thin latex paint comes down to the delivery method and the job. If you’re using a high-pressure or airless sprayer, paint often needs slight thinning for proper atomization.
If you’re rolling or brushing, keep it as mixed from the can to preserve body and hide. Don’t thin if color matching matters—dilution can alter tint and coverage.
Also avoid thinning older cans; instead check paint storage conditions and age, since separation or contamination can’t be fixed safely by adding solvent.
When in doubt, test-spray a small panel to verify flow and finish before committing.
How to Thin Latex Safely (What to Add, How Much)
If your latex paint’s too thick for your sprayer, you’ll need to thin it with the right additive and the right amount.
Use water for most interior latex paints—start with 5–10% by volume and only add more in small increments until it flows properly.
For specialty or exterior formulas, check the label and use a manufacturer-recommended reducer to avoid weakening the finish.
What To Add
When you need to thin latex paint for spraying, use only water or a manufacturer-recommended acrylic thinner and add it sparingly—start with 5–10% by volume, mix thoroughly, and test spray on cardboard to check flow and coverage. You’ll protect finish quality and simplify color matching and texture blending by avoiding solvents. Add water in small increments, stir, then run a spray test. Record ratios for repeatability.
| Additive | Purpose |
|---|---|
| Water | Lowers viscosity safely |
| Acrylic thinner | Restores flow as approved |
| Flow conditioner | Improves atomization |
How Much To Use
After you’ve chosen a safe additive and mixed a small test batch, decide how much to thin based on your sprayer and the paint’s starting viscosity. You’ll usually add 5–15% water or manufacturer-recommended thinner for HVLP and airless sprayers; start low, test atomization, then increase in 2–3% increments.
Stir thoroughly, let bubbles settle, and spray a panel to check coverage and color matching—thinning can slightly alter tint appearance. Note that over-thinning harms film integrity and complicates paint storage.
Store leftover properly, label contents and ratio, and discard mixtures that separate or smell off to avoid finish failures.
Straining and Filtering to Prevent Clogs
Straining and filtering your latex paint will save you time and prevent frustrating clogs in your sprayer, so always remove lumps, dried bits, and skin before you load the gun. You’ll pour through a fine mesh or disposable filter, checking for contaminants and ensuring color mixing is uniform.
Confirm solvent compatibility if you’ve thinned the paint—use recommended water or additives only. Maintain a clean funnel and replace filters often.
Follow this quick checklist:
- Use 60–100 mesh filter for body.
- Double-filter after mixing for smoothness.
- Inspect for fibers or debris before spraying.
Choosing the Right Sprayer for Latex: HVLP, Airless, or Air
Because each sprayer handles latex differently, pick the one that matches your project’s scale, finish, and skill level.
For small detail or fine finish, HVLP gives low overspray and smoother results; you’ll manage thinner coats and careful color mixing for precise hues.
For large exterior jobs, airless sprayers deliver fast, even coverage—expect more overspray but less thinning.
Compressed-air systems sit between: versatile but messier and requiring more technique.
Consider cleanup, material waste, and environmental impact—HVLP typically wastes less.
Match sprayer choice to project size, desired finish, and your comfort with setup and cleanup.
Nozzle and Tip Sizes for Spraying Latex
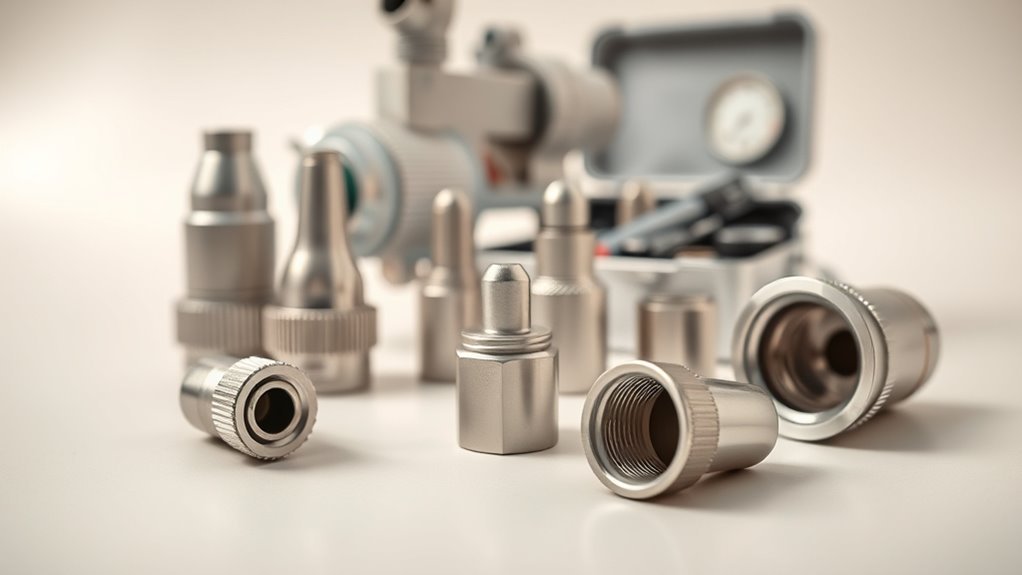
When you pick a nozzle or tip for spraying latex, think in regards to particle size and flow rate—smaller tips give finer atomization and smoother finishes but clog more easily, while larger tips handle thicker, high-build latex and speed up coverage.
You’ll choose based on finish, substrate, and any color mixing or texture options you want. Consider common tip ranges and uses:
- 0.009–0.013″ — fine detail, thin latex, minimal texture.
- 0.015–0.019″ — general-purpose, balanced atomization and flow.
- 0.021–0.027″+ — high-build, heavy textures, faster coverage with coarser spray.
Match tip size to paint viscosity and job scale.
Pressure and Flow Settings by Sprayer Type
Although different sprayer types operate on distinct principles, you’ll always balance pressure and flow to match paint viscosity and tip size.
No matter the sprayer, balance pressure and flow to match paint viscosity and tip size for proper atomization.
For HVLP, lower pressure and higher flow suit thinner latex or properly thinned batches; increase flow before raising psi to avoid dry spray.
Airless units use higher pressure with larger tips; start at recommended psi and reduce if overspray or sagging appears.
LVLP sits between them—moderate pressure, controlled flow.
Test panels after color mixing to confirm atomization.
Keep leftover latex in proper paint storage to preserve consistency for future adjustments and prevent nozzle clogging.
Preparing Surfaces for Sprayed Latex to Ensure Adhesion
If you want sprayed latex to stick and look smooth, start by removing dirt, grease, and loose material so the coating can bond to a stable surface.
Sand glossy or chalky areas until dull, then wipe with a tack cloth.
Repair cracks and fill holes; let patches cure fully.
Mask edges and cover nearby items to prevent overspray contamination.
Consider how color mixing affects coverage—test a small area after mixing.
Store leftover material properly: correct paint storage preserves viscosity and prevents contamination that harms adhesion.
Follow these steps for a clean, consistent substrate before spraying.
When and How to Prime Before Spraying Latex
You’ve prepped the surface so paint will bond—now decide whether a primer is needed and which type to use. If the surface is stained, porous, or drastically different in color, prime to seal and equalize absorbency.
Use an acrylic latex primer for most surfaces; oil-based or bonding primers suit slick or challenging substrates. When spraying, thin primer per manufacturer specs and test spray to avoid runs.
Consider how primer affects color mixing—tinted primer reduces coats and improves final hue. For edges and corners, apply primer with proper brush techniques before spraying to ensure full coverage and adhesion.
Best Latex Formulations and Labels to Look For
Look for spray-ready formulations or products labeled as atomizable so you won’t have to thin them much for a sprayer.
Choose low-VOC or zero-VOC options if you want less odor and faster curing, especially indoors.
Also check surface-specific labels—walls, trim, or exterior—to make sure the chemistry and adhesion match your project.
Spray-Ready Formulations
When you’re choosing a latex paint for spraying, prioritize products labeled “spray-ready,” “spray-friendly,” or “HVLP-compatible,” since those formulations are thinned and stabilized to atomize cleanly without separating or clogging nozzles. You’ll also want labels that note low overspray and fast leveling for smooth finishes.
Pay attention to color matching info and follow paint storage guidance to keep sprayability.
- Look for “spray-ready” or “HVLP-compatible” badges.
- Prefer waterborne acrylics with surfactant stabilizers.
- Choose kits that include nozzle size recommendations.
These choices save thinning time, reduce clogs, and improve application consistency.
Low-VOC Options
If you want to keep spraying-friendly performance without the strong odors and health risks, pick low-VOC or zero-VOC latex formulas that still list spray compatibility on the label. Look for terms like “sprayable,” “atomization optimized,” or “contractor grade” and confirm dry time and rebond specs.
Choose waterborne acrylics or hybrid latex variants; they spray well and minimize fumes. When buying, consider how color mixing affects VOC content—some tints add solvents—so ask about tinted VOC levels.
Also check paint storage guidelines on the can; proper sealing and temperature control preserve sprayability and prevent separation between uses.
Surface-Specific Labels
Because different surfaces need different formulations, always check the label for the substrate it’s made for—wood, drywall, metal, masonry, or trim—so you pick a latex that’s engineered for adhesion, flexibility, and durability on that material.
You’ll spot keywords telling you if a paint is right for color mixing or texture application, and you should follow those cues. Look for terms like “exterior,” “stain-blocking,” or “masonry grade.”
Consider these quick picks:
- Wood: flexible, primer-bonding formulas.
- Metal: rust-inhibiting, high-adhesion latex.
- Drywall/Trim: low-sheen, easy-sand finish.
Spraying Latex Indoors vs. Outdoors: Ventilation and Overspray
Though spraying latex can speed a job, you’ll need to weigh ventilation and overspray risks before deciding to work indoors or outdoors. If you spray inside, open windows, run fans, and use an exhaust or respirator to avoid breathing mist. Mask occupants and cover floors and furniture to prevent settling.
Outdoors you’ll reduce inhalation risk but watch wind, neighbors, and plants—overspray travels. Keep mixed tint samples sealed and labeled; proper color mixing and paint storage prevent waste and contamination between sessions.
Plan containment, protect nearby surfaces, and test a small spray pass to confirm spray pattern and coverage.
Temperature and Humidity Limits for Spraying Latex
When you spray latex, temperature and humidity directly affect atomization, drying time, and final film formation, so work within the paint maker’s recommended ranges to avoid poor adhesion, orange peel, or blistering.
You’ll spray best between about 50–85°F and relative humidity below 80%; cold slows coalescence, high humidity causes blushing or poor film clarity. Adjust gun settings and thin slightly in cooler temps.
Remember color mixing can change guises in different conditions; test sprays. Don’t rely solely on brush techniques for coverage when conditions hinder drying. Check weather and finish samples before committing to large areas.
- Monitor temp/humidity
- Test spray
- Adjust thinning
Masking and Protecting Areas From Overspray
Before you spray, cover nearby surfaces with plastic or paper to stop stray mist from landing where it shouldn’t.
Seal gaps and edges with painter’s tape so paint can’t sneak under trim or around fixtures.
Use heavy-duty drop cloths on floors and furniture to catch any overspray and make cleanup easier.
Cover Nearby Surfaces
If you want clean edges and no paint where it shouldn’t be, mask and protect everything within the spray zone before you pull the trigger. Cover floors, furniture, and trim with drop cloths or plastic; tape seams so wind or overspray won’t sneak under.
Use lightweight paper for windows and larger plastic for cars or plants. Consider color matching test patches on scrap to confirm hue before committing.
Remember safety precautions: wear a respirator, goggles, and gloves. Protect vents and hardware.
Quick checklist:
- Secure floor and furniture coverings
- Tape and overlap seams
- Test color and confirm ventilation
Seal Gaps And Edges
Because tiny gaps and edges are where overspray sneaks through, take time to seal them tightly before you spray. You’ll run tape along trim, tuck masking film into crevices, and press foam or rubber gasket where two surfaces meet.
Sealant and caulk stop mist from settling in seams and preserve crisp lines for color matching later. Properly sealed joints also protect underlying materials, contributing to paint durability by preventing moisture and dirt intrusion.
Work methodically from top to bottom, check edges with a flashlight, and remove or replace tape cleanly after tack time to avoid lifting fresh latex.
Use Proper Drop Cloths
When you’re ready to spray, lay down proper drop cloths to catch overspray and protect floors, furniture, and fixtures. You’ll want materials that won’t shift, tear, or let paint seep through. Choose breathable cloths for indoor work and plastic for quick outdoor coverage, but consider eco-friendly options like recycled canvas. Also plan for color matching cleanup—keep rags and small cloths separate.
- Secure edges with low-tack tape.
- Layer high-traffic zones for extra protection.
- Use weighted corners or clips to prevent billowing.
Do a quick test spray to confirm coverage before you begin.
Spraying Technique for Latex: Distance, Overlap, and Speed
Although latex sprays nicely, getting an even coat depends on your distance, overlap, and trigger speed—hold the nozzle about 8–12 inches from the surface, overlap each pass by roughly 50%, and move at a steady pace so paint lays down wet without pooling.
You should keep strokes consistent, start and stop off the edge, and use cross-coats for tricky surfaces.
Adjust pressure for atomization, thin only if necessary, and strain to avoid clogs. Mind ventilation and tack times.
For best results, follow manufacturer guidance on color mixing and paint storage to preserve viscosity and spraying performance.
How Many Coats to Spray and Dry Times Between Coats
Decide on the number of coats based on color change, coverage, and the finish you want—most projects need two thin coats.
Wait the manufacturer’s recommended dry time between coats, usually 30 minutes to an hour for latex, but longer in humid or cool conditions.
Don’t rush: light sanding between coats can improve adhesion and smoothness before you spray the next one.
Number Of Coats
Wondering how many coats you’ll need and how long to wait between them? You’ll typically spray 2–3 thin coats for even coverage. Keep in mind color mixing can change opacity, so test a spray panel first; proper paint storage preserves consistency between coats.
Follow this quick guide:
- One coat: primer or light tint—use only for base.
- Two coats: standard for most colors and surfaces.
- Three coats: deep colors or repaired areas needing opacity.
Spray thin layers, watch for runs, and allow recommended tack-free time before recoating. Adjust coat count based on test results and surface absorbency.
Dry Time Between
Now that you know how many thin coats to spray, plan the dry time between each one to guarantee proper adhesion and a smooth finish. You’ll wait 15–30 minutes for tack-free touch, but always follow the paint can’s recommended recoat interval—often 2–4 hours for latex.
Humidity and temperature extend or shorten these times, so adjust accordingly. Light sanding between coats improves grip if longer than 24 hours passes.
Keep mixed batches consistent—color mixing can affect drying behavior—label them and manage paint storage to avoid contamination.
Proper timing prevents runs, ensures even coverage, and produces a durable finish.
Avoiding Orange Peel, Sags, and Runs With Latex Spray
When you spray latex, controlling thickness and overlap is key to preventing orange peel, sags, and runs. You’ll spray thin, even passes, keeping the gun moving and the tip perpendicular to the surface. Proper setup improves color matching and paint durability while reducing defects.
- Maintain 50% overlap and steady speed to avoid texture.
- Adjust fluid and air settings so each coat levels without pooling.
- Keep distance consistent (6–12 inches) and watch edges to feather blends.
Let coats flash between passes per manufacturer directions, and sand lightly between coats for a smooth, uniform finish.
Troubleshooting Drips, Poor Coverage, and Dust Contamination
If you see drips, thin spots, or specks of dust in your finish, you can usually fix the problem quickly by diagnosing spray technique, surface prep, and environmental factors.
First, check your spray distance and speed—slow passes or uneven overlap cause drips and poor coverage; maintain consistent motion.
Inspect the surface for dust, oils, or loose particles and wipe with appropriate cleaner.
Adjust viscosity and tip size if coverage is thin; guarantee proper color mixing to avoid streaks.
Keep paint sealed and stored upright to prevent contamination; proper paint storage reduces debris and preserves sprayability.
Cleaning and Maintaining Sprayers After Using Latex
After you finish spraying latex, flush your sprayer thoroughly with clean water to remove all residue before it dries.
Doing this right away prevents clogs in the nozzle and internal passages.
Regular cleaning and occasional inspection will keep the unit spraying smoothly for the next job.
Flush With Water
Wondering how to get latex out of your sprayer without clogging it? Flush with clean water immediately after use to protect seals and maintain color matching accuracy for future touch-ups, and label cans for paint storage.
- Rinse system: run water through gun, hose, and cup until clear.
- Disassemble: soak removable parts briefly, then scrub with a brush.
- Final cycle: run water plus a mild cleaner, then flush with plain water.
You’ll prevent residue buildup and simplify next color matching.
Dry parts completely before reassembly and store the sprayer in a dry, labeled spot for reliable performance.
Prevent Clogs
Keeping your sprayer clog-free starts with the quick rinse you already do, but you’ll also need a few habit changes and simple tools to keep latex from drying inside tiny passages.
After each use, disassemble the tip, needle, and filters; soak parts in warm soapy water and flush passages with a soft brush or bottle brush.
Use a dedicated container for color mixing to avoid cross-contamination and strain through a fine mesh before loading.
Run water through the gun until clear, then blow out moisture with compressed air and lightly lubricate seals.
Store components dry and inspect filters before every job.
When to Choose HVLP vs Airless vs Compressed-Air
When you pick a sprayer, match the tool to the job: HVLP gives fine control and low overspray for cabinets and furniture. Airless delivers high production and thick-coating power for exterior siding and fences. Compressed-air systems suit very smooth finishes on large-scale or high-end projects where moisture and cleanup aren’t issues.
You’ll also consider color matching and paint storage needs. Choose based on surface, finish, and volume:
- HVLP — best for trim, cabinets, and controlled color matching.
- Airless — fastest for large exteriors; tolerate thicker coats.
- Compressed-air — premium, ultra-smooth finishes; demands strict paint storage.
Time and Cost: Spraying Latex vs Rolling or Brushing
Choosing the right sprayer affects more than finish — it also changes how much time and money you’ll spend compared with rolling or brushing. Spraying usually cuts application time dramatically, especially on large, complex surfaces. However, you’ll spend more on equipment, masking materials, and possibly primer.
Rolling or brushing costs less up front and wastes less paint on overspray, making them economical for small jobs.
For precise color matching and texture blending, spraying offers superior consistency and faster corrections, though it demands careful setup.
Weigh surface area, job complexity, and your tolerance for prep versus tool investment before deciding.
Safety Gear and Best Practices for Spraying Latex
Because latex paint turns into a fine mist when sprayed, you should protect yourself and the workspace with the right gear and disciplined prep. Wear an N95 or P100 respirator, goggles, and disposable coveralls. Ventilate well and seal off adjoining areas to avoid overspray. Keep tools clean and label leftover paint for proper color mixing records and future paint storage. Follow equipment instructions and test spray on cardboard first.
Protect yourself and prep thoroughly: respirator, goggles, coveralls, sealed ventilation, clean tools, labeled paint, and test sprays.
- Mask, eye protection, gloves.
- Drop cloths, taped seams, ventilation.
- Clean-up protocol, waste disposal, labeled cans.
These steps cut risk and improve finish consistency.
Spraying Latex on Trim, Cabinets, and Floors: Special Tips
Now that you’ve got safety and prep locked down, spraying latex on trim, cabinets, and floors calls for some technique tweaks to get factory-smooth results. Work in thin, even passes, keeping the gun about 8–12 inches away and overlapping each pass 50%.
For cabinets, remove hardware and spray inside first. For trim, sand between coats for adhesion. Choose primer selection that suits substrate—stain-blocking for knots, bonding primer for slick surfaces.
For color matching, spray test panels and view in different light before committing. Cure times matter: allow longer between coats on floors and use a durable topcoat for traffic areas.
Safe Disposal and Handling of Thinned Latex
When you thin latex paint for spraying, handle the leftovers carefully to avoid clogging drains or contaminating water: don’t pour thinned paint or water-based cleanup fluids down the sink or storm drains. You should test latex consistency and label containers; sealed, cured residue is easier to manage. Follow local disposal regulations — many areas treat thinned latex as nonhazardous only when fully dried or taken to a household hazardous waste site.
- Solidify small amounts with kitty litter or paint hardener.
- Transport larger volumes to a sanctioned disposal facility.
- Keep records and receipts to prove compliance with disposal regulations.
Quick DIY Checklist: Prepare, Spray, Finish
Before you spray latex paint, make sure you prep the surface by cleaning, sanding, and masking off any areas you don’t want painted.
Pick the right equipment — a compatible sprayer, proper tip size, and protective gear — so the job goes smoothly.
With those basics set, you’ll cut mistakes and get a professional-looking finish.
Prep The Surface
Although prepping feels tedious, it’s the step that guarantees your latex paint adheres smoothly and lasts. You’ll clean, sand, and repair surfaces so coats go on even.
You should wipe away dust, grease, and old flaking paint; use a mild degreaser on kitchen areas. Sand glossy spots and fill holes, then prime bare patches.
Keep color mixing notes and secure paint storage to avoid surprises between coats.
- Clean: remove contaminants, rinse, dry.
- Repair: fill, sand, smooth.
- Protect: tape edges, cover nearby items before spraying.
Choose The Right Equipment
Now that the surface is prepped, pick equipment that matches your project’s size and finish goals. Choose a sprayer type: an airless for large areas, an HVLP for finer control, or a handheld for touch-ups.
Match nozzle size and pressure to latex viscosity and desired texture. Use filters and extensions as needed.
Test on scrap to verify color matching and spray pattern. Check paint branding recommendations for compatible thinners or additives.
Wear a respirator and cover surroundings. Prepare extra cups, hoses, and drop cloths.
Clean thoroughly after use to prevent clogs and preserve equipment longevity.
When to Hire a Pro for Spraying Latex
If your project has complex surfaces, large scale, or strict finish requirements, it’s smart to hire a pro for spraying latex. You’ll save time and avoid costly rework when you need precise color matching, advanced color mixing, or subtle texture enhancement that DIY gear can’t achieve.
Consider hiring a pro when:
- You’re covering extensive exterior or multi-room interiors quickly.
- The surface needs specialist prep, repairs, or protective coatings.
- The job demands flawless, uniform finish or specialized application techniques.
A pro brings experience, commercial equipment, and controlled conditions so your result meets expectations without guesswork.
Quick Reference: Common Mistakes and Fast Fixes
When you rush or skip key steps, spraying latex can quickly go wrong — but most problems have simple fixes you can do yourself.
Blotchy coverage? Clean or thin the tip, keep consistent overlap, and check nozzle spray pattern.
Drips and runs? Reduce pressure, keep gun moving, sand and recoat.
Orange peel texture? Thin slightly and test spray; adjust air pressure.
Clogged sprayer? Flush with water and filter the paint.
Mismatched shade after touch-up? Reevaluate color mixing and stir thoroughly.
Poor shelf life? Follow proper paint storage: seal cans, store upright, and avoid freeze.
Frequently Asked Questions
Can You Spray Latex Paint Over Existing Oil-Based Paint Without Deglossing?
No — you shouldn’t spray latex over oil without deglossing. Surface preparation matters: you’ll need to sand/clean and use a primer for paint compatibility so the latex adheres and resists peeling or failure.
Will Thinned Latex Affect the Color or Sheen of the Final Coat?
Yes — thinning latex can slightly shift color and reduce sheen if you over-thin; maintain proper latex consistency to preserve pigment saturation and use sheen preservation techniques like minimal thinning and proper spray settings for uniform finish.
How Long Should I Wait Before Sanding Between Sprayed Latex Coats?
About 2–4 hours is typical; you’ll want to wait until the coat’s dry-to-touch. 60% of pros recommend longer cures for durability. Use proper spray techniques and surface preparation to avoid clogging and uneven sanding.
Can Additives (Drying Agents, Flow Improvers) Void Paint Warranties?
Yes — using additives can void warranties. You’ll need to check additive compatibility with the manufacturer; otherwise warranty implications may apply if altered chemistry causes failures. Always follow manufacturer guidelines and document approved product use.
Is It Safe to Spray Latex Near Sensitive Electronics or Artwork?
You shouldn’t risk it—spraying latex near sensitive electronics or artwork can spread fine particulates and solvents that damage finishes, corrode contacts, and harm pigments. Prioritize electronics safety and artwork preservation with barriers, ventilation, and distance.
Conclusion
Yes — you can spray latex paint, but not always the same way. Thin for smooth flow, strain for clogs, and test on scrap wood; use a high-volume, low-pressure (HVLP) or airless sprayer for best coverage, and avoid thinning for exterior elastomerics or heavy-fill paints. Prep by cleaning and masking, spray in even passes, and back-brush or roll for texture. Dispose of thinned latex responsibly, and hire a pro for large, detailed, or critical jobs.