37 Creative Organization Ideas for Craft Rooms
Transform your craft room into a vibrant haven with colorful storage solutions, creative workstations, and multi-functional furniture. Use bright bins and patterned boxes to spark joy and keep your supplies organized. Create personalized workstations with adjustable surfaces and inspiring wall art to fuel your creativity. Don’t forget to designate specific zones for different projects and keep essential tools within reach. There’s a world of design ideas waiting to inspire your next project just ahead.
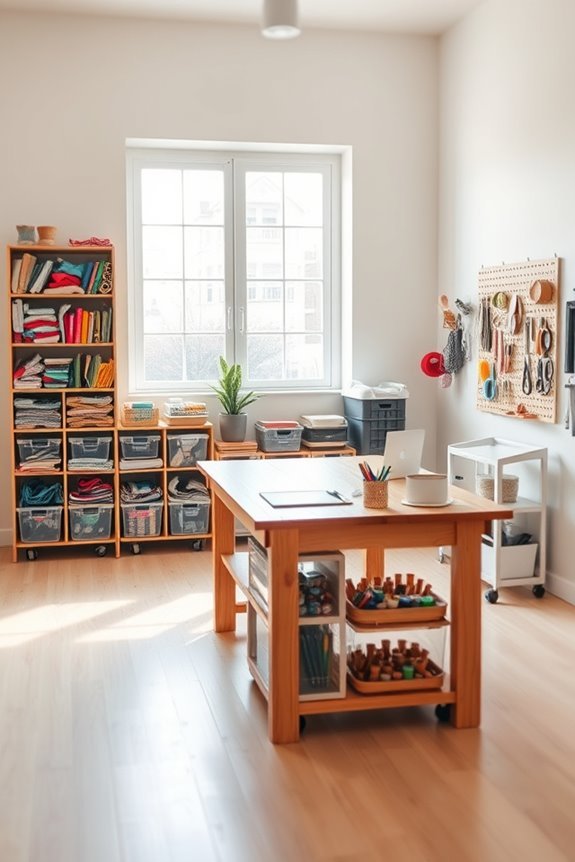
Utilize Vertical Space With Shelving
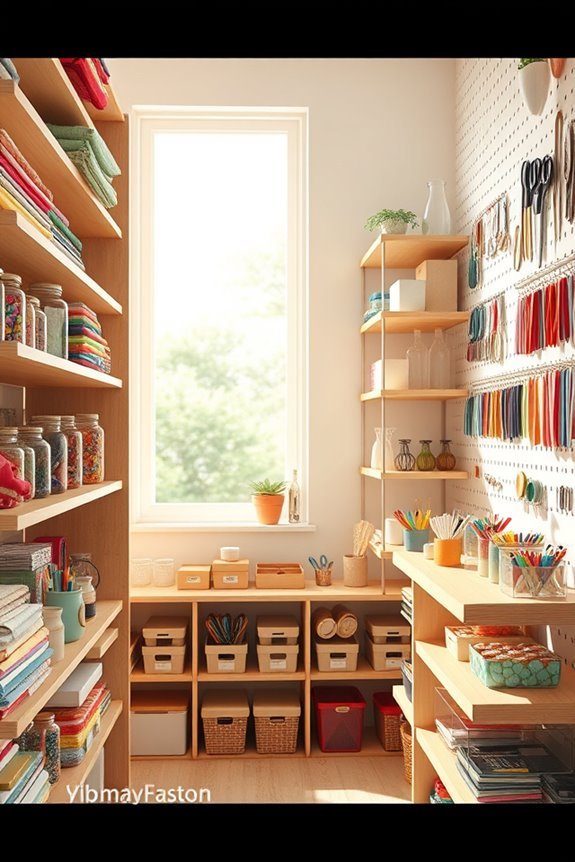
If you want to maximize your craft room’s potential, utilizing vertical space with shelving is key. Start by installing shelves at varying heights to create an eye-catching display. This technique not only enhances shelf styling but also keeps your supplies organized and accessible.
You can showcase your favorite crafting materials, tools, and finished projects, making them part of your decor. Consider incorporating vertical gardening elements too. Use small planters on shelves to add a touch of greenery, which can inspire creativity and improve air quality.
With thoughtful arrangement, your shelves can become a functional and beautiful part of your space. Embrace the vertical dimensions of your craft room, and you’ll find yourself enjoying a more efficient and aesthetically pleasing environment.
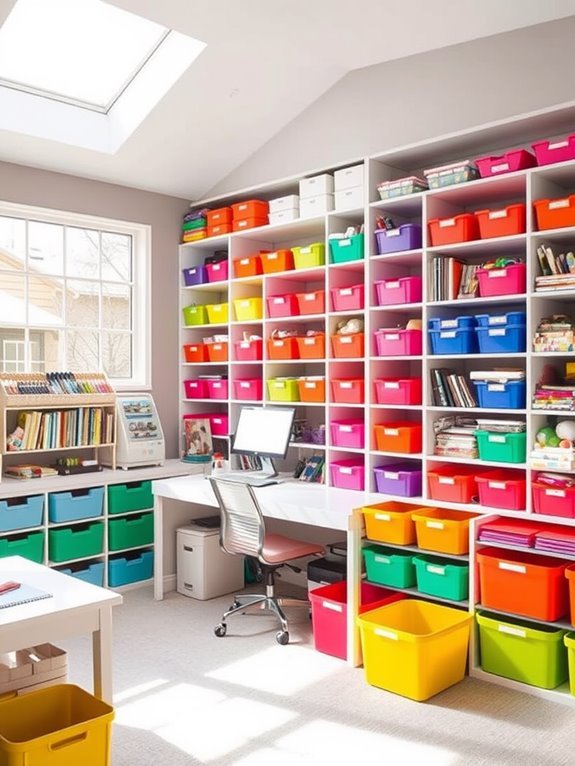
Clear Storage Bins for Easy Visibility

Clear storage bins are a game-changer for keeping your craft room organized and clutter-free. By using transparent containers, you can easily see the contents without rummaging through piles of supplies. This visibility saves you time and frustration, making your crafting experience more enjoyable.
Stackable bins are another fantastic option, allowing you to maximize vertical space while keeping everything accessible. You can categorize materials by type or project, ensuring you find what you need quickly.
Plus, the sleek design of these bins adds a modern touch to your craft room. So, embrace clear storage bins to streamline your organization, reduce clutter, and create a more inspiring workspace for your creative projects.
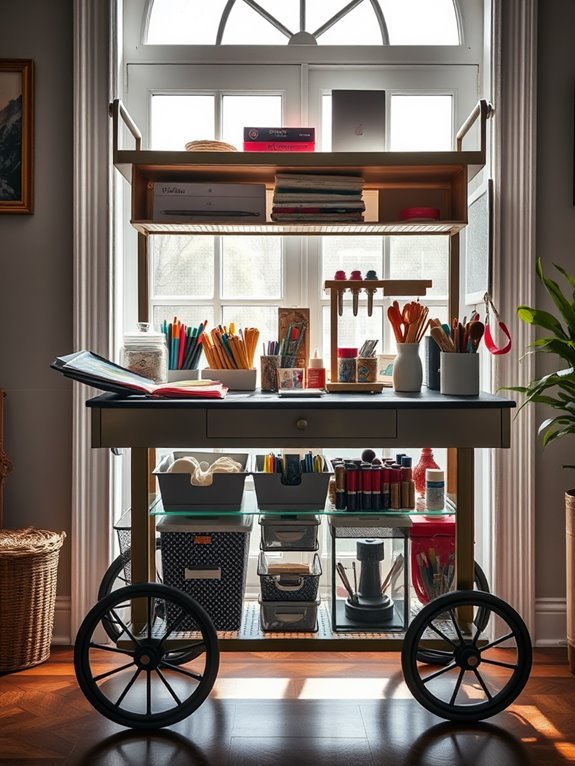
Rolling Carts for Mobility

As you look to enhance the functionality of your craft room, incorporating rolling carts can provide the mobility you need for seamless crafting.
These versatile pieces of mobile storage allow you to easily transport supplies, tools, and projects wherever you need them. Whether you’re working at a table, moving from room to room, or just need extra space, rolling carts can be a game-changer.
Choose carts with multiple tiers or customizable compartments to keep everything organized and accessible. You’ll appreciate how easy it’s to roll your supplies in and out of storage, promoting craft mobility and efficiency in your creative space.
Plus, they come in various styles, so you can find one that fits your aesthetic perfectly.
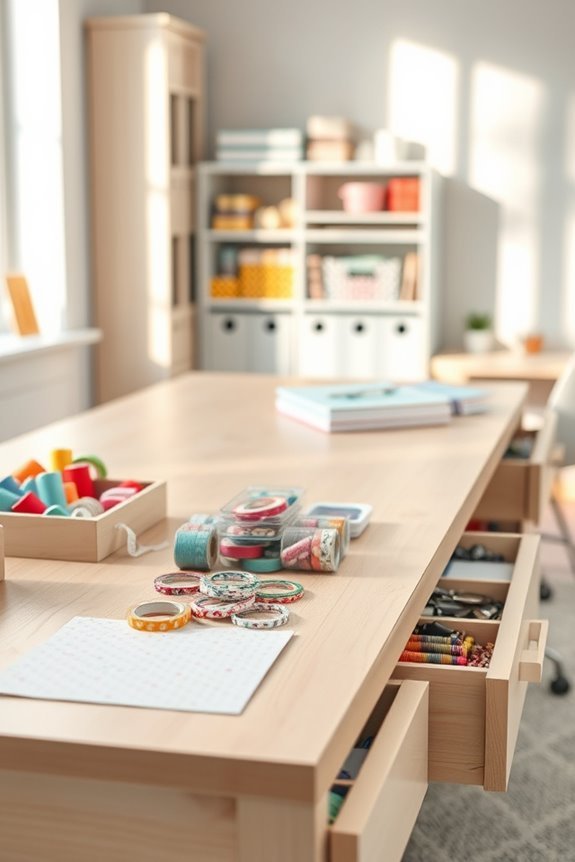
Drawer Dividers for Craft Supplies

When you want to keep your craft supplies neatly organized, drawer dividers can make a world of difference. These simple tools enhance drawer organization by creating designated spaces for each type of supply. You’ll find it easier to locate items like scissors, markers, and adhesives when they’re neatly separated.
Consider measuring your drawers before purchasing dividers to guarantee a perfect fit. Many dividers are adjustable, allowing you to customize the layout based on your needs. This not only maximizes your craft supply storage but also helps prevent clutter.
With everything in its place, you can focus on your creative projects without the distraction of searching for misplaced items. Embrace the power of drawer dividers for a tidy, efficient craft space!
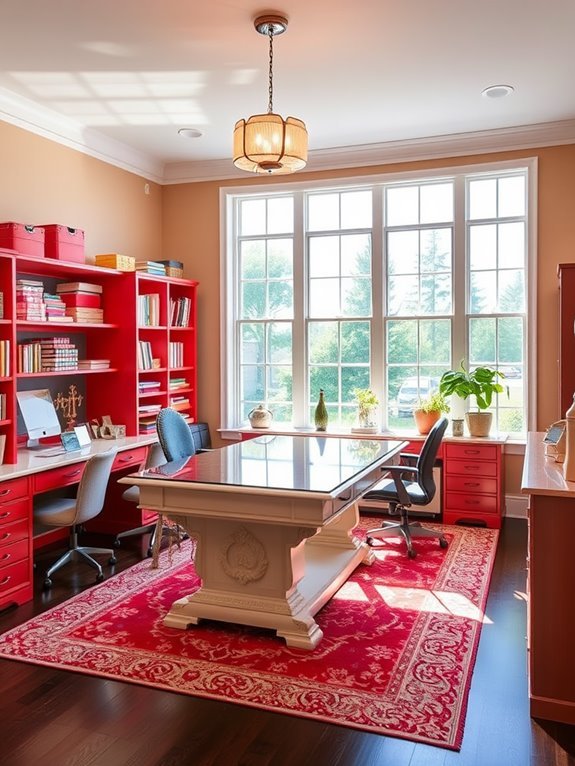
Repurpose Furniture for Storage
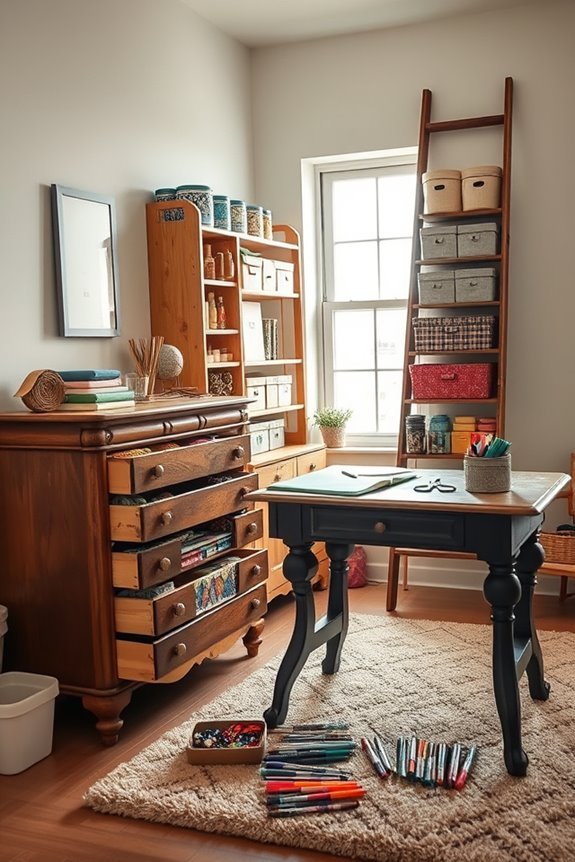
Transforming old furniture into storage solutions can breathe new life into your craft room. Consider using vintage dressers to store fabric, yarn, or tools. You can easily sort items into drawers, keeping everything organized and accessible.
Antique trunks also make fantastic storage options; they add character while hiding away larger supplies. Place one at the foot of your crafting table or use it as a coffee table to maximize space.
By repurposing these pieces, you’ll not only declutter but also enhance the aesthetic of your room. Remember to give them a fresh coat of paint or some minor repairs to match your decor.
With a little creativity, your craft room can become a stylish and functional workspace.
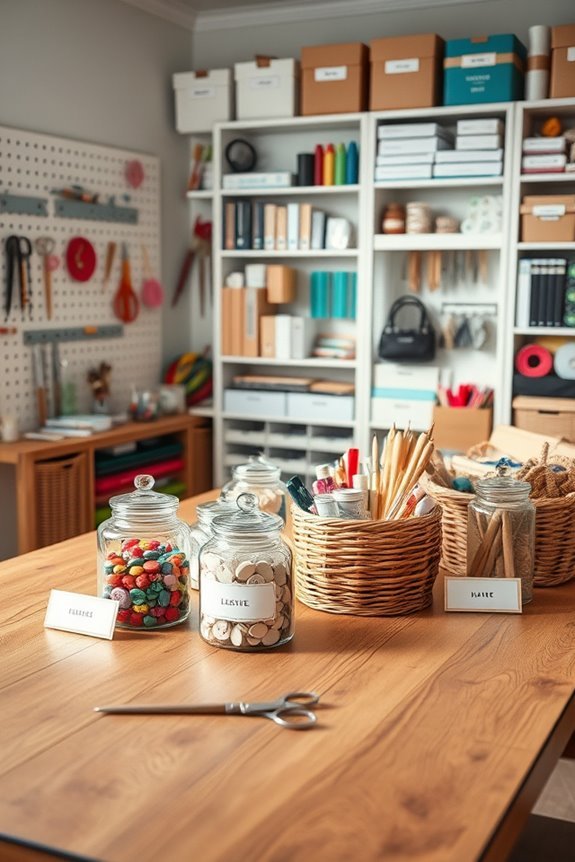
Use Glass Jars for Small Items
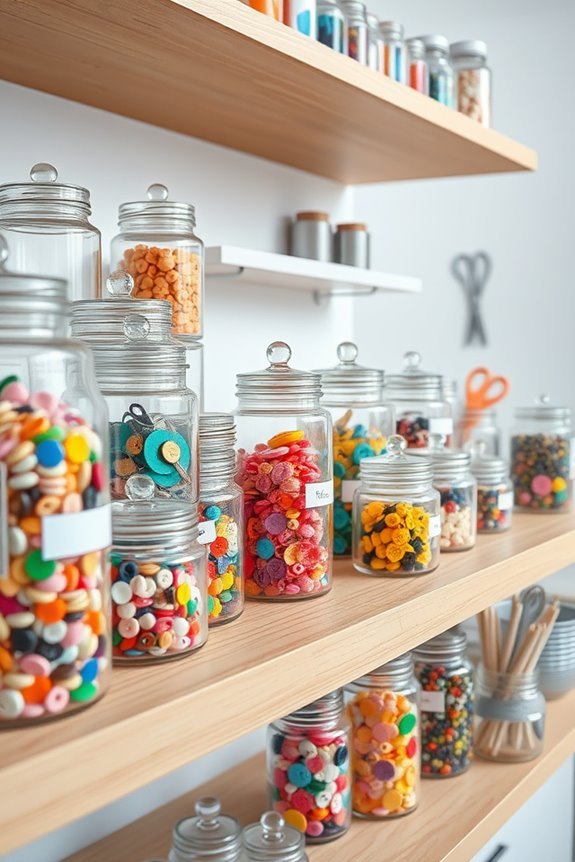
Because small items can quickly clutter your craft room, using glass jars is a simple yet stylish solution. You can easily sort buttons, beads, or other tiny supplies into these jars, keeping everything visible and accessible.
To enhance their look, consider using decorative jar displays; they can double as art pieces in your space. Don’t forget about glass jar labels! Labeling each jar not only adds organization but also makes it easier to find what you need at a glance.
Whether you choose elegant handwritten tags or printed labels, they’ll help maintain a tidy environment. With this method, you’ll create a functional and visually appealing craft room that inspires creativity while minimizing chaos.
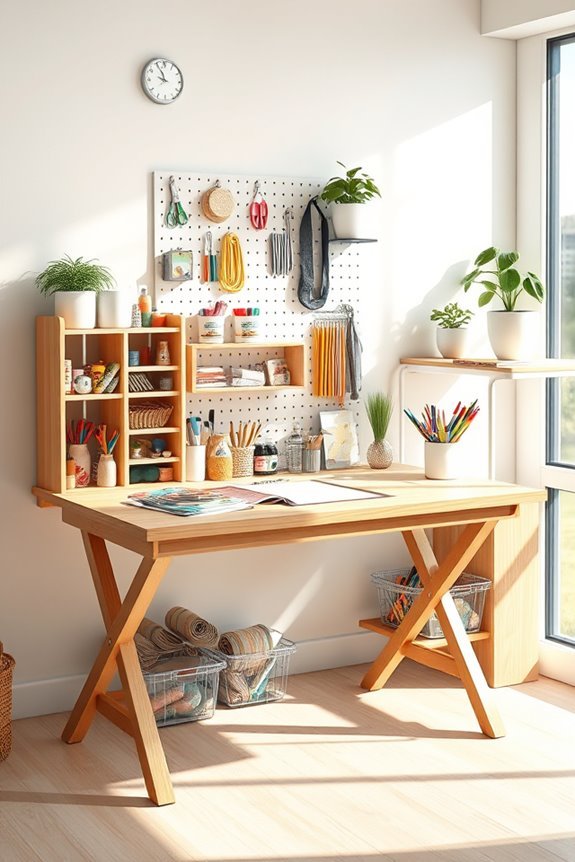
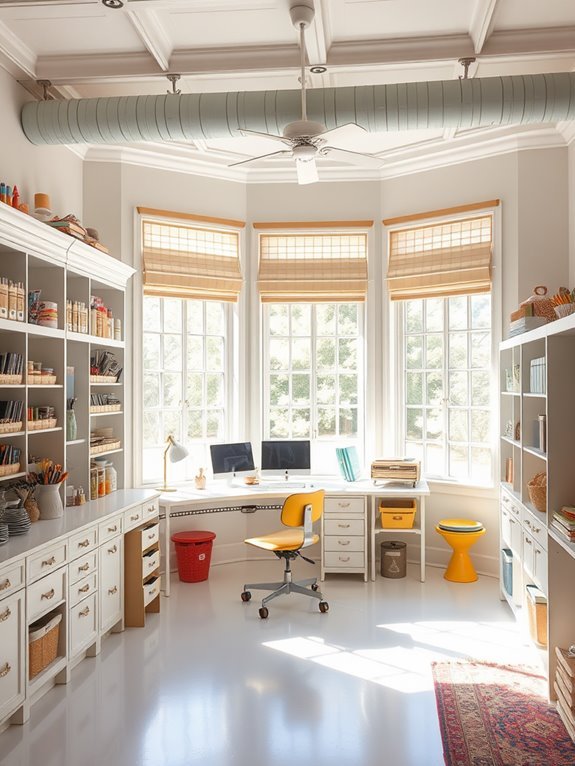
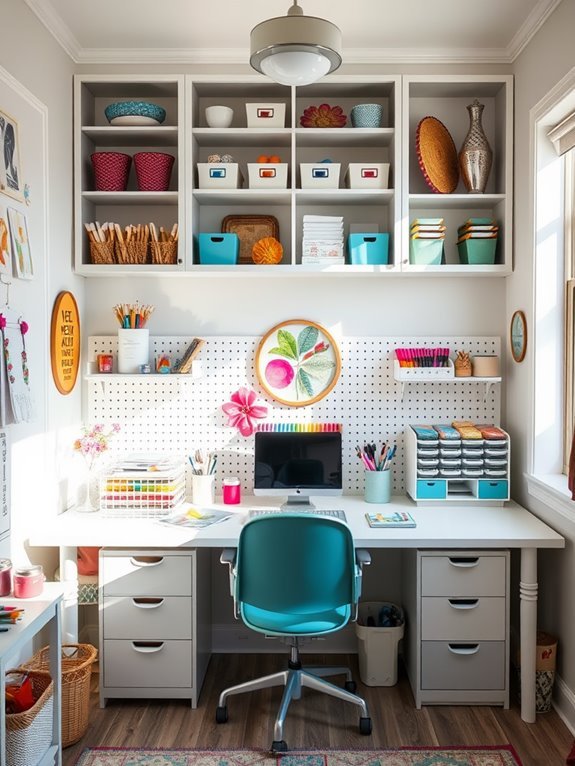
Create a Designated Craft Zone
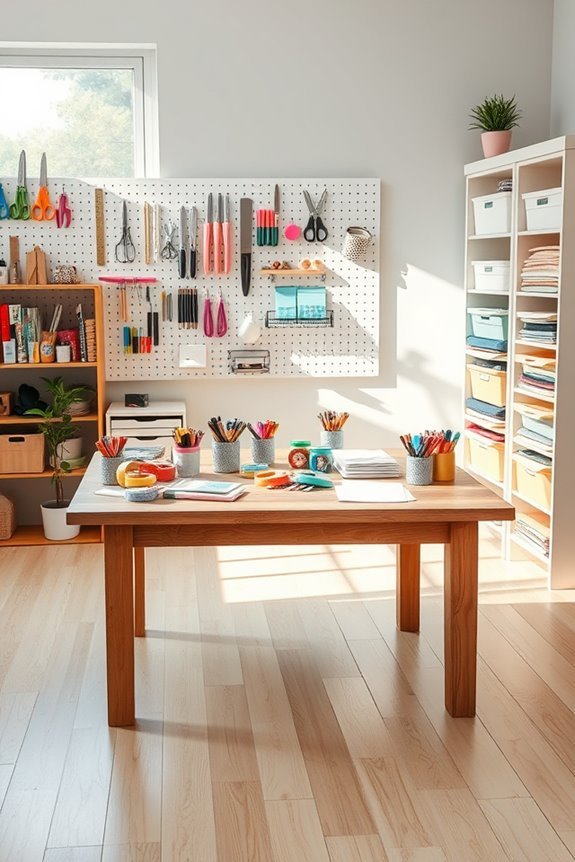
Creating a designated craft zone can greatly enhance your crafting experience. Start by planning your craft zone layout to guarantee it’s functional and inviting. Choose a space that allows easy movement and access to your supplies.
Use tables or desks as your main work surface, while shelving units can store materials neatly.
Next, think about craft area decor. Personalize your space with colors and themes that inspire you, like adding artwork or displaying completed projects.
Consider using pegboards for tools and materials—it’s both practical and stylish.
Color-Coded Organizing Systems

When you implement a color-coded organizing system, you’ll find it easier to locate your craft supplies at a glance. By arranging your materials according to color palettes, you create a visually appealing and efficient workspace.
Start by selecting a few organizational themes that resonate with your crafting style—think vibrant, pastel, or even monochromatic schemes. Categorize items like papers, threads, and tools into these color groups.
Consider using clear bins or labeled drawers to maintain order while showcasing your colors. This method not only simplifies finding supplies but also inspires creativity as you work.
With a well-structured color-coded system, you’ll enjoy both functionality and aesthetics in your craft room.
Wall-Mounted Racks for Yarn

If you want to maximize your craft room’s space, wall-mounted racks for yarn can be a game-changer.
These racks not only keep your yarn organized but also turn your collection into a beautiful display. You can easily sort your yarn colorways, making it simple to find the perfect shade for your next project.
When choosing wall-mounted racks, look for sturdy options that fit your space and style. You might opt for shelves, pegboards, or specialized racks designed specifically for yarn storage solutions.
This way, you can keep your yarn easily accessible while freeing up valuable floor space. With a well-organized wall-mounted system, you’ll find that your creative process becomes even more enjoyable and efficient!
Utilize Tension Rods for Ribbon Storage

After organizing your yarn with wall-mounted racks, consider utilizing tension rods for ribbon storage. Tension rods are perfect for keeping your ribbons neat and accessible.
Choose a spot in your craft room where you can easily reach your ribbons, ensuring proper tension rod placement. You’ll want to install it between two walls or inside a cabinet.
For efficient ribbon color organization, sort your ribbons by hue and slide them onto the rod. This way, you can see all your options at a glance, making it easy to grab the perfect shade for your projects.
Plus, you can swap out ribbons as needed without fuss. With this simple setup, your craft room will stay organized and visually appealing.
Craft Supply Binders for Documentation
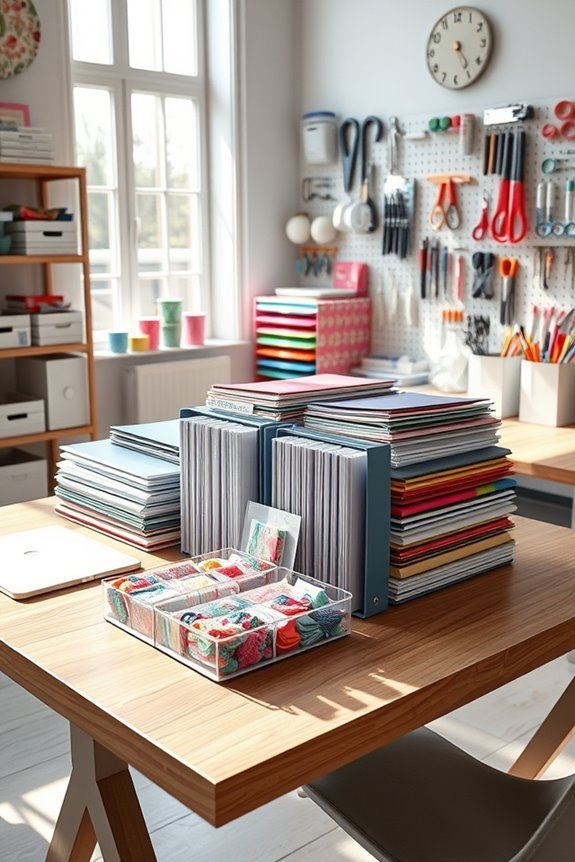
Creating craft supply binders can transform how you document and manage your materials. By organizing your supplies in binders, you streamline your craft supply organization and make it easier to locate what you need.
Start by categorizing your materials—like paper, fabric, or embellishments—and assign each category a dedicated binder. Use clear binder labeling to identify the contents at a glance, which saves time when you’re in the creative zone.
Include pockets for swatches, patterns, and project ideas, allowing for a thorough overview of your supplies. This method not only keeps your materials tidy but also inspires new projects by showcasing your collection.
With binders, you’ll enjoy a more efficient and enjoyable crafting experience.
Label Everything for Easy Access
To maximize efficiency in your craft room, labeling everything is essential for easy access. Implementing effective labeling strategies helps you find supplies quickly, reducing frustration and wasted time.
Start with clear, bold labels for storage bins, drawers, and shelves. Use a consistent format—consider color-coding or specific fonts for easy identification.
For smaller items, like buttons or beads, label individual containers to avoid rummaging through clutter. You can also create a master list of your supplies, which acts as a reference guide. This way, you’ll know exactly where everything is stored.
With a well-organized labeling system, you’ll streamline your crafting process, making it more enjoyable and efficient. So, get started on labeling and watch your productivity soar!
Use Suitcases for Portable Craft Kits
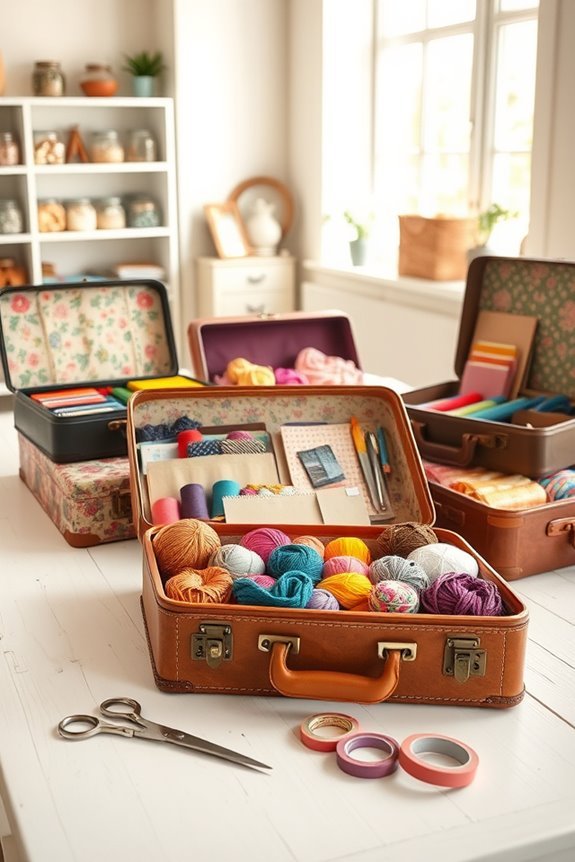
A well-organized craft room can benefit from creative storage solutions, and using suitcases as portable craft kits is a brilliant idea. Different suitcase styles, from vintage to modern, not only add character but also provide versatile storage options.
You can easily pack your supplies into a sturdy suitcase, ensuring everything stays organized and accessible for your next project. Use smaller containers inside for further portable organization, keeping similar materials together.
When you’re ready to craft, simply grab your suitcase and go! This approach not only saves space in your craft room but also allows you to craft anywhere, whether it’s at home or on the go.
Embrace this clever solution to keep your creativity flowing!
Over-the-Door Organizers
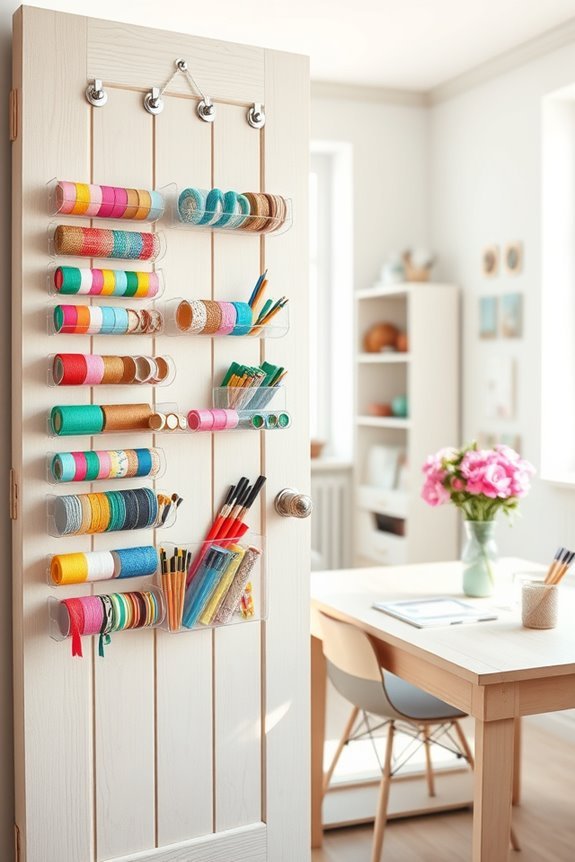
Over-the-door organizers can transform your craft room by maximizing vertical space and keeping supplies within easy reach.
Consider using over the door shoe organizers to store smaller items like scissors, tape, and embellishments. These organizers come with multiple pockets, so you can easily see everything you have at a glance.
If you need extra hanging storage, over the door hooks are perfect for keeping larger items like ribbons, fabric, or even your favorite tools organized and accessible.
By utilizing these solutions, you’ll create a clutter-free environment that boosts your creativity.
Plus, since they don’t take up floor space, you can enjoy a more open and inviting craft room atmosphere.
Start organizing today!
Craft Table With Built-In Storage
Maximizing space doesn’t stop with over-the-door organizers; a craft table with built-in storage can take your organization to the next level.
When you choose the right craft table styles, you’ll find that many come equipped with drawers, shelves, or even cubbies. These storage solutions can help you keep your supplies organized and accessible.
Imagine having all your paints, papers, and tools neatly tucked away yet within arm’s reach. A multi-functional craft table not only provides a workspace but also functions as a storage hub.
Look for options that fit your aesthetic and needs, ensuring that your craft area remains tidy and inspiring. With the right table, you can elevate your crafting experience while maximizing your space efficiently.
Use a Lazy Susan for Small Supplies
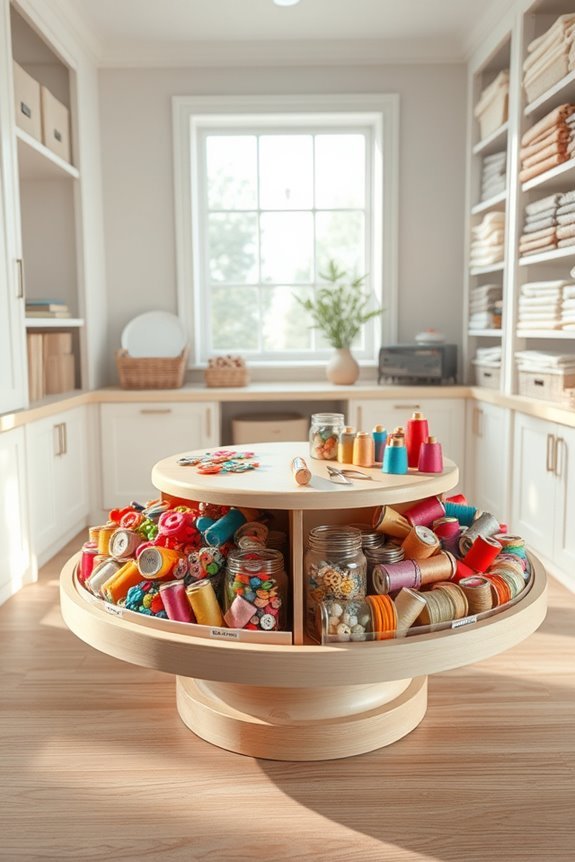
Using a Lazy Susan can transform your craft space by keeping small supplies organized and easily accessible.
This clever rotating storage solution allows you to maximize your space while ensuring quick access to your favorite tools. Place your markers, scissors, glues, and embellishments on a Lazy Susan, and you’ll never have to dig through clutter again.
You can customize it by using small containers or repurposed jars to create designated spots for each item. When you need something, simply give it a spin to find exactly what you’re looking for.
Not only does this method save time, but it also adds a touch of style to your craft room. Embrace the convenience of a Lazy Susan for a tidy, efficient workspace!
Store Paper in Vertical Holders

After sorting your small supplies with a Lazy Susan, consider organizing your paper in vertical holders to keep everything neat and accessible.
Vertical storage is a game changer for paper organization, allowing you to save space while keeping your sheets visible and easy to grab. Instead of stacking papers horizontally, which can lead to chaos and crumpled edges, use holders that stand upright.
This approach not only protects your paper but also helps you quickly find what you need for your craft projects. Choose holders that fit your style, whether they’re sleek and modern or colorful and fun.
With everything organized vertically, your craft room will feel more inviting and functional, making it easier to release your creativity.
Hang Baskets for Additional Storage

Transform your craft room with hanging baskets, which offer a stylish and efficient way to store supplies. By incorporating decorative baskets, you not only enhance your room’s aesthetic but also create functional storage solutions.
Wall-mounted baskets can be placed at eye level, making it easy to access your frequently used items, like scissors or ribbons. You can categorize different supplies in various baskets, keeping everything organized and within reach.
Plus, hanging baskets free up precious counter space, allowing for a clutter-free workspace. Choose a mix of sizes and colors to add visual interest, and don’t hesitate to use them for larger items like rolls of fabric or yarn.
You’ll love how they elevate both organization and style in your craft room!
Use a Corkboard for Inspiration
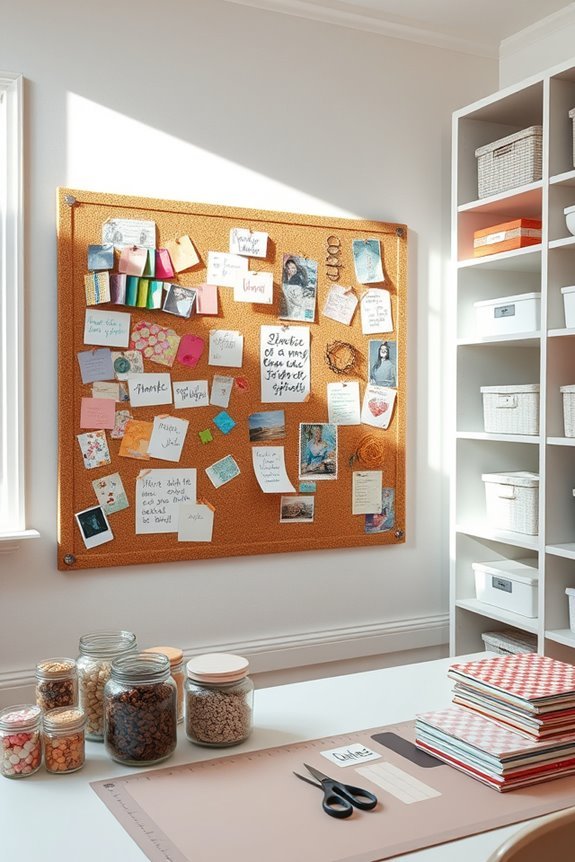
Incorporating a corkboard into your craft room can spark creativity and keep inspiration front and center. Use it as an inspiration board to showcase your favorite creative quotes, images, and ideas.
Hang up swatches of fabric, sample color palettes, or snippets from magazines that resonate with your style. This visual collage not only motivates you but also serves as a reminder of your craft goals.
When you see those creative quotes, you’ll feel energized and ready to get started on your next project. Plus, a corkboard helps you stay organized—no more scattered papers or forgotten ideas.
Dedicated Drawers for Fabric
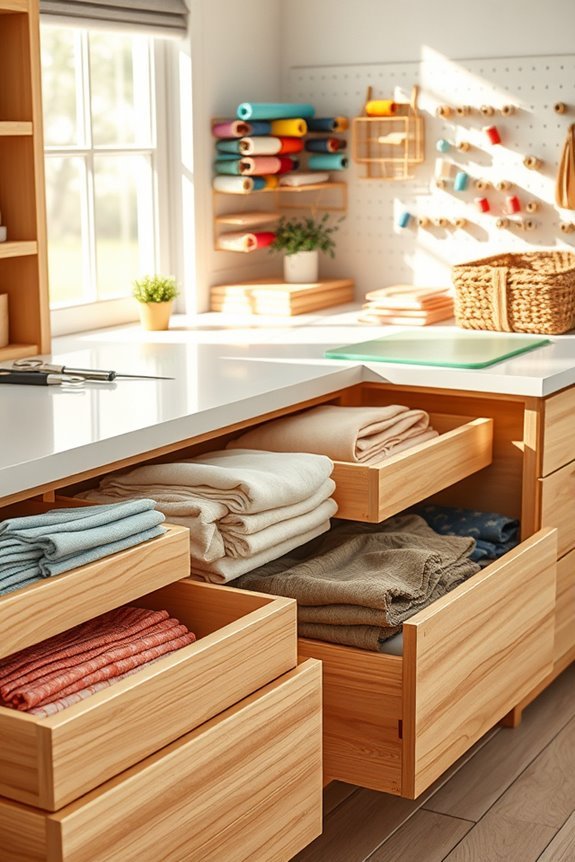
A well-organized craft room makes all the difference, especially when it comes to storing fabric. Dedicated drawers can be your best friend in managing various fabric pieces.
Start by selecting the right drawer sizing to accommodate your fabric stash without overcrowding. Use larger drawers for bulkier fabrics and smaller ones for scraps or specialty materials.
Implement fabric color coding to make finding the right piece a breeze. Arrange your fabrics by shades, ensuring you can quickly spot the color you need for your next project.
Label each drawer clearly, so you don’t waste time rummaging through them. With dedicated drawers and a smart organizational system, you’ll transform your crafting experience and enjoy a tidier workspace.
Foldable Tables for Space-Saving
When space is at a premium in your craft room, foldable tables can be a game changer. These versatile foldable workspaces allow you to maximize functionality without sacrificing valuable floor space. You can easily set up a table when you need it for portable crafting and fold it away when you’re done.
This flexibility makes it simple to switch between projects or clear space for other activities. Look for tables that are lightweight and easy to maneuver, so you can rearrange your setup as needed.
Plus, many foldable tables come with additional features like built-in storage or adjustable heights, enhancing your crafting experience while keeping your room organized. Embrace the convenience of foldable tables to transform your crafting space!
Clear Containers for Seasonal Items

Foldable tables create flexibility in your craft room, but managing your supplies is just as important.
Using clear containers for your seasonal items helps you stay organized and makes item rotation simple. You can easily identify your festive supplies at a glance, whether it’s Halloween decorations or Christmas crafting materials.
Label each container by theme to streamline your process further. When a new season arrives, swap out the containers to keep your workspace fresh and inspiring.
This method not only saves space but also guarantees you’re always prepared for your next project. Plus, seeing everything clearly can spark new ideas and creativity.
Embrace clear containers and enjoy a more organized craft room!
Utilize Closet Space Efficiently
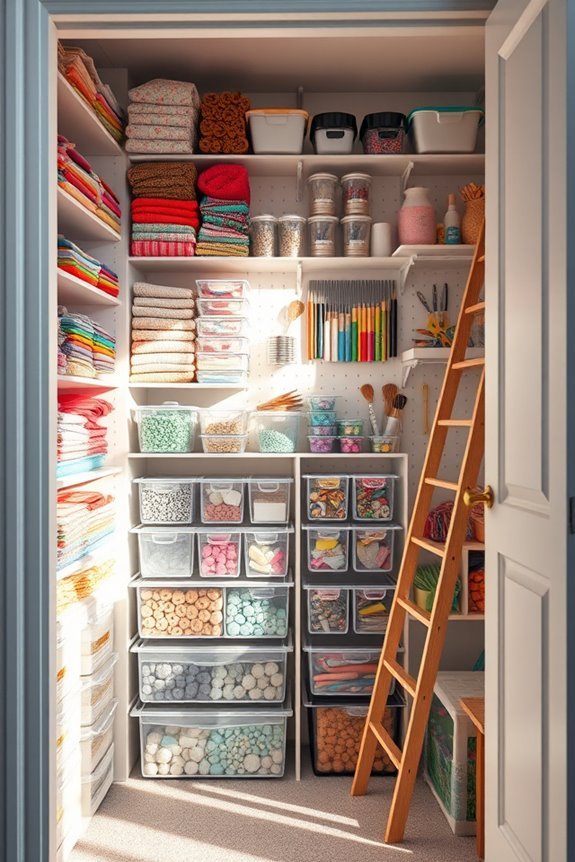
When you want to maximize your closet space for crafting, consider using vertical organization techniques that make the most of every inch.
Start by installing shelves at various heights, allowing you to store items like bins and baskets. Use clear containers for easy visibility, and label everything for quick access.
Hooks and pegboards are great for hanging tools, ribbons, and other supplies, freeing up valuable shelf space.
Don’t forget about the door; an over-the-door organizer can hold smaller items like scissors, tape, or paintbrushes.
By focusing on closet organization and implementing these strategies, you’ll achieve effective space maximization, turning your closet into a functional and inspiring crafting hub.
Happy organizing!
Use a Wall-Mounted Folding Table
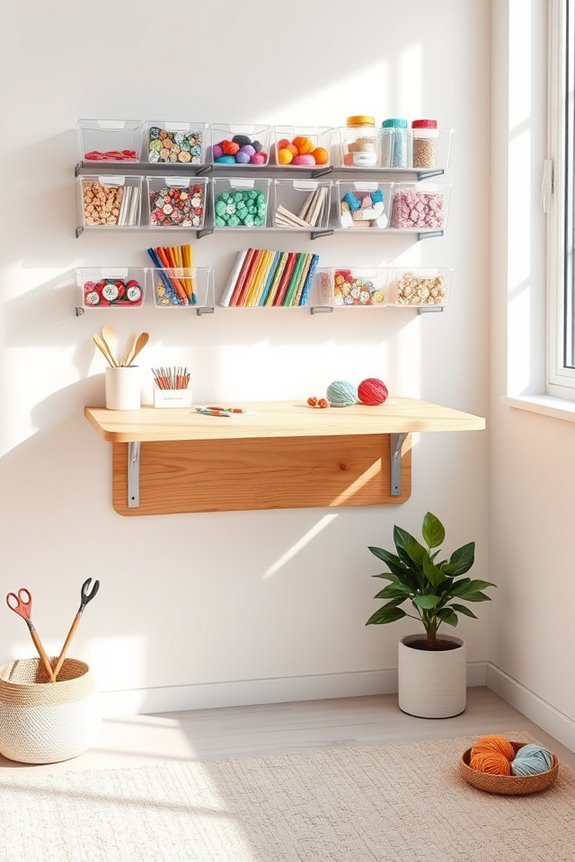
If you’re short on space but need a versatile work surface, a wall-mounted folding table is an excellent solution for your craft room.
These tables offer significant wall-mounted benefits, such as saving floor space and providing a sturdy area for crafting.
When choosing a folding table style, consider options that suit your aesthetic and functional needs. You can find designs ranging from sleek and modern to rustic and charming, ensuring it complements your space.
Plus, when you’re done working, simply fold it up against the wall to clear the area.
This flexibility allows you to maximize your craft room’s functionality without sacrificing style, making it an ideal choice for anyone looking to optimize their workspace.
Utilize Under-Bed Storage
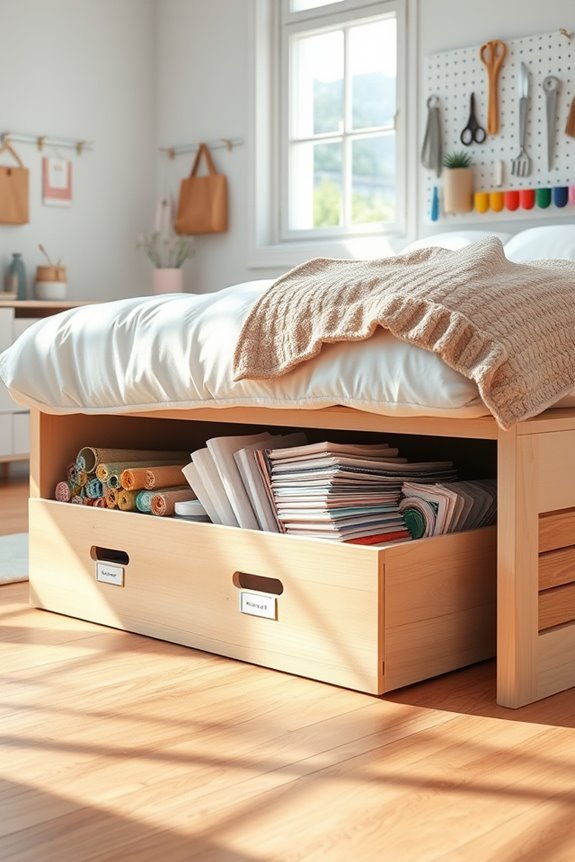
Under-bed storage can be a game changer for maximizing space in your craft room. You can easily slide under bed bins beneath your bed to keep your crafting supplies organized and out of sight.
These bins are perfect for fabric storage, allowing you to categorize your materials by color or type. By utilizing this often-overlooked space, you’ll free up valuable floor and shelf space for other essentials.
Choose clear bins so you can easily see what you have, or opt for decorative ones to add a touch of style. Remember, keeping your crafting supplies accessible yet hidden helps maintain a tidy workspace, making your crafting experience more enjoyable and efficient.
Create a Crafting Command Center

To transform your craft room into a hub of creativity, consider creating a crafting command center that centralizes your supplies and tools.
Start by designing a crafting station layout that suits your workflow. Use shelving units or carts to keep everything visible and easily accessible. Invest in organization tools like bins, jars, and drawer dividers to categorize your materials.
Label everything, so you know where to find what you need at a glance. Don’t forget to include a designated workspace for projects in progress, ensuring you can dive right in whenever inspiration strikes.
Regularly Declutter and Purge Supplies
As your crafting needs evolve, regularly decluttering and purging supplies becomes essential to maintain an organized craft room.
Start by evaluating your crafting inventory every few months. Identify items you haven’t used or don’t plan to, and consider whether they can be donated. Supply donation not only clears space but also helps fellow crafters in your community.
Create categories for your supplies, like fabrics, tools, or embellishments, and keep only what you love or need.
For items that are broken or outdated, it’s time to let go. By doing this, you’ll streamline your workspace, making it easier to find what you need and inspiring creativity.
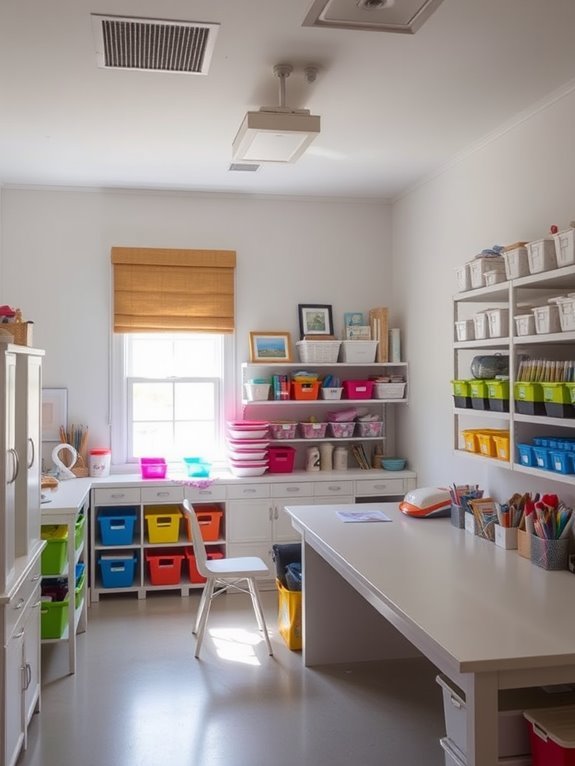
Colorful Storage Solutions
When it comes to organizing your craft room, vibrant storage solutions can make a world of difference.
Bright bins, colorful shelves, and patterned boxes not only keep your supplies tidy but also add personality to the space. Choose hues that inspire you, and mix various styles for an eclectic look.
You’ll find that a visually appealing environment boosts your creativity and makes crafting even more enjoyable.
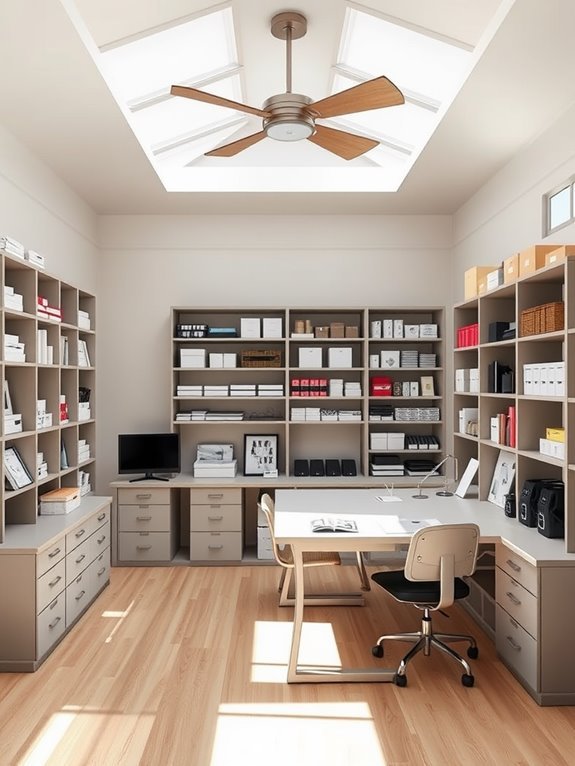
Creative Workstations
Vibrant storage solutions set the stage for an inspiring craft room, but the heart of your creative space lies in the workstations you create.
Design your workstations to reflect your crafting style, incorporating adjustable surfaces, proper lighting, and easy access to tools.
Personalize each area with colors and decor that energize you, making it a joyful space where creativity flows effortlessly.
Multi-Functional Furniture
While you may have a limited amount of space, incorporating multi-functional furniture can transform your craft room into an efficient haven.
Consider a foldable table that doubles as storage, or ottomans with hidden compartments.
A rolling cart can serve as both a bedroom workspace and a supply organizer.
These versatile pieces maximize your area, keeping everything you need within reach while maintaining a tidy environment.
Organized Craft Supply Zones
Creating organized craft supply zones can transform your craft room into a functional and inspiring space.
Start by grouping similar items together—fabric, paper, and tools. Use clear bins or labeled drawers for easy access.
Designate a workspace for each project, ensuring everything you need is within reach. This way, you’ll save time and release your creativity without the clutter holding you back.
Flexible Layouts
When you design your craft room, incorporating flexible layouts can greatly enhance your crafting experience.
By allowing for easy reconfiguration, you can adapt your space to different projects and activities.
Consider these ideas:
- Use rolling carts for easy access to supplies
- Arrange furniture to create multiple work zones
- Incorporate foldable tables for extra workspace when needed
This way, your creativity can flow freely!
Nature-Inspired Decor
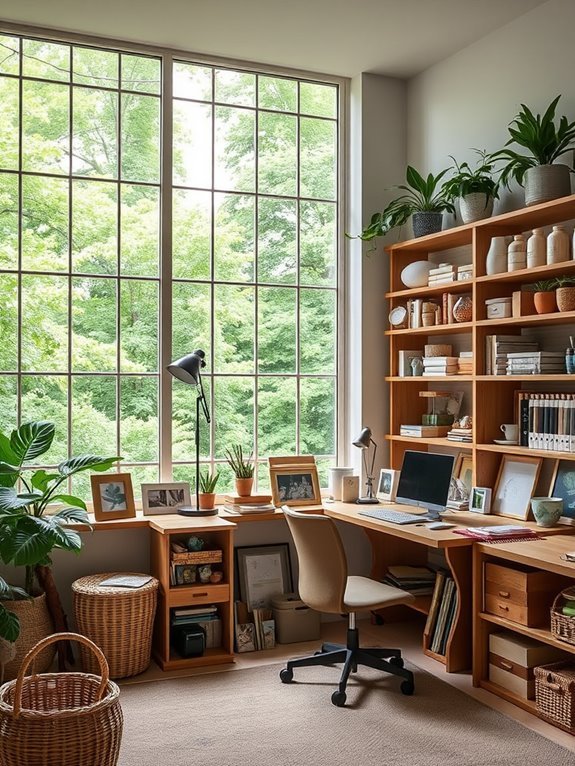
A flexible layout sets the perfect stage for incorporating nature-inspired decor in your craft room.
Use earthy color palettes, like soft greens and browns, to create a calming atmosphere. Incorporate natural materials, such as wooden shelves and wicker baskets, to enhance the decor.
Add plants or botanical prints for a fresh touch, bringing the outdoors inside and inspiring your creativity.
Personal Touches
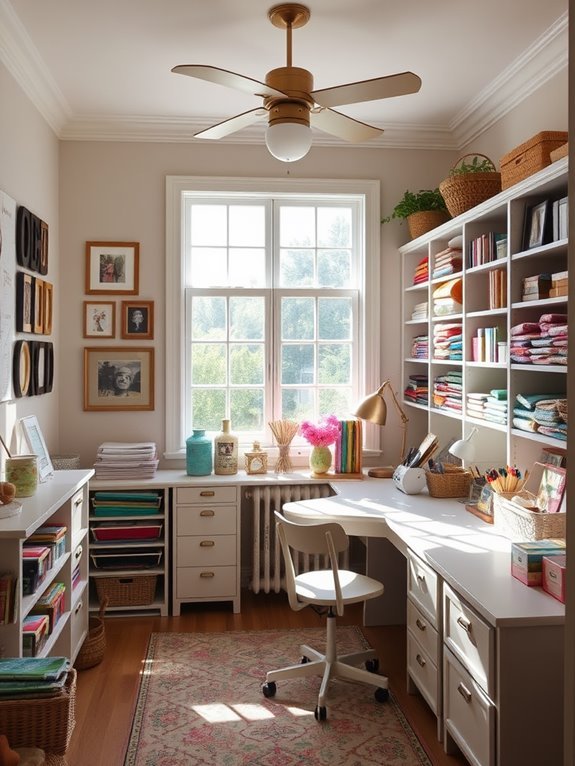
To truly make your craft room feel like your own, infusing it with personal touches is essential.
Consider incorporating elements that reflect your personality and interests:
- Favorite artwork that inspires creativity
- Family photos to keep you motivated
- Handmade items that remind you of cherished memories
These personal details will create a space that feels uniquely yours, inviting you to craft with joy.
Mobile Craft Carts
Crafting corners can be enhanced even further with the addition of mobile craft carts.
These versatile carts allow you to easily transport your supplies wherever you need them. With multiple shelves and compartments, you can keep everything organized and accessible.
Plus, their mobility lets you change your workspace layout effortlessly, adapting to your creative flow.
Invest in one and elevate your crafting experience!
DIY Craft Tables
A well-designed DIY craft table can transform your creative space into a functional haven.
You can customize it to fit your needs and style. Consider these ideas for your craft table:
- Use adjustable height legs for comfort
- Incorporate storage solutions like drawers or shelves
- Add a durable surface for cutting and crafting
With these features, you’ll boost your creativity and productivity!
Seasonal Decoration Ideas
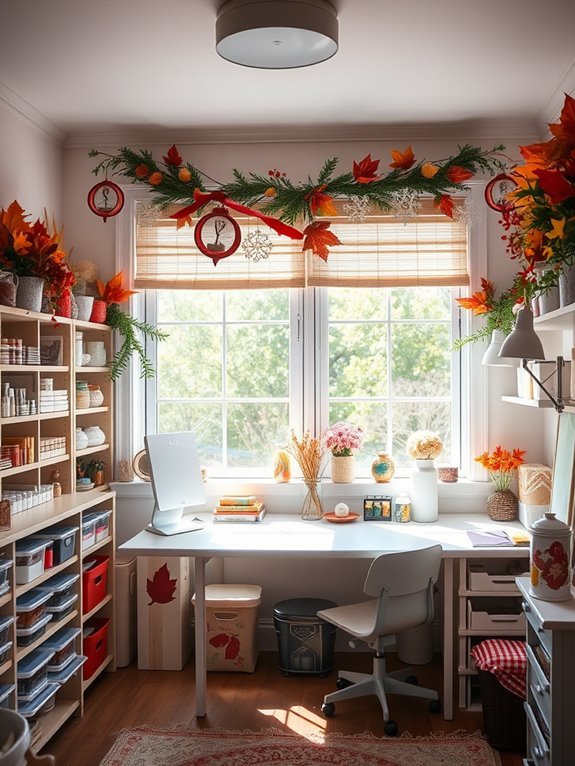
After setting up your DIY craft table, it’s time to think about how to infuse your creative space with seasonal charm.
Hang colorful garlands, display handmade ornaments, or switch out tablecloths to reflect the season.
Use themed storage bins for supplies, and incorporate seasonal colors in your decor.
These small touches can make your craft room feel festive and inspire your creativity all year round!
Conclusion
As you commence your crafting journey, think of your space as a garden, waiting to bloom. Each design idea is a seed, ready to sprout creativity and inspiration. By nurturing your craft room with colorful storage, organized zones, and personal touches, you cultivate an oasis where your imagination can flourish. So grab your tools, dig in, and watch as your passion blossoms into beautiful creations that bring joy to your heart and hands.