Does Exterior Paint Need a Sealer
Yes—if your exterior is porous, chalky, stained, or faces harsh weather, you should use a sealer first. It locks in tannins and efflorescence, blocks moisture and mildew, and gives paint a stable surface to bond to so coats last longer and don’t ghost stains. Sealers also normalize texture for even color and reduce peeling in sun or freeze-thaw climates. If your siding is sound and smooth, you can skip it, but keep reading for guidance.
Quick Answer: Does Exterior Paint Need a Sealer?
If you want long-lasting, protected siding, you usually should use a sealer over exterior paint—especially on porous surfaces or in harsh climates. You’ll often need a sealer when surfaces face heavy sun, freeze-thaw cycles, or moisture that can degrade paint.
Sealer choice depends on substrate and desired finish; consider color choices since sealers can slightly deepen or satinize paint. Match sealer type to exterior textures—smooth, rough, or porous—to guarantee even coverage and prevent trapped moisture.
For well-maintained, sheltered surfaces you might skip it, but when in doubt, sealing adds an inexpensive layer of insurance.
Why a Sealer Helps: Adhesion, Stains, and Moisture
Because a sealer bonds paint to the surface and blocks underlying problems, it dramatically improves adhesion, hides stains, and keeps moisture from breaking down the finish. You’ll notice better paint grip on rough or smooth substrate because sealers normalize surface texture, creating a predictable base coat.
Stains—from tannins, water marks, or mildew—get locked away so your topcoat doesn’t ghost them through. Moisture intrusion that causes peeling and blistering is reduced, so coatings last longer and need fewer touch-ups.
Sealers also aid color matching by providing a uniform background, so the final hue reads true and consistent across the exterior.
How Sealers Differ From Primers and Paint
You’ll notice sealers aren’t the same as primers or paint: sealers penetrate and block substrates, primers build adhesion and hide imperfections, and paint provides color and the final protective film.
Their compositions differ too—sealants often use penetrating resins, primers include adhesion promoters and fillers, and paints contain higher pigment and binder levels.
Also plan your timing accordingly: sealers go on first to stabilize the surface, primers follow for bonding, and paint is applied last for appearance and durability.
Sealers Versus Primers
When you’re preparing exterior surfaces, sealers play a different role than primers or paint: they penetrate and block substrates to stop moisture and stains. You’ll use a sealer to stabilize porous areas and reduce tannin bleed, not to alter color coordination.
Primers bond and hide imperfections while offering a uniform base for the topcoat; paint provides protection and the visible paint finish you choose.
Sealants sit beneath primer or paint when recommended, improving adhesion and longevity. So, don’t expect a sealer to replace primer’s bonding or paint’s aesthetics—use each in its designated sequence for best results.
Function And Composition
Although sealers, primers, and paint all protect exterior surfaces, they do so through different chemistries and actions: sealers penetrate and block moisture and stains, primers build adhesion and hide flaws, and paint forms the durable, colored film that withstands weather. You’ll choose sealers to stabilize porous masonry or raw wood, preventing moisture-driven color fading and preserving surface texture. Primers bond and equalize suction; some block tannins. Paint provides UV resistance, durability, and the final aesthetic. Compare roles quickly:
| Layer | Primary Action | Benefit |
|---|---|---|
| Sealer | Penetrate/block | Moisture control |
| Primer | Adhesion | Uniform base |
| Paint | Film/UV | Color retention |
Application Timing Differences
How soon should you apply a sealer compared with primer or paint? You’ll usually apply sealer after surface prep and before primer or paint when substrates are porous or uneven. Sealers stabilize surface texture and block stains so primer and paint adhere properly. They won’t handle color matching, so save tinting for primer or topcoat.
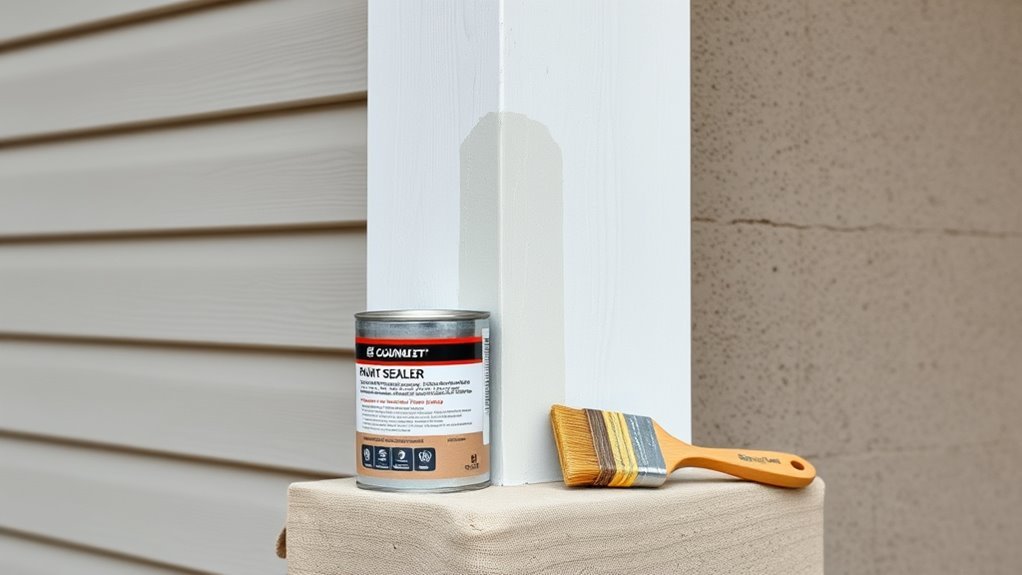
- When to seal: right after cleaning and sanding, on bare wood, masonry, or chalky surfaces.
- When to prime: after sealer dries, to improve adhesion and provide a neutral base for color matching.
- When to paint: once sealer and primer cure, apply topcoat for final protection and hue.
Which Exterior Materials Need a Sealer
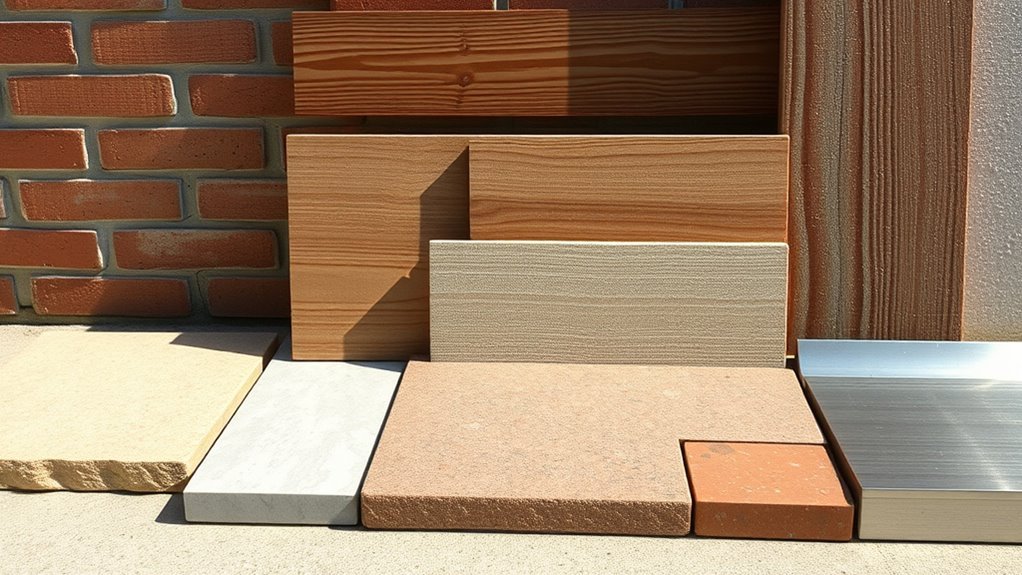
If you want your exterior paint to last, you need to seal porous or moisture-prone surfaces before painting. Sealers suit raw wood, new stucco, concrete, brick, and fiber cement — all absorb water if left unprotected.
You’ll also want a sealer for patched areas, chalky siding, and previously uncoated masonry.
For color options, pick primers or sealers that won’t alter hue or that accept tinting; manufacturers list compatible color systems.
Consider eco friendly formulas to reduce VOCs and environmental impact.
Choose a breathable sealer on masonry to let moisture escape while preventing penetration and paint failure.
When Paint Alone Is Usually Enough
When does paint alone do the job? You can skip a sealer when your substrate is sound, the surface texture is smooth, and paint adhesion is excellent. Choose high-quality exterior paint and the right paint color to mask minor imperfections.
- Smooth, nonporous surfaces with good prep — dirt and loose material removed.
- Durable paint systems (primer + topcoat) applied per manufacturer instructions.
- Low-exposure areas—protected porches or eaves where moisture and abrasion are minimal.
You’ll still monitor wear and touch up as needed, but in these situations paint alone usually provides adequate protection and appearance.
When Climate Makes Sealing Essential
If you’re dealing with heavy rainfall, coastal salt spray, or persistently high humidity, a sealer becomes essential to prevent moisture from penetrating paint and substrate.
You’ll also want a sealer that offers strong UV resistance and temperature stability if your area gets intense sun or big temperature swings.
Choosing the right product will protect both finish and structure where paint alone won’t hold up.
Extreme Moisture Protection
Because coastal storms and humid summers accelerate paint failure, you’ll need a sealer that stands up to constant moisture and salt exposure. You’ll choose breathable, mildew-resistant sealers and match color options to avoid frequent repainting.
Use proper application tools—rollers, brushes, or sprayers rated for heavy-body sealers—to guarantee full coverage and adhesion. Inspect seams, flashing, and siding for gaps before sealing.
Maintain drainage and trim vegetation to reduce wet contact. Reapply on a schedule based on wear and local moisture cycles.
Prioritize products with proven warranties and lab-tested water intrusion resistance.
- Breathable mildew-resistant formulations
- Correct application tools and technique
- Regular inspections and timely reapplication
UV And Temperature Stability
High humidity and salt exposure aren’t the only threats to exterior coatings—intense sunlight and wide temperature swings can break down binders, fade pigments, and cause cracking that lets moisture in. You’ll want a sealer that adds UV resistance so color matching stays reliable and fading slows.
Thermal cycling stresses surfaces; flexible sealers bridge small cracks and prevent substrate movement from splitting the paint film. Choose formulations rated for UV and temperature stability in your climate, and test on a small area to confirm texture enhancement and adhesion before full application.
Proper sealing extends lifespan and keeps finishes looking consistent.
How Moisture and Water Intrusion Damage Exteriors
When water finds its way past paint or sealant, it doesn’t just sit on the surface — it soaks into wood, masonry, and joints, causing swelling, rot, corrosion, and paint failure that quickly spread if you don’t stop them.
You’ll see blistering, peeling, and stains that ruin exterior appearance and complicate interior decoration or color coordination when moisture reaches siding or trim. You must act fast to prevent structural decay, mold, and metal rust.
Common pathways include gaps, damaged flashings, and porous materials.
- Cracked caulk and joints
- Faulty flashings and gutters
- Porous siding and masonry
How Sealers Improve Adhesion and Stop Stains
Once you’ve stopped water from getting in, sealers keep stains from coming back and give paint something to grip. You’ll find they penetrate porous substrates, lock down tannins and efflorescence, and create a uniform base so your finish adheres evenly.
Good surface preparation removes contaminants so the sealer bonds properly; without it, blisters and peel recur.
Sealants also block bleed-through that ruins color matching and force you to repaint. Apply thin, even coats, let them cure, then inspect for remaining stains before topcoating. That approach saves time and ensures a durable, true-color result.
How to Pick the Right Sealer for Your Surface
Which sealer is right for your surface depends on substrate type, exposure, and the stains you need to stop. You’ll assess porosity, UV exposure, and whether moisture or tannin bleed is the main issue.
Also consider color matching if the sealer alters appearance and check surface texture compatibility so the finish stays uniform.
- For porous masonry: choose a penetrating sealer that won’t film over the texture.
- For wood siding: pick a sealer that blocks tannins yet preserves grain and color matching.
- For painted trim: use a clear, flexible sealer compatible with the paint’s surface texture.
Oil-Based vs. Water-Based Sealers: Quick Comparison
Although both types protect surfaces, oil-based and water-based sealers behave differently and you’ll want to pick the one that fits your job.
You’ll find oil-based sealers deepen color schemes and enhance gloss, smoothing over rough paint textures for a richer finish; they’re durable but slower to dry and need solvent cleanup.
Water-based sealers dry fast, stay clearer, resist yellowing, and suit light or modern color schemes where true hues matter; they’re easier to clean and lower odor.
Choose oil for high-traffic, weathered exteriors; choose water for quick jobs and color fidelity, balancing durability with convenience.
Surface Prep Before Sealing and Painting
Choosing the right sealer is only part of a successful exterior paint job; proper surface prep makes sure that sealer and paint will bond and last. You’ll start by cleaning surfaces, removing dirt, mildew, and loose paint so the sealer penetrates evenly.
Sand rough spots and feather edges where old paint peels. Repair cracks and caulk gaps to prevent moisture intrusion, which undermines adhesion and color matching.
Consider how solvents and cleanup affect environmental impact; choose low-VOC cleaners and dispose of waste responsibly.
- Clean and degloss
- Sand and smooth
- Repair and protect
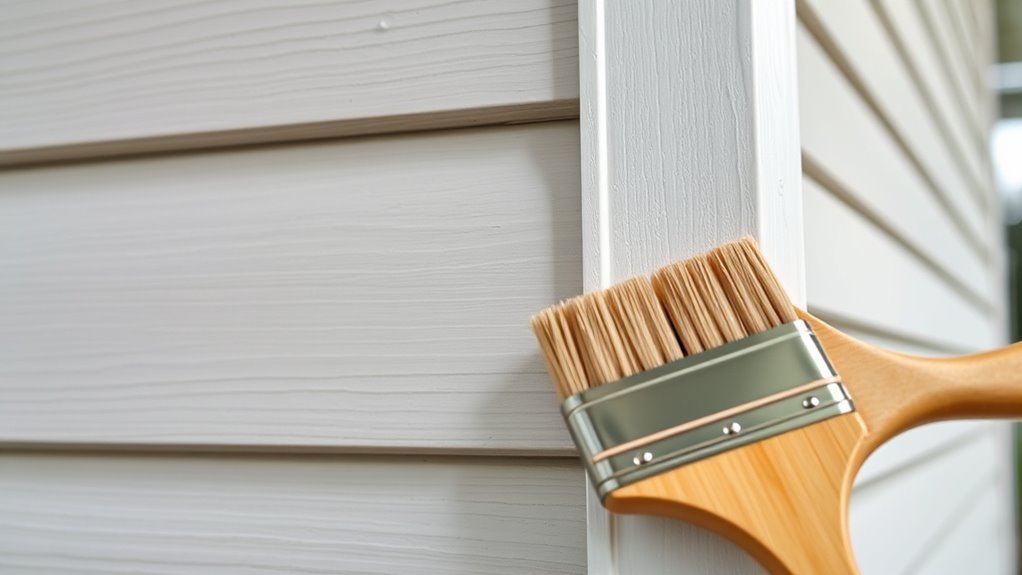
How to Apply a Sealer Correctly (Step-by-Step)
Before you start, gather the right sealer, brushes or sprayer, stirring sticks, and safety gear so you won’t pause mid-job. Working with everything at hand keeps application smooth and consistent.
Inspect and clean the surface, repairing cracks and removing loose paint.
Stir sealer thoroughly, test a small area for compatibility and surface texture response.
Apply thin, even coats with long, overlapping strokes, maintaining a wet edge to avoid lap marks.
Sand lightly between coats if needed for adhesion.
Check for drips and remove them promptly.
Clean tools, dispose of waste safely, and store remaining sealer per label.
Drying and Cure Times: When to Paint Over a Sealer
You need to know the difference between a sealer’s drying time—when it’s touch-dry—and its full cure, which can take days to weeks.
Aim to paint within the manufacturer’s ideal recoat window to guarantee proper adhesion and finish.
Keep in mind that temperature, humidity, and sunlight will speed up or slow down both drying and curing, so adjust timing accordingly.
Sealer Drying Vs. Curing
When a sealer goes on tack-free it’s tempting to paint over it right away, but drying and curing are different stages you need to respect—drying means solvents have evaporated, while curing is the chemical process that builds full hardness and adhesion. You’ll rely on manufacturer specs and consider temperature, humidity, and sealer chemistry.
Color trends and paint brands won’t change the physics, but they affect formulation choices and recommended wait times. Check labels and tech sheets.
- Observe tack-free, then verify manufacturer cure time.
- Account for weather: warmth speeds cure; cold slows it.
- Test adhesion before full coating.
Ideal Recoat Window
Although tack-free feels ready, don’t assume the sealer’s safe to topcoat immediately; follow the manufacturer’s recommended recoat window instead. You’ll wait long enough for proper cure, not just surface dryness, so the topcoat bonds evenly.
Check label times for minimum and maximum recoat intervals; exceed neither. Test a small patch if you’re unsure before committing to full walls.
Proper timing prevents adhesion failures, blistering, or uneven sheen that ruin your planned color schemes and paint finishes. Keep records of product, batch, and ambient conditions so future touch-ups match and perform as intended.
Weather Impact On Timing
Even if you’ve followed the sealer’s recoat window, weather can speed up or slow down drying and cure times, so factor local conditions before painting over it. You’ll check humidity, temperature, and sun exposure; those affect tack-free times and full cure.
Lower temps and high humidity prolong cure, risking adhesion problems if you rush. Fast drying can trap solvents, altering finish and color selection, which matters for exterior-to-interior passage and interior decoration continuity.
Wait for the manufacturer’s minimum cure plus buffer when conditions are poor, or shorten wait in ideal weather.
- Monitor humidity and temperature.
- Allow buffer beyond recoat window.
- Test a small area first.
Common Mistakes That Ruin Sealers or Paint Jobs
If you skip proper surface prep or rush curing times, you’ll undo the best sealer or paint job. You must remove dirt, loose paint, and mildew; failing that creates adhesion failure and peeling.
Don’t apply sealer over incompatible coatings or uneven surface texture — it traps flaws. Avoid sloppy color matching by testing small areas; mismatched primer or sealer shows through thin topcoats.
Never seal over incompatible coatings or rough texture — test small areas so primer and sealer don’t bleed through thin topcoats.
Don’t paint in extreme heat, cold, or humidity, and don’t skimp on recommended coats or dry times. Use the right tools and follow manufacturer specs.
Fix these mistakes early to prevent costly touch-ups and premature refinishing.
Sealer: Added Cost vs. Extended Lifespan
You’ll face higher upfront material costs when you add a quality exterior sealer, but that expense can cut long-term maintenance needs.
Over time you’ll save on repainting, repairs, and weather-related damage, which improves your overall return on investment.
Let’s compare those short-term outlays to the lifespan gains so you can decide what makes financial sense.
Upfront Material Costs
Adding a quality exterior sealer will raise your upfront material costs, but it’s an investment that can extend the paint’s lifespan and reduce long-term repainting expenses. You’ll pay more for primer-grade and weatherproof sealers, and labor may rise slightly if application takes extra time.
Consider how your choices affect interior finishes near exterior openings and any aesthetic impacts on sheen or color. Balance price against warranty and coverage rates to choose wisely.
- Compare product coverage (sq ft per gallon) and cost.
- Factor application tools and prep materials.
- Evaluate warranties and expected performance.
Long-Term Maintenance Savings
How much will a quality exterior sealer actually save you over time? You’ll reduce repaint frequency because sealers protect against moisture, UV fading, and dirt buildup that wear finishes unevenly across surface texture. That means fewer touch-ups and less labor, especially where rough or porous areas age faster.
You’ll also cut costs tied to color matching—less frequent full repaints mean you won’t chase exact shades after patchy fading. Upfront sealer expense adds modestly, but ongoing savings from avoided repairs, cleaning, and shortened project logistics accumulate.
Track maintenance intervals to see real-world savings on your specific siding and climate.
Return On Investment
When you factor in a quality exterior sealer, the extra upfront cost usually pays off through a longer paint life and fewer full repaints. You’ll spend a bit more now, but sealer boosts color preservation and delivers aesthetic enhancement that keeps surfaces looking newer longer. That reduces frequency of labor, materials, and disruption.
- Lower repaint frequency: saves labor and paint costs over decades.
- Preserved curb appeal: maintains resale value via consistent color preservation and aesthetic enhancement.
- Targeted touch-ups: smaller, cheaper fixes instead of full-scale restoration when sealer delays degradation.
Decision Checklist: Do You Need a Sealer for This Project?
If your project involves exterior paint exposed to weather, decide whether a sealer will improve durability and appearance before you start. Consider surface type, existing finish, and climate: porous wood, stucco, or chalking paint often benefit.
Ask whether you want UV resistance, moisture protection, or easier cleaning.
Decide if you need UV protection, moisture resistance, or easier cleaning before choosing a sealer.
Evaluate color options—some sealers deepen or shift hues—and weigh texture enhancement: matte sealers preserve texture, gloss smooths it.
Factor budget, maintenance frequency, and expected lifespan.
Test a small area with your chosen paint plus sealer. If results match needs, proceed; if not, skip or try alternatives.
Frequently Asked Questions
Can I Use a Sealer Over Existing Exterior Stain?
Yes — you can apply a sealer over existing exterior stain if you properly clean and sand; surface preparation matters. Choose compatible sealer types (penetrating or film-forming) based on stain type, drying time, and desired protection.
Will a Sealer Change the Color or Sheen of My Paint?
Yes — a sealer can change color and sheen: you’ll see color enhancement and subtle sheen modification, sometimes slightly darkening or enriching hues while smoothing gloss levels, so spot-test surfaces to secure satisfying, stable results.
Are Sealers Eco-Friendly or Low-Voc Options Available?
Yes — you can choose eco friendly coatings and low VOC alternatives; they’re widely available, perform well, and reduce odors and emissions, so you’ll get protective, durable finishes without harsh chemicals or strong off-gassing indoors or outdoors.
How Often Should I Reapply Sealer on a Painted Exterior?
You should reapply sealer every 3–7 years depending on exposure and coat type; you’ll monitor paint adhesion, inspect surface preparation quality annually, and touch up high-wear areas sooner to maintain protection and appearance.
Can I Seal Previously Painted Metal or Vinyl Surfaces?
Yes — you can seal previously painted metal or vinyl surfaces if you prep properly: perform metal preparation like cleaning and deglossing, and wash the vinyl surface, repair damage, then use a compatible sealer for adhesion and protection.
Conclusion
You should usually use a sealer when surfaces are porous, stained, or prone to moisture—sealers boost adhesion and block problems paint alone won’t fix. Notably, studies show properly sealed exteriors can extend paint life by up to 50%, cutting repaint frequency and long-term costs. Weigh that benefit against added time and expense: if you’re painting sound, nonporous siding, skip it; for wood, masonry, or repairs, seal first to protect your work.