Does Latex Paint Stick to Plastic
Yes — you can get latex paint to stick to many rigid plastics if you prep correctly. Clean with soap and alcohol, scuff lightly with 220–320 grit, then use a primer made for plastic (acrylic bonding, shellac, epoxy, or plastic-etch). PVC, ABS, and acrylic take latex well; polyethylene and polypropylene usually need specialty primers or paints. Apply thin, even primer coats and let them cure for best adhesion, and keep going for tips on tougher plastics.
Does Latex Paint Stick to Plastic?
Can latex paint stick to plastic? You can get good adhesion on some plastics, but it’s not automatic. Clean and scuff the surface, choose a plastic-friendly primer, and apply thin coats.
You’ll notice differences in color mixing if underlying hues show through—use opaque primer to prevent bleed-through. Work in controlled conditions so paint drying isn’t rushed; humidity and temperature affect tack and curing.
Flexible plastics need flexible finishes to avoid cracking. Test a small area first to confirm adhesion and flexibility. If the sample holds after full cure, you can confidently paint the rest without surprises.
When Latex Is a Good Choice (Short Answer)
If you sand and prime the plastic first, latex can stick well to surfaces that aren’t handled often.
It’s a good choice for decorative pieces, planter pots, or furniture that sees light use.
For high-traffic items you’ll want a tougher coating.
When Surface Is Prepared
When you properly clean, sand, and prime plastic, latex paint will adhere reliably for many indoor projects. You’ll get good paint durability if you remove oils, scuff the surface for tooth, and apply a plastic-specific primer.
Choose a high-quality latex and consider tinting: color mixing at the tint stage helps you match hues without overloading pigments that can weaken finish.
Apply thin, even coats, allow full drying between layers, and finish with a compatible clear sealer for extra abrasion resistance.
With these steps, latex becomes a practical, long-lasting option for many prepared plastic surfaces.
For Low-Traffic Items
Why choose latex for low-traffic plastic pieces? You’ll find latex paint works well on decorative items that don’t face heavy use—think faux planters, photo frames, or display objects.
Prep with light sanding and a plastic primer, then apply thin coats for even coverage.
Latex lets you experiment with fabric patterns transfers or stenciling to match interior decor without worrying about durability like you’d for functional items.
It dries fast, cleans up with water, and won’t crack easily when handled gently.
For occasional touch-ups and style swaps, latex is an economical, simple choice.
Which Plastics Accept Latex Paint Best
Curious which plastics take latex paint well? You’ll find rigid PVC, ABS, acrylic, and some polycarbonate accept latex readily when prepped.
Plastic compatibility varies: smoother, higher-energy surfaces bond better, improving paint durability. Rigid PVC (like trim and outdoor furniture) sands and cleans easily, so primer and latex adhere well.
ABS and acrylic used in housings and décor respond to light abrasion and a quality adhesion primer, then latex topcoat.
Polycarbonate can work but needs careful prep. Test a small area first.
Avoid assuming all plastics behave the same; prepping and using the right primer determines long-term finish.
Why Polyethylene and Polypropylene Resist Paint
You’ll notice paint struggles to stick to polyethylene and polypropylene because their low surface energy causes drops to bead instead of wetting.
Their chemical inertness means there’s little for primers or paint binders to bond with.
Add in a smooth, nonporous surface and you’ve got plastics that repel coatings unless you use special prep or adhesion promoters.
Low Surface Energy
How do polyethylene and polypropylene shrug off paint so reliably? You face low surface energy: their molecular makeup minimizes attractive forces, so droplets bead instead of wetting.
That poor wetting undermines surface compatibility; even a well-tuned paint formulation can’t spread or anchor properly. You’ll see high contact angles, rapid bead-up, and weak mechanical grip.
Because the surface repels polar and many nonpolar binders, adhesion primers or surface treatments become necessary to alter energy or create mechanical keys.
In short, low surface energy prevents intimate contact between coating and plastic, so standard latex won’t stick without intervention.
Chemical Inertness
Why won’t common paints bond chemically to polyethylene and polypropylene? You face plastics with almost no chemical reactivity; their saturated hydrocarbon chains won’t form bonds with paint resins. That lack of interaction hurts material compatibility, so coatings sit loosely instead of integrating.
- You feel frustration when adhesion fails.
- You worry about peeling and wasted effort.
- You want reliable results but encounter mismatch.
- You need solutions that respect the substrate.
Understanding that these plastics are chemically inert helps you choose primers or treatments that alter surface chemistry and improve long-term paint performance.
Smooth Nonporous Surface
A smooth, nonporous surface like polyethylene or polypropylene gives paint nothing to bite into, so your brush or roller can’t form a mechanical grip. You’ll find these plastic types have low surface energy and minimal surface texture, so latex beads up and slips instead of wetting evenly.
Unless you alter the substrate—by roughening, applying a compatible primer, or using a specialized adhesion promoter—paint adhesion will fail over time. To improve results, sand to create micro-roughness, clean thoroughly, and choose primers formulated for low-energy plastics.
That approach addresses both surface texture and material-specific behavior without guesswork.
How to Identify What Kind of Plastic You Have
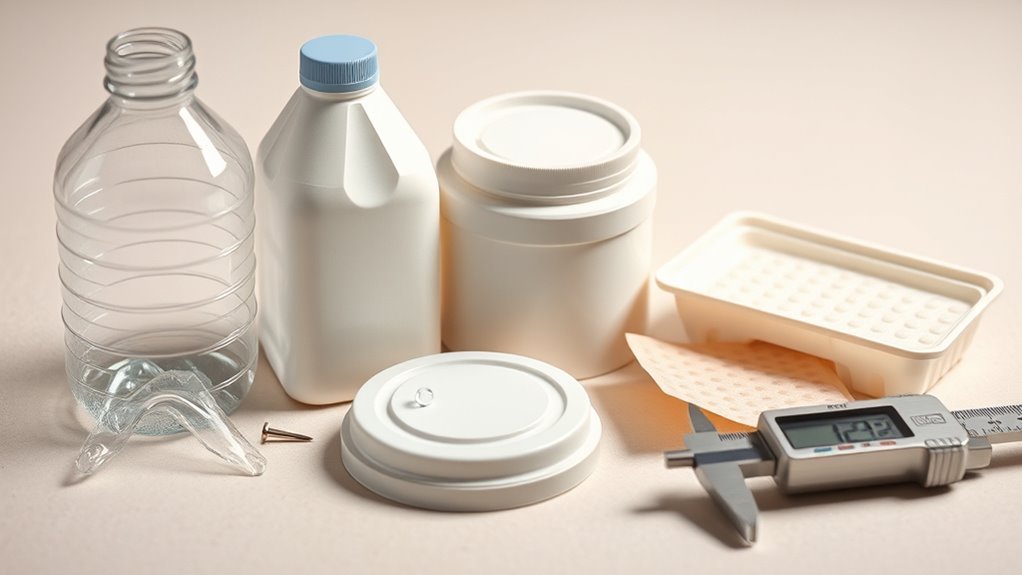
Before you grab paint and primer, figure out the plastic type so you can choose the right prep and products. Look for molded resin codes (triangles with numbers) and stamped letters like PP, HDPE, PVC, or ABS.
Feel texture, flexibility, and weight; rigid plastics behave differently than flexible ones.
Check manufacturer labels or online product pages if available.
Consider Plastic recycling and Environmental impact when deciding whether to repaint or replace.
- Molded code: relief and relief of uncertainty.
- Stamped letters: clarity, confidence.
- Texture test: tactile reassurance.
- Labels/online lookup: informed calm.
How to Test Adhesion Before a Full Paint Job
If you want to avoid a ruined paint job, test adhesion on a small, inconspicuous spot first. Lightly sand a hidden area, wipe away dust, then apply the primer or adhesion promoter you plan to use.
After proper paint drying, press a square of tape over the patch and peel sharply; if paint flakes, adhesion’s poor. Try a second spot with a different primer or adhesion method until you get a clean pull.
Note any color mixing issues when matching topcoat samples. Record successful combos and drying times so your full paint job proceeds confidently without surprises.
How to Clean Plastic Before Painting
Wondering how to get paint to stick? You’ll clean plastic thoroughly so latex adheres and your color mixing decisions won’t be ruined by dirt or oils. Start by wiping with mild soap and water, rinse, and dry completely. Then use isopropyl alcohol to remove residues and let it evaporate before paint drying begins.
- Scrub stubborn grime gently with a soft brush.
- Degrease seams and handles with alcohol.
- Rinse and air-dry to avoid trapped moisture.
- Inspect surface; repeat if it still feels slick.
Clean surfaces boost adhesion and confidence before you paint.
How to Sand Plastic for Better Paint Grip
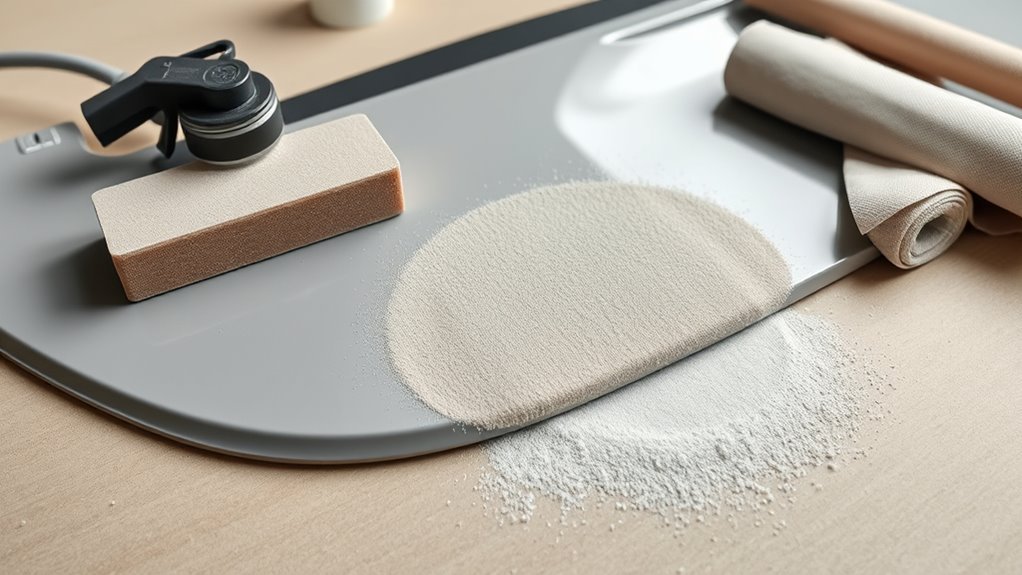
How do you roughen smooth plastic so latex paint actually grabs? Start by cleaning, then sand with 220–320 grit to scuff glossy surfaces; use light, even strokes until shine dulls.
For textured or fragile items, try 400 grit or a non-woven abrasive pad to avoid damage to plastic durability. Wipe dust with a tack cloth and let dry.
Feather edges where paint will overlap to avoid ridges. Test a small hidden area, then prime if recommended.
Once prepped, you’ll have consistent adhesion and accurate paint color options—better results without over-sanding or weakening the part.
How to Use an Adhesion Promoter on Plastic
After sanding and cleaning the plastic, apply an adhesion promoter to lock paint to slick surfaces and reduce peeling. You’ll spray or brush a thin, even coat, wait the recommended flash time, then sand lightly if instructed.
After sanding and cleaning, apply a thin adhesion promoter, wait the flash time, then lightly sand if directed.
Choose a promoter compatible with latex and your plastic type. Think about color mixing only after the promoter cures, so tinting won’t affect bonding.
Test a small area to confirm adhesion and desired finish. Follow safety and ventilation instructions.
- Relief — no more flaking.
- Confidence — paint stays put.
- Joy — smooth, predictable Finish options.
- Pride — professional-looking Color mixing results.
Why Primer Improves Latex Adhesion to Plastic
Before you prime plastic, make sure the surface is clean, scuffed, and free of oils—proper preparation gives primer something to grip.
Bonding primers contain special resins that chemically and mechanically link latex paint to smooth plastics.
Together, prep and the right primer turn a slick surface into one that holds paint reliably.
Surface Preparation Matters
Because plastics are nonporous and chemically inert, paint struggles to form a lasting bond on bare plastic surfaces, so proper surface prep and a compatible primer are essential. You’ll boost surface durability and guarantee chemical compatibility by cleaning, sanding, and testing spots first. Treat the plastic gently but thoroughly so primer can do its job.
- Clean: remove oils, dirt, and wax to stop peeling.
- Sand: scuff the surface to give paint teeth.
- Degrease: use a suitable solvent for stubborn residues.
- Test: try a small area to confirm adhesion and your confidence.
Bonding Primers Explained
How do bonding primers actually help latex paint stick to plastic? You apply a bonding primer to create a chemical bridge between slick plastic and latex, improving surface energy so paint wets and bonds.
It fills tiny voids for texture enhancement and evens sheen, letting coatings adhere uniformly. Some primers also allow color matching by providing a neutral base that prevents underlying hues from altering your final shade.
You’ll clean and scuff first, then roll or spray the primer thinly and let it cure per instructions. With the right bonding primer, latex paint grips plastic reliably and lasts longer.
Which Primers Work With Latex on Plastic
When you want latex paint to adhere to plastic, choosing the right primer is the most important step, since most plastics repel conventional paints. You’ll pick primers designed for plastic: adhesion promoters, plastic-toughened bonding primers, and spray-on etching primers. Consider color matching and drying times—some clear adhesion promoters preserve color while others need longer cures before topcoat.
- Shellac-based primer — grips slick surfaces, fast drying, urgent relief.
- Epoxy bonding primer — intense adhesion, longer cure, confident security.
- Acrylic bonding primer — flexible, good color match options, steady reassurance.
- Plastic etching primer — chemically roughens, quick set, decisive trust.
When Latex Paint Can Work Without Primer
You don’t always need a primer to get latex paint to stick to plastic — in some cases the surface and paint can bond well enough on their own. If the plastic is clean, lightly scuffed, and meant for indoor use, you can skip primer. Thin coats help; avoid heavy buildup that traps solvents during paint drying. Consider how color mixing affects opacity and whether multiple coats will be needed. Test a small area first.
| Condition | Recommendation |
|---|---|
| Cleaned & scuffed | Paint directly |
| Smooth glossy | Sand first |
| Indoor use | Primer optional |
| Color change | Multiple coats |
Best Latex Paint Formulas for Outdoor Plastic
Because outdoor plastics face UV, temperature swings, and moisture, pick latex formulas that combine flexibility, UV resistance, and strong adhesion. You’ll want acrylic latex blends with UV stabilizers, elastomeric paints that stretch with thermal shifts, high-quality exterior house paints formulated for plastics, and products labeled for plastic adhesion.
For outdoor plastics, choose flexible, UV-resistant acrylic latex or elastomeric paints with strong adhesion and plastic-specific formulations.
Watch color mixing advice—tinting can affect UV protection and paint drying time—so follow manufacturer limits. Test a small panel first.
Consider finish: satin hides imperfections and resists dirt; flat fades faster. These choices help your project endure, look consistent, and avoid peeling or chalking on outdoor plastic surfaces.
- Acrylic latex blends
- Elastomeric paints
- Exterior plastic-formulated paints
- Satin finishes
Spray or Brush? Choosing an Application Method
If you’re aiming for smooth, even coverage on outdoor plastic, choosing between spraying and brushing will shape your prep, time investment, and final look. You’ll spray for speed and fine misting—great for intricate shapes and even color mixing—while brushing gives control for edges and thicker coats. Consider drying times: sprays dry faster but may need more thin coats; brushes lay heavier paint and can hide imperfections. Match method to project size, texture, and weather. Use primer either way.
| Method | Best for | Notes |
|---|---|---|
| Spray | Large, detailed | Fast, thin coats |
| Brush | Small, edges | Thicker coverage |
| Hybrid | Mixed tasks | Balance speed and control |
Step‑by‑Step: Paint Plastic Patio Furniture
Ready to refresh your plastic patio furniture? You’ll prep, sand lightly, clean with mild detergent, and scuff to help latex adhere. Use a primer made for plastic, then apply thin, even coats, letting each dry fully. Consider color mixing to create a custom shade and test it on a hidden spot. Seal with a suitable topcoat for durability. Store leftover cans properly.
- Anticipation — imagine vibrant seating.
- Pride — your handiwork transforms the yard.
- Relief — furniture looks renewed.
- Joy — guests admire your effort.
Follow paint storage guidelines to keep supplies usable.
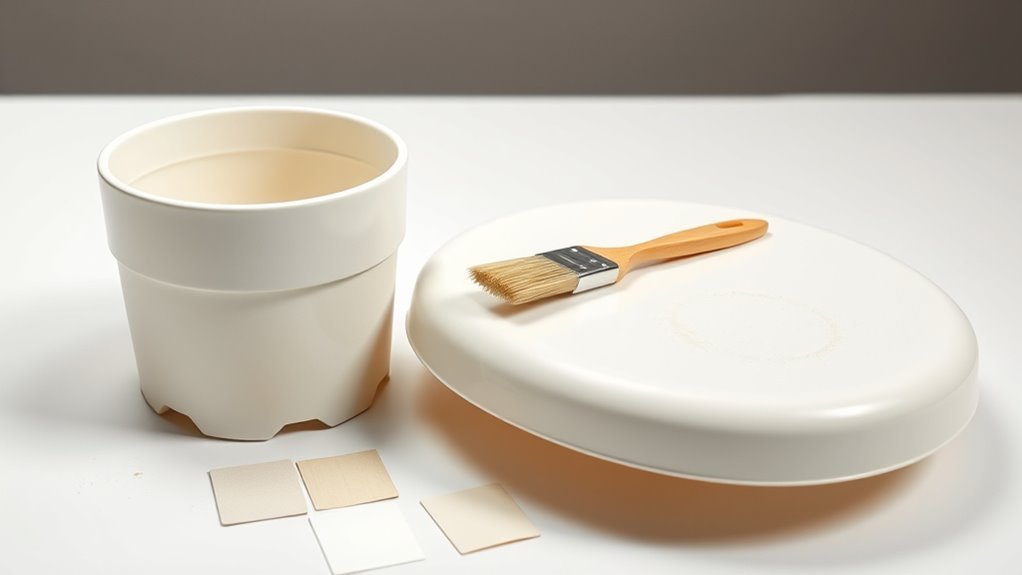
How to Paint Plastic Planters and Pots Safely
When you paint plastic planters and pots safely, start by choosing non-toxic, weatherproof paints and prepping the surface so the finish lasts and plants stay healthy.
Clean thoroughly, sand lightly, and apply a plastic primer. Use breathable, plant-safe sealers and avoid coating drainage holes.
Test a small area, then apply thin, even coats; allow full cure between layers.
For color mixing, blend small batches to match hues and label them.
Keep paints sealed and stored upright in a cool, dark place—proper paint storage prevents contamination and VOC loss.
Recheck labels for plant-safe certifications before use.
How Temperature and Humidity Affect Latex on Plastic
After you’ve prepped and primed plastic planters, temperature and humidity become the next big factors that decide whether latex paint will adhere and cure properly. You’ll want steady conditions: avoid extremes and rapid temperature fluctuations that can cause cracking or poor bonding.
Keep Humidity control in mind—too high and drying stalls, too low and paint skins over unevenly. Work in a sheltered area, monitor forecasts, and bring pieces indoors if needed. These steps help paint form a flexible, lasting film rather than peeling.
Avoid high or low humidity—work sheltered, watch forecasts, and move planters indoors so paint dries into a flexible, lasting film.
- Fear of bubbles
- Relief when it cures right
- Frustration with tacky paint
- Pride in a smooth finish
How Long to Let Primer and Latex Dry on Plastic
Because plastic doesn’t absorb paint, you’ll need to give primer and latex extra time to form a proper film before handling or recoating. Aim for 24–48 hours between primer and topcoat, and 48–72 hours before heavy use. Cooler or humid conditions can extend drying; warm, ventilated spaces speed it up. Proper timing improves paint durability and honors surface compatibility to reduce future issues.
| Stage | Typical Wait | Notes |
|---|---|---|
| Primer tack-free | 1–2 hours | Ready for light sanding |
| Primer cure | 24–48 hours | Recoat window |
| Topcoat full cure | 48–72 hours | Normal use allowed |
How to Prevent Peeling and Flaking on Plastic Surfaces
If you want paint to stay put on plastic, start with a clean, scuff‑abraded surface and use a compatible primer and topcoat; this trio—surface prep, primer, and correct paint—prevents most peeling and flaking. You’ll also control adhesion by avoiding oily residues, sanding sharply, and letting coatings cure fully.
Choose primers made for plastic, then pick latex or specialty paints that match finish options and *meant* use. Mind environmental factors—temperature and humidity affect bonding.
Thoughtful color mixing can impact opacity and required coats, so test small areas first to *assure* lasting results and emotional satisfaction.
- Pride in prep
- Relief from durability
- Confidence in color
- Joy in lasting finish
How to Touch Up and Repair Painted Plastic
When a chip, scratch, or worn spot appears on painted plastic, you can restore the look without stripping the whole piece by cleaning, sanding, priming, and matching paint in small, deliberate steps.
First, clean with mild detergent, rinse, and dry.
Lightly sand edges for adhesion, then wipe dust away.
Apply a plastic primer sparingly, let it cure, and feather on matched latex with a fine brush or touch-up pen.
Blend layers thinly, curing between coats.
Consider environmental impact when choosing low-VOC products and disposing of waste.
Note historical uses of paints on plastics to guide compatible primers and finishes.
How Long Painted Plastic Typically Lasts Outdoors
Once you’ve repaired and repainted a plastic item, you’ll want to know how long that finish will hold up outdoors. Lifespan varies: outdoor exposure, UV, temperature swings, and how well surface prep matched the specific plastic manufacturing process.
Latex can last 2–5 years on sheltered pieces; direct sun and moisture cut that. The paint chemical properties—UV resistance, flexibility, adhesion—matter more than brand. You’ll notice fading, chalking, or flaking first.
To set expectations, consider these emotional realities:
- Relief when a fresh coat survives a season.
- Frustration if it peels prematurely.
- Pride in proper prep.
- Regret if neglected care shortens life.
When to Choose Specialty Plastic Paint Instead of Latex
Because latex works well on some plastics but not all, pick specialty plastic paint when you need stronger adhesion, greater flexibility, or superior UV and chemical resistance than latex can provide.
Choose specialty products if the surface is low‑energy plastic (like polyethylene or polypropylene), will flex or rub, or faces prolonged sun, salt, or solvents.
Opt for specialty plastic paints for low‑energy plastics, flexible or abrasive surfaces, or prolonged sun, salt, or solvent exposure
If you want long-term color stability or newer coatings enabled by recent plastic innovations, specialty formulas outperform common latex alternatives.
Use them for outdoor fixtures, toys, automotive trim, or items needing impact resistance.
Follow manufacturer prep and primers tailored to the plastic type for best results.
Cost and Time: Latex + Prep vs Plastic‑Specific Paints
You’ll likely spend more time prepping plastic for latex—cleaning, sanding, and using a bonding primer—than you’d with a plastic-specific paint that skips some steps.
Upfront cost can look lower with a latex-and-primer combo, but specialty plastic paints often cost more per can while saving labor time.
We’ll compare the actual prep time you’ll invest versus the price difference so you can pick the most efficient option for your project.
Prep Time Versus Cost
How much time and money you’ll spend depends on whether you use regular latex paint with prepping or a plastic-specific formulation. You’ll invest time cleaning, sanding, applying primer, and waiting through extended drying times; you’ll also deal with color mixing touch-ups.
If you rush, coats peel. If you’re patient, latex can work.
- Anxiety: long prep feels tedious but prevents failure.
- Satisfaction: careful sanding and priming rewards you.
- Frustration: fast coats ruin finish when colors shift.
- Relief: right prep means fewer repairs and lasting adhesion.
Paint Cost Comparison
Having weighed the time and effort for prepping latex, it helps to compare total costs: material prices, labor or time value, and the chance you’ll need touch‑ups or redoing.
You’ll find latex plus primer often costs less upfront: cheaper cans but more prep time and primer purchases.
Plastic‑specific paints cost more per can but cut prep and recoat time, improving effective paint durability and reducing long‑term labor.
Factor in color matching: custom tints for plastic paints can be pricier, while latex offers easier touch‑ups.
Choose based on how you value time versus money and the expected lifespan of the finish.
Eco and Safety Tips for Painting Plastic Objects
When you’re painting plastic objects, prioritize ventilation, proper PPE, and low-VOC products to protect your health and the environment. You’ll reduce environmental impact by choosing water-based paints, disposing of waste responsibly, and avoiding solvent-heavy primers.
Follow safety precautions: wear gloves, a respirator if needed, and eye protection. Work outdoors or near open windows to keep fumes low.
- Choosing low-VOC paints shows you care about future generations.
- Proper PPE keeps you safe and confident.
- Responsible disposal prevents pollution and guilt.
- Mindful painting turns a chore into a respectful, creative act.
Quick Checklist: Getting Latex Paint to Stick to Plastic
Before you start painting, make sure you clean and degrease the plastic thoroughly so the paint can adhere.
Lightly scuff or sand the surface to give the primer something to grab onto.
Finally, use a primer specifically formulated for plastic before applying your latex paint.
Clean And Degrease
A clean, grease-free surface is the single most important step to get latex paint to stick to plastic, so wipe the item with a mild detergent solution, rinse, and let it dry thoroughly. You’ll remove surface contamination like oils, fingerprints, and residues that repel paint.
Also consider environmental factors: clean in low dust, moderate temperature, and dry conditions to avoid recontamination.
Follow this short checklist to prepare confidently:
- Scrub with mild detergent—feel reassured as grime lifts.
- Rinse thoroughly—watch clarity return.
- Dry completely—relief when no dampness remains.
- Wipe with isopropyl alcohol—satisfaction as the surface feels right.
Scuff And Sand
How rough should the plastic be to help latex paint adhere? You want a dull, slightly abrasive surface — not deep scratches. Light scuffing with a scuff pad or 220–320 grit sandpaper creates uniform micro-texture enhancement so paint grabs evenly.
Work in one direction, wipe away dust, and check for consistent dullness. For molded or glossy plastics, sand edges and contours gently to avoid grooves that show through.
Scuffing also helps color matching by preventing pooling or uneven sheen that alters perceived hue. After scuffing, remove debris and inspect under good light before proceeding to the next step.
Use Primer Designed
Once you’ve scuffed the plastic to a uniform dullness, pick a primer formulated for slick surfaces so your latex will bond instead of peel. You’ll want one that chemically sticks to plastic and fills micro-imperfections to improve surface texture and long-term paint durability.
Apply thin, even coats, let each cure per label instructions, and avoid overworking wet primer. That foundation determines how the topcoat behaves — skip it and you risk flaking or bubbling.
Choose adhesion-promoting primers marked for PVC, polyethylene, or polypropylene when relevant.
- Relief: you’ll feel confident.
- Pride: results look pro.
- Calm: fewer repairs later.
- Joy: lasting finish.
Frequently Asked Questions
Can Latex Paint Be Used on PVC Piping Indoors?
Yes, you can paint indoor PVC piping with latex if you prep properly: sand, clean, use a primer made for plastic adhesion, and pick compatible paint for paint compatibility; you’ll get durable, attractive results when you follow steps.
Will Latex Paint Release Fumes Harmful to Houseplants Near Painted Plastic?
You won’t vapor-kill your houseplants with latex paint fumes, but don’t be complacent: toxicity concerns exist, so ventilate, let paint fully cure, and keep plants aside until off-gassing stops to guarantee plant safety.
Can You Paint Flexible Plastic Toys With Latex Safely for Kids?
Yes — you can paint flexible plastic toys with latex if you prep and prime properly; you’ll need a flexible plastic primer and flexible acrylic topcoat, let it cure fully, and guarantee non‑toxic, child‑safe paints and finishes.
Does Textured Plastic Require Different Prep Than Smooth Plastic?
Yes — textured plastic needs different surface preparation: you’ll sand peaks lightly, clean grooves, and use a primer to bridge crevices so paint grips like grip on rough stone, ensuring durable adhesion and smoother finish.
How Do Color and Sheen Affect Latex Adhesion on Plastics?
Color contrast can mask imperfections, but won’t improve adhesion; sheen influence matters more because glossier plastics repel paint. You’ll prep and prime glossy surfaces thoroughly, deglossing or using adhesion primer so paint sticks reliably.
Conclusion
Think latex won’t stick to plastic? It can — but only if you prep right. You’ll get good results on painted, nylon, ABS or PVC pieces after thorough cleaning, sanding, and a plastic primer; polyethylene and polypropylene usually fight you and often need specialty paints or a chemical primer. So test a small spot first. With proper prep, latex is a cheap, safe option; skip it only when adhesion or durability really matters.