Does Paint Dry Lighter or Darker Interior
Most interior paints shift slightly as they dry, and you’ll usually find wet paint dries a bit darker as solvents evaporate and pigments settle. Sheen, surface texture, porosity, and lighting can make some colors look lighter or show undertones differently, so priming and consistent coats help. Temperature and humidity also change drying tone, and multiple samples under your room’s light give the best match—keep going to see practical tests, tips, and fixes.
Who This Guide Helps and How to Use It
Wondering if this guide’s for you? You’re likely planning a room refresh and want predictable results. This guide helps homeowners, renters, and DIYers who care about color psychology for mood and light, painters needing quick checks, and anyone balancing samples before commitment.
You’ll learn how sheen and paint texture affect perceived shade, when to test swatches, and which lighting reveals true tone. Follow the steps, note drying shifts, and use simple tests rather than guessing.
Does Interior Paint Dry Lighter or Darker?
Although paint can look different as it dries, most interior paints dry slightly darker than their wet appearance, so you should expect a modest deepening once the sheen levels out. You’ll notice subtle shifts as solvents evaporate and pigments settle; gloss levels and lighting influence perception.
Most interior paints dry a touch darker as sheen fades; expect subtle deepening as solvents evaporate and pigments settle.
Consider how color psychology affects room mood—darker tones feel cozier, lighter ones airier. Also factor paint durability: tougher finishes can alter final look less over time.
To plan effectively, note these variables:
- Sheen and light reflection
- Room lighting direction and intensity
- Pigment concentration and base
- Surface texture and priming
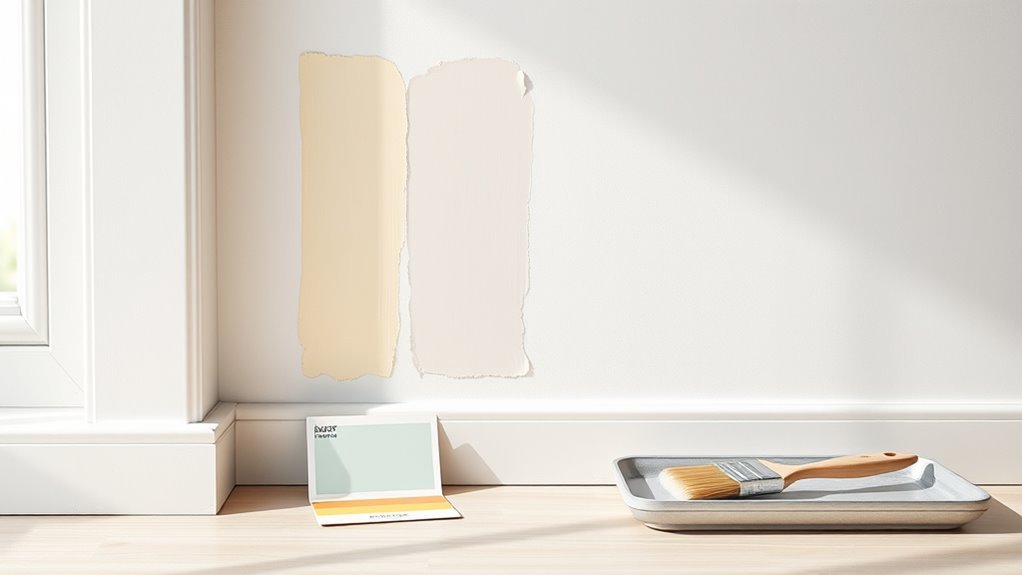
Quick Method: Test a Patch Now
Start by painting a small patch in an inconspicuous spot so you don’t commit to the whole room. Watch it as it dries and note any shift in tone over a few hours.
Check the patch under different lighting—natural daylight, warm bulbs, and shaded areas—to see how the color reads in each.
Test Small, Observe Drying
Before you commit to painting an entire wall, grab a small area—like inside a closet door or a 2×2-foot patch—and apply the chosen paint exactly as you’ll on the rest of the room so you can watch how the color and sheen settle as it dries.
You’ll notice how color consistency changes with coats and how paint chemistry affects drying behavior. Leave the swatch untouched, then check at intervals to compare wet versus dry tones. Record observations to guide your full project.
- Note drying time per coat
- Photograph each stage
- Compare single vs. double coat
- Jot ambient conditions
Check Under Different Lights
When you test a patch now, view it under the different lights you’ll use daily—natural daylight, warm incandescent, cool LED—and note how the color and sheen shift, because lighting can drastically alter perception.
You’ll see hues warm under incandescent and crisp under cool LED; daylight reveals true undertones. Walk the room at different times, take photos, and compare.
Consider color psychology—how lighting changes mood and perceived size—before committing.
Also assess paint durability on the patch: rub it after drying to spot scuffing or adhesion issues that different bulbs might hide.
This quick check saves repainting and guarantees the finish behaves as expected.
How Paint Sheen Affects Final Color
Although sheen is often treated as a finish choice, it directly changes how you perceive a color. You’ll notice color perception shifts because sheen alters light reflection and surface clarity.
Sheen isn’t just a finish—it alters light and surface clarity, changing how you perceive color.
Higher sheens bounce more light, making hues appear brighter and more saturated; lower sheens absorb light, muting tones and softening contrasts. Pick sheen based on room use and desired mood, since it affects visibility of imperfections and cleaning needs.
- Matte: reduces glare, hides flaws, softens color
- Eggshell: subtle sheen, balanced reflectivity
- Satin: increased depth, easier to clean
- Semi-gloss: vivid color, high reflection
How Undertones Change as Paint Dries
Sheen affects how light plays on a wall, but the underlying pigments also shift as paint cures, and you’ll notice subtle undertones emerging or fading over time. As moisture evaporates, warm or cool hints can become more or less apparent, so monitor samples across several days.
To preserve the color consistency you expected, view swatches in the room’s lighting at different times. Application thickness and porosity influence how undertones settle, so maintain consistent technique.
Choosing a quality product improves finish durability and reduces dramatic shifts, but small undertone changes are normal—plan with test patches before committing to large areas.
How Pigments and Chemistry Alter Wet-to-Dry Appearance
Because pigments sit suspended in a solvent or binder, you’ll see a clear shift as that carrier evaporates and the paint film forms. You notice immediate changes: gloss, depth, and hue can alter depending on pigment stability and ongoing chemical reactions within the binder.
You’ll want to observe drying stages to predict final color rather than rely on the wet sample. Factors like particle size, refractive index, and additives control light scattering and absorption as the matrix densifies.
- Particle aggregation and settling affect uniformity
- Oxidation or crosslinking shifts tone subtly
- Additives modulate drying rate
- Surface gloss changes perceived depth
How Primer Stabilizes Your Color
Before you apply the topcoat, a primer evens out porosity so your color goes on uniformly. It also seals and blocks stains that would otherwise show through and alter the final shade.
Plus, primer improves adhesion so the topcoat lays down smoothly and dries true to the color you picked.
Improves Color Uniformity
When you apply a primer, it evens out the surface so your topcoat lays down consistently and shows its true color. You’ll notice better color consistency because primer seals porous spots and prevents uneven absorption. That means your chosen shade won’t look patchy or shift as it dries.
Primer also aids paint blending at edges and between coats, so gradual shifts stay smooth and predictable. Use primer when switching between drastic hues or covering repaired areas to keep tones uniform across the room.
- Seals porous surfaces
- Equalizes sheen and texture
- Promotes smooth paint blending
- Reduces visible patchiness
Blocks Stains Effectively
Along with evening out texture, primer stops stains from bleeding through and altering your topcoat’s hue. You’ll prevent yellowing, water marks, and tannin bleed that would otherwise shift shades and ruin color consistency.
Choose a stain-blocking primer formulated for the specific issue—oil-based for stubborn tannins, shellac for severe staining, or water-based for light discoloration. Apply evenly and let it cure so subsequent coats reflect true color.
That stable base narrows the variables that affect final appearance, letting you pick from various finish options without fearing hidden blemishes will reemerge and skew the result.
Enhances Topcoat Adhesion
Because primer creates a consistent, slightly porous surface, your topcoat can bond more reliably and cure evenly, which stabilizes the paint’s color and sheen. You’ll notice improved color consistency because the primer evens out substrate variations that would otherwise alter pigment appearance.
Better adhesion reduces patchiness, so light reflection stays uniform across the wall. That consistency prevents areas from appearing lighter or darker after drying.
Use primer when switching finishes, covering repairs, or painting over glossy surfaces to guarantee predictable results.
- Promotes uniform pigment laydown
- Minimizes substrate-induced hue shifts
- Enhances film formation
- Reduces uneven gloss
How Surface Texture and Porosity Shift Shade
If you paint over a rough, porous surface, you’ll usually see the color read darker and more muted than it appears on a smooth, sealed wall. You’ll notice surface texture scatters light, so highlights shrink and shadows deepen, shifting perceived hue.
Porosity effects matter because porous substrates soak up binder and pigment unevenly, altering sheen and saturation. You can counteract this by priming or sealing to uniformize absorption and reduce texture contrast.
Test patches reveal true drying behavior on your specific wall. Expect subtle shifts; plan coats and primers accordingly to match the desired final shade.
Natural vs. Artificial Light: What to Expect
Surface texture and porosity change how paint interacts with light, so you should also think about the type of light that will hit the wall. Natural light shifts throughout the day and can reveal undertones, while artificial bulbs offer steadier lighting conditions that affect perceived color consistency.
You’ll notice cooler daylight makes colors look crisper; warm indoor bulbs soften tones. Test samples under both sources before committing.
- View swatches near windows and under fixtures
- Compare samples at different hours, not just one moment
- Use the actual bulbs you’ll keep in the room
- Photograph samples for accurate comparison
Room Orientation and Time-of-Day Effects
Think about how the sun’s angle changes the way wet paint looks as it dries — low morning light casts warmer, softer tones while late afternoon sun is stronger and can make colors read richer or cooler.
If you’re painting in the morning, expect gentler highlights; in the evening, expect sharper contrasts that can shift perceived depth and hue.
Also note that north-facing rooms get steadier, cooler light while south-facing rooms see brighter, warmer light through the day, so orientation will affect your final result.
Sunlight Angle Impact
How does the angle of sunlight change the way paint reads in a room? You’ll notice color perception shifts as low-angle light grazes walls, enhancing texture and altering hue intensity. Midday high-angle sun compresses contrasts, making tones appear flatter through direct light reflection. You can use this to predict how a paint will behave during different periods without relying on broad generalizations.
- Low-angle light emphasizes surface texture and deepens shadows.
- High-angle light reduces contrast and mutes subtle undertones.
- Side lighting reveals imperfections and rich pigments.
- Diffuse light softens color and balances reflections.
Morning Vs Evening Light
Building on how sunlight angle affects texture and contrast, morning and evening light bring distinctly different qualities depending on room orientation.
You’ll notice soft, cool morning light mutes warm tones and can make freshly painted walls read slightly lighter, influencing color psychology by calming a space.
Evening light casts warmer, richer hues that can deepen paint appearance, making colors feel cozier but sometimes heavier.
When planning finish and sheen, consider how these shifts interact with paint durability—UV exposure in bright evenings may affect fading over time.
Test swatches at both times to guarantee the mood and longevity meet your expectations.
North Vs South Rooms
Because room orientation controls the quality and consistency of light, north- and south-facing rooms will make the same paint read very differently throughout the day. You’ll notice north rooms keep cooler, steadier tones with less glare, aiding color consistency. South rooms get stronger, warmer shifts, so the same swatch can look brighter or deeper as sunlight moves.
Consider how light influence changes perception during peak hours and in shadowed corners; this affects finish choice and timing for final inspection. Use samples and observe at different times to guarantee satisfaction.
- Test at morning, midday, evening
- Compare painted samples on different walls
- Note reflective surfaces
- Inspect in artificial light
How Many Coats Change the Perceived Shade
When you apply additional coats, you’ll usually see the color deepen until the pigment fully hides the previous layer and the surface beneath it. You’ll notice subtle shifts with each coat: the first evens out tone, the second builds color consistency, and a third often locks in true depth.
Don’t overcoat hoping for dramatic change; quality pigment and proper primer matter more. Multiple coats also improve paint durability and hide imperfections, so you’ll balance appearance with protection.
Test on a small area and let each coat cure before judging. That way you’ll achieve the shade you *meant* without surprises.
Why Dark Paints Sometimes Dry Lighter
Although dark paints look bold wet, they often dry lighter because the solvent evaporates and exposes only the pigmented binder, reducing the glossy, refractive surface that deepens wet color. You’ll notice the shift as sheen, light angle, and pigment concentration change during cure.
Dark paints often appear richer when wet but dry slightly lighter as sheen fades and solvents evaporate.
Expect a modest shift, not a complete loss of depth, and factor it into choices driven by color psychology and paint durability — darker tones absorb wear but show flaws.
- Sheen reduction alters perceived saturation
- Light scattering increases as surface dulls
- Pigment load limits final darkness
- Multiple coats restore intended depth
Why Pale Paints Sometimes Dry Darker
Dark paints can lighten as they lose gloss, but pale paints can surprise you by going the other way: they often dry darker as solvents evaporate and pigments settle into a thinner, more concentrated film. You’ll notice subtle shifts when a wet, milky-looking coat becomes richer once tacky.
That change ties to color consistency—formulation, binder, and pigment type dictate how concentrated the surface film appears. You can minimize surprises by stirring thoroughly, applying even coats, and testing samples under your room’s light.
Proper technique also supports paint durability, preventing premature wear that might alter tone over time.
How Temperature and Humidity Affect Drying Color
Because drying isn’t just a chemical change but an environmental one, the temperature and humidity in your room will noticeably shift a paint’s wet-to-dry color. You’ll see warmer temps speed solvent evaporation, sometimes making the dry shade appear lighter, while high humidity slows drying, deepening tone.
Drying is environmental — warmer, drier air can lighten paint; cooler, humid conditions deepen and prolong the wet look.
Controlling conditions helps preserve color permanence and maintain finish durability.
- High temperature: faster drying, potential lightening.
- Low temperature: slower cure, subtle darkening.
- High humidity: extended wet phase, richer appearance.
- Low humidity: rapid flash-off, risk of uneven sheen.
Adjust ventilation and climate to predictably lock in the meant hue.
Brand and Formulation Differences That Matter
When you compare brands and formulations, you’ll notice pigments, binders, and additives change how a paint dries and what final shade you get. You’ll find some brands load pigment heavier, yielding richer wet-to-dry retention, while others dilute for easy application, which can dry lighter.
Binders affect sheen and depth, and additives influence leveling and UV resistance, tying directly to paint durability.
Consider how color psychology interacts with finish: a matte may absorb light and feel softer, while gloss reflects and reads brighter.
Choose a reliable formulation that balances desired mood, longevity, and real-world lighting for predictable results.
How to Test Paint at Home: Quick Patch and Full-Wall
Before committing to a full repaint, test the color in both small patches and a larger swath so you can see how it behaves in your actual lighting and finish. You’ll spot shifts in hue and assess color consistency between batches.
Start with a 4×4″ patch at eye level, then paint a 3–4 foot section to watch drying over days.
Begin with a 4×4″ eye-level patch, then paint a 3–4 foot swatch and observe drying over several days.
Note sheen differences and check finish durability by lightly rubbing after full cure. Record brand, batch, and number of coats.
- Patch at different heights
- Full-wall swatch for several days
- Note sheen and batch info
- Perform a light durability rub-test
How to Interpret Sample Results Correctly
Once your patches and full-wall swatch have cured, interpret the results by comparing how the color looks at different times of day, angles, and lighting conditions—note whether it dries lighter or darker, how sheen affects perceived depth, and if any undertones emerge.
You’ll check for color consistency across patches and the full wall; unevenness can signal poor coverage or substrate issues. Observe under natural daylight, warm evening light, and artificial bulbs to see shifts.
Stand back and up close, and view from multiple angles. Record notes and photos at set times so you can compare objectively before committing.
Choosing Primers and Base Coats to Control Color
Now that you’ve compared cured samples across lighting and angles, consider how primers and base coats can lock in the color you saw. You’ll want primer importance front and center: a wrong primer shifts hue, undermining color consistency.
Choose tinted primers to neutralize stains or to match a deeper base, and use white or high-hide primers for brighter tones. Test the primer plus topcoat on a sample panel before committing.
- Match primer tint to your desired final value
- Use high-hide primers over patched or stained areas
- Apply consistent coverage for uniform absorbency
- Recheck samples under final lighting conditions
When to Change Your Color Versus the Finish or Lighting
If the room still feels off after testing paint samples and primers, decide whether to change the color itself or adjust the finish and lighting based on what’s wrong.
If hues clash with mood goals—calming blues looking harsh or energetic yellows flatten—you’ll change color to respect color psychology.
If light reflections exaggerate sheen or hide texture, swap a matte or satin finish first.
Boost or soften lighting with bulbs, lamps, or dimmers before repainting.
Consider paint durability needs in high-traffic areas; durable finishes may limit sheen choices.
Test final combos in situ at different times of day before committing.
Common Mistakes That Cause Surprise Shifts
You’ll often be surprised by color shifts when the lighting in a room wasn’t evaluated properly, the surface wasn’t prepped right, or the paint went on at the wrong thickness.
Poor lighting can make a wet sample look like a different color once dry, while dirt or old finish left on the wall prevents proper adhesion and alters the final tone.
Applying too thin or too thick coats changes sheen and pigment concentration, so measure and apply consistently.
Poor Lighting Evaluation
Ever stood back from a freshly painted wall and felt surprised because the color looked off? You misjudged lighting: bulbs, natural shifts, and angle change perceived hue and value. Poor lighting evaluation overrides color psychology cues and can make a durable finish seem flat or too intense, undermining paint durability expectations.
Test paint at different times and use lamps that mimic desired fixtures. Take notes, compare swatches on all walls, and inspect finishes after curing.
- View samples morning, noon, and evening
- Use neutral-temperature bulbs for trials
- Check both gloss and matte finishes
- Photograph samples under actual lighting
Improper Surface Preparation
When surfaces aren’t cleaned, sanded, or primed properly, paint can dry looking lighter, darker, or uneven in ways that surprise you. Skipping surface conditioning lets dirt, oils, and gloss variations show through, causing patchy absorption and reflectance. You’ll notice streaks, blotches, or edges that read as different tones under the same light.
Proper cleaning, sanding to feather edges, and using an appropriate primer equalizes porosity so coats bond predictably. That attention promotes reliable color consistency across walls and trim.
Do the prep work; it prevents unexpected shifts and reduces the need for extra coats or touch-ups later.
Incorrect Paint Thickness
If you apply paint too thinly or too thickly, the finish can read noticeably lighter or darker than you expect. You’ll affect color consistency and risk uneven sheen while compromising paint durability when layer thickness varies.
Apply even coats, follow manufacturer spread rates, and use consistent tools and technique so each pass matches the last. Test a small area and let it fully cure before deciding.
- Measure coverage per coat and stick to recommended mils.
- Use quality rollers or sprayers for uniform laydown.
- Avoid overworking edges or reloading mid-stroke.
- Sand between heavy coats to level build and adhesion.
Pro Tips for Matching Swatches to Finished Walls
Because lighting and surface texture change how paint reads, you’ll want to test swatches under the exact conditions of the room before committing. Put several 4×6 samples on different walls, near trim and furniture, and observe them at morning, midday, and evening.
Note how color psychology shifts with warmth or coolness of light. Apply samples with the same finish and thickness to judge final tone and paint durability. View from typical standing and seated positions.
Photograph samples for reference. Choose the swatch that holds up under varied light and use, then order slightly more paint than calculated to guarantee consistent batches.
Troubleshooting Stubborn Color Surprises
You’ve tested swatches and picked the best-performing sample, but sometimes the paint on your walls still reads differently than expected — here’s how to troubleshoot those stubborn surprises. Check light, undertones, and room function to align color psychology with your intent.
Inspect sheen and surface prep; improper priming alters appearance and paint durability. Clean a small area to see if dirt or previous coatings affect hue.
Inspect sheen and surface prep — improper priming changes color and durability. Clean a small area to reveal true hue.
Try these targeted steps:
- View swatches at multiple times of day and artificial lights.
- Test a larger painted patch for true drying behavior.
- Confirm primer compatibility and proper curing times.
- Use consistent application tools and stroke direction.
When to Call a Pro or Repaint?
If you see visible damage, peeling, or persistent stains and odors that won’t come out, it’s time to contemplate your options.
You can try spot repairs, but if the issues are widespread or recurring, call a pro to assess the surface and underlying problems.
Repainting is usually the best choice when cosmetic fixes won’t stop peeling or eliminate smells for good.
Visible Damage Or Peeling
When paint starts cracking, bubbling, or flaking off walls, it’s a clear sign you’re dealing with a problem rather than normal wear—and you’ll want to assess whether a simple touch-up will do or if a pro is needed.
Check for underlying moisture, substrate damage, or poor adhesion that compromise paint durability and color consistency. If peeling is widespread, bubbling recurs, or multiple coats fail to adhere, call a professional. Otherwise, you can spot-repair after proper prep.
- Inspect extent and pattern
- Test adhesion with a scraper
- Identify moisture sources
- Evaluate matching and finish
Persistent Stains Or Odors
How bad are those stains or smells, and can a repaint really fix them? If odors linger after cleaning or stains bleed through primer, you’ll need more than a fresh color. Consider how odor can affect mood—color psychology won’t mask persistent smells—and choose sealants, odor-blocking primers, or professional remediation.
If stains indicate mold, water damage, or smoke, call a pro to address the source; repainting alone wastes effort. For minor marks, high-quality primer and paint with strong paint durability can suffice.
Always test primers and ventilation after treatment to guarantee the room’s air and finish stay restored.
Pre-Paint Checklist to Guarantee the Shade You Expect
Because lighting, surface prep, and undertones all affect the final look, you should run a short pre-paint checklist to make sure the color you pick is the color you get. Consider color psychology to match mood—warm tones energize, cool calm—then test samples.
Before painting, consider lighting, undertones, and mood—test samples so the color you choose is the color you get.
Evaluate existing paint textures and repair imperfections so sheen reads consistently. Note natural and artificial light at different times. Do a small, taped-off sample area and view it from various angles over 48 hours.
- Degrease and sand glossy spots
- Prime stained or patched areas
- Paint 12×12″ samples on all walls
- Check samples under day and night light
Frequently Asked Questions
Can Paint Color Change Over Years Due to UV Exposure or Yellowing?
Yes — over years UV exposure and yellowing can alter paint; you’ll see fading and warm shift. To protect Paint durability and Color stability, you’ll choose UV-resistant, high-quality pigments, clear coats, and regular maintenance.
Do VOCS or Off-Gassing Alter Paint Color After Drying?
Yes — you’ll notice VOC impact during the drying process: as solvents off-gas, paint can subtly shift hue or sheen. You’ll see minor changes early on, though long-term color shifts usually stem from sunlight or aging.
Will Wallpaper Adhesive or Previous Coatings Affect Final Shade?
Yes — wallpaper effects and adhesive influence can alter the final shade; you’ll see uneven absorption, staining, or tinting from residual glue or previous coatings, so you should test, prime, and remove contaminants before repainting.
Does Aging of Lighting Fixtures Change Perceived Wall Color?
Yes — lighting color shifts as fixture aging occurs, and you’ll notice wall hues change. As bulbs dim or yellow and fixtures corrode, colors appear warmer or muted, so you’ll reassess paint choices under updated lighting.
Can Mixing Leftover Paints Create Predictable New Shades?
Yes — you can mix leftover paints, but Color mixing reduces Shade predictability because pigments interact unpredictably; you’ll get approximations. Test small mixes, record ratios, and adjust gradually so you can reproduce or refine the resulting shade.
Conclusion
You’ve got this—paint usually dries slightly darker, but sheen and undertones shift the look. Remember my neighbor who swore beige would brighten his den; after one wet coat it looked pale, but once dry it matched the swatch—like a cast-iron pan developing its true color as it cools. Test a patch, note sheen, and follow the checklist; that quick habit turns surprises into predictable results and saves you repaint trips.