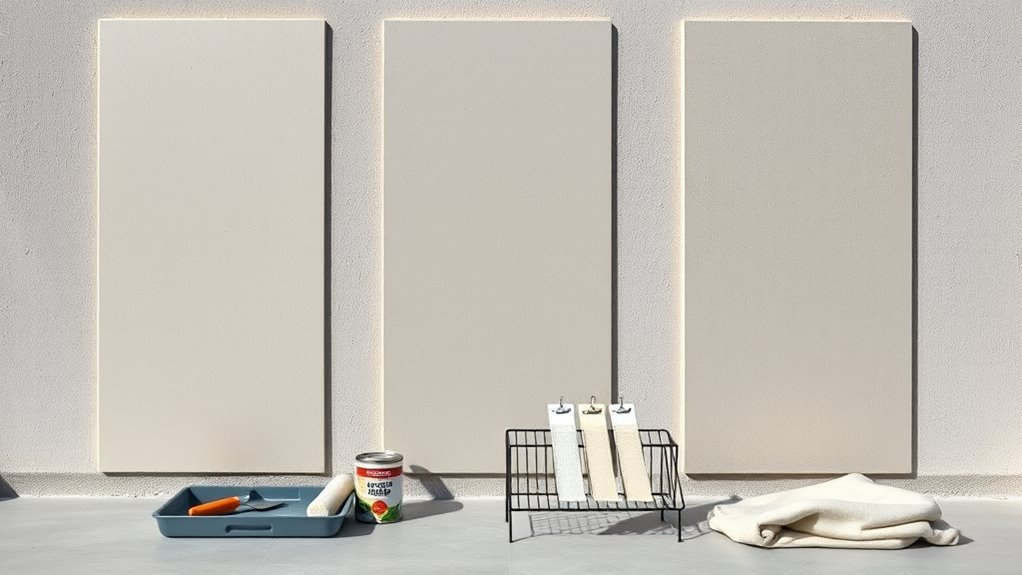
How Long Does Cement Paint Take to Dry
You can expect cement paint to feel dry to the touch within 1–4 hours and be safe for light handling after about 24 hours, but full curing takes longer—typically 7–14 days indoors and 14–28+ days outside depending on temperature, humidity, coat thickness, and airflow. Thin coats and good ventilation speed things up, while cold or humid conditions slow them. Keep these factors in mind, and the rest explains practical timing, testing, and job scheduling.
Quick Answer: Typical Cement Paint Drying & Curing Times
Although exact times vary with temperature and humidity, cement paint typically feels dry to the touch within 1–4 hours and is safe for light handling after about 24 hours.
You’ll notice dry times shift with layer thickness, ventilation, and substrate porosity. Curing continues over days to weeks, so you shouldn’t subject surfaces to heavy use immediately.
If you choose a darker cement color or higher paint gloss, drying may feel faster visually but actual cure still needs time.
Plan multiple coats with 24–48 hour intervals in moderate conditions, and prioritize manufacturer recommendations for best adhesion and long-term performance.
Drying vs Curing: What Each Term Means for Cement Paint
When you touch cement paint after a few hours, you’re feeling drying time—the surface has lost its water but the film isn’t fully strengthened.
Curing is the longer chemical process that continues for days or weeks as the paint gains durability and adhesion.
Understanding both explains why a surface can look dry yet still needs time before it reaches full performance.
Drying Time Defined
Because drying and curing refer to different physical processes, you’ll want to treat them separately when working with cement paint. Drying is the surface water evaporation that makes paint touch-dry; it affects color consistency and how soon you can recoat. You’ll notice matte vs glossy shifts as solvents leave. Environmental factors and application methods speed or slow this step. Typical touch-dry times range from 30 minutes to a few hours, depending on conditions.
- Expect surface dryness before full hardness.
- Avoid heavy handling until tack-free.
- Plan recoats per manufacturer’s recommended interval.
Curing Process Explained
While drying is the quick loss of solvents or water from the paint film, curing is the slower chemical process that gives cement paint its strength and durability. You can’t accelerate it simply by waiting for the surface to feel dry.
You’ll need to let chemical bonds form over days to weeks; humidity, temperature, and substrate moisture control that timeline.
During curing, avoid heavy abrasion or painting layers too soon. Proper tool selection and consistent technique help prevent streaks and guarantee even color blending as the film matures.
Follow manufacturer cure times for best adhesion and long-term performance.
Performance Differences Over Time
Curing affects long-term performance differently than the initial drying you already read about, so you’ll want to judge paint readiness by both stages. Drying feels complete when surfaces are touch-dry, but curing bonds pigments and fillers over days to weeks, affecting durability, Color fading resistance, and Environmental impact. You should monitor conditions and planned use.
- Adhesion: Curing strengthens bonds; premature stress can peel finishes.
- Weather resistance: Fully cured paint better resists moisture, UV, and Color fading.
- Environmental impact: Proper curing limits VOC release and need for recoats, reducing waste.
Check manufacturer cure times before heavy use.
Typical Surface-Dry and Recoat Times for Cement Paint
When you apply cement paint, it usually feels dry to the touch within 1 to 2 hours under warm, dry conditions, but full surface hardness and readiness for a recoat typically take 12 to 24 hours; cooler or humid weather can stretch those times considerably. You’ll notice porosity, substrate type, and layer thickness alter timing. Consider environmental impact and historical applications when choosing formulations. If you’re impatient, test a small patch before recoating. Emotional stakes matter—your finish reflects care.
| Situation | Feeling |
|---|---|
| Quick sunny day | Relief |
| Humid morning | Frustration |
| Rush project | Anxiety |
| Perfect timing | Pride |
Full Cure Times: Interior vs Exterior Cement Paint
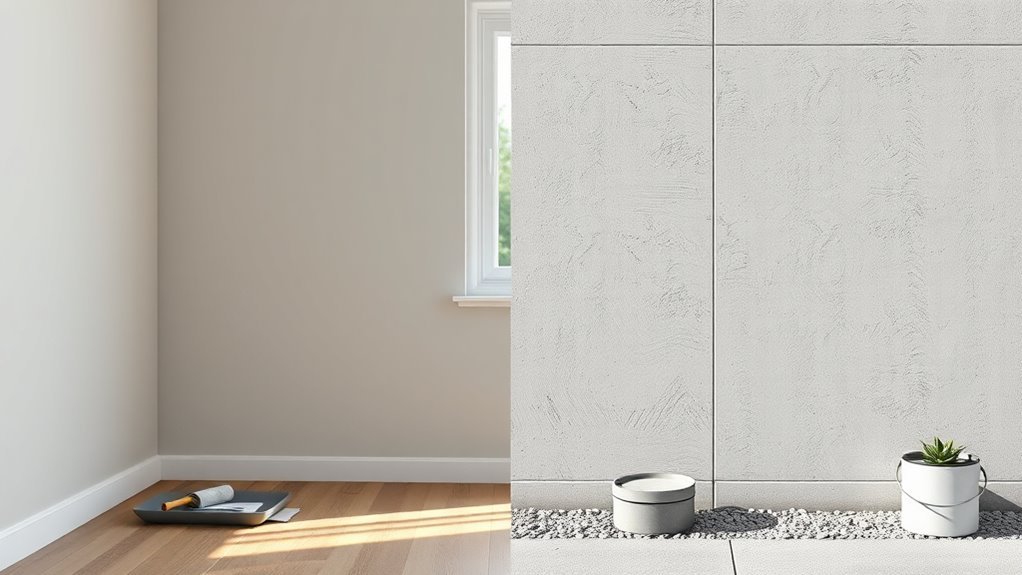
For a finished, durable surface you’ll want to know the full cure time, which differs for interior and exterior cement paint.
Indoors, paint typically cures fully in about 7–14 days under normal conditions.
Outdoors, exposure to weather can extend full cure to 14–28 days or more depending on temperature and humidity.
Interior Full Cure Time
Although indoor cement paint may feel dry to the touch within a day or two, it typically needs 7 to 28 days to reach full cure depending on temperature, humidity, and ventilation. You’ll want patience: curing affects color consistency and long-term durability, and it can influence environmental impact if you rush recoats or cleaning.
To help you plan:
- Monitor humidity and temperature—higher humidity slows cure, lower temps do too.
- Guarantee steady ventilation without drafts to promote even curing and prevent patchy finish.
- Avoid heavy cleaning or hanging fixtures until the full cure window passes to protect the coat.
Exterior Full Cure Time
How long will exterior cement paint really take to fully cure? You’ll typically see surface dry in 24–48 hours, but full cure outdoors often needs 2–4 weeks depending on temperature, humidity, and sunlight.
Wind and UV speed skin formation yet can worsen color fading over months if finishes aren’t UV-resistant. You should follow recommended application techniques: apply thin, even coats, allow proper recoat intervals, and avoid painting before rain.
Use breathable primers and UV-stable topcoats to protect pigment. Monitor conditions and wait the full cure before cleaning or sealing to guarantee durable, fade-resistant results.
How Temperature Affects Cement Paint Drying
When temperatures rise, cement paint dries faster because heat speeds up the chemical reactions and evaporation that remove water and solvents. If it gets too hot, though, the surface can skin over while the underlying layer stays moist.
You should monitor temperature fluctuations because repeated heating and cooling can alter adhesion and paint texture, causing cracking or uneven finish. Aim for steady, moderate warmth during drying to let solvents escape uniformly.
- Drying rate increases with higher temperature until surface defects appear.
- Low temperatures slow reactions, extending tack-free and cure times.
- Avoid rapid temperature swings to preserve film integrity.
How Humidity Changes Cement Paint Drying Speed
You’ll notice humidity has a big impact on cement paint drying time. High humidity slows evaporation and can leave paint tacky for much longer.
While low humidity speeds drying, it can cause too-rapid surface cure and potential cracking. Keep humidity in mind when scheduling applications to get an even, durable finish.
High Humidity Effects
Although high humidity slows evaporation, it can dramatically prolong the time it takes cement paint to dry because moisture in the air reduces the rate at which water leaves the paint film.
You’ll notice slower tack-free times and greater risk of sagging or runoff on vertical surfaces. High humidity also affects color variations and texture consistency, so expect uneven sheen and potential blotches.
- Reduce airflow and extend drying intervals.
- Use dehumidifiers or heaters cautiously to speed curing.
- Avoid recoating until moisture content is within recommended limits to prevent adhesion failures.
Low Humidity Effects
If air is dry and warm, cement paint will lose moisture faster and seem to set more quickly. But that speed can bring its own problems. You’ll notice surface film forming before deeper layers cure, increasing risk of cracking and poor adhesion.
Rapid evaporation can cause texture changes—paint may look powdery, uneven, or brittle. Pigments can be stressed, raising chances of color fading under sunlight.
To avoid defects, mist the substrate lightly before application, work in shaded periods, and use slower-drying formulations or retarder additives. Monitor curing for several days and rehydrate surfaces if you see premature drying.
How Air Circulation Speeds (Or Slows) Drying
When air moves across a freshly painted cement surface, it carries away moisture and speeds drying.
When air flows over fresh cement paint, it removes moisture and accelerates drying for a quicker cure.
But stagnant or overly turbulent flow can change how evenly the paint cures.
You should control ventilation to avoid uneven curing that leads to color fading or surface peeling.
Gentle, consistent airflow helps solvent evaporation without shocking the film.
- Use fans or natural cross-ventilation for steady circulation.
- Avoid powerful blasts that dry outer layers too fast.
- Shield from drafts that cause patchy curing and weak adhesion.
Monitor conditions; adjust airflow to balance drying speed and uniform finish.
How Coat Thickness Alters Drying and Curing
If you apply a very thin coat of cement paint it’ll dry on the surface much faster, but it may not provide full coverage or durability.
Thicker coats take longer to dry and can trap moisture underneath, extending curing time and increasing the risk of cracking or poor adhesion.
When you layer multiple coats, each additional layer changes drying dynamics—allowing proper surface cure between coats is essential for a strong, long-lasting finish.
Thin vs Thick Coats
Because coat thickness controls how quickly solvents escape and moisture moves through the film, thin and thick layers of cement paint dry and cure very differently.
You’ll notice thin coats dry faster, reducing the risk of color fading from prolonged exposure and improving surface adhesion because the binder concentrates evenly.
Thick coats trap moisture, extend curing time, and can weaken adhesion or shear if stressed.
- Thin coats: quick touch-dry, uniform finish, lower cracking risk.
- Thick coats: slower solvent release, potential sagging, internal stresses.
- Practical tip: prefer multiple thin passes for durability and predictable curing.
Multiple Layer Effects
Although multiple coats can boost durability, they change how each layer dries and how the whole film cures. You’ll notice thicker builds slow solvent release, trapping moisture between coats and lengthening cure time. Apply subsequent coats only after tack-free touch to preserve Color consistency and avoid blistering. Thicker systems can also alter sheen and create uneven drying patterns, so monitor ambient humidity and temperature. Consider Environmental impact: more coats mean more material and potential VOC release, so balance longevity with sustainability. The table below summarizes practical effects.
| Effect | Result |
|---|---|
| Dry time | Increases with thickness |
| Finish | May change sheen |
| Risk | Trapping moisture |
| Impact | Higher material use |
Why Substrate Porosity (Concrete, Block, Plaster) Matters
When you apply cement paint, the porosity of the substrate—whether concrete, block, or plaster—directly controls how quickly the paint soaks in and sets, so you’ll see big differences in drying time from one surface to another.
You’ll notice porous plaster absorbs more, speeding initial set but risking uneven finish; dense concrete slows absorption, extending surface drying. Consider environmental impact and historical applications when evaluating old masonry.
Manage porosity by priming or pre-wetting to even absorption and drying.
- Porous plaster: fast soak, variable drying.
- Hollow block: moderate absorption, longer cure.
- Dense concrete: slow uptake, prolonged surface time.
New vs Old Cement Surfaces: Drying Differences
Having covered how substrate porosity affects soak-in and setting, you should also expect age to change drying behavior. New cement surfaces typically still release moisture from curing, so they’ll hold dampness and slow surface drying.
While older, weathered masonry has lost much of that internal moisture and usually dries faster. You’ll notice new concrete can take days to reach paint-ready dryness, requiring moisture checks and sometimes longer curing before application.
For older walls, expect quicker absorption but watch for salts or contaminants. Consider historical techniques for preparing aged masonry, and choose eco-friendly options that balance breathability with protection.
How Primer Type Changes Cement Paint Drying and Adhesion
The primer you choose changes how fast cement paint dries because porous primers let solvent escape quicker while dense primers slow it down.
You’ll also want a primer whose chemistry matches the paint—acrylic primers pair best with acrylic cement paints, while alkyd or solvent-based primers suit oil-based finishes.
Picking the right porosity and chemical match improves adhesion and prevents peeling or extended tackiness.
Primer Porosity Effects
Because primers vary in porosity, they change how cement paint soaks in, dries, and sticks to masonry. You’ll notice cement porosity and surface absorption control drying speed: high-porosity primers draw water from paint, speeding skin formation but risking poor film continuity; low-porosity primers slow drying, promoting even curing and stronger adhesion.
- High-porosity primer: rapid absorption, faster touch-dry, potential for uneven finish.
- Low-porosity primer: slower absorption, longer open time, improved film integrity.
- Balanced porosity: moderate absorption, ideal drying rate, reliable adhesion.
Choose primer porosity to match substrate porosity for best results.
Primer Chemistry Match
Porosity sets the stage, but primer chemistry determines how cement paint actually reacts at a molecular level — and that affects drying and adhesion more than you might expect. You’ll see that primer matching influences solvent exchange, curing rates, and bond strength. Choose primers that respect cement chemistry: alkaline substrates need silicate or alkali-resistant primers; acrylic primers suit polymer-modified cement paints. Wrong matches cause peeling, longer tack times, or powdery finishes. Test adhesion and drying on a small area. Use the table to compare typical choices and outcomes.
| Primer Type | Expected Effect |
|---|---|
| Silicate | Strong chemical bond |
| Acrylic | Flexible film, faster dry |
Acrylic vs Mineral Cement Paint: Timing Differences
Although both acrylic and mineral cement paints dry to a hard finish, you’ll notice important timing differences driven by their chemistry and how they interact with substrate moisture. You’ll find acrylics film-form faster, letting you recoat sooner, while mineral (silicate) paints cure by chemical bonding and need more time.
Acrylics film-form quickly for faster recoats, while mineral silicate paints cure chemically and require significantly more time.
Consider color options and application techniques because pigments and film thickness affect drying.
- Acrylic: fast surface dry, recoat in 4–6 hours, full cure days.
- Mineral: slower set, recoat in 24+ hours, chemical cure over weeks.
- Conditions: temperature, humidity, and substrate porosity alter both.
Additives and Retarders: Effects on Drying Time
You’ve seen how base chemistry and conditions change drying windows; now consider how additives and retarders let you fine-tune those windows. You’ll use additives to alter flow, adhesion, and cure rate; Additive effects can speed film formation or improve workability. Retarder influence slows evaporation and reaction, giving longer open time but extending touch and full cure. Balance helps avoid tackiness or poor durability. Test small batches under target conditions before large jobs.
| Additive type | Primary effect |
|---|---|
| Plasticizers | Improve flexibility |
| Retarders | Extend open time |
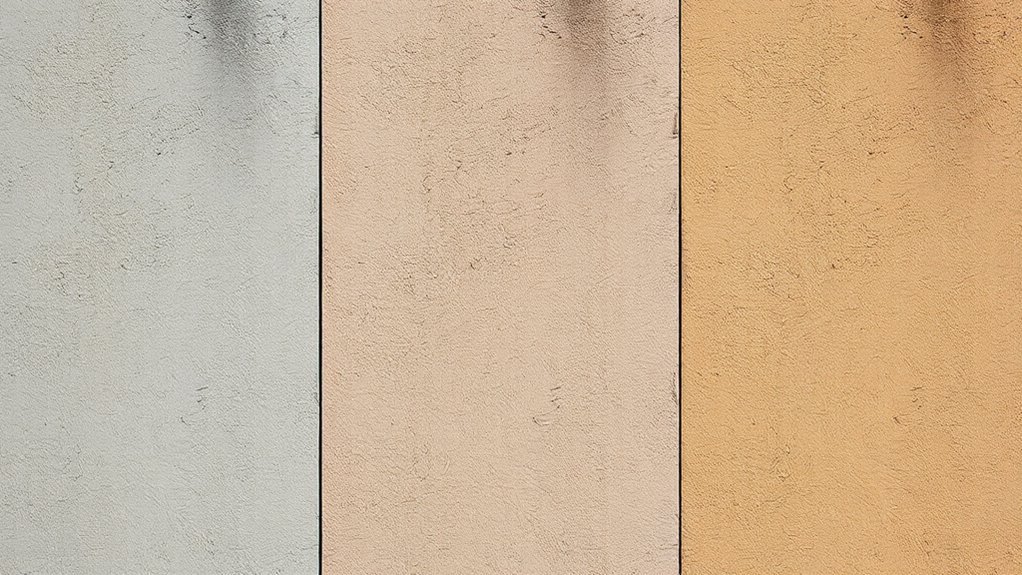
Do Pigments and Color Affect Cement Paint Drying?
When you choose darker or more heavily pigmented cement paints, they’ll usually absorb and retain more heat and can slow surface evaporation, so drying times often lengthen compared with lighter, less opaque colors.
Darker, heavily pigmented cement paints absorb more heat and slow surface evaporation, often lengthening drying times.
You should consider Color impact and pigment stability because they influence film formation and moisture release. Stable pigments resist chemical change; unstable ones can alter cure and appearance.
Also note binder-to-pigment ratio affects drying.
- Heavier pigmentation: reduces porosity, may slow evaporation.
- Pigment stability: prevents reactions that impede curing.
- Light colors: reflect heat, often dry faster.
Adjust formulation and application for consistent results.
Temperature Swings, Dew, and Overnight Drying Risks
If temperatures drop sharply after you paint, curing slows and the surface can stay tacky much longer.
That overnight chill can also lead to dew forming on the paint, leaving spots or interfering with adhesion.
To avoid problems, plan applications for stable, warmer periods or protect fresh work from night moisture.
Temperature Drop Effects
Because cement paint relies on chemical reactions and moisture evaporation, sudden nighttime temperature drops can stall drying and leave surfaces tacky by morning. You’ll notice slower solvent release and delayed film formation, which can dull Cement pigments and affect Paint aesthetics if chill locks moisture in the binder.
To protect your finish, plan applications when nights stay warmer and drier.
- Monitor forecasts: apply when overnight temps remain stable above minimum recommended levels.
- Use accelerators or low-viscosity formulations to speed cure, but follow manufacturer limits.
- Provide temporary shelter or gentle heat to maintain drying without causing cracks.
Overnight Dew Risk
Although nights may seem calm, temperature swings often let dew form on freshly painted cement, and that moisture can rewet the surface before it’s fully set. You should avoid painting late if forecasted humidity will spike overnight, since dew softens the film, causes tackiness, and ruins smooth finishes.
Protect work with tarps or breathable covers and schedule jobs during stable daytime warmth. If you use artistic techniques like glazing or wet-on-wet color blending, dew can blur edges and cause pigments to run.
Check surface dryness in the morning before additional coats; a damp feel means wait—don’t force the process.
Testing: Is Paint Ready for a Recoat?
Before you apply a second coat, you’ll want to confirm the cement paint has dried enough to accept it without lifting or trapping solvent. Check color consistency across the surface—uneven shade can mean still-wet areas. Consider environmental factors like humidity and temperature; they slow drying.
- Touch test: press a fingertip lightly; it should be dry, not tacky.
- Tape test: apply low-tack tape, pull gently; no paint should lift.
- Edge inspection: look for sheen changes or soft edges indicating moisture.
If tests pass, you can recoat. If not, wait and recheck periodically.
How to Tell if Cement Paint Has Fully Cured
When cement paint has fully cured, it won’t just feel dry—you’ll see and test for permanent changes: the surface will be hard to the touch, the color and sheen will be consistent across the area, and the paint will resist mild abrasion and solvent tests without softening or lifting.
To confirm, press, rub, and try a gentle solvent on a hidden spot; cured paint stays intact. Check edges and joints for cracking or tackiness.
Remember that proper surface preparation affects cure quality and long-term color longevity, so inspect for blisters, chalking, or uneven gloss before declaring a job fully cured.
Speeding Up Drying Safely (What Actually Works)
Now that you know how to tell a cement paint coat has fully cured, you might want to speed drying safely to get projects finished sooner. You can accelerate drying without harming cement paint durability or color retention by controlling environment and technique.
- Increase airflow with fans or cross-ventilation to remove moisture quickly.
- Use low-heat, indirect warming (heater set low, not blowing hot directly) to avoid surface sealing.
- Apply thin, even coats and follow manufacturer recoat times so solvents escape and curing proceeds properly.
These steps help you finish faster while preserving finish strength and long-term color.
Slowing Drying to Avoid Cracks and Adhesion Loss
If the weather’s hot, windy, or sunny, slow the cement paint’s drying so it won’t crack or lose adhesion. Work in shaded hours, mist the substrate lightly, and use breathable, eco friendly formulations that extend open time without trapping moisture.
You’ll want slower-setting primers or retarders recommended by the manufacturer; add small doses only and mix thoroughly. Maintain moderate humidity with temporary windbreaks or damp burlap to prevent surface skinning.
These steps help even film formation and improve color retention by avoiding rapid binder migration. Monitor drying visually and don’t rush subsequent coats until touch-dry and stable.
Drying Cement Paint in Cold Weather: Techniques
When working in cold weather, you’ll need to prepare the surface thoroughly by removing frost, sealing cracks, and ensuring it’s dry so paint can bond properly.
Use temporary heat sources and increase ventilation to speed curing without creating rapid temperature swings.
Combine careful surface prep with controlled warmth and airflow to get consistent drying and strong adhesion.
Prepare Surface Thoroughly
Because cold slows curing and traps moisture, you’ve got to start with a spotless, dry surface before you paint. Remove loose cement, salt efflorescence, and old flaking paint so moisture won’t hide beneath your finish. Check for damp spots and only proceed when the substrate reads dry.
- Power-wash and let surfaces air-dry; scrape stubborn areas.
- Repair cracks and fill voids; choose primers suited to color options and substrate porosity.
- Sand or broom to uniform texture; consider texture variations to improve adhesion.
Prep controls drying consistency and prevents peeling in cold conditions.
Use Heat And Ventilation
Although cold air slows curing, you can speed cement paint drying by combining steady heat with good ventilation. You’ll use heaters to raise ambient temperature gradually—avoid direct intense heat that causes cracking.
Position fans to circulate warm air and exchange moisture-laden indoors with drier outdoor air, maintaining steady airflow. For enclosed sites, use thermostatic heaters and venting to prevent condensation.
Consider eco-friendly alternatives like low-energy heaters and heat-recovery ventilators to reduce impact. Note historical applications where craftsmen combined stoves and windows to control humidity; you can adapt those principles safely with modern equipment for reliable drying in cold weather.
Drying Cement Paint in Hot, Dry Climates
If you’re working in a hot, dry climate, cement paint will dry much faster than in cool, humid conditions, so plan your application and timing accordingly to avoid brush marks, lap lines, or poor adhesion. You’ll want to work in smaller sections, use retarding additives if needed, and choose tools that let you blend quickly.
Consider Color options that perform under UV and think about environmental impact of faster curing additives.
Choose UV-stable colors and weigh the environmental trade-offs of additives that speed curing.
Follow this checklist:
- Paint during cooler morning/evening windows to extend open time.
- Thin coats for even curing and adhesion.
- Keep tools damp and work steadily.
Drying Cement Paint in High-Humidity or Rainy Seasons
When you’re painting during high humidity or the rainy season, expect considerably slower drying times and plan for extended curing windows to prevent tackiness, streaking, or poor adhesion. You’ll need to monitor forecasts, avoid painting before rain, and allow extra days between coats so solvent and water can evaporate.
Use dehumidifiers or fans in enclosed areas and choose formulations rated for humid climates. Dark paint color may retain heat differently but won’t speed drying in damp air.
Consider environmental impact of additives and choose low-VOC products. Test a small area first to confirm drying behavior before full application.
Preparing the Substrate for Consistent Drying
Before you paint, clean the surface thoroughly to remove dirt, loose particles, and efflorescence so the paint can bond evenly.
Check and address any moisture problems—wet or salty substrates will slow drying and cause failures.
Apply an appropriate primer to seal the substrate and promote consistent drying and adhesion.
Surface Cleaning
Although you might be keen to start painting, proper surface cleaning is essential to guarantee cement paint dries evenly and adheres well. You’ll remove dirt, loose particles, and previous flaking paint to prevent color variations and preserve texture consistency.
Start with a stiff brush or pressure washer for heavy grime, then use mild detergent for oily spots. Rinse thoroughly and let the surface air-dry.
Patch cracks or laitance before priming. Follow this checklist:
- Remove loose material with brush or scraper.
- Clean stains with detergent and rinse.
- Allow full drying and inspect for residues before priming.
Moisture Inspection
Because trapped moisture can stop cement paint from curing properly, you need to check the substrate thoroughly for dampness and water sources before you prime. Use a moisture meter, probe suspicious areas, and inspect for leaks, rising damp, or poor drainage. Moisture alters cement composition and can cause blistering or color fading later. Repair cracks, improve ventilation, and allow full drying; document readings and retest after fixes.
| Check | Action |
|---|---|
| Surface damp | Measure with meter |
| Rising damp | Seal and dry |
| Leak source | Repair plumbing |
| Ventilation | Increase airflow |
Primer Application
Once you’ve confirmed the substrate is dry and sound, apply a suitable primer to promote adhesion and uniform curing of cement paint. You’ll pick a primer that seals porous surfaces, balances absorbency, and prevents uneven drying that causes patchy color contrast.
Use proper application tools—roller for flats, brush for edges, and sprayer for large areas—to guarantee even film thickness. Follow manufacturer drying times before topcoating.
Prepare mixes and work in sections to avoid lap marks. Check for compatibility with cement paint and ambient conditions.
Proper priming reduces rework and helps the finish dry consistently and predictably.
Applying the First Coat for Optimal Drying Performance
When you’re ready to apply the first coat, work in manageable sections and keep a wet edge so the paint lays down evenly and dries uniformly. Start after proper surface preparation: clean, repair cracks, and remove loose material so adhesion is strong.
Use even strokes and consistent pressure to maintain color consistency across panels and avoid lap marks. Thin mixes or overworking cause streaks and slow drying.
Use even strokes and steady pressure to keep panels consistent—avoid thin mixes and overworking that cause streaks.
Watch for drips and smooth them immediately. Maintain recommended temperature and humidity for the product.
Let the first coat cure fully before any further work, ensuring a durable, uniform finish.
How Long to Wait Between Coats: Vertical vs Horizontal
If you’re painting vertically, like walls or siding, you’ll usually need less wait time between coats than on horizontal surfaces because gravity helps run-off and airflow dries those surfaces faster. Vertical surfaces often accept a recoat in 2–4 hours under ideal conditions, while horizontal surfaces (floors, tabletops, flat roofs) hold moisture and may need 6–24 hours to dry enough for a safe recoat.
You should monitor tackiness, humidity, and temperature to prevent color fading or uneven sheen. Consider these practical checks before recoating:
- Light touch test for tack.
- Measure ambient humidity and temp.
- Inspect for texture differences or pooling.
Handling Corners, Joints, and Textured Surfaces When Drying
When you’re painting corners and edges, you should allow a bit more drying time since those areas can retain moisture longer.
Make sure joints are sealed properly before the next coat to prevent cracking or trapped dampness.
For textured surfaces, use thin, even layers and extra drying time so paint settles into grooves without pooling.
Corners And Edge Timing
Although corners, joints, and textured surfaces dry on the same chemical timeline as flat walls, you’ll notice they behave differently—edges often stay tacky longer and textures trap moisture, so plan extra drying time and gentle handling for those areas.
You’ll watch cement color deepen as moisture leaves; eco friendly additives can slightly alter drying feel but won’t speed edge curing.
Focus on airflow and low humidity near complex areas.
Use gentle touch to test dryness and avoid heavy contact until firm.
Prioritize patience at corners and textured spots to prevent marks and uneven sheen.
- Increase ventilation.
- Light monitoring.
- Minimal contact.
Sealing Joints Properly
Because joints and corners concentrate movement and moisture, you’ll want to seal them carefully before the paint fully cures to prevent cracking and staining.
You should remove dust, widen gaps slightly if needed, and apply a flexible masonry sealant into seams; smooth it flush so paint adheres evenly.
Allow the sealant’s tack time to pass, then spot-prime where necessary to match paint color and bonding.
Work in moderate temperatures and avoid heavy moisture while curing.
Check corners again after 24–48 hours for shrinkage, and reapply sealant or touch up primer and paint color to maintain a uniform, durable finish.
Textured Surface Techniques
After sealing joints, pay close attention to how textured surfaces and corners shed or hold moisture as the paint dries. You’ll inspect ridges and recesses where textured patterns trap dampness, adjusting ventilation or using a soft fan to promote even evaporation.
For decorative finishes, avoid brushing hard across raised areas; instead, dab or roll gently to preserve texture. When corners stay wet longer, reduce humidity and keep temperature steady.
- Check edges daily for pooling or slower drying.
- Use targeted airflow, not direct heat, on textured patterns.
- Touch-test decorative finishes before applying a second coat.
Protecting Fresh Cement Paint From Rain and Condensation
When rain or heavy condensation threatens a fresh cement paint job, act fast to shield the surface so the finish cures properly and you don’t end up with streaks, blistering, or peeling. You’ll use temporary covers—tarps, plastic sheeting, or pop-up canopies—secured to prevent pooling and wind damage.
Schedule painting for dry windows and monitor forecasts; adjust application techniques to allow longer open time and lighter coats in humid conditions. If moisture appears, gently blot drips and keep the area ventilated to reduce condensation.
After rain, inspect for washing or color fading and touch up only when the substrate fully dries.
How Foot Traffic Affects Cured Cement Paint Strength and Timing
Shielding fresh cement paint from rain or condensation is only part of getting a durable finish—how people use the area afterward matters just as much.
You should wait full cure before steady foot traffic; early walking compresses the surface and can reduce long-term strength. Light, intermittent use after a week is usually fine, but heavy traffic needs longer curing to prevent wear, decorative patterns distortion, and accelerated color fading.
- Light traffic: 7–14 days.
- Moderate traffic: 14–28 days; use mats.
- Heavy traffic: 28–60 days; restrict access and monitor.
Common Drying Problems: What Each One Looks Like
If you spot blotchy patches, powdery residue, peeling edges, or unusually fast or slow drying, you’ve likely run into a common cement paint drying problem.
Blotches mean uneven evaporation or poor mixing, harming color consistency.
Blotchy patches indicate uneven evaporation or poor mixing, leading to inconsistent color and finish.
A powdery surface (efflorescence or incomplete curing) rubs off and dulls finishes.
Peeling or flaking signals adhesion failure—look for loose substrate or moisture beneath.
Rapid skinning with wet underlayer creates trapped moisture, while slow drying often follows high humidity or thick application.
Tiny blisters or pinholes show trapped air or solvent release.
Texture enhancement attempts can reveal these flaws, so inspect finishes closely.
Fixing Runs, Blistering, or Powdery Surfaces After Drying Issues
Although it’s frustrating to find runs, blisters, or a powdery finish after waiting for cement paint to dry, you can usually repair these issues without redoing the whole job. Start by identifying the cause—poor surface preparation, moisture, or incompatible undercoats—and isolate affected areas.
For each problem, follow targeted steps:
- Sand smooth and feather edges for runs, then spot-prime and repaint.
- Cut out blisters, allow substrate to dry, treat for moisture, patch, prime, repaint.
- Remove powdery residue by washing or abrading, improve surface preparation, prime to prevent cement paint peeling.
Test a small area before full repairs.
Choosing Cement Paint Products With Reliable Fast Drying
When you need a fast-drying cement paint, focus on formulations and labels that promise quick tack-free and recoat times—these give you the practical drying performance you’ll experience on the wall. You’ll prioritize products listing fast-evaporating solvents or advanced acrylic binders; they shorten open time without sacrificing adhesion.
Check Brand reputation through reviews and trade recommendations so you’re not chasing unproven claims.
Consider Color selection too, since darker pigments can retain heat and affect drying speed; test a small patch in the actual conditions.
Buy from reliable suppliers, follow product instructions, and you’ll cut waiting time with confidence.
How to Read Manufacturer Drying and Curing Claims
After you’ve picked a fast-drying cement paint and tested a small patch, the next step is to read the manufacturer’s drying and curing claims so you know what to expect on site. Check labels for specific times (touch, recoat, full cure) and note conditions like temperature and humidity.
Assess how cement composition and paint pigmentation affect stated times—lighter pigments often dry differently than heavy pigmentation, and binder ratios matter. Compare claims to your test patch.
- Verify touch, recoat, and full cure times.
- Confirm test conditions match your site.
- Note additives, primers, and substrate recommendations.
Plan Schedules Using Realistic Cement Paint Drying Windows
If you want your project to stay on schedule, build drying windows into each task so you’re not surprised by hold-ups or rushed recoats. Plan realistic intervals based on temperature, humidity, and manufacturer times, then add buffer hours for slower curing.
Sequence tasks so surfaces get adequate ventilation and aren’t recoated during high moisture. Track actual dry times on-site and adjust subsequent windows to protect cement paint aesthetics and guarantee color retention.
Communicate windows to your crew and clients, noting when touch-ups or final inspections can occur. That discipline prevents rework, preserves finish quality, and keeps timelines credible.
Estimating Materials by Target Dry Film Thickness
Now that you’ve built realistic drying windows into your schedule, you’ll want to estimate how much paint you need by targeting a specific dry film thickness (DFT). Choose a DFT based on substrate, expected wear, and cement composition; thinner films dry faster but may need more coats.
Consider pigment effects on coverage—heavily pigmented mixes can reduce spread rate. Measure area, convert DFT (microns) to volume, and add allowance for waste.
- Calculate area × desired DFT.
- Adjust for cement composition and primer absorption.
- Factor pigment effects and application method for final quantity.
Documenting Drying Conditions for Warranties or Disputes
When you document drying conditions for warranties or disputes, record objective evidence—date and time, ambient temperature and humidity, surface temperature, ventilation, and any weather events—so you can prove the conditions that affected cure.
Take photos with timestamps, log measurements from reliable thermometers and hygrometers, and note substrate prep and application details.
Include batch numbers if you used specific cement paint recipes or eco-friendly alternatives so manufacturers can trace materials.
Store records securely and share copies with contractors or clients.
Clear, consistent documentation strengthens warranty claims and resolves disputes by showing you followed or deviated from specified curing conditions.
How Pros Schedule Multi-Day Cement Paint Jobs
How do professionals keep multi-day cement paint projects on track? You plan around drying windows, staging crews to control color saturation by applying consistent coats, and monitor weather to limit environmental impact. You also coordinate supplies and client access.
Professionals plan around drying windows, stage crews for consistent coats, monitor weather, and coordinate access.
- Sequence tasks by cure time: primer, base coats, touch-ups.
- Schedule inspections after tack-free and full cure milestones to catch saturation shifts.
- Use covers and ventilation to mitigate humidity and pollution that affect drying.
You communicate daily updates, adjust timelines if conditions change, and document readings so you can justify schedule tweaks and preserve finish quality.
Maintaining Cured Cement-Painted Surfaces for Long Life
Because a properly cured cement paint forms a durable but breathable layer, you can extend its life with regular, targeted care. Inspect yearly, wash gently, and touch up chips using compatible cement composition and matching Application techniques to avoid delamination. Control moisture, fix cracks promptly, and keep vegetation away. Recoat only when adhesion tests pass.
| Task | Frequency | Tip |
|---|---|---|
| Inspect | Annual | Look for hairline cracks |
| Clean | Biannual | Use mild detergent |
| Touch-up | As needed | Match composition |
| Recoat | Every 5–10 yrs | Test adhesion first |
These steps keep surfaces sound and appearance consistent.
Frequently Asked Questions
Can Cement Paint Be Applied Over Damp Concrete Without Waiting for Full Dryness?
No, you shouldn’t apply cement paint over damp concrete; you risk poor cement paint curing and compromised paint color stability, so wait until the surface is dry and moisture-free to guarantee proper adhesion and lasting color.
Will Additives Used to Speed Drying Alter Long-Term Paint Color or Sheen?
Yes — additives can affect color stability and sheen consistency over time; you’ll notice slight shifts or uneven gloss, especially with strong accelerators. Test a small area and follow manufacturer guidance to minimize long-term changes.
Can Sealed or Waterproofed Substrates Extend Cement Paint Curing Times?
Yes — sealed or waterproofed substrates can slow curing: they trap moisture, restrict breathability, and alter adhesion. You’ll need thorough surface preparation and verify paint compatibility so coatings bond, dry properly, and resist peeling or delayed cure.
Does Paint Thickness Measurement Require Special Tools for Cement Paints?
No, you don’t always need special tools; you can judge paint consistency and use application techniques for rough estimates, but for precise thickness you’ll want a wet film comb or dry film gauge—those give reliable, repeatable measurements.
Are VOCS and Ventilation Requirements Different for Fast-Drying Cement Paints?
Want safer air while painting? You’ll find VOC levels often similar, but fast-drying cement paints can demand stricter ventilation standards due to quicker off-gassing, so you’ll follow recommended airflow and protective measures.
Conclusion
Now you know the truth: cement paint doesn’t vanish overnight — it slowly toughens like a stubborn superhero. You’ll wait hours for surface-dry, days to recoat, and weeks for full cure, depending on temperature and thickness. Track conditions, plan multi-day schedules, and estimate materials carefully, or expect sticky, flaky drama. Follow best practices and your finish will outlast your patience — and maybe even the building itself.