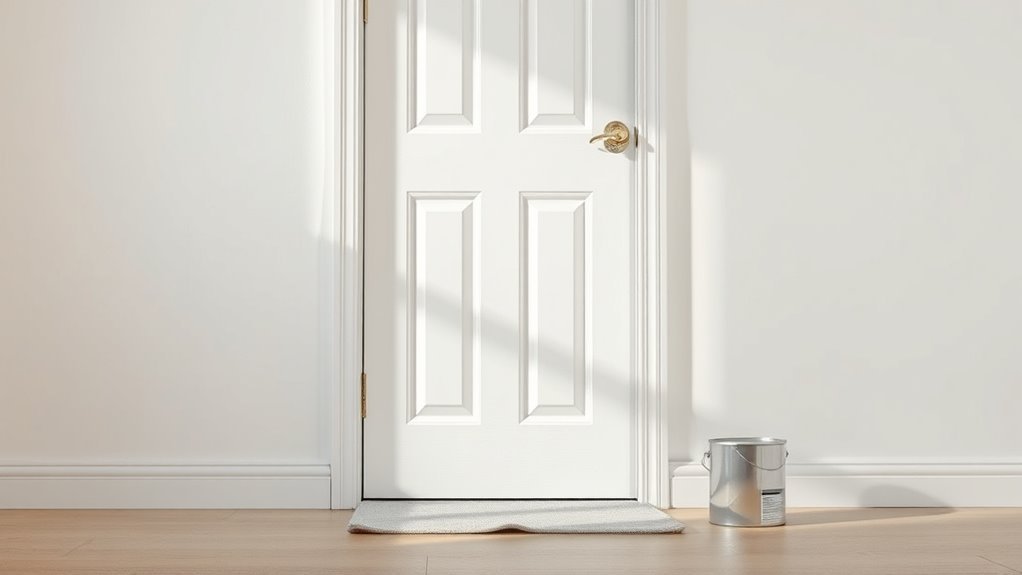
How Long Does Door Paint Take to Dry
You can expect a painted door to be touch‑dry in about 30 minutes to 8 hours depending on paint type and conditions, with latex usually ready faster and oil‑based taking longer. You can rehung or handle it lightly after 24–72 hours, but full cure for maximum hardness and durability often takes 7–30 days. Humidity, temperature, coat thickness and ventilation change times, so follow those cues — keep going to learn practical tips and timing details.
Quick Answer: When a Painted Door Is Ready to Rehang or Use
If you need the short version, a painted door is usually dry enough to rehang or use for light handling after 24 hours with latex paint and 48 hours with oil-based paint.
Full cure can take up to 7–30 days depending on paint type and conditions. You’ll handle it gently to avoid smudges while paint texture sets and color accuracy stabilizes.
Check edges, hinges, and high-contact spots for tackiness before rehanging. If paint feels firm and resists fingerprints, you’re okay to reinstall.
Wait longer when humidity’s high or temperatures are low to guarantee a proper finish.
Dry vs. Fully Cured: What Those Terms Mean for Doors
When you touch a painted door and it feels dry, that usually means the surface has set enough to handle light use.
Fully cured means the paint has reached its maximum hardness and chemical resistance, which can take days or weeks depending on the formula.
Understanding the difference helps you decide when it’s safe to rehange the door, install hardware, or subject it to heavy wear.
Dry vs. Cured Defined
Although a painted door might feel dry to the touch within hours, “dry” and “fully cured” mean two different things for performance and durability. You’ll notice dry means surface tack is gone; cured means the coating has reached full hardness and chemical stability.
Color options or paint finishes don’t change those definitions, though they affect cure time. Humidity, temperature, and coat thickness influence how long full cure takes.
- Dry: no tack, can handle light contact
- Tack-free: solvent evaporation mostly finished
- Through-cure: solvents and binders fully reacted
- Full cure: maximum hardness and abrasion resistance
Practical Implications For Doors
Because a painted door can look and feel ready long before it’s actually at full strength, you should treat “dry” and “fully cured” as different milestones that affect how you use and protect the door.
When paint is dry to the touch, you can rehung door hardware and open the door gently, but avoid heavy use.
Full cure means the finish resists scuffs, oils, and humidity—wait before slamming, wiping frequently, or changing paint color styling.
Interior doors often cure in days to weeks; exterior doors and dark paint color may take longer.
Plan use, protect edges, and delay installing final trim until cured.
Typical Dry Time: Water-Based (Latex) Door Paint
If you’re using water-based (latex) paint on a door, you’ll usually see it become touch-dry in about 30 minutes to an hour under normal indoor conditions.
You’ll want to wait longer before recoating or handling—typically 2 to 4 hours between coats and 24 to 48 hours for light use.
Dry time shifts with humidity, temperature, ventilation, and coat thickness.
Paint color affects perceived dryness; darker colors may show imperfections sooner.
Choice of brush types influences finish and film thickness, altering cure slightly.
- Thin, even coats dry faster
- Warm, dry rooms speed drying
- Good airflow helps cure
- Avoid heavy buildup
Typical Dry Time: Oil-Based Door Paint
With oil-based door paint, you’ll want to separate drying from curing — the surface may feel dry long before the finish hardens fully.
Expect touch-dry times around 6–8 hours, with safe recoating typically after 24 hours under good conditions.
Full cure can take several days to a week, so handle the door gently until the finish hardens completely.
Drying Vs. Curing
When you paint a door with oil-based paint, remember that “dry” and “cured” mean different things. You’ll notice touch-dry times sooner, but full cure takes days to weeks, affecting durability, color psychology, and how paint texture settles. Don’t rush use or heavy cleaning.
- Appearance: sheen and color deepen as solvents evaporate.
- Feel: glossy, tacky, or smooth changes during curing.
- Use: hinges and hardware can mar partly cured surfaces.
- Protection: cured paint resists scratches, stains, and moisture better.
Plan projects so traffic and humidity won’t interfere with the longer curing process.
Typical Touch Dry
After curing considerations, you’ll want to know how quickly oil-based paint will feel dry to the touch—typically that’s 6 to 8 hours under normal conditions. You’ll notice initial tackiness fades as solvents evaporate, and factors like temperature, humidity, and ventilation directly affect that window.
Smooth paint texture dries differently than heavy brush strokes, so run a fingertip gently to check for tack. Remember that color psychology can influence how you perceive dryness—darker hues may seem richer and mask slight tackiness.
Always test discreetly; if it resists light pressure, wait longer before handling to avoid marks.
Recoat And Full Cure
Although the surface may feel touch-dry in 6–8 hours, you should usually wait 24 hours before recoating oil-based door paint to guarantee proper adhesion and a smooth finish. You’ll avoid lifting the first layer and preserve paint texture by allowing that initial cure.
For full cure, expect 7 days for light handling and up to 30 days for complete hardness. Check color matching after the first coat dries; sheen shifts can affect perceived hue.
If you sand between coats, use fine grit and clean thoroughly to maintain adhesion and finish quality.
- Smooth, slightly tacky initial feel
- Minor sheen change after drying
- Gentle sanding needed for flaws
- Full hardness develops over weeks
How Many Coats Change Total Dry and Recoat Time

Because each additional coat adds both wet time and the necessary curing window, the number of coats you apply directly increases total dry and recoat time. You’ll plan more time for decorative finishes or eco friendly options because multiple thin coats dry faster than fewer heavy ones. Typically, two coats balance coverage and speed; three coats improve durability but extend recoat intervals. Between coats, wait the manufacturer’s recommended tack-free time, and for full cure multiply that by coats applied. Track times to avoid smudges or delayed use.
| Coats | Typical Effect |
|---|---|
| 1 | Fastest finish |
| 2 | Best balance |
How Primer Changes Drying and Recoat Expectations
Adding primer before your topcoats changes both drying and recoat expectations, since primers absorb and seal differently than finish paints and alter how subsequent layers bond and dry. You’ll notice primer effects in faster tack-free times but sometimes longer full cure, and this corrects many drying misconceptions about “paint drying fast.”
Use primer to improve adhesion and reduce blotching, but expect recoat windows to depend on primer type.
- Oil-based primer: longer dry, wider recoat window
- Water-based primer: quicker tack-free, shorter wait
- Stain-blocking primer: needs full cure for topcoat
- High-build primer: smooths surface, may slow curing
How Surface Material (Wood, MDF, Metal) Affects Dry Time
When you paint a door, the material beneath the finish—whether solid wood, MDF, or metal—directly changes how quickly the paint dries and cures because each surface soaks up, bonds with, and conducts moisture differently. You’ll find wood absorbs primer and can speed initial drying; MDF soaks edge areas more and may feel tacky longer; metal stays slick, so solvent evaporation dominates drying. Paint color can slightly affect heat absorption and drying speed, while paint texture interacts with surface porosity. Use the table to compare typical effects.
| Material | Dry Time Influence | Notes |
|---|---|---|
| Wood | Moderate | Varies with grain |
| MDF | Slower at edges | Needs sealing |
| Metal | Faster surface dry | Cures by solvent loss |
| All | Finish-dependent | Consider paint color and paint texture |
How Paint Sheen (Satin, Semi-Gloss, Gloss) Affects Drying and Durability
When you pick a sheen for your door—satin, semi-gloss, or gloss—you’ll notice small but important differences in how quickly the paint feels dry to the touch.
Higher sheens (semi-gloss and gloss) typically cure a bit faster and form harder, more durable surfaces that resist scuffs and clean more easily.
That means if durability and easy maintenance matter, choosing a higher-sheen finish can save you time and wear over the long run.
Sheen And Dry Time
Because paint sheen changes film thickness and pigment concentration, it also influences how quickly a door dries and how well the finish resists wear. You’ll notice gloss dries faster to touch than satin because it lays thinner. Pigment load and Paint color can affect cure time, and your Brush type influences film uniformity. Choose sheen based on use and drying needs, not just look.
- Satin shows moderate sheen, slightly longer tack time.
- Semi-gloss balances dry speed and smoothness.
- High gloss dries quickest to the touch.
- Lower sheen may need extra coats and longer open time.
Adjust airflow and temperature for best results.
Durability And Finish
If you want a durable door that dries efficiently, pick the right sheen: satin, semi-gloss, or high gloss. Each change how the film forms, how fast solvents evaporate, and how the finish resists scuffs and moisture.
You’ll find satin hides imperfections and dries moderately, offering balanced durability for muted paint color choices.
Semi-gloss speeds surface drying, boosts abrasion resistance, and suits doors that see traffic.
High gloss forms the toughest, quickest-to-cure surface but highlights flaws and emphasizes paint color differences.
Match finish sheen to use: choose glossier for durability and washability, satin when you want subtlety with reasonable resilience.
How Paint Thickness and Application Affect Dry Time
Although thicker coats can give better coverage, they also trap solvents and extend drying time. Therefore, you should apply paint in even, moderate layers rather than one heavy pass.
You’ll notice paint texture affects how solvent escapes; rough, thick texture slows curing and can alter color consistency across the door. Use smooth, controlled strokes and thin successive coats to maintain an even finish.
Watch for runs and sagging; sand lightly between coats if needed. Good technique helps drying and appearance.
- Thin, even coats dry faster
- Smooth application improves paint texture
- Sanding evens color consistency
- Avoid heavy brush loading
Ideal Temperature Range for Faster Drying
For fastest drying, aim to paint when temperatures are in the manufacturer’s recommended window—usually between about 50°F and 85°F—since too cold or too hot slows curing.
You’ll also want moderate humidity and good ventilation, because high moisture traps solvents and poor airflow prolongs tackiness.
Adjust your schedule or use a dehumidifier/fan to keep conditions within that ideal range.
Optimal Temperature Window
When you want paint on a door to dry quickly and evenly, aim for a consistent temperature between about 65°F and 75°F (18°C–24°C); this range balances solvent evaporation and film formation without trapping moisture or causing skinning. You’ll get reliable drying times within that window, preserve paint texture, and avoid finish flaws.
Cooler temperatures slow curing; hotter conditions can cause bubbling or tacky surfaces. Consider color psychology when choosing sheen and hue, since perceived warmth affects satisfaction. Check cans for manufacturer guidance and adjust your schedule accordingly.
- Smooth, even finish in the ideal window
- Reduced risk of skinning
- Predictable recoat times
- Preserved paint texture
Humidity And Ventilation
Because moisture in the air and how well you move it out directly affect drying, keep relative humidity between about 40% and 50% and guarantee steady ventilation so solvent and water evaporate rather than linger on the film.
You’ll speed drying by running fans, opening windows, or using a dehumidifier, especially in cooler weather. Monitor conditions with a hygrometer and adjust airflow to avoid trapped damp pockets that dull door color or alter paint texture.
Strong ventilation prevents tackiness and reduces dust settling, but don’t blast cold air that can cause blushing; balance temperature and airflow for consistent cure.
How Humidity Slows Drying and What to Do
Although high humidity slows paint evaporation, you can still get good results if you control the environment. Moist air lengthens tack and cure times, so you’ll notice slower recoat intervals and longer dust-attraction windows. Paint color and finish sheen can look muddier or tackier in damp conditions, so plan accordingly.
- Use dehumidifiers to lower relative humidity before and during drying.
- Warm the room slightly to help evaporation without overheating.
- Apply thinner coats to reduce trapped moisture and improve flow.
- Wait longer between coats; test tackiness near edges before proceeding.
These steps keep your door paint curing predictably.
How Ventilation and Airflow Speed Up Drying
You can speed door paint drying by improving ventilation and airflow around the surface. Increase air circulation with a circulating fan.
Run exhaust fans to pull moist air away, and open windows or doors to create a cross breeze. These steps help solvents evaporate faster and shorten drying time.
Increase Air Circulation
When you boost airflow around a freshly painted door, evaporation speeds up and solvents leave the finish faster, cutting overall dry time. You’ll want steady cross-ventilation, gentle fans, and clean air to reduce dust. Proper air filtration helps keep particles off the wet surface, and moving air reduces the chance of color fading from prolonged solvent exposure.
- Position fans to draw fresh air across both sides of the door.
- Use window openings or screened vents for constant exchange.
- Keep traffic low to avoid dust and smudges.
- Monitor humidity; increased circulation won’t help if air is saturated.
Use Exhaust Fans
Because exhaust fans pull moist, solvent-laden air away from the painted surface, they speed drying by keeping the surrounding air drier and preventing vapors from lingering. You should position a fan to capture fumes and vent them outside, which reduces tackiness and shortens recoat time.
Monitor temperature and humidity—fans work best with moderate warmth. Avoid blasting with overly strong suction that could disturb wet paint or cause uneven sheen, especially where color contrast is critical.
When you’re doing paint mixing nearby, run fans to remove odors and solvents so pigments settle uniformly and curing proceeds predictably.
Create Cross Breezes
If you set up opposing windows or doors to draw fresh air through the room, cross breezes speed evaporation by replacing humid, solvent-rich air at the paint surface with drier air. You’ll want airflow directed across the door frame so solvent molecules move away quickly, reducing tack time and helping paint sheen cure evenly.
Position fans to guide air, not blast paint. Monitor temperature and humidity; extreme drafts can cause dust to stick. A steady, gentle breeze promotes uniform drying and prevents runs.
- Open window opposite the door
- Low-speed fan near ceiling
- Exhaust toward outdoors
- Seal nearby vents to control flow
How to Tell If Paint Is Ready to Rehang a Door
Although paint might feel dry to the touch, you’ll want to check a few key signs before rehanging a door to avoid smudges, sticking, or finish damage.
Inspect paint texture for uniformity—no tacky spots, glossy fingerprints, or dimples. Gently press an inconspicuous corner; if it resists indentation and no residue transfers, it’s likely cured enough for handling.
Verify edges and hinge areas similarly, ensuring the finish hasn’t softened.
Confirm color matching across panels and trim after full drying; shadows can hide mismatches.
If you’re unsure, wait longer—overnight or the manufacturer’s recommended cure time prevents costly touch-ups.
Test Painted Door Edges Before Closing
Before you close the door for the first time, test a small hidden area on the edge to make sure the paint’s set. Check the edge dryness daily so you catch any tackiness early.
Make sure the paint film is intact and not cracking or peeling before rehanging or regular use.
Test Small Hidden Area
When you’ve finished painting, test a small hidden edge of the door—like the bottom or inside jamb—so you can confirm the finish is fully dry and doesn’t stick before closing the door. You’ll check around door hardware and observe whether the paint color matches the rest of the surface when dry.
Gently press with a fingertip or a clean cloth; any tackiness means wait longer. If it’s dry, close slowly and watch for dragging. If it smudges, remove buildup and let cure more.
- Fingertip press at corner
- Cloth swipe on jamb
- Inspect near latch
- Check under door edge
Check Edge Dryness Daily
If you’ve painted the door edges, check them daily so you catch any tackiness before closing. Gently press a fingertip along the top and sides and run a clean cloth under the edge to confirm there’s no drag or transfer.
You’ll notice drying varies with paint color and humidity, so repeat checks each morning.
Pay attention to edge buildup from heavy brush techniques that trap solvent; thin, even strokes dry faster. If you detect residue, leave the door open and avoid slamming.
Keep records of each check so you know when edges match the face in dryness and won’t stick or mar adjacent surfaces.
Ensure Paint Film Integrity
You’ve checked for tackiness at the edges; now verify the paint film will hold up under normal use by testing the edges before you close the door. Gently press a corner with a fingertip, then slide a clean cloth along the mating edge to check for transfer or snagging. If paint lifts, revisit paint priming and allow full cure time.
Also inspect color blending at overlaps to ensure uniform finish. Perform simple, repeatable checks before reattaching hardware.
- Press corner gently to test adhesion
- Slide cloth to detect transfer
- Open/close slowly to feel snags
- Recheck after 24–48 hours of cure
When It’s Safe to Handle a Painted Door Without Fingerprints
Although paint may feel dry to the touch within a few hours, it’s not always safe to handle a painted door without leaving fingerprints until the finish has had more time to cure.
You should wait until the paint has reached handle-ready hardness—often 24–72 hours for latex, longer for oil-based or high-gloss finishes.
Consider how painting techniques and color selection affect drying: thin, even coats and lighter pigments dry faster.
Test discreetly by pressing a clean fingertip on an edge; if it smudges or leaves oil, wait longer.
Use gloves if you must move the door before full cure.
Quick-Step Checklist Before Rehanging a Painted Door
Before rehanging the door, confirm the paint has reached handle-ready hardness and inspect both sides for runs, drips, or tacky spots that could be mar the finish. Check alignment, hardware fit, and that paint color selection matches surrounding trim. Verify edges are sanded smooth and touch-ups cured. Test the latch and strike plate before final mounting.
Before rehanging, ensure paint is fully cured, inspect for runs or tacky spots, verify alignment and hardware fit.
- Clean hinge mortises and screw holes; perform basic door hinge maintenance.
- Reinstall hinges one at a time to prevent scuffing.
- Use soft pads or towels to protect painted surfaces while positioning.
- Cycle the door gently several times to confirm smooth operation and finish integrity.
Speed Drying Safely: Heaters, Dehumidifiers, Fans
Once the door is rehung and you’ve confirmed the finish is handle-ready, you can speed up drying with heaters, dehumidifiers, and fans—but you must use them carefully to avoid finish problems. Use low, even heat; keep dehumidifiers steady; angle fans for gentle airflow. Monitor temperature and humidity to prevent bubbling, ambering, or tackiness. Consider how color psychology and historical door styles influence perceived dryness—darker hues show flaws sooner. Trust slow curing over haste when unsure.
| Tool | Tip |
|---|---|
| Heater | Low, steady |
| Dehumidifier | Constant RH |
| Fan | Gentle airflow |
| Monitor | Temp & RH |
Why Hairdryers and Heat Guns Can Ruin a Finish
When you blast a drying finish with a hairdryer or heat gun, the rapid, uneven heat can soften the binder and trap solvents beneath a skin that forms on the surface, causing bubbling, blushing, or a tacky finish. You’ll risk lifting layers, ruining smoothness, and warping thin wood panels in certain door design profiles.
Heat also alters pigment settling, so your chosen paint color can streak or haze. Instead, let paint cure gradually at moderate temperature and humidity.
- Bubbling across raised panels
- Blushing near edges and grooves
- Tacky spots under glossy coats
- Warped trim or swollen joints
Best Paint Features for Quick-Drying Doors
If you want doors that dry fast without sacrificing durability, look for paints formulated with fast-evaporating solvents or rapid-cure waterborne resins—these shorten surface and tack-free times so you can recoat sooner. You’ll want low-VOC formulas, high-solids binders, and satin or semi-gloss sheens for quick drying and easy cleaning. Consider finish durability, adhesion promoters, and additives that reduce tack. For Color coordination and paint color selection, pick colors that hide brush marks and suit traffic levels. Compare features at a glance:
| Feature | Benefit | When to Use |
|---|---|---|
| Low-VOC | Faster air-dry, safer | Indoor doors |
| High-solids | Durable film | High-traffic |
| Satin/semi-gloss | Quick, cleanable | Entry doors |
| Rapid-cure resin | Short recoat time | Fast projects |
Fast-Dry Paint Brands and Formulations to Consider
When you need doors ready fast, consider fast-dry alkyds for their durable, quick-setting film.
Waterborne quick-dry enamels are also a good option for lower odor and faster tack-free times.
You can also look at specific brands that advertise rapid recoat windows and compare their VOC and gloss levels.
If you need to speed things further, additives exist that safely accelerate drying without sacrificing finish.
Fast-Dry Alkyd Options
Because you don’t always have days to wait between coats, fast-dry alkyds give you the durability of traditional oil-based paint with much quicker recoat times. You’ll get hard, glossy finishes that suit vintage door styles while some newer formulas advertise eco-friendly finishes to reduce odor and VOCs.
Choose products labeled quick-dry alkyd or synthetic alkyd for entry doors and high-traffic interiors. Apply thin coats, sand lightly between coats, and allow manufacturer-specified hours before recoat.
- Smooth, furniture-like sheen
- Good adhesion on trim and metal
- Moderate VOC variants available
- Recoat in 4–6 hours on average
Waterborne Quick-Dry Enamels
Though they dry even faster than traditional alkyds, waterborne quick-dry enamels still give you a tough, smooth finish that stands up to frequent use.
You’ll find several brands offering low-odor formulas that level well, resist yellowing, and tolerate cleaning — ideal for high-traffic doors.
Pick a sheen that complements your paint color and hides brush marks; satin and semi-gloss are popular.
Apply thin coats, watch tack-free times (often 30–60 minutes), and avoid installing door hardware until full cure.
These enamels suit both interior and exterior doors when you need fast turnaround without sacrificing durability.
Additives To Accelerate Drying
If you want an even faster turnaround than waterborne quick-dry enamels provide, additives can speed tack-free times and shorten cure without sacrificing finish quality. You’ll add accelerators or catalysts per label, testing small areas to confirm color contrast and paint texture remain acceptable. Use sparingly—too much alters gloss and adhesion. Match additive type to base (water or solvent) and follow pot-life limits.
Consider brands offering low-odor, fast-cure formulas for doors.
- Fast-acting waterborne accelerators for reduced recoat time
- Solvent-based catalysts for industrial-grade speed
- Humectants to tweak paint texture subtly
- Anti-skin agents for brush applications
How to Reduce Tackiness Between Coats
When you’re painting a door, tackiness between coats usually comes from trapped solvents or an overly thick layer, so you’ll want to promote faster curing and better solvent evaporation. Work in thin, even coats and wait the manufacturer’s minimum recoat time.
Improve airflow with a fan or open windows, but avoid dust blowing onto wet paint. Use low-VOC formulas or fast-drying additives compatible with your paint to reduce tackiness without harming door security hardware.
Light sanding with fine grit between tacky coats helps adhesion. Consider how paint color choices affect heat absorption and drying speed on exterior doors.
Common Mistakes That Extend Drying Time
Because small mistakes add up, a few common missteps can easily double or triple your door’s drying time. You’ll slow curing by applying thick coats, skipping proper sanding between layers, or painting in high humidity.
Leaving door hinges attached traps moisture around frames and creates uneven drying. Poor ventilation lets paint fumes linger and delays solvent evaporation.
- Applying overly thick coats
- Painting in damp or cold conditions
- Skipping sanding or proper prep
- Keeping door hinges and hardware on
Avoid these errors: work in a dry, ventilated space, use thin coats, and remove hardware when possible to speed drying.
Prevent Sticking When Closing a Freshly Painted Door
Even with proper prep and thin coats, a freshly painted door can still stick if paint builds up along edges or around hardware, so take steps to prevent the problem before you close it. You’ll mask gaps, leave the latch slightly open, and consider temporary spacers while paint cures. For thorough Door maintenance, remove or loosen trim and perform hardware removal if needed so components don’t bind. Check sash gaps and sand burrs after tack-dry. Use a pencil to mark high spots and a block plane or fine sandpaper once fully cured.
| Step | Action | Timing |
|---|---|---|
| 1 | Mask gaps | Before painting |
| 2 | Loosen latch | After tack-dry |
| 3 | Use spacers | During drying |
| 4 | Inspect edges | Tack-dry |
| 5 | Final sand | After cure |
Fixing Runs, Bubbles, or Wrinkles From Premature Handling
If you handle a door too soon and notice runs, bubbles, or wrinkles, act quickly but calmly: let the finish fully dry to the touch, then sand the defects smooth with fine-grit paper. Clean the surface, and recoat thinly to blend repairs.
You’ll assess whether the blemish is a surface wrinkle or trapped bubble, then sand just enough to level it. Match paint color and paint sheen to the surrounding area to avoid obvious touch-ups.
Work in thin layers, letting each coat dry fully before the next. Use proper ventilation and a tack cloth to remove dust.
- small raised runs along edge
- blistered bubbles near panels
- wrinkled ripples from brushing
- subtle sheen mismatch spots
How Long Before You Can Reinstall Hardware and Locks
Once the paint feels dry to the touch, don’t rush to reattach hardware—wait until it’s fully cured to prevent smudges, indentations, or adhesive failures. You’ll typically wait 24–72 hours for light handling, and up to a week for heavy-use locks. Test an inconspicuous spot; if finish resists fingerprints and won’t dent, proceed. Consider door accessories and paint color selection when reinstalling to guarantee contrast or concealment. Keep screws and plates on soft padding to prevent scratches. Use gentle torque and avoid forcing misaligned holes.
| Item | Wait Time | Tip |
|---|---|---|
| Knobs | 24–48 hrs | Test gently |
| Deadbolts | 72+ hrs | Align first |
| Plates | 48–72 hrs | Pad hardware |
How Curing Time Affects Long-Term Durability and Cleaning
Although the paint may feel dry, it keeps curing beneath the surface for days to weeks, and that ongoing chemical change determines how well the finish resists wear, cleaning, and stains. You should avoid heavy scrubbing and harsh cleaners until curing advances; premature cleaning can dull gloss, hinder color blending, or reveal imperfect pattern matching.
Though surface-dry, paint keeps curing for days to weeks—avoid harsh scrubbing until the finish fully hardens to protect gloss.
Over weeks, coatings harden, improving abrasion and stain resistance, so gentle maintenance early preserves the long-term look. Expect improved durability after full cure and follow manufacturer timelines for best results.
- Wait before aggressive cleaning to protect the finish
- Use mild cleaners and soft cloths
- Check hinges for paint transfer
- Touch up chips after full cure
Seasonal Tips: Painting and Drying in Winter vs. Summer
Beyond curing timelines, the season you paint in has a big impact on how quickly paint dries and how well it ultimately cures. You’ll choose strategies based on humidity, temperature, and ventilation: in winter, warm, dry indoor air speeds evaporation but may hinder curing; in summer, higher temps speed drying but humidity can stall it. Consider color psychology and paint color trends—darker hues absorb heat, lighter ones reflect it, affecting dry time. Use the table below to compare seasons and pick techniques that suit your project.
| Winter | Summer |
|---|---|
| Lower humidity | Higher humidity |
| Use heaters | Use dehumidifiers |
| Slow curing | Fast skinning |
| Warm temps help | Ventilate well |
| Watch for blush | Watch for tackiness |
Time-Saving Workflow: Paint, Dry, and Rehang Multiple Doors
When you’re painting several doors, plan a staged workflow so you can paint, dry, and rehang each one without blocking doorways or wasting time. You’ll prep and label doors, choose finishes considering color psychology to suit rooms, and pick brush/roller combos that match paint texture for smooth coverage.
Set up drying racks, schedule coats by room priority, and keep hardware stored per door.
- Remove doors, hinges, and knobs; label each clearly
- Paint one side, dry on rack, then flip for second side
- Rotate doors by room priority so high-traffic rooms finish first
- Rehang as soon as final cure allows
Frequently Asked Questions
Can Painted Doors Be Refinished or Sanded Before Full Curing?
Yes — you can sand or refinish painted doors before full curing, but you’ll risk tackiness or blush. Consider door paint curing progress and maintain proper paint drying temperature to avoid damage and guarantee smoother results.
Do VOCS From Drying Paint Require Special Ventilation Times?
Yes — you should ventilate until VOC emissions drop, like airing out a smoky room; you’ll keep windows open and use fans, adjusting times for drying temperature and paint type so lingering fumes don’t bother you.
How Do Stains or Sealers Under Paint Affect Drying and Curing?
Stains or sealers under paint can speed or slow drying and curing; you’ll want to prevent stain interference because poor paint adhesion occurs if stains bleed through, so choose compatible sealer and test adhesion before finishing.
Will Painting Both Sides of a Door Cause Warping During Drying?
Yes, painting both sides can warp: balance coatings, match paint sheen and thickness, control humidity and temperature, and keep the door off the frame until cured; attach to the door frame only after full curing prevents distortion.
How Long Before Painted Door Trim or Jambs Can Be Painted Adjacent?
You can paint adjacent trim or jambs after 24–48 hours for latex, 48–72 for oil; choose door color choices and paint finish options that match, and test adhesion so you’ll avoid runs or tackiness.
Conclusion
When the last coat dries, your door will feel like a newly skimmed surface—smooth, cool, and ready. You’ll know it’s safe to rehang when it’s dry to the touch and tack-free; wait the full cure before slamming, cleaning, or reinstalling locks. Think of curing as the paint settling into its armor: patient time gives it strength. Follow seasonal tips and proper recoating intervals, and your doors will look fresh and hold up beautifully.