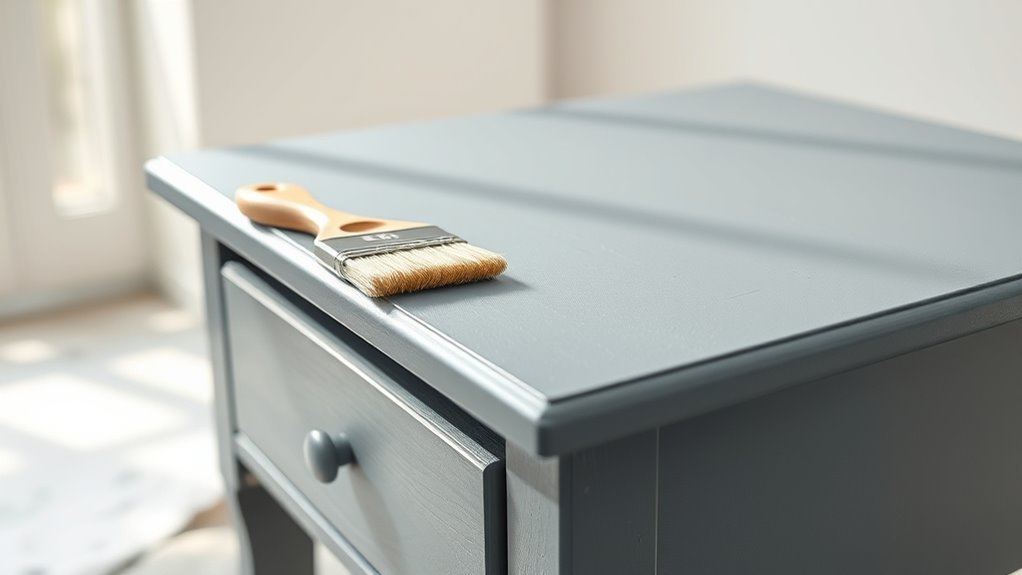
How Long Does It Take for Furniture Paint to Dry
You can usually handle newly painted furniture lightly within a few hours—latex and fast acrylics often feel dry in 30 minutes to 2 hours, chalk paint in 20–60 minutes, and spray finishes in 10–30 minutes. Oil-based paints take longer to be touch-dry (1–2 days) and need weeks to fully cure. Full hardness and heavy use typically require 1–4 weeks, sometimes longer in cool or humid conditions; keep going for tips on speeding or slowing the process.
Quick Answer: When Painted Furniture Is Dry and Ready
Although drying times vary by paint type and conditions, you’ll usually be able to handle painted furniture lightly within 1–2 hours, especially with latex or fast-drying acrylics. You’ll still wait 24 hours before heavier use and several days for full hardness.
Consider furniture design and paint color selection: darker colors can feel dry faster but may show imperfections, while intricate designs need longer before moving. Always test a hidden spot before stacking or reassembling.
Touch gently, avoid placing heavy objects, and follow manufacturer cure recommendations to guarantee the finish won’t dent, stick, or mar during initial use.
Chalk Paint Drying & Cure Times (Furniture)
When you use chalk paint on furniture, it dries to the touch quickly—often within 20–60 minutes—but it takes longer to harden and fully cure, typically several days to a few weeks depending on conditions and whether you seal it.
You’ll notice paint texture remains soft at first; light handling is fine after a day, but heavy use should wait until the finish firms. Temperature, humidity, and coat thickness affect cure time.
Wax or water‑based sealer speeds surface protection but full hardness can still require weeks. Match curing decisions to your furniture style and desired use to avoid damage.
Latex (Water‑Based) Paint Drying & Cure Times
If you’re using latex (water‑based) paint on furniture, expect it to feel dry to the touch within 30 minutes to an hour under normal conditions, but don’t assume it’s fully cured — hardening and full chemical cure usually take several days to a few weeks depending on temperature, humidity, coat thickness, and whether you sand or seal between coats.
You’ll notice faster drying with thin coats and warm, low‑humidity rooms. Plan sanding between coats if you want ultra‑smooth finishes or to follow current color trends for modern furniture styles. Careful curing prevents fingerprints and improves durability.
- Thin coats dry faster
- Sand between coats for smoothness
- Allow full cure before heavy use
Oil‑Based Paint Drying & Cure Times

With oil‑based paints you’ll notice the surface feels dry long before it’s fully cured, so don’t rush to reassemble or heavily use the piece.
Factors like temperature, humidity, ventilation, paint thickness, and the type of oil binder all affect how long curing takes.
I’ll explain what “dry to the touch” means versus full cure and how to speed or slow the process safely.
Drying Time vs. Curing
Although oil‑based paints often feel dry to the touch within a day or two, their true cure can take weeks to months, and you’ll need to treat that difference carefully when planning use of painted furniture. You can handle “dry” pieces for light staging, but you shouldn’t subject cured‑incomplete surfaces to heavy use.
Think about furniture styles and color coordination when scheduling a full reveal—delicate finishes need longer rest. Keep these quick rules in mind:
- Wait before stacking cushions or placing heavy objects.
- Use felt pads to prevent scuffs during curing.
- Schedule final styling after full cure for best durability.
Factors Affecting Cure
Because oil‑based paints cure by a chemical reaction—oxidation and polymerization—they can feel dry before they’re fully hardened, and several factors speed up or slow that process. You’ll monitor temperature, humidity, ventilation, coat thickness, and additives; each alters curing rates and final hardness. For furniture restoration you should control conditions to avoid tackiness or color shift that ruins color matching. Test with a hidden area. Expect weeks for full cure under ideal conditions. Use slow, even coats and proper solvents. Refer to manufacturer charts for specifics and don’t rush use or reassembly.
| Factor | Effect |
|---|---|
| Temperature | Faster at warmth |
| Humidity | Slows cure |
Spray Paint Drying & Cure Times
When you use spray paint on furniture, the surface will feel dry in 10–30 minutes.
But full cure can take several days to a week depending on the formula.
Factors like coat thickness, temperature, humidity, and ventilation all affect how quickly the paint hardens and reaches maximum durability.
To speed cure time, spray thin even coats, work in warm dry conditions, and boost airflow with fans or a dehumidifier.
Spray Paint Drying Time
If you’re using spray paint on furniture, expect the surface to feel dry to the touch within 10–30 minutes. But plan for several hours to handle pieces and 24–48 hours for most paints to reach a workable cure.
You’ll want to test small areas before moving pieces; different furniture styles and color matching can affect how you perceive drying. Light coats speed drying and reduce runs.
- Spray thin, even layers and wait between coats.
- Use a fan or ventilated space to help drying.
- Avoid heavy handling for 24–48 hours to ensure a stable finish.
Factors Affecting Cure
You’ve seen how surface dryness and handling times vary with spray paint; now look at what actually controls how long the paint takes to cure. You’ll notice that temperature, humidity, and airflow determine chemical reaction speed in coatings.
Thicker coats and slower-evaporating solvents extend cure time, while multiple layers create trapped solvents between films.
Primer choice and paint formulation matter—oil-based, latex, and lacquer cure differently.
The piece’s material and porosity influence absorption and adhesion.
Even the furniture styles you choose and the paint color can affect heat absorption and perceived finish during cure.
Understand these variables to set realistic expectations.
Speeding Up Cure Time
Although you can’t rush chemistry, there are practical steps you can take to speed up both spray paint drying and final cure times. You’ll improve results by controlling environment, technique, and handling to reduce tackiness and avoid issues like color fading or visible brush strokes. Use thin, even coats and allow proper flash time between layers.
Increase ventilation and maintain moderate warmth and low humidity. Consider fast-curing formulas or additives for tough projects, but test first.
- Spray light, multiple coats rather than one heavy coat.
- Warm, dry air speeds solvent evaporation.
- Dry time shortcuts can risk adhesion—test on scrap.
How Finish (Matte, Satin, Gloss) Changes Drying and Cure
Because sheen level affects how paint forms its surface, the finish you choose—matte, satin, or gloss—directly changes both drying time and the long-term cure. You’ll find finish options influence evaporation and film formation: matte often hides imperfections but dries slightly slower to a touchable state, satin balances durability and cure speed, while gloss hardens fastest and shows flaws.
Good surface preparation remains essential; a clean, deglossed base helps consistent drying and adhesion. Expect gloss to reach full chemical cure sooner, satin intermediate, and matte last. Adjust expectations for use and recoating, not application thickness or environmental changes.
How Coat Thickness (Thin vs. Thick) Affects Drying Time
You’ll notice that thin coats dry much faster because the solvent and water can evaporate quickly from a smaller film.
Thick coats trap moisture and take longer to harden, increasing the risk of tackiness and runs.
For best results, apply multiple thin layers rather than one heavy one.
Thin Coats Dry Faster
Wondering why thin coats feel like they dry almost overnight? You apply less paint per pass, so solvents evaporate quicker and curing proceeds faster. Thin layers also reduce drips and sanding time, letting you reposition pieces sooner and test finishes without long waits.
Consider how furniture arrangement and storage solutions affect airflow and dust—good placement speeds drying.
- Work in sections so each thin coat dries evenly.
- Keep vents open and avoid crowded storage solutions that trap humidity.
- Use light sanding between coats to improve adhesion and shorten overall project time.
Thick Coats Take Longer
If thin coats speed things up, thick coats do the opposite: they hold more solvent and dry from the outside in, so the surface can feel dry while the interior stays soft for much longer.
You’ll notice thick layers extend tack-free and cure times, increasing risk of runs, drips, and uneven furniture texture as paint sags before it sets.
Thick application can also harm color consistency, creating glossy spots or trapped solvents that dull pigment.
Apply thinner, even coats, allow full flash times, and gently sand between layers.
That approach preserves texture, ensures uniform color, and accelerates safe handling and topcoating.
Why Surface Temperature Changes Drying Time
Because paint dries by solvents evaporating and by chemical reactions that are temperature-sensitive, the temperature of the surface you’re painting directly speeds up or slows down drying.
If the surface temperature is cool, solvents evaporate slowly and paint consistency stays heavier, so you’ll wait longer between coats.
Warmer surfaces thin the film and speed chemical cure, but too-hot surfaces can skin over without proper curing underneath.
- Check surface temperature before you start to avoid surprises.
- Warm surfaces usually mean faster recoat times, but watch for cracking.
- Adjust your technique and drying expectations based on surface temperature.
How Humidity Slows Paint Drying
When humidity is high, the air holds more moisture so paint solvents and water can’t evaporate as quickly, and your drying time stretches out.
That slower evaporation raises the risk of runs, tackiness, and poor adhesion if you don’t adjust your schedule.
You can prevent moisture-related problems by painting in drier conditions, using dehumidifiers or heaters, and allowing extra curing time.
Humidity’s Effect On Evaporation
Although high humidity doesn’t change the chemical cure of most paints, it directly slows evaporation of water or solvent from the film, so your paint will take longer to set and feel dry. You’ll notice tacky layers and longer recoating times, which can affect color consistency and force you to adjust brush techniques to avoid streaks.
High moisture raises surface vapor pressure, reducing the evaporation gradient, so solvents linger. Work slower, expect extended dry times, and monitor conditions.
Tips to cope:
- Wait longer between coats to prevent dragging.
- Use thin coats for even drying.
- Dry in a dehumidified space if possible.
Preventing Moisture-Related Problems
If high humidity’s already slowing evaporation, you can still prevent moisture-related problems by controlling the environment and your technique.
Lower humidity with a dehumidifier or HVAC, increase airflow with fans, and heat the room slightly to speed drying without overheating.
Choose fast-drying formulations and apply thin, even coats so moisture escapes rather than trapping it under film.
Protect cured pieces with wax or polyurethane for long-term furniture protection, but wait until paint fully cures.
Use moisture barriers like breathable primers on raw wood to block rising damp while allowing vapor to pass, preventing blisters and adhesion failure.
How Ventilation Speeds Drying Safely
Good ventilation moves solvent-laden air away and replaces it with fresh air, so your paint dries faster and you avoid buildup of fumes. You should open windows, run fans, and create cross-breezes to speed evaporation without overheating the room.
Mind furniture arrangement so airflow reaches all painted surfaces and keep freshly painted pieces separated to prevent sticking or scuffing. Consider your color palette—darker paints can retain heat and feel tacky longer, so balance drying conditions accordingly.
- Open opposite windows for cross-ventilation.
- Use window fans or exhaust fans safely.
- Maintain moderate temperature and low humidity.
How Substrate Material (Wood, Metal, Laminate) Affects Dry Time
Because different materials absorb and conduct solvents differently, the surface you’re painting has a big impact on how quickly paint dries. You’ll notice wood soaks primers and slows drying in grainy surface texture, metal conducts heat and can speed solvent evaporation, while laminate repels solvents so coatings sking over and cure slower underneath. Choose primer and adjust dry expectations by substrate and Paint sheen.
| Material | Absorption | Typical Dry Time |
|---|---|---|
| Wood | High (grainy) | Moderate–long |
| Metal | Low (conductive) | Fast–moderate |
| Laminate | Very low (slick) | Slow–moderate |
How Old Finishes Impact Drying and Adhesion
Before you paint, check for surface contaminants like grease or wax because they’ll stop paint from drying properly and bonding.
You’ll also need to take into account whether the new paint is compatible with the existing finish—oil over latex (or vice versa) can cause adhesion problems.
In many cases, stripping or sanding the old finish is the quickest way to guarantee proper drying and a durable bond.
Surface Contaminant Effects
When you paint over old finishes, residues like wax, oil, or degraded varnish can interfere with both how quickly the new paint dries and how well it sticks. You’ll notice slowed curing where surface contamination prevents solvent evaporation and creates barriers to paint adhesion.
Clean, degloss, or strip affected areas so the new coat bonds uniformly; otherwise you risk tacky spots or peeling later. Test a small patch: if paint beads or dries soft, contaminants remain. Address them before sanding or priming to guarantee consistent drying times and durable results.
- Check for oily sheen
- Wipe with appropriate cleaner
- Re-test before painting
Existing Finish Compatibility
If your furniture still has an older finish—varnish, lacquer, shellac, or polyurethane—that layer will directly affect how a new coat dries and bonds, so you’ll want to identify it first. You’ll check finish type because oil-based topcoats can repel waterborne paints and slow curing, while shellac may react with certain primers.
Match your approach to the piece’s furniture style and desired color coordination; a glossy antique needs different prep than matte modern. Test adhesion in an inconspicuous spot, note drying times, and choose compatible primer and paint so layers bond properly without compromising appearance.
Old Finish Removal
Having identified the existing finish and tested adhesion, you’ll often need to remove old varnish, lacquer, shellac, or polyurethane to guarantee the new paint dries and bonds properly.
You’ll strip or sand down to a uniform surface so solvents or trapped oils don’t slow curing or repel primers. Consider how removal reveals wood tone that influences furniture styles and paint color choices; rustic pieces may keep some patina, while modern lines need smooth bases.
Use chemical strippers, heat guns, or medium-grit sanding, then clean thoroughly.
Pick compatible primer and allow proper dry times before topcoats.
- Choose method by surface fragility
- Test a hidden spot first
- Ventilate and protect hands
How Primer Speeds the Project (And When to Use It)
Because primer creates a uniform, porous surface, it helps paint adhere faster and reduces the number of topcoat layers you’ll need, so you finish the job sooner. You’ll notice better coverage on pieces with complex furniture design or when shifting between contrasting color palettes.
Use primer on bare wood, stained surfaces, or glossy finishes to prevent blotching and improve bonding. It also seals porous materials so drying is more consistent, letting you sand and recoat predictably.
Skip primer only for surfaces already primed or when using paint-and-primer-in-one on light colors; otherwise, primer usually saves time and effort.
Which Primers Dry Fastest for Furniture
When you need a quick turnaround, shellac-based primers are your fastest option because they dry to the touch in minutes and sandable within an hour.
Acrylic latex primers take longer to dry but still work well if you need fewer fumes and easier cleanup.
I’ll compare their dry times, pros, and best uses so you can pick the right one for your furniture project.
Shellac-Based Primers
If you need speed without sacrificing adhesion, shellac-based primers are one of the best choices for furniture— they dry to the touch in about 15–30 minutes and can be recoated in an hour under ideal conditions.
You’ll find shellac primers excellent for sealing knots, blocking stains, and providing a tight bond to old finishes during furniture restoration. They sand easily and accept most topcoats, but they’re alcohol-sensitive and have strong odor, so ventilate.
- Quick tack-dry lets you work faster.
- Great for preventing bleed-through from tannins or water stains.
- Sand and wipe between coats for smooth results.
Acrylic Latex Primers
Although they don’t dry as fast as shellac, acrylic latex primers still dry relatively quickly and give you a durable, easy-to-sand base for furniture paint. You’ll appreciate their low odor and water cleanup, and they’re forgiving if you’re working between coats.
Choose a primer formulated for adhesion if your piece has a glossy finish or mixed materials; that choice affects paint durability more than color alone.
For modern or rustic furniture style, latex works well under latex or water-based acrylic topcoats.
Allow the recommended flash time—usually 30–60 minutes—before sanding or recoating to guarantee a smooth, long-lasting finish.
Sanding Between Coats: How Long to Wait?
Because paint continues to cure after it feels dry, you’ll want to wait the right amount of time before sanding between coats to avoid tearing or clogging the sandpaper. Typically, wait 2–4 hours for latex and 6–12 hours for oil-based paints; full cure takes longer, so be gentle.
Wait to sand until paint cures—about 2–4 hours for latex, 6–12 for oil—to avoid tearing and clogged paper.
Sanding refines texture, helps adhesion, and preserves furniture style and color matching across coats.
- Lightly sand with 220–320 grit for smoothness.
- Wipe dust with a tack cloth before recoating.
- Test a small area to ensure paint resists denting before applying the next coat.
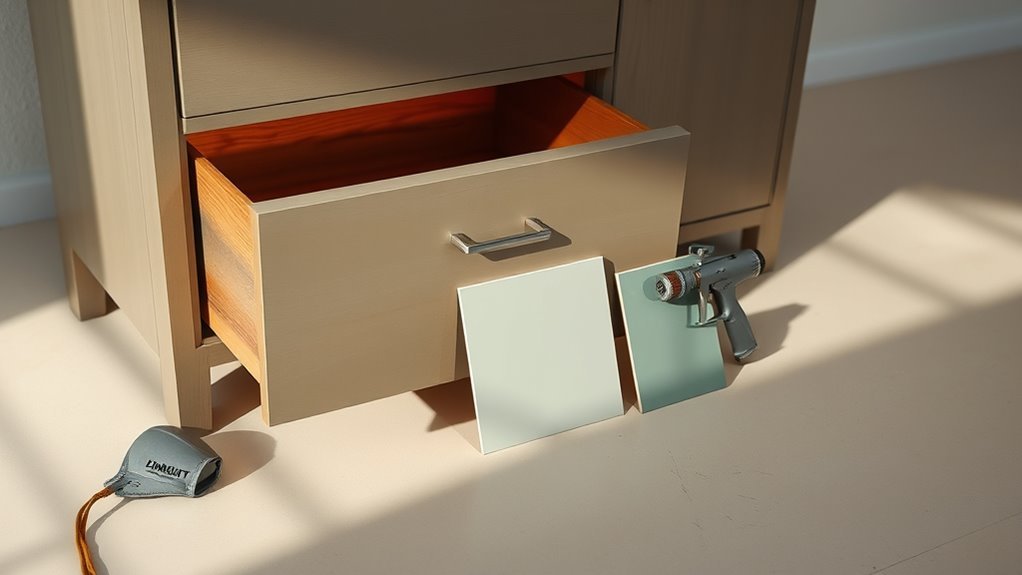
When a Painted Drawer Is Safe to Use
You’ll want to check the dry-to-touch time first so you know when the surface won’t mark from a fingertip.
Confirm the recommended recoat window and the full cure time on the paint can, since cured paint handles stress and wear.
Finally, run simple practical use tests—open and close the drawer, slide items in, and wait for any tackiness before regular use.
Dry-To-Touch Time
Once the paint feels dry to the touch, you can lightly handle the drawer, but that doesn’t mean the finish is fully cured—dry-to-touch usually takes 30 minutes to a few hours depending on paint type, temperature, and humidity.
You’ll still avoid heavy use: drawers with different furniture styles or bold color selection may look ready but need gentle treatment. Check corners and edges; cool or humid rooms slow drying. If it resists smudging and feels matte, it’s likely dry-to-touch.
- Test a hidden spot before full use.
- Keep the drawer level while drying.
- Avoid stacking or heavy items.
Recoat And Cure
If you plan to add another coat or put the drawer back into regular use, wait for the specified recoat window and full cure time for your paint type—typically 2–4 hours before recoating and 7–30 days for full cure. You’ll check tackiness, edges, and scent; only then handle the drawer gently. Consider furniture placement and lighting conditions while curing — keep it dry, ventilated, and out of direct sun.
| Stage | Checkpoint | Action |
|---|---|---|
| Recoat | 2–4 hrs | Light touch |
| Initial cure | 24–72 hrs | Gentle use |
| Full cure | 7–30 days | Normal use |
Practical Use Tests
Although the paint may feel dry to the touch, you’ll want to run simple practical tests before treating a painted drawer as fully usable. Check for tackiness, adhesion, and finish hardness to avoid sticking or marks. Test gently so you don’t damage soft finishes or delicate furniture styles.
- Slide the drawer empty to feel resistance and listen for rubbing sounds.
- Place a folded cloth inside, close, and reopen to check for scuffing or color transfer with your chosen paint color options.
- Load a few lightweight items and repeat slides over several days to confirm cured performance before full use.
How Long Before You Can Recoat Safely?
When you plan to recoat furniture, the key is to let the first layer cure enough to resist lifting or wrinkling but not so long that adhesion to the next coat suffers. Check the paint’s label for recommended recoat time—often 2–4 hours for latex, longer for oil.
Lightly touch a discreet edge; if it gums, wait. Sanding between coats improves bonding and helps with color matching, especially over repairs.
Keep furniture placement stable and dust-free while curing. Work in consistent temperature and humidity to avoid film defects.
When in doubt, err on a bit more curing time for reliable results.
How Long Before Light Handling Is OK?
Because paint needs to form a stable surface before you touch it, expect to wait longer than the recoat window—typically 24 hours for light handling with water-based paints and 48–72 hours for most oils or heavy-bodied finishes. You’ll want to avoid pressing, leaning, or moving pieces until that time passes.
Wait longer than the recoat window—about 24 hours for water-based paints, 48–72 for oils; avoid touching.
Consider how your furniture design and color psychology choices affect handling—bold colors show flaws, intricate shapes trap tackiness.
- Test a hidden edge gently before full contact.
- Use gloves to prevent fingerprints on glossy finishes.
- Move pieces minimally; support bottoms to avoid stress.
How Long Before Full Cure and Heavy Use?
Since full cure affects how much wear and weight your furniture can take, plan on a much longer wait than the dry-to-touch or recoat times. Generally, expect 2–4 weeks for most latex or oil-based paints to reach full hardness; some specialty finishes can need up to 90 days.
During this period, avoid heavy items, repeated closures, or sliding objects across surfaces.
Temperature, humidity, and ventilation speed curing, as does coat thickness and paint texture. Test discreet spots before heavy use.
Remember that furniture color doesn’t change cure time much, but darker shades can feel warmer and slightly alter drying conditions.
Avoiding Tacky Finishes: Common Causes
If your paint stays tacky after the recommended dry time, it’s usually due to a few predictable problems you can fix. Check humidity and temperature first — high moisture or cold stalls drying.
You might apply coats too thickly or not wait between layers.
Contaminants like dust, oil from hands, or old finish residue can interfere, especially when you reposition items during styling.
Consider how furniture layout and decorative accents will contact painted surfaces to avoid smudges.
- Thick coats or rushed recoats
- High humidity or low temperature
- Surface contamination from handling or nearby decor
Speed Drying Safely
When you need to speed up drying without causing tacky spots or damage, focus on controlled adjustments rather than quick fixes. You’ll improve cure time by tweaking airflow, temperature, and thin coats. Use fans for circulation, keep heat moderate, and avoid direct hot air that can blister finishes. Consider how drying affects furniture design choices and color psychology — warmer tones can look different when rushed. Test a scrap first.
| Action | Why | Tip |
|---|---|---|
| Thin coats | Dry faster | Use proper thinner |
| Airflow | Prevents tack | Low-speed fans |
| Temperature | Speeds cure | Stay moderate |
| Humidity control | Avoid tack | Dehumidifier |
| Test patch | Avoid surprises | Small area first |
How to Slow Drying to Reduce Brush Marks
If you want fewer brush marks, slow the paint’s open time by using a paint conditioner or choosing a slower-drying formula so you can work the surface longer.
You can also lower the room temperature a few degrees to slow evaporation and give brush strokes time to level out.
These simple adjustments help you achieve a smoother finish without extra sanding.
Extend Open Time
Slowing a paint’s dry time—also called extending its open time—gives you more working time to level brush marks and blend edges without reworking the surface. You can add a manufacturer-recommended retarder or slow-drying additive to water-based paints, which helps finishes lay smoother and supports thoughtful choices in furniture design and color psychology as you refine tones.
Work in thin, even coats and keep a wet edge to avoid lap marks. Avoid overbrushing; let the additive do the smoothing.
- Choose the right retarder for your paint type.
- Test on a scrap piece first.
- Keep tools clean and slightly damp.
Lower Room Temperature
Because paint cures faster in warm air, you can reduce brush marks by lowering the room temperature a few degrees while your coats dry. You’ll slow surface drying, giving brush strokes time to level before skin forms.
Don’t chill so much that humidity rises and tackiness increases; aim for a steady, moderate drop. Use a thermostat or portable AC to maintain consistency, and avoid drafts that cause uneven drying across furniture styles or paint color choices.
Cooler drying works well with water‑based paints and detailed pieces, but always test on a hidden area to confirm finish and adhesion before proceeding.
Best Temperatures for Painting Furniture
When you paint furniture, the temperature you work in directly affects drying time, film formation, and finish durability. You should aim for a stable 60–75°F (15–24°C) range; that’s ideal for most water-based and oil-based paints and for keeping paint colors true across furniture styles.
When painting furniture, work in a steady 60–75°F (15–24°C) range for proper drying and durable finishes.
Avoid extremes: cold slows cure, heat can cause blistering. Monitor humidity too—high moisture prolongs tackiness.
Use these quick guidelines to pick the right day and workspace:
- Choose a warm, ventilated room for consistent drying.
- Keep humidity moderate to protect sheen and adhesion.
- Allow extra cure time if conditions fall outside the ideal range.
Tools That Affect Drying: Brushes, Rollers, Sprayers
Although the tool you pick doesn’t change the chemistry of the paint, it strongly influences how quickly and evenly the finish dries. You’ll find brush strokes trap more solvent, slowing surface drying on detailed trim.
A dense roller lays a uniform film that dries predictably on flat panels. A sprayer atomizes paint into thin coats that flash off faster, but you must control overlap to avoid thin spots.
Choose tools based on furniture styling and surface texture; match technique to your color matching process so coats build consistently and drying time stays even across the piece.
How Additives and Retarders Change Dry Time
Tool choice affects how much solvent the paint holds and how fast the surface skins over, but additives and retarders give you direct control over the chemical drying process. You can slow drying to avoid brush marks, help paint flow for intricate furniture style details, or extend working time for perfect color matching.
Use retarders sparingly—too much weakens cure. Additives like flow enhancers and leveling agents adjust surface tension without huge time penalties.
- Use small amounts when working on vintage pieces.
- Test on scraps for color matching.
- Note manufacturer limits and ventilation.
Spot‑Check Tests to Confirm Dryness
Before you commit to sanding or recoating, do a few quick spot‑check tests to confirm paint is truly dry rather than just surface‑tacked.
Lightly press an inconspicuous area with your fingertip; if a print appears or finish feels gummy, it needs more time.
Try the fingernail test at an edge—no tackiness or lift should occur.
For larger pieces, press a clean white cloth to check transfer; none should show.
Rotate checks across furniture styles and color schemes, since dark or glossy paints can hide softness.
Record results and wait until every test passes before proceeding.
How to Fix Tacky or Soft Paint
If paint feels tacky or soft, first check the drying conditions—temperature, humidity, and ventilation can all slow curing.
If conditions are fine, you can lightly scuff and recoat with a compatible product.
If the finish won’t harden, strip back to bare wood and start over.
Take notes on what you change so you can avoid the same issue next time.
Assess Drying Conditions
When paint stays tacky or soft long after you expected it to dry, you’ll want to systematically assess the conditions that affect curing—temperature, humidity, ventilation, and the coating’s thickness—and adjust them before re-coating or troubleshooting further.
Check room temperature (ideal 65–75°F) and raise it with a space heater if needed. Reduce humidity with a dehumidifier or wait for a dryer day. Improve airflow with fans but avoid direct strong blasts that can skin the surface.
Evaluate how thick the coat is and whether your furniture placement or color selection could trap heat or moisture.
- Time of day
- Airflow path
- Surface proximity
Recoat Or Strip
Once you’ve checked temperature, humidity, ventilation, and coat thickness, decide whether to recoat or strip the tacky finish. Recoating can save time when the surface is just soft, but stripping is safer if the paint is gummy, wrinkled, or failing to cure.
If you recoat, wait until tackiness lessens, sand lightly, wipe with a tack cloth, and apply a thin, even layer.
For persistent issues, perform furniture cleaning, test a small area, then proceed with paint removal using chemical stripper or sanding.
After stripping, clean thoroughly, prime if needed, and repaint under proper drying conditions.
Dealing With Bubbles, Drips, and Uneven Drying
Although you’ve taken care to prepare and apply paint evenly, bubbles, drips, and patches that dry unevenly can still appear, and knowing how to spot and fix them quickly will save you time and improve the final finish. Inspect in good light; small blisters often mean trapped air or moisture.
Lightly sand drips and high spots once tack-free, remove dust, and repaint thinly. For serious flaws consider paint removal and a restart. Store finished pieces properly—proper furniture storage prevents humidity-driven issues.
- Sand gently to level bubbles and drips.
- Clean surface before recoat.
- Control humidity while drying.
Safe Topcoats: When and What to Apply
After you’ve smoothed out bubbles, drips, and uneven spots, protect the cured paint with a topcoat that matches the paint type and the piece’s use. Choose water-based poly for latex or acrylic, and oil-based or wipe-on poly for alkyd paints. Shellac works for antiques but can amber lighter color palettes.
Let the paint cure per label before sealing — usually 24–72 hours for many furniture projects.
Match sheen to furniture styles: matte for rustic, satin for transitional, gloss for contemporary. Apply thin, even coats, lightly sanding between coats with fine grit. Test a hidden spot before full application.
How Long Sealers and Varnishes Take to Dry
If you’re wondering how long sealers and varnishes take to dry, expect initial surface drying in a few hours but full curing that can take days to weeks depending on the product and conditions.
You’ll want to factor in temperature, humidity, and coat thickness so your finish complements the furniture style and preserves any color matching work. Faster-drying waterborne sealers shorten wait time; oil-based varnishes often need longer.
- Check tackiness before recoating to avoid trapping solvents.
- Sand lightly between coats for a smooth, durable finish.
- Allow full cure before heavy use to prevent dents or discoloration.
Painting Outdoors vs. Indoors: Drying Differences
When you paint outdoors, the weather becomes as important as the paint itself, because temperature, humidity, wind, and sunlight all speed up or slow down drying and curing in ways that differ from indoor conditions.
Painting outdoors makes weather as crucial as paint—temperature, humidity, wind, and sun dictate drying and curing.
You’ll notice heat and sun accelerate surface drying but can trap solvents, so full cure may still lag. High humidity slows drying and risks tackiness; wind evaporates faster but can blow debris onto wet surfaces.
Indoors, you control ventilation and temperature for consistent results.
For furniture restoration, plan timing and test finishes; color selection affects heat absorption, so darker hues may dry and cure differently than pale ones.
Chalk and Furniture Wax: Cure Times for Painted Pieces
Because chalk paint dries quickly to the touch, you’ll often assume a piece is ready to use—but the wax topcoat needs far longer to fully cure. You should wait at least 7–30 days depending on wax type, temperature, humidity, and how often the piece is handled.
During curing, avoid heavy use and keep items clear for final buffing.
- Protect the surface while arranging furniture to prevent scuffs.
- Keep stable lighting conditions and moderate temperature to help consistent curing.
- Test a hidden spot before full use to confirm the wax has hardened and resists marks.
Weekend Repaint: A Time‑Saving Project Plan
Tackle a weekend repaint by planning a focused sequence: prep the piece, choose quick‑dry products, and schedule two modest work sessions so you can sand, prime, paint, and topcoat without rushing.
Start Saturday morning by cleaning, repairing dents, and light sanding.
Mix small test batches for color mixing to confirm shade and sheen; keep notes.
Apply a fast‑dry primer, wait the recommended recoat time, then lay down thin paint coats to avoid drips.
Sunday, sand between coats if instructed, apply final coat, then a quick topcoat compatible with your chosen furniture design.
Store tools and ventilate overnight.
Maintenance Tips After Paint Has Fully Cured
After your weekend project has fully cured, you can start regular upkeep to keep the finish looking fresh and durable. Treat painted surfaces gently: lift rather than drag objects to protect edges and avoid scratches. Rotate cushions and distribute items to prevent wear from constant furniture weight. Use mild soap and water for cleaning; avoid harsh chemicals that dull paint or sealer. Refresh touch-up paint for chips and match original color combinations to keep consistency.
- Wipe spills promptly with a soft cloth.
- Use felt pads under decorative items.
- Reapply clear topcoat every few years if needed.
Common Mistakes That Lengthen Drying Time
If you rush the process, use thick coats, or paint in poor conditions, you’ll considerably extend drying and curing times. You should avoid painting in high humidity, low temperatures, or dusty spaces. Don’t apply heavy layers; thin, even coats dry faster and look better for furniture styling and color coordination. Skipping primer or using incompatible topcoats traps solvents. Recoating too soon seals moisture. Poor ventilation and crowded drying areas slow evaporation. Check manufacturer times and test a hidden area.
| Mistake | Effect |
|---|---|
| Thick coats | Long dry time |
| Low ventilation | Curing delayed |
Selecting Paint by Drying Time for Your Project
When you need a quick turnaround, choose paints with fast surface-dry and recoat times—water-based acrylics and specialty fast-dry formulas often be ready to handle in an hour or two, while oil-based options can take a day or more.
Balance drying speed with durability and finish to match how the piece will be used. You’ll pick by project: high-traffic pieces need tougher finishes; decorative items can favor speed.
Consider color mixing impact on dry time and opt for environmentally friendly paints when possible. Test a small area first to confirm feel and cure before finishing.
- Choose fast-dry for small fixes
- Test sheen and color mixing
- Prefer low-VOC, environmentally friendly paints
Frequently Asked Questions
Can Painted Furniture Emit Odors After Curing and Are They Harmful?
Yes — painted furniture can emit odors after curing; you’ll encounter volatile organic compounds that can linger. They’ll affect air quality impact and may irritate you; ventilate, choose low-VOC paints, and limit prolonged exposure.
Can Paint Discolor or Yellow Over Years Despite Initial Cure?
Yes — paint can yellow or discolor over years despite initial cure; you’ll want coatings with proven color stability and Aesthetic durability, avoid cheap resins, limit UV and smoke exposure, and apply UV-resistant topcoats for protection.
How Does Paint Affect Indoor Air Quality During Long-Term Use?
Paint can emit VOC emissions long after curing, and you’ll notice lingering odors if air circulation’s poor; you’ll lower exposure by choosing low-VOC paints, increasing ventilation, using air purifiers, and avoiding heated enclosed storage for painted items.
Can Pets or Children Cause Chemical Transfer From Newly Painted Furniture?
Yes — you should assume pets or children can cause chemical transfer from newly painted furniture; keep them away until fully cured, use non-toxic paints, and clean surfaces to minimize residue and accidental ingestion or contact.
Is It Safe to Refinish Painted Furniture Without Stripping Old Paint First?
You can, but you shouldn’t: proper surface preparation guarantees paint adhesion, so you’ll likely sand, clean, and prime instead of fully stripping. Skipping prep risks peeling, uneven finish, and reduced durability—do the prep for best results.
Conclusion
Now you know roughly when painted furniture goes from tacky to tough: chalk and latex dry fast, oil takes its sweet time, and sprays speed things up. Plan around cure times, avoid common mistakes, and treat newly finished pieces gently for a few weeks. With patience and the right paint, your project will look sharp and last—think of curing like brewing coffee: the wait rewards you with something satisfying and built to enjoy.