How Long Does It Take for Gloss Paint to Dry
You’ll find gloss paint feels dry to the touch in about 1–6 hours, is usually recoat-ready around 24 hours, and reaches full hardness in roughly 7–30 days depending on formula and conditions. Expect water-based gloss to dry faster than oil-based, and remember heat, humidity, airflow, coat thickness, and surface prep all change timings. Test gently before cleaning or use, and keep ventilation on; keep going for practical timelines, tips, and troubleshooting.
Quick Answer: Gloss Paint Drying Windows
If you need a quick reference, gloss paint typically feels dry to the touch within 1–6 hours, becomes recoat-ready in about 24 hours, and reaches full hardness in 7–30 days depending on the formula and conditions.
You’ll plan around those windows: tack-free time guides light handling, recoat time tells when to apply another layer, and full cure affects durability. Manage temperature and humidity to keep schedules reliable.
When prepping, think about color blending strategies and brush techniques to avoid streaks and lap marks during the recoat window. Follow manufacturer directions for best results and predictable drying windows.
How to Use This Guide (What to Read First)
Because gloss paint drying times vary by formula and conditions, start here to pick the sections that match your project and schedule. Scan the Quick Answer first for rough windows, then read the Preparation section if you need surface tips to avoid color fading.
Skip to Drying Timelines for specific wait times and to Recoat & Cure for when it’s safe to handle. Check Troubleshooting if you see tackiness or loss of gloss sheen.
Use the Tools & Conditions table to match temperature and humidity to your situation. Finish with Maintenance advice to keep the finish durable and color stable over time.
Oil-Based vs Water-Based Gloss: Drying Differences
When choosing between oil-based and water-based gloss, know that their drying mechanisms and timelines differ enough to affect your schedule and technique.
You’ll notice oil-based gloss cures by oxidation and solvent evaporation, taking longer to harden but leveling well for a smooth finish sheen.
Water-based (acrylic) dries faster via water evaporation, allowing quicker recoats and less odor, though you may need quicker color blending to avoid visible overlap.
For trim or high-traffic areas you want durable oil gloss, but for fast projects or light colors pick water-based.
Adjust brushing and recoat timing accordingly to match each type’s behavior.
How Temperature Affects Gloss Paint Drying
Temperature has a direct impact on how quickly your gloss paint sets and cures.
In high heat, the solvent or water evaporates faster, which can speed surface drying but may cause tackiness, blistering, or poor flow.
In cold conditions, drying slows dramatically, lengthening tack-free and recoat times and increasing the risk of poor adhesion.
Temperature And Drying Time
If air and surface temps are too low, gloss paint will slow its chemical curing and feel tacky for much longer than you’d expect. You’ll notice delayed drying, possible color fading over time, and subtle texture change if moisture sits on the film. Aim for recommended temperature ranges and good ventilation to speed solvent evaporation and film formation. Monitor surface—not just air—since cold substrates trap moisture. Use warmer conditions cautiously; follow manufacturer limits. Below is a quick reference table to guide expectations and actions.
| Condition | Effect | Action |
|---|---|---|
| Cold | Slows cure | Raise temp |
| Humid | Extends tack | Dehumidify |
| Warm | Faster dry | Ventilate |
| Very cold | Film defects | Delay painting |
High Heat Versus Cold
Because extreme temperatures push paint chemistry in opposite directions, you’ll see very different drying behavior in high heat versus cold conditions.
In high heat, solvents evaporate quickly, so gloss paint skins over fast but can trap solvents underneath, risking blistering or ambering that alters finish sheen and hampers color matching. You’ll need slower application, thinner coats, and shade or airflow to avoid defects.
In cold, curing slows, tack persists, and dust or moisture can mar the surface. Extended dry times increase contamination risk and complicate color matching between coats.
Always follow manufacturer temps and allow extra cure time when needed.
How Humidity Changes Dry Times

While you’re waiting for gloss paint to dry, humidity plays one of the biggest roles in how long that wait will be. High humidity slows solvent evaporation and can tack up surfaces, while low humidity speeds drying but may affect sheen. You should consider environmental impact and paint formulation—waterborne vs. solvent-borne behaves differently. Monitor conditions and adjust timing or product choice accordingly.
| Humidity Level | Effect on Drying |
|---|---|
| Low (20–40%) | Faster evaporation, potential flash drying |
| Moderate (40–60%) | Ideal balance for curing |
| High (60%+) | Slower, risk of blush and longer tack time |
Why Ventilation Matters for Curing Gloss Paint
You’ll want good airflow when curing gloss paint because moving air speeds solvent evaporation and helps the finish harden evenly.
Controlling humidity with ventilation prevents tackiness and long dry times.
Also, keep windows, fans, and safety—like fresh air and proper masks—in mind to reduce fumes and fire risk.
Air Flow Importance
Curious how much airflow changes drying times? You’ll speed curing by managing air movement: it replaces solvent-laden air, helps heat disperse, and lowers tack.
Pay attention to air filtration and weather conditions to keep contaminants off glossy surfaces.
- Position fans to move air across—not directly at—paint so solvents evaporate evenly.
- Use filters to stop dust; trapped particles ruin sheen and lengthen touch-dry time.
- Coordinate ventilation with weather conditions—ventilate more on mild, dry days, less when particulates or strong winds bring dust.
Control airflow, and your gloss will set cleaner and faster.
Humidity Control
Airflow helps move solvent-laden air away, but humidity controls how fast that solvent actually evaporates, so you’ll want to manage moisture as well.
High humidity slows curing, so paint stays tacky longer and risks sagging or dulling the paint sheen.
Low humidity speeds evaporation but can cause blistering or poor flow, harming smoothness and color retention.
You should monitor relative humidity and timing: avoid painting during damp conditions and aim for manufacturer-recommended ranges.
Use dehumidifiers or humidifiers to stabilize the space, and keep conditions steady through the full drying and curing window to protect finish quality.
Ventilation Safety Tips
Because solvent fumes can build up quickly while gloss paint cures, you should prioritize good ventilation to protect your health and the finish. Open windows and doors, run fans to exhaust fumes, and avoid confined spaces during color mixing or brush cleaning. Follow these quick safety steps:
- Position an exhaust fan to push air outside; cross-ventilate with an intake window.
- Use low-VOC paints and wear a respirator when sanding or handling solvents.
- Keep solvents sealed when not in use, and clean brushes at an outdoor sink to minimize indoor vapor buildup.
Stay alert to dizziness or strong smells; stop and ventilate.
How Coating Thickness Alters Dry and Cure Times
When you lay on a thicker coat of gloss paint, it slows both surface drying and full curing because solvents take longer to escape and chemical crosslinking happens more slowly.
You’ll notice coating consistency affects tack time: heavy, viscous layers feel dry on top yet stay soft underneath. Thicker films also alter gloss sheen—deep, glossy finishes can build while solvents remain trapped, risking wrinkling or dull spots later.
To control timing, apply multiple thin coats, follow manufacturer recoat intervals, and allow extended cure times between layers. Measure film thickness if precise results matter and avoid rushing the process.
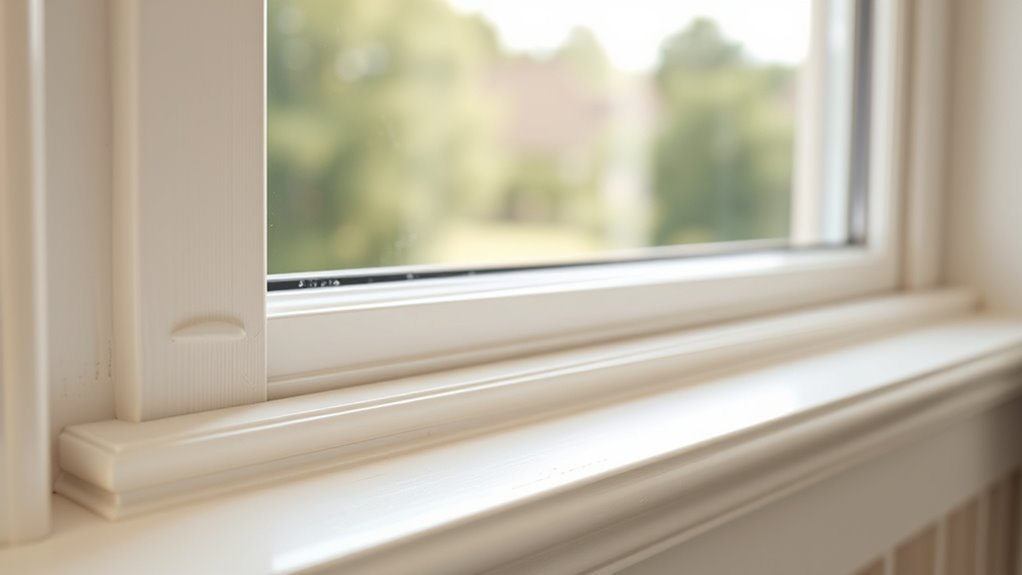
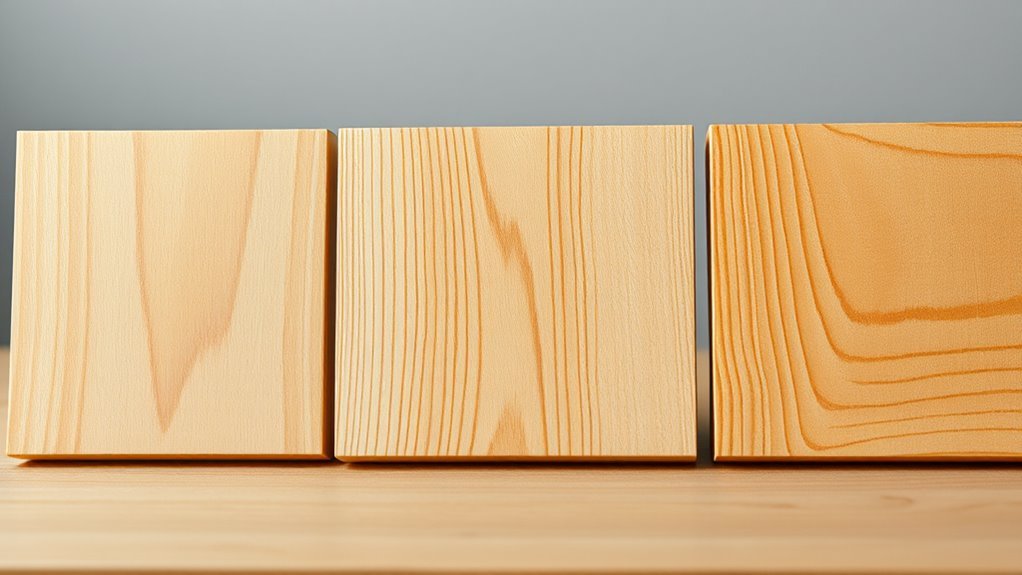
How Surface Type Affects Gloss Paint Drying
Although different surfaces may look similar, they change how gloss paint dries by affecting absorption, adhesion, and evaporation rates. You’ll notice that porous, smooth, and previously coated surfaces each demand different surface preparation and test paint compatibility before you start.
Consider these effects:
- Porous (brick, plaster): absorbs solvent, so paint dries faster on top but cures slowly; seal or prime first.
- Smooth (metal, glass): limits absorption, lengthens surface drying; abrade and use compatible primer for adhesion.
- Painted or lacquered: existing finish alters evaporation and bonding; confirm paint compatibility and sand glossy layers.
Factory-Primed vs Bare Wood: Drying Comparison
If you’re comparing factory-primed wood to bare wood, you’ll find that the primer changes both how quickly gloss paint skins over and how long it takes to fully cure.
When you paint factory-primed surfaces, the sealed substrate soaks less, letting the paint gloss form a uniform gloss sheen faster and reducing tack time.
On bare wood, porous fibers pull in solvents and binders, slowing film formation and potentially requiring extra coats.
You’ll also see fewer color shifts and better adhesion on primed wood, meaning shorter wait times between coats and a more consistent final appearance with less blistering risk.
Indoor vs Outdoor Painting: Realistic Expectations
Because indoor and outdoor jobs face very different conditions, you should set realistic drying and curing expectations before you start painting. Indoor jobs dry faster thanks to stable temps and low humidity; you’ll still need proper surface preparation to avoid peeling.
Outdoors, sun, wind, and moisture slow curing and can alter Color matching as light changes. Plan timing and protection accordingly.
- Control: Indoors, use ventilation and dehumidifiers to speed drying.
- Protect: Outdoors, avoid direct sun and night dew; wait for a dry forecast.
- Inspect: Check surface preparation and test Color matching in actual light.
Read Manufacturer Drying and Recoat Labels Correctly
When you read the manufacturer’s drying and recoat instructions, follow them exactly—dry times on the can reflect ideal conditions and specific formulations, so they’re your best guide for timing recoats and handling. Check whether times are at specific temperature and humidity ranges, and note recommended tack-free, recoat, and full cure intervals.
Use their guidance to preserve color consistency and maintain targeted gloss level; deviating risks blotchy sheen or uneven tint. Pay attention to surface prep notes, recommended thinner or additive limits, and oven or forced-dry options.
When in doubt, contact tech support for clarification before proceeding.
Wet-to-Touch, Tack-Free, Recoat, and Full Cure: How They Differ
Now that you’ve learned to read the manufacturer’s drying and recoat labels, you need to understand what those different timeframes actually mean: wet-to-touch, tack-free, recoat, and full cure represent distinct stages in a gloss paint’s drying and hardening process.
You’ll use each stage to plan handling and avoid issues like color fading or paint peeling.
- Wet-to-touch: surface feels dry; avoid pressure.
- Tack-free: no stickiness; light dust won’t adhere.
- Recoat vs full cure: you can apply another coat at recoat time, but full cure — often days to weeks — gives maximum hardness and durability.
Quick Tests to Check If Gloss Paint Is Dry
Want a fast way to tell if your gloss paint is ready for the next step? Lightly press a clean fingertip on an inconspicuous spot—if no tack transfers, it’s likely dry-to-touch.
Use the fingernail test gently: a non-marked surface suggests more cure.
Gently use a fingernail—no mark means the gloss has likely cured further and is safe to proceed.
Smell the surface; strong solvent odor means it’s still drying.
Try the tissue test: press a tissue briefly; no smearing indicates tack-free.
For larger areas, tap with a soft tool to check for firmness.
Keep notes about Color mixing and Paint storage—these affect drying—so you can replicate conditions when testing future coats.
When to Recoat Gloss Paint (Practical Timing)
You’ll usually notice gloss paint is dry to the touch within a couple of hours, but that doesn’t always mean it’s ready for another coat.
Aim for the manufacturer’s recoat window—often 4–6 hours for quick-dry formulas and up to 24 hours for slower ones—and adjust based on temperature, humidity, and film thickness.
Check the surface with a light touch and consider sanding between coats if conditions slowed curing.
Dry-To-Touch Time
Typically, gloss paint becomes dry to the touch within 1 to 6 hours, depending on formulation and conditions, and that’s the moment you can gently recoat without marring the finish. You’ll notice the paint no longer feels tacky and the paint sheen looks even, especially around color accents. Still, check small test spots before plugging in full recoats.
- Light touch: press fingertip gently; no imprint means safe to recoat.
- Environmental check: high humidity or low temp slow drying — wait longer.
- Surface feel: smooth, uniform sheen without stickiness indicates readiness to proceed.
Recoat Window Guidelines
When conditions are favorable, plan your recoat window so each layer bonds without lifting or trapping solvents. For most gloss paints, that means waiting until the surface is dry to the touch but not fully cured.
You’ll test small areas: press lightly—no tack—and check gloss consistency across the panel. If the paint gives or strings, wait longer.
Match the new coat’s paint sheen to the existing finish to avoid visible gradations.
Thin, even recoats improve adhesion; don’t overload the brush or roller.
Follow manufacturer minimum recoat times as a baseline, then confirm with touch and visual checks before proceeding.
Factors Affecting Recoat
Because several variables influence how long you should wait, knowing the key factors lets you judge recoat timing more accurately. You’ll assess surface temperature, humidity, and product type to avoid trapping solvents or causing poor adhesion. Watch for tackiness and test a small area before proceeding.
- Temperature and humidity: cold or humid conditions slow curing, extend recoat times, and can alter gloss sheen.
- Paint type and manufacturer instructions: oil and alkyds need longer; water-based often recoat sooner.
- Surface prep and previous coats: poor bonding or signs of color fading mean wait longer or sand between coats.
When It’s Safe to Handle or Move Painted Items
How long should you wait before handling a freshly painted piece? You should let the gloss cure enough to resist fingerprints and avoid brush marks being disturbed. Wait at least 24 hours for light contact, but 48–72 hours is safer; humidity and temperature can extend that.
Move items carefully, supporting painted surfaces and avoiding dragging. Use clean gloves to prevent oils and color fading from sunlight or skin contact.
For larger pieces, allow a week before heavy use or stacking. If unsure, test an inconspicuous spot by gently pressing—if it doesn’t tack or dent, it’s likely safe to handle.
When You Can Wash or Clean Gloss-Painted Surfaces
Don’t wash gloss-painted surfaces until the paint has fully cured—dry to the touch isn’t enough.
Before a full cleaning, wipe a small, inconspicuous area with a soft cloth to make sure the finish won’t lift or stain.
Keep in mind temperature and humidity affect cure times, so adjust your timeline accordingly.
Wait For Full Cure
While the paint may feel dry to the touch within hours, you should wait for a full cure before washing or cleaning gloss-painted surfaces to avoid damage. You’ll protect sheen and adhesion by waiting the manufacturer’s recommended cure time—often 7–30 days.
During cure, avoid scrubbing, heavy use, and exposure to solvents. Keep surfaces dust-free and control humidity and temperature. Remember that proper color mixing and correct paint storage before application affect final hardness and cure consistency.
Follow these steps before cleaning:
- Check the label for full cure time.
- Wait recommended days before light cleaning.
- Use gentle cleaners only after curing.
Test With A Cloth
Ready to check if your gloss paint can handle cleaning yet? Gently press a clean, lint-free cloth dampened with water onto an inconspicuous area. If no tacky residue transfers and the finish resists light rubbing, it’s likely cured enough for gentle washing.
Avoid aggressive scrubbing; use mild soap and rinse the cloth frequently. Test areas near edges and decorative details, since color mixing during touch-ups or poor paint storage can affect uniform drying.
If the cloth picks up pigment or feels sticky, wait longer and retest periodically. Document results so future cleaning or touch-ups won’t damage the gloss surface.
Consider Environmental Factors
After you’ve tested with a cloth and the finish feels non-tacky, consider the environment before you start washing; temperature, humidity, and airflow all affect how fully the gloss cured and how it will respond to water and soap.
You’ll judge when to clean based on drying efficiency and potential environmental impact. Use gentle methods until you’re sure the cure is complete.
- High humidity: wait longer—moisture slows drying efficiency and raises risk of damage.
- Low temperature: curing slows, so postpone cleaning to avoid streaks or lifting.
- Good airflow: accelerates cure; you can usually wash sooner with caution.
When Furniture Is Safe to Use After Gloss Paint
Before you set a heavy object or sit on freshly gloss-painted furniture, let the surface cure enough to resist dents, stickiness, and solvent odors. You’ll wait longer for high-traffic pieces; color matching and paint texture can affect perceived readiness. Test with light pressure, a fingertip tack test, and smell. If dry to touch but still soft, keep using supports and coasters.
| Test | When to try | Action |
|---|---|---|
| Fingertip | 24–48 hrs | Light touch |
| Small weight | 48–72 hrs | Apply gently |
| Full use | 7 days+ | Normal use |
| Odor check | Until gone | Ventilate |
Common Mistakes That Slow Gloss Paint Drying
If you want faster results, avoid common mistakes that keep gloss paint tacky. Applying coats that are too thick, working in poor ventilation, and using low-quality brushes all prolong drying time. Fixing these issues will help your paint cure evenly and sooner.
Applying Thick Coats
When you slather on thick coats of gloss paint to cover imperfections faster, you actually trap solvents and extend drying time considerably. You’ll slow curing, invite runs, and hide uneven sheen. Instead, control layers and tools.
- Apply thin, even coats—wait between layers to avoid solvent entrapment and glossy orange peel.
- Use proper color mixing to keep viscosity right; don’t over-thin or over-thicken, which alters drying.
- Keep brushes and roller covers clean; brush cleaning prevents dried buildup that causes dragging and inconsistent film thickness.
Follow these steps and you’ll speed drying and get a smoother, more durable finish.
Poor Ventilation
Because gloss paint needs airflow to release solvents and cure, poor ventilation can dramatically extend drying times and increase tackiness. If you seal windows and doors or work in a small room without fans, poor airflow lets solvents linger, slowing film formation and leaving a sticky finish.
You should open windows, run an exhaust fan, or use a portable blower to move air and speed evaporation. Avoid creating stagnant air pockets by positioning vents so fresh air crosses the painted surface.
Monitoring humidity and temperature helps, too—ventilation won’t fix very high humidity, but it prevents solvent buildup that keeps paint from drying.
Low-Quality Brushes
Although it may seem minor, using low-quality brushes can slow gloss paint drying by leaving stray bristles and uneven films that trap solvents and moisture. You’ll notice longer tack times and blotchy gloss if brush quality is poor, because thick, inconsistent layers resist evaporation and interact badly with the drying environment.
Choose proper brushes and maintain them to speed curing. Consider:
- Replace frayed brushes to avoid bristles in the finish and uneven coating.
- Use high-quality synthetic or natural bristles suited to your paint to lay smooth, thin films.
- Clean and store brushes so they won’t compromise future drying.
How to Avoid Tacky Gloss Paint Finishes
If your gloss paint stays tacky long after application, you can usually trace the problem to surface contamination, incorrect thinning, or poor drying conditions. Address these factors and you’ll prevent sticky finishes and get the smooth, hard sheen you want.
Start by cleaning and sanding surfaces so dust, oil, and old finishes won’t block cure and harm paint durability. Follow manufacturer thinning guidelines—over-thinning slows film formation.
Use compatible primers and test for color matching before full coats to avoid extra layers. Maintain recommended temperature and humidity to allow solvents to evaporate properly.
Wait full cure before handling or topcoating.
How to Speed Up Gloss Paint Drying (Practical Tips)
To speed up gloss paint drying, improve room ventilation by opening windows or using fans to move humid air away.
You can also mix in fast-dry additives designed for your paint type to shorten tack-free time.
Finally, apply thin, even coats—each thinner layer dries faster and reduces the chance of runs or tackiness.
Improve Room Ventilation
When you boost airflow in the room, gloss paint sheds solvents and moisture much faster, cutting dry time by hours. Open windows, run fans, and aim airflow across wet surfaces so coats cure evenly.
While you focus on ventilation, keep color mixing tight and use consistent brush techniques to avoid extra rework that traps moisture.
- Position a box fan near a window to push damp air out.
- Use a ceiling or oscillating fan to circulate air across painted panels.
- Dehumidify the space; lower humidity speeds solvent evaporation and prevents tacky finishes.
Use Fast-Dry Additives
Although gloss paints already dry through solvent evaporation, you can speed that process by adding a fast-dry additive designed for your paint type. These products thin the film and boost solvent release so coats harden faster.
You’ll follow manufacturer ratios and test a small batch to confirm color matching won’t shift; some additives can slightly alter tint or transparency.
Check compatibility with oil- or water-based formulations to avoid finishes that blush or wrinkle. Also verify the additive won’t change finish sheen beyond acceptable limits.
Use minimal amounts, stir thoroughly, and allow proper flash time between coats for best results.
Apply Thin, Even Coats
If you’ve tried fast-dry additives, don’t stop there — the way you apply each coat has an equally big effect on drying time. Apply thin, even coats so solvent evaporates quickly and you avoid tacky layers. Use proper tools and steady strokes, and keep color mixing minimal between coats to prevent uneven drying.
Check paint storage temperature before you start; cold paint thins poorly and slows cure.
- Use a high-quality brush or foam roller for smooth, thin layers.
- Maintain consistent stroke direction and overlap.
- Wait recommended flash time between coats, not longer.
Using Heaters and Fans Safely to Speed Drying
Because gloss paint cures best with steady, controlled warmth and airflow, you can safely speed drying by using heaters and fans—so long as you follow a few precautions.
Gloss paint dries best with steady, controlled warmth and gentle airflow—use heaters and fans carefully to avoid problems.
You’ll prioritize heat safety: keep heaters at a moderate distance, avoid open flames, and use thermostats to prevent overheating that can blister paint.
For fan placement, aim for gentle, indirect airflow across the surface rather than blasting it; position fans to circulate air without stirring dust onto wet paint.
Work in a well-ventilated space, monitor temperature and humidity, and let each coat feel tack-free before applying the next to avoid trapping solvents.
When Thinners or Drying Agents Help: And When They Harm
When you’re racing against time, thinners and drying agents can seem like a shortcut to faster gloss paint drying, but they’re tools that need careful use. You can speed tack time or improve flow, yet misuse causes wrinkling, poor adhesion, or altered gloss. Consider these guidelines:
- Use manufacturer-recommended thinner amounts to preserve color blending and film integrity; test small areas first.
- Add drying agents sparingly in warm, ventilated conditions; too much accelerates skinning and brittle finish.
- Avoid mixing different brands and store mixed paint correctly; good paint storage prevents contamination and unpredictable reactions.
Choosing Fast-Drying Gloss Paint: What to Look For
After you’ve considered how thinners and dryers affect drying, pick a gloss formula that matches your timeline and environment. Choose quick-curing alkyd or water-based enamel labeled “fast-dry” and check manufacturer drying times for tack-free and recoat intervals.
Verify VOC limits if you’re indoors. Look for products with additives already balanced to avoid wrinkling or blush. Confirm color matching through swatches or small test panels; pigments can slow cure, so test under your conditions.
Decide desired finish sheen—high gloss often shows imperfections but dries predictably. Always read technical data sheets for temperature and humidity recommendations before buying.
Tools and Techniques That Reduce Drying Problems
Before you paint, make sure the surface is clean, sanded, and primed so gloss coats adhere and dry evenly.
Use quality brushes or rollers and the right applicator for your paint to avoid streaks, bubbles, or overworking the film.
Control temperature, humidity, and airflow in the room to speed curing and prevent tacky or uneven finishes.
Proper Surface Preparation
Even if you’re enthusiastic to start, taking time to prep the surface will prevent common gloss-paint drying problems and give you a smoother, more durable finish. You’ll improve paint adhesion and maintain color consistency by removing dirt, grease, and loose material.
Sanding creates a keying surface; cleaning removes contaminants; and priming seals porous areas. Follow these three steps:
- Degrease and wash the surface, then dry completely to avoid trapped moisture.
- Sand lightly to dull gloss and remove flaking paint, wiping dust afterward.
- Apply an appropriate primer to promote adhesion and uniform color before gloss coats.
Quality Application Tools
While the right tools won’t change the chemistry of drying, they’ll help you apply gloss paint evenly so it cures faster and looks better. Use high-quality synthetic brushes for smooth edges and a dense nap roller for flat areas to avoid streaks and thick spots that prolong tackiness.
Keep a clean, well-maintained spray gun if you spray; clogged nozzles cause uneven layers. Carry a portable color matching strip to verify tones under different lights and prevent overworking corrections.
Store leftover mixes properly—label cans, seal lids, and follow paint storage guidelines to preserve consistency for touch-ups.
Controlled Drying Environment
If you control temperature, humidity, and airflow, you’ll cut drying time and avoid tacky finishes or bloom. Set a stable 60–75°F, keep humidity near 40–50%, and use gentle fans to move air without dusting wet gloss.
Monitor with a thermometer and hygrometer, and use a dehumidifier or humidifier as needed. Proper paint storage matters: keep cans sealed, upright, and at moderate temperature to preserve solvents and ensure consistent color mixing.
For controlled drying, consider:
- Portable heater with thermostat for stable temp.
- Dehumidifier plus oscillating fan for even airflow.
- Isolated drying tent or room to limit dust.
How to Thin Gloss Paint for Better Flow and Drying
When your gloss paint seems too thick to lay down smoothly or it’s running slow to dry, thinning it can improve flow and speed up curing; start by checking the manufacturer’s recommendation for solvent type and ratio.
Use small increments of solvent—mineral spirits for oil-based, water or a manufacturer-approved reducer for water-based—stirring thoroughly between additions.
Test on a scrap to confirm color matching and observe how it affects sheen and texture finishing.
Thin just enough to improve brush or spray application without lowering hiding power.
Work in a ventilated area, and allow proper flash-off time before applying the next coat.
Sanding Between Coats: Timing and Grit Guide
You’ll want to wait until the gloss is dry to the touch and tack-free—usually a few hours to overnight depending on temperature and humidity—before sanding.
Use fine grits (320–400) for typical smoothing, or go up to 600–800 if you’re prepping for a final polish.
Wet sanding gives smoother results and reduces dust, while dry sanding’s faster for quick scuffs, so pick the method that matches your finish goals.
Drying Time Before Sanding
Before you sand between coats, make sure the gloss paint has cured enough to resist the pressure of sanding without gumminess or tearing. Generally, that’s a dry-to-touch period followed by additional curing, so check both time and feel rather than relying on a single number.
You’ll factor in temperature, humidity, and manufacturer recommendations. Note that color mixing can affect drying speed and final paint sheen.
Test by light touch in an inconspicuous spot. If it skins over but feels pliable, wait longer.
Follow these checkpoints:
- Manufacturer dry-to-touch and recoat times.
- Physical feel test at several spots.
- Environmental conditions and elapsed cure time.
Recommended Sandpaper Grit
If your goal is a smooth, durable finish, pick sandpaper grit that removes imperfections without cutting through the gloss coat. Start with fine grits—220 to 320—for gentle leveling between coats, and move to 400–600 grit for final smoothing before the last coat.
You’ll sand only after the recommended dry time, using light pressure and a sanding block to avoid uneven spots. Choose higher grits if you notice minimal orange peel or want to preserve gloss sheen.
Avoid aggressive grit that reveals underlying primer and risks color fading. Clean dust thoroughly before recoating to secure adhesion and appearance.
Wet Sanding Versus Dry
When deciding whether to wet sand or dry sand between gloss coats, consider the paint’s hardness and your desired smoothness—wet sanding cuts less aggressively and helps prevent swirl marks, while dry sanding is quicker for minor levelling.
You’ll choose based on timing, grit sequence, and the finish sheen you want, and you’ll pay attention to color matching if repairs follow.
- Wet sand: use 1000–2000 grit, slow strokes, keeps dust down, preserves sheen.
- Dry sand: use 400–800 grit for leveling, faster but riskier for soft gloss.
- Blend: start coarser dry, finish wet for perfect color matching and gloss.
Fixing Runs, Sags, and Orange Peel in Glossy Finishes
Although glossy paint can give a striking finish, runs, sags, and orange peel are common flaws you can correct with the right timing and technique. You’ll wait until tack-free, then sand runs smooth with fine grit, clean, and recoat. For orange peel, wet-sand and polish; for sags, sand flat and feather edges. Keep color matching in mind when blending repairs, and practice good brush maintenance to avoid new defects. Follow light coats and proper drying between layers.
| Problem | Fix |
|---|---|
| Run | Sand, clean, recoat |
| Sag | Sand, feather, recoat |
| Orange peel | Wet-sand, polish |
| Prevent | Thin coats, dry time |
Identifying and Fixing Adhesion or Blistering Issues
If your gloss is lifting or blistering, first check for surface contaminants like oil, wax, or old silicone that can stop proper adhesion. You’ll need to strip or thoroughly clean the area, sand to a sound profile, and apply the right primer before repainting.
For spot repairs, feather the edges, scuff the surrounding paint, and follow the manufacturer’s recoat windows to prevent recurrence.
Surface Contaminant Inspection
Because contaminants are the most common cause of poor adhesion and blistering, you should inspect the surface carefully before painting and again if problems appear afterward. Use systematic surface contamination inspection techniques to spot oil, wax, dust, or residue that can lift gloss finishes. You’ll want to document findings and act promptly.
- Visual check: look for sheen irregularities, spots, or bubbles.
- Touch test: run a clean fingertip to detect slick areas or residue.
- Solvent wipe: use an approved cleaner on a small area to reveal hidden contamination.
Address sources immediately to prevent recurring adhesion failures.
Proper Surface Preparation
When you spot adhesion problems or blistering, tackle surface preparation methodically to prevent recurring failures. First, remove loose paint with a scraper and sand affected areas to solid edges; don’t feather into bad paint.
Clean residues with a suitable solvent, rinse, and dry fully. Inspect substrate for moisture, rust, or contamination causing lift. Prime exposed bare spots with an appropriate primer to promote adhesion and maintain consistent paint sheen.
When patching, match color matching and sheen to surrounding finish to minimize spotting. Allow recommended cure times before proceeding so repairs bond and last.
Recoat And Repair Techniques
Although you’ve prepped the surface carefully, adhesion problems and blistering can still show up during recoating, so you need a systematic approach to identify and fix them.
Inspect for loose film, popping blisters, and edge lifting. Remove failed areas, feather edges, and sand for texture smoothing before spot-priming. Match primer and gloss for proper color blending, then test a small patch.
- Cut out blisters, sand to sound substrate, apply corrosion inhibitor if metal.
- Feather and sand surrounding paint to smooth gradients and guarantee adhesion.
- Use compatible primer, then recoat, checking cure times and adhesion.
How Long Before Gloss Paint Yellows or Crazes
If you’re using traditional oil-based or certain alkyd gloss paints, expect yellowing to show within months to a few years. You’ll notice warm amber casts, especially on whites and pale colors, accelerated by heat, poor ventilation, or nicotine exposure.
Crazing—fine surface cracks—can appear when coatings cure unevenly or over incompatible primers. Watch for early signs: color fading adjacent to intact areas and small flakes preceding surface peeling.
Preventive choices—modern formulations and proper preparation—delay problems, but once yellowing or crazing starts you’ll need to assess adhesion and film integrity before deciding on stripping or refinishing.
Maintenance to Preserve a Cured Gloss Finish
To keep a cured gloss finish looking sharp, stick to simple, regular care: dust with a soft cloth, wash gently with a mild detergent solution, and dry immediately to prevent water spots. You’ll protect the sheen and slow color fading while keeping texture smoothing intact. Follow a brief maintenance routine and inspect for damage.
- Wipe weekly with a microfiber cloth; use diluted soap for grime and rinse well.
- Apply a non-abrasive polish sparingly every few months to enhance gloss and smooth minor texture inconsistencies.
- Repair chips promptly with matching touch-up paint to prevent larger deterioration.
Safety When Accelerating Paint Drying
When you speed up gloss paint drying, take safety steps to protect yourself and the finish. Work in a well-ventilated area or use ventilation fans to reduce fumes; wear a respirator rated for organic vapors, eye protection, and gloves.
Avoid open flames and hot surfaces—accelerants can create fire risks and release harmful compounds that pose environmental hazards. Don’t overuse heat or chemicals that can blister or yellow the finish.
Collect rags and waste in sealed, fire-safe containers and follow local paint disposal rules; never pour leftover thinners down drains.
Follow product instructions and safety data sheets for best results.
Project Timeline Estimates for Doors, Trim, and Furniture
Because doors, trim, and furniture vary in size, surface prep, and paint type, you should plan your project in stages and allow extra time for proper curing. Expect full dry-to-touch in hours but handle with care for days; full cure often takes weeks. Monitor gloss sheen and watch for early color fading under sunlight. Sequence work to avoid recontamination and allow for sanding between coats.
- Doors: 24–48 hours between coats; 7–14 days to cure for heavy use.
- Trim: 12–24 hours between coats; 3–7 days for light handling.
- Furniture: 24–72 hours between coats; 2–4 weeks to fully cure.
Troubleshooting: Symptoms, Likely Causes, and Fixes
If your gloss finish isn’t looking right, start by identifying the symptom—blushing, orange peel, tackiness, or dull spots—and trace it to likely causes like humidity, wrong thinner, poor surface prep, or insufficient dry time. Diagnose quickly, then apply fixes: improve ventilation, strip and recoat, or wait longer between coats. Consider Color consistency and perform Brand comparison if problems persist.
| Symptom | Fix |
|---|---|
| Blushing | Increase heat/ventilation |
| Orange peel | Thin or spray correctly |
| Tackiness | Longer dry time |
| Dull spots | Light scuff, recoat |
Test on scrap before full repairs.
Quick Checklist to Confirm Gloss Paint Is Fully Cured and Safe
After you’ve diagnosed and addressed finish problems, confirm the gloss paint is truly cured and safe before regular use. Check cure by touch, smell, and appearance to protect gloss durability and prevent color fading.
- Light touch: gently press an inconspicuous spot — no tackiness means surface cure; no dents means hardness is developing.
- Odor test: minimal solvent smell after ventilation indicates advanced curing; strong odor means wait longer to avoid fumes.
- Visual inspect: consistent sheen and no soft spots or discoloration show proper crosslinking; note any early color fading and retest later.
Follow manufacturer cure time for full durability.
Frequently Asked Questions
Can Gloss Paint Cause Allergic Reactions While Curing?
Yes — you can get allergic symptoms from gloss paint while it’s curing; paint fumes can trigger sneezing, itchy eyes, skin rash, or breathing trouble. You should ventilate, wear a mask, and avoid prolonged exposure.
Does Paint Sheen Affect VOC Emissions Over Time?
Like a fading sunset, yes — sheen affects VOC emissions: you’ll see initial VOC reduction tied to binder cure, but sheen longevity influences long-term off‑gassing, so higher sheens often sustain lower emissions over time.
How Does Paint Color Influence Perceived Drying Time?
Darker paints can make you perceive slower drying because color perception and retained heat create a drying illusion; lighter hues reflect light, so you’ll often feel they dry faster, though actual evaporation rates may stay similar.
Can Mold Grow Beneath Semi-Cured Gloss Paint?
Yes — you can get mold growth under semi cured paint; it’s like a hidden garden thriving in wet shadow. If moisture’s trapped, mold will colonize beneath the film, so dry, ventilate, and fix leaks promptly.
Are There Eco-Friendly Disposal Rules for Leftover Gloss Paint?
Yes — you should follow eco disposal guidelines and local paint regulations: don’t pour gloss paint down drains, take leftovers to hazardous-waste or paint-recycling centers, and check municipal rules for proper labeling, storage, and drop-off requirements.
Conclusion
Think of gloss paint like a pond at dawn—surface may mirror the sky quickly, but depth takes time. You’ll see skin-dry sheen in hours, but curing needs days to weeks depending on oil vs. water base, temperature, and humidity. Treat freshly painted doors, trim, and furniture gently until the pond’s calm is complete: wait the recommended drying window, avoid heavy use, and follow the checklist so your finish stays bright and unmarked for seasons to come.