How Long Does It Take for Wall Primer to Dry
Most wall primers are touch‑dry in 30 minutes to a few hours and ready for a recoat anywhere from about 1 to 24 hours, depending on type, coat thickness, and conditions. Latex primers usually recoat in 2–4 hours; oil‑based need 16–24 hours; shellac dries fastest, often recoatable within an hour. High humidity, low temps, or heavy coats slow drying. Keep ventilation and thin coats for best results, and if you want specifics, keep going for details.
Who This Guide Is For and What You’ll Learn
Whether you’re painting a single accent wall or prepping an entire house, this guide helps you understand primer drying times and how to work with them. You’ll get practical advice if you’re a DIYer, renter, or pro painter wanting predictable schedules.
You’ll learn factors that change dry and recoat windows, how humidity, temperature, and surface type matter, and when to wait vs. speed up drying. You’ll also find tips for color matching after priming and a primer comparison overview to pick the right base.
Quick Answer: Typical Primer Dry and Recoat Times
Although primer types and conditions vary, you can generally expect latex primers to feel dry in 30–60 minutes and be ready for a recoat in 2–4 hours.
While oil-based primers usually dry to the touch in 6–8 hours and need 24 hours before recoating.
You should plan projects around those windows, adjusting for humidity and temperature.
Fast-drying primers speed schedules but may sacrifice primer durability; heavy stains or drastic color matching needs often benefit from longer-curing products.
Always follow manufacturer times and test a small patch before full recoating to guarantee adhesion, coverage, and accurate color matching.
Water-Based (Latex) Primer: Dry and Recoat Times
Because latex primers dry fast under typical indoor conditions, you can usually handle a second coat or topcoat the same day. You’ll often wait 1–2 hours for touch-dry and 3–4 hours for recoat in moderate temps and humidity.
If humidity’s high or ventilation’s poor, add extra drying time. For tricky spots, consider light sanding or primer removal before recoating to guarantee adhesion and smooth finish.
Also plan for color matching if covering dark or patched areas—use a tinted primer or extra coats.
- soft, tack-free surface
- even, matte finish
- subtle lap marks
- uniform base for paint
Oil-Based (Alkyd) Primer: Dry and Recoat Times
When you use an oil-based (alkyd) primer, expect longer dry and recoat times than with latex—typically touch-dry in 6–8 hours and ready for sanding or recoating in 16–24 hours under normal indoor conditions. You’ll notice stronger odor and slower cure; plan ventilation. Oil primers excel at primer sealing and stain blocking, and they help with color matching when covering bold hues. Temperature and humidity affect cure, so don’t rush sanding. Use the table to compare quick expectations:
| Stage | Typical Time | Tip |
|---|---|---|
| Touch-dry | 6–8 hrs | Ventilate |
| Recoat-ready | 16–24 hrs | Test first |
| Full cure | 7+ days | Avoid heavy use |
Shellac Primer: Drying and Ideal Recoat Window
Shellac primer usually dries to the touch in about 15–30 minutes and can be sanded within an hour, so you’ll see very fast initial drying.
Because it cures quickly, the ideal recoat window is typically 1–2 hours, though full solvent resistance can take longer.
Make sure you follow the manufacturer’s guidance and allow extra time in cool or humid conditions.
Shellac Primer Dry Times
If you need a fast, reliable base coat, shellac primer dries quickly and gets you ready to recoat in a short window. You’ll notice tack-free times around 15–30 minutes and handling dry in about an hour under ideal conditions.
Shellac excels for stain blocking and color matching when you’re covering bold hues, and many pros refer to it among top primer primers for speed. Keep ventilation steady and temperature moderate to hit those times.
Visualize the finished wall:
- smooth, sealed surface
- blocked stains and tannins
- crisp shift to topcoat
- true base for accurate color results
Ideal Recoat Window
Because shellac primer dries so fast, you can usually recoat in about 45 minutes to an hour under good conditions, though tack-free times can be as short as 15–30 minutes. You’ll plan your schedule around that window, checking humidity and temperature before you start. For color matching and primer selection, test a small area to confirm adhesion and coverage. If conditions are cool or humid, wait longer to avoid trapping solvents. Sand lightly between coats for best results. Use the table below to guide timing by condition and note any precautions.
| Condition | Typical Recoat | Notes |
|---|---|---|
| Ideal | 45–60 min | Low humidity |
| Warm/dry | 30–45 min | Faster cure |
| Cool/humid | 2–4 hrs | Extend wait |
How Drywall, Plaster, Wood, and Old Paint Affect Drying
Different surfaces change how fast primer dries, so you’ll want to take into account drywall, plaster, wood, and existing paints before you start.
You’ll notice drywall soaks primer evenly.
Plaster can be chalky and slow absorption.
Raw wood drinks it fast.
And glossy old paint may resist adhesion.
Consider color matching and primer removal when prepping: scuff glossy areas, strip loose layers, and test a patch.
Visualize surface types:
- porous drywall with paper seam tape
- rough, limey plaster with hairline cracks
- unfinished wood grain soaking in
- glossy enamel paint beads on top
Adjust product and dry time accordingly.
How Humidity Influences Primer Drying Time
If the air’s humid, your primer will take longer to dry because moisture in the air slows solvent evaporation.
In contrast, low humidity helps primer cure faster and more evenly.
You’ll want to adjust drying times and ventilation based on local conditions to get the best results.
High Humidity Effects
Ever wondered why your primer seems to stay tacky for ages on humid days? High humidity slows evaporation, so you’ll notice longer dry times and potential sagging.
You should check color matching and primer compatibility before painting; wet film can trap moisture, altering hues and adhesion.
To visualize effects:
- Steam clinging to a freshly rolled wall
- Tiny beads lingering on primer surface
- Brush marks smoothing slowly under damp air
- A paint can sweating on the drop cloth
Work in ventilated spaces, use low-VOC quick-dry formulas, and wait extra hours before sanding or recoating.
Low Humidity Benefits
When humidity’s low, primer dries noticeably faster because moisture evaporates quickly from the film, letting solvents and water leave the surface and the binder set more efficiently. You’ll get quicker recoat times, crisper color matching, and more reliable surface sealing because the primer forms a uniform film without trapped moisture. Workable conditions reduce tackiness and sanding time, so your project stays on schedule. Monitor temperature and airflow too; extreme dryness can cause flash drying. Use the table to compare typical outcomes:
| Condition | Dry Time | Result |
|---|---|---|
| Low humidity | 30–60 min | Faster recoats |
| Moderate | 1–2 hr | Standard results |
| High | 4+ hr | Poor sealing |
How Temperature Speeds Up or Slows Primer Drying
Because chemical reactions speed up with heat, higher temperatures usually make primer dry faster, while cooler conditions slow the process down. You’ll notice tack-free time shortens in warm rooms and extends in chilly ones, affecting when you can touch up or plan color coordination.
Avoid premature primer removal by waiting the recommended time at the current temperature.
Visualize effects:
- A sun-warmed wall becoming ready to sand sooner
- A cold basement keeping primer soft longer
- Quick surface firming under warm lights
- Slow curing under a drafty, cool window
Adjust schedules to match room temperature for reliable results.
Improve Drying With Ventilation and Airflow
Temperature isn’t the only factor you can regulate to speed primer drying — airflow makes a big difference too. Open windows and doors to create cross-ventilation, and position fans to move air parallel to the wall so evaporation accelerates evenly.
Use a dehumidifier in humid conditions and avoid directing hot air onto wet primer, which can cause tackiness. Maintain steady, moderate airflow to prevent dust settling into the surface.
While you focus on ventilation, keep brush techniques consistent to avoid streaks that trap moisture and ensure primer lays smoothly for accurate color matching later when you apply paint.
Coat Thickness and Application: Brush, Roller, Sprayer
If you apply primer too thickly, it’ll take much longer to dry and can sag or trap solvents, so aim for an even, moderate film rather than heavy buildup.
You’ll get best results by matching technique to surface: brush for edges, roller for flats, sprayer for fast, thin coats.
Watch drying times between coats and check paint compatibility to avoid adhesion issues.
Allow adequate drying between coats and verify paint compatibility to prevent adhesion problems.
For color matching, apply a thin test patch and let it cure.
Visualize the finish:
- Smooth roller strokes covering flats
- Crisp brush lines at corners
- Even mist from a sprayer
- Thin, uniform test patch
Fast-Dry vs. High-Build Primers: What to Expect
Fast-dry primers cure much quicker, so you can recoat in a few hours.
High-build primers take longer but fill imperfections for a smoother finish.
You’ll notice fast-dry options leave a thinner texture, whereas high-build products create a thicker, more uniform surface that can hide flaws.
When planning your work, factor in longer tack and dry times for high-builds and quicker turnaround for fast-dry primers.
Drying Time Differences
While both fast-dry and high-build primers aim to prepare your walls for paint, they dry and perform very differently, so you’ll want to choose based on your timeline and surface needs. Fast-dry primers set in 30–60 minutes, letting you recoat same day; they help with color matching when you’re sealing stains quickly.
High-build primers take several hours to skim and cure, offering thicker primer texture that fills minor imperfections but needs longer before sanding or recoating. Picture the difference:
- Thin, quick film drying in an hour
- Thick, tacky layer needing patience
- Rapid recoat vs. measured wait
- Smooth finish vs. filled surface
Surface Texture Effects
Because the primer you pick affects how your wall feels and how the finished paint lays down, think about texture as part of the prep decision. You’ll notice fast-dry primers lay thin, preserving fine texture and subtle color contrast, so paint looks crisp sooner. High-build primers fill imperfections, offering stronger texture enhancement and smoother final coats, but they take longer to set. Match primer choice to your wall’s needs: quick turnaround or surface correction. Visualize options:
| Fast-Dry | High-Build |
|---|---|
| Thin layer | Thick layer |
| Preserves texture | Fills defects |
| Quick set | Longer cure |
| Maintains contrast | Softens contrast |
Choose accordingly.
Application And Recoat
When you apply primer, think about how thickness and drying time affect your next steps. Fast-dry primers let you recoat in hours, while high-build types need longer to cure but hide imperfections better. Choose based on schedule, surface and color matching needs, and environmental impact.
- A thin fast-dry coat on smooth drywall, ready in 1–3 hours.
- A thick high-build layer smoothing rough patches, tack-free in 4–8 hours.
- Wet edges blend easier with fast-dry if you work quickly.
- High-build requires gentle sanding before recoating for best adhesion.
Plan recoats for temperature and humidity.
How Porous Surfaces Change Primer Absorption and Dry Time
If you’re working on a highly porous wall—like bare drywall, plaster, or unsealed brick—the primer soaks in faster and can seem to dry quicker on the surface while still leaving deeper layers damp.
You’ll notice surface porosity affects primer absorption: more porous substrates draw liquid away, thinning the primer film and accelerating surface tack loss. That means you may need additional coats or a sealer to achieve uniform coverage and proper adhesion.
Monitor the wall’s feel and appearance, allow extra drying time between coats, and consider using a primer formulated for high-porosity materials to avoid weak, uneven results.
Dry to the Touch vs. Ready to Sand vs. Ready to Paint
Porosity affects how quickly a primer loses surface tack, but that doesn’t always tell you when you can move on to the next step: “dry to the touch,” “ready to sand,” and “ready to paint” are three different milestones.
You’ll learn to judge each by feel and appearance rather than time alone.
Dry to the touch means no tack; ready to sand means the film resists gumminess; ready to paint means full adhesion and uniform color for good color matching and final paint sheen.
No tack when dry, firmer and non-gummy for sanding, fully adhered and color-uniform when paint-ready
- soft, slightly dull surface
- firm, even film for sanding
- clean edges without lifting
- consistent hue for sheen preview
Tack Test: Check If Primer Is Dry Enough to Sand
After the recommended wait time, you should do a simple tactile check by lightly touching the primed surface to see if it feels set.
Use a fingernail pressure test on a small, inconspicuous spot—if the primer resists a gentle scratch and doesn’t tack, it’s likely ready to sand.
If it still feels gummy or comes away on your nail, give it more time before sanding.
Surface Tactile Check
When the primer looks dry, do a quick tactile or “tack” test to see if it’s ready to sand. You gently press a gloved fingertip to a small area to confirm tackiness without leaving a mark. You’re checking for even feel, aiming for color matching with adjacent coats and texture smoothing potential.
If it’s slightly tacky, wait; if it resists, you can sand. Visualize the surface:
- smooth satin finish under light
- faint dull spots where primer pooled
- uniform color across the wall
- subtle grain where texture remains
Proceed with light sanding only when the tactile check feels consistent.
Fingernail Pressure Test
If the surface looks dry, try the fingernail pressure test to be sure: press a clean fingernail (or gloved fingertip) gently into an inconspicuous spot to check for tackiness and give—no scrape or gouge—so you can tell if the primer will sand cleanly without clogging your sandpaper. If it leaves a slight impression but no stick, you’re good to sand lightly. Different primer brands vary; note how tack relates to color matching coats. Visualize results:
| Spot | Impression | Action |
|---|---|---|
| Smooth | None | Sand |
| Slight | Shallow | Light sand |
| Sticky | Deep | Wait |
| Damaged | Gouge | Recoat |
Timing After Application
Although primer may look dry to the touch, you should still perform a tack test before sanding to confirm it’s ready; gently press your fingertip or a piece of clean tape against a hidden area and feel for any stickiness or give. If it’s tack-free, you can sand lightly.
Consider timing: allow recommended recoat times, longer in cool or humid conditions. Check primer compatibility with your topcoat to avoid issues. Also think about color matching—primer may shift as it cures, affecting final paint.
Visualize readiness:
- soft, velvety surface
- no residue on finger
- even, uniform color
- firm, paintable feel
How to Sand Primer Without Damaging the Surface
To sand primer without damaging the surface, start by choosing the right grit and working lightly—you’re removing imperfections, not the whole coat. Use 220–320 grit for most latex primers; finer grits for smooth finishes. Keep a light, even pressure and sand with the grain or in circular motions depending on texture.
Wipe dust frequently to check progress; trapped particles affect primer durability and final paint adhesion. If you’ll shift to a bold topcoat, remember color psychology when planning opacity and tinting—lightly scuffing helps uniform coverage.
Finish with a clean, dry surface before recoating for best results.
Common Mistakes That Slow Primer Drying (And Fixes)
When you rush the job, use the wrong primer, or paint in poor conditions, you’ll slow drying and risk adhesion problems. Recognizing these common mistakes lets you fix them quickly and keep your project on schedule.
Rushing, wrong primer, or poor conditions slow drying and risk adhesion—spot these mistakes to stay on schedule.
Check product labels for temperature and humidity limits, and store cans upright—proper primer storage preserves solvents and drying agents.
Avoid overthick coats; apply thin, even layers. Watch for incompatible combinations: oil-over-water traps moisture. Also consider color matching—heavy tinting can alter dry time, so let tinted primer rest per manufacturer instructions.
Common culprits include:
- Thick globby application
- High humidity room
- Improper ventilation
- Old or poorly stored primer
Troubleshooting: What to Do If Primer Stays Tacky
If your primer stays tacky, first check the room temperature and humidity—too cold or humid air will slow curing.
If conditions are fine, consider thinning the primer per the manufacturer’s instructions or applying a light recoat once tackiness lifts.
If the surface has dust, grease, or other contaminants, gently clean and spot-prime the affected areas before proceeding.
Check Temperature And Humidity
Wondering why your primer stays tacky? Check temperature and humidity first — both slow curing. You’ll want to control the room to match the primer formulations’ recommended range, especially for water-based versus oil-based products.
Also consider color matching: darker pigments can retain heat and affect drying.
- A chilly garage with 40% humidity feels slow
- A steamy bathroom after a shower traps moisture
- Sunlit south wall warms a dark primer coat
- A poorly ventilated closet holds solvent fumes
Use a heater, dehumidifier, or fan to reach ideal conditions and recheck tackiness after an hour.
Thin Or Recoat Primer
Because primer can stay tacky from being too thick or from recoating before it’s dry, you’ll want to correct the film rather than keep piling it on.
If the coat’s heavy, thin it by gently sanding the tacky surface once it’s firm enough to resist smudging, then apply a thin, even layer.
For recoat errors, wait until tackiness subsides; speeding up drying with ventilation helps.
If sanding or waiting won’t fix adhesion or color matching issues, consider primer removal and reapplication.
Always test a small patch before broader work to avoid damaging the substrate or causing finish problems.
Remove Contaminants Carefully
When contaminants like oil, dust, or silicone get trapped under primer, they can keep the film tacky and prevent proper adhesion. So you should remove them carefully before reapplying. You’ll inspect the surface, note primer texture changes, and test small areas.
Gently remove residues without damaging the substrate, then clean, dry, and sand if needed. Check color matching after repairs to avoid visible patches. If tack remains, strip and start fresh.
- Greasy fingerprints smeared across a test patch
- Fine dust settling like a gray veil
- Silicone beads beading up the primer
- Sanded edges revealing different primer texture
Scheduling Multiple Coats: Primer, Sanding, and Topcoat
If you plan the sequence—primer, light sand, and topcoat—you’ll save time and get a smoother, longer-lasting finish. You’ll choose primer formulas suited to substrate and color matching needs so fewer coats are needed. Apply primer thinly, wait manufacturer-recommended dry time, then inspect for imperfections.
Sand lightly with fine-grit paper to remove nibs and guarantee adhesion; wipe dust away thoroughly. Allow any touch-up primer to dry before sanding again.
Schedule topcoat application when humidity and temperature meet product specs for proper curing. Stagger rooms or sections so primers can dry uninterrupted, then finish with confident, even topcoats.
Painting Latex Over Oil: Primer Choices and Drying Tips
If you’re painting latex over an oil-based finish, pick a bonding primer formulated for oil-to-latex to guarantee proper adhesion.
Expect these primers to feel dry to the touch in a few hours but allow the manufacturer’s recommended cure time—often 24 hours—before topcoating.
Proper surface prep, like degreasing and scuff-sanding, is essential to prevent peeling and speed reliable drying.
Oil-To-Latex Primer Options
Painting latex over oil-based paint calls for the right primer to guarantee adhesion and prevent peeling, and you’ve got several reliable options depending on time and surface condition. Choose primers that advertise primer compatibility with both oil and latex, and consider color matching if you’re covering dark or stained areas.
Options include:
- A shellac-based primer for quick sealing and stain blocking.
- An oil-based alkyd primer for tough adhesion on glossy surfaces.
- A bonding latex primer formulated for oil-to-latex progressions.
- A stain-blocking water-based primer for mild discoloration.
Apply per label instructions and test a small area first.
Drying Time Expectations
After picking the right oil-to-latex primer, you’ll want to know how long it needs to dry before you can topcoat with latex—drying times vary by primer type, temperature, humidity, and film thickness. Expect recoat windows from 30 minutes for fast-dry latex-based primers to 24 hours or more for heavy oil-based formulas.
Cooler, humid conditions extend cure time; thin coats speed it up. Check manufacturer flash times and test a small area before full color selection to guarantee uniform coverage.
If you plan primer removal later, avoid overbuilding films; sanding between coats helps adhesion and prevents trapping solvents.
Surface Prep And Adhesion
When you plan to put latex paint over an oil-based finish, thorough surface prep is the single best step to guarantee adhesion and a lasting job. You’ll sand to dull gloss, degloss with solvent, and clean grease so primer formulations bond.
Choose a compatible bonding primer or a shellac-based option if adhesion’s doubtful. Consider color matching if the oil base is dark—an opaque primer saves coats.
Visualize the process:
- Sanded sheen, fine dust on a drop cloth
- Tacky wipe-down with degreaser
- Smooth roller laying primer
- Even, dry surface ready for latex
Follow instructions and dry times for best results.
Priming in Cold or Humid Climates: Best Practices
Although colder or damper conditions slow drying, you can still get reliable primer results by controlling temperature, humidity, and ventilation. You should work when surfaces are clean and slightly warm, follow manufacturer temps, and pick primers labeled for low-temp cure. Consider eco friendly options and read labels for safe primer disposal. Monitor tackiness before recoating and allow extra drying time; don’t rush. Use small test areas to confirm adhesion and finish.
| Action | Why it helps |
|---|---|
| Choose low-temp primer | Designed to cure cooler |
| Increase ventilation | Reduces moisture |
| Test small area | Confirms drying and adhesion |
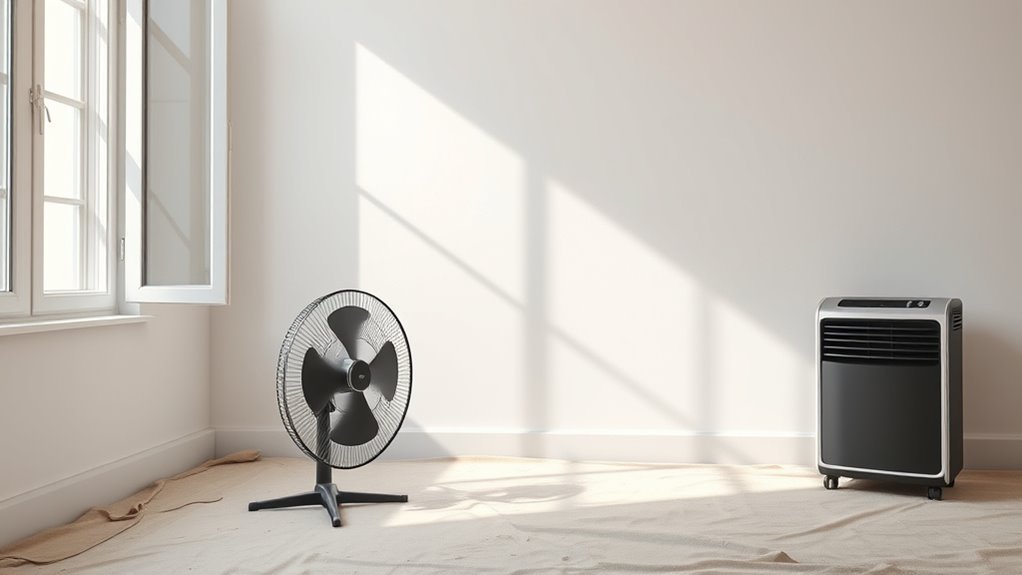
Tools That Speed Drying: Dehumidifiers, Fans, Heaters
If you need to speed primer drying, use targeted tools—dehumidifiers remove excess moisture, fans boost air circulation, and portable heaters raise surface temperature—so you can control conditions rather than wait on the weather.
You’ll set up equipment to shorten tack time and avoid runs. Position a dehumidifier near the wet wall, angle fans for cross-ventilation, and keep heaters safe and moderate.
Think about how faster drying affects subsequent choices like color theory when planning topcoats or timing furniture restoration nearby.
Faster drying influences decisions—from final color choices to scheduling furniture restoration—so plan topcoats and timing accordingly.
Visualize placement:
- Dehumidifier by a damp corner
- Box fan creating cross-flow
- Small ceramic heater directed safely
- Open window for exhaust
When Cured Primer Is Safe for Furniture and Room Use
Once the primer feels dry to the touch and has sat for its recommended cure time, you can start planning to move furniture back and reoccupy the room—but don’t assume tack-free equals fully cured.
Check manufacturer cure hours; many primers need 24–72 hours before heavy contact. When you return furniture, lift rather than drag to avoid primer removal or scuffs.
If you’ll hang art or match new paint, test small swatches for color matching after full cure.
Keep ventilation for the first few days to help residual solvents dissipate. If any tackiness remains, wait longer to prevent damage.
Safety and VOCs While Primer Is Drying
While the primer’s surface may feel dry within hours, the solvents releasing volatile organic compounds (VOCs) can linger and affect indoor air quality, so you should ventilate the space and limit exposure until VOC levels drop.
Open windows, run fans, and use low-VOC products to reduce risks. Consider respiratory protection if ventilation’s poor.
Primer porosity and temperature affect off-gassing duration, and color matching solvents can add odors.
Keep people and pets out until smells fade.
- a cracked window letting fresh air in
- a fan pushing fumes outside
- sealed cans labeled low-VOC
- a respirator nearby for short tasks
When to Call a Pro: Signs You Need Expert Help
When you notice peeling, blistering, or uneven primer coverage that sanding and a recoat won’t fix, call a pro—these issues often signal underlying moisture, adhesion, or surface-prep problems that can compromise the final finish.
You should also seek help if stains bleed through despite stain-blocking primer, if mold returns, or if large sections flake after drying.
A pro will diagnose moisture sources, test substrate compatibility, and explain paint interactions that affect adhesion. They’ll dispel priming myths you might’ve heard and recommend corrective measures—sealants, substrate repair, or specific primer systems—so your repaint lasts.
Step-by-Step Timing Checklist for Priming Success
Because timing makes or breaks your priming job, follow a clear checklist that maps each step to a realistic drying window and inspection point.
Start by doing a color analysis to decide primer color and surface prep.
Apply primer in thin coats; note tack-free times.
Wait full cure before sanding or topcoating.
- Inspect for pinholes and uneven sheen after 30–60 minutes.
- Lightly sand after recommended cure to smooth raised fibers.
- Recoat only within manufacturer’s specified window to avoid lifting.
- Final color analysis under natural light before painting to confirm primer color match.
Frequently Asked Questions
Can Primer Be Applied Over Latex Paint That’s Not Fully Cured?
You shouldn’t apply primer over uncured latex paint; it can hinder primer adhesion and compromise paint compatibility. Let the latex cure fully, then sand lightly and clean before priming to guarantee a durable, compatible finish.
Will Primer Change the Color or Sheen of My Topcoat?
Yes — primer can slightly alter your topcoat’s color or sheen, but if you guarantee proper surface preparation and choose primer for strong primer adhesion, you’ll maintain desired finish; test a small area first to confirm results.
Can I Store Partially Used Primer for Future Touch-Ups?
Like a saved ember, you can store partially used primer for touch-ups if you seal the can tightly and label it; proper primer storage preserves performance, ensuring touch up preservation and avoiding skinning, contamination, or thickening.
Do Primers Expire or Go Bad in the Can?
Yes — primers do expire. You’ll note primer shelf life on the label; over time cans thicken, separate, or smell off. For expired paint safety, don’t use compromised primer; dispose per local hazardous-waste rules.
Is Ventilation Required When Using Low-Voc Primers?
Yes — you should ventilate when using low‑VOC primers: ventilation importance remains because fumes and odors can persist, and while you’ll get low VOC benefits, fresh air reduces exposure, speeds drying, and improves comfort.
Conclusion
You’re basically a priming superhero now — you’ve learned the fast facts, drying windows, and when to call for backup. Follow the simple timing checklist, respect VOCs, and don’t rush recoats like a caffeine-fueled daredevil. With the right primer and a little patience, your walls’ll be ready faster than you can finish a podcast episode — and way less likely to crumble into a painty disaster. Go conquer that wall.