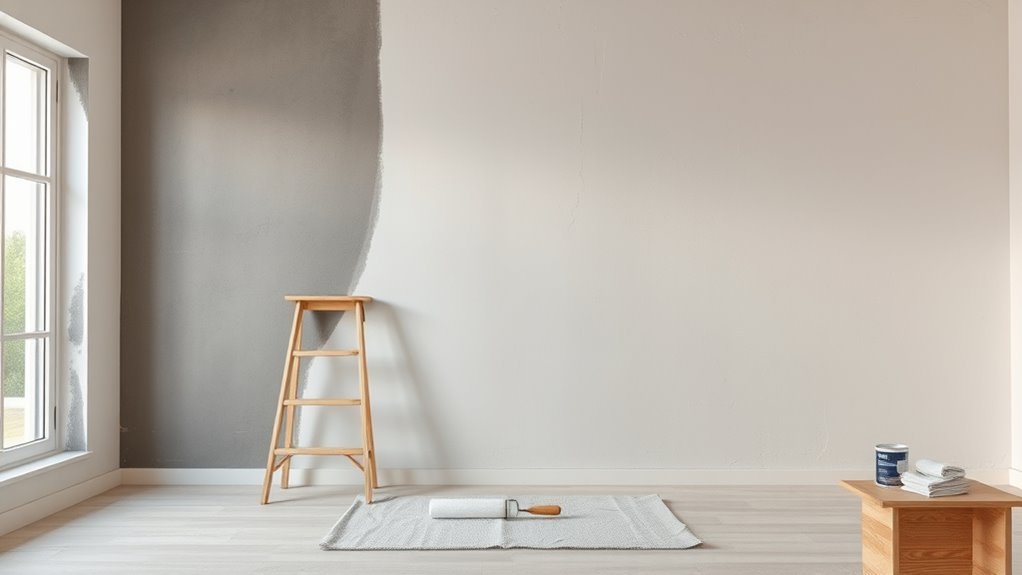
How Long Does It Take Plaster to Dry Before Painting
You should wait until plaster is fully dry before painting to avoid blistering, peeling, or mold. Gypsum skim coats usually dry in 24–72 hours; standard 10–15 mm layers need about 5–7 days; lime or heavy cement renders can take weeks to months. Check dryness with a moisture meter, tissue test, and tactile inspection, and use a breathable primer on new plaster. Keep patience—continuing will show you how to test, speed drying safely, and schedule jobs correctly.
How Long Does Plaster Need to Dry Before Painting?
Because plaster holds moisture differently depending on type and thickness, you should expect varying drying times before you can paint. You’ll assess plaster composition—lime, gypsum, or cement—plus thickness and ambient humidity to judge readiness.
Historical techniques like multi-coat lime work often require longer cure times than modern gypsum. You’ll monitor moisture with a meter or by touch, avoiding premature sealing.
If you use eco-friendly materials, be aware they might alter drying behavior. Plan drying days, ventilation, and avoid rapid heating.
Waiting guarantees paint adhesion and prevents blistering, peeling, or trapped moisture issues.
Quick Rule-of-Thumb Drying Times
While exact times vary, you can use simple rules of thumb to plan: thin gypsum skim coats often dry in 24–48 hours. Standard 10–15 mm plaster takes about 5–7 days. Thicker lime or cement-based renders may need several weeks to fully cure. Use these guidelines to schedule painting and check paint compatibility before starting.
Thin gypsum skim dries in 24–48 hours; standard plaster about 5–7 days; heavy renders can take weeks.
- Skim coats: quick turnarounds, but watch moisture for color matching.
- Standard plaster: allow a week, prime appropriately for paint compatibility.
- Heavy renders: longer cure, monitor humidity and surface dryness for best paint finish.
Testing Plaster for Paint Readiness
Before you pick up a brush, you’ll want to check for any damp spots that could trap moisture under paint. Press a clean tissue or use a moisture meter on different areas to spot hidden wetness.
Run your hand over the surface for cool or clammy patches.
Tap the plaster lightly—hollow sounds or soft give mean it’s not ready, while a firm, dry tone is a good sign.
Moisture Spot Checks
When you’re unsure whether plaster’s dry enough to paint, do a few targeted moisture spot checks to avoid trapping damp under your finish. You’ll verify dry areas, especially where Plaster textures or Decorative finishes create pockets that stay moist longer. Use simple tools and note spots that need more drying.
- Press a paper towel for a minute; darkening shows moisture.
- Use a moisture meter on multiple areas, especially textured or recessed sections.
- Compare readings near windows, corners, and behind trim to spot hidden damp.
Address any wet spots before priming so paint adheres and won’t blister.
Touch And Tap Tests
Although you’ve checked moisture, you still need to confirm drying by touch and tap tests to catch localized damp or soft spots that a meter might miss. You’ll run your hand lightly over the surface; a cool or slightly tacky feel means more drying time.
Tap with a knuckle or small hammer—hollow, ringing sounds indicate dryness, dull or muffled tones show trapped moisture or delamination. Mark any soft areas for repair, then reassess after drying.
Once firm and sounding right, proceed with primer, paying attention to color matching and texture blending so repairs disappear under paint.
What to Do If Plaster Is Still Damp
If your plaster’s still damp, don’t rush into painting—moisture trapped under paint will cause bubbling, peeling, and mildew. Check humidity and ventilation, and let the surface dry naturally; use fans and dehumidifiers to speed things up.
If plaster is still damp, wait—improve ventilation, reduce humidity, and let it dry fully before painting.
Avoid sealing or priming until the plaster feels dry to the touch and the plaster texture looks uniform.
- Increase airflow and lower humidity with fans and a dehumidifier.
- Remove sources of moisture and wait; don’t apply decorative finishes too soon.
- Use a moisture meter to confirm dryness before priming or painting.
Be patient; proper dryness protects your finish and longevity.
Gypsum Plaster (Skim Coat) Drying Times
Because gypsum plaster sets chemically rather than simply drying out, a skim coat can feel firm in a few hours but still hold moisture deeper down. You should expect full dry-back to take 24–72 hours under good conditions.
You’ll speed drying with good ventilation, moderate temperatures, and low humidity. Check moisture with a meter or the touch test before priming.
Thin coats dry faster than thick ones, so apply multiple thin layers for consistent Plaster textures.
When painting, wait until moisture is gone to avoid blistering and poor adhesion, and consider test patches for color matching once the surface is fully dry.
Lime Plaster Drying and Curing Times
Gypsum plaster dries by chemical set and often feels ready sooner than it truly is, whereas lime plaster relies on a slower carbonation process that binds lime with carbon dioxide from the air. So you should expect much longer drying and curing times.
Gypsum sets quickly by chemical reaction, but lime cures slowly by carbonation—expect much longer drying and curing times.
You’ll wait weeks to months for full strength; thin coats may be paint-ready sooner, but curing continues. Control humidity, ventilation, and temperature to speed carbonation without cracking.
Lime’s translucency affects color matching, so test finishes. Consider historical techniques for authentic results and patience.
- Expect slow carbonation
- Test samples for color
- Maintain steady conditions
Cement-Based Plaster Drying Times
When you work with cement-based plaster, drying times depend on mix ratio, temperature, humidity, and coat thickness.
You’ll want to use moisture meters, calcium carbide tests, or simple touch checks to confirm surface and internal moisture levels.
Remember that curing (gain of strength through hydration) continues after the plaster feels dry, so allow proper curing time before painting.
Drying Time Factors
Although cement-based plaster is durable, its drying time varies widely depending on several key factors you can control. Temperature, humidity, thickness, and ventilation all affect cure rates, so adjust conditions to speed drying without causing cracks.
Consider how finish choices interact with timing—your color schemes and furniture placement plans depend on fully dry plaster.
- Temperature: warmer speeds drying, but avoid rapid drying that cracks.
- Humidity & ventilation: lower humidity and good airflow help evaporation.
- Thickness & coat count: thinner coats dry faster; multiple coats need longer intervals.
Monitor conditions and wait for stable dryness before priming or painting.
Moisture Measurement Methods
You’ve adjusted temperature, humidity, and ventilation to speed drying—now you need a reliable way to verify moisture levels before priming or painting. Use a moisture meter for spot checks, weigh samples for lab accuracy, and try the calcium carbide method when precision matters. Remember Historical techniques for context, and consider Artistic applications that need lower moisture to avoid paint failure.
| Method | Use |
|---|---|
| Moisture meter | Quick onsite readings |
| Weighing samples | Precise lab results |
| Calcium carbide | Accurate, invasive |
| Visual/Touch | Complementary check |
Combine methods: meter for speed, lab for certainty, visual for judgment.
Curing Vs. Drying
Because curing and drying affect plaster differently, you need to know which process matters for cement-based mixes before you paint. You’ll treat drying as moisture loss and curing as chemical strength gain; both influence Plaster texture and readiness for Decorative finishes. Don’t rush one for the other.
- Curing: retains moisture so cement hydrates properly — improves strength and reduces cracking.
- Drying: evaporates free water — lower humidity readings mean paint adhesion improves.
- Timing: follow manufacturer guidance; thicker coats need longer curing and drying intervals.
You’ll test moisture, respect curing time, then assess Plaster texture before applying Decorative finishes.
How Plaster Thickness Changes Drying Time
When you apply thicker coats of plaster, they hold more water and take noticeably longer to dry than thin ones, so plan drying time accordingly. You’ll see that thicker sections can stay damp internally even when the surface seems dry; plaster color may look uniform while moisture lingers.
Surface texture affects evaporation too—smooth finishes slow surface drying less than heavily textured areas that trap moisture. Work in thinner, consistent layers when possible, and monitor moisture with touch and a meter.
Allow extra curing time for deep repairs or builds before sanding or painting to avoid adhesion and finish problems.
Room Temperature Effects on Drying Speed
You’ll want to keep the room within the ideal temperature range (around 10–21°C / 50–70°F) to promote steady plaster drying.
Too much heat can cause the surface to set unevenly or crack, while too-cold conditions will slow curing and extend wait times.
Adjust heating or cooling to avoid extremes and check progress regularly.
Ideal Temperature Range
If you want plaster to dry predictably, keep the room temperature steady between about 10°C and 25°C (50°F–77°F); that range lets moisture evaporate neither too slowly nor so fast that the surface skins over.
You’ll control drying time and reduce cracking while preserving decorative finishes or respecting historical techniques when restoring surfaces. Aim for consistency rather than extremes.
- Maintain stable heating or mild ventilation to avoid abrupt swings.
- Monitor with a room thermometer and adjust settings gradually.
- Expect cooler rooms to extend curing; warmer rooms speed it up within the suggested band.
Check surface hardness before priming or painting.
High Heat Risks
Although higher temperatures speed evaporation, pushing plaster drying with strong heat can cause the surface to dry too quickly and form a hard skin while the interior stays damp. You’ll risk hairline cracks, bond failure, and uneven texture if you rely on ovens, heaters, or direct sunlight.
Follow historical techniques that advocate gradual curing and controlled warmth to preserve strength and adhesion. For artistic finishes, rapid drying can ruin trowel marks, color blends, and lime-based patinas.
Instead, monitor humidity, use gentle, even warmth if necessary, and allow the core to reach dryness before sanding or applying primers and paints.
Low Temperature Delays
When room temperatures stay low, plaster dries much more slowly because the reduced heat cuts evaporation and slows the chemical reactions that harden the material. You’ll notice longer wait times before sanding or painting; decorative finishes need a stable, fully cured base to avoid trapping moisture.
Historical techniques often relied on warmer work seasons for predictable drying.
- Use gentle heating or insulated covers to raise local temperature.
- Avoid rapid drying that causes cracks; low, steady warmth is safer.
- Monitor moisture with a meter before applying primers or paint.
Plan schedules around temperature to protect finish quality and longevity.
Humidity’s Impact on Plaster Drying
Because plaster dries by losing moisture to the surrounding air, humidity plays a key role in how quickly it sets—you’ll find drying slows dramatically in damp conditions and speeds up in dry ones. You should monitor humidity; high levels prolong tackiness and risk mold, while very low humidity can cause cracking. Consider how Artistic techniques and historical applications managed moisture—traditional lime plasters fared differently than modern gypsum. Use the table to gauge relative impacts and plan painting timelines.
| Humidity Level | Effect on Drying |
|---|---|
| Low (≤30%) | Faster, risk cracks |
| Moderate (30–60%) | Ideal balance |
| High (≥60%) | Much slower |
| Very High | Mold risk |
Ventilation and Airflow for Faster Drying
If you boost airflow and keep fresh air moving, plaster will shed moisture far faster and reach paint-ready hardness sooner. You should position fans to create cross-ventilation, open windows when outdoor humidity’s lower, and avoid blasting heat that can crack finishes.
Proper airflow also helps you evaluate color matching and texture blending sooner, so touch-ups feel accurate.
- Place a fan near an open window to pull damp air out.
- Use a second fan to push fresh air across the room.
- Run ventilation intermittently to prevent dust settling on tacky plaster.
Monitor dryness with a moisture meter for best results.
Drying Plaster on Brick, Block, and Drywall
Different surfaces dry at different rates, so you’ll want to know typical times for brick, block, and drywall. Factors like thickness, porosity, temperature, and humidity will change those timelines.
Before painting, you’ll prepare each surface—cleaning, sealing porous brick or block, and ensuring drywall is fully dry and sanded for a uniform finish.
Drying Times By Surface
When you plaster over brick, concrete block, or drywall, the substrate drastically affects how fast moisture leaves the wall. Porous materials like brick and block soak up water and can speed surface drying but may hold moisture deeper, while drywall panels and joint compound dry faster at the surface yet can trap moisture behind paper facings.
You’ll plan paint timing and consider color choices and furniture protection accordingly. Typical guidance:
- Brick/block: surface may feel dry in 24–48 hours; deep moisture can take weeks.
- Drywall: skim coats dry in 24–72 hours; joint compound may need longer.
- Test moisture before painting.
Factors Affecting Drying
Because substrate, plaster mix, and site conditions all interact, you’ll need to assess several variables to predict drying times for plaster on brick, block, or drywall.
Brick and block absorb moisture faster, so thicker coats take longer. Dense drywall dries quicker but traps moisture behind paper if overwatered.
Temperature, humidity, and airflow control evaporation; use ventilation and moderate heat to speed curing without cracking.
Mix proportion and additives alter setting and porosity—lime, gypsum, or cement-based plasters behave differently.
Finish type matters: smooth skim coats and decorative finishes may need extra cure time.
Consider color coordination only after full cure to avoid staining.
Preparing Surfaces For Paint
Having checked how substrate, mix, and site conditions affect drying, you’ll now focus on preparing brick, block, and drywall so paint adheres and won’t trap moisture. Inspect surfaces, remove loose plaster, and guarantee full dryness—masonry can hold moisture longer.
Prime porous block and brick; use breathable primers for lime-based or historical techniques to avoid sealing in dampness. For drywall, repair joints and skim where needed.
Consider decorative finishes only after confirming dryness and compatibility.
- Check moisture with a meter or tap test.
- Choose primers compatible with substrate and finish.
- Allow extra cure time for dense or older masonry.
Additives and Retarders: What to Expect
If you want more control over plaster’s working time and final properties, additives and retarders can help—but they change drying behavior and surface chemistry, so you’ll need to adjust expectations.
You’ll notice slower evaporation and longer cure times; plan extra drying days before sanding or sealing.
Some additives improve adhesion or flexibility, which helps decorative finishes stay true, but they can alter porosity and color appearance, so allow test patches for color matching.
Additives can boost adhesion and flexibility, but they may change porosity and color—always test patches first.
Use manufacturer dosages, avoid overuse, and ventilate the space.
Keep records of mixes and conditions so you can reproduce results and know when the surface is ready to paint.
Surface pH: Test and Correct Before Painting
Before you paint, test the plaster’s surface pH with a simple pH strip or meter to make sure it’s not too alkaline.
If the reading is high, neutralize the alkalinity with a mild acid wash (like diluted white vinegar) and rinse thoroughly.
Let the surface dry fully and re-test so your paint will adhere and not degrade.
Test Surface pH
Why check the pH of your plaster surface? You want paint adhesion, accurate color matching, and to protect wall texture from damage. Test with a simple kit or pH strips on a dampened area.
- Dab distilled water, press a strip, read after specified time.
- Try multiple spots: new plaster, repaired areas, corners with different wall texture.
- Record results and note uneven patches for primer selection.
If readings vary, target the highest pH areas first when planning prep and primer choice. Testing is quick and prevents failed finishes or unexpected color shifts.
Neutralize High Alkalinity
Because fresh or lime-rich plaster often stays highly alkaline, you’ll need to neutralize high surface pH to guarantee primers and paints bond and colors stay true.
Start by testing with pH strips or a meter; aim for pH 7–9 depending on manufacturer specs.
If it’s too alkaline, wash the surface with a diluted white vinegar solution (one part vinegar to five parts water), rinse thoroughly, and let dry.
For stubborn alkalinity, use a commercial acid primer or neutralizing solution following instructions.
Proper neutralization improves paint adhesion and prevents color matching issues, ensuring a durable, accurate finish.
Identifying Trapped Moisture and Causes
When plaster feels warm, soft, or shows dark patches long after application, you’re likely dealing with trapped moisture that can prevent proper drying and lead to paint failure. You should inspect sources and understand causes quickly.
Older buildings using historical techniques or artistic finishes may hide moisture paths. Look for:
- Rising damp from floor or wall junctions, especially with missing damp-proof courses.
- Leaks in plumbing, roofs, or condensation from poor ventilation.
- Dense backings or impermeable paints that trap moisture beneath the plaster.
Identify the cause, then fix leaks, improve airflow, or remove barriers so drying can proceed before painting.
Using Moisture Meters Correctly on Plaster
You’ll want to pick the right moisture meter for plaster—pin-type for depth checks or non‑invasive for surface readings.
Use a consistent technique: clean the surface, take multiple readings across the area, and follow the manufacturer’s calibration instructions.
Learn how to interpret the numbers for plaster specifically so you can tell true moisture from background humidity and decide when it’s safe to paint.
Choosing The Right Meter
Although several meter types can check plaster moisture, picking the right one matters for accuracy and to avoid surface damage. You’ll want a meter suited to the plaster’s age and finish—especially with decorative finishes or in historical restoration projects where conservation matters. Consider these choices:
- Pin meters: give direct readings but can leave tiny marks; use sparingly on delicate surfaces.
- Pinless meters: noninvasive and fast, ideal for finished plaster but less precise near edges or thin layers.
- Hygrometers (relative humidity): measure room conditions to complement surface readings for overall drying assessment.
Choose based on invasiveness, accuracy, and the plaster’s condition.
Correct Measurement Technique
Because accurate readings depend on consistent technique, you should approach moisture measurement on plaster methodically: verify the meter type, take multiple readings across the area, and note environmental conditions.
Place the probe or pin contacts on clean, flat plaster, avoiding edges, trim, or recent repairs that reflect historical techniques or different materials. Keep probes perpendicular and apply steady pressure; wait for the meter to stabilize before recording.
Map readings logically—grid or targeted spots near windows and plumbing. Clean and calibrate the meter regularly, log values with temperature and humidity, and avoid testing over artistic finishes that mask true moisture.
Interpreting Readings Accurately
Now that you’ve collected consistent readings, the next step is knowing what those numbers actually mean for plaster. You’ll compare moisture percentages to manufacturer specs, account for ambient humidity, and avoid premature painting that could ruin color schemes or decorative accents.
Readings vary by meter type, so calibrate and retest spots. Use trend lines rather than single values.
- Check manufacturer recommended safe range for plaster.
- Verify adjacent materials (wood, drywall) show compatible moisture.
- Re-measure after 24–48 hours to confirm steady decline.
If readings stay high, delay priming and improve drying conditions before painting.
Signs of Hairline Cracks and What They Mean
Notice the hairline cracks immediately around windows, corners, or along plasterboard joints — they’re small, often barely visible fissures that tell you where movement, drying shrinkage, or improper jointing has stressed the surface.
You should inspect their direction: vertical cracks often signal settlement, horizontal ones indicate lateral movement.
Fine spiderwebbing suggests surface shrinkage; repeated cracking near corners points to jointing faults or flexible substrates.
In older buildings, historical techniques and mismatched layers can cause recurring lines.
Lightly widen and probe suspect cracks to see if they extend through the plaster.
Address only those that prove structural or cosmetic before painting.
Handling Areas With Uneven Plaster Thickness
Check the plaster for variations in thickness, since thin and thick areas will dry at different rates. You’ll need to mark or measure those spots so you can plan staged drying and avoid trapping moisture.
Adjust your drying time accordingly, letting thicker sections cure longer before sanding or painting.
Assess Thickness Variations
Because plaster thickness directly affects drying time, you should quickly map out any high- or low-spots before priming or painting. Walk the surface, feeling for ridges and hollows, and mark them so you can plan repairs and finish work.
Consider how thickness differences influence color matching and primer selection when you prep.
- Note deep areas that need additional plaster or extended cure time.
- Flag thin spots that may absorb more paint or show through.
- Group similar-thickness zones to treat consistently and avoid patchy results.
Adjust Drying Times
When you’re dealing with uneven plaster thickness, adjust drying schedules to match the slowest, deepest areas so you don’t trap moisture under paint. You should identify thick spots, mark them, and let those sections dictate your timeline.
Use hygrometers and touch tests to confirm dryness before priming. Plan color coordination and texture enhancement together: lighter tones and smoother finishes show imperfections, so delay painting until all layers level out.
If needed, apply thin skim coats to even thickness, then allow full cure. Stagger work by zone, document drying times, and only paint when moisture readings are consistently low.
Wait Times Between Plaster Coats
If you apply multiple plaster coats, you’ll need to let each layer set sufficiently before adding the next to avoid cracking or poor adhesion. You should wait until the surface is firm and slightly damp, not wet. Thicker coats and humid conditions take longer.
Consider how decorative textures affect drying and maintain color consistency by avoiding rushed layering. Typical waits:
Bear in mind textured finishes slow drying; avoid rushing layers to preserve even color and consistent results
- Thin skim coat: 24 hours in normal conditions.
- Medium base coat: 48–72 hours; check firmness.
- Thick or patch repairs: up to 7 days, especially in damp rooms.
Always test firmness by light pressure before applying the next coat.
Wait Times Between Paint Coats on New Plaster
Although new plaster feels dry to the touch after a week in typical conditions, you should still give each paint coat adequate time to cure so the finish won’t peel or trap moisture.
Wait at least 24 hours between water-based coats in warm, ventilated spaces; low temperature or high humidity can extend this to 48 hours.
For oil-based paints, allow 48–72 hours.
Lightly sand between coats for adhesion and a smooth surface.
Choose eco-friendly materials and low-VOC paints to protect drying plaster and indoor air.
Think about color psychology when layering hues to achieve the desired mood.
When to Apply Primer After Plaster Cures
Once your plaster’s fully cured, you’ll want to know the right window to apply primer so it bonds and hides any remaining porosity.
Use simple moisture tests — like taping a plastic sheet for 24 hours or checking with a moisture meter — to confirm the surface is dry enough.
Follow primer manufacturer guidelines for timing and makeup of the plaster to get the best adhesion and finish.
Primer Timing Guidelines
After your plaster has reached its cured hardness and surface moisture has dropped to a consistent level, you can plan to prime.
You’ll want to time primer so it seals pores without trapping moisture, ensuring color consistency and a uniform topcoat.
Apply primer when ambient humidity is moderate and temperature matches product specs.
Use proper brush techniques on edges, rolling smoothly on flats.
- Wait until tactile dryness and stable RH for 24–48 hours.
- Choose a breathable primer for new plaster to avoid blistering.
- Test a small patch to confirm adhesion and even color before full application.
Moisture Test Methods
When you’re ready to prime, confirming low and stable moisture is essential, so use simple tests—like a damp‑meter reading, a plastic sheet (or tape) test, and spot checks with a screwdriver—to verify the plaster’s dryness before sealing it. You’ll track readings, watch for condensation under the sheet, and probe for soft areas. Historical techniques inform careful observation, while modern meters help protect artistic finishes. If tests disagree, wait and retest. Use the table below to record results and decide when to apply primer.
| Test | Pass Criteria | Action |
|---|---|---|
| Damp‑meter | <0.5% MC | Prime |
| Plastic sheet | No condensation | Prime |
| Screwdriver probe | Firm, no crumble | Prime |
Best Paint Types for Newly Plastered Walls
Although freshly plastered walls look smooth, you’ll need to pick paints that breathe, adhere well, and hide minor imperfections without trapping moisture. You’ll usually choose breathable primers and paints formulated for new plaster: limewash, breathable emulsion, or specialist plaster paint. Consider decorative finishes later, but start with compatible base products.
Also weigh eco-friendly paints to reduce VOCs and help drying.
- Breathable mineral paints: allow moisture escape, durable, matt finish.
- Water-based acrylic emulsions: good adhesion once fully dry, easy touch-up.
- Limewash or lime-based paints: traditional breathable option that suits new plaster.
Preparing a Freshly Dried Plaster Surface
Because fresh plaster can still release moisture and attract dust, you should inspect the surface for evenness, hairline cracks, and friable areas before you paint.
Check for powdery patches by rubbing lightly; if residue lifts, seal with a suitable primer.
Fill small cracks with flexible filler and sand smooth once cured.
Remove dust with a soft brush or vacuum, then wipe with a damp cloth and let dry.
Respect historical methods when working on older walls—use compatible materials to preserve patina and cultural significance.
Test a small area before full application to guarantee adhesion and finish uniformity.
Speeding Up Drying Safely (Do’s)
If you want plaster to dry faster without risking cracks or weakening the surface, focus on controlled measures: increase ventilation with fans or open windows, raise room temperature moderately (around 18–21°C/65–70°F) using a thermostat-controlled heater, and reduce humidity with a dehumidifier.
You should also monitor progress and prepare for finishing. Use gentle, consistent steps to protect paint adhesion and guarantee accurate color matching later.
- Keep airflow steady but avoid direct hot blasts.
- Check moisture with a reliable meter before priming.
- Let each coat cure fully to secure adhesion and true color matching.
Don’t Force-Dry Plaster: Common Mistakes
While boosting airflow and warmth can help, you shouldn’t try to hurry plaster by blasting it with high heat, fans pointed directly at wet areas, or chemical accelerants. You risk cracks, uneven curing, and bond failure if you force the process.
Don’t sand or paint prematurely; moisture pockets hide beneath smooth surfaces. Avoid moisture meters misreadings caused by surface drying.
Remember that traditional and historical plaster techniques relied on gradual curing for durability, so respect time-tested methods.
Also consider color psychology when choosing finishes—accelerated flaws show more under bright, cool hues.
Be patient: correct drying prevents costly repairs.
Drying Plaster in Summer vs Winter
When you plaster in summer, heat and low humidity speed surface drying but can trap moisture beneath, whereas winter’s cool, damp air slows overall curing even though surfaces may feel dry. You’ll monitor depth drying, not just touch. Use ventilation, gentle heating, and avoid sealing too soon. Recall historical techniques and consider eco-friendly materials to reduce cracking and salt migration. Watch joints and corners closely; they behave differently.
Summer dries surfaces fast but traps moisture; winter slows curing. Monitor depth, ventilate, avoid early sealing, and protect joints.
- In summer, check for hidden dampness and allow extra internal cure time.
- In winter, give longer drying windows and moderate temperature swings.
- Balance drying to protect finish and longevity.
Strategies for High-Humidity Climates
Summer and winter set opposite challenges, but high humidity creates its own set of rules for drying plaster and planning paint. You’ll slow drying times, so schedule longer curing windows and test moisture with a gauge before priming.
Use dehumidifiers and controlled heat to maintain steady conditions without overheating. Consider historical techniques like lime washes that tolerate moisture and allow breathability; they pair well with modern primers.
Choose eco-friendly materials—low-VOC paints and breathable sealants—to reduce trapped moisture and mold risk. Monitor humidity, stagger work in small sections, and only paint when readings consistently meet recommended thresholds.
Drying Plaster in Poorly Ventilated Rooms
Because air movement drives evaporation, you’ll need to actively manage drying in poorly ventilated rooms to prevent long waits and surface issues. You can speed drying without overheating or cracking by controlling humidity, using fans to circulate air, and avoiding direct heat that seals surfaces.
Focus also on ventilation enhancement and temporary moisture barriers where needed to protect adjoining areas.
- Position fans to move air across plastered surfaces.
- Use a dehumidifier on low to extract damp without rapid shrinkage.
- Install simple moisture barriers for furniture and floors until plaster cures.
Check dryness with a moisture meter before painting.
Exterior Lime Plaster: Cure Time Before Paint
If you’re planning to paint exterior lime plaster, expect a much longer cure than with gypsum or cement renders—lime needs months, not days, to carbonate and reach a stable moisture level suitable for paint.
You should monitor the curing process, allowing at least 6–12 weeks per coat in dry, warm conditions and longer in cool or humid climates.
Keep the wall sheltered from rain and rapid drying; controlled moisture aids proper carbonation and strength gain.
Test dryness with a damp meter and finger-tack checks.
Only paint when moisture is consistently low and the substrate feels hard—rushing risks adhesion failure and trapped moisture.
Patching Repairs: When to Paint Over Them
When you’ve patched a wall, don’t rush to paint—let the repair fully cure and match the surrounding substrate’s moisture and hardness first. You’ll test dryness by feel and tap; a firm, consistent surface means you can proceed.
Consider compatibility: historical techniques or modern mixes must bond with paint and existing plaster. Use eco friendly materials where possible to avoid sealing moisture in.
Follow these quick checks before painting:
- Dry to touch and similar weight when knocked
- No darker color or sheen indicating retained moisture
- Sanded smooth and keyed for primer
Once all three pass, prime and paint.
When to Re-Plaster Instead of Painting
You’ve checked your patch for firmness and dryness, but sometimes repainting a repaired area won’t fix deeper problems—re-plastering is the better option. Choose re-plaster when cracks recur, substrate crumbles, or moisture damaged underlying lath or drywall.
If surface texture is inconsistent or large areas need leveling, skim-coating won’t match the original finish. Consider how color theory affects your outcome: extreme contrasts highlight imperfections, so a flawless base matters.
Also factor in paint types—breathable masonry paints over damp-prone plaster or flexible emulsions over hairline movements. Re-plastering takes more time but prevents repeated touch-ups and yields a durable, uniform surface.
Documenting Drying Time for Disputes or Warranty
Because plaster drying times can determine liability and warranty coverage, you should document the process clearly from start to finish. Note material batch numbers, mix ratios, and any reference to historical techniques used, since clients or insurers may question methods.
Log environmental impacts like temperature and humidity, and record readings regularly. Take dated photos and keep signed work orders.
- Note start/end dates with timestamps.
- Record equipment and sensor calibrations.
- Save communications and change orders.
If disputes arise, your concise record shows care and compliance, helping resolve warranty claims quickly and objectively without relying on memory.
Project Timeline: Scheduling Painting After Plastering
If you want predictable results, plan your painting schedule around the plaster’s actual dryness rather than a fixed calendar date. Check humidity, temperature, and perform moisture tests; moist plaster slows you down.
Sequence tasks: rough coats, drying checks, sanding, primer, and final paint. Allow extra time after repairs or thick coats.
Coordinate trades so ventilation and heating support drying without overheating.
Consider historical techniques when restoring older walls and choose eco-friendly materials for primers and paints to reduce VOCs and future moisture issues.
Document each stage and test result so you can adjust timing confidently and avoid rework.
Frequently Asked Questions
Can I Paint Over Plaster That Has Been Misted With Water to Stop Dust?
Yes — you can paint, but only after proper plaster sealing and water mitigation; you’ll need to make certain the misted surface fully dries and any trapped moisture’s addressed so primers and paints will bond without causing blistering or mold.
How Long Before Hanging Wallpaper on Newly Plastered Walls?
Give the walls a hero’s journey: you’ll wait about 2–4 weeks before hanging wallpaper. That lets plaster curing finish and painting preparation settle; you’ll avoid mold, bumps, and regrettable weekend DIY wars.
Will Underfloor Heating Affect Plaster Drying From the Floor Up?
Yes — you’ll find underfloor heating raises floor temperature and speeds drying from the floor up, but you should monitor moisture levels carefully; too fast drying can cause cracks, so reduce heat if plaster dries unevenly.
Can Mold Inhibitors in Paint Cause Issues on Newly Cured Plaster?
Yes — you can run into problems: mold prevention additives may react with newly cured plaster, so you should check paint compatibility, wait for full cure, and test a small area to avoid staining or adhesion issues.
Is It Safe to Place Furniture Against Fresh Plaster During Final Curing?
Yes — but don’t lean furniture against wet walls; you’ll risk marks and uneven Plaster curing. Wait until fully dry, use spacers or pads for Furniture placement, and occasionally check moisture before final contact.
Conclusion
You’ll think plaster dries in a day because you want to paint now — cute optimism. In reality, wait for the plaster to be truly dry: a few days for thin skim coats, up to a week or more for thicker work, longer in damp rooms. Test with the touch and a moisture meter, repair any stubborn dampness, then paint. Rushing only guarantees bubbles, peeling, and the regret you’ll have to fix later.