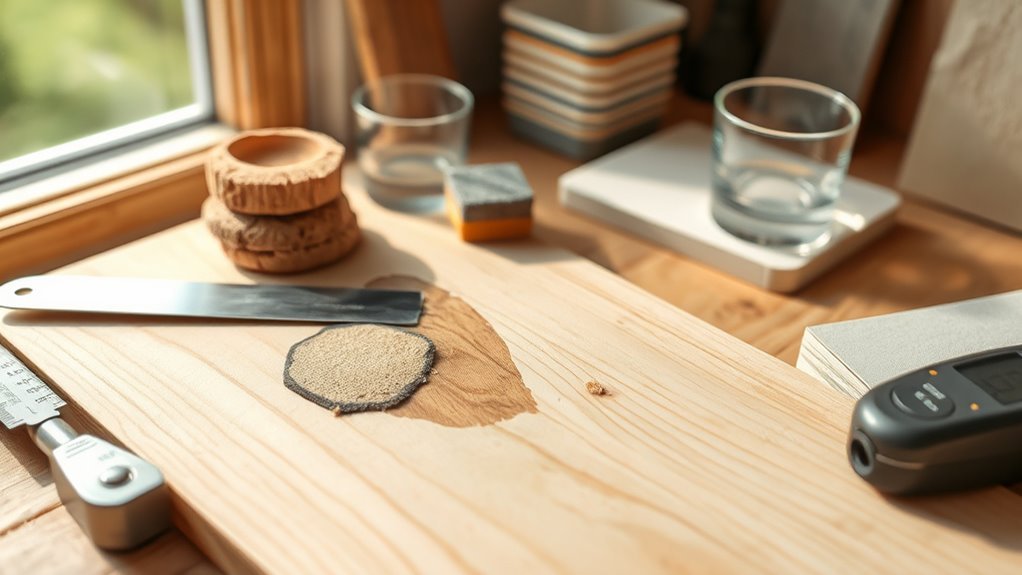
How Long Does Wood Filler Take to Dry Before Painting
You should wait until wood filler feels fully firm and non‑tacky before sanding, priming, or painting. Small water‑based fills often skin over in 30–60 minutes and sand in 1–4 hours; deeper water fills can take 6–24 hours. Solvent fillers may need 24+ hours, and epoxies or large repairs can require days. Speed depends on thickness, temperature, humidity and wood species, so follow the product label — keep going to learn practical timing and tips.
Who This Guide Is For And What You’ll Learn
If you’re a DIYer, woodworker, or homeowner tackling repairs or refinishing, this guide helps you pick the right wood filler and know when it’s ready for paint. You’ll learn to match filler to wood grain, choose between solvent- and water-based products, and decide when structural fixes need Carpenter’s glue instead.
I’ll walk you through surface prep, application tips, and simple tests to check drying and curing without complex tools. You’ll also get guidance on sanding, staining compatibility, and common pitfalls that cause paint failure.
Quick Answer: Wood Filler Dry Times At A Glance
Now that you know who this guide is for and what you’ll learn, here’s a quick cheat-sheet for how long common wood fillers take to dry before you can sand or paint.
Small surface dents: 15–30 minutes touch-dry; sandable in 1–2 hours.
Deeper fills up to 1 inch: 6–24 hours depending on thickness and ventilation.
Large structural or multi-layer repairs: 24–72 hours.
Always test a small area; dry time varies with temperature and humidity.
After sanding, check wood grain alignment and smoothness before applying primer.
Paint when filler matches surrounding finishing sheen for a seamless result.
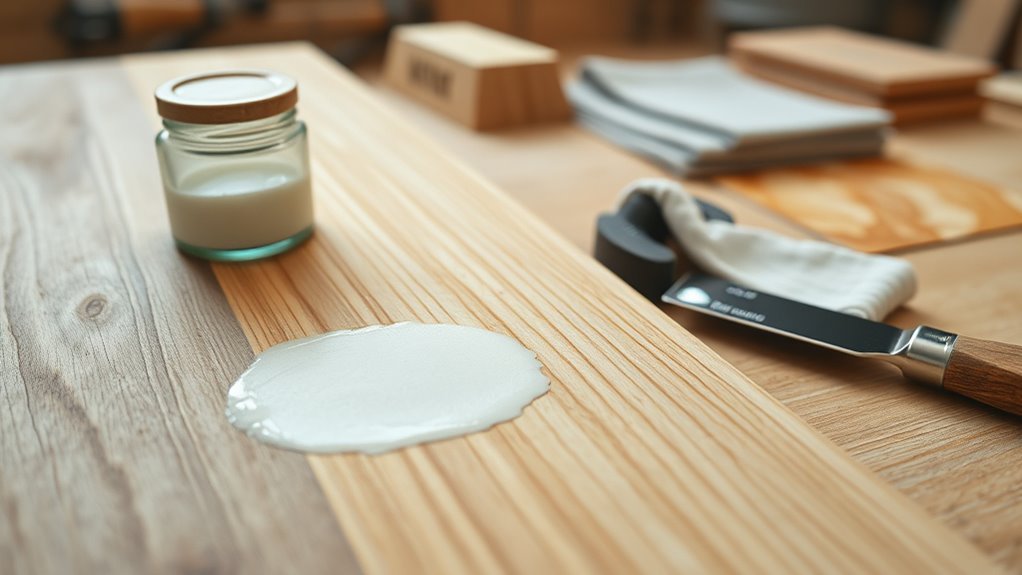
Which Filler Type Matters Most: Water, Solvent, Epoxy
Because the type of filler you choose affects drying behavior, strength, and finish compatibility, it’s the single biggest factor in how soon—and how well—you can sand and paint.
Water‑based fillers dry faster, are low‑odor, and score well on environmental impact, but they can shrink and need quick sanding.
Water-based fillers dry quickly, smell mild, and are eco-friendlier—but may shrink and require prompt sanding.
Solvent‑based fillers offer smoother leveling and longer working time, yet they emit stronger fumes and demand careful tool maintenance.
Epoxy fills gaps permanently, resists moisture, and sands hard—ideal for structural repairs—but cures slower and involves resins that raise environmental and disposal concerns.
Match filler to project needs for best results.
Water‑Based Wood Filler: Typical Dry And Cure Times
Water‑based wood filler dries noticeably faster than solvent or epoxy options, so you’ll usually be ready to sand and prime within a few hours rather than days.
You’ll find most water fillers skin over in 30–60 minutes and cure surface-ready in 2–4 hours, depending on temperature and humidity.
Deeper fills may need longer or multiple applications. Because water fillers are easy to sand, you can shape repairs quickly, but check color matching before final coats—many dry lighter.
Also confirm primer compatibility with the filler to avoid adhesion or staining issues, and allow full cure per manufacturer instructions before painting.
Solvent‑Based Fillers: What To Expect And Timing
If you choose a solvent-based wood filler, expect longer dry and cure times than with water formulas. These products often skin over in 1–3 hours but can take 24 hours or more to fully cure, especially in deep fills or cool, humid conditions.
You’ll need to plan extra curing time before sanding or painting; test firmness at the deepest point. Use gloves and work in ventilation because odor concerns are real and persistent.
Clean-up requires solvent cleanup with mineral spirits or specific thinners rather than water. Follow manufacturer directions for recoating windows and maximum cure times for best adhesion and finish.
Two‑Part Epoxy Fillers: Mix, Cure, And Working Time
When you mix two-part epoxy fillers, the resin and hardener start a chemical reaction that sets a firm working clock, so measure and combine precisely to get predictable pot life and cure times. You’ll follow epoxy mixing ratios on the label, stir thoroughly, and work fast within the pot life before viscosity rises.
The curing process yields a hard, sandable repair far faster than many water-based fillers, but full strength can take hours to days depending on temperature. Keep parts thin for quicker cure, warm the workspace for faster reaction, and avoid overmixing air into the compound to maintain bond quality.
Why Repair Depth Changes Wood Filler Dry Time
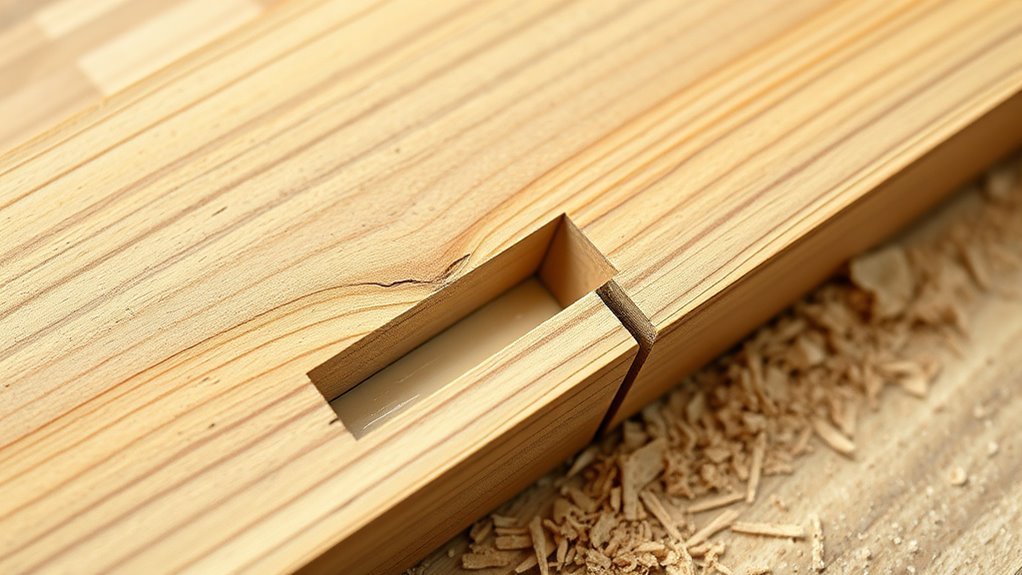
How deep you fill affects drying because thicker layers take longer to cure than thin skim coats.
The material beneath—soft, porous wood or a sealed hard surface—also speeds or slows moisture loss.
And those effects change further with temperature, humidity, and airflow, so you’ll need to adjust technique and drying time for different repairs.
Layer Thickness Effects
Because thicker repairs hold more moisture and reduce airflow through the filler, they take noticeably longer to dry than thin, skimmed layers. You’ll notice layer consistency affects cure time: dense, even layers dry more predictably, while uneven buildup traps moisture. Expect more filler shrinkage in deep fills, so plan extra drying and possible reapplication. Use thin passes to control shrinkage and speed drying.
| Layer Type | Dry Time Estimate | Notes |
|---|---|---|
| Skim coat | 1–2 hrs | Fast, minimal shrinkage |
| Medium fill | 4–8 hrs | Moderate shrinkage |
| Deep fill | 24+ hrs | High shrinkage, slower drying |
Base Material Influence
Your choice of substrate affects how quickly wood filler dries, especially as repair depth changes. If you’re working on dense hardwood, deep repairs dry slower because filler can’t wick moisture into tight wood grain as readily.
Softwoods absorb moisture faster, speeding surface set but risking shrinkage in deeper fills. On veneered or plywood substrates, layers and glue lines change drying paths, so thick fills take longer.
For knot removal you’ll notice gaps and oily pockets that repel filler, prolonging cure unless cleaned and sealed. Match filler type to substrate and keep repair depth minimal to promote consistent drying and adhesion.
Drying Conditions Interaction
Although depth isn’t the only factor, drying conditions—temperature, humidity, and airflow—directly change how fast a deep repair cures compared with a shallow one.
You’ll notice deep fills hold moisture longer because internal layers dry by slow moisture migration, so inconsistent temperature fluctuation prolongs cure. High humidity slows surface evaporation and increases tack time; low humidity speeds surface skinning but can trap moisture inside.
Good airflow and steady warmth encourage even drying, reducing cracking and shrinkage. To get reliable results, control room conditions, use thinner layers for deep voids, and allow extra drying time when humidity impact or temperature swings are present.
How Temperature Speeds Or Slows Wood Filler Drying?
When temperatures rise, wood filler dries faster because heat speeds the evaporation of solvents and accelerates chemical curing. However, too much heat can cause the surface to skin over while the core stays soft. You’ll notice temperature influence immediately: moderate warmth promotes drying acceleration, while cold slows curing and prolongs tackiness. Adjust your timing based on ambient temperature and manufacturer guidance so you don’t sand or paint prematurely.
Heat speeds filler drying but can skin the surface; adjust timing—warm = faster, cold = slower, extreme heat risks soft cores.
- Warm conditions: faster set, shorter wait, risk of surface skinning.
- Cool conditions: slower set, longer wait, better working time.
- Extreme heat: uneven cure, check subsurface before finishing.
How Humidity And Ventilation Affect Wood Filler Dry Time?
Because moisture in the air slows solvent evaporation and water-based fillers absorb humidity, high relative humidity lengthens dry time and can leave the center tacky even after the surface feels dry.
You’ll notice humidity effects most when mornings or rainy days raise moisture; the outer skin may seem cured while underlying filler remains soft.
To speed cure, increase airflow: fans, open windows, or a dehumidifier reduce ambient moisture and promote evaporation.
Ventilation impact is biggest in enclosed spaces, so don’t rely on temperature alone.
Monitor touch and sandability; wait longer if tackiness or indentation still occur despite surface dryness.
How Wood Species And Porosity Change Cure Speed
You’ll notice filler dries differently on hardwoods versus softwoods because density affects how much moisture the wood draws from the repair. More porous surfaces soak up water-based fillers faster, which can speed surface set but may weaken the bond if the filler dries too quickly.
Adjust your product choice and prep—sanding, sealing, or using a primer—based on the species and porosity to guarantee a proper cure.
Hardwood Vs Softwood
Although wood filler chemistry plays a big role, the species you’re working with often dictates how fast it dries: dense hardwoods like oak and maple absorb less moisture, so fillers sit on the surface and cure more slowly.
While porous softwoods such as pine soak up water and solvent, pulling filler in and speeding evaporation and hardening. You’ll notice wood aging affects absorption and filler color may change as solvents evaporate.
Consider these practical points:
- Hardwoods: slower cure, may need sanding later.
- Softwoods: faster set, risk of over-absorption.
- Adjust mix and drying time by species.
Surface Porosity Effects
When wood’s surface is highly porous, it pulls water and solvent out of filler faster, speeding cure time but risking a dry, crumbly patch. You’ll notice porosity variability between species: open-grained oak soaks up filler quicker than tight-grained maple. That affects working time and sanding—fillers may cure superficially while remaining soft below.
Check surface texture; rough, sanded or scorched areas change absorption. To control cure speed, pre-seal porous sections or thinly mist with water to slow uptake. Test a small area, then sand and paint only once the filler feels solid throughout to avoid failures.
Does Filler Color Or Sheen Affect Paint Adhesion?
Because filler comes in different pigments and finishes, its color and sheen can influence how well paint bonds and how the final color looks. You should note color sheen and filler consistency because both affect absorption and surface reflection.
A high-gloss or heavily pigmented filler may resist primer, while a matte, porous one soaks paint. Test a small area first.
Consider:
- Matte, porous fillers: they absorb primer quickly, improving adhesion but possibly altering tone.
- Glossy or sealed fillers: they can repel paint; scuffing or sanding helps.
- Matching pigment: reduces tinting and number of paint coats needed.
Reading Labels: Dry Time Vs. Full Cure On Tech Sheets
When you’re reading a product label or tech sheet, note the difference between “dry time”—when the filler is surface-dry and can be sanded or painted—and “full cure,” which is when it reaches full strength and chemical resistance.
Manufacturers may define these terms differently, so you’ll want to follow their specific times rather than assuming one standard.
If a project needs durability or solvent exposure, wait for the full cure even if the surface seems dry.
Dry Time Versus Cure
If you’re checking a wood filler label, note that “dry time” and “full cure” aren’t the same thing: dry time tells you when the surface is ready for light sanding or painting, while full cure indicates when the filler has reached its maximum strength and chemical resistance.
You’ll want to take into account environmental factors and application techniques because they change both intervals. Follow the tech sheet, but adjust expectations for humidity, temperature, thickness, and tools.
- Light sanding/painting safe at dry time, but avoid heavy stress.
- Full cure may take days; strength and solvent resistance improve.
- Thicker fills extend both timelines.
Manufacturer Label Definitions
Although tech sheets pack a lot of jargon, you’ll get the right results if you learn how manufacturers define “dry time” and “full cure.” Read labels: dry time means the filler’s surface is no longer tacky and you can sand or topcoat. Full cure means the material reached its rated strength and chemical resistance.
Manufacturers often list temperature, humidity, and layer thickness—follow those for consistent wood grain blending and knot prevention. Don’t assume sanding equals cure. If labels conflict, contact tech support.
Test a small patch under your job conditions to confirm sanding and painting times before finishing.
When Can You Sand Wood Filler Safely?
Once the wood filler feels firm and no longer tacky to the touch, you can start sanding. However, you should still confirm the manufacturer’s recommended drying time and check for full cure in thicker fills.
You’ll want to preserve the natural wood look and follow the grain pattern when sanding to avoid visible scratches. Test small areas first; if dust clumps, it’s not fully cured.
- Use medium grit to level, then finer grit to blend.
- Lightly sand across the grain for feathering edges.
- Remove dust with a brush and tack cloth before finishing.
When Is Filler Ready For Primer Vs. Paint?
When the filler’s surface is dry and the edges are feathered smooth, you can usually apply primer straight away. You’ll prime to seal porosity, lock in any stain bleed from knot filling, and create a uniform base that follows the wood grain.
Primer lets you spot imperfections and decide if more filler or sanding’s needed before topcoat. Wait to paint until primer cures fully and feels hard; that ensures adhesion and true color.
For deep repairs or heavy knot filling, consider a second skim of filler, sand, then prime. Paint only after primer passes its cure time and inspection.
Fingernail Test: Quick Way To Check Readiness?
Press your fingernail lightly into the filler to see if it gives—if it doesn’t dent, it’s likely set enough for sanding or primer.
If you see a tacky residue or a shallow mark that crumbles, the interior may still be soft even if the surface feels firm.
Use that quick check alongside curing time to decide whether to wait longer.
Simple Fingernail Pressure
If the filler’s ready, you’ll feel it—gently press a fingernail into the patched area and look for a slight spring rather than a tacky impression. You’re checking nail pressure response and overall surface texture; this quick test tells you if the top feels firm and rebounds slightly. Don’t overpress.
- Light press: use just nail pressure to sense tackiness, not depth.
- Edge check: press near seams to compare firmness and texture across the repair.
- Multiple spots: repeat across the patch to ensure uniform cure before sanding or priming.
Trust your touch; it’s the fastest readiness cue.
Signs Under The Surface
Because the surface can seem dry while the core remains soft, you’ll want to use a fingernail test to check readiness beneath the top layer. Press firmly but gently into the filler; a cured patch resists indentation and flakes cleanly, while a soft center yields a slight give or gummy residue on your nail.
Test several spots, especially deep repairs and joints, to confirm consistent hardness. This quick check is a key step in surface preparation and informs your choice of Finish techniques—sanding, priming, or waiting longer—so you don’t trap moisture under paint or create adhesion problems.
Light Sanding Test: How To Confirm A Cure?
Before you commit to priming or painting, do a light sanding test to confirm the filler is fully cured. You’ll check feel and appearance while keeping surface preparation in mind, and remember environmental factors like temperature and humidity can slow cure.
Before priming or painting, do a light sanding test to ensure the filler is fully cured.
Sand lightly with fine grit and inspect for tackiness, color change, and firmness.
- Sand a small, inconspicuous area with 220-grit; no gummy residue means good cure.
- Rub with your fingertip; a cured patch feels hard and uniform.
- Wipe dust away; if the filler holds without crumbling, it’s ready to prime.
Using A Moisture Meter For Deep Fills: When And How?
When you’ve filled a deep void, wait until the filler’s surface is firm and then test with a moisture meter to verify internal dampness has dropped to safe painting levels.
Choose a pin meter for precise core readings or a non-invasive sensor for quick surface checks, depending on how deep the repair is.
Interpret readings against your wood and paint manufacturer’s recommended moisture percentages—if it’s above that, give the filler more time to cure.
When To Test
Curious about the right moment to meter a deep wood fill? You’ll want to wait until surface tack is gone and the filler has had time to settle into the wood grain; that reduces false high readings from surface moisture and hides early filler shrinkage.
Use the meter at these checkpoints:
- After manufacturer’s minimum cure time plus 24 hours — confirms initial chemical set.
- Once temperature and humidity have been stable for 12–24 hours — avoids transient moisture swings.
- After sanding and sealing any exposed pores — ensures readings reflect internal moisture, not surface contamination.
If readings are stable across checks, you’re ready to prime.
Choosing Meter Type
You’ve confirmed stable readings and now need the right meter to assess deep fills accurately. Choosing meter type matters: pin meters measure moisture at contact points and work well near the surface, while pinless meters scan deeper without damaging the filler color or finish.
For deep fills, use a low-frequency pinless unit or a hybrid meter that combines pin and pinless functions so you can verify both surface and subsurface moisture. Guarantee the meter’s depth range exceeds the fill thickness.
Calibrate for the wood species, avoid painted areas that mask true readings, and follow manufacturer guidelines for repeatable results.
Interpreting Readings
Because deep fills can hide moisture pockets that affect curing and paint adhesion, you’ll need to read meters with care and context. You’ll check multiple spots, compare surface and deep-read values, and note how readings change over hours.
Consider Environmental factors like humidity and temperature before trusting a single number; they shift readings and drying speed. Also factor in Color matching—damp filler can alter tint and sealers behave differently on moist substrate.
Follow this quick checklist:
- Take baseline surface and pin/infrared deep readings.
- Track readings over time; expect gradual decline.
- Adjust wait time if environment or readings stagnate.
Small‑Hole Repairs: Plan A Quick Repair Timeline
If you’ve got nail holes or tiny dings to fix, plan for a short, focused timeline. You’ll consider environmental factors and application techniques to speed curing: clean, apply thinly with a putty knife, and press filler into the void. Light sanding after surface cure, then prime and paint. Expect 15–60 minutes to skin over and 1–4 hours before sanding, depending on humidity and temperature.
| Step | Time estimate | Tip |
|---|---|---|
| Clean & prep | 5–10 min | Remove dust |
| Fill | 2–5 min | Thin layers |
| Cure | 1–4 hrs | Watch humidity |
| Sand/paint | 15–30 min | Use fine grit |
Large Or Deep Repairs: Realistic Multi‑Day Timelines
For large or deep repairs, you’ll first assess how thick the damaged area is so you can plan multiple thin layers instead of one thick fill.
Expect a layered drying schedule over several days, letting each coat cure partially before sanding and adding the next.
Keep in mind that high humidity or low temperatures will slow curing, so adjust your timeline accordingly.
Assessing Repair Depth
When you’re facing a large or deep repair, plan for multiple drying and curing stages rather than a single overnight wait. You’ll assess depth, substrate, and filler type to estimate days required.
Check texture consistency to guarantee each pass bonds; uneven texture prolongs sanding and sealing. Manage odor control by ventilating between coats, especially with solvent-based fillers.
Use a steady checklist:
- Measure depth and mark sections for staged fills.
- Note substrate porosity and environmental factors affecting cure.
- Test a small area for adhesion and final texture before committing to full topcoating.
Layered Drying Schedule
Although a single overnight cure might seem tempting, large or deep wood repairs need a staged drying schedule you can depend on. Begin by filling in 1/4–1/2-inch layers, letting each layer firm before adding the next; this prevents shrinkage and preserves surface adhesion.
Expect 2–4 days for multi-layered fills on standard fillers; epoxy or two-part compounds may need longer. Light sanding between layers removes loose material and promotes filler longevity.
Final sanding and a tack-free check come after the last layer fully hardens. Only paint once the filler resists indentation and feels uniformly solid to ensure lasting results.
Moisture And Temperature Effects
Because moisture and temperature directly control how fillers cure, you should plan multi-day repairs around realistic environmental conditions. You’ll stagger work to let deep fills mature; don’t rush painting when core moisture levels remain high. Monitor ambient humidity and avoid big temperature fluctuations that slow or distort cure.
- Check moisture levels with a meter; wait until readings match surrounding wood.
- Keep a steady temperature (ideally 65–75°F) to prevent Temperature fluctuations that create shrinkage or extended cure.
- Allow extra days for thick fills, ventilating gently and avoiding direct heat so curing proceeds evenly.
Layering Filler: How To Avoid Trapped Moisture
If you apply multiple filler layers without letting each one cure, you risk trapping moisture between coats and prolonging drying, so plan your layering to promote airflow and complete curing.
Apply each filler layer only after it cures—otherwise trapped moisture between coats slows drying and curing.
When you use layering techniques, apply thin, even coats and wait the manufacturer’s recommended time before sanding or adding more. Check each layer by touch and a light crosshatch; any coolness or tackiness indicates moisture trapping.
Improve ventilation and moderate temperature to speed evaporation.
For deep voids, build up in several thin passes rather than one thick fill.
Keep records of cure times so you won’t rush the final paint.
Feathering Edges For Invisible Paint Repairs
When you feather the edges of wood filler, you blend the repair smoothly into the surrounding surface so paint won’t reveal a ridge or shadow; you’ll work small, easing filler to a thin, seamless perimeter. Focus on edge tapering before priming so color matching reads consistently across the patch.
Aim for texture blending that mirrors the original grain without overworking the fill. Do these steps:
- Apply a thin bead, press level, then pull outward with a damp finger or flexible scraper.
- Remove excess while still pliable, creating a subtle slope to the surrounding wood.
- Spot-prime and inspect under good light, repeating as needed.
Sanding Technique: Grit Progression For Smooth Fills
Start sanding with a coarse grit to knock down excess filler and establish the shape you want.
Then move to a medium grit to smooth tool marks and blend the repair into the surrounding wood.
Finish with a fine grit for a silky surface that’s ready for primer and paint.
Start With Coarse Grit
Although it may feel counterintuitive, begin sanding your filled area with a coarse grit to knock down high spots and shape the repair quickly. You’ll work fast, following grain orientation so you don’t tear fibers or create visible ridges; coarse grit removes excess filler and reveals any color contrast issues early. Use steady pressure, test frequently, and keep dust low.
- Use 60–80 grit to level high spots without gouging.
- Check edges and progressions; coarse grit exposes bridging or gaps.
- Stop when the shape is right and the filler sits flush.
Progress Through Medium Grit
Once you’ve knocked down the high spots, shift to a medium grit like 120–150 to refine the shape and smooth scratches left by the coarse paper. This grit removes remaining ridges without digging into the filler.
As you progress through medium grit, keep the pad flat and use light, even strokes to follow the contour. Check wood filler consistency—if it’s crumbly, you’ll need another thin patch and full cure before more sanding.
If it’s firm, continue until blending feel seamless under your fingers. Wipe dust often to inspect progress and avoid over-sanding into the surrounding wood.
Finish With Fine Grit
When you reach fine grit—180 to 220—switch to light, controlled strokes and keep the sanding pad perfectly flat so you don’t dig into the repair. This grit polishes the filler and feather-edges the repair into the surrounding wood for a seamless shift. You’ll finish sanding with care to achieve true surface smoothing before priming or painting.
Work patiently, check for low spots, and wipe dust frequently so you can see the final contours.
- Sand with the grain, steady pressure, inspect often.
- Use a soft sanding block to maintain flatness.
- Clean the surface thoroughly before coating.
Cleaning The Repair Before Priming And Painting
Before you prime or paint, thoroughly clean the filled area so the primer bonds properly and the finish looks smooth. Remove dust with a soft brush, then wipe with a tack cloth or damp microfiber to lift fine particles.
If the filler released sanding dust, vacuum with a HEPA attachment first to control airborne particles—think about environmental impact when disposing residues.
Use gloves, eye protection, and a mask as safety precautions, especially with solvent wipes.
Let the surface fully dry before touching primer.
Check for remaining contaminants by running your hand lightly over the repair; it should feel clean and dry.
Primer Choice: How It Affects Adhesion Over Filler
Choose a primer that’s compatible with your specific filler—some water-based fillers won’t bond well with solvent-based primers and vice versa.
You’ll also need to decide between a sealer, which locks in moisture and stain, and a bonding primer, which promotes adhesion to slick or dense filler surfaces.
Pick the right type to prevent peeling and guarantee a smooth topcoat.
Primer Compatibility With Fillers
Because different fillers have varied compositions and curing characteristics, your primer choice can make or break adhesion across repaired areas. You need primers formulated for the filler type to guarantee Paint adhesion and proper Surface preparation before topcoating. Match solvent systems and flexibility to avoid peeling or cracking.
- Water-based fillers: use acrylic primers that bridge porosity and remain flexible.
- Solvent-based fillers: choose solvent-compatible primers to prevent breakdown and ensure bonding.
- Epoxy or two-part fillers: select high-build primers or those rated for non-porous surfaces to promote mechanical and chemical adhesion.
Sealer vs Bonding Primer
Wondering whether you need a sealer or a bonding primer over your filled repairs? You’ll choose based on the filler type and surface condition.
Sealer vs bonding primer isn’t just semantics: sealers lock in stain and moisture, giving a uniform base, while bonding primers actively adhere to slick or slightly shrunk filler surfaces.
If wood filler shrinkage occurred, a bonding primer bridges tiny gaps and prevents peeling.
For porous or properly sanded filler, a sealer can work, but on compromised or nonporous spots, use a bonding primer.
Test a small patch to confirm adhesion before painting.
Paint Compatibility: Matching Filler To Paint Type
When you’re planning to paint over repaired wood, match the filler to your paint type so adhesion, flexibility, and finish stay consistent. Water-based fillers pair best with latex paints, while solvent-based or epoxy fillers work with oil-based paints and high-solids finishes.
You’ll also consider color matching and grain alignment to minimize sanding and achieve a uniform look. Choose fillers specified for exterior or interior use and for the substrate movement expected.
Test a small patch, let it cure fully, and sand before priming.
- Water-based filler + latex paint
- Solvent/epoxy filler + oil/high-solids
- Test patch, sand, prime
Preventing Stain‑Through And Bleed‑Through Over Fillers
If you want your repairs to stay clean and crisp, stop stain‑through and bleed‑through before you prime by sealing both the wood and the filler; oils, tannins, and pigments can leach through unfinished patches and discolor topcoats.
You should do thorough surface preparation: sand, clean, and dry the area, then apply an appropriate sealer or primer compatible with your filler and paint.
Test for bleed‑through on a hidden spot.
For stained or oily wood use a shellac‑based or stain‑blocking primer; for water‑based systems pick a compatible sealer.
Color matching is easier after sealing prevents dye migration.
Speed Drying: Safe Heat Options That Work
Sealing the wood and filler stops bleed‑through, but sometimes you still need repairs to dry faster so you can prime and paint on schedule. Use gentle, controlled heat to avoid cracking filler or raising wood grain; you’ll want consistent warmth, not blasts that could harm paint compatibility later.
Seal wood and filler, then speed drying with gentle, consistent warmth—avoid hot blasts to prevent cracking or raised grain.
Try these safe options:
- Low‑wattage heat gun on a wide, sweeping motion to keep temperature even.
- Space heater set to low, positioned to warm the area indirectly and steadily.
- Warm room technique: raise ambient temp slightly while monitoring humidity and surface feel.
Always test a small area first for paint compatibility.
Speed Drying: Dehumidifiers And Fans-Best Practices
You can speed curing by running a dehumidifier near the work area to pull moisture out of the air without overdrying the filler.
Position fans to create gentle cross‑ventilation that moves moist air away from the patched surface rather than blasting it directly.
Keep an eye on temperature and humidity and adjust the machines so conditions stay within the filler manufacturer’s recommended range.
Use Dehumidifiers Strategically
When humidity’s high, a dehumidifier can cut drying time dramatically, and using it with fans focuses airflow to whisk moisture out of wood filler and surrounding air. You’ll improve Dehumidifier effectiveness and Moisture control by choosing the right capacity for room size and running it continuously until readings stabilize.
- Set dehumidifier to target humidity (around 40-50%) and monitor with a hygrometer.
- Empty or use a drain hose to avoid interruptions; consistent operation keeps drying steady.
- Combine with gentle air movement but avoid blasting the filler surface directly to prevent cracking.
Position Fans For Airflow
Although fans can’t remove moisture like a dehumidifier, they speed evaporation by moving air across the filler surface. So, position them to create steady, even airflow without blasting the patch.
You want Airflow optimization: direct a gentle stream parallel to the surface to carry moist air away. Use multiple low-speed fans rather than one high-speed unit to avoid uneven drying or shrinkage.
For Fan placement, set intake fans to draw drier room air across the repair and place exhaust to move humid air out of the space. Keep fans a few feet back and adjust the angle until evaporation looks uniform.
Monitor Temperature And Humidity
Because temperature and humidity directly control how fast wood filler cures, you should monitor both throughout the drying period and adjust your dehumidifier and fans to keep conditions steady.
You’ll rely on temperature monitoring and Humidity control to speed cures without harming adhesion. Check readings often, aim for manufacturer-recommended ranges, and avoid sudden swings.
Use a combined hygrometer/thermometer placed near the repair, not by vents.
- Place devices at working height for accurate temperature monitoring.
- Run dehumidifiers to lower moisture; adjust fan speed for gentle air movement.
- Hold conditions steady until filler feels fully set.
Avoiding Cracks When You Speed Up Drying
If you speed up drying with heat or fans, take steps to prevent the filler from cracking as it cures. You’ll want even, moderate airflow and gradual temperature increases so the surface doesn’t skin over while the interior stays wet.
Account for wood expansion—rapid changes can stress the filler bond. Keep humidity steady to reduce shrinkage, and avoid direct high heat like blowtorches or hairdryers at close range.
Choose a filler whose finish compatibility matches your planned paint or varnish so topcoats flex similarly. Light sanding between thin layers helps reveal any hairline cracks to repair before painting.
Thinning And Mixing Fillers For Faster Cure (When Safe)
When you need a faster cure, thinning or adjusting the mix can help—provided the product’s instructions allow it. You’ll only thin water‑based fillers with water and powder fillers per label; solvents can ruin performance. Consider environmental impact when choosing thinners and avoid VOC‑heavy solvents.
- Measure precisely: small changes affect cure and strength.
- Test on scrap: verify sandability and color before committing.
- Note historical usage: some traditional mixes tolerated thinning, but modern formulas vary.
Follow manufacturer guidance, record ratios, and don’t assume faster cure equals adequate bond or paint readiness.
Using Accelerators With Two‑Part Fillers: Dos And Don’ts
Adjusting mixes only gets you so far; with two‑part fillers you can also use accelerators to speed curing—if you follow the rules.
You should test a small batch first, measure ratios precisely, and record results.
Use manufacturer‑approved accelerators; they’re formulated to keep strength and adhesion.
Avoid overdosing: too much accelerator causes brittleness and poor sandability.
Consider historical techniques only for learning—modern formulations differ.
If you prefer eco friendly options, choose low‑VOC accelerators or water‑based catalysts approved by the filler maker.
Always ventilate, wear PPE, and wait full cure before sanding or painting.
When Not To Use Heat Or Accelerators
Don’t use heat or accelerators when the filler is prone to shrinking or cracking, because rapid curing can stress the patch.
Also avoid them in poorly ventilated spaces or with solvent‑rich formulas, since fumes can build to hazardous levels.
If you’re unsure about the filler’s chemistry or the room ventilation, let it cure naturally.
Risk Of Cracking
If you speed up drying with heat or chemical accelerators, you’ll often cause the filler to cure unevenly and develop surface or internal cracks. You’ll then ruin delicate grain patterns and make color matching harder, since fissures reflect light and absorb finish differently. Avoid forced cures on wide fills or long seams.
- Small hairline cracks appear quickly when outer layers dry before cores, compromising strength.
- Deep fills can shrink internally, creating voids you can’t see until sanding.
- Cracked filler rejects stains and paints, so you’ll end up redoing work or using more filler.
Chemical Fume Hazard
When you try to speed up drying with heat or chemical accelerators, you can create hazardous fumes that overwhelm indoor ventilation and irritate your eyes, nose, and lungs. You shouldn’t use heaters or additives in enclosed spaces without proper ventilation. Recognize chemical hazards on labels, wear appropriate respirators, and keep others away. If the product warns against heat or accelerants, follow it. For small jobs, open windows and use fans; for larger projects, move outdoors or hire pros. Prioritize fumes safety over speed to avoid health risks and compromised repairs.
| Risk | Action |
|---|---|
| Poor ventilation | Open windows |
| Label warnings | Follow instructions |
| Sensitive occupants | Relocate |
| Respiratory risk | Use respirator |
| Large projects | Work outside |
Choosing Filler For Painted Furniture
Because painted furniture has different needs than bare wood, you’ll want a filler that sands smooth, holds paint well, and won’t shrink or crack over time. Choose a product compatible with your topcoat and grain, and consider Aesthetic finishes for visible repairs; match texture so paint hides seams.
If sustainability matters, look for Eco friendly options with low VOCs and water-based formulations. Test adhesion on a scrap, then sand and prime. Follow drying guidelines before painting to avoid sinkage.
- Water-based fillers for quick drying and easy sanding.
- Solvent-based for deep gouges and durability.
- Two-part epoxy for structural repairs.
Choosing Filler For Exterior Woodwork
For exterior woodwork you’ll want a filler that stands up to moisture and temperature changes, so prioritize weather resistance and durability.
Make certain it bonds well and accepts paint smoothly to guarantee lasting adhesion.
Also pick a product that’s easy to apply and sand so you can finish the job cleanly and quickly.
Weather Resistance And Durability
If you plan to use wood filler on exterior trim or furniture, pick a product formulated to withstand moisture, temperature swings, and UV exposure. You’ll want to factor in weather considerations and choose a filler that promises long-term performance to improve filler longevity.
Consider these practical points before application:
- Use flexible, water-resistant fillers that expand and contract with wood to prevent cracks.
- Select UV-stable formulations or those rated for outdoor use to avoid breakdown and discoloration.
- Prefer fillers with documented resistance to mold and salt spray for coastal or humid climates.
These choices extend durability and reduce maintenance.
Paintability And Adhesion
When you plan to paint exterior woodwork, choose a filler that bonds well to the substrate and accepts coatings without shrinking or peeling. You’ll want one formulated for paint adhesion so primers and topcoats grip firmly, reducing flaking over time.
Check compatibility with oil- or water-based systems and cure times recommended before priming.
Aim for fillers that allow easy color matching and subtle texture blending so repairs vanish under paint.
Sand smoothly once cured, then test a small primed patch to confirm adhesion.
Proper selection guarantees your finish holds up and the repair doesn’t telegraph through the paint.
Ease Of Application
Good adhesion and paintability matter, but you’ll also want a filler that’s simple to apply on exterior woodwork. You need a product that spreads smoothly, fills gaps consistently after wood seasoning, and sands without clogging.
Consider these practical points:
- Ease of mixing and a creamy consistency that lets you work quickly on trim and sills.
- Sanding behavior that supports finish polishing without excessive passes or dust that hides flaws.
- Weather-resistant formulations that remain workable during application and cure reliably so you can paint on schedule.
Choose fillers that save time and reduce rework when prepping exterior wood.
Choosing Filler For Nail Holes And Dents
Because nail holes and dents vary in size and location, you should match the filler to the repair.
For tiny nail holes, use a fast-drying, paintable wood putty that sands smooth and follows the wood grain for an invisible finish.
For larger dents, choose a two-part or solvent-based filler that fills depth without excessive shrinkage.
If you’re dealing with knot removal or areas where sap might bleed, pick a filler rated for knots or seal the knot first to prevent staining.
Always test on scrap, allow full cure, and sand flush before priming and painting.
Choosing Filler For Structural Gaps Vs. Adhesives
Although fillers can patch gaps quickly, you should pick between filler and adhesive based on load, movement, and how the joint will be finished. You’ll choose filler when gaps are cosmetic, movement is minimal, and Filler texture matches surrounding grain.
Use adhesive when you need structural bonding or expect shear loads.
- Evaluate load: adhesives handle tensile and shear; fillers don’t.
- Anticipate movement: flexible adhesives or gap-specific fillers tolerate expansion—consider Application temperature for cure and flexibility.
- Finish and sanding: fillers sand smooth for paint; adhesives may require mechanical fastening or trim for tidy edges.
Make the selection to suit function, not habit.
Troubleshooting Tacky Or Slow‑Drying Filler
Choosing the right product was step one; now you might run into filler that stays tacky or cures slowly.
If it’s soft after the recommended time, check humidity and temperature—high moisture or cold delays curing.
Confirm you used the correct hardener ratio and mixed thoroughly; improper mixing or expired components cause tackiness.
Avoid over-applying thick layers; build thin layers, letting each cure.
Sand gently when firm, preserving color matching for final finish.
Clean tools immediately—good tool maintenance prevents contamination that ruins cure.
If problems persist, replace the batch or try a different manufacturer’s formula.
Fixing Filler That Cracked After Drying
If your wood filler cracks after it dries, don’t panic—you can usually fix it without stripping the whole repair. Lightly sand the cracked area, remove dust, and assess whether the crack is surface-only or deeper. Address any Filler discoloration from sanding or UV exposure before refinishing.
- Clean and sand to sound wood, then apply a thin layer of compatible filler to fill the crack.
- Let it fully cure per instructions, then sand flush and check for color match.
- Seal and prime to prevent moisture ingress as Crack prevention and to guarantee even paint absorption.
Fixing Shrinkage In Deep Fills
When deep filler settles and shrinks, you’ll get a recessed void that weakens the repair and shows through finish coats, so address it before sanding and painting.
You’ll remove dust, widen the cavity slightly for adhesion, then layer compatible filler in thin coats, letting each cure fully to minimize shrinkage.
For shrinkage prevention, embed a backing — foam, cloth, or galvanized mesh — to support the load, then apply subsequent layers.
Consider filler reinforcement with fiberglass tape in larger gaps.
After final cure, sand flush and prime.
This staged approach ensures durable, unseen repairs ready for paint.
How Solvent Reactions Can Discolor Filler Or Paint
Because many fillers and paints rely on solvents to dissolve binders and activate curing, chemical interactions between them can change color or cause blotching after you apply a topcoat. You’ll want to understand how solvents migrate, how additives react, and how environmental barriers affect drying and appearance. Consider these points:
- Solvent migration: residual solvent in filler can leach into paint, causing soft spots or discoloration where pigments separate.
- Additive reactions: amines, accelerators, or oils in fillers may chemically interact with paint binders, shifting hue or sheen.
- Environmental barriers: humidity, temperature, and sealers alter reaction rates and the likelihood of blotching.
How To Sand Filler For A Paint‑Ready Finish
Once the filler has fully cured, you’ll want to remove excess material and shape the repair so the surface blends seamlessly with the surrounding wood.
Start with coarse sandpaper (80–120 grit) to level, then progress to 180–220 grit for a smooth finish. Sand with the grain, use a sanding block for flatness, and feather edges so the filler color blends naturally.
Check edges under good light; pinch or run your hand to feel imperfections. Keep the workspace near recommended drying temperature to avoid soft spots.
Vacuum dust, wipe with a tack cloth, and inspect before priming or painting.
How Long To Wait Between Primer And Topcoat
Although primer can feel dry to the touch quickly, you should let it cure fully before applying the topcoat to guarantee proper adhesion and an even finish. You’ll typically wait 24 hours for standard primers, but humidity, temperature, and wood expansion may extend cure time.
Before topcoating, do light finish sanding to remove nibs and promote bonding.
- Check primer label for recommended cure; surface dryness isn’t full cure.
- Allow extra time in high humidity or with dense woods prone to wood expansion.
- After recommended cure, perform finish sanding, tack off dust, then apply topcoat for best results.
Where To Find Real Cure Times: Labels, SDS, Tech Sheets
If you want accurate cure times, check the product label first, then consult the Safety Data Sheet (SDS) and technical data sheet—each source gives different but complementary details about drying vs. full cure.
The label gives practical drying windows and basic instructions. The SDS lists chemical hazards and exposure-based cure notes. The tech sheet shows lab-tested cure curves, recommended thicknesses, and repaint windows.
Compare all three, and adjust for environmental factors like temperature and humidity. Also account for your application techniques—thin coats cure faster than thick fills.
When in doubt, follow the most conservative guidance and allow extra time before sanding or painting.
Recommended Fillers And Their Typical Dry Times (Quick Ref)
When you pick a wood filler, choose one that matches the job and timeline—here’s a quick reference to common types and how long they typically take to dry before you can sand or paint. You’ll want products that respect wood grain and handle knot removal cleanly.
- Water-based/latex: Dries in 30–60 minutes for light fills; full cure in 24 hours. Easy to sand and paint.
- Solvent-based: Tack-free in 1–2 hours, workable in 4–6 hours; better for exterior repairs and deeper holes.
- Epoxy/2-part: Sandable in 3–24 hours depending on formula; best for structural fills and stubborn knot removal.
Common Mistakes That Slow Wood Filler Dry Time
Picking the right filler and knowing its typical drying window helps, but a bunch of common mistakes can still stretch drying times and ruin your schedule. You’ll slow curing by applying filler too thickly, using damp or dirty wood, or skipping primer on oily surfaces.
Cold or humid conditions delay set time, so control temperature and airflow without forced drying that cracks filler. Mixing errors—wrong ratios or insufficient blending—create soft spots that never fully harden.
For wood preservation and Furniture restoration, sand between layers, remove dust, and follow manufacturer cure times so repairs hold and finish smoothly.
Frequently Asked Questions
Can I Paint Over Wood Filler the Same Day I Apply Primer?
Yes — you can paint over wood filler the same day you apply primer if the filler’s application timing and drying process are complete, the primer’s cured per instructions, and the surface’s dry, sanded, and free of dust.
Will Wood Filler Affect the Sheen of My Final Paint Coat?
Like a patch on a quilt, yes — if you sand and prime properly, your wood filler won’t disrupt sheen consistency, and it’ll support paint adhesion; otherwise uneven filler can dull gloss and cause finish irregularities.
Can I Use Wood Filler on Exterior Trim in Wet Climates?
Yes — you can use exterior-grade wood filler on trim in wet climates; you’ll want products rated for exterior durability and high moisture resistance, and you should prime and topcoat promptly to guarantee long-lasting protection and adhesion.
Is Wood Filler Safe for Food-Contact Surfaces Like Cutting Boards?
You might worry, but no — you shouldn’t use typical wood filler on cutting boards; it risks food safety and often lacks surface compatibility. Use food-safe, FDA-compliant epoxy or glue designed for direct food contact instead.
Do Colored/Paintable Fillers Need a Separate Sealer Before Paint?
Yes — you’ll usually need a separate sealer before paint with colored/paintable fillers. Color matching improves after sealant application, and sealing guarantees even absorption, adhesion, and true color so your finish looks consistent and durable.
Conclusion
You’ve learned the basics, but here’s the kicker: drying times can vary wildly—sometimes a few minutes, sometimes days—depending on the filler, temperature, and thickness. Don’t rush it; a premature coat can ruin your finish. Check the label, test a small patch, and wait for the filler to feel firm and sandable. Ready for the satisfying reveal? Be patient, follow the product guidance, and you’ll get a smooth, professional-looking result that’s worth the wait.