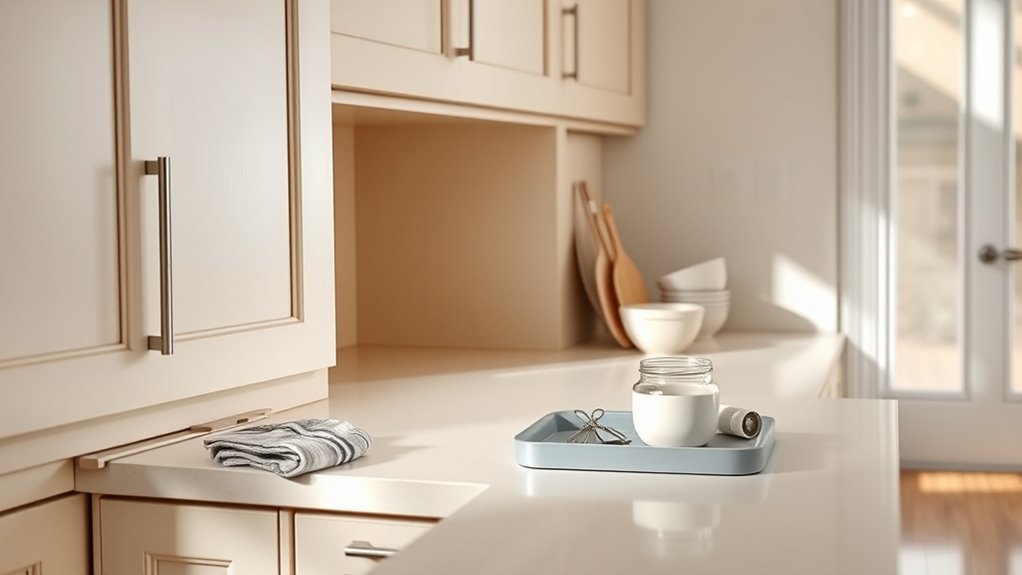
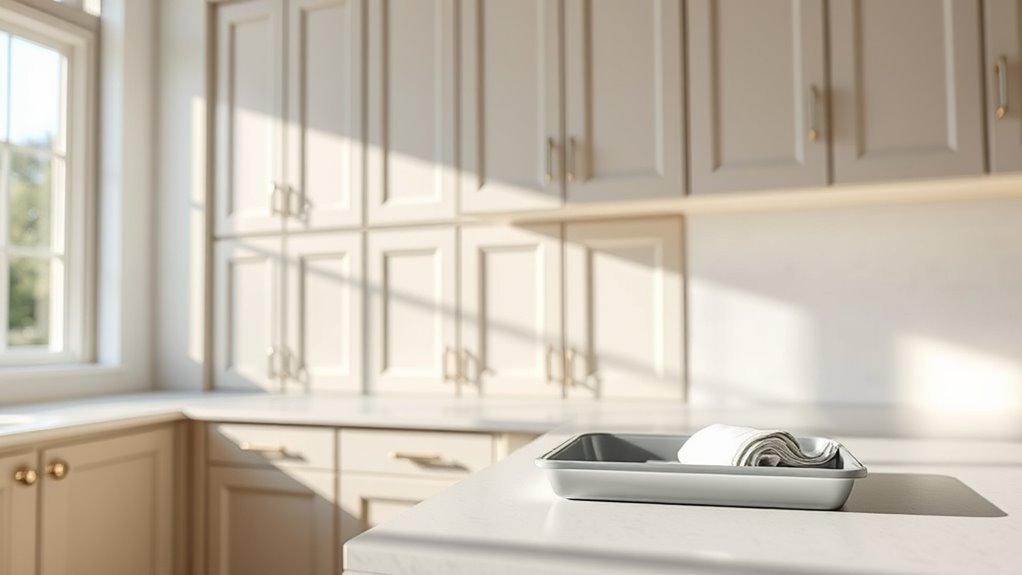
How Long for Cabinet Paint to Dry
You can usually handle painted cabinets gently after about 24–72 hours, but full curing that gives maximum hardness and durability can take up to 30 days depending on paint type and humidity. Touch-dry times are quicker, yet you should avoid heavy use, slamming doors, or hanging items until the finish has cured. Increase ventilation and keep traffic low to speed drying, and test a small corner first — keep going to learn practical tips for faster, safer use.
How Long Until Painted Cabinets Are Safe to Use?
When can you start using painted cabinets without harming the finish? You’ll usually wait 24–72 hours for light use, but full cure can take up to 30 days depending on paint type and humidity.
Treat surfaces gently: avoid slamming doors or hanging heavy items on cabinet hardware right away. Use soft cloths and gentle cleaners; avoid abrasive pads.
Handle painted cabinets gently—no slamming or heavy hardware; clean with soft cloths and mild cleaners, never abrasive pads.
Color theory won’t change drying time, but darker paints may show imperfections, so handle them carefully while curing.
If you need earlier use, open doors to ventilate and keep traffic low. Test a corner before regular use to be safe.
How Long Does Cabinet Paint Feel Dry to the Touch?
Although paint can feel dry within a few hours, how it feels to the touch depends on the paint type, coat thickness, temperature, and humidity. You’ll notice latex often feels dry in 1–2 hours, while oil-based takes longer. Thin coats dry faster; high humidity slows you down. Test a hidden edge before rehanging cabinet hardware. Also consider color psychology when choosing finishes—gloss shows imperfections but feels smoother.
| Paint Type | Typical Touch Dry | Tip |
|---|---|---|
| Latex | 1–2 hours | Thin coats |
| Oil-based | 6–8 hours | Ventilate |
| Alkyd | 3–6 hours | Warmth helps |
Drying vs Curing: What It Means for Cabinet Paint
Because drying and curing describe different stages, you’ll want to treat them as separate checkpoints when refinishing cabinets. Drying means the surface feels dry; curing means the paint reaches full hardness and chemical stability. You’ll notice changes in sheen and how the finish handles contact.
Treat drying and curing as separate checkpoints: drying is surface-dry; curing is full hardness—plan around both stages.
- Surface dry: can touch lightly; still vulnerable to smudges and fingerprints.
- Tack-free to light use: better for careful handling, helpful when doing color matching or minor adjustments.
- Full cure: required before heavy use or glazing in furniture restoration to avoid indentations or adhesion issues.
Plan projects around both milestones.
Typical Curing Time Before Heavy Cabinet Use
You’ve already used surface-dry and tack-free checkpoints to guide light handling; for everyday cabinet use you’ll need to wait longer for the finish to fully cure. Expect most water-based paints to reach practical cure in 7–14 days before heavy use like frequent door slams or installing cabinet hardware.
During that period, avoid abrasive cleaning and hanging towels that rub painted surfaces or unset paint around screws. Test a hidden spot before full use.
Cooler temperatures and high humidity extend cure time, and richer paint colors may show wear sooner, so plan gentle use and allow the full curing window to protect your finish.
How Paint Type Affects Cabinet Drying Times
What you choose—oil-based (including alkyd) or water-based (latex)—changes how fast cabinets dry and cure.
Oil and alkyd paints generally take longer to dry but build a tougher finish.
Latex dries quicker and’s easier to recoat.
Knowing these trade-offs helps you plan drying time and when to handle or reinstall hardware.
Oil-Based Versus Water-Based
When choosing paint for your cabinets, the type—oil-based or water-based—has the biggest impact on how soon you can sand, recoat, and use them. You’ll find oil-based dries slower but levels beautifully and can boost paint durability; water-based dries fast, reduces odor, and eases color matching with modern formulations.
Consider these trade-offs:
- Oil-based: longer tack time, wait 8–24 hours to recoat, superior leveling, strong durability.
- Water-based: recoat in 2–4 hours, quick turnaround, easier cleanup, good durability now.
- Practical tip: test a small panel to verify drying rhythm and color matching before full application.
Alkyd And Latex Differences
Although alkyd and latex paints both suit cabinets, they dry and behave differently enough that they change your prep and recoating schedule. You’ll notice alkyd feels smoother, levels better, and allows longer open time for color blending, but it takes longer to cure and needs solvent cleanup.
Latex dries faster to touch, so you can sand and recoat sooner, yet you may see brush marks if you don’t use proper brush techniques.
Choose alkyd when you want a hard, durable finish and can wait; choose latex for quicker turnaround and easier cleanup. Match drying times to your workflow and sanding steps.
Waterborne Acrylics and Fast-Drying Alkyds: Timelines
When you’re choosing waterborne acrylics or fast-drying alkyds, know that drying and curing are different: paint may feel dry to the touch in an hour but won’t fully cure for days.
You’ll get faster touch-dry times with acrylics in warm, low-humidity conditions, while modern alkyds offer quick recoat windows but still need proper curing time.
Aim for good ventilation, moderate temperature, and thin coats to speed safe handling and reach full durability sooner.
Drying vs Curing Times
Because drying and curing refer to different chemical stages, you’ll want to track both timelines—not just the time until a cabinet feels dry to the touch.
With waterborne acrylics you’ll get surface dry in 30–60 minutes and handleable in a few hours; full cure can take 7–14 days.
Fast-drying alkyds feel dry in a couple hours but often cure in 5–7 days.
Note how color mixing and paint sheen can influence perceived dryness and final appearance.
- Surface dry: touch safe.
- Handleable: light use allowed.
- Full cure: regular use and cleaning safe.
Optimal Application Conditions
If you want reliable drying and curing, aim for stable, moderate conditions: 65–75°F (18–24°C) and 40–50% relative humidity.
Waterborne acrylics dry within their 30–60 minute surface window and reach handleable strength in a few hours.
Fast-drying alkyds will feel dry in a couple of hours and cure in about 5–7 days.
You should sand lightly between coats when acrylics feel tack-free and wait longer for full cure before installing cabinet hardware.
Control airflow, avoid high humidity, and use thin coats to prevent traps.
Consider color theory when selecting sheen—darker tones show imperfections faster.
Oil-Based Paint Schedules: Tack-Free to Fully Cured
Curious how long you’ll wait between using your cabinets and calling them finished? Oil-based paints go tack-free in 6–8 hours but need days to weeks to harden fully. You’ll manage drying by controlling temperature, humidity, and thin coats, and by using proper color mixing and brush techniques to avoid thick buildup.
- Tack-free: 6–8 hours; handle gently after 24 hours.
- Recoat: 16–24 hours for most formulations; follow manufacturer times.
- Fully cured: 7–30 days depending on film thickness, ventilation, and ambient conditions — avoid heavy use until hardness is achieved.
Lacquer & Conversion Varnish for Cabinets: Fast Drying
While lacquer and conversion varnish dry much faster than oils, they demand careful application and ventilation to get the best results. You’ll appreciate rapid tack-free times and quicker recoat windows, but you must control humidity and airflow. Use proper brush techniques to avoid streaks; a quality natural or foam brush works for lacquer, while conversion varnish benefits from a high-quality synthetic. Pay attention to color matching under fast-dry finishes; spray application often gives the most uniform tone.
| Finish Type | Dry Time | Best Application |
|---|---|---|
| Lacquer | 15–60 min | Spray/foam brush |
| Conversion | 1–4 hrs | Spray/synthetic |
| Tips | Ventilate | Thin coats |
How Primer Choice Changes Drying Speed

Your primer choice matters because different formulas — oil-based, latex, shellac, or bonding primers — absorb and cure at different rates.
You’ll notice oil and shellac primers often dry faster to sand and topcoat than some latex primers, while bonding primers may need longer to fully set.
Pick a primer with a drying time that matches your project timeline to avoid delays before painting.
Primer Type Matters
Because primers form the foundation for paint adhesion and drying, the type you choose will directly affect how quickly your cabinet finish dries and cures. Choose based on surface, topcoat, and desired look; color theory and furniture style influence whether you need tinted or high-build primers to reduce coats.
- Oil-based: Fast sealing on wood, great under lacquer; tends to slow full cure but speeds initial dry.
- Latex: Quick drying and easy cleanup; works well with waterborne paints and modern furniture styles.
- Shellac: Extremely fast tack-free time, excellent stain blocking, ideal for difficult substrates.
Drying Time Differences
Having picked the right primer, you’ll notice it doesn’t just prep the surface—it changes how quickly paint goes tack-free and reaches full cure.
Oil-based primers slow initial drying but promote smoother color blending and a durable bond, so you might wait longer before sanding.
Water-based primers dry faster, letting you recoat sooner, though their cure can still take days for full hardness.
Shellac sets almost instantly, useful for quick turnarounds but needs compatible topcoats to avoid finish gloss issues.
Match primer to your topcoat and schedule recoat, sanding, and handling times accordingly to avoid mistakes.
Do Stain, Shellac, or Tannin Blockers Affect Drying?
If you’re blocking stains, shellac, or tannins before painting, expect them to change the drying rhythm. You’ll notice color blending and texture smoothing behave differently: primers dry at varying rates, and the topcoat waits for a reliable base. Use blockers to seal wood, but plan extra cure time, especially in humid conditions.
Blocking stains, shellac, or tannins alters drying rhythms—expect varied primer cure times and extra cure time in humidity.
- Shellac primers: fast tack-free times, but you’ll still wait longer before sanding to avoid lifting.
- Oil-based stain blockers: slower to harden; allow full flash time for solvent release.
- Tannin-specific products: prevent bleed-through but need thorough dry to bond properly.
Number of Coats: How Each Adds Drying Time
Blockers change how long each layer needs to settle, and the number of coats you apply further lengthens the schedule. Each additional coat means you’ll wait full recoat times, so plan cumulative drying.
Primer, mid-coats, and topcoats all build film thickness; that affects when you can sand or handle pieces. If you’re doing color mixing, test a sample sequence since pigments can alter drying speed.
Higher paint sheen often shows imperfections, so you might add thin finish coats, increasing total cure time. Track manufacturer times per coat and add buffer for humidity and temperature to avoid tacky results.
Thin Coats vs Thick Coats: Drying Trade-Offs
While thin coats dry faster and let you recoat sooner, they demand more layers to build a durable finish. Thick coats cut the number of passes but take much longer to dry and are more prone to sagging or running. You’ll balance speed, durability, and appearance: thin coats promote even primer adhesion and reduce runs, while thicker ones can improve color blending in one pass but risk orange peel.
Thin coats dry faster and control runs; thick coats build faster but dry slower and risk sagging or orange peel.
Consider:
- Thin coats: faster touch-dry, better control, need more passes.
- Medium coats: compromise between build and drying time.
- Thick coats: fewer layers, longer cure, higher sag risk.
When Is Paint Dry Enough to Sand Between Coats?
Because you’ll want a smooth, durable finish without damaging the underlying layer, sand between coats only when the paint is set enough to resist clogging the abrasive but still soft enough to accept adhesion.
You’ll usually wait 1–6 hours for latex or longer for oil-based formulas, but check manufacturer times and test a discrete spot.
Lightly scuff with fine-grit paper, then wipe dust away.
Maintain consistent Brush techniques during recoating to avoid streaks; sanding evens imperfections from color mixing or application.
If paint powders or peels, it wasn’t ready—allow more cure time before sanding again.
How Long Before Applying a Topcoat on Cabinets?
How long should you wait before applying a topcoat on cabinets? You should let the paint cure enough to avoid trapping solvents but not so long that surface contamination or color fading occurs. Typically wait 24–48 hours for latex and 48–72 hours for oil-based paints, adjusting for humidity and temperature. Check tackiness; it should feel dry, not gummy.
Wait 24–48 hours for latex or 48–72 for oil; ensure paint is dry to the touch before topcoating.
- Inspect: confirm finish isn’t sticky and edges aren’t lifting to prevent paint peeling.
- Light sand: scuff with fine grit to promote adhesion.
- Clean: remove dust and oils before you apply the topcoat.
Solvent Flash-Off: When You Can Safely Recoat
When can you safely recoat after painting cabinets? You’ll wait for solvent flash-off—solvents evaporating from the finish—until the surface’s tackiness is gone but before full cure.
Lightly touch a hidden area; if paint lifts or smells strongly, wait longer. Proper brush selection and smooth application reduce trapped solvent, speeding safe recoating.
Also consider humidity and ventilation to aid flash-off without forcing temperature changes.
For color matching, avoid rushing; recoating too soon can alter sheen and distort match between coats.
When the surface feels dry and odor is mild, you can recoat carefully, following manufacturer recoat windows.
How Temperature Impacts Cabinet Paint Drying
Temperature has a big say in how fast your cabinet paint dries—warmer conditions usually speed the solvent evaporation and film formation.
But high humidity can counteract heat by slowing drying, while very low temperatures can prevent proper curing and leave paint soft or tacky.
You’ll need to balance temperature and humidity to get a fully cured, durable finish.
Temperature And Dry Time
Although paint chemistry largely dictates drying stages, the room’s ambient heat plays a direct role in how quickly your cabinet finish sets. You’ll notice warmer temperatures speed solvent evaporation, helping paint reach tack-free and recoat times sooner. However, extreme heat can cause skinning and uneven cure. Consider these practical points:
- Moderate warmth (60–75°F) promotes steady drying and preserves paint sheen and color contrast between panels.
- Higher temps shorten open time; you’ll need faster technique to avoid lap marks.
- Very high temps can trap solvents, leading to blushing or poor adhesion—cool slightly before final coats.
Humidity Versus Heat
Heat and humidity work together to determine how your cabinet paint dries, so after controlling temperature you’ll want to manage moisture too. You’ll notice high humidity slows surface drying, increasing tackiness and risking drips, while low humidity speeds skin formation but can cause micro-cracking. Balance helps achieve the sheen and depth that complements color theory and your chosen furniture styles.
| Condition | Effect |
|---|---|
| High humidity | Slow drying, tacky finish |
| Low humidity | Fast skinning, possible cracking |
Adjust ventilation and dehumidifiers, and test on a small door to confirm results.
Curing At Low Temperatures
How does cold air change the way your cabinet paint cures? Cold slows solvent evaporation and chemical crosslinking, so paint stays tacky longer and attracts dust. You’ll need patience and controlled conditions to get a durable finish.
- Lower temps extend cure time — allow extra days before light use.
- Use proper color mixing and thinner ratios to guarantee consistent drying; avoid heavy coats.
- Rely on suited brush techniques for thin, even layers; avoid reworking tacky surfaces.
If possible, raise ambient temperature slightly or use a space heater safely to speed cure without compromising finish.
Ideal Humidity Ranges and How Humidity Slows Drying
When humidity sits above about 60%, paint on your cabinets can take much longer to dry because the moisture in the air slows solvent evaporation and prevents water-based binders from setting properly. You’ll notice humidity impact directly: tacky surfaces, longer recoat times, and visible blemishes. Aim for 40–50% relative humidity for reliable drying; below 30% can cause too-rapid curing and cracking. Expect drying delays proportional to higher humidity and cooler temps. Use the table to compare target ranges and effects:
| Relative Humidity | Expected Effect |
|---|---|
| 40–50% | Ideal drying conditions |
| 60%+ | Significant drying delays |
Using Ventilation, Fans, or Airflow to Speed Drying
To speed drying, increase air circulation around your cabinets by opening windows and doors.
Point fans so they blow across painted surfaces rather than directly at wet paint to promote even evaporation. You’ll cut drying time noticeably without overheating or stirring up dust.
Increase Air Circulation
Even if you’ve got the right paint and temperature, boosting airflow will cut dry time considerably, so set up ventilation and fans to move fresh, dry air across cabinet surfaces. You’ll avoid trapped moisture that dulls finish sheen and can cause uneven color blending.
Position windows and doors for cross-ventilation, and keep dust out.
- Open opposing windows/doors to create a steady through-breeze.
- Use ceiling or box fans to circulate room air without blasting surfaces.
- Run an exhaust fan or air mover to remove humid air, lowering overall drying time.
Use Directed Fans
Although steady cross-ventilation helps, directing fans toward specific cabinet faces will speed solvent evaporation and cut drying time even more. Point a fan at the cabinet from about 3–6 feet away and angle it so airflow skims the surface rather than blasts it.
You’ll want low-to-moderate airflow to avoid dust settling or moving wet paint. Use oscillating fans or clip-ons to target shelves, doors, and decorative accents.
Rotate finished pieces periodically to expose all sides. Keep humidity down with a dehumidifier if possible.
Wait the recommended tack and cure times before hardware installation to prevent fingerprints and adhesion problems.
Using Heaters or Dehumidifiers Safely for Cabinets
If your shop is cold or humid, you can speed cabinet paint drying with a heater or dehumidifier—but you’ve got to use them safely to avoid fish eyes, solvent flash, or fire hazards. You’ll control temperature and humidity while protecting finish chemistry: follow heater safety rules and think about dehumidifier placement so airflow’s gentle and even. Check solvent labels; don’t point hot air at wet solvent-rich coats.
Speed up cabinet paint drying with heaters or dehumidifiers—use cautious placement and follow solvent and heater safety to protect the finish.
- Keep heaters off floor, away from solvents and dust; use thermostats and tip-over protection.
- Place dehumidifier where it draws moisture without blasting finish.
- Monitor temp/humidity until full cure.
Tools to Speed Drying: Sprayers, Rollers, Brushes, Fans
When you want faster drying without sacrificing finish quality, pick tools that apply paint evenly and promote gentle airflow—sprayers give thin, uniform coats, rollers cover flat surfaces quickly, brushes handle edges and detail, and fans speed solvent evaporation without disrupting the film.
You’ll choose a sprayer for smooth Gloss sheen and minimal brush marks, but use a brush for tight joints and a small roller for panels.
Position fans to move air across surfaces, not directly blast paint. Practice color blending with thin passes to avoid streaks.
Clean and maintain tools to guarantee consistent laydown and predictable drying times.
Spray vs Brush vs Roller: Drying Differences for Cabinets
Because the application method dictates film thickness and surface texture, you’ll see noticeable differences in how fast cabinet paint dries with a sprayer, brush, or roller. You’ll choose based on finish, speed, and how Color theory affects perceived uniformity. Use Brush techniques to minimize streaks and thin coats.
- Sprayer: Applies thin, even film so it dries fastest; you’ll avoid brush marks but need good ventilation.
- Brush: Gives control for edges; thicker strokes dry slower, so you’ll apply thinner coats and use proper Brush techniques.
- Roller: Leaves slight texture and medium film thickness, drying between sprayer and brush.
Drying Times for Doors vs Frames vs Drawers
When you’re planning cabinet work, remember that doors usually dry to the touch faster than they fully cure, so you can rehung them sooner.
Frames take longer to reach full hardness because they’re fixed and get more handling stress, so plan for an extended cure period.
Drawers often sit somewhere in between—paint needs enough set-up time on faces and runners before you reassemble.
Door Drying Time
How long should you wait before rehanging painted cabinet doors? You’ll usually wait 24–48 hours for surface dryness, but full handling strength can take 5–7 days depending on paint type, humidity, and temperature.
Keep color mixing records and practice tool maintenance to avoid streaks or contamination that force touch-ups.
- Check: gentle touch at 24 hours; if tacky, wait longer.
- Hang: reinstall hinges after 48 hours if dry to touch and firm.
- Final cure: avoid heavy use for a week; adjust hinges gradually to prevent chipping or misalignment.
Frame Cure Duration
While doors often feel dry within 24–48 hours, frames and drawer boxes usually need more time to reach a durable cure because they get multiple thin coats in tight joints and see more handling.
You should expect frames to cure fully in 7–14 days for typical latex or alkyd finishes; oil-based systems can take longer.
During curing, avoid installing cabinet hardware or stressing joints. Check paint sheen for uniformity and tack before reassembling—high-sheen areas may mask softness.
If you sand or touch up too soon, you’ll mar the finish. Patience preserves adhesion and durability for years of use.
Drawer Paint Set-Up
Because drawers sit and get handled differently than doors and frames, you should plan their paint timing accordingly. You’ll let drawer fronts dry longer before reattaching cabinet hardware to avoid smudges and sticking. Consider paint color selection impacts touch-up visibility; darker shades can show wear faster. Seal edges and allow full cure for smooth sliding.
- Wait 24–48 hours before light handling; 72+ hours before reinstalling pulls and knobs.
- Give 7–14 days for full cure before heavy use or drawer liners.
- Test one drawer first to confirm finish hardness and operation.
How Wood Species and Surface Prep Affect Drying & Adhesion
If you’re working with oak, maple, or pine, know that each species soaks up primers and paints differently, and that you’ll get the best drying times and long-term adhesion when you match your surface prep to the wood’s grain, porosity, and tannin content. You should sand to control wood grain exposure and adjust surface texture so primer wets evenly. Clean, degloss, and remove dust; dense maple needs scuff-sanding, open-grain oak benefits from filling, and soft pine needs light sanding to avoid gouges.
| Species | Prep Tip | Expected Drying |
|---|---|---|
| Oak | Fill open grain | Moderate |
| Maple | Scuff-sand | Faster |
| Pine | Light sand | Variable |
How Primer and Surface Prep Prevent Tannin Bleed
When you prime and prep cabinets properly, you block tannins from leaching through paint and causing yellow or brown stains; choose a stain‑blocking primer, seal any bare or cut ends, and clean the surface thoroughly so the primer bonds evenly.
You’ll stop discoloration and ensure consistent color blending under topcoats. Sanding, deglossing, and wiping with a tack cloth remove contaminants so primers seal uniformly.
Keep brushes and rollers clean—tool maintenance prevents contamination that can disrupt primer film. Follow manufacturer dry times before topcoating to avoid trapping tannins.
- Seal end grain and knots.
- Use a dedicated stain‑blocking primer.
- Clean and maintain tools.
How to Test If Cabinet Paint Is Cured (Simple Tests)
To check if your cabinet paint is fully cured, start with a gentle touch test to see if the finish feels hard or tacky.
If that seems okay, try a light adhesion scratch test in an inconspicuous spot to verify the paint won’t lift.
Finally, note any lingering chemical smell—if odors persist strongly, the paint likely needs more time to cure.
Touch Test Timing
Although paint can feel dry to the touch within hours, determining whether your cabinet finish is truly cured takes a few simple tests you can do at different stages. You’ll also protect color mixing consistency and avoid issues from poor paint storage by testing before heavy use.
- Light touch: after 24–48 hours, press gently with a clean fingertip; no tackiness means initial set.
- Fingernail press: at 72 hours, press lightly with a nail edge; slight give is okay, no indentation.
- Full contact: after 7–14 days, rest a clean cloth on the surface for a few minutes to check transfer.
Adhesion Scratch Test
After the touch tests, check how well the paint actually bonds by performing a simple adhesion scratch test. Lightly press a fingernail or a coin-edge at an inconspicuous spot, across grain and along brush techniques marks, to see if paint flakes or resists.
If it lifts, wait longer; sanding and repainting may be needed. For best results, test over a small area where you’ve done any color mixing or touch-ups so you assess the cured finish, not fresh mist.
Record results and timing so you adjust future coats, drying times, and application methods for durable cabinetry.
Chemical Smell Check
If you still smell solvent or a strong chemical odor around your cabinets, the paint probably hasn’t fully cured yet, so keep windows open and avoid heavy use until it fades.
You can do simple checks to confirm curing while prioritizing chemical safety and odor elimination. Try these quick tests:
- Light touch: press a clean finger gently; no tackiness means curing progresses.
- Smell test: after airing for an hour, step back in — persistent smell suggests more time.
- Paper test: press a white tissue for a minute; transfer or staining indicates solvents remain.
If any fail, wait and ventilate.
Signs Paint Hasn’t Cured Enough for Hardware Reinstallation
When the paint hasn’t fully cured, you’ll notice clear cues that mean you should hold off on reinstalling hardware—tacky surfaces, fingerprints, paint that glugs when screws are turned, or chips where the finish pulls up.
You’ll also see dull spots where touch alters sheen; color psychology tells you variations may look worse until cure evens things out. Don’t force cabinet hardware onto a surface that dents or stretches; screws can gouge wet paint and cause runs.
Test discreet areas with gentle pressure and wait if you see smudging, stringing, or surface tack. Patience prevents damage and preserves finish longevity.
When to Reinstall Hinges, Knobs, and Pulls
Wait until the paint is dry to the touch and has had additional curing time recommended for your finish before reattaching hardware.
Remember some adhesives or backing on knobs and pulls need their own cure time, so follow the manufacturer’s instructions.
Do a final surface inspection for tackiness, brush marks, or soft spots before screwing anything back on.
Drying Time Before Reinstalling
Because freshly painted cabinets can still be vulnerable to scuffs and fingerprints, you should delay reinstalling hinges, knobs, and pulls until the paint hasn’t only dried to the touch but has cured enough to handle regular use.
You’ll typically wait 24–72 hours for touch-dry and 7–30 days for full cure depending on paint type. Keep parts off during any final color mixing or paint removal touch-ups to avoid damage.
- Check manufacturer cure times and test a hidden spot.
- Reattach hinges first, then knobs and pulls to avoid stress.
- Use gentle handling and clean hardware before reinstalling.
Hardware Adhesive Cure Time
You’ve let the paint cure enough to handle light use, but the adhesives you’ll use for hinges, knobs, and pulls have their own cure schedules that affect when you can safely reinstall hardware. For reliable hardware installation and long-term paint durability, follow adhesive manufacturer cure times: thin cyanoacrylates set fast but reach full strength in 24–48 hours; construction adhesives and epoxies may need 72 hours. Avoid stressing joints early. If you can, wait a full week before heavy use. Use the table below to compare common options and typical wait times.
| Adhesive Type | Set Time | Full Cure |
|---|---|---|
| CA glue | Minutes | 24–48 hr |
| Epoxy | 5–30 min | 72 hr |
| Construction adhesive | 10–30 min | 48–72 hr |
Final Surface Inspection
Before reinstalling hinges, knobs, and pulls, inspect the painted surfaces closely to confirm full cure, even sheen, and no tackiness. You want to avoid pressing softened paint and risk marks or adhesion loss. Check edges and corners, where color fading or incomplete cure can appear.
Confirm paint durability by gently rubbing a hidden spot with a microfiber cloth.
- Look for consistent sheen and no fingerprints.
- Press lightly to ensure no tackiness or denting.
- Check for color fading, scuffs, or weak spots that suggest more cure time.
Only reinstall hardware once surfaces feel fully hardened and resilient.
How Long Before Rehanging Doors to Avoid Sticking?
If you wait until the paint is fully cured before rehanging cabinet doors, you’ll greatly reduce the chance they’ll stick, swell, or transfer tacky paint to the frames.
You should typically wait at least 7–14 days for latex and up to 30 days for oil-based finishes in normal conditions. Check cure by gently pressing an inconspicuous edge; it should feel hard, not tacky.
During furniture restoration or when doing color matching touch-ups, keep humidity low and temperature steady to speed curing.
When rehanging, use new or cleaned hardware and allow hinges slight adjustment to prevent future binding.
Avoiding Fingerprints and Marks While Paint Cures
While the paint’s still curing, handle cabinets as little as possible and use clean, soft gloves or pads when you must touch them to prevent oils and sweat from leaving fingerprints or smudges. You’ll reduce surface damage and improve fingerprint prevention by planning access and minimizing contact. Follow these quick steps:
- Use nitrile or cotton gloves and clean them frequently to avoid transferring dirt or causing paint smudges.
- Lay down soft, breathable cloths under work areas to catch drips and avoid accidental rubbing.
- Keep doors and drawers slightly ajar with sticks or wedges to avoid touching edges while airflow completes curing.
Troubleshooting Sticky or Tacky Cabinet Paint Finishes
If your cabinet paint feels sticky, first check the room’s humidity and temperature because high moisture or low heat can slow curing.
Next, identify whether the paint is still in its tacky cure stage or has a surface-only issue.
If you spot dust, oil, or residue, you can often fix the problem by gently cleaning the surface and allowing more time to fully cure.
Check Humidity And Temperature
Because paint cures through chemical reactions and solvent evaporation, you’ll want to check both humidity and temperature before blaming the paint itself for a tacky finish. You’re aiming for a controlled environment so decorative accents and color matching don’t suffer from slow drying or uneven sheen.
- Measure: use a hygrometer and thermometer; ideal is 40–50% RH and 65–75°F for most cabinet paints.
- Adjust: run a dehumidifier or heat, or pause painting if conditions are outside range.
- Ventilate: increase airflow with fans and filtered fresh air to speed solvent evaporation without dust contamination.
Identify Paint Cure Stage
When paint feels tacky, start by identifying which cure stage it’s in so you can choose the right fix. You’ll check tackiness, smell, and time since application: surface-dry, hardening, or full cure. Surface-dry tack means recent coat; hardening tack suggests slowed cure from humidity or cool temps; full cure rarely feels tacky—look for contamination. Note how color psychology influences perception of flaws and consider waiting before reinstalling cabinet hardware to avoid marks. Use this quick table to classify symptoms and next steps.
| Stage | Clues/Action |
|---|---|
| Surface-dry | Light tack, fresh smell — wait |
| Hardening | Persistent tack, days — adjust environment |
| Full cure | No tack, firm — reinstall hardware |
Fix Surface Contamination
Although surface contamination can leave your cabinet paint feeling sticky or looking dull, you can usually fix it without stripping the finish. You’ll first diagnose whether grime, silicone, or oily residue is causing tackiness rather than incomplete cure; paint odor often signals solvents still evaporating, not contamination.
Tackle contamination gently to avoid damage.
- Clean: Wipe with a mild degreaser or TSP solution, rinse, dry thoroughly.
- Decontaminate: Use a dedicated surface cleaner or solvent like mineral spirits sparingly to remove silicone or wax.
- Recoat spot: If sheen is uneven after cleaning, lightly scuff and apply a thin topcoat.
Fixing Orange Peel, Runs, and Sags From Bad Drying
Notice a bumpy “orange peel” texture or visible runs in your cabinet finish? You can correct these without stripping everything. Lightly sand problem areas with fine-grit paper until smooth, then feather edges to preserve color blending so the repair won’t show.
Lightly sand orange-peel or runned spots, feather edges for seamless color blend, then rebuild with thin, even coats.
For runs and sags, scrape raised paint, sand, and clean dust thoroughly. Apply thin, even coats—don’t overload the brush or spray gun—to rebuild the surface.
After sanding between coats, check uniform finish gloss under good light. Allow proper dry times before touch-ups to prevent recurrence.
Patience and careful prep restore a professional-looking cabinet surface.
Best Clear Topcoats and How They Change Cure Time
When you pick a clear topcoat for your cabinets, the type—water-based, oil-based, or polyurethane—directly affects both durability and how long the finish takes to fully cure.
Water-based topcoats dry fast and soften cure times, while oil-based and catalyzed finishes can add days or even weeks to full cure despite offering tougher protection.
I’ll compare the pros and cons of each and explain how they change your project timeline.
Topcoat Types Compared
If you’re trying to pick the best clear topcoat for your cabinets, start by comparing the main types—waterborne polyurethane, oil-based polyurethane, acrylic urethane, and conversion varnish—because each one alters dry and cure times as well as durability and appearance.
You’ll also consider cabinet hardware protection and whether you did complete paint removal first.
Choose based on sheen and traffic.
- Waterborne polyurethane: fast dry, low odor, retains color.
- Oil-based polyurethane: slower cure, ambering, robust chemical resistance.
- Conversion varnish: hardest finish, professional cure, needs proper ventilation and prep.
Effects On Cure-time
Picking a topcoat doesn’t just change look and durability—it directly affects how long your cabinets take to fully cure. You’ll choose between water-based, oil-based, or conversion varnish; each alters cure-time and future Cabinet maintenance. Your Color selection can affect heat absorption and subtle curing differences.
| Topcoat | Typical Cure Time |
|---|---|
| Water-based polyurethane | 7–14 days |
| Oil-based polyurethane | 14–30 days |
| Conversion varnish | 3–7 days |
Pick conversion for fastest full cure, oil-based for toughness but longer wait, water-based for balance and easier routine Cabinet maintenance.
Using Wax, Polyurethane, or Conversion Varnish Over Paint
Although you can leave many painted cabinets as-is, applying a topcoat like wax, polyurethane, or conversion varnish will improve durability and ease of cleaning. You’ll reduce color fading and benefit from texture smoothing while protecting against scratches and stains.
Choose based on use: wax for low-traffic charm, polyurethane for robust water resistance, conversion varnish for professional-grade toughness. Apply thin coats, sand lightly between, and wait full cure times before heavy use so topcoats bond without trapping solvents.
Your choice affects appearance, maintenance, and longevity, so match product properties to cabinet function and desired sheen.
- Wax: gentle finish, easy touch-ups
- Polyurethane: durable, water-resistant
- Conversion varnish: hardest, professional-grade
Health and Safety During Cabinet Paint Drying
When you’re painting cabinets, keep fresh air moving by opening windows and using fans to push fumes out so drying is safer and faster.
Choose low-VOC or water-based paints and finishes to reduce harmful emissions while they cure.
Wear a respirator if ventilation is limited and follow product safety instructions to protect yourself.
Ventilation And Air Flow
Because paint fumes can build up quickly in enclosed spaces, make ventilation your top priority before you start or while you’re drying cabinets. You’ll reduce odors, speed curing, and protect respiratory health. Keep windows and doors open, and use fans to create cross-breeze. Monitor humidity; low humidity helps solvent dispersal but avoid overly dry conditions that affect color blending and paint sheen.
- Place an exhaust fan near the work area to pull fumes outside.
- Position intake fans or open windows opposite the exhaust for steady airflow.
- Run fans for several hours after final coats until smells dissipate.
Safe Paint And Coating Choices
Good ventilation lowers fumes, but choosing low-toxicity paints and coatings will further protect your health while cabinets cure.
Pick water-based acrylics or low-VOC alkyds labeled for cabinets, and avoid oil-based or high-VOC primers unless you can isolate the workspace.
Wear a respirator rated for organic vapors when sanding or applying heavy coats.
Use gloves and eye protection for solvents and clear coats.
Practice Color blending on scrap to limit rework and solvent exposure.
Apply thin, even layers with proper Brush techniques to reduce overspray and fumes, speeding cure and minimizing health risks.
Protecting Nearby Surfaces and Belongings While Drying
If you want your freshly painted cabinets to look professional and your home to stay clean, take a few simple protective steps before the paint starts to dry. Protect floors and counters with drop cloths or plastic sheeting taped at edges; this avoids dust, drips, and accidental smudges while you check color matching and finish textures.
Seal nearby vents and doorways to keep dust out and fumes contained. Move small items away or cover them with lightweight cloths.
- Use breathable drop cloths for floors.
- Tape plastic to walls and counters.
- Cover hardware and fixtures securely.
Brand Guidance: Recommended Drying Times From Major Paints
When you’re choosing a paint brand, check the manufacturer’s recommended drying and recoat times—these vary by formula (latex, acrylic, alkyd) and by conditions like temperature and humidity.
Major brands list tack-free, dry-to-touch, and recoat intervals; you should follow them to avoid issues like color bleeding when layering and paint peeling from premature handling.
Fast-dry lines let you recoat in hours but may sacrifice leveling; premium cabinet enamels often ask 8–24 hours between coats and several days to cure.
Read technical data sheets, adjust for your shop conditions, and don’t rush recoating or heavy use until full cure is confirmed.
Low-VOC and Waterborne Formulas: What to Expect
With low-VOC and waterborne cabinet paints, you’ll notice they often dry to the touch faster but take longer to fully cure, so plan your timeline accordingly.
You’ll also need to pay close attention to surface prep—cleaning, sanding, and using a proper primer are essential for adhesion with these formulas.
Follow manufacturer recoat and cure recommendations to avoid tacky finishes or poor durability.
Drying vs. Curing Time
Because low‑VOC and waterborne cabinet paints dry quickly to the touch, you might assume the job’s done—but drying and curing are different stages and each matters for durability. Drying removes solvents; curing completes chemical crosslinking.
You’ll notice dryness in hours but should wait days to weeks for full cure before heavy use or installing cabinet hardware. Also consider color psychology when choosing finishes—gloss reflects light differently as it cures.
- Dry time: surface tack-free in 1–6 hours.
- Handle time: light use after 24–48 hours.
- Full cure: 7–30 days depending on product and conditions.
Surface Prep And Adhesion
Although low‑VOC and waterborne cabinet paints go on smoothly, they need careful surface prep to stick and last. You should clean, degloss, and sand surfaces, removing grease and old finish.
Scuffing creates bite for thinner formulas, and a quality primer improves adhesion and helps with color matching when switching brands or covering stains. Test small areas to confirm paint sheen and coverage before committing.
Allow recommended flash times between coats and use light sanding between layers for durable results. Proper prep prevents peeling, reduces touchups, and guarantees your cabinets cure evenly with a professional-looking finish.
When to Wait Longer Than the Label Recommends
When your kitchen sees heavy use, in high humidity, or if you notice any tackiness after the label time, you should wait longer than the manufacturer’s guideline before reassembling or using the cabinets. You want paint fully cured so Color psychology choices and Cabinet hardware fit and function aren’t compromised.
Check finish firmness, smell, and resistance to fingerprints. If any feel soft, delay.
- Test by pressing a hidden corner; no indentation means safer reassembly.
- Allow extra days for corners and inside drawers.
- Keep ventilation and low humidity to speed safe curing.
How Seasonality Changes Cabinet Drying Schedules
Seasonal changes affect how long cabinet paint needs to dry, so plan your project around temperature and humidity shifts. You’ll make Seasonal Adjustments by monitoring indoor conditions: warmer, drier months speed curing, while cold or humid periods slow it.
Use a heater, dehumidifier, or ventilate to counteract adverse Climate Effects, but avoid rapid temperature swings that cause problems. Adjust dry and recoat intervals accordingly, and test with a small panel before full application.
Keep records of temperature and relative humidity for future reference so you’ll know how long to wait next season and avoid premature handling.
Weekend Refinish Plan: Realistic Steps and Wait Times
If you’re tackling a weekend cabinet refinish, plan realistic steps and wait times so you won’t be rushed or tempted to skip essential drying stages. You’ll prep, paint, and reinstall in measured phases.
Account for sanding dust settling, proper color mixing for consistent coats, and drying before handling cabinet hardware.
- Day 1: Remove doors/hinges, sand, clean, and apply primer; wait recommended tack-free time.
- Day 2 morning: Light sand and wipe, mix paint carefully, apply first coat; allow full cure between coats.
- Day 2 evening: Apply final coat, dry overnight; reinstall hardware next day when fully cured.
Timing a Multi-Day Cabinet Refinishing Project
Because timing makes the difference between a smooth refinish and a weekend of setbacks, you’ll want a clear multi-day schedule that balances prep, drying, and curing windows so each coat and component gets handled at the right time.
Day one: remove doors, label, strip or sand, and bag vintage hardware separately.
Day two: prime and allow full tack-free time before light sanding.
Day three: apply first topcoat; wait recommended flash times.
Day four: second topcoat or touch-ups, then reassemble doors when finish is dry to the touch but not fully cured.
Stagger work to avoid rushing and protect cabinet lighting.
Kitchen Timeline: Safe Light Use After Painting
When you’re planning kitchen lighting during a cabinet repaint, think in terms of stages: low-power task lights can run soon after the paint feels dry to the touch, but full overhead fixtures and built-in LED strips should stay off or at reduced brightness until the finish has had more time to cure.
Think in lighting stages during a cabinet repaint: low-power task lights early, hold bright LEDs until the finish cures.
You’ll protect gloss and avoid heat-triggered tackiness while preserving color mixing perception and hardware compatibility with adhesive trims.
- Keep under-cabinet puck lights on low for 24–48 hours.
- Delay high-intensity LEDs and dimmers 48–72 hours.
- Resume full brightness after 7 days, checking for tack.
When Cabinets Are Ready for Heavy Use and Cleaning
After the paint has felt dry for several days and passed a tack test, you can start treating cabinets like everyday kitchen surfaces. Begin gently: open doors, use cabinet hardware, and avoid slamming for another week to guarantee edges set.
Clean with a soft, damp cloth and mild detergent; don’t scrub abrasively. Wait two weeks before heavy cleaning or grease-cutting products.
Check interior lighting fixtures and wiring before cleaning around them, and avoid spraying cleaners directly toward bulbs.
If chips appear, touch up sparingly and let cures continue. By one month, normal heavy use and routine cleaning are safe.
How to Shorten Drying Times Without Harming the Finish
If you want to speed up cabinet paint drying without risking the finish, control temperature, humidity, and airflow while avoiding direct heat on the surface. You’ll preserve paint durability and avoid problems with color blending by working methodically and using the right products. Try these steps:
- Use a dehumidifier and maintain 65–75°F for consistent curing.
- Run gentle fans for cross-ventilation; avoid heat guns or direct sunlight.
- Choose fast-dry primers and topcoats labeled for cabinets to ensure smooth color blending and reliable paint durability while shortening tack-free times.
Common Mistakes That Prolong Cabinet Paint Drying
Speeding up drying helps, but you can still slow things down with avoidable mistakes. Don’t paint over dust, ignore humidity, or skip sanding; those choices trap moisture and tackiness. Mind temperature and ventilation, and don’t crowd fresh coats with wet rags or tools. Avoid thin, rushed layers—apply proper thickness and cure time. Be careful swapping finishes because Color symbolism choices won’t affect drying but might prompt extra coats. Remove and label Cabinet hardware to prevent smudges. Follow product directions, let each coat fully set, and resist early handling.
| Mistake | Effect |
|---|---|
| Dusty surface | Poor adhesion |
| High humidity | Slower cure |
| Thin coats | Rework needed |
| Improper temps | Uneven drying |
| Wet tools nearby | Contamination |
Cost vs Time Trade-Offs for Faster-Drying Products
When you choose faster-drying cabinet paints or additives, you’re trading money for time: premium formulations and catalysts can cut cure times dramatically, but they cost more per gallon and sometimes require special prep or equipment.
You’ll decide if quicker turnaround justifies higher spend, and you’ll factor in learning new brush techniques or altered color blending behavior in fast films.
- Pay more for acrylic-urethane or catalyst systems; they shorten recoat windows but need ventilation.
- Use additives sparingly; they speed drying but may change finish leveling.
- Rent spray gear for speed; sprays reduce brush marks but alter color blending dynamics.
Final Checklist: How to Know Cabinet Paint Is Truly Ready
Choosing faster-drying products may get you back to installing doors sooner, but you still need a reliable way to confirm the paint’s truly ready before handling, hardware installation, or moving items back.
Check cure time on the label, then wait the full period—touching too soon risks smudges or fingerprints.
Check the label for cure time and wait the full period—touching too soon invites smudges and fingerprints.
Do a gentle fingernail test in an inconspicuous spot; no tackiness means surface cure.
Inspect cabinet color under natural light for uniformity and verify paint sheen matches sample.
Reattach one hinge and test movement; no sticky edges or dust bumps means you can proceed with confidence.
Frequently Asked Questions
Can Painted Cabinets Be Moved Between Rooms During Curing?
Yes — you can move painted cabinets between rooms during curing, but don’t. You’ll risk tackiness, smudges and dust; use furniture protection, minimize handling, and follow ventilation tips so paint cures evenly and avoids sticking or trapping fumes.
How Long Before Painting Adjacent Walls Near Newly Painted Cabinets?
You should wait about 48–72 hours before painting adjacent walls to protect cabinet durability and account for paint sheen effects; this minimizes scuffing, guarantees consistent finish, and lets primers or topcoats cure enough for safe contact.
Will Cabinet Paint Emit Odors After Curing Completes?
Yes — you might still notice faint paint fumes after curing, though they’ll drop as VOC emissions dissipate; you’ll smell less over weeks to months, especially with ventilation, low‑VOC products, and proper curing conditions.
Can Pets Safely Be in the Painted Room During Cabinet Curing?
You can’t safely have pets in the painted room during cabinet curing; pet safety demands keeping them away until paint fumes fully off-gas. Ventilate well, use low-VOC paints, and wait the manufacturer’s recommended cure time.
How Does Repeated Light Cleaning Affect Newly Cured Paint?
Repeated light cleaning won’t harm properly cured paint if you used good surface preparation; it’ll boost paint durability by removing grit, but avoid harsh scrubbing or solvents, and wait full cure time so you won’t scuff or dull finishes.
Conclusion
In short, wait for cabinets to fully cure before heavy use—even if they feel dry. For example, a homeowner I know used a fast-dry acrylic and felt confident after 24 hours, but scratches appeared after a week; once they waited the recommended 7–14 days for curing, the finish held up. Give painted cabinets at least a week before light use and up to two weeks for daily wear—longer if you used oil-based or high-build products.