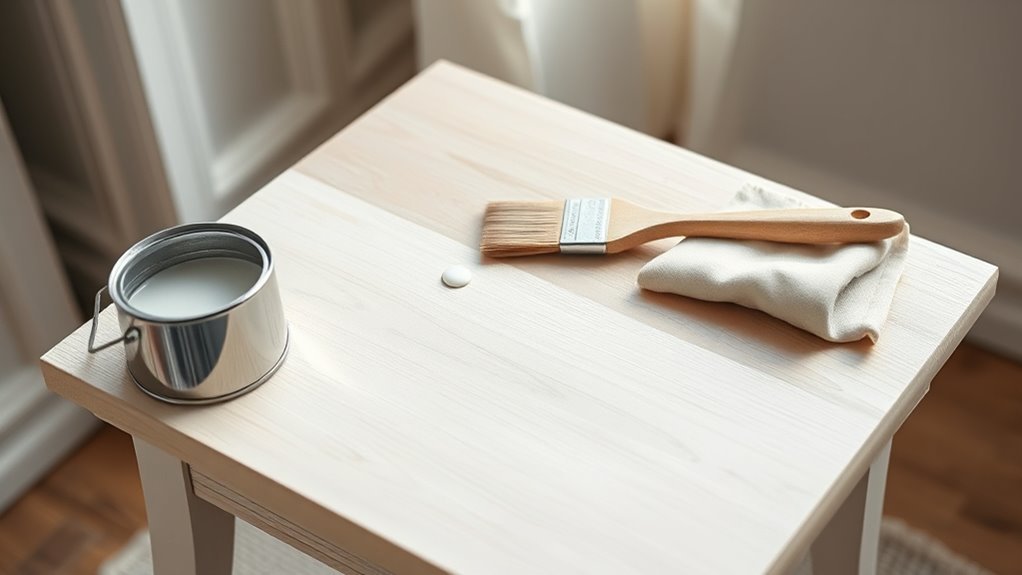
How Long for Chalk Paint to Dry Between Coats
You can usually recoat chalk paint after about 30–60 minutes for thin, touch-dry layers, but expect 1–4 hours for thicker coats, porous surfaces, high humidity or cool temps. Press an inconspicuous spot to check for tackiness and avoid heavy brushing that can lift paint. Thin, even coats in warm, ventilated conditions dry fastest; priming speeds tack-free time. Follow manufacturer guidance and test a scrap piece if unsure—keep going for tips on timing, troubleshooting, and finishing.
Quick Recoat Timing at a Glance
If you’re doing a quick recoat, plan on waiting about 30 minutes to an hour for most chalk paints to be touch-dry. That gives you enough time to lightly sand or add another thin coat without lifting the first.
For quick recoats, wait 30–60 minutes until touch-dry before lightly sanding or applying another thin coat
You’ll assess touch-dryness by lightly pressing a finger in an inconspicuous spot.
Good surface preparation speeds this: remove dust, degrease, and sand glossy areas before the first coat.
When you mix colors, do small test swatches so drying differences don’t surprise you.
Keep coats thin, work in consistent conditions, and avoid heavy brushing that can gum up fast recoats.
Typical Chalk Paint Drying Window Between Coats
You’ll usually wait about 30 minutes to an hour for chalk paint to surface-dry before considering another coat.
Humidity, temperature, paint thickness, and the brand you’re using can speed that up or slow it down.
Check for tackiness and apply the next coat only when the paint feels dry to the touch but not fully cured.
Typical Drying Time
Because chalk paint dries relatively quickly on most surfaces, you can usually recoat in just 30 minutes to an hour for thin applications. You’ll find that typical drying time depends on how you apply coats and whether you’ve done proper surface preparation to guarantee adhesion and color consistency.
Expect these common windows:
- 30–60 minutes — thin, even coats.
- 1–2 hours — slightly thicker coats or porous surfaces.
- 3–4 hours — heavy coverage or textured finishes.
- 24 hours — fully cured for sanding or distressing.
Check tackiness before recoating; wait longer if the paint feels cool or gummy.
Factors Affecting Drying
When evaluating how long chalk paint needs between coats, consider several key factors that speed up or slow drying: coat thickness, surface porosity and prep, room temperature and humidity, airflow, and the type of paint or additives used.
You’ll notice thicker coats take much longer to cure, so apply thin, even layers.
Porous woods soak paint and can shorten surface dry time, while sealed or primed surfaces slow absorption.
Color choices can affect apparent drying—darker pigments sometimes feel dry sooner but may hide tackiness.
Good surface prep prevents uneven drying, and increased ventilation or a dehumidifier speeds safe recoating intervals.
When To Recoat
If you’re working with standard chalk paint, plan on waiting about 30 minutes to 2 hours between thin coats under normal indoor conditions—longer for thicker applications, high humidity, or cooler rooms.
You’ll know when to recoat by touch, appearance, and consistency with your color coordination and furniture style goals.
- Lightly touch a hidden edge: no tackiness means safe to recoat.
- Inspect sheen: even matte suggests cure; glossy spots need more time.
- Consider layer thickness: thicker layers may need several hours.
- Adjust for environment: use fans or heat to speed drying, avoid dust.
Why Drying Time Matters for Furniture Durability
You’ll want to respect drying times because proper cure lets the paint harden fully and resist scratches and wear. If you rush, the new coat won’t bond well to the layer beneath, which can cause peeling or chipping later.
Giving each coat its needed time to set ensures strong layer-to-layer adhesion and a longer-lasting finish.
Proper Cure Time
Because chalk paint may feel dry to the touch long before it’s fully cured, you should factor cure time into your project schedule to protect the finish and the furniture beneath it. You’ll preserve color, hardness, and longevity by respecting manufacturer cure windows tied to chalk composition and application techniques. Follow these steps:
- Wait 24–48 hours between coats for light handling.
- Avoid heavy use for 7 days; maximum hardness often needs 21–30 days.
- Keep temperature 60–75°F and low humidity to speed cure.
- Apply wax or topcoat only after recommended tack-free and cure times.
Layer Bond Strength
Letting each coat reach its recommended dryness and cure windows directly affects how well the layers bond and how long your finish will hold up. You’ll get stronger adhesion between coats when you wait the proper time, preventing peeling, chipping, or tacky spots that ruin color matching and texture.
Good furniture prep—cleaning, sanding, and removing wax—helps layers interlock rather than slide. If you rush, solvents trap moisture and compromise bond strength; cured layers resist knocks and cleaning.
Follow manufacturer dry and cure times, test adhesion in an inconspicuous spot, and only apply additional coats once previous ones feel fully set.
Why Different Chalk Paints Dry at Different Speeds
When comparing brands and formulas, you’ll notice chalk paints dry at different rates because their ingredients and consistencies vary—some use more water or slower-evaporating binders, others include additives that speed drying or improve leveling.
Chalk paints dry at different rates—ingredients, binders, and additives all shape drying speed and finish quality
You’ll see effects in color consistency and learn that proper surface preparation helps uniform drying. Consider these factors:
- Binder type: acrylic vs. mineral affects film formation.
- Solvent content: water-heavy mixes dry slower.
- Additives: retarders or hardeners modify cure time.
- Pigment load: heavy pigment can change drying and opacity.
Choose formula based on project needs and expected drying behavior.
How Temperature Affects Chalk Paint Drying
You’ve seen how paint formulation and surface prep change drying behavior; temperature has a similarly large effect on how quickly chalk paint loses moisture and sets. You’ll notice warm conditions speed surface drying, so you can recoat sooner, while cold slows chemical evaporation and curing.
Sudden temperature fluctuations can cause film irregularities, longer tackiness, or poor adhesion between coats. Because Chalk paint composition varies, manufacturers’ recommendations differ—binders and pigments respond uniquely to heat.
Aim for a stable, moderate temperature during projects, avoid rapid swings, and follow the paint’s guidance to guarantee reliable dry times and strong, even finishes.
How Humidity and Airflow Change Drying Times
Because moisture in the air and the movement of that air control how quickly chalk paint sheds solvent, higher humidity slows drying and steady airflow speeds it up, so you should plan your recoats around local conditions. You’ll notice Humidity effects and airflow influence interact: damp rooms hold solvent longer, while fans or open windows remove moisture.
- Measure humidity — below 50% dries faster.
- Use gentle airflow — direct fans speed curing.
- Avoid humid activities — showers or cooking nearby add moisture.
- Schedule recoats — allow extra time on muggy days to prevent tackiness.
Raw vs Finished Wood: How the Surface Changes Drying
Though raw wood soaks up chalk paint and finished surfaces repel it, both change how quickly paint dries and how many coats you’ll need. You’ll notice raw wood needs more attention during surface preparation to seal uneven absorption; otherwise each coat soaks in and seems dry faster but remains tacky underneath.
Finished wood lets paint sit on the surface, so drying feels slower but cures more uniformly. Adjust your paint application: thin, even coats on sealed or finished pieces, a primer or sanding on raw pieces.
Knowing the substrate helps you judge true dryness and plan coat timing accurately.
How Coat Thickness and Brush Technique Affect Drying
When you lay paint on too thick, it takes much longer to dry and can stay tacky beneath a cured surface, so always aim for thinner, even coats that let solvent evaporate and binders set properly. You’ll control drying by technique and coat thickness while preserving color consistency and avoiding brush marks.
Consider these steps:
- Apply thin, uniform strokes; avoid heavy loading.
- Use long, even passes with the grain for smooth leveling.
- Keep Tool maintenance: clean brushes and rollers between coats to prevent drag.
- Sand lightly between thin coats to promote adhesion and faster cure.
Brand Differences: What to Expect From Popular Chalk Paints
Different chalk paint brands dry at different rates, so you’ll want to check manufacturer recommendations before planning your next coat.
You’ll also notice variations in finish and texture—some brands level out smoothly while others keep a more matte, chalky feel. Testing a small patch will show you how long to wait and what final look to expect.
Drying Times Vary
Because each manufacturer’s formula balances pigments, binders, and additives differently, you’ll notice chalk paints dry at noticeably different speeds from one brand to another. You’ll also find that color matching and surface preparation influence how long you wait between coats.
Consider these practical brand differences:
- Fast-drying brands: thin, oil-light formulas that tack in 20–30 minutes.
- Medium-drying brands: balanced binders, typically 1–2 hours to recoat.
- Slow-drying, rich-pigment brands: may need 4–6 hours to avoid lifting.
- Specialty or textured lines: follow label guidance; they often require longer cure.
Test on scrap to confirm timing before committing to a project.
Finish And Texture
Now that you’ve seen how drying times vary by formulation, it helps to look at how those same formulas affect finish and texture. You’ll notice some brands give a smoother finish consistency straight from the brush, while others create a more matte, velvety surface needing light sanding.
If you want visible brushstrokes or a distressed look, pick a thicker formula that aids texture enhancement. Thinner, creamier paints level out better for sleek results.
Test small areas to confirm how a brand’s binder and pigments influence topcoat adhesion and the final tactile feel before committing to a full piece.
How to Tell a Coat Is Ready for the Next Layer
When the surface feels dry to the touch and has lost its tackiness, you’re usually safe to apply the next coat. Check by lightly pressing a fingertip in an inconspicuous spot, looking for no indentation, no color transfer, and no stickiness.
When the surface feels dry and non-tacky, test an inconspicuous spot—no indentation, color transfer, or stickiness before recoating.
You’ll also use visual cues tied to surface prep and color contrast to decide timing. Follow these quick checks:
- Inspect under good light for even color contrast and no wet sheen.
- Run a clean fingertip; no paint should transfer.
- Feel for uniform texture; no soft or gummy areas.
- Verify edges and crevices are dry before recoating.
The Thumb Test and Other Simple Readiness Checks
Before you add another coat, try the thumb test: gently press your clean thumb on an inconspicuous spot to check for tackiness.
Also run your fingers lightly across the surface to feel for smoothness or rough texture that might need sanding.
Use elapsed drying time plus these touch checks to decide when it’s ready for the next layer.
The Thumb Test
If you want a quick, reliable check between coats, do the thumb test: gently press the pad of your thumb into an inconspicuous spot and feel for tackiness. You’ll know when a coat’s dry enough to handle without smudging, which helps preserve delicate Color blending or Antique effects you’ve layered.
- Wait the manufacturer’s minimum time.
- Lightly touch; no paint should transfer.
- Check edges and corners as they dry faster.
- If tacky, wait longer and recheck.
Use this simple method alongside touch judgment to decide when to apply the next coat confidently.
Surface Texture Checks
The thumb test gives you a quick go/no-go, but there are a few other simple surface checks you can use to confirm readiness between coats. Run your fingers lightly across the grain to feel for tackiness, bumps, or dust nibs; a smooth, dry texture means you can proceed.
Hold the piece to your nose—if paint smells strong, it may still be off-gassing. Inspect edges and corners under good light for uneven sheen. These checks tie back to surface preparation: remove contaminants before recoating.
Also remember paint storage affects curing; old or improperly stored paint can alter drying behavior and texture.
Timing And Touch
When you’re ready to check between coats, use touch and timing together: give the painted surface the quick thumb test (lightly press with a clean fingertip) and note whether it’s tacky, firm, or fully dry, then compare that to the recommended dry time on the can and the room conditions—temperature, humidity, and airflow all change how long you should wait.
Use these quick checks:
- Tacky: wait longer; improve airflow.
- Firm: OK for light sanding; good surface preparation step.
- Dry: safe to recoat; confirm color selection hasn’t shifted.
- Sticky after long wait: strip or thin coats and reassess.
When You Should Wait Longer Before Recoating
Because paint dries at different speeds depending on conditions, you’ll want to wait longer before recoating in certain situations. If humidity’s high or temperature’s low, drying slows—pause longer to avoid tackiness or lifting.
Porous surfaces or poor surface preparation absorb moisture unevenly, so give extra time for full cure.
Dark or intense color options may show brush marks or require steadier drying to prevent streaks; wait before adding another coat.
When you’ve applied thick layers or used metallics, extend the interval.
If you’re unsure, touch lightly at edges; a firm, non-tacky feel means it’s safe to proceed.
When It’s Safe to Recoat Sooner : Limits and Risks
You can often tell if chalk paint is ready for another coat by doing a light tackiness check—if it’s no longer sticky, it may be safe to proceed.
Keep in mind that high humidity or low temperatures slow drying, so you might need to wait longer even if the surface feels tack-free.
Rushing to recoat can trap solvents, cause uneven texture, or weaken adhesion, so weigh those risks before you paint sooner.
Paint Tackiness Check
If the surface feels only slightly tacky, do a quick tack test before recoating. You’ll protect your finish and respect proper color mixing after any blending touch-ups, and good surface prepping minimizes surprises. Try this simple check:
- Lightly touch an inconspicuous spot with a clean fingertip.
- Press a piece of clean tape to the paint, peel quickly.
- Rub a cotton swab gently—look for drag or residue.
- Test a small brush stroke to confirm adhesion.
If any test shows tackiness, wait longer. If tests pass, you can cautiously recoat, watching for lifting or color shift.
Humidity And Temperature
When humidity’s low and temperatures are warm, paint dries faster and you can sometimes recoat sooner—though pushing those limits raises risks like poor adhesion, brush marks, or altered sheen.
You should monitor conditions: below 50% humidity and 60–75°F speeds curing, but extremes (very hot/dry) can skin over while remaining tacky.
Good surface preparation and proper color mixing affect drying: thinner, well-mixed coats cure more evenly.
If you must shorten wait times, use thin coats, gentle airflow, and moderate heat sources cautiously.
Always test a small area before proceeding to full recoating under accelerated conditions.
Risks Of Early Recoat
Although tempting to rush, recoating chalk paint too soon can cause adhesion failures, tackiness, and uneven sheen that ruin the finish; you’ll want to respect drying times even when enthusiastic to finish.
Know that Chalk paint myths about instant layering aren’t true—moisture and solvent need to leave before the next coat bonds. Color selection affects perceived dryness; dark shades may look dry yet remain soft.
If you must recoat early, limit risk by following these steps:
- Test a small hidden area for tackiness.
- Lightly sand between coats.
- Wait at least the manufacturer’s minimum.
- Improve ventilation and reduce humidity.
How Many Coats of Chalk Paint You Actually Need
Since chalk paint lays down opaque pigment with excellent coverage, you often won’t need more than two coats for most surfaces, and sometimes one coat will do if you’re working with a light color over a similar base. You’ll consider color mixing and surface prep: a primed, clean surface may take one coat; contrasting colors or bare wood usually need two. Test a small area to decide. Use distressing or glazing for depth instead of extra layers. Refer to the table for quick guidance.
| Situation | Recommended Coats |
|---|---|
| Primed/light base | 1 |
| Bare wood | 2 |
| Dark over light | 2 |
| Touch-ups | 1 |
| Decorative finish | 1–2 |
Drying vs Curing : When the Finish Reaches Full Hardness
After you decide how many coats to apply, you’ll need to know the difference between drying and curing so you can handle the piece correctly.
Drying means the surface feels dry; curing is the chemical hardening that can take weeks. You’ll want to plan around both for color mixing decisions and proper furniture prep.
Drying is surface dryness; curing is the slow chemical hardening—plan your color choices and prep accordingly.
- Dry time: surface dry in 30–60 minutes.
- Recoat window: usually 1–2 hours for chalk paint.
- Initial hardness: within days, tolerates light use.
- Full cure: 2–4 weeks for maximum durability; avoid heavy stress until then.
How to Speed Up Chalk Paint Drying Safely
If you want your chalk paint to dry faster without risking the finish, focus on controlling temperature, airflow, and humidity while using thin, even coats and quick-dry additives sparingly.
You’ll prep well: proper surface preparation removes dust and oils so paint sticks and dries predictably.
Work in a warm, ventilated space; a fan speeds evaporation but avoid direct blast that causes uneven drying.
Thin coats with a good brush or roller lower drying time and reduce lap marks.
If you mix colors, do small test patches first.
Use manufacturer-approved accelerators cautiously to maintain adhesion and color integrity.
How to Slow Drying to Avoid Brush Marks and Lap Lines
If you’re getting brush marks or lap lines, slowing the paint’s dry time can give you more working time to blend edges. You can extend drying by painting in cooler, slightly more humid conditions or by applying thinner, even coats.
For more control, try a manufacturer’s retarding additive or a small amount of water (if the paint allows) to keep the paint open longer.
Extend Drying Time
When you want to avoid brush marks and lap lines, slowing chalk paint’s drying gives you more time to level and blend strokes for a smoother finish. You can extend open time without additives by controlling conditions and technique; this helps color retention and minimizes environmental impact from wasted rework.
Try these practical steps:
- Lower room temperature slightly and avoid direct sun.
- Raise humidity with a humidifier or a damp towel nearby.
- Work in smaller sections to keep edges wet and blendable.
- Use a slow, even brushing motion and feather edges to eliminate laps.
Use Retarding Additives
Alongside adjusting temperature and humidity, you can use retarding additives to slow chalk paint’s drying so you’ve more time to blend brush strokes and erase lap lines.
Additives designed for water-based paints extend open time, letting you level out marks without overworking the surface. Follow manufacturer ratios—too much can prevent cure and attract dust. Mix thoroughly, test on a scrap piece, and watch the drying process under your workshop conditions.
Use sparingly for humid or cool environments only when needed. After applying retardant, allow extra curing time before sanding or topcoating to ensure a durable finish.
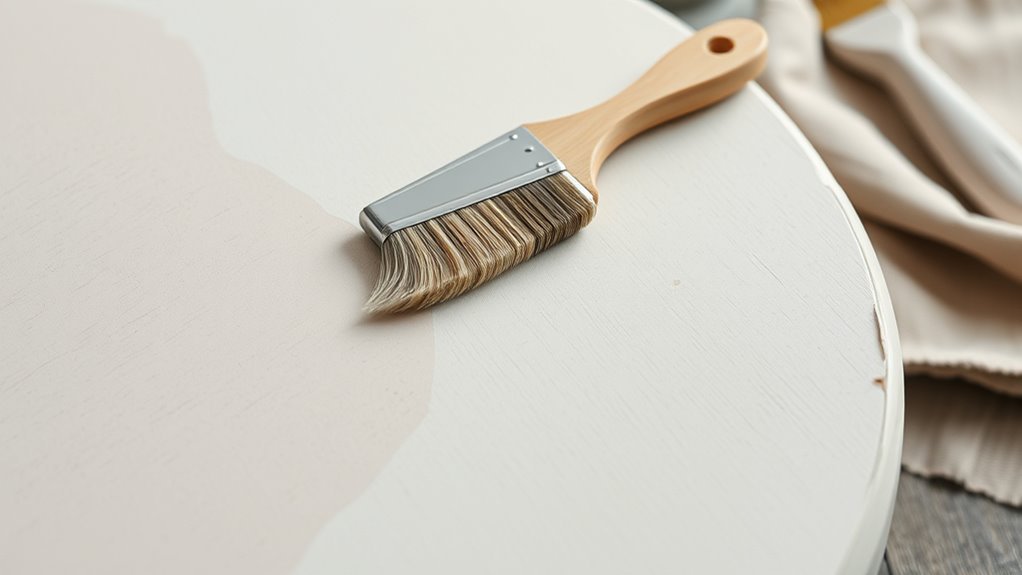
Best Brushes and Tools for a Smooth Chalk‑Paint Finish
Choosing the right brushes and tools makes a huge difference in getting a smooth chalk‑paint finish, so you should pick items that match your project’s scale and texture. You’ll also want to consider color mixing needs and proper surface sanding beforehand to ensure even application.
Recommended tools:
- Fine‑bristle synthetic brush for smooth panels and light detail.
- Foam roller for flat, larger surfaces to minimize brush marks.
- Small angled brush for edges and tight spots.
- Sanding sponge (fine grit) for between coats and final smoothing.
Use clean tools, keep strokes consistent, and replace worn items for best results.
Using Fans, Heaters, and Dehumidifiers Correctly
You can speed up chalk paint drying by directing a fan toward the piece, but keep airflow gentle to avoid dust and brush marks.
Use a heater or dehumidifier to control room humidity and prevent long tacky times, but don’t overheat the space or place heat too close to the paint.
Balance airflow and moisture so coats cure evenly without cracking or bubbling.
Speed Up Drying
When you need to speed drying between chalk paint coats, controlled airflow and temperature make the biggest difference—so use fans, heaters, and dehumidifiers thoughtfully rather than blasting heat or wind indiscriminately. You’ll reduce tackiness without harming finish or aggravating chalk paint allergies; choose eco friendly options when possible.
- Position a low-speed fan for gentle, even airflow across the surface.
- Use a thermostat-controlled space heater at moderate temps to avoid blistering.
- Run a dehumidifier briefly to lower moisture if air feels clammy.
- Pause between adjustments, test a small area, and wait for touch-dry before recoating.
Control Room Humidity
Gentle airflow and steady warmth help, but balancing humidity often makes the bigger difference for chalk paint drying times. You’ll use fans to circulate air, heaters to raise temperature modestly, and dehumidifiers to lower excess dampness — all as part of effective humidity control.
Keep moisture levels between about 40–60% for predictable drying; monitor with a hygrometer. Position fans for gentle crossflow, not direct blast on wet paint.
Run dehumidifiers until readings stabilize, and avoid rapid temperature swings. Adjust settings based on room size and ventilation so coats cure evenly and you can recoat safely on schedule.
Avoid Overheating
Although speeding up drying can be tempting, don’t overheat the room — excessive heat or airflow will cure the surface too quickly and can cause cracking, peeling, or uneven texture. You want steady, moderate conditions to avoid overheating risks and paint blistering.
Use fans, heaters, and dehumidifiers sparingly and monitor results.
- Keep temperature around 65–75°F to promote even cure.
- Use low-speed fans to move air without blasting the surface.
- Run dehumidifiers to lower humidity gradually; don’t force rapid drying.
- If you see paint blistering or tacky spots, stop heat and let paint rest.
How Topcoats and Wax Change Drying and Recoat Timing
If you seal chalk paint with a topcoat or wax, you’ll change both the surface feel and how quickly you can recoat or use the piece.
Wax gives a softer, matte finish you can buff in 24 hours, but it remains susceptible to water and marks until fully cured in several days.
Polyurethane or water-based topcoats dry faster to touch—usually within 1–2 hours—and allow gentle recoat in 2–4 hours; full hardness may take weeks.
Choose based on color choices and furniture styles: delicate antiques suit wax, high-traffic modern pieces benefit from durable topcoats for quicker, safer use.
How Primer or Shellac Undercoats Change Chalk Paint Timing
If you use a primer, you’ll usually see faster, more even drying because the primer seals porous surfaces and prevents the chalk paint from soaking in.
Shellac undercoats can speed tack-free times even more and block stains, but they can also make subsequent coats adhere differently than bare wood.
Consider whether you need stain blocking or quicker recoat times before deciding between primer, shellac, or no-prep.
Primer Impact On Drying
When you apply a primer or shellac undercoat, it changes how chalk paint soaks in and dries, often speeding up surface curing so you can recoat sooner. You’ll notice differences in coverage and finish depending on prep. Color mixing reacts differently over primed surfaces, and surface preparation affects adhesion and drying consistency.
- Primer seals porous wood, reducing soak-in and shortening tack time.
- Shellac blocks stains, giving a uniform base that dries rapidly.
- Thinner coats over primer cure faster than thick, absorbent layers.
- Test a small area to confirm recoat window before full application.
Shellac Versus No-Prep
Though a shellac undercoat adds an extra step, you’ll often cut the chalk paint’s tack time dramatically because it seals porous surfaces and prevents heavy soak-in. If you skip shellac and do no-prep, expect longer dry intervals as paint soaks into bare wood or chalky finishes.
Use shellac when surface preparation is limited or when old stains might bleed through; it stabilizes fibers and speeds recoat. Note that shellac can affect color mixing—topcoat tones may appear slightly warmer.
Balance quicker timing against the extra work: for fast projects choose shellac, for textured vintage looks skip it.
How to Plan a Realistic Painting Timeline for One Piece
Because you’re working on one piece, you can map each step clearly and set realistic time blocks for sanding, priming, painting, and drying so the whole job won’t drag out longer than needed.
Begin with furniture prep and color matching so you know supplies and target finish. Estimate work and wait times, then follow this simple schedule:
- Sand and clean — 1–2 hours.
- Prime (if needed) — 2–4 hours plus 2–4 hours cure.
- Chalk paint coats — 1 hour per thin coat, 2–4 hours tack-free between coats.
- Seal and cure — 2–6 hours tack-free, 24–72 hours full cure.
Adjust for humidity and temperature.
Same‑Day Projects: Timelines and Tricks for Quick Jobs
If you only have a few hours to spare, you can still get a satisfying chalk-paint refresh by planning each step tightly and choosing fast-drying products.
Start with a small, manageable piece and prep quickly: clean, sand lightly, and tape edges.
Begin with a small piece: clean, sand lightly, and tape edges for quick, tidy prep.
Apply thin coats and use a hairdryer on low to speed skin-dry times between layers, but wait the recommended minutes before recoat.
Pick a palette ahead for easy color coordination and limit to two tones.
For Antique finishes, glaze or distress sparingly once topcoat cures briefly.
Seal with a spray sealer to shorten wait and protect the finish.
Large Projects: Staging Coats for Multiple Pieces
When you’re tackling multiple pieces, set up a clear staging plan so you can move items through prep, painting, and sealing without backtracking. You’ll group pieces by drying time and finish so coats dry evenly and you can apply color blending or antique finishes efficiently. Use numbered stations and a simple checklist to keep flow steady.
- Prep station: sand, clean, prime.
- Paint station: base coats, note dry time per coat.
- Detail station: blending, distressing, antique finishes.
- Seal station: wax or topcoat, curing area.
Rotate pieces through stations, monitor humidity, and stick to recommended recoat intervals.
Common Mistakes That Ruin Dry Times and Finishes
Moving pieces through stations helps keep timing predictable, but a few common mistakes will still throw your schedule and ruin finishes.
You’ll rush recoats before the chalk composition fully sets, trap solvents, and get tacky layers.
You’ll skip surface prep, leaving dust or grease that prevents proper adhesion and alters paint color.
You might apply overly thick coats or use wrong tools, causing drips and uneven drying.
Humidity and temperature blind spots slow cure times—don’t assume warmth equals speed.
Finally, mixing inconsistent batches changes sheen and drying behavior; label mixes and test a scrap before committing.
Fixing Problems From Recoating Too Early
Because recoating too soon can leave tacky, trapped layers, you’ll want to assess the damage before continuing; start by feeling for tackiness and checking for blisters, wrinkling, or color shifts. If issues exist, act promptly:
- Lightly sand the tacky area to remove trapped film and smooth wrinkles.
- Clean dust and residues—good surface preparation prevents adhesion problems.
- If color mixing occurred (streaks or tint unevenness), feather-sand edges and spot-prime with a compatible primer.
- Recoat only when fully dry per manufacturer times, using thin, even layers.
Test a small area before full recoat.
Fixing Issues From Waiting Too Long Between Coats
Letting coats sit too long can cause adhesion problems, flaky edges, or a rough, grainy finish that won’t bond smoothly to the next layer.
Letting paint sit too long leads to poor adhesion, flaky edges, and a rough, grainy finish that won’t bond smoothly.
You can rescue it by lightly sanding with fine-grit paper to remove loose particles and create a keyed surface, then clean thoroughly with a tack cloth.
Use a feathered primer where adhesion is poorest, especially around edges, before repainting.
For consistent color blending or antique finishes, apply glazes or diluted paints and work quickly to merge tones.
Finish with a compatible topcoat to lock in texture and prevent future lifting or chipping.
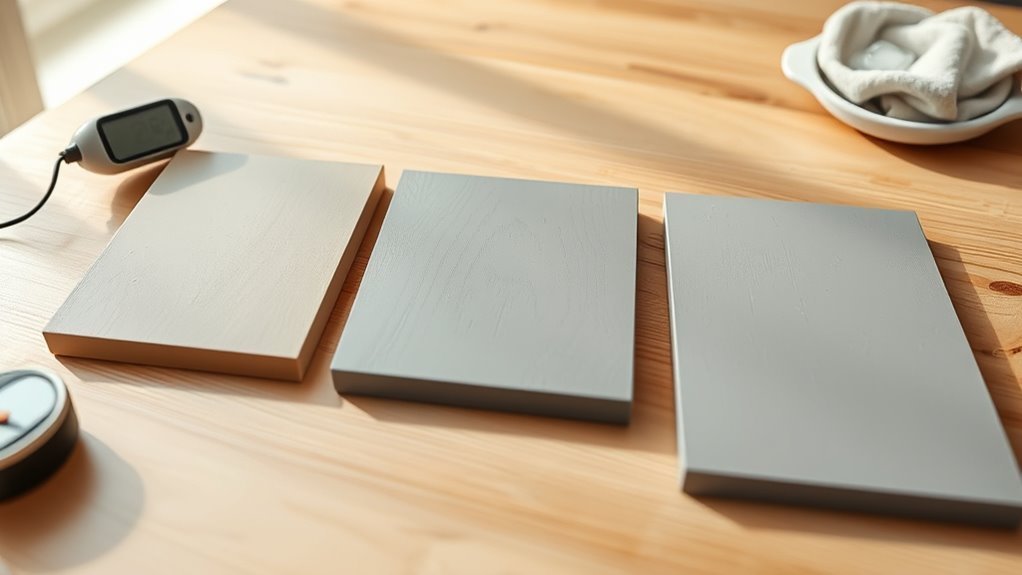
How to Test Brands and Techniques on Sample Boards
When you’re choosing chalk paint brands or new finishing techniques, test them on sample boards first so you can compare drying times, adhesion, and final appearance under the lighting and conditions you’ll actually use. Use scrap wood or primed panels and note brand, batch, and any Color mixing ratios.
Pay attention to Surface preparation for each board—sanding, cleaning, and primers affect results. Follow a consistent application method and record timing.
- Apply one coat, note dry-to-touch time.
- Apply second coat, note recoat window.
- Sand between coats lightly, observe adhesion.
- Seal or wax, assess final look and hardness.
Troubleshooting: Common Symptoms and What to Do
If a coat looks tacky, cracks, flakes, or shows brush marks, don’t panic—you can usually fix it once you identify the symptom and the likely cause.
If tacky, wait longer and improve ventilation or thin the paint slightly; humidity and heavy application slow curing.
If paint feels tacky, give it time, boost ventilation, or thin the coat slightly to speed curing.
Cracking or flaking usually means inadequate adhesion—sand, remove loose areas, address poor furniture prep, then recoat with thin layers.
Visible brush marks mean paint’s too thick or the brush technique needs adjustment; thin and drag light, even strokes.
For color matching issues, test small areas and adjust pigment before final coats to avoid redoing work.
Pre‑Coat Checklist Before You Hit “Apply”
Before you load your brush, run through a quick checklist to make sure each coat will bond and dry properly. You’ll avoid problems and respect historical techniques while getting modern results. Check these four items before you apply:
- Surface: clean, sanded, and free of wax or oily residue.
- Temperature/humidity: within the paint’s recommended range for proper drying.
- Paint consistency: thin or stir for even color mixing; strain if lumpy.
- Tools and test area: use the right brush/roller and try a small patch to confirm adhesion.
Do this every time to guarantee smooth, lasting coats.
Frequently Asked Questions
Can Chalk Paint Be Applied Over Existing Oil-Based Finishes Without Sanding?
You can, but chalk paint compatibility varies, so you’ll check the finish first; light scuffing or deglossing is safest. For proper surface preparation, clean thoroughly, remove grease, and sand or use bonding primer if needed.
Will Tinting Chalk Paint Change Its Drying Time?
Like a slow sunset shifting hues, yes — tinting chalk paint can alter drying speed slightly. You’ll notice minor changes depending on pigment load and binder; just test for color consistency and adjust thin coats as needed.
Is Chalk Paint Safe to Use Outdoors Without a Protective Topcoat?
No, you shouldn’t use chalk paint outdoors without a protective topcoat; it lacks outdoor durability, so you’ll need protective finishes like exterior varnish or marine-grade polyurethane to prevent fading, flaking, and moisture damage over time.
How Long After Waxing Can I Apply a Second Wax Layer?
Want a smoother finish? You can apply a second wax layer after 24 hours; patience helps the wax application and drying process cure. You’ll buff between coats and avoid heavy buildup, ensuring even protection and sheen.
Can Chalk Paint Be Mixed With Other Paints or Additives?
Yes — you can mix chalk paint with other paints or additives for color blending and texture enhancement, but you’ll want to test ratios first, since finish, adhesion, and durability can change depending on what and how much you add.
Conclusion
You’ll usually wait 30 minutes to an hour between chalk paint coats, yet you’ll sometimes find a perfect, smooth second coat at exactly 45 minutes — like two friends arriving at the same door. That coincidence reminds you: test a scrap, feel for tackiness, and trust touch. When temperature or brand slows you down, adjust timing rather than rushing. Do that, and your piece will finish strong, durable, and unexpectedly harmonious.