How Long for Trim Paint to Dry
You’ll usually have trim paint dry to the touch within 30 minutes to 6 hours—water‑based trims often feel dry in under an hour, oil‑based can take several hours—while full cure can take days to weeks depending on coat thickness, temperature, humidity and finish. Recoat windows run about 1–4 hours for latex and ~24 hours for oil. Keep temps 50–85°F, thin even coats, and use airflow; keep going and you’ll learn how to speed and protect the finish.
Quick Answer: How Long Does Trim Paint Take to Dry?
How long does trim paint take to dry? You’ll usually see it dry to the touch in 30 minutes to an hour for water-based paints, and 2–6 hours for oil-based.
Handle time—when you can lightly touch without damage—often runs 2–4 hours (water) or 6–8 hours (oil).
Full cure can take days to weeks depending on ventilation, temperature, and humidity.
When choosing paint, remember color matching can affect layering and appearance; stick with reputable paint branding to *guarantee* consistent drying schedules and finish quality.
Always check the manufacturer’s label for specific times and conditions.
What “Dry to the Touch” Means for Trim Paint
When trim paint is “dry to the touch,” you can lightly rest a finger on the surface without paint transferring, but it doesn’t mean the paint has fully cured.
You’ll want to know the difference because touch-dry paint can still be soft and vulnerable to smudges or dents.
Temperature, humidity, paint type, and applied thickness all influence how quickly a trim goes from touch-dry to fully cured.
Touch Versus Cure
Although the surface may feel dry within an hour or two, “dry to the touch” doesn’t mean the paint has finished curing; it just means solvents on the surface evaporated enough that you can lightly touch it without leaving a mark.
You shouldn’t treat trim as fully hardened — curing continues as polymers crosslink, deep solvents escape, and adhesion strengthens. If you move furniture or hang pictures too soon, you risk marring color saturation and harming gloss retention.
Wait the manufacturer’s recommended cure time before cleaning, caulking, or stressing the trim. Patience preserves finish durability, appearance, and long-term resistance to dents and stains.
Factors Affecting Dryness
Because several variables influence how quickly trim paint feels dry, you should know what actually governs that surface-dry moment. You’ll notice temperature, humidity, and airflow speed up or slow solvent evaporation; warm, dry, ventilated conditions generally make paint dry to the touch faster.
Paint sheen matters: higher gloss dries differently than flat finishes, often feeling dry sooner but remaining tacky underneath. Film thickness and number of coats affect drying time, as does color contrast—darker or stronger pigments can alter heat absorption and apparent dryness.
Finally, the type of paint (latex vs oil) determines cure behavior beyond the surface-dry stage.
Recoat Times: Latex vs Oil-Based Trim Paint
You’ll notice latex and oil-based trim paints reach “dry” at different speeds, which affects when you can safely recoat.
Pay attention to each paint’s recommended recoat window—latex usually allows a quicker turnaround, while oil-based formulas need more time to harden.
Also consider long-term finish care, since recoat timing influences durability and how the trim stands up to cleaning and wear.
Dry Time Comparison
Curious how long you’ll wait between coats? You’ll notice latex dries faster, often touch-dry in 30–60 minutes, while oil-based feels tacky for several hours. Consider color choices and primer compatibility—dark hues and oil primers can slightly extend cure time. Choose based on project pace and desired sheen.
| Paint Type | Typical Recoat Time |
|---|---|
| Water-based latex | 1–4 hours |
| Low-VOC latex | 2–6 hours |
| Alkyd (oil-based) | 24 hours |
| Fast-dry alkyd | 6–12 hours |
Measure surface readiness by feel and tack; don’t rush coats.
Recoat Window Differences
How soon can you brush on another coat without ruining the finish? You’ll usually wait 2–4 hours for latex and 24 hours for oil-based trim paint, but temperature and humidity shift that.
Latex dries fast, so you’ll spot color matching sooner. Oil-based gives longer leveling time for a smooth paint sheen. Don’t rush—tacky layers trap brush marks.
- Anxiety eases when latex dries quickly.
- Patience rewards with oil’s rich sheen.
- Color matching is easier after full cure.
- Rushing creates visible flaws and frustration.
Long-Term Finish Care
Because long-term appearance depends on proper recoating, you should follow recommended wait times for latex and oil-based trim paints to preserve sheen, adhesion, and durability. You’ll base recoat timing on product specs, room humidity, and paint texture; color theory affects perceived finish, so test small areas. Latex often recoats in 2–4 hours; oil-based needs 24 hours. For tough spots, sand lightly between coats. Track cures for cleaning and high-traffic use.
| Paint Type | Recoat Time | Longevity |
|---|---|---|
| Latex | 2–4 hours | High |
| Oil-Based | 24 hours | Very High |
| Hybrid | 6–12 hours | Good |
Which Primers Speed or Slow Trim Paint Drying
When you pick a primer for trim, remember it can speed up or slow down drying depending on its base and additives. You’ll notice oil-based primers slow drying but build smooth paint texture. Water-based primers dry fast and let your brush technique shine.
Fast primers with quick-evaporation solvents work in warm, ventilated spaces. High-hide primers with heavy binders tack longer. Match primer to topcoat and conditions so you don’t trap moisture or cause adhesion issues.
- Fear when a primer drags drying times.
- Relief with a fast, compatible primer.
- Frustration from poor paint texture.
- Pride in perfect brush technique.
Trim Paint Finishes: Which Dry Fastest (Gloss, Satin, Semi-Gloss)
After you’ve matched primer and topcoat to avoid slow tackiness, pick the finish that fits your timeline and look.
You’ll find gloss and semi-gloss dry faster to touch because their resins level quickly, letting you recoat sooner and resist smudges.
Satin takes a bit longer but hides imperfections and helps color blending across trim and walls.
Remember that primer adhesion affects overall cure and recoat timing; a poorly bonded primer can trap solvents and slow drying regardless of finish.
Choose gloss or semi-gloss for speed and durability, satin for appearance, and always confirm recoat times on the product label.
How Temperature Changes Trim Paint Drying Time
Temperature has a big impact on how quickly trim paint cures, so you’ll want to control the environment when you paint.
Warmer air speeds evaporation and shortens dry times, while cold or humid conditions can slow drying dramatically.
Aim for the manufacturer’s recommended temperature range—typically between about 50°F and 85°F—to get predictable results.
Temperature Effects On Drying
If you raise or lower the air temperature in the room, you’ll change how fast trim paint cures because heat speeds up the chemical reactions that dry the paint and cold slows them down. You’ll notice color consistency shifts and slight texture changes if temperature swings while you use certain brush techniques. Manage warmth to protect sheen and avoid tacky surfaces.
Keep airflow steady but gentle. Watch drying times between coats so you don’t smudge or trap solvents.
- Frustration when paint gums.
- Relief as panels clear quickly.
- Anxiety over uneven gloss.
- Satisfaction with smooth, fast results.
Ideal Temperature Ranges
While you control the room climate, aim for a steady range—typically 50–85°F (10–29°C)—because staying within those bounds helps trim paint cure predictably, avoid tackiness, and maintain consistent sheen.
You’ll see faster drying near the warmer end, but excessive heat can trap solvents, altering paint texture and gloss.
Cooler temps slow curing and extend recoat times, risking dust adhesion.
Balance humidity with temperature for even results: moderate humidity prevents cracking yet avoids extended tackiness.
Also consider color psychology when selecting finishes; darker hues absorb heat differently, so adjust conditions to ensure uniform drying and true final appearance.
How Humidity Affects Trim Paint Drying and Curing
Because moisture in the air slows solvent evaporation, high humidity makes trim paint take longer to dry and fully cure, so you’ll notice tacky surfaces and extended recoat times.
High humidity slows solvent evaporation, leaving trim paint tacky and extending drying and recoat times—plan accordingly.
You’ll also see how humidity affects Color mixing outcomes and Paint storage; damp conditions can alter sheen and promote condensation on cans, changing texture before use.
Plan for longer wait times, use dehumidifiers, and avoid painting during storms.
- Frustration when tacky paint ruins plans.
- Relief when dehumidifiers speed drying.
- Anxiety over ruined finishes from poor storage.
- Satisfaction with crisp, fully cured trim.
Why Paint Thickness Changes Dry and Cure Times
When you lay on a thicker paint film, solvent has farther to travel so evaporation and tack-free times slow down.
Thicker films also change how quickly polymer chains find each other and form crosslinks, so full cure can take much longer.
Understanding both solvent evaporation rate and resulting crosslink density helps you judge realistic dry and cure schedules.
Film Thickness Effects
If you lay on paint thicker than the label recommends, you’ll change how solvents evaporate and how the film crosslinks, which lengthens both dry and cure times. You’ll notice thicker film hides brush types differently and can alter perceived paint color saturation. Thicker layers trap solvents, slow chemical curing, and increase risk of runs or wrinkling.
Control thickness: thin coats build strength faster and dry more predictably.
Emotional reminders:
- Frustration when a project stalls.
- Pride when smooth, even layers form.
- Anxiety over tacky surfaces.
- Relief after following thin-coat practice.
Solvent Evaporation Rate
Although solvent evaporation sounds simple, the rate at which solvents leave a paint film determines how quickly surfaces go from wet to dry and how well the coating can chemically cure. You’ll notice thinner coats evaporate faster; thicker coats trap solvent, prolonging tackiness and risking solvent blush. Temperature, humidity, and airflow change rates, and solvent choice affects odor and safety—consider paint disposal rules. Color psychology won’t change drying mechanics but influences finish selection that may alter thickness. Monitor flash-off between coats to avoid trapping solvent.
| Factor | Effect |
|---|---|
| Temperature | Speeds evaporation |
| Humidity | Slows evaporation |
Polymer Crosslink Density
Because crosslinking governs how polymer chains lock together, thicker paint films change both drying feel and ultimate cure time: higher crosslink density restricts chain mobility, so solvents and reactive groups take longer to reach each other and complete cure.
While thinner films let chains align and react faster. You’ll notice texture, tack, and hardness depend on Polymer crosslinking and the curing process; understanding this helps you choose film thickness and drying conditions.
Consider how thickness affects you emotionally:
- Frustration when tack remains.
- Relief when hardness arrives.
- Pride in a smooth finish.
- Anxiety over uneven cure.
How Pigments and Color Affect Drying Speed
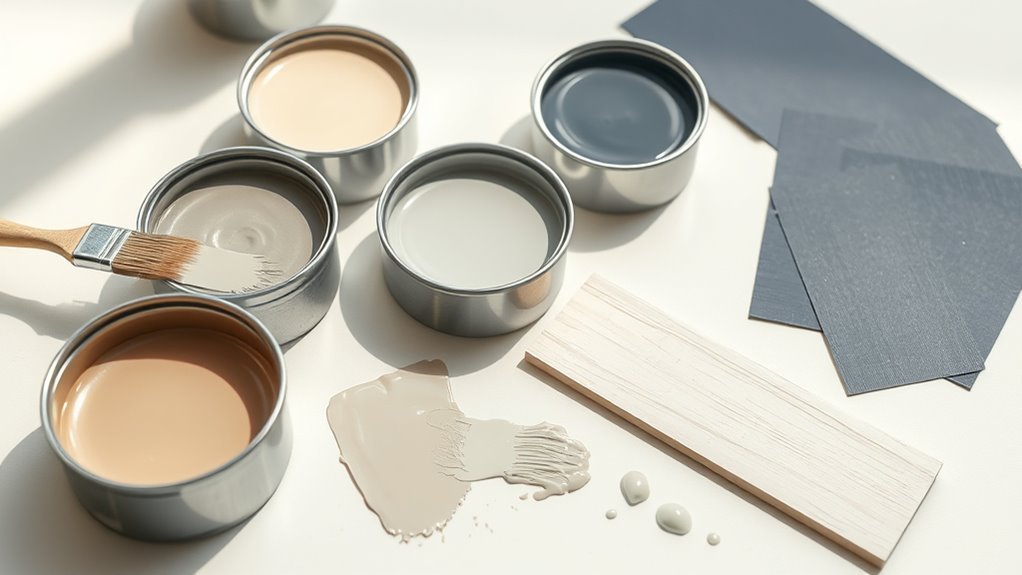
When you pick a trim color, don’t assume drying time stays the same—pigment type and concentration change how fast paint cures. You’ll notice darker, heavily pigmented hues often slow solvent release, so drying can take longer than pale shades.
Pigment stability matters: unstable pigments may interact with binders, altering film formation and tack time. High color vibrancy sometimes requires more pigment load, which can increase viscosity and reduce evaporation.
Manufacturers balance pigment choice, binder chemistry, and additives to keep flow and dry time predictable. When selecting bold colors, check technical data for recommended recoat intervals and cure notes.
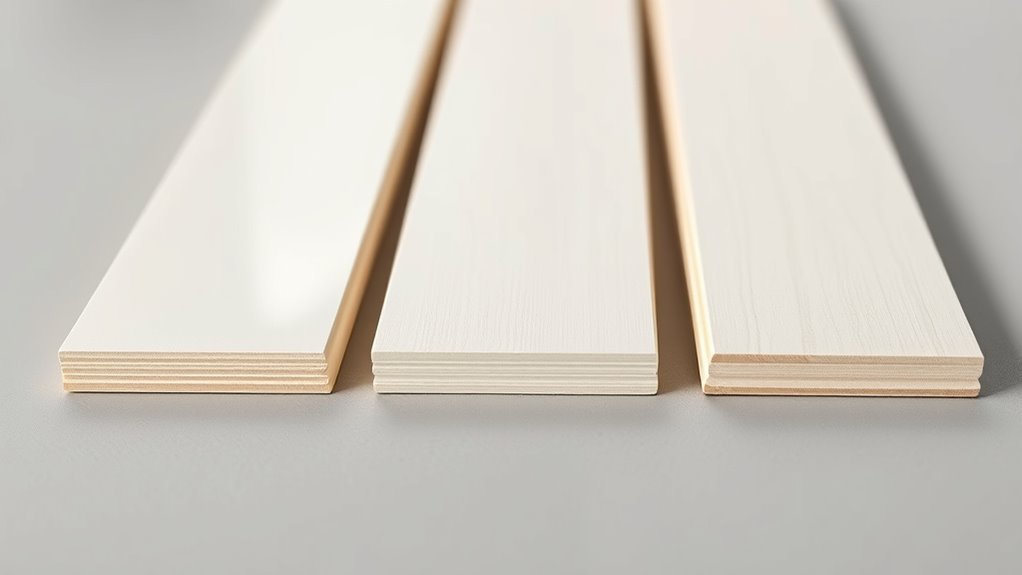
Trim Paint Drying Times on Wood, MDF, and PVC
If you’re painting trim, expect drying times to differ noticeably between wood, MDF, and PVC because each substrate soaks up or repels solvents and binders in its own way.
You’ll notice raw wood soaks primer and can feel dry to touch sooner but cures slower.
MDF absorbs more, needing longer before topcoat.
PVC repels, so surface dries fast yet film cures more slowly.
Account for temperature and humidity, and keep color blending trials small.
Store leftover mixed paint properly—good paint storage prevents thickening.
Choose dry times based on substrate to avoid tackiness and brush marks.
How Thinners, Retarders, and Solvent Additives Change Drying
Having chosen the right substrate and accounted for temperature and humidity, you also need to understand how thinners, retarders, and solvent additives alter drying behavior.
You’ll use thinners to reduce viscosity for spraying or brushing; they speed surface evaporation but can lengthen cure by thinning film.
Retarders slow solvent escape, giving longer open time for color matching and smoother blends, but extend tackiness.
Special solvent additives modify flow, improve leveling, or accelerate cure in cold conditions—part of environmental control strategies.
Always follow manufacturer ratios: overuse can cause wrinkling, poor adhesion, or extended drying, undermining finish quality.
How to Test If Trim Paint Is Ready for a Second Coat?
You can check readiness with a simple surface touch test: lightly press a hidden edge to see if the paint feels tacky or firm.
Also scan for visual cues like an even sheen, no fingerprint marks, and no soft spots or wet streaks.
If it passes both checks, it’s usually safe to apply a second coat.
Surface Touch Test
When the paint feels dry to the eye, do a surface touch test before you roll on a second coat to avoid tacky, uneven finishes. Lightly press a fingertip in an inconspicuous spot; if it lifts or feels gummy, wait longer.
Consider how color psychology affects your patience—richer hues can seem drier but still be soft. If you used eco-friendly paints, expect slightly different dry times; follow manufacturer guidance.
Repeat tests across the trim:
- Tap gently for tackiness to detect softness.
- Smell for solvent odor indicating cure.
- Check for transfer on a tissue.
- Wait and retest if unsure.
Visual Inspection Cues
Surface checks give quick clues, but visual inspection cues tell you whether the paint’s ready for another coat without touching it. Look for uniform sheen—no dull or glossy patches—and even color selection across the trim; variations often mean underlying wet spots.
Inspect edges and corners under good light; hairline streaks or subtle bloom indicate more drying time. Watch for tiny beads or tacky spots that reflect light differently.
If the finish looks consistently smooth and no smudges appear when you lightly tilt the surface toward light, it’s ready. Remember proper paint storage affects drying behavior, so note product age.
Speed Up Trim Paint Drying: Ventilation, Heaters, Dehumidifiers
If you need trim paint to dry faster, focus on controlling airflow, temperature, and humidity. You’ll boost evaporation with cross-ventilation, but protect fresh stripes from dust and temperature shocks. Use low heat steadily; high blasts can cause cracking.
Run a dehumidifier to pull moisture, especially in basements or after humid days. If you chose eco-friendly paints or had tricky color matching done, these measures still apply—gentle, consistent conditions preserve finish and hue.
- Feel relief as drying speeds up.
- Enjoy pride in a flawless edge.
- Avoid panic over tacky spots.
- Celebrate a job well finished.
Tools and Products That Speed Up Trim Paint Curing
You’ve already controlled airflow, heat, and humidity—now use targeted tools and products to shave hours or days off curing time. Use fast-dry primers, low-VOC alkyds, or waterborne enamels; gloves and fine brushes help smooth paint texture, and a heat gun on low shortens tack time. Test swatches for color matching before accelerating cure.
| Product Type | Benefit | When to Use |
|---|---|---|
| Fast-dry primer | Bonds quickly | New or bare trim |
| Waterborne enamel | Low odor, durable | Interior rooms |
| Heat gun | Speeds tack | Small areas only |
| Fan | Airflow | Whole room |
Common Mistakes That Slow Trim Paint Drying
When paint seems to take forever to dry, chances are common mistakes are to blame—applying thick coats, skipping proper sanding or cleaning, or painting in high humidity will all prolong curing. You’ll feel frustrated when hours turn to days because you rushed prep or used wrong products. Consider these pitfalls:
- Overapplication: thick layers trap solvents, heightening anxiety and delaying cure.
- Poor surface prep: dust and oils prevent adhesion, making you redo work.
- Wrong environment: high humidity or cold stalls drying, crushing your timeline.
- Bad paint storage: old cans or extreme temps alter chemistry; color psychology won’t fix it.
How to Avoid Smudges and Brush Marks While Paint Cures
After avoiding the common mistakes that slow drying, you’ll want to protect the paint film from smudges and brush marks while it cures. Stay off the trim until it’s dry to the touch, and use low-traffic scheduling so accidental bumps don’t happen.
Lightly sand between coats when recommended, and use a high-quality brush or foam applicator for smooth strokes. Match sheen and color matching across touch-ups to hide any fixes.
Choose the right primer selection to guarantee adhesion and fewer topcoat passes. Use gentle ventilation, avoid dust, and keep pets and kids away until the paint firms up.
When Trim Paint Is Fully Cured: and Why That Matters
Although the paint may feel dry to the touch within hours, full curing can take days to weeks depending on the formula and conditions, so you should wait before heavy use or cleaning.
Dry-to-touch soon, but wait days to weeks for full cure before heavy use or cleaning.
Full cure means the finish achieves maximum hardness, resistance to scuffs, and stable Paint sheen and Color matching; premature contact can dull or miscolor trim. You’ll know it’s cured when it resists fingerprints, solvents don’t lift pigment, and the sheen is even.
- Relief — your trim looks finished.
- Pride — flawless Color matching shows care.
- Confidence — surfaces resist daily wear.
- Calm — no anxious touch-ups needed.
When to Move Furniture and Reinstall Hardware
Because you want to protect fresh trim and finish the room without causing damage, wait until the paint is fully cured before moving furniture back or reinstalling hardware. You’ll test discreet spots by lightly pressing with a fingernail; no tackiness means it’s safe.
Lift furniture on sliders or use pads to avoid scuffs, and reinstall hardware with clean hands or gloves to prevent oils from affecting paint texture. Consider color coordination when returning pieces so placement complements the trim.
If you must move items sooner, use extreme care and temporary protection, but plan for full cure to guarantee a flawless finish.
Estimating Timelines: Room Size, Trim Length, and Coats
When you estimate how long trim paint will take, consider three main variables: room size, total trim length, and the number of coats—each changes how much time you’ll need for prep, drying, and recoating.
Larger rooms mean more trim runs and longer setup; longer trim adds minutes per coat; extra coats extend curing. Also factor in color matching attempts and desired paint sheen, which may prompt touch-ups. Plan buffer time for tack-free and full cure between coats.
- Relief when schedule fits.
- Frustration if you miscount.
- Pride after perfect color matching.
- Calm seeing consistent paint sheen.
Troubleshooting Slow-Drying Trim Paint and When to Call a Pro
If your trim paint seems to be taking forever to dry, start by checking five common causes—humidity and temperature, excess film thickness, inadequate ventilation, incompatible products, and surface contamination—and rule them out one by one. Inspect temperature and airflow first; thin coats dry faster. Verify you mixed primers and topcoats correctly—bad compatibility slows curing. Smudges or oil on wood can trap moisture. Consider color matching issues or wrong sheen hiding wet areas. Call a pro if you’ve eliminated basics, drying still stalls, or large areas need fixes.
| Cause | Check | Fix |
|---|---|---|
| Humidity | Hygrometer | Dehumidify |
| Thickness | Visual | Recoat thin |
| Ventilation | Airflow | Fans |
| Compatibility | Labels | Use right combo |
| Contamination | Surface test | Clean & sand |
Quick Checklist to Ensure Fast, Durable Trim Paint Drying
To make sure your trim paint dries quickly and stays durable, follow a short, practical checklist that covers conditions, prep, and product choices. You want results that look great and last — and fast drying helps.
- Ensure temperature 50–85°F, low humidity; ventilate to speed curing and ease frustration.
- Prep thoroughly: clean, sand, and prime bare wood so paint bonds and resists chipping.
- Choose a reliable paint brand and the right finish; trust quality for faster drying and tougher wear.
- Pick Color selection wisely—lighter colors often show fewer touch-ups and dry cleanly in thin coats.
Frequently Asked Questions
Can Trim Paint Dry Properly in Winter Without Artificial Heat?
Yes—you can, but it’s riskier. You’ll need low humidity, proper ventilation, and slow curing time; trim paint durability can suffer if temperatures stay cold. Consider paint color selection (lighter dries slightly faster) and patience for best results.
Is There a Difference in Drying on Exterior Vs Interior Trim?
Yes — exterior trim dries differently than interior trim. You’ll need better surface preparation outside and a tougher paint formulation to handle weather; interior finishes dry faster since conditions are controlled and formulations focus on low odor and durability.
How Long Before Caulked Joints Can Be Painted and Then Dried?
Like waiting for bread to rise, you’ll usually wait 24 hours before painting caulked joints; silicone may need 48 hours. That lets caulk curing finish and guarantees paint adhesion, so the finish won’t peel or snag.
Do Multiple Thin Coats Dry Faster Overall Than One Thick Coat?
Yes — you’ll get faster overall drying times with multiple thin coats; proper brush techniques spread paint evenly, reduce tackiness, and let layers cure quicker than one thick coat, improving finish and preventing runs or long wet spots.
Will Voc-Free or Low-Voc Paints Dry Slower Than Standard Formulas?
Imagine a contractor testing two trims; you’ll find low-VOC paints can dry similarly or slightly slower. VOC levels influence drying time, but formulation, temperature, humidity, and film thickness usually matter more for your final result.
Conclusion
You’ve got the basics down: trim paint usually feels dry to the touch in 1–6 hours but needs longer before handling or recoating—especially with oil-based types. Pick faster-drying primers, choose semi-gloss or satin for quicker cure, and factor room size and number of coats into your timeline. If drying drags, troubleshoot humidity, ventilation, and temperature, or call a pro. With good prep and patience, your trim will be shipshape in no time.