How Long Should Paint Dry Before Clear Coat
You should wait until the paint feels tack-free and the manufacturer’s minimum dry time has passed—typically 30 minutes to 4 hours for modern basecoats, longer for solvent-heavy or thick layers. Check for no tack, a faint solvent scent, and test a small patch; sand lightly if needed and clean before clear. Temperature, humidity, coat thickness and paint type all change timings, so follow product guidance and a quick test to confirm readiness if you want more detail.
Who This Guide Is For and What You’ll Learn
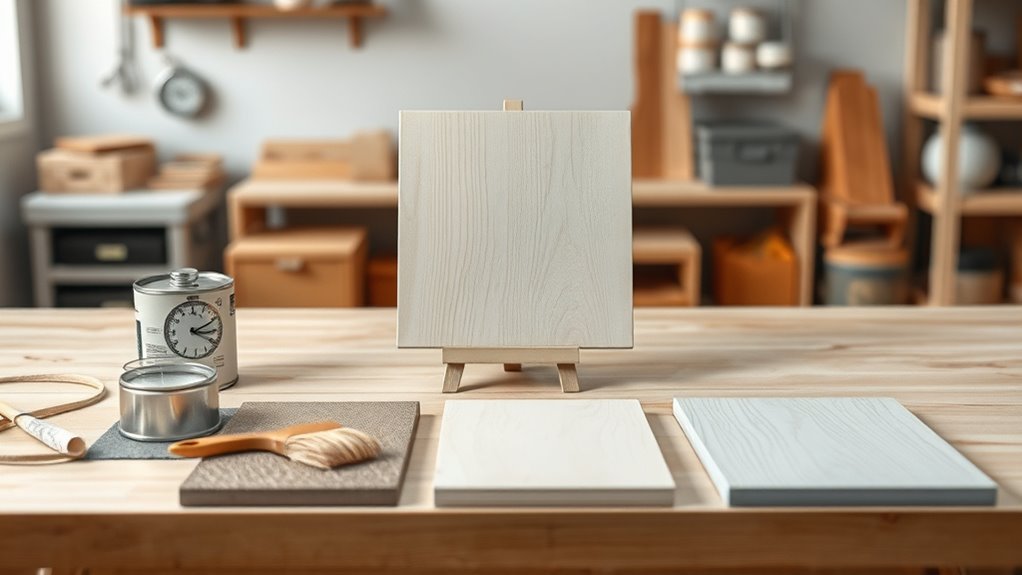
Whether you’re refinishing furniture, painting a car panel, or spraying a DIY craft, this guide helps you know when to apply clear coat for the best finish and durability. You’ll learn practical timing based on paint type, temperature, and humidity, plus signs that let you judge tack-free and cure stages.
You’ll get tips for matching clear coat to desired paint gloss and preserving color integrity—think how a color wheel informs contrast and layering. This guide’s for DIYers, hobbyists, and pros who want consistent results without guesswork, avoiding premature sealing or excessive waiting that harms appearance or adhesion.
Quick Answer: How Long to Wait Before Clear Coat
If you’re aiming for a solid, durable finish, wait until the paint is at least tack-free before applying clear—typically 30 minutes to 2 hours for water-based paints and 2 to 24 hours for solvent-based or automotive paints, with full cure taking days to weeks. You’ll check tack-free by lightly touching an inconspicuous spot; don’t press. Consider how color mixing and brush techniques affect film thickness and drying time. Use the table below for quick guidance.
| Paint Type | Typical Wait | Notes |
|---|---|---|
| Water-based | 30m–2h | Thin coats dry faster |
| Solvent-based | 2–24h | Thicker films need longer |
| Automotive | 2–24h+ | Follow manufacturer instructions |
Dry-to-Touch vs Fully Cured: What the Terms Mean
When a surface is “dry to touch,” you can lightly press it without leaving a mark. But that doesn’t mean the paint has reached full strength.
Fully cured means the paint has completed its chemical drying and will resist scratches, solvents, and heat.
You’ll often be able to clear coat after it’s touch-dry, yet waiting for full cure—which can take days to weeks depending on the formula—gives the best long-term protection.
Dry-To-Touch Defined
Though the paint may feel dry to the touch within an hour or two, that doesn’t mean it’s fully cured and ready for a clear coat or heavy use.
Dry-to-touch means solvent evaporation left the surface non-tacky; you can lightly touch it without transfer. It’s a convenience check, not a structural one.
You’ll still need to take into account risks to color matching if you press too hard or apply clear too soon, since slight movement or solvent entrapment can alter hue.
Gloss retention can also be compromised by premature handling.
Treat dry-to-touch as preliminary—handle gently and wait before layering or stressing the finish.
Fully Cured Explained
Because dry-to-touch only means the solvents on the surface have evaporated, you shouldn’t assume the paint is fully cured and ready for heavy handling or a clear coat.
Fully cured means the chemical crosslinking or oxidation has progressed throughout the film, delivering final hardness, adhesion, and resistance. You’ll notice differences: cured paint resists fingerprints, holds consistent paint texture, and lets you safely perform color blending without lifting underlying layers.
Cure times depend on formula, temperature, and humidity, so follow manufacturer specs. Rushing clear coat onto uncured paint risks clouding, solvent pop, or poor adhesion, undoing your work.
Practical Timing Differences
If you’ve ever checked paint by lightly touching the surface, you’ve already used the “dry-to-touch” test—but that quick feel only tells you the topmost solvents have evaporated, not that the film has reached full chemical cure. You’ll rely on dry-to-touch for handling, but wait for full cure before clear coat to avoid trapping solvents. Factors like color mixing, temperature, humidity, and brush techniques change timing. Use this quick guide:
| Stage | What it means | Action |
|---|---|---|
| Dry-to-touch | Surface feels dry | Handle gently |
| Tack-free | No stickiness | Light sanding ok |
| Full cure | Chemical hardened | Apply clear coat |
| Extended cure | Max durability | Final polish |
Flash Time vs Full Cure : Which Matters for Clear Coat?
When you’re prepping to lay down clear coat, the immediate “flash time” and the longer “full cure” play very different roles: flash time tells you when the solvent has evaporated enough to accept the next layer without trapping bubbles, while full cure is when the base layer reaches its final hardness and chemical resistance.
You’ll prioritize flash time for layering—skip it and you risk fisheyes, solvent pop, or poor adhesion. But full cure matters for long-term durability and chemical interactions with the clear coat.
Always account for environmental factors like temperature and humidity; follow product flash and cure windows for best results.
Solvent Evaporation vs Chemical Curing Explained
Although both happen after you spray, solvent evaporation and chemical curing follow different timelines and affect paint performance in distinct ways. You wait for solvents to leave so layers won’t soften or trap moisture; evaporation controls immediate tack and helps color blending between coats. Chemical curing bonds resins over hours to days, governing hardness and long-term finish glossiness. Plan clear coat timing to avoid solvent entrapment yet allow enough cure for adhesion.
| Stage | Effect | Timing |
|---|---|---|
| Evaporation | Tackiness, blending | Minutes–hours |
| Curing | Hardness, gloss | Hours–days |
| Risk | Solvent pop | Improper timing |
How Temperature Affects Paint Drying Speed
Because temperature speeds up molecular motion, higher heat generally makes solvents evaporate faster and accelerates chemical curing, so you’ll see shorter tack times and quicker hardening as the ambient and surface temps rise.
You should work within manufacturer temperature ranges: too cool and solvents linger, delaying clear coat; too hot and film formation can trap solvents, causing blistering.
For precise color matching, consistent temperature prevents shifts as pigments and binders cure.
When stripping and repainting, note that warmed paint softens differently, so paint stripping methods and timing must adapt.
Adjust cure time estimates rather than relying on fixed hours to avoid mistakes.
How Humidity Changes Drying and Curing Times
When humidity’s high, paint can stay tacky much longer because moisture slows solvent evaporation. So you shouldn’t rush the clear coat.
In contrast, very low humidity speeds surface drying but can hinder full curing and cause solvent flash or poor adhesion.
Check local humidity and adjust your wait times accordingly to get a solid, durable finish.
High Humidity Effects
If humidity’s high, you’ll notice paint takes longer to dry and can stay tacky for hours or even days. You’ll see the humidity impact in slower solvent evaporation and extended curing; drying delays mean you should wait longer before clear coating.
Keep painted parts in a well-ventilated, dehumidified space or use fans and portable dehumidifiers to speed things. Check tackiness by light touch and follow manufacturer minimums plus extra hours for each 10% rise above ideal humidity.
Avoid sealing in moisture—applying clear too soon traps solvents, causes blushing, cloudiness, or adhesion problems you’ll then have to fix.
Low Humidity Considerations
Lower humidity speeds solvent evaporation and can make paint feel dry to the touch much sooner, but that doesn’t mean it’s fully cured or ready for clear coat. You should still account for how lower humidity levels thin the wet film and can trap solvents beneath a seemingly dry surface.
At higher drying temperature you’ll accelerate surface set while the substrate remains soft; that uneven cure increases risk of blushing or solvent pop under clear.
Wait longer than touch-dry guidelines suggest, follow manufacturer recoat windows, and monitor tackiness and smell. If unsure, test a small area or use a moisture- and temperature-controlled environment.
How Coat Thickness Alters Wait Times
Because thicker paint holds more solvent and takes longer to cure through, you’ll need to wait considerably more time before applying clear coat on heavy builds.
When you lay on multiple wet coats for color blending or to fix edges, each layer adds solvent that must evaporate and chemically cure. Heavy texture smoothing techniques also increase mass and slow through-dry.
Tap lightly to test tack after the manufacturer’s minimum time, but extend waits for visibly soft or glossy areas. If you rush, clear coat can trap solvents, causing clouding, soft spots, or adhesion failures.
Patience prevents rework.
How Primer and Substrate Affect Clear Coat Adhesion
Heavy builds change how long you wait, but the foundation you sprayed on before color matters just as much for clear coat adhesion. You’ll check primer type—etching, high-build, or urethane—because porosity and cure rate alter how the clear bonds.
Heavy build thickness and primer choice—etching, high‑build, urethane—dictate porosity, cure time, and ultimately clear coat adhesion.
Sandling profile and substrate—metal, plastic, or OEM paint—affect mechanical grip and solvent compatibility, so test adhesion before full application.
If you used mixed colors or wet-on-wet layers, consider color mixing impacts on solvent balance.
Even if you brushed small areas, brush techniques influence surface texture and solvent entrapment.
Prep, correct primer choice, and testing ensure durable clear coat adhesion.
Paint Types Overview: Which Affect Wait Time Most
You’ll notice drying time changes a lot depending on whether you’re using water-based or solvent-based paint, and whether it’s alkyd or acrylic.
Water-based and acrylic formulas generally dry faster, while solvent-based and alkyd paints can take longer to cure fully.
Knowing which type you have helps you pick the right wait time before applying clear coat.
Water-Based Vs. Solvent-Based
When you’re deciding how long to wait before applying a clear coat, the type of paint—water-based or solvent-based—makes the biggest difference in drying and cure behavior. You’ll find water-based dries fast to the touch, tolerates cooler conditions, and needs careful color mixing and paint storage to avoid contamination. Solvent-based often takes longer to flash and fully cure, but gives longer open time and lacquer compatibility.
| Feature | Water-Based | Solvent-Based |
|---|---|---|
| Touch Dry | Fast | Moderate |
| Full Cure | Hours–days | Days–weeks |
Adjust wait times to manufacturer specs and environmental conditions.
Alkyd Versus Acrylic
Although both alkyd and acrylic paints can look similar once dry, their chemistry drives very different wait times before you can safely apply a clear coat.
You’ll find alkyds cure by oxidation, taking longer to harden; they tolerate slow color blending but need more time before a clear won’t amber or trap solvents.
Acrylics dry faster through water evaporation, offering quicker recoat and clear coat windows and more predictable finish sheen.
If you’re unsure, test a small area: press for tackiness, check solvent resistance, and follow manufacturer cure times.
Match clear coat type to paint chemistry for best adhesion and durability.
Dry Times for Latex Paint Before Clear Coat
Because latex paint dries by water evaporation and film formation, you should wait long enough for both surface tack and deeper cure before applying a clear coat. Check manufacturer recoat times—typically 24 to 48 hours at moderate temperatures and humidity.
If you’ve done color mixing, allow extra time for pigments and additives to settle and for sheen to equalize.
Lightly sand between coats once the paint is dry to the touch to promote adhesion. Use proper brush techniques to avoid leaving thick ridges that trap moisture and extend cure time.
Cooler or humid conditions can double drying times, so be patient and test a small area.
Dry Times for Oil-Based and Alkyd Enamel Paint
If you’re working with oil-based or alkyd enamel, expect much longer wait times before you can safely apply a clear coat compared with latex. You’ll typically need 24 to 72 hours for surface dry and several days to a week for a proper cure depending on temperature, humidity, and coat thickness.
You should plan for slower drying, account for ventilation, and avoid scuffing until cured. Pay attention to Color mixing ratios and Brush techniques to guarantee consistent film thickness.
Tips:
- Test a small panel to confirm tack-free time.
- Allow 7 days in cool or humid conditions.
- Sand lightly before clear.
Dry Times for Lacquer and Nitrocellulose Paint
With lacquer and nitrocellulose finishes, you’ll notice a quick surface dry but a longer curing time beneath. So understand the difference between drying and curing before you clear coat.
Watch for the solvent flash-off period—clear too soon and trapped solvents can cause blistering or cloudiness.
Also respect the recoat window limits: wait long enough to avoid solvents, but don’t exceed the window if the manufacturer warns of adhesion loss.
Drying Vs. Curing Time
When you’re deciding when to clear coat lacquer or nitrocellulose paint, remember that “dry” and “cured” mean different things: dry refers to the solvent evaporating enough to handle the surface, while cured means the finish has reached its full hardness and chemical stability.
You’ll often be safe to clear coat once dry to the touch, but full curing can take days to weeks, affecting durability, color blending, and texture enhancement. Consider these factors before sealing:
- Temperature and humidity: speed curing, influence adhesion
- Paint thickness: thicker coats cure slower, may trap solvents
- Manufacturer cure times: follow technical data for best results
Solvent Flash-Off Period
Before you apply clear coat, you need to account for the solvent flash-off period—the brief window after spraying lacquer or nitrocellulose when solvents evaporate from the film. You should wait until the surface feels tack-free but still allows slight solvent migration; that usually takes 10–60 minutes depending on temperature, humidity, and film thickness.
During that time, avoid touching or reworking; color mixing decisions are best finalized before spraying. If you used brush techniques for edges or small spots, give those areas extra time because solvent pockets dry slower.
Proper flash-off prevents blush, lifting, and solvent entrapment under clear.
Recoat Window Limits
Because lacquer and nitrocellulose have limited recoat windows, you need to time your clear coat carefully: too soon and you risk lifting or solvent entrapment, too late and adhesion can suffer as the paint fully cures. You’ll watch tack times and manufacturer specs; typically you’ve got minutes to a few hours for safe recoat.
Aim for even Color blending and Texture smoothing by testing a small area first.
Key points to remember:
- Recoat within the manufacturer’s stated window to avoid lifting.
- If you miss it, abrade lightly with fine sandpaper before clear.
- Store solvents and mix fresh to maintain consistent dry times.
Dry Times for Automotive Basecoat Paints
If you’re working with automotive basecoat paints, expect them to feel dry to the touch within 15–30 minutes under ideal shop conditions. But they’ll typically need several hours to fully flash and up to 24 hours to cure enough for clear coat application.
You should allow full flash before polishing or blending panels to avoid lifting. Color blending works best once solvents have evaporated and the film is stable. Check manufacturer flash times and aim for recommended ambient temperature and humidity.
Applying clear too soon risks solvent pop and poor adhesion, reducing overall gloss finish and long-term durability.
Clear Coat Over Spray Polyurethane and Acrylics
If you’re using spray polyurethane or acrylics, wait until the finish feels tack-free and the manufacturer’s minimum dry time has passed before applying clear coat.
You’ll also want to lightly scuff the surface with fine sandpaper, remove any dust with a tack cloth, and make sure the area is clean and solvent-free.
Following those steps prevents adhesion problems and gives you a smoother final gloss.
Dry Time Before Clearcoat
When you’re planning to spray clear coat over a surface sealed with spray polyurethane or acrylics, let the base dry enough to cure to the touch but still allow solvent flash—typically 1–4 hours for most spray polyurethanes and 30 minutes–2 hours for fast-drying acrylics, depending on product and conditions.
You’ll need to balance cure and solvent release so the clear bonds without trapping solvents.
Consider these quick checks:
- Light touch: no tack but slight solvent scent indicates ready.
- Temperature/humidity: higher heat speeds times; humidity slows them.
- Test patch: confirms adhesion and avoids color matching or brush techniques issues.
Surface Preparation Tips
After the base coat has reached that touch-cure stage and solvents have flashed off, focus on preparing the surface so the clear will bond evenly and smoothly. You’ll inspect for dust, sand imperfections with fine grit, and remove oils with a tack cloth. If you used spray polyurethane or acrylics, check compatibility before clear coat. Keep color mixing records and note any edge buildup. Practice consistent brush techniques when touching edges; avoid overworking. Final wipe with a lint-free cloth and isopropyl alcohol readies the panel.
| Task | Purpose |
|---|---|
| Sand 800–1200 | Smooth defects |
| Tack cloth | Remove dust |
| Wipe alcohol | Degrease |
| Record mix | Reproduce color |
How Metallic and Pearlescent Paints Change Timing
Because metallic and pearlescent finishes layer differently than solid colors, you’ll need to adjust your clear-coat timing to avoid dulling or shifting the effect.
Because metallic and pearlescent finishes layer differently than solids, adjust clear-coat timing to preserve their effect.
You should wait until base coats feel dry to the touch but still allow solvents to flash off fully; rush and you’ll trap streaks or disturb flake orientation.
Consider these quick guidelines:
- Wait longer for Metallic finishes so metal flakes settle flat and reflect evenly.
- For Pearlescent effects, let solvents evaporate fully to prevent washout of the pearl binder.
- Test a small panel: verify no tackiness and consistent appearance before applying clear coat.
How to Layer Multiple Colors Before Clear Coat
Plan your color sequence so each layer builds the look you want and lighter tones don’t get overwhelmed by darker ones.
Use edge feathering techniques to blend overlaps smoothly, and make sure you let each color reach its recommended tack-free state before applying the next.
Follow the manufacturer’s wait times between coats to avoid lifting or solvent trapping before you clear coat.
Color Sequence Planning
When you’re layering multiple colors before the clear coat, think through the sequence so each coat bonds, hides, and highlights as meant. You’ll plan from base to accent: select a base that supports Color matching and guarantee Paint mixing yields consistent opacity. Let each layer cure to the manufacturer’s recommended tack level before next application.
- Start with primers or base coats for adhesion and coverage.
- Apply mid-tones next to establish depth and block-through prevention.
- Finish with highlights or metallics for contrast, using lighter coats to avoid sink-in.
This order minimizes rework and guarantees the clear coat protects a stable, uniform finish.
Edge Feathering Techniques
If you want crisp shifts between colors without noticeable ridges under the clear coat, edge feathering is the technique you’ll use to blend adjacent layers smoothly. You’ll work wet-edge to wet-edge when possible, lightly dragging a soft, dry brush across the junction to break the edge.
Use small overlapping strokes and varied pressure to achieve subtle color blending without lifting paint. For sharper transitions, mask and feather the tape edge before removing.
Practice brush techniques on scrap panels to control stroke length and angle. Finish by inspecting edges under raking light to correct any high ridges before clear coat.
Wait Times Between Coats
After you’ve smoothed and inspected your feathered edges, you’ll need to manage wait times between color coats so each layer bonds without lifting or trapping solvents. You judge readiness by tackiness, manufacturer’s recoat window, and temperature/humidity.
Light sanding between coats helps adhesion when switching hues after color mixing. Use gentle Brush techniques to apply thin, even layers; heavy application traps solvents.
When layering multiple colors before clear coat:
- Wait until the previous coat is dry-to-touch but within recoat time.
- Sand lightly with fine grit before adding contrasting colors.
- Allow full cure per label before final clear to avoid blush.
When to Scuff vs When to Wet-Sand Before Clear Coat
Because surface prep determines how the clear coat bonds and how the finish looks, you need to choose scuffing or wet-sanding based on the paint’s cure state and the defects you see.
If paint is tack-free but not fully cured and only light sheen inconsistencies or dust nibs exist, scuff with fine Scotch-Brite or 600–800 grit to promote adhesion without risking through-sanding. Verify color matching after scuffing and check tool calibration for consistent pressure.
If runs, orange peel, or large imperfections remain and paint has cured enough to resist gouging, wet-sand with 800–1200 grit, then re-clean before clear.
How Long to Sand Between Coats Before Clear Coat
Before you apply the clear coat, make sure each paint layer has cured the recommended time—usually 20–60 minutes for fast-dry primers and several hours for basecoats depending on product specs.
Sand progressively with finer grits (start around 320–400, move to 600–800 before final wipe) to remove imperfections without cutting through the paint.
Clean and tack the surface thoroughly after sanding so the clear bonds to a dust-free, slightly abraded finish.
Recommended Drying Time
When you’re ready to sand between coats and apply clear, wait until the paint’s surface is dry to the touch but still young enough to bond—typically 24 to 48 hours for most solvent-based and 12 to 24 hours for fast-drying waterborne paints under normal shop conditions.
You’ll check tackiness and humidity; lower temps or high humidity lengthen cure. Consider color matching and paint mixing history when deciding timing—new mixes can flash differently.
- Verify surface is non-tacky and cool.
- Lightly scuff to promote adhesion.
- Clean residue with a solvent-safe wipe.
Then apply clear within the recommended window.
Sanding Grit Sequence
If you’re prepping between paint coats and before clear, follow a stepped sanding grit sequence to remove imperfections without cutting through the color. Start with 400–600 grit to level runs or orange peel, then move to 800–1000 grit to smooth the surface.
Finish with 1200–2000 grit for a satin, scratch-free base that the clear can grip. Sand lightly, keep pads flat, and wipe dust often.
Remember sanding won’t fix poor color mixing or bad brush techniques; address those during painting. When ready, tack cloth, inspect under good light, and only then apply your clear coat.
Surface Preparation Tips
Although you’ll follow the sanding grit sequence outlined earlier, plan the time between coats so the paint fully cures to the touch—typically 24–48 hours for most solvent-based and 12–24 hours for many acrylics or waterborne paints—before you lightly sand for the clear. You’ll check tackiness, humidity, and temperature; don’t rush.
Light sanding removes dust nibs and promotes adhesion without cutting through color or basecoat. Remember basics like color theory when blending edges, and refine edges with proper brush techniques for small spots.
Tips:
- Use 400–600 grit for scuffing between coats.
- Clean with tack cloth.
- Inspect under raking light.
Tools to Measure Surface Dryness and Cure
Because you need reliable data before laying down a clear coat, a few simple tools can quickly tell you whether paint is dry to the touch, dry through, or fully cured. Use a moisture meter for substrates, an infrared thermometer to check surface temperature, and a humidity gauge to monitor environment. A tack rag won’t measure cure but helps color blending and texture enhancement before coating. Consider an adhesion tape test and a solvent swipe for solvent-borne systems.
| Tool | Purpose |
|---|---|
| Moisture meter | Substrate moisture |
| Infrared thermometer | Surface temp |
| Humidity gauge | Ambient RH |
| Adhesion tape | Bond strength |
| Solvent swipe | Cure check |
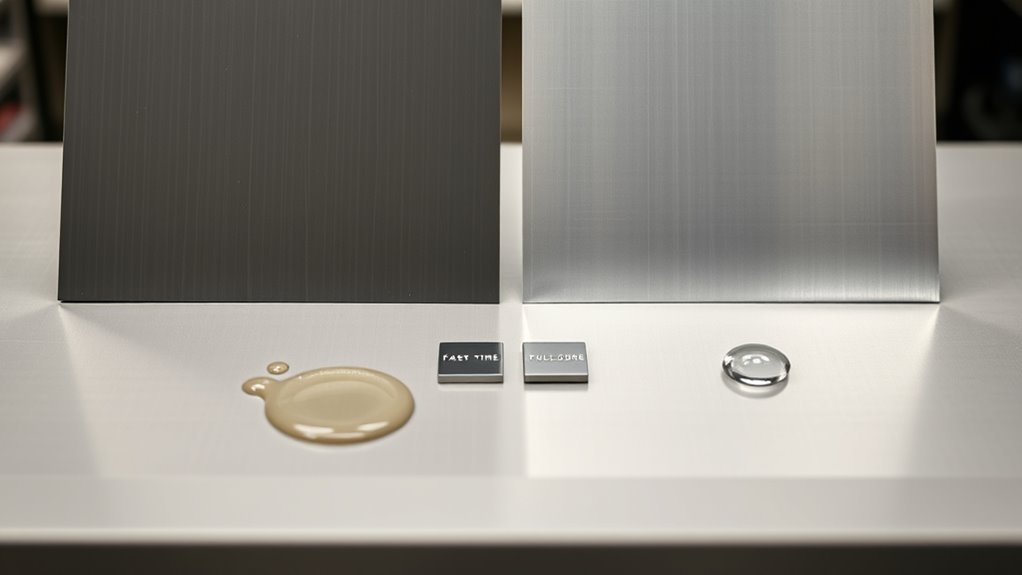
Simple Touch Tests That Actually Work
You can do two quick touch checks to gauge whether paint’s ready for clear coat. First, the dry-to-the-touch test: lightly rest a clean fingertip to see if the surface feels tacky or smooth.
Then use the finger-press flex test: press gently to spot any set-off, indentation, or delayed rebound that means it needs more time.
Dry-To-The-Touch Test
When the paint looks dry, don’t assume it’s ready for clear coat—perform a simple dry-to-the-touch test instead. You’ll verify surface cure, check color blending, and confirm texture smoothing before sealing.
Lightly touch an inconspicuous edge with a clean fingertip; it should feel dry, not tacky. If uncertain, wait and retest.
- Gently press for tackiness only; avoid sliding.
- Inspect for lift or smearing on a cotton swab.
- Check adjacent panels for consistent feel.
Only proceed to clear coat when all areas pass. Rushing risks trapping solvents or disturbing finish integrity.
Finger-Press Flex Test
Although simple, the finger-press flex test gives you a quick, reliable check of paint film resilience before clear coat.
Press the painted edge gently with a fingertip while flexing the panel slightly to see if the paint springs back without cracking, lifting, or feeling gummy. You’ll notice tack, resilience, and adhesion immediately; if the film deforms or feels sticky, wait longer.
Use this alongside dry-to-the-touch checks and proper brush techniques to avoid surface defects.
It also helps confirm color matching won’t be disturbed by solvent bleed when clear is applied.
Repeat in multiple spots before committing to clear coat.
Tape Adhesion Test to Check Readiness
Before you clear coat, do a simple tape adhesion test to confirm the paint’s cured enough to handle. You’ll check small areas where color mixing and brush techniques mattered most.
Press a strip of high-quality tape, rub firmly, then pull sharply at 45 degrees.
- Choose discreet spots: edges, overlap areas, and blended sections.
- Use consistent pressure and a quick pull to avoid false fails.
- Inspect for lifted paint, tackiness, or film separation.
If paint peels, wait longer and reassess; don’t clear coat over unstable layers. Repeat the test in multiple spots before proceeding.
Solvent Rub Test to Detect Uncured Paint
If you suspect the paint hasn’t fully cured, do a solvent rub test to quickly reveal soft or uncured areas.
Apply a small amount of a recommended solvent (like methyl ethyl ketone or lacquer thinner) on a lint-free cloth. Rub a discreet spot with moderate pressure for a few seconds, then inspect for lift, tackiness, or color transfer.
You’ll learn if underlying layers resist solvent, indicating proper cure. Use the test near edges or hidden areas after considering color mixing history and brush techniques that might trap solvent.
If you see transfer, wait longer or consult product cure times before clear coating.
Flash vs Bake Cycles in Professional Shops
When you’re deciding between flash and bake cycles in a professional shop, think of flashing as a quick solvent-release step that readies the surface for sanding or additional coats.
While baking uses controlled heat to speed chemical cure and harden the finish.
You’ll choose based on material, workflow, and shop equipment.
Flashing prevents solvent pop; baking locks finish fast.
Consider:
- Flash cycle: short, room-temp solvent release, good before wet-sanding; complements proper brush techniques for small repairs.
- Bake cycle: oven-cure for durability and consistent gloss.
- Workflow: integrates with color mixing schedules and production timing.
Recommended Wait Times for Common DIY Projects
For interior furniture pieces you’ll usually wait 12–24 hours before applying clear coat, depending on the paint type and humidity.
For exterior trim you should give paint 24–48 hours to cure.
For decks plan on 48–72 hours or longer so the stain or paint fully sets.
Always check the product label and test a small area if you’re unsure.
Interior Furniture Pieces
Although specific times vary by paint type and conditions, you’ll usually wait longer than you think before applying a clear coat to indoor furniture. You’ll let paint cure to avoid tackiness, brushing marks, or trapped solvents.
Consider color mixing effects and budget considerations when planning multiple coats; darker or custom mixes can need extra drying.
- Small side tables: wait 24–48 hours between paint and clear coat.
- Dressers and cabinets: allow 48–72 hours, sanding lightly between coats.
- High-use surfaces (tops, arms): wait 72+ hours and consider water-based polyurethane for faster recoat.
Always test a hidden spot before finishing.
Exterior Trim & Decks
Moving from indoor furniture to outdoor surfaces means you’ll face different drying demands—sun, wind, humidity, and temperature all speed or slow paint and clear coat curing.
For exterior trim and decks, wait at least 24–48 hours before clear coating latex in mild conditions; oil-based paints often need 48–72 hours. If humidity’s high or temperatures are low, extend waits to 5–7 days.
When you mix colors, allow extra drying time after color mixing coats to guarantee uniform cure before sealing. Proper timing preserves paint durability and prevents tackiness, peeling, or trapped moisture under the clear coat.
Recommended Wait Times for Automotive Refinishing
When you’re refinishing a vehicle, follow manufacturer-specified flash and cure times closely to avoid trapping solvents or causing solvent pop. You should let basecoat tack appropriately before clear, and respect overnight cures when recommended.
Proper color mixing prevents rework, and regular tool maintenance ensures consistent application.
- Wait the suggested flash (often 5–20 minutes) between coats unless instructions say otherwise.
- Allow basecoat to cure to the specified dry-to-touch or dry-through time before clear.
- For colder or thicker coats, extend wait times and inspect for solvent evaporation before clear.
Always document times and conditions for repeatable, reliable results.
Temp & Humidity Dry-Time Chart
You’ve already been tracking flash and cure times, so now you’ll want a practical temp-and-humidity dry-time chart to convert those guidelines into shop conditions. Use this chart to estimate tack, handle, and full cure windows based on temperature and relative humidity; it helps you plan color mixing and avoid reworking brush techniques. Apply conservatively when coatings are new.
| Temp (°F) | Humidity (%) | Dry Time (hrs) |
|---|---|---|
| 60 | 70 | 6-8 |
| 70 | 50 | 3-5 |
| 80 | 40 | 2-3 |
| 90 | 30 | 1-2 |
Accelerating Dry Times Safely With Heat and Airflow
You can speed drying by using low-heat sources like garage heaters or heat lamps set well below the paint’s maximum temperature to avoid softening or blistering.
Point fans or a directional blower to increase steady airflow across the surface without creating dust or uneven drying.
Keep a thermometer on the surface so you’re monitoring the actual temperature rather than room air alone.
Use Low Heat Sources
If you’re trying to speed up drying without risking the finish, pick low-temperature heat and steady airflow instead of blasting high heat at the job. You’ll protect pigments and avoid lifting delicate layers—important after careful color mixing and when practicing precise brush techniques.
Use gentle warmth to aid solvent evaporation without baking the film.
- Place a low-wattage infrared lamp several feet away for even, mild heat.
- Use a space heater on low with indirect placement to avoid hot spots.
- Maintain ambient humidity and moderate temperature; sudden shifts can ruin adhesion.
Increase Directed Airflow
Gentle heat works well, but pairing it with directed airflow speeds solvent evaporation and evens drying without overheating the paint. You’ll position fans to move air gently across the surface, avoiding strong blasts that disturb wet edges or lift pigments after color mixing.
Keep airflow consistent and angled to promote uniform solvent escape; rotate larger pieces or adjust stands so every area receives circulation. Combine this with proper brush techniques—thin, even strokes reduce trapped solvent and dry more predictably.
Monitor tack carefully; when the surface is matte and non-tacky, you can consider testing for clear coat readiness.
Monitor Surface Temperature
When you use heat and airflow to speed drying, keep a close eye on surface temperature so you don’t bake solvents into the paint or scorch the film. You’ll monitor temps with an infrared thermometer or surface probe, adjusting lamps and fans to stay within the manufacturer’s range.
Keep consistent conditions for proper color matching and reliable paint mixing reactions. Check spots rather than assuming uniformity.
- Scan panels systematically to detect hot or cool zones.
- Lower heat immediately if softening, orange peel, or strong solvent smell appears.
- Log temps during each stage to reproduce successful results.
When Drying Accelerants or Dryers Are Harmful
Although drying accelerants can speed up your workflow, they can also cause problems if misused. You might force surface skinning before solvents evaporate, trapping volatiles and creating adhesion failures or soft clear coats.
Using drying accelerants can hurry jobs—but misused, they trap solvents, causing skinning, adhesion failures, and soft clear coats.
Some dryers interact poorly with specific paint formulations, altering cure chemistry and causing blushes or weakened film strength.
Consider environmental impact: high-VOC products may violate regulations and harm health, so you’ll need proper ventilation and PPE.
Test accelerants on a scrap panel matching your paint system before full application.
When in doubt, follow manufacturer guidance rather than rushing to speed up the process.
Preventing Cloudy or Hazy Clear Coats
Since accelerants can leave solvents trapped or change the film, they also raise the risk of a cloudy or hazy clear coat—so you’ll want to take steps to prevent that. Work in controlled temperature and humidity, and wait until base coats are fully cured per manufacturer specs.
Use proper color mixing ratios to avoid excess solvents, and apply thin, even layers. Mind your brush techniques or spray pattern to limit agitation that traps air or solvent.
- Check flash times and tack before topcoating.
- Keep tools clean and solvent-free.
- Thin only as recommended; don’t over-reduce.
Troubleshooting Tacky Clear Coat Problems
If your clear coat stays wet or tacky after application, you’ll want to check for causes like insufficient flash time, high humidity, or improper reducer mix.
You can often fix tackiness by allowing more drying time, moving the project to a warmer, drier area, or carefully recoating with the correct thinner ratio.
If those steps don’t work, you may need to strip and reapply the clear with proper curing conditions.
Wet Clear Coat Causes
When your clear coat stays tacky, it’s usually a sign that something in the process went wrong—common culprits include insufficient flash time between base and clear, overly thick application, contaminated surfaces, or incompatible products that prevent proper solvent release and curing.
You’ll want to check materials and technique so you don’t lose color blending or texture enhancement.
Common causes include:
- Applying clear too soon or in humid/cold conditions that slow solvent evaporation.
- Spraying heavy coats that trap solvents and prevent curing.
- Surface contamination (wax, silicone, oil) or using clears incompatible with your basecoat.
Identify the specific cause before proceeding to fixes.
Fixing Tacky Clear Coat
Because a tacky clear coat can ruin your finish and get worse if you try the wrong fixes, you’ll want to approach troubleshooting methodically: start by evaluating cure time, environmental conditions, and product compatibility, then move to targeted interventions like additional drying, solvent popping relief, or careful solvent wiping.
First, wait longer under stable temperature and humidity; tackiness often signals incomplete cure. If solvents or contamination caused tackiness, gently wipe with recommended reducer, avoiding abrasives that accentuate brush strokes or cause color fading.
If persistent, sand and recoat with compatible clear, testing a small area before full repair.
Fixing Adhesion Failure After Premature Clear Coat
Although it’s frustrating to see peeling or fisheyes after rushing the clear coat, you can recover much of the finish by addressing adhesion issues methodically.
First, remove loose clear and sand to solid edges; then clean with solvent and etch if needed. Spot-prime exposed paint and feather edges for smooth gradation.
Practice color matching for touch-ups and use appropriate brush techniques when working small areas to avoid marks. Finally, recoat only after proper drying.
- Sand to firm substrate (320–600 grit)
- Clean with wax/oil remover
- Use compatible primer and follow manufacturer flash times
Best Clear Coat Types for Different Paints
Picking the right clear coat depends on the paint system you’ve used and the performance you need, so match chemistry and desired use before you spray. You’ll choose polyurethane for durability with modern basecoats, acrylic for quick DIY jobs, and enamel-compatible clears for enamel paints. Consider compatibility with color mixing solvents and avoid contamination from brush techniques if you brush the topcoat. Test adhesion on scrap first.
| Paint Type | Recommended Clear |
|---|---|
| Waterborne/basecoat | 2K polyurethane |
| Solvent/enamel | Acrylic or enamel-compatible 2K |
| Lacquer | Nitrolacquer-compatible clear |
Choosing Single-Stage vs Two-Stage Systems
When you decide between single-stage and two-stage systems, think about finish goals and workflow. You’ll pick single-stage for simplicity and faster turnaround, but two-stage gives deeper gloss and easier color blending.
Consider surface priming quality and how it affects adhesion before clear. Evaluate:
Consider how priming quality influences adhesion to the clear—proper priming ensures lasting finish and optimal appearance
- Project speed: single-stage cures faster, fewer steps.
- Visual depth: two-stage lets you control metallics and flake with clearer layering.
- Repairability: two-stage is easier to match and buff without redoing base.
Match system to your time, skill, and desired depth. Always guarantee proper surface priming to maximize adhesion and final appearance.
Clear Coating Over Decals, Stickers, and Vinyl
If you’re planning to clear coat over decals, stickers, or vinyl, test compatibility first and prepare the surface carefully to prevent lifting, wrinkling, or solvent damage. You should clean and degrease, then sand lightly around edges to promote adhesion without abrading artwork.
Use compatible adhesives and solvent-safe clear coats; do a small patch to confirm no running or softening. Apply thin, even coats with adequate flash time to avoid trapping solvents that cause lifting.
Clear coats can aid color blending at edges and provide texture enhancement when using satin or matte clears, but always confirm results with a test panel.
Storage and Handling of Painted Parts Before Clear Coat
Because freshly painted parts remain vulnerable to dust, fingerprints, and solvent migration, you should handle and store them with care until they’re ready for clear coat.
Keep parts in a clean, stable area away from direct sun and traffic; avoid stacking or leaning painted surfaces together.
Protect soft edges and areas needing color blending by using padded supports.
Use gentle brush techniques for touch-ups only after tack-free time, not before full cure.
- Store flat on clean, lint-free surfaces.
- Keep covered with breathable, dust-free cloth.
- Label and separate by paint batch to prevent contamination.
Environmental and Safety Tips: Ventilation & PPE
Although adequate ventilation and proper PPE might seem like extra steps, they’re essential for protecting your health and ensuring a clean finish when applying clear coat.
Adequate ventilation and proper PPE may feel extra, but they’re vital for health and a flawless clear coat finish.
You’ll work in a well-ventilated area—open doors, use fans to push fumes away, or run a filtered spray booth to control overspray and protect color blending.
Wear an appropriate respirator, chemical-resistant gloves, and eye protection; consider disposable coveralls to avoid transferring dust that ruins finish sheen.
Monitor temperature and humidity, and keep fire hazards clear.
Follow product MSDS instructions and dispose of solvents and rags safely to minimize risk.
Common Beginner Mistakes That Add Drying Time
When you rush the prep, mix, or application steps, you’ll almost always add drying time and risk a poor finish. You’ll notice extended tackiness if you overwork edges trying to force Color blending without letting layers set.
Poor Brush techniques—like heavy loading or inconsistent strokes—trap solvent and slows cure.
Also avoid these common mistakes:
- Applying thick coats to hide imperfections instead of sanding between layers.
- Skipping recommended flash times and immediately recoating for faster “progress.”
- Painting in high humidity or low temperature without adjusting dry times.
Fix these and your clear coat window will be predictable and shorter.
When to Test a Small Patch First
If you’re unsure how a paint or clear coat will behave on your surface, test a small patch first to confirm adhesion, drying time, and final appearance before committing to the whole job. Choose an inconspicuous area, replicate your color mixing ratios and brush techniques, and note ambient temperature and humidity.
Apply the full system—primer, paint, and clear—so interactions show up. Time each stage, inspect for tackiness, runs, or blooming, and sand lightly if needed to test adhesion.
Record results and adjust drying intervals, thinner or application method based on that patch before proceeding to larger sections.
Quick Checklist: Is It Safe to Apply Clear Coat Now?
After testing a small patch and noting how the layers behaved, use this quick checklist to decide whether you can safely apply the clear coat now. Check feel, look, and adhesion: it shouldn’t tack, the color blending must be even with no streaks, and edges should hold.
Evaluate cure time and environment: humidity and temperature match product specs.
Confirm technique and tools: your brush techniques didn’t lift or cause bubbles in the test area.
- Surface is fully matte-to-satin and not sticky
- No color shift or bleed after light rub
- Test passes adhesion and solvent resistance checks
Real-World Timing Examples From Projects
Because every paint, environment, and technique differ, you’ll want concrete examples to gauge clear-coat timing in real projects. Use these quick cases to judge when to clear: small touch-up after color blending, full panel respray with texture smoothing, or fast-dry base coats. Check tackiness, adhesion, and solvent burn concerns before sealing.
| Project | Base Type | Typical Wait |
|---|---|---|
| Touch-up | Single-stage | 30–60 min |
| Mini panel | OEM base | 1–2 hrs |
| Full panel | Primer + base | 2–6 hrs |
| Metallic blend | Color blending | 2–4 hrs |
| Textured finish | Texture smoothing | 4–8 hrs |
Further Reading and Manufacturer Guidance Sources
When you want authoritative guidance, consult manufacturer technical data sheets, application guides, and recommended cure tables—these sources give the specific dry times, temperature and humidity ranges, and surface prep requirements that apply to the products you’re using. You’ll also review safety data sheets and online FAQs for brand-specific tips.
Use manufacturer-recommended primers and clears, and follow paint branding notes for warranty and finish consistency. For deeper study, check vendor white papers, pro forums, and training videos.
Use manufacturer-recommended primers and clears, follow brand notes for warranty and finish, and consult vendor resources for deeper learning.
- Technical Data Sheets (TDS) for dry times and cure charts
- Application guides for surface prep and color mixing protocols
- Manufacturer support lines and authorized training resources
Frequently Asked Questions
Can Clear Coat Be Applied Over Paint With Silicone Contamination?
You shouldn’t apply clear coat over paint with silicone contamination; it’ll ruin clear coat adhesion. You’ll need to remove contamination thoroughly—wash, solvent wipe, and possibly scuff—then test adhesion before proceeding.
How Long After Clear Coat Before Polishing or Compounding?
You can polish or compound after about 24–48 hours, though patience wins: ironically, rushing ruins finishes. Guarantee proper surface preparation and respect drying time; waiting 72 hours is safer for deep cures and better results.
Will Applying Clear Coat Affect Underlying Paint Color or Sheen?
Yes — applying clear coat can slightly deepen color and increase sheen, but it won’t alter hue if paint’s cured. Make certain proper paint adhesion and follow recommended drying time so the clear bonds well and finishes evenly.
Can Incompatible Brand Clear Coats Be Layered Together Safely?
Picture two rivers merging—if they’re mismatched, they’ll churn. You shouldn’t layer incompatible brand clear coats; brand compatibility matters. Layering risks include bubbling, lifting, and poor adhesion, so always test or use matched systems.
How Long Should Painted Outdoor Furniture Weather Before Clear Coating?
You should let outdoor furniture weather for at least 7–14 days before clear coating. Do prep thoroughly: use preparation tips like sanding and primer, and guarantee surface cleaning removes dirt, pollen, and oils before you apply.
Conclusion
You’ve learned the limits and labors of laying lacquer, latex, or urethane: let painted parts breathe before you bring on the bright, protective clear. Wait for surface dryness, respect the recommended flash time, and run a small spot test to avoid sticky, sagging, or sealed-in solvents. With patience and proper prep, clear coats cure cleanly and confidently—protecting paint and producing professional, pleasing results you’ll proudly point to.