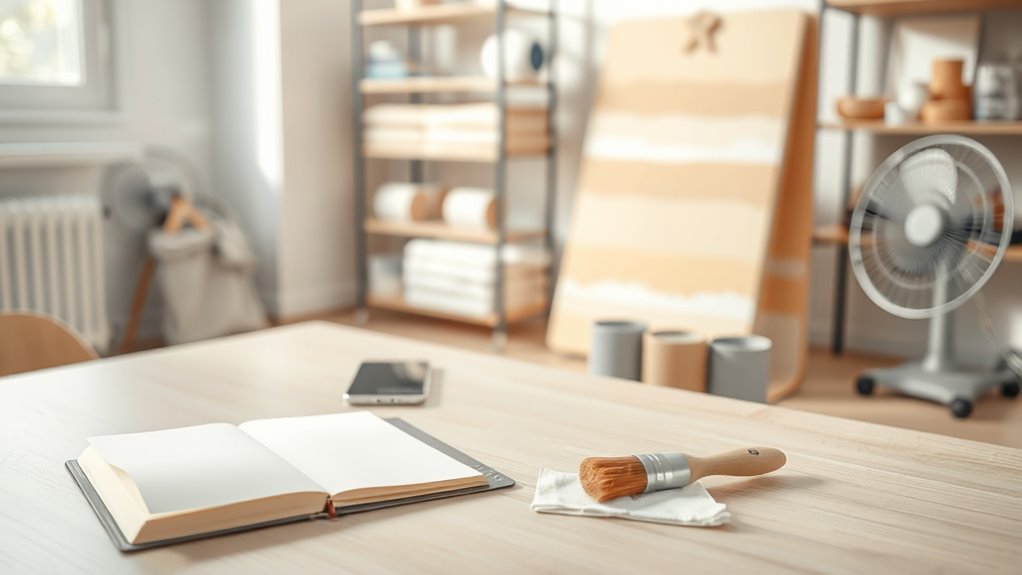
How Long to Leave Paint to Dry
You should wait until paint is dry to the touch before recoating or light handling—usually 30 minutes to 4 hours for water-based (latex/acrylic) and 6–24+ hours for oil-based—though full cure can take days to weeks depending on temperature, humidity, coat thickness, and surface. Thin coats, good ventilation, and moderate heat speed drying; high humidity and cold slow it. Follow the product recoat window and manufacturer instructions, and keep going for tips on timing, tests, and troubleshooting.
Who This Guide Is For and How to Use It
Whether you’re repainting a single room, refinishing furniture, or tackling a whole-house project, this guide explains drying times and practical factors that affect them so you can plan confidently.
You’ll find advice tailored to homeowners, renters, DIYers, and pros weighing schedules, ventilation, and surface prep. Use the quick-reference charts for common finishes, then read deeper sections on coatings, color theory choices that influence opacity, and how paint branding affects formulation and performance.
Follow the step-by-step timing suggestions, note temperature and humidity tips, and apply checklist reminders so you’ll get predictable, durable results without wasting time or materials.
Quick Answer: How Long Does Paint Take to Dry?
If you’re working on a typical interior wall, most latex paints will feel dry to the touch within 1 hour and be ready for a second coat in 2–4 hours.
While oil-based paints usually take 6–8 hours to dry and up to 24 hours before recoating.
Dry times vary with temperature, humidity, and thickness.
Primer often dries faster.
Exterior paints need longer curing.
If you mix colors, allow added pigments extra time to settle before judging dryness.
For leftovers, proper paint storage in sealed cans at stable temperatures preserves drying properties.
Always follow manufacturer recommendations for best results.
How to Tell When It’s Safe to Recoat
Knowing the feel-dry time is helpful, but deciding when it’s safe to recoat means verifying more than surface dryness. You should press lightly in an inconspicuous spot; if paint doesn’t tack or transfer, it’s usually ready.
Check manufacturer recoat windows on the can and consider temperature and humidity—cool, damp conditions slow curing.
Avoid heavy brushing that lifts underlying layers.
For color mixing jobs, test a small blended patch to ensure adhesion and color consistency before full recoating.
Proper paint storage between sessions keeps solvents stable and prevents skinning, which can interfere with recoat performance.
Dry-to-the-Touch vs Fully Cured: What’s the Difference
When paint is dry-to-the-touch, you can lightly touch the surface without it feeling tacky. However, the film hasn’t finished hardening.
Fully cured means the paint’s chemical reactions are complete and it’s reached its maximum strength and resistance.
Knowing which stage you’re at helps you decide when to handle, move, or put stress on the painted item.
Dry-To-The-Touch Defined
Although a paint surface can feel dry to the touch within hours, that just means the top layer has set enough that it won’t smudge under gentle contact—you can lightly handle it but shouldn’t subject it to stress or heavy use.
When paint is dry-to-the-touch, solvents at the surface have evaporated and tack is minimal, but underlying layers may remain soft. You’ll still need to avoid heavy handling, cleaning, or placing objects against it.
Watch for issues like imperfect color blending or texture variation that won’t resolve until layers fully harden. Treat dry-to-the-touch as temporary readiness, not final durability.
Fully Cured Explained
If the surface feels dry to the touch, don’t assume the job’s done—fully cured paint has completed chemical hardening throughout the film, not just at the surface. You’ll notice color mixing stability and consistent paint texture only after curing. Dry-to-the-touch is quick; full cure can take days to weeks depending on formula, humidity, and temperature. Avoid heavy use, washing, or layering before curing. Test edges subtly; look for tackiness, smell, and flexibility. Use the table to compare states and guide timing.
| State | Feel | When to handle |
|---|---|---|
| Dry-to-touch | Slight tack | Light handling |
| Fully cured | Firm, smooth | Normal use |
How Paint Type Changes Drying: Latex vs Oil

Because the binder and solvent differ, latex and oil paints dry by different processes and demand different drying times and conditions.
Because their binders and solvents differ, latex and oil paints dry by different processes and require different drying times and conditions.
You’ll notice latex (water-based) dries by evaporation, so it skins over quickly and is ready for recoat in hours; it supports faster color blending when working wet-on-wet and shows less lingering odor.
Oil (solvent-based) cures by oxidation, taking longer to harden and allowing extended working time for subtle texture variation and smoother leveling.
You should choose latex for speed and easier cleanup, oil for longer open time and richer finish—adjust ventilation, temperature, and humidity accordingly.
Slow-Drying Finishes: Alkyd & Oil-Based Paint Drying Times
When you’re working with alkyds or traditional oil-based paints, expect substantially longer drying and curing times than with water-based latex. These finishes rely on oxidative curing rather than simple evaporation, so surface tack can persist for hours and full hardness can take days to weeks.
You’ll need patience: tack-free times often run several hours, recoat windows can be 8–24+ hours, and full cure may stretch to 30 days. Control temperature, humidity, and ventilation to speed curing safely.
Mind color mixing—additives alter drying—and keep unused paint sealed; proper paint storage prevents skinning and contamination that slow drying further.
Fast-Drying Options: Acrylic and Water-Based Paints
Acrylic and water-based paints typically dry to the touch within 30 minutes to an hour and can be recoated in 2–4 hours, so you’ll get projects done much faster than with oil-based finishes.
To speed things up, work in a warm, well-ventilated space, apply thinner coats, and use a fan or dehumidifier to promote evaporation.
If you need ultra-quick turnaround, choose paints labeled fast-drying and check the manufacturer’s recoat time before starting.
Drying Time Range
If you need paint to dry quickly, water-based and acrylic formulations are your best bet; they typically become touch-dry within 20–60 minutes and can be recoated in as little as an hour under ideal conditions.
Expect full cure in 7–30 days depending on film thickness, ventilation, and humidity. Thin coats dry faster than heavy ones, so apply light layers and wait recommended intervals.
When doing color matching or paint mixing, test a small swatch to confirm dry color and adhesion before committing.
Remember that lower temperatures and high humidity lengthen drying; plan your schedule around stable, warmer, drier conditions.
Tips To Speed
Since water-based and acrylic paints dry much faster than oils, you can speed a project further by choosing the right product and using a few simple techniques.
Pick fast-drying formulations labeled “quick-dry” or low-VOC, and thin coats for even evaporation. Work in warm, low-humidity conditions and use fans to circulate air, avoiding direct heat that can crack paint.
When you mix colors, do so sparingly to prevent wasted blended batches that slow workflow.
Store leftover paint properly—seal containers tightly and keep them cool—to preserve performance and drying characteristics for touch-ups and future projects.
Primer vs Topcoat: Drying Expectations
When choosing between primer and topcoat, remember they dry for different reasons and on different schedules. You’ll notice primer soaks in and sets to seal; topcoat forms the final film and often needs longer cure time. Consider factors like humidity, brand, and thin versus thick coats. Also think about color mixing and proper paint storage to keep consistency and performance.
- Primer absorbs and bonds; it’s tack-free sooner.
- Topcoat builds sheen and durability; cure takes longer.
- Dry times listed on cans are minimums.
- Light sanding may be needed between coats.
- Allow full cure before heavy use.
How Surface (Wood, Metal, Drywall) Affects Drying
Although the material under your brush might look the same at a glance, wood, metal, and drywall draw and release moisture differently, and that changes how fast paint dries and cures. You’ll notice porous wood soaks primer and paint, speeding initial set but requiring longer curing; its grain and texture variation affect sheen and color blending between layers.
Smooth metal repels moisture, so paint skins over quickly but can trap solvents underneath unless properly prepped.
Drywall absorbs inconsistently—joint compound areas hold more moisture, slowing drying and altering finish. Match prep and product to the substrate for predictable dry times and durable results.
How Number of Coats Changes Drying Time
The number of coats you apply directly affects overall drying time because each layer needs its own cure before the next goes on.
You should wait the recommended drying window between layers to avoid trapping solvent and causing longer tackiness or poor adhesion.
Plan for additional drying time with every extra coat, especially with thicker or glossy finishes.
Number Of Coats
If you apply multiple coats, each additional layer changes how long the paint needs to dry because new layers sit on top of—not merge with—what’s already there, so moisture and solvents take longer to escape. You’ll notice thicker film dries slower, and formulation, temperature, and humidity matter.
Consider surface, sheen, and whether you sand between coats.
- Thinner coats dry faster; avoid heavy application.
- Oil and alkyd often need more time than latex.
- Multiple coats increase tackiness window.
- Use consistent color mixing to avoid surprises.
- Good paint storage preserves drying properties.
Plan drying time per coat, not just overall.
Drying Between Layers
When you add each new coat, expect drying to slow because fresh paint sits atop the previous layer and traps solvents and moisture beneath a thicker film. You’ll need longer wait times between coats as pigments and binders cure; thin, even layers dry faster than thick ones.
Allow manufacturer-recommended recoat intervals, but extend them in cool or humid conditions.
Light sanding between coats improves adhesion and texture consistency, and reduces visible brush marks.
For subtle color blending, wait until the underlying coat is touch-dry but not fully cured to avoid lifting.
Track temperature and humidity to adjust drying schedules accurately.
How Film Thickness Affects Dry Time
Although thicker paint layers can give you richer coverage, they also slow drying because solvents or water and binders have farther to travel before the film cures. You should apply thinner coats, wait between layers, and avoid overloading the brush. Consider how color mixing affects opacity and whether extra coats are needed. Proper paint storage keeps additives stable so you get consistent drying.
- Apply thin, even coats
- Sand light between layers for adhesion
- Wait full recommended flash time
- Use manufacturer’s recoat window
- Store cans sealed, upright to preserve chemistry
Thicker films increase tack time and raise risk of runs.
Brush, Roller, or Spray: Drying Time Differences
Because application method controls how much air reaches the film and how evenly it’s laid down, whether you brush, roll, or spray will change drying times noticeably.
Application method—brush, roll, or spray—affects airflow and film thickness, so expect noticeably different drying times.
You’ll find brushing deposits thicker ridges, slowing solvent escape and extending tack time. Rolling lays a moderate film—faster than brushing but slower than spraying—so adjust recoat intervals accordingly.
Spraying atomizes paint into thin, quick-drying layers but needs proper overlap to avoid thin spots. Remember thin coats dry faster, so match technique to project and maintain consistent color mixing to avoid uneven curing.
Proper paint storage preserves solvents and resins, keeping expected drying performance.
How Paint Sheen Influences Dry and Cure Times
Sheen level affects both how quickly paint feels dry and how long it takes to fully cure.
Higher sheens (like semi-gloss) have less pigment and binders near the surface, so they often dry faster but can take longer to cure evenly.
Lower sheens (like flat) stay softer longer and may need more cure time before heavy use or cleaning.
Sheen Level Basics
When you pick paint, the level of gloss you choose affects how quickly it dries to the touch and how long it takes to fully cure. Sheen matters: flat absorbs light, satin and semi-gloss reflect more, and that shifts drying feel and cleanup. Consider color mixing effects and proper paint storage to keep sheen consistent. You’ll notice different workability and touch-dry times by finish.
- Flat: hides flaws, slower surface drying
- Eggshell: balanced sheen, moderate dry
- Satin: easier cleaning, faster to touch
- Semi-gloss: quick dry, shows imperfections
- Gloss: fastest touch-dry, highest sheen
Impact On Cure
Although it might seem subtle, the paint’s gloss level changes both how quickly the surface feels dry and how long the coating takes to fully cure. You’ll see this because higher-sheen finishes use more resins and fewer fillers, which promote faster film formation and solvent release.
You should expect eggshell or satin to feel dry slower and cure later than gloss. Increased resin speeds polymer crosslinking, while fillers in flatter paints trap solvents and slow cure.
Color mixing can alter solvent balance and cure rates, so test samples. Choose eco-friendly paints carefully, since low-VOC formulas may cure differently.
Temperature: Ideal Range for Paint Drying
If you want paint to dry predictably, keep the temperature in a steady, moderate range—typically between about 50°F and 85°F (10°C–29°C) for most interior and exterior paints—because heat speeds evaporation while cold slows chemical curing. You’ll control drying time and final hardness by staying in that band, especially when doing color mixing or choosing eco-friendly finishes.
Consider these quick tips:
- Start jobs when forecasted temps stay steady.
- Avoid freezing nights after daytime painting.
- Warm rooms dry faster than unheated garages.
- Extreme heat can trap solvent under a skin.
- Use gentle heat sources to raise low temps.
How Humidity Slows Drying and How to Manage It
High humidity slows paint drying by trapping moisture on the surface, which can extend tackiness and increase the risk of drips or poor adhesion.
You can speed things up by using dehumidifiers, running fans, or improving ventilation to pull moisture away.
If conditions are very damp, pick a fast-drying formula or wait for a drier day before painting.
Effects Of High Humidity
When moisture hangs in the air, paint takes much longer to dry because water vapor slows the solvent-evaporation and film-formation processes. You’ll notice longer tack times, slower curing, and a higher risk of runs or sags.
High humidity affects finish, adhesion, and drying schedules. You’ll also see mottling or slower color development, which can mess with color mixing and complicate paint storage decisions.
Practical impacts you’ll encounter:
- Extended recoat intervals
- Increased risk of tacky film and dust pickup
- Peeling or blistering over time
- Uneven sheen across panels
- Delayed hardness gain, affecting handling and use
Ways To Reduce Moisture
Because moisture in the air slows solvent evaporation and film formation, you’ll want to actively reduce humidity in the work area to speed drying and avoid defects.
Use dehumidifiers and portable fans to keep air moving and lower relative humidity; run HVAC systems when possible.
Avoid painting after showers or in damp basements; schedule jobs for drier days.
Store cans off cold concrete and follow Paint storage guidelines to prevent condensation and contamination.
When color mixing, keep lids tight and work in a controlled environment so blended batches don’t absorb moisture.
Monitor humidity with a hygrometer and adjust conditions as needed.
Ventilation’s Role in Speeding Paint Drying
Good airflow can cut drying time considerably by moving moisture-laden air away from the painted surface and replacing it with drier air, so set up cross-ventilation with windows, doors, or fans to speed the process.
Good cross-ventilation—windows, doors, or fans—moves moisture away and significantly speeds paint drying.
You’ll want to monitor humidity and temperature while you work; proper color mixing and sensible paint storage before application also help consistency.
Use targeted ventilation to avoid dust settling.
Practical tips:
- Open windows opposite each other for natural flow
- Use box or oscillating fans to boost movement
- Run dehumidifiers in damp rooms
- Keep doors ajar between areas
- Avoid direct drafts that cause uneven drying
Additives and Extenders: When to Slow or Speed Drying
If you want more control over drying time, additives and extenders let you either slow or speed the process to suit the job. You’ll use retarders to extend open time for blending and color mixing, especially in warm conditions, and accelerators when you need faster tack-free surfaces.
Additives change flow, leveling, and adhesion, so follow manufacturer ratios and test small areas. Remember additives can affect longevity; adjust paint storage to maintain mixed batches and discard altered paint per guidelines.
Mix thoroughly, label containers with contents and date, and only alter paint when necessary to avoid unintended finish issues.
How to Tell You Can Safely Recoat (Quick Checklist)
After adjusting drying time with additives, you’ll still need a quick, reliable way to know when it’s safe to recoat. Check surface tack, sheen uniformity, and paint texture before proceeding. Use this checklist to decide:
- Lightly press a hidden edge for tackiness; no stick means ready.
- Inspect sheen and color mixing consistency; mismatched gloss or streaks signal more time.
- Run a fingernail gently to test film resilience without gouging.
- Smell for strong solvent odor; if present, wait and ventilate.
- Confirm manufacturer’s recommended minimum recoat time has passed, factoring temperature and humidity.
Follow these steps and you’ll recoat confidently.
How Long Before You Can Handle Painted Objects?
While drying times vary by paint type and conditions, you can usually handle small, fully cured-feeling objects after the paint has lost tack and the film resists light pressure—typically 1–2 hours for water-based primers and craft paints.
6–8 hours for most latex wall paints, and 24 hours or more for oil-based finishes. Always factor in temperature, humidity, and the manufacturer’s guidance before picking up your project.
Test edges and undersides first, then lift gently. For pieces where color blending or texture enhancement matters, wait longer to avoid smudging or marks.
Use gloves for grip, and rest items on soft, breathable supports.
When Furniture or Flooring Can Be Used After Painting
You can pick up small painted items once they feel dry to the touch, but larger surfaces like furniture and flooring need much longer before you can use them safely. Wait for full cure rather than surface dryness; timeline depends on paint type, room temperature, and humidity. Check manufacturer guidance and consider paint branding for recommended cure times.
Also mind color mixing batches—different mixes can alter drying. Use gentle testing: press a hidden spot, sit lightly, then fully use after a week to a month depending on oil or latex.
- Test a hidden area first
- Keep room ventilated
- Avoid heavy traffic early
- Use rugs for protection
- Follow label instructions
How Long Before Washing or Cleaning Painted Surfaces
Because paint needs time to fully harden beyond surface dryness, wait before washing painted surfaces so you don’t damage the finish. Typically, wait 2–4 weeks for latex and 4–6 weeks for oil-based paints before scrubbing.
Light dusting or gentle wiping with a damp cloth is usually safe after 48–72 hours, but avoid solvents and abrasive tools. Test a hidden spot first.
Proper color mixing and thorough stirring before use helps guarantee an even cure. Also follow label guidance and keep cans sealed; good paint storage prevents contamination that could affect drying and how safely you can clean surfaces later.
Common Mistakes That Make Drying Slower
If you pile on thick coats, paint will take much longer to cure and can drip or tack.
Don’t ignore humidity—high moisture in the air slows drying dramatically.
And make sure you provide good ventilation, because stagnant air traps solvents and extends drying time.
Applying Thick Paint Layers
When you slap on thick coats thinking they’ll cover in one go, paint traps solvents and slows drying dramatically. Thinner, even layers let solvents evaporate and the film cure properly. You should apply multiple thin coats, wait between them, and avoid heavy buildup that leads to tacky surfaces.
Pay attention to color mixing—adding too much tint can alter drying time—and proper paint storage, since old or contaminated paint won’t dry predictably.
To prevent problems, remember practical habits:
- Strip excess with a proper brush or roller
- Sand lightly between coats for adhesion
- Use recommended spread rates
- Keep tools clean
- Label cans with date
Ignoring Humidity Levels
Although you mightn’t notice it, high humidity can stall paint drying by keeping solvents from evaporating. You’ll see tacky finishes and extended recoat times if you overlook humidity levels. Check forecasts and use a hygrometer so you’re aware of humidity effects before you start.
Time your painting for lower relative humidity when possible, and avoid painting after rain or in damp basements. Good surface preparation still matters—remove moisture, clean grease, and make sure surfaces are dry to promote adhesion.
If conditions are unavoidably humid, wait for better weather or delay your project to prevent poor results.
Poor Ventilation Practices
Because paint needs airflow to let solvents evaporate, poor ventilation is one of the quickest ways to slow drying and cause tacky finishes or strong odors to linger. You’ll stall curing if you keep windows closed, block vents, or use only ceiling fans that recirculate stale air.
Consider Ventilation improvements to speed evaporation and avoid Drying delays.
- Crack windows on opposite walls for cross-breeze
- Run exhaust fans or portable ventilators
- Remove obstructions near vents and registers
- Use dehumidifiers when humidity’s high
- Avoid painting in enclosed vehicles or closets
Fix airflow early to cut tackiness and reduce odor.
How to Speed Up Drying Safely (Heat, Fans, Dehumidifiers)
If you need paint to dry faster without risking finish problems, use controlled heat, steady airflow, and reduced humidity — and don’t overdo any one method.
Speed up drying safely with gentle heat, steady airflow, and lower humidity—avoid overdoing any single method.
You can aim heaters at moderate settings, keeping temperature steady so solvents evaporate evenly; that helps color blending settle without shifting pigments.
Position fans for gentle circulation, not direct blasts that cause skinning or texture variation; fans promote uniform drying and aid texture enhancement.
Run a dehumidifier to pull moisture from the air, especially in confined spaces.
Monitor surface tack and room conditions, and stop accelerating once the paint firms to avoid stress on the film.
When Not to Speed Up Drying (Risk of Cracks or Adhesion Loss)
Speeding drying methods help in many situations, but you shouldn’t rush every job. If you force-dry certain finishes you’ll risk surface cracks, poor adhesion, and ruined color mixing results. Think before accelerating drying when:
- You’re working with thick coats or oil-based paints.
- The substrate is flexible or previously painted.
- You’ve blended tones and need curing time for true color mixing.
- Paint storage indicates slow cure or specific humidity limits.
- You’re applying multiple layers in quick succession.
Let coatings cure naturally when listed conditions appear; proper patience preserves adhesion, finish integrity, and the colors you worked to achieve.
Troubleshooting: Paint That Never Seems to Dry
If your paint stays tacky long after the recommended drying time, check for common causes like high humidity, low temperature, or applying too-thick coats.
You can speed curing by improving ventilation, raising room temperature slightly, or carefully removing excess paint and recoating thinner.
If problems persist, consider switching to a faster-drying formula or consulting the manufacturer’s guidance.
Paint Remains Tacky
When paint stays tacky long after you’ve applied it, it usually signals an issue with the surface, environment, or product—so you’ll want to examine those factors first. You may notice strong paint odor or signs from recent color mixing that hint at incomplete curing. Address immediate observations and avoid using the surface until it dries fully.
- Check humidity and temperature in the room.
- Confirm the surface was clean and dry before painting.
- Verify the paint’s recommended recoat and cure times.
- Avoid heavy traffic on the area until tackiness resolves.
- If odor persists, ventilate the space and monitor progress.
Causes And Fixes
Because paint that never seems to dry usually stems from a few common causes, you can troubleshoot it quickly by checking product, surface, and environment factors.
First, confirm the paint isn’t expired, over-thinned, or improperly mixed—poor color mixing or added retarders slow curing.
Next, verify the surface is clean, dry, and primed; contaminants or incompatible primers trap solvents.
Then assess environmental impact: high humidity, low temperature, or poor ventilation will keep paint tacky.
Fixes: use correct thinner, stir thoroughly, improve airflow, heat the room, or apply a compatible topcoat.
If problems persist, test a small patch or consult the manufacturer.
Fixing Brush Marks, Runs, and Tacky Spots After Drying
Although careful brushing and proper technique reduce most problems, you’ll sometimes notice brush marks, runs, or tacky spots after the paint dries; these flaws are usually fixable with a few targeted steps. You’ll assess the issue, sand lightly, and decide whether spot-priming or recoating is best.
Keep leftover paint labeled for color mixing tests and proper paint disposal.
Quick fixes include:
- Sand glossy edges smooth with fine grit.
- Feather and blend with a lightly thinned skim coat.
- Use a quality brush or roller for the final pass.
- Allow full cure before heavy handling.
- Clean tools and store paint correctly.
Best Practices for Multi-Day Painting Projects
If your project stretches over several days, plan each stage so drying and curing times don’t collide—schedule prep, priming, and coats with buffer days for touch-ups and unforeseen delays.
Map a daily timeline: sanding and cleaning first, primer next, then base coats and finishes.
Label mixed cans clearly and note color mixing ratios to reproduce tones later.
Store open cans sealed, upright, in a cool dry spot.
Rotate tasks to avoid rushing interiors when exterior humidity spikes.
Use eco-friendly paints where possible; they reduce odor and allow safer intermittent occupancy.
Keep tools clean and document each step.
Seasonal Tips: Painting in Winter vs Summer
When temperatures dip or soar, you’ll need to adjust timing, product choice, and technique to get reliable drying and durable finishes.
When temperatures dip or soar, tweak timing, products, and technique for consistent drying and durable finishes.
In winter, slow curing and thicker coats can cause runs; in summer, heat speeds skin formation but traps solvents. Manage color mixing carefully—cold can shift pigments, heat can change viscosity.
Mind paint storage: keep cans frost-free in winter and shaded in summer. Follow these quick tips:
- Warm room before painting in cold weather
- Thin slightly in summer to avoid brush marks
- Work in smaller sections when hot
- Use fast-dry formulations for humid days
- Store opened cans airtight between sessions
Estimating Total Project Time Using Drying Stages
Seasonal factors affect how long each drying stage takes, so factor them in when you plan your schedule. You’ll map tack-free, recoat, and full-cure times for each coat, then add buffers for humidity or low temps.
Track drying intervals per product label and adjust if you’re doing heavy Color mixing that alters solvent content. Allow extra time after glossy finishes.
Schedule tasks sequentially—prep, prime, base, finish—with overlaps only where safe.
Note that Brush techniques affect film thickness and consequently drying; lighter strokes speed cure, heavy loading slows it.
Total project time equals summed stages plus contingencies.
Pro vs DIY Drying Timelines and Expectations
Although pros and DIYers follow the same drying stages, you’ll notice big differences in timing and predictability. You’ll benefit from pros’ controlled environments, consistent surface preparation, and faster decisions about color mixing, but you can match results with planning.
Expect variable open times, tack-free moments, and cure durations depending on conditions.
- Pros use climate control for steady drying.
- DIYers face humidity and ventilation limits.
- Pros blend colors precisely for coverage and recoat timing.
- You can improve outcomes with better surface preparation and patience.
- Know when to wait: don’t rush recoats or final handling.
Product Labels and TDS: What Drying Terms Mean
After you’ve planned timing and prep, the label and technical data sheet (TDS) become your most reliable guides for drying expectations. You’ll find terms like “surface dry,” “recoat time,” and “full cure” defined precisely; follow those for safe workflow.
Check temperature, humidity, and film thickness notes—those change stated times. Look for warnings about color mixing and solvent compatibility, and specific guidance on primer adhesion to avoid peeling or poor bonding.
If directions conflict with shop practice, prioritize TDS for performance-critical jobs. Keep the label’s cleanup and disposal instructions too; they matter for proper handling and legal compliance.
Ready-to-Use Checklist: Recoat, Handle, Clean, and Use Timelines
Check the recoat window on the label so you know when it’s safe to apply another coat without lifting the first.
You’ll want to test a small area to confirm the surface is firm enough to handle and won’t dent or tack under light pressure.
Clean brushes and rollers promptly according to the product’s instructions to keep tools ready and avoid dried-on mess.
Recoat Window Timing
When planning your project, knowing the recoat window helps you apply the next coat at the right time so it bonds properly without lifting or excessive texture. You’ll check label times, surface temperature, and humidity to hit the sweet spot between tacky and fully cured.
Missing it risks color contrast issues or increased texture variation.
- Follow manufacturer recoat times
- Test a small corner for tackiness
- Wait longer in cold or humid conditions
- Sand lightly if you exceed the window
- Keep coats thin for faster, even drying
This keeps finishes smooth and durable.
Handle Surface Readiness
Because proper timing determines whether a finish holds up, use this ready-to-use checklist to judge when a painted surface is safe to recoat, handle, clean, or put back into service.
Check that the paint feels dry to the touch, without tackiness, before light handling. Press an inconspicuous area to confirm cure depth; slight give means wait longer.
Inspect paint texture for uniformity—no blisters or wrinkling.
Test a small cleaned spot to verify adhesion and color matching if you’ll touch up.
For frequently touched areas, allow additional cure time per manufacturer guidelines before regular use to avoid marks or premature wear.
Tool Cleaning Schedule
After you confirm surfaces are ready, plan a simple tool-cleaning schedule so brushes, rollers, and trays stay usable and don’t contaminate future coats. You’ll save time and preserve Color mixing accuracy and paint storage integrity by cleaning at set points: after each color change, at day’s end, and before long breaks. Follow this checklist and stick to timelines.
- Rinse brushes immediately after use for latex; use solvent for oil.
- Spin or shake rollers to remove excess, then wash.
- Wipe trays and pour leftover paint into proper paint storage containers.
- Label stored paint with date and color.
- Dry and hang tools before storing.
Frequently Asked Questions
Can I Paint Over Wallpaper Without Waiting for Extra Drying Time?
You shouldn’t paint over wallpaper without waiting; you’ll risk poor paint adhesion and future peeling. Consider wallpaper removal or priming with a strong sealer first, ensuring surfaces are clean, dry, and well-prepared for lasting results.
Will Paint Fumes Affect Pets Long-Term After Curing?
It’s unlikely paint fumes harm pets long-term after curing, but investigate: residual chemicals can persist, so prioritize pet safety and fume longevity by ventilating thoroughly, using low-VOC paints, isolating animals during painting, and monitoring for symptoms.
Does Paint Thickness Affect Color Appearance While Drying?
Yes — thicker paint changes perceived color while drying; you’ll see deeper, richer tones and slower sheen development. Paint consistency alters drying duration, so expect longer drying times and potential slight color shifts until full cure completes.
Can Primers From One Brand Mix With a Different Topcoat Brand?
Yes — you can often mix primers and topcoats from different brands, but you’ll test primer compatibility first, read technical data, and use a compatible chemistry (water- or solvent-based). Brand mixing risks adhesion or finish issues, so verify.
How Does Paint Drying Interact With Humidity-Sensitive Finishes Like Milk Paint?
You’ll notice humidity levels directly stretch milk paint drying time; high moisture slows cure, risks tackiness and bleeding, while low humidity speeds drying but can cause cracking or poor adhesion, so adjust environment and ventilation accordingly.
Conclusion
You’ve reached the hush between brushstrokes — give paint its little nap. Follow label times, feel for dry-to-the-touch before beckoning a recoat, and respect full cure before heavy use; it’ll repay your patience with lasting beauty. Weather, type, and ventilation whisper clues, so don’t rush their advice. Treat drying like a quiet negotiation: a bit of waiting now keeps projects from calling you back later for fixes.