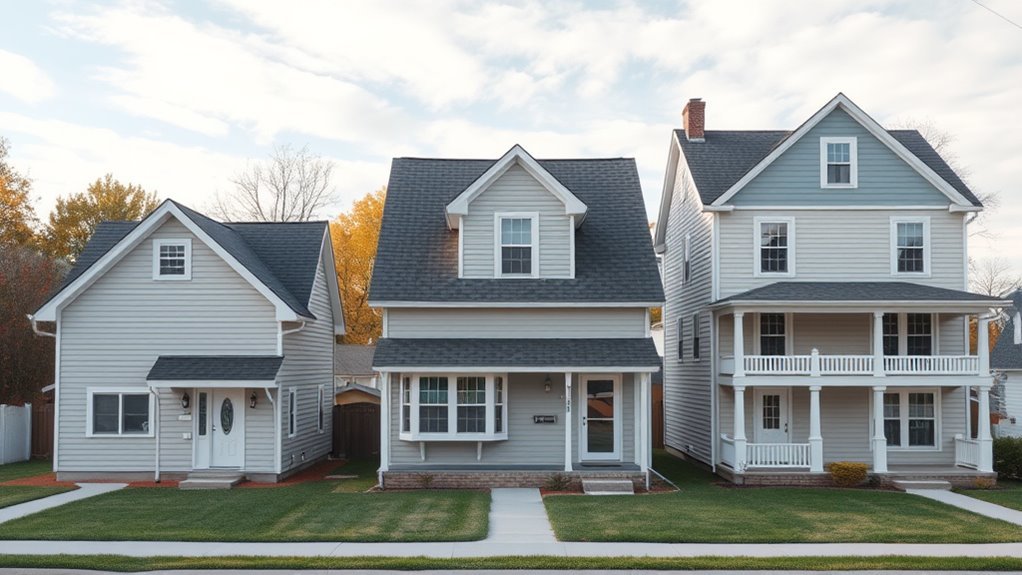
How Many Gallons of Paint to Paint a House Exterior
You’ll typically need 5–12 gallons for a single-story house and 10–20 gallons for a two-story, but your exact need depends on exterior square footage, surface texture, and how many coats you’ll apply. Measure each wall (length × height), subtract windows and doors, then divide total paintable square feet by the paint’s coverage per gallon and round up. Add 10–15% for textured surfaces and touch-ups, and keep an extra quart; continue on to learn how to calculate precisely.
Quick Answer : Gallons Needed by House Size
Quick answer: for most typical single-story homes you’ll need about 5–12 gallons of paint, while two-story homes usually require 10–20 gallons depending on complexity.
You’ll pick amounts based on wall area, trim, and how many coats you plan. If you choose darker color schemes or high-contrast accents you might need extra coats to achieve full coverage.
Smooth surfaces and quality paint with proper paint finishes can reduce coats, while rough siding soaks more paint.
Always round up and account for touch-ups. This gives you a practical starting point before you measure and calculate exact square footage.
Measure Your Home’s Exterior Square Footage
Start by measuring the total wall surface area of your home—length times height for each wall, then add them together.
Subtract the square footage of windows and doors so you don’t overestimate how much paint you need.
Record these numbers to calculate the exact gallons required.
Measure Wall Surface Area
Ready to figure out how much paint you’ll need? Measure each wall’s width and height, multiply to get surface area, then add all walls. Note trim separately later; don’t subtract windows/doors yet. Use measurements in feet for square footage. Keep notes for color matching and choose eco friendly paints early so coverage estimates match product specs.
| Wall | Width × Height (ft) |
|---|---|
| Front | 30 × 10 = 300 |
| Back | 30 × 10 = 300 |
| Left | 20 × 10 = 200 |
| Right | 20 × 10 = 200 |
Total wall area: 1,000 sq ft.
Account For Windows/Doors
Because windows and doors don’t need as much paint, subtract their combined area from your total wall square footage before calculating gallons. Measure each opening (height × width), add them, and deduct that sum. Remember trim around them still needs paint.
- Measure: jot each window and door size, total the square footage.
- Adjust: subtract openings from wall area, then factor in coats and texture.
- Choose: pick Color matching swatches and Eco friendly options for trim and sash, noting that primer or specialty finishes can affect required gallons.
This keeps your estimate accurate and avoids overbuying paint.
How to Calculate Paintable Surface Area
Before you estimate gallons, measure the areas you’ll actually paint so your coverage numbers match reality. Walk each wall, note heights and widths, and multiply to get rectangle areas. Subtract doors, windows, and unpainted trim you accounted for earlier.
Measure each painted wall—calculate rectangles, subtract doors/windows, and total per elevation before buying paint.
For gables or irregular shapes, divide into triangles or rectangles, measure, then add.
Factor porches, railings, and siding texture—rough surfaces need more paint. Consider how chosen color schemes and eco-friendly paints affect coverage (some tints or low-VOC formulas require extra coats).
Record totals per elevation to keep calculations organized and accurate before buying paint.
Step-by-Step Paint Gallon Calculator (Manual)
When you’ve totaled the paintable square footage for each elevation, you can convert that number into gallons by dividing by the paint’s coverage per gallon and then adjusting for coats and surface texture.
Start by listing walls, trim, and accents separately. Use color matching notes and choose eco-friendly options if desired.
Then follow this simple manual calculator:
- Divide total square feet by coverage per gallon, round up fractional gallons.
- Multiply by number of coats; add 10–15% for rough surfaces or waste.
- Account for trim and doors separately; keep extra for touch-ups and color matching.
How Paint Coverage Per Gallon Works
You’ll want to know a paint’s coverage rate—usually listed as square feet per gallon—so you can estimate how much you need.
Remember that rough or textured surfaces soak up more paint than smooth ones, which will increase your gallon count.
Also, calculate trim separately, since narrow areas and multiple coats on trim can change the total.
Coverage Rates Explained
Curious how one gallon can cover dozens or even hundreds of square feet? You’ll learn that coverage depends on paint type, surface porosity, and application. Check labels for theoretical square feet per gallon, then adjust for real conditions. Keep color matching in mind—multiple coats or tinted touch-ups change totals—and practice proper paint storage to preserve coverage between coats. Estimate generously to avoid shortfalls.
- Calculate labeled coverage, then subtract 10–20% for real-world loss.
- Count doors, windows, and trim separately; they alter effective area.
- Plan for at least two coats for true uniformity.
Surface Texture Effects
After adjusting labeled coverage for real-world loss and counting openings, think about how surface texture changes how much paint you’ll need. Rough surfaces—stucco, heavy-grain siding, or cedar shakes—absorb and hide more paint than smooth clapboard, so you’ll plan for extra coats and higher consumption.
Smooth, primed surfaces let a gallon cover closer to the label. Also consider texture’s interaction with paint durability: rough surfaces can wear faster and trap moisture, so choose a tougher formula and possibly thicker application.
Measure sample areas, note porosity, and adjust gallon totals upward for uneven textures to avoid shortages.
Calculating Trim Needs
Because trim is narrower and often requires a smoother, more durable finish, you’ll want to treat its coverage differently than wall areas. You’ll calculate linear feet, factor in multiple coats, and allow for primer or sealant.
Color matching can demand extra coats, especially over stark contrasts, and Eco friendly paints sometimes cover differently than conventional formulas.
Use this quick checklist to estimate gallons for trim:
- Measure total trim linear feet, convert to square feet using width.
- Multiply by coats (usually 2) and add 10% for waste and sanding.
- Check manufacturer coverage per gallon, adjust for color matching and Eco friendly paints.
How Primer Changes Your Total Paint Needs
When you factor primer into the plan, your total paint needs usually drop because a good primer seals the surface and evens out porosity, so topcoat coverage improves and you often need fewer gallons.
You’ll save paint when primer fills tiny cracks and creates a uniform base, reducing the number of topcoat passes.
Use color matching primer for dramatic color shifts to avoid extra coats.
Choose eco-friendly options to limit VOCs without sacrificing adhesion.
Account for primer’s spread rate on labels—apply one coat where needed, two on problem areas—and subtract that coverage from your topcoat gallon estimate.
Siding vs. Stucco vs. Brick: Gallons to Expect
If your home’s exterior is siding, stucco, or brick, expect very different gallon counts because texture and porosity drive coverage. You’ll choose Color palettes and Painting tools differently for each surface, and that affects how much paint you buy.
- Siding: Smooth vinyl or fiber cement needs fewer gallons — you’ll cover more square feet per gallon and can use rollers and brushes efficiently.
- Stucco: Rough texture soaks more paint; plan on extra gallons and use thicker-nap rollers or sprayers.
- Brick: Highly porous, often sealed first; expect higher consumption and use masonry brushes or sprayers for even coverage.
When Do You Need One Coat vs. Two Coats?
You’ll decide between one coat and two by evaluating the surface condition—smooth, well-sealed siding might take a single coat, while damaged or porous areas usually need more.
Check whether a primer is required, since priming can cut down on a second finish coat or make it essential for adhesion.
Also consider the paint type and its stated coverage, because high-quality, high-hide formulas often cover in one coat while cheaper paints typically don’t.
Surface Condition Assessment
Before deciding on one coat or two, assess the existing surface for adhesion, porosity, and visible defects so you can pick the right approach and avoid wasted paint.
You’ll inspect for surface deterioration and note weather influence like sun, rain, or freeze cycles that caused cracking or chalking.
Check how porous materials absorb water and whether previous layers peel. Based on that, you’ll decide coverage needs.
- Scrape and probe failing areas to see if a second coat’s needed.
- Test porosity with a water drop.
- Map damaged zones to estimate extra paint.
Primer Requirement Determination
When the substrate shows bare wood, masonry, heavy stains, significant repairs, or strong color changes, you’ll want at least one coat of primer to guarantee adhesion and uniform topcoat coverage. Two coats may be necessary if porosity is high or the surface soaked up the test water quickly.
You’ll decide based on surface porosity, stain severity, and previous paint adhesion. If you’re switching from a dark to a light hue, consider extra primer for effective color matching.
Also weigh environmental impact: low-VOC primers reduce emissions, and using the right primer can prevent repainting sooner, saving materials and waste.
Paint Type And Coverage
If your siding and trim are in good shape and you’re sticking with a similar shade, one high-quality exterior coat can often do the job; you’ll save time and gallons.
You’ll need a second coat when switching colors drastically, covering stains, or the surface lacks uniform texture.
Consider color matching and finish—flat hides imperfections, satin boosts durability. Eco-friendly paints now match performance, so choose low-VOC formulas if you want greener options.
- New color or poor coverage: apply two coats for true color matching.
- High-traffic areas: two coats for durability.
- Pristine same-color refresh: one coat works.
How Texture and Porosity Change Coverage
Although you can estimate paint needs from square footage, texture and porosity change how much paint a surface actually soaks up and covers. You’ll find rough, stucco, or wood clapboard needs more because texture variation increases surface area and creates shadows.
Smooth vinyl or metal usually requires less.
Porosity effects mean porous masonry or bare wood absorbs primer and paint, so you’ll use more coats. Test a small area to see actual spread rate, note how many coats are needed, and adjust your gallon estimate accordingly.
Always factor in primer for porous substrates to achieve true coverage.
Accounting for Windows, Doors, and Accents
Because windows, doors, and trim don’t need full exterior paint coverage, subtract their area from your total surface square footage before calculating gallons so you don’t overbuy. Measure window and door openings, and deduct trim widths. Accents like shutters or decorative molding you’ll paint separately.
Consider color psychology when choosing trims—contrasting hues highlight features and affect curb appeal. If you’ll use eco-friendly paints, note they may have slightly different coverage—check the label.
Estimate accent and trim gallons independently; small cans are fine. Keep a 10% buffer for touch-ups.
- Measure openings precisely
- Choose trim color with intent
- Buy small cans for accents
Estimating Paint for Common House Types (Examples)
Now that you’ve accounted for windows, doors, and trim, let’s look at real-world examples so you can estimate paint needs by house type.
For a small one-story (1,000–1,200 sq ft), expect 8–10 gallons for two coats.
A mid-size two-story (1,800–2,400 sq ft) often needs 15–18 gallons.
A large home or complex facade with lots of siding and gables can require 25+ gallons.
Adjust for rough surfaces, extra coats, or heavy color matching, which may need a tinted primer or extra paint.
Consider paint additives for durability or flow; they won’t change coverage but improve finish and application.
How to Split Paint Between Multiple Colors and Accents
When you’re planning multiple colors, start by assigning paint by surface type—main body, trim, and accents—so you can calculate gallons for each area separately; this keeps ordering accurate and reduces waste. Then map accents and high-visibility zones to smaller cans and note mixes for consistency. Track color mixing ratios and label cans clearly.
- Estimate main body gallons first, buy whole cans, and reserve extra for touch-ups.
- Purchase accent colors in quarts or pints; test swatches and record mixing formulas.
- Use airtight containers for paint storage, label with date, batch, and mix notes to avoid mismatches.
Calculating Trim, Fascia, Soffits, and Doors
Before you calculate gallons for trim, fascia, soffits, and doors, measure each element separately and note the material type and finish, since those details affect coverage and coat count.
For trim, add linear feet times width to get square footage. Fascia and soffits are simple rectangles—multiply length by exposed height.
Doors need face area plus edges. Check manufacturer coverage (sq ft/gallon) and divide total area by that number, then round up per surface type.
Factor in primer needs for bare wood or metal.
Consider color coordination to minimize coats and choose low-VOC products to reduce environmental impact.
How Much Extra Paint to Allow for Touch-Ups
Because you’ll inevitably have small chips, scuffs, or areas that weather differently, plan to set aside a modest extra amount of paint specifically for touch-ups. Keep a dedicated quart or pint per major color so you can match tones later. Store labeled, sealed cans in a cool spot to preserve paint durability and ease color blending.
- Save 10–15% extra for walls and 20% for high-traffic trim.
- Keep a small test patch to check fading before full touch-up.
- Note batch numbers and finish to avoid mismatches.
This approach keeps repairs quick and consistent.
Finish Choices and Their Effect on Coats and Coverage
Your choice of sheen matters because higher sheens can highlight imperfections and often require more coats for even coverage.
You’ll also want to factor in whether you’re using a primer — it can cut the number of finish coats you need, especially on bare or patched surfaces.
Knowing how sheen and primer interact helps you estimate the total gallons more accurately.
Sheen Impact On Coverage
When you pick a finish, you’re also choosing how many coats you’ll need and how evenly the paint will hide the old surface. Sheen affects reflectivity, durability, and how flaws show through. You’ll want to match gloss to substrate and lifestyle while considering color psychology and environmental impact of products.
- Matte: hides imperfections, may need extra coats for uniformity.
- Satin: balances concealment and washability; often one to two coats.
- Semi-gloss/gloss: shows flaws but boosts longevity and cleans easily, potentially reducing repaint frequency.
Primer And Coat Counts
Sheen choices influence how many coats you’ll apply, but primer and proper coat counts determine the real coverage and adhesion of your exterior paint.
You should always prime bare wood, patched areas, and drastic color changes to guarantee uniform adhesion and reduce the number of finish coats needed.
One coat of primer plus two finish coats is typical, though high-quality primers and color blending techniques can let you get away with fewer finish coats.
Choose products labeled eco friendly options if you want lower VOCs.
Measure surface porosity and follow manufacturer spread rates so you buy the right gallons.
How to Read Paint Labels and Technical Sheets
Before you pick a color, learn to read the label and technical sheet so you know what the paint will actually do: coverage (spread rate), recommended number of coats, drying and recoat times, substrate compatibility, VOC content, and warranty details.
You’ll check spread rate to estimate gallons, note recommended coats for accurate coverage, and confirm substrate compatibility to avoid adhesion issues. Color matching notes tell you about tints and fading resistance. Paint safety sections list VOCs, respirator recommendations, and disposal rules.
- Verify spread rate and coats.
- Confirm substrate and prep needs.
- Read VOC and safety instructions.
When to Call a Pro (Complex Exteriors, Lead, Big Jobs)
If your house has multiple siding materials, steep roofs, extensive trim, or suspect lead paint, call a pro—these situations need experience, proper equipment, and safety protocols that most DIYers don’t have. You’ll want specialists for lead abatement, complex scaffolding, or large square footage so work meets code, uses correct primers, and avoids costly mistakes. Pros handle color matching precisely, manage hazardous waste, and offer secure paint storage during multiweek projects. Hire when timelines, permits, or insurance are factors. Compare contractors’ credentials, warranties, and references before committing.
| When to Call | Why it Matters |
|---|---|
| Lead paint | Safety, regulation |
| Complex exteriors | Equipment, skill |
How Gallons Affect Project Cost
Calling a pro can change the paint estimate considerably because contractors factor labor, prep, and waste into the total gallons they recommend. You’ll see cost rise with more gallons: more paint means higher material cost, longer labor, and bigger equipment needs.
Calling a pro often increases the estimated paint gallons, as contractors include labor, prep, and waste.
Your color selection can also affect coats needed, and paint durability choices (premium vs economy) change price per gallon and longevity, altering lifetime cost.
- Coverage: more gallons = more time and higher labor billing.
- Quality: durable paints cost more but cut repaint frequency.
- Waste: trim, texture, and mistakes increase gallons used and total cost.
Smart Shopping Tips : Buy Just Enough Paint
When you shop for exterior paint, aim to buy just enough to cover your surfaces plus a small buffer for touch-ups and mistakes, because overbuying ties up money and underbuying stalls work.
Measure walls, doors, trim and porous surfaces, then factor in primer and the coverage per gallon listed on cans.
Pick paint brands you trust and compare warranties, VOCs and weather resistance.
Match quantities to your chosen color schemes, remembering multiple coats or dark-to-light shifts need extra.
Buy one full extra quart of each color for repairs, and keep receipts for returns or exchanges.
Frequently Asked Questions
Can I Use Leftover Interior Paint for Exterior Touch-Ups?
You can, but you shouldn’t for significant exterior repairs; interior touch ups with leftover paint may fade, chip, or peel sooner. You’ll want exterior-grade paint for durability, matching sheen and weather resistance for proper results.
How Does Paint Color Affect Drying Time in Sun Vs Shade?
Darker colors dry faster in sun, lighter colors hold heat less, so they dry slower in shade; you’ll adjust paint application and timing based on color temperature, sunlight exposure, and surface warmth to avoid runs and tackiness.
Are Eco-Friendly Paints Less Durable Outdoors?
On the whole, you won’t be sacrificing much—eco friendly coatings now rival traditional options for outdoor paint longevity. You’ll still watch for prep and climate; with care, they’ll stand up, come rain or shine.
Can I Paint Over Existing Lead-Based Exterior Paint Safely?
You can’t safely paint over deteriorating lead paint without precautions; lead paint hazards demand containment. You’ll use lead removal techniques like encapsulation, specialized primers, or hiring certified abatement pros to avoid dust and contamination risks.
How Long Should Painted Exterior Surfaces Cure Before Washing?
You should wait about 30 days before washing painted exterior surfaces; proper surface preparation matters, and environmental factors like temperature, humidity, and sun exposure affect curing, so avoid scrubbing too soon to prevent damage.
Conclusion
You’ve got the gist: measure carefully, calculate paintable square footage, and pick coverage that matches the job so you don’t overbuy or run short. If the exterior’s fiddly or potentially hazardous, consider bringing in a pro — it’ll save headaches and maybe a surprise or two. Buy a little extra for touch-ups, but not so much you’re stuck with a paint surplus; think “peaceful cushion,” not cluttered attic.