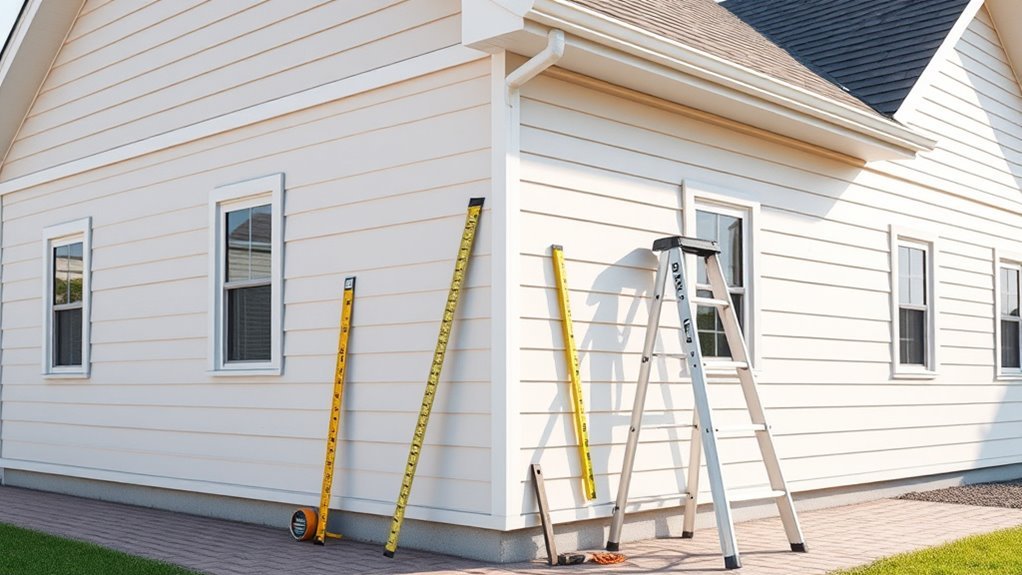
How Many Gallons to Paint Exterior 2000 Sq Ft House
For a 2,000 sq ft exterior you’ll typically need about 8–12 gallons of paint for two coats, assuming 250–350 sq ft coverage per gallon; textured or porous surfaces like stucco cut coverage to 150–250 sq ft/gal so plan more. Measure walls, trim, soffits and subtract windows/doors, then add 10–15% extra for waste and touch‑ups. Also estimate primer separately. Keep your measurements and color choices handy if you want more detailed guidance.
Quick Answer: Gallons of Paint for a 2,000 Sq Ft Exterior

If your home’s exterior is about 2,000 sq ft, you’ll typically need between 8 and 12 gallons of paint to cover the walls with two coats, assuming average siding and 250–350 sq ft coverage per gallon.
For a 2,000 sq ft exterior, expect about 8–12 gallons for two coats (250–350 sq ft/gal).
You’ll choose based on finish and desired longevity: higher-quality paints boost paint durability and resist fading, chalking, and mildew.
Pick color schemes that suit trim, roof, and neighborhood context so you won’t repaint soon.
Factor primer needs, textured surfaces, and trim separately.
Buy a little extra for touch-ups.
Confirm product coverage on the can and test a small area before committing to full purchase.
Coverage Basics: What “Sq Ft Per Gallon” Means
Think of “sq ft per gallon” as the paint’s declared reach — it tells you how many square feet one gallon will typically cover in a single coat under ideal conditions. You use that number to estimate gallons by dividing surface area by coverage, but remember real results vary.
Texture, number of coats, and application method change yield. Premium brands often advertise higher coverage, while eco-friendly paints may sacrifice slight coverage for low-VOC formulas; that’s a trade-off to weigh alongside color psychology — darker hues can need more coats for full opacity.
Always allow a small buffer for touchups and waste.
How to Calculate Painted Surface Area
Now that you know how coverage is expressed, you’ll need to measure the actual surfaces you’ll be painting to calculate how many gallons to buy. Measure widths and heights, subtract windows and doors, and total wall area. Consider trim separately. Note how Color psychology affects finish choices and final coats. Pick Eco friendly options if sustainability matters; low-VOC paints may require different coverage. Divide total square footage by the paint’s sq ft-per-gallon to find gallons needed, then add 10–15% for waste.
| Item | Area (sq ft) |
|---|---|
| Wall 1 | 0 |
| Wall 2 | 0 |
| Trim | 0 |
| Openings | 0 |
Measuring Your House: Walls, Eaves, and Rooflines
Start by measuring each exterior wall’s height and length to get an accurate wall surface area.
Don’t forget to subtract windows and doors, then add the eaves’ exposed faces to your totals.
Also include any roofline trims and fascia since those narrow areas still require paint.
Measure Wall Surface Area
Before you buy paint, measure the wall surfaces you’ll be covering so your estimates are accurate. Walk each elevation, note width and height of walls, and subtract windows and doors.
Multiply wall lengths by height for gross square footage, then deduct openings for net paintable area. Record totals by side to check symmetry and calculate coats.
Factor in texture—rough surfaces need more paint. Keep measurements and color harmony notes together with paint storage instructions so matching and touch-ups are simple later.
Use a spreadsheet or sketch to prevent errors, and round up slightly to ensure you don’t run short.
Account For Eaves
After you’ve measured walls and openings, include eaves and rooflines in your calculations since they add significant surface area and affect paint type and quantity.
Measure the length and projection of eaves around the house, multiplying to get square footage, and subtract any soffit vents or exposed rafters.
Note material changes—wood, metal, or vinyl—since each uses different coatings.
Factor in eaves maintenance needs; rough or damaged surfaces require primer and more paint.
Also consider eaves insulation access panels that may change paintable area.
Record these measurements separately so you can accurately total paint gallons and choose proper exterior products.
Include Roofline Trims
How will you account for roofline trims when totaling paintable area? Measure fascia and soffit lengths, then multiply by their widths to get square footage. Include gable trims, rakes, and decorative moldings; count both sides where exposed.
Subtract overlaps like flashing, but don’t overlook small sections that affect Color selection. Add this trim area to wall and eave totals before dividing by coverage per gallon.
Choose products rated for exterior conditions—paint durability matters for thin trims exposed to sun and water. Using accurate trim measurements ensures you buy enough paint and pick a finish that lasts, minimizing touch-ups and waste.
Subtracting Windows, Doors, and Openings
Measure each window and door (height × width) so you’ve got accurate areas for every opening.
Add those measurements to get the total square footage of openings.
Subtract that total from your wall area to find the true paintable surface.
Measure Window And Door Areas
Before you calculate paint needs for walls, subtract the square footage of windows, doors, and large openings so your estimate isn’t inflated. Measure each opening’s height and width, multiply to get square footage, and note if trim gets painted.
Use a tape measure and record dimensions on a sketch of each elevation. Subtract grouped openings separately for accuracy.
While choosing colors, remember color psychology affects perceived size; darker trims can shrink visual mass.
If you’re using eco-friendly paints, confirm coverage rates on the label and adjust totals.
Accurate measurements prevent overbuying and reduce waste.
Calculate Total Opening Square Footage
Once you’ve recorded each opening’s height and width, add up their square footage so you can subtract a precise total from your wall area. Now list each opening, convert inches to feet if needed, and total the areas. Consider how color schemes might influence which openings you highlight, and note weather considerations that affect trim and caulking before painting. Use the table below to organize measurements quickly.
| Opening | Height (ft) | Width (ft) |
|---|---|---|
| Window 1 | 3 | 4 |
| Window 2 | 3 | 3 |
| Door 1 | 7 | 3 |
| Garage | 8 | 16 |
Subtract Openings From Wall Area
Now subtract the total opening area from your wall measurements to get the true paintable surface. You’ll subtract window, door, garage, and other opening totals from gross wall area so your gallon estimate isn’t inflated.
Measure each opening, add them, then deduct that sum.
Don’t forget trim or shutters if you plan to paint them; include or exclude consistently.
This precise figure helps you match paint to surface for accurate color selection and to choose coatings that guarantee paint durability.
With openings removed, you’ll pick the right amount and type of paint, avoid waste, and budget for primers or specialty finishes.
Surface Type: Paint Coverage for Wood, Vinyl, Stucco, Brick
Although every 2,000 sq ft home has roughly the same surface area, the type of siding—wood, vinyl, stucco, or brick—dramatically changes how much paint you’ll need because porosity, texture, and absorption vary.
Although a 2,000 sq ft home’s area is similar, siding type—wood, vinyl, stucco, brick—greatly affects paint needs.
For wood, plan on two coats for good coverage; stain or primer may improve color coordination and paint durability.
Vinyl often needs less paint since it’s smooth, but use paint formulated for plastics.
Stucco’s rough texture soaks more paint; budget extra for a thick first coat.
Brick is porous and may require masonry primer plus two coats for uniform color and long-lasting protection.
How Porosity and Condition Change Paint Needs
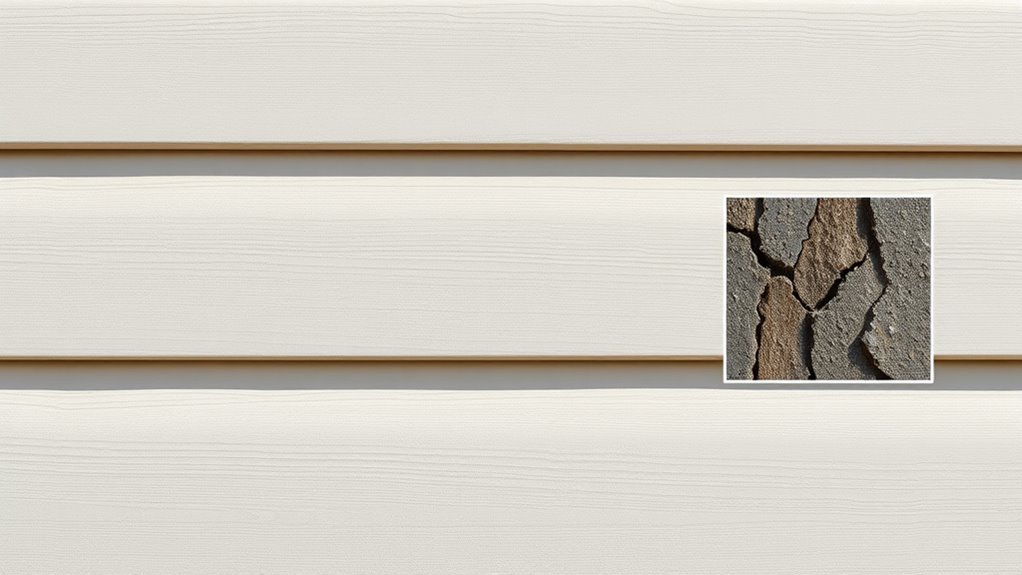
How much paint you need depends a lot on how much the surface soaks it up — high-absorption materials will eat more coats.
Check the existing finish for peeling, chalking, or glossy areas because those conditions change adhesion and coverage.
Sanding, priming, or sealing porous spots first will save you paint and give a more even result.
Surface Absorption Rates
Because different materials soak up paint at different rates, you’ll use more on porous or weathered surfaces than on smooth, sealed ones. Check substrate porosity by misting small areas; if water soaks in, expect higher absorption and plan extra coats and primer.
Rough wood, stucco, and bare masonry can cut coverage per gallon considerably, while vinyl and metal need less. Choose primers and eco-friendly paints formulated for high-absorption surfaces to improve coverage and durability.
Remember how color psychology affects your choice—darker or more saturated hues may require additional coats to achieve true color and uniformity.
Existing Finish Condition
Want to know why the existing finish matters so much? You’ll see that old, chalky, or peeling surfaces absorb more and need extra coats, while smooth, well-bonded finishes let paint spread evenly. That affects how much paint you buy and the final look.
Poor condition accelerates color fading and lowers paint durability, so you’ll plan for touch-ups or a primer to restore adhesion. Assess gloss, flaking, and previous coatings to estimate coverage loss.
Porous Spot Preparation
When you prep porous spots, you’ll treat them differently than smooth areas because they soak up primer and paint unevenly. Failing to fill or prime these areas first can double the coats you need and ruin the finish.
You should identify porous spots by touch and absorbency tests, then clean and sand loose material.
Apply a quality surface sealing primer to lock substrate porosity, let it cure, and spot-fill depressions. That surface sealing step evens absorption so your topcoat spreads uniformly and uses less paint.
Proper prep reduces total gallons needed and improves durability and appearance.
Primer: When to Prime and How Much to Buy
If your walls show stains, bare patches, or drastic color changes, prime them before you paint to guarantee even coverage and better adhesion. You should prime patched areas, raw wood, and drastic color changes to improve primer application and paint durability. Estimate coverage: one gallon typically covers 300–400 sq ft. For a 2000 sq ft exterior, factor area removed for windows/doors; buy slightly more for touchups. Choose oil or latex primer based on substrate and weather.
| Substrate | Reason to Prime | Recommended Gallons |
|---|---|---|
| Raw wood | Seals grain | 2–4 |
| Patchwork | Uniform base | 1–2 |
| Stain | Blocks bleed | 1–2 |
| Bare metal | Prevents rust | 1–2 |
How Coats Affect Total Gallons Needed
Because each coat adds coverage and uses more paint, you’ll need to multiply your base estimate by the number of full coats you plan to apply.
If one coat of exterior paint covers X gallons for 2000 sq ft, two coats double that, and three coats triple it.
Factor in primer separately if you prime.
Choose eco-friendly paints if you’re reducing VOCs; they may have different spread rates, so check manufacturer coverage per gallon.
Also consider color psychology when deciding coats—saturated hues or dramatic accents might need extra coats for true color and uniform finish, increasing total gallons required.
Color Changes: Dark‑to‑Light and Light‑to‑Dark Rules
If you’re switching from a dark color to a lighter one, expect better coverage per gallon but plan for an extra coat in high-contrast areas.
When going from light to dark, you’ll usually need a stain‑blocking or tintable primer to prevent show‑through and reduce the number of finish coats.
Factor those coverage changes into your gallon estimate so you don’t run short.
Dark-To-Light Coverage Boost
When you’re switching from a dark color to a much lighter one, expect to need more coats and sometimes a tint of primer to get full, even coverage. Dark pigments can show through thin layers of light paint, so plan accordingly. You’ll want high-coverage formulas to minimize extra trips, and consider how color psychology affects perceived size and brightness—lighter hues open façades.
Choose eco-friendly paints when possible; they often offer low-VOC options with good opacity. Test samples on your siding and count coats needed in sunlight.
Budget extra gallons for overlap areas and trim, and schedule drying time between coats.
Light-To-Dark Primer Need
Although flipping from a light shade to a deep, saturated color often feels simpler than the reverse, you’ll usually need a bonding primer or a tinted primer to guarantee true color payoff and prevent uneven absorption.
You should pick a primer that helps with color matching, especially if you’re shifting to a bold hue, so the topcoat covers in fewer coats. A proper primer evens porosity, reduces bleeding, and improves paint durability against weather and UV.
Apply one full coat, inspect for stain bleed-through, and spot-prime as needed. That prep saves time, reduces gallons used, and yields a consistent finish.
Two‑Story vs Single‑Story: Paint Quantity Differences
Because a two‑story home stacks wall area vertically, you’ll generally need more paint than for a single‑story of the same square footage—mostly due to taller exterior walls and extra trim around second‑floor windows and eaves.
You’ll calculate surface area by elevation rather than footprint, so expect roughly 20–30% more paint for walls alone on many two‑story builds.
Factor in ladder access, higher waste from cutting in, and potential second‑coat needs if you change color schemes.
Buy slightly extra and plan paint storage for left‑overs and touch‑ups.
Measure methodically, then convert total square feet to gallons using your paint’s coverage.
Trim, Soffits, Fascia, and Doors: Extra Paint to Budget
If you want an accurate paint estimate, don’t forget to budget separately for trim, soffits, fascia, and doors since they often use a different finish and color than the walls.
You’ll need extra gallons for narrow trim lines, soffit undersides, fascia boards, and entry or garage doors. Estimate linear feet of trim and surface area of doors and soffits, then add 10–20% for touchups.
Coordinate with your color schemes so accents and contrasts are consistent, and check coverage from preferred paint brands to confirm quantities. Buying matching primer and specialty paints prevents surprises and keeps the job efficient.
Choosing Finish and Product Type (and Coverage Impacts)
Your choice of sheen affects how much surface imperfections show and how many coats you’ll need, so pick satin or eggshell for living areas and semi-gloss for trim and doors.
Different paint types—latex, acrylic, or oil-based—have varying coverages and durability, and higher-quality formulas often cover in fewer coats.
Don’t forget that proper primer and prep can cut the total gallons required by improving adhesion and hiding stains.
Sheen Level Effects
When choosing a finish, think about how sheen changes both appearance and coverage. You’ll notice higher sheens reflect more light, making colors pop—use color psychology to guide mood choices—while flatter sheens hide surface flaws and may need extra coats.
Consider environmental impact: low-VOC formulas exist across sheens but glossy options often highlight imperfections that demand prep. Balance durability, maintenance, and how many coats you’ll apply for adequate coverage.
- Higher sheen = more scrubbable, fewer coats on smooth surfaces
- Flat = conceals imperfections, may require priming
- Semi-gloss = good for trim
Test samples outdoors first
Paint Type Differences
Now that sheen choices and their coverage effects are clear, you also need to pick the right paint type—latex, acrylic, oil, or specialty formulations—because the base chemistry affects durability, drying time, odor, and how many coats you’ll need. You’ll choose based on substrate, climate, and maintenance. Eco friendly paints reduce VOCs but may need different coats. Consider Color psychology for curb appeal when selecting gloss level. Use this quick comparison:
| Type | Durability | Coverage |
|---|---|---|
| Latex | Good | 1–2 coats |
| Acrylic | Excellent | 1–2 coats |
| Oil/Specialty | Very durable | 1–3 coats |
Balance performance and environmental impact.
Primer And Prep
Although primer often feels like an extra step, skipping it can mean more coats, uneven color, and poor adhesion—so choose a primer suited to your substrate and the paint type to get the coverage and durability you want.
You’ll prep by cleaning, repairing, and sanding; primer evens porosity, boosts paint durability, and helps with color selection by preventing bleed-through.
Pick oil- or latex-based primers to match substrate and topcoat. Consider coverage rates—high-hide primers cut total gallons needed.
Key prep reminders:
- Clean surfaces of dirt and mildew
- Repair cracks and loose trim
- Sand glossy areas
- Use a stain-blocking primer where needed
Sample Math: Gallons for a Typical 2,000 Sq Ft House
If you’re painting a typical 2,000 sq ft house, you’ll want to start by estimating the actual surface area rather than assuming square footage equals wall area. Measure perimeter and height, subtract doors and windows, then multiply for total square feet.
For a two-story 2,000 sq ft home you might end up with approximately 3,000–3,500 sq ft of paintable surface. Divide by coverage (usually 350–400 sq ft per gallon) to get gallons per coat, then multiply by number of coats.
Consider color psychology when choosing finish and factor environmental impact if you pick low-VOC or specialty paints that alter coverage.
Sample Math: Textured Stucco Example
For textured stucco you’ll need to first calculate the true surface area, since the texture increases square footage beyond the flat footprint.
Then you’ll check the paint’s coverage rate (usually listed as square feet per gallon) and adjust for the roughness by using a reduced effective coverage.
That lets you divide adjusted area by coverage to estimate how many gallons to buy.
Surface Area Calculation
When you’re calculating surface area for textured stucco, start by measuring each wall’s height and length and note openings like windows and doors so you can subtract them.
Textured finishes need a small allowance for extra material. You’ll total exterior wall areas, subtract openings, and add a percentage for texture absorption.
Consider Color psychology when choosing shades—darker tones may need more coats. Also weigh Eco friendly paints; their coverage can vary.
Use this checklist:
- Measure wall height × length for each elevation
- Subtract window and door areas
- Add 5–15% for texture waste
- Round up for trims and errors
Paint Coverage Rates
Wondering how much paint you’ll actually need for textured stucco? Start by checking coverage rates on the can—most 1-gallon latex paints cover about 250–400 sq ft on smooth surfaces, but textured stucco often lowers that to 150–250 sq ft per gallon.
Measure your adjusted wall area, then divide by the realistic coverage rate to get gallons per coat. Factor two coats, plus 10–15% for waste, trim, and touch-ups.
Also consider color psychology when choosing darker or lighter hues—darker may need extra coats.
Opt for eco-friendly paints to reduce VOCs and environmental impact.
Sample Math: Freshly Primed Bare Wood Siding
Since the siding’s been freshly primed, you can treat it as a uniform surface when estimating paint needs and focus on topcoat coverage and finish.
Measure 1,800 sq ft of exterior siding (subtracting openings). Assume 350 sq ft per gallon for one coat, so you’ll need about 5.1 gallons—round to 6 for two coats and touchups.
Consider color psychology when choosing lighter colors that may require fewer coats than deep hues, and prioritize paint durability for exterior exposure.
Remember sealer type and climate affect performance.
Plan for:
- Two coats
- Primer already applied
- Extra for trims
- Touchup reserve
Reading Paint Labels: Coverage Claims Explained
You’ve already estimated how many gallons you need for primed siding, but the number on the can may not match real-world coverage. Labels list theoretical spread rate (sq ft/gal); you should adjust for texture, number of coats, and color psychology effects when switching hues. Also note VOC info and paint disposal instructions on the label.
| Label Item | What It Means | Why It Matters |
|---|---|---|
| Spread Rate | Sq ft/gal claim | Often optimistic |
| Surface Type | Recommended substrate | Affects absorption |
| Coats | Suggested coats | Impacts gallons |
| VOC/Disposal | Safety & disposal | Legal, eco reasons |
Trust labels, but test.
Buying Extra: How Much for Touch‑Ups and Maintenance
When you finish a big paint job, keep at least one quart of each color and the corresponding primer for touch-ups and small repairs—store them labeled and sealed so you can match fades or cover chips without repainting whole sections. You’ll want extra for fast fixes, trim scuffs, and seasonal maintenance.
Consider color selection carefully—record brand, sheen, and batch number. Prioritize paint durability for siding and high-wear areas; stronger formulas resist fading, reducing touch-ups.
- Keep a small labeled stash per elevation
- Note batch and sheen on your list
- Store away from extreme temperatures
- Replace quarts after 3–5 years
Cost Estimate: Gallons × Common Paint Price Ranges
Although exact totals depend on your paint choice and coverage rates, you can roughly estimate costs by multiplying the gallons needed by typical per‑gallon prices.
Estimate painting costs by multiplying required gallons by typical per‑gallon prices for a quick baseline.
Budget brands run about $25–$45, mid‑range $40–$70, and premium or specialty paints $70–$120+ per gallon.
Once you know gallons, multiply by price band to get a baseline, then add primer if needed.
Factor in extra for trim and accents, and consider color coordination that may require multiple cans or tints.
If you prefer eco friendly paints, expect slightly higher per‑gallon costs but lower VOCs.
Add a small contingency for waste and touch‑ups.
Where to Buy: Retail, Pro Stores, or Contractor Supply
If you want the best combination of selection, price, and expert help, decide whether you’ll shop at big-box retailers, specialty pro stores, or contractor supply outlets—each serves different needs and budgets. You’ll weigh selection, staff expertise, and trade discounts.
Big-box stores give convenience and eco-friendly options at lower prices.
Pro stores offer color psychology guidance and higher-performance lines.
Contractor supply caters to volume buyers and pros.
Consider returns, loyalty programs, and delivery.
Think about matching your priorities: cost, convenience, or technical support.
- Convenience and lower price
- Expert color psychology advice
- Eco friendly options available
- Volume and contractor perks
Order Smart: Samples, Matching, and Batch Mixing Tips
Because paint can look different on your walls than it does in the store, order samples and test them on the actual surfaces and at different times of day to confirm color and sheen. You’ll evaluate hue, undertones, and how natural light affects the appearance.
Color psychology for curb appeal. Match batches by recording brand, formula, and batch number; bring chips to the store for tint adjustments. If you use a paint sprayer, spray a sample panel to verify atomization and coverage.
When buying full gallons, ask for a single batch mixed for the whole exterior or plan to intermix cans to avoid subtle shade shifts.
Avoid Running Out Mid‑Job: Common Calculation Mistakes
When you underestimate surface area, coat counts, or waste, you’ll likely end up short on paint mid‑job; pay close attention to measurements and assumptions. Don’t forget trim, doors, and textured surfaces that raise coverage needs.
Factor in application losses from brushes, rollers, and spraying, and adjust for primer and finish coats. Also consider how painting techniques affect consumption and how color psychology might push you to add extra coats for full opacity when switching to bold or dark hues.
- Measure walls, trim, and doors separately
- Add 10–20% for waste
- Count primer and finish coats
- Round up for safety
Quick Checklist to Finalize Your Paint Shopping List
Now that you’ve nailed measurements and coat counts, use this quick checklist to confirm exactly what to buy so you don’t make extra trips or overspend. Verify gallon counts per surface and add 10% for touchups. Match primer type to siding material and confirm topcoat sheen. List trim, doors, and accent gallons separately for color coordination and label each.
Add brushes, rollers, trays, tape, caulk, and drop cloths. Check fasteners, patching compound, and ladder/accessory rentals. Review weather considerations for drying time and avoid buying seasonal-only formulas.
Recheck totals before you purchase to stay efficient.
Next Steps: Measuring, Ordering, and Starting Your Job
Before you order paint, double-check your final measurements and surface conditions so you buy the right quantities and products. Confirm wall square footage, trim linear feet, and account for windows and doors. Pick a color palette and test samples on different exposures. Choose finish and products rated for paint durability and climate.
- Re-measure key elevations
- Order 10% extra for touch-ups
- Buy primers and specialty coatings
- Schedule delivery and labor
Prep surfaces: clean, scrape, and caulk. Lay out staging, drop cloths, and ladders. Start with primer, then apply topcoats consistently, tracking gallons used.
Frequently Asked Questions
Will Paint Color Choice Affect Exterior Drying and Cure Times?
Yes — your color choice can affect drying and cure times; darker pigments may slow evaporation, while lighter formulations aid drying. For color consistency, you’ll use additives or drying enhancement techniques to guarantee even, durable results.
Can I Paint Exterior in Cold or High‑Humidity Conditions?
By golly, yes—you can paint outside in cold or humid weather if you follow exterior painting tips and cold weather precautions: use low‑temperature latex, extend drying time, warm surfaces, avoid rain, and apply primer for proper adhesion and curing.
Do Warranties Cover Fading or Peeling on Exteriors?
Yes — warranties can cover fading or peeling, but you’ll need to confirm exterior paint durability terms, maintenance requirements, and exclusions; manufacturers often limit warranty coverage for color change, chalking, improper prep, or environmental damage.
How Long Should I Wait Between Coats in Hot Weather?
You should wait 2–4 hours between coats in hot weather, but check manufacturer guidance; proper paint application and thorough surface preparation let each coat dry faster while avoiding blistering or poor adhesion, ensuring a durable, even finish.
Can I Use Leftover Interior Paint for Exterior Trim?
Yes — but cautiously: you shouldn’t use interior paint for exterior trim unless the interior paint’s formulation supports exterior exposure. Check paint compatibility, weather resistance, and adhesion; ideally use exterior-grade trim paint for lasting protection.
Conclusion
You’ve got the numbers, but don’t click “order” just yet — double‑check your measurements, subtract windows and doors, and decide if you’re doing one or two coats. Choose paint with the right coverage (and grab a sample), then buy an extra quart or a spare gallon for touchups. If you’re uncertain, wait — measure again, or call a pro for a quick look. Do that, and you’ll avoid costly surprises when you start.